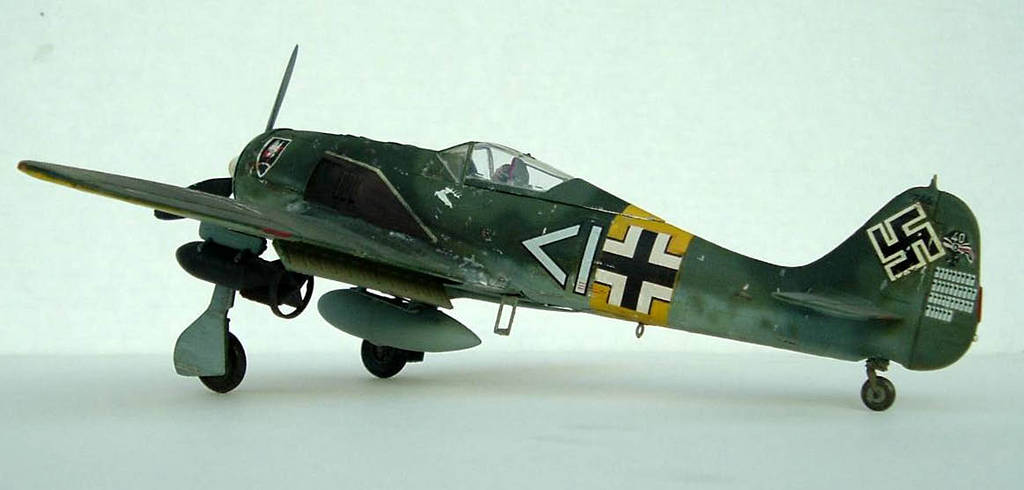
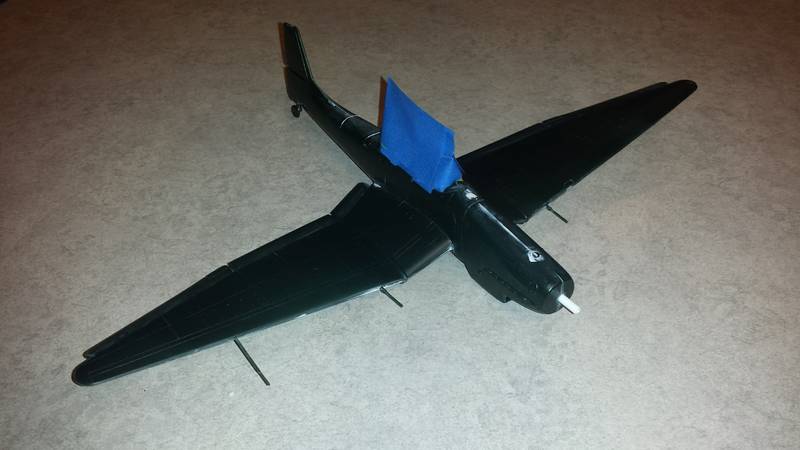
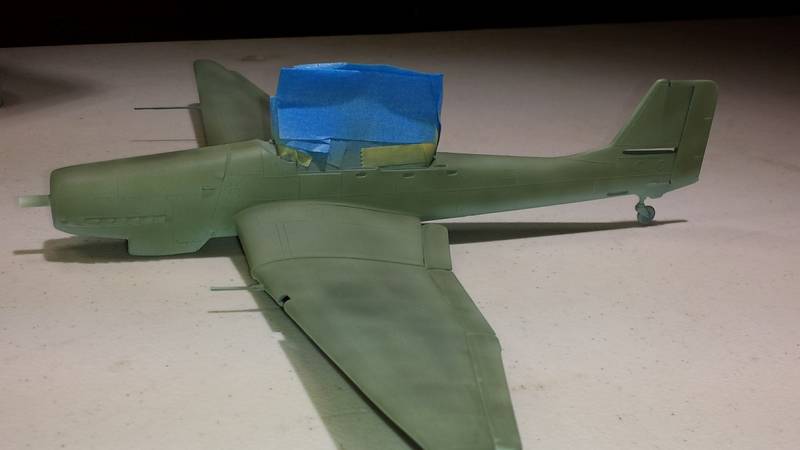
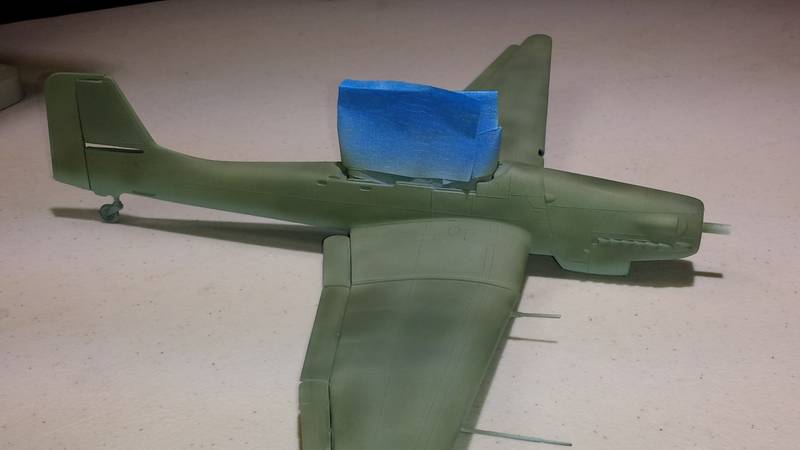
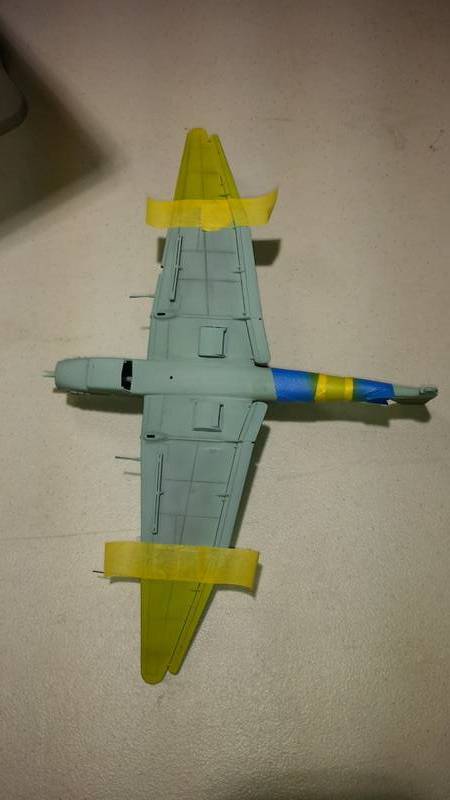
A trip down memory lane. 40 years ago I built this kit as an eager 7 year old. It was a fun kit to build of a cool looking airplane. I thought I was pretty slick at the time by painting some masking tape yellow for the fuselage identification band.
Of course I didn't have an airbrush and didn't even try to brush paint it. I recently found the built kit in an old box of models from my youth. Thought it would be fun to build the same, basic kit, but using the modeling skills I've learned over the years and my Iwata airbrush to finish it properly. Quick visit to eBay found a decent donor kit for the project. Not going to load it up with aftermarket parts, just a good clean build. May have to scratch build a few replacement parts if any are missing, but nothing crazy.
Enjoy the project. I will!
Hosted by Rowan Baylis
1/48 Monogram Ju-87D. Nostalgic Build
GidGar
Alaska, United States
Joined: August 22, 2005
KitMaker: 47 posts
AeroScale: 19 posts
Joined: August 22, 2005
KitMaker: 47 posts
AeroScale: 19 posts
Posted: Saturday, October 08, 2016 - 08:36 AM UTC
Posted: Saturday, October 08, 2016 - 01:47 PM UTC
Enjoy this! I recently built the Monogram FW190 circa 1978 for nostalgia. It was great!
Gaz
Gaz
rdt1953
New Jersey, United States
Joined: February 06, 2015
KitMaker: 1,098 posts
AeroScale: 900 posts
Joined: February 06, 2015
KitMaker: 1,098 posts
AeroScale: 900 posts
Posted: Saturday, October 08, 2016 - 05:41 PM UTC
Looking forward to this as I have fond memories of these kits from my youth , albeit something more than 40 years ago. I hope we get to see your original effort alongside the new !
Cheers ! Richard
Cheers ! Richard
Posted: Sunday, October 09, 2016 - 04:15 AM UTC
I heartily endorse the idea. There is great nostalgia in these old kits, and even after 4 decades many still stand up well. For example, I think the Monogram P-47 kits are prime subjects even now, for a change of pace like you're doing.
I will follow your Stuka with interest.
Joel_W
Associate Editor
New York, United States
Joined: December 04, 2010
KitMaker: 11,666 posts
AeroScale: 7,410 posts
Joined: December 04, 2010
KitMaker: 11,666 posts
AeroScale: 7,410 posts
Posted: Sunday, October 09, 2016 - 11:36 PM UTC
I to remember this kit when I got back into the hobby in the early 70s, unfortunately, I was already married and in my late 20s. It certainly does bring back some fond memories. Back then just finishing a model was a major milestone for me. I'll be following along with great interest to see what you can do with it now.
Joel
Joel
GidGar
Alaska, United States
Joined: August 22, 2005
KitMaker: 47 posts
AeroScale: 19 posts
Joined: August 22, 2005
KitMaker: 47 posts
AeroScale: 19 posts
Posted: Monday, October 10, 2016 - 08:45 AM UTC
Gents, thanks for the comments. Seems like we all have some common nostalgia here, eh?
@Gaz-Awesome! The Fw-109 is another one of my favorite Monogram nostalgia kits. Have one on the shelf with all of it's glorious rivet detail!
@Richard - Indeed, will dig out the original and post some photos soon.
@Brian - couldn't agree more on the shelf life of these kits. Last year I finished the Great Wall 1/48 P-61. Yes, Shep Paine's diorama in the Monogram kit hooked me in 4th grade for life! Pulled the Monogram version off the shelf and low and behold, the fuselage half was a perfect match to the modern GWH version. Granted, Great Wall's was for more refined, but Monogram's top turret was better molded and more accurate. Go figure!
So, got into the kit over the weekend. Started with the wings. Pretty basic and straightforward. Opened up a few holes on the underside for the bomb attachments and dive brakes. Attached dive brakes. Then looked for bomb carriers......oh, the joys of buying used kits sight unseen! No bomb carriers!
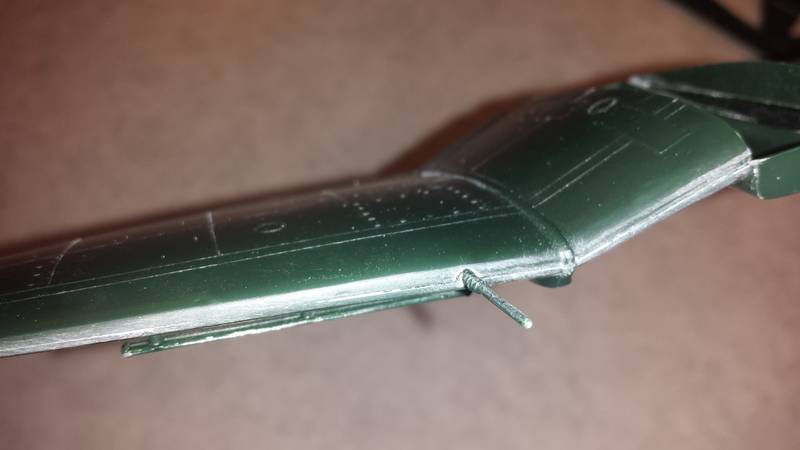
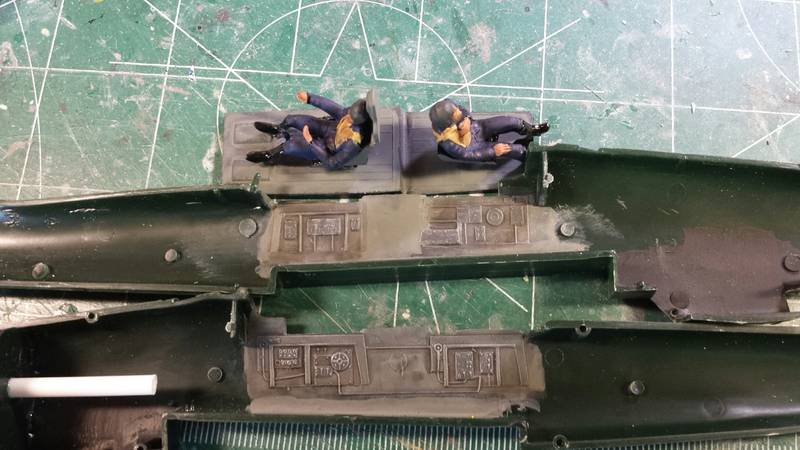
So, filled the holes, attached wing tops. Bored out gun barrels a tad and on my merry way to work on the cockpit. Basic coat of Ceramcoat craft paint. Hippo grey I believe? Then a black wash of citadel war gaming paint. Friend turned me on to this stuff recently. I've tried for years to not get too many different types of paints and supplies, but I broke down for this stuff. Easy to use and consistent.
Dried overnight, and hit it with a drybush for highlights. Then a few strokes with a silver pencil for extra highlights. Not going to worry about the giant ejector pin mark. The pilots and seats will block most of that.
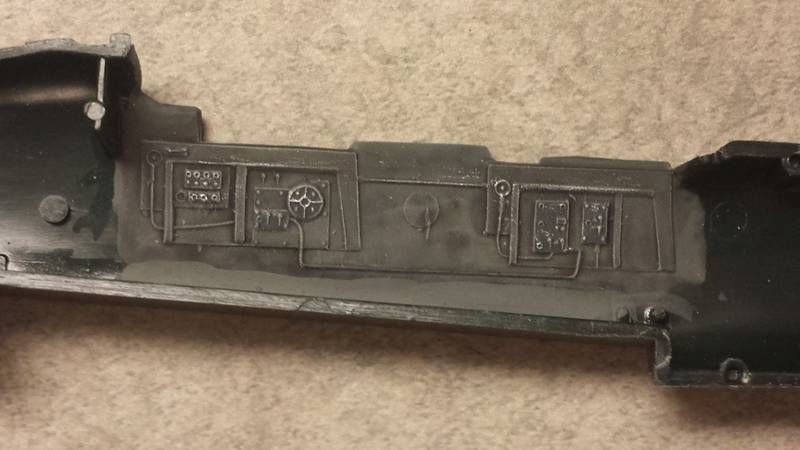
Wings were dry, so why not put on the wheel spats? Oh, right, those were on the missing sprue with the bomb carriers.
Right, back to eBay. Found another classic Monogram boxing of the Ju-87G. Promptly won the bid for a very nice sum of $7.50. I can live with that!
That's the update for now. Will also have to scratchbuild an instrument panel. But that's a pretty straightforward project. Again the goal is to not encumber the build with a ton of extra work. Build and enjoy for the simplicity. nice break from my twin Hasegawa Me-109 E-3' in Spanish Civil War markings. But that's a topic for another day!
Thanks again for the comments, more to come.
Posted: Monday, October 10, 2016 - 09:29 AM UTC
GidGar,
I'll be watching. This is a respectable model and for a fraction of the cost of the "latest-greatest" model Stukas. Many of Monogram's models are still competitive; until Tamiya's P-51 release, Monogram's 1/32 P-51D was considered the gold standard for LSP P-51s - raised rivets and all. This is my Monogram Fw 190:
citadel paint? I love their washes. Can't find them any more.
I'll keep watching your Stuka.
Joel_W
Associate Editor
New York, United States
Joined: December 04, 2010
KitMaker: 11,666 posts
AeroScale: 7,410 posts
Joined: December 04, 2010
KitMaker: 11,666 posts
AeroScale: 7,410 posts
Posted: Monday, October 10, 2016 - 08:16 PM UTC
Fred,
A impressive build on that old Monogram Fw 190.
Joel
A impressive build on that old Monogram Fw 190.
Joel
oliver
Beersheba, Israel
Joined: August 26, 2006
KitMaker: 119 posts
AeroScale: 30 posts
Joined: August 26, 2006
KitMaker: 119 posts
AeroScale: 30 posts
Posted: Tuesday, October 11, 2016 - 04:49 AM UTC
Brings back lots of modelling first memories seeing the old Monogram Ju 87,one of the first kit I ever completed paint and all about 1983 just as I started building models.
GidGar
Alaska, United States
Joined: August 22, 2005
KitMaker: 47 posts
AeroScale: 19 posts
Joined: August 22, 2005
KitMaker: 47 posts
AeroScale: 19 posts
Posted: Tuesday, October 11, 2016 - 12:08 PM UTC
@JPTRR - Thanks for sharing the Fw-190, nice looking kit!
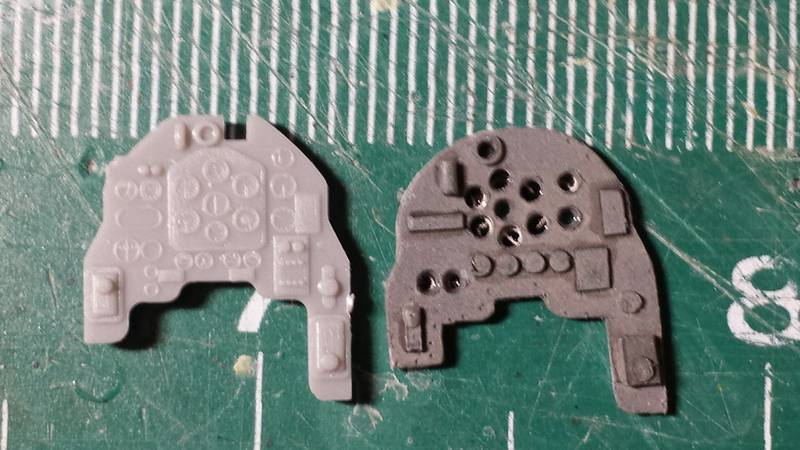
As I mentioned previously, I was missing a few pieces. One of which is the instrument panel. Worked on scratchbuilding one tonight so I can get the fusealage together this week. My goal is to be painting this weekend!
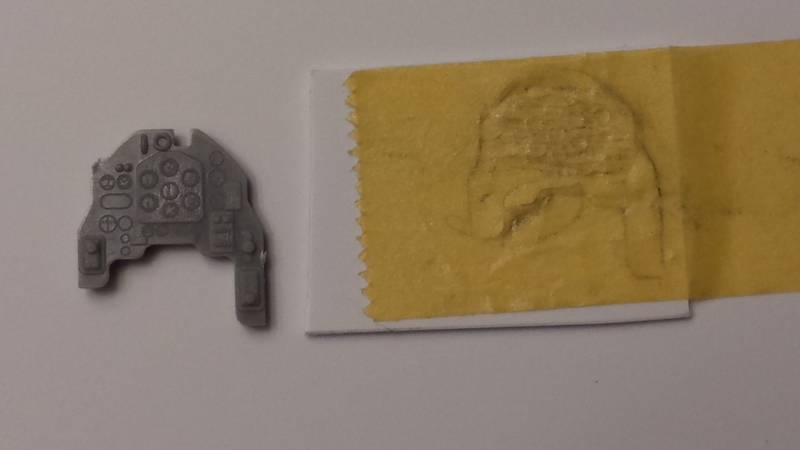
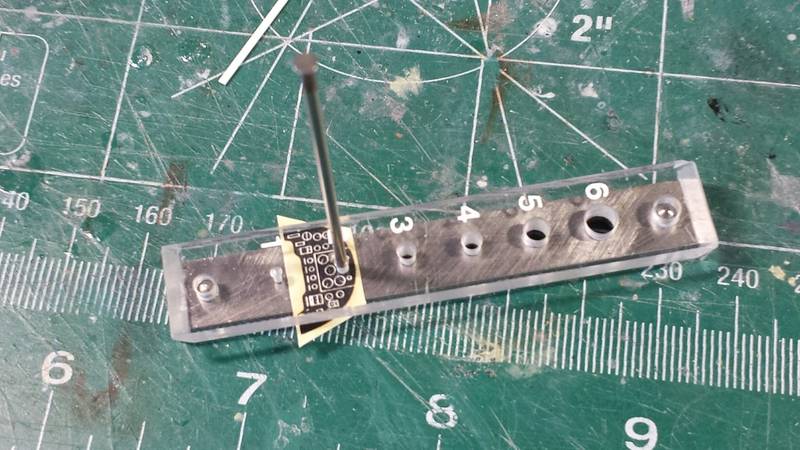
Grabbed a Hasegawa Ju-87B off the shelf to use the instrument panel as a template. Used the "Brass Etching" technique with some Tamiya masking tape to get the outline and location of bezels.
Transferred the tape to some plastic stock and used a sharp scratch awl to transfer the lines through the tape to the plastic. Scored, and snapped the plastic off. A bit of shaping with files, drilled a few holes, and then ream the holes gently with ratfile.
Added a few bits an pieces from the punch and die and spare plastic stock to make it look somewhat similar to what it should like. My homage to Shep Paine's concept of "gizmology".
will add some decal dials from an old decal sheet to a clear back for details after painting.
Okay, that's the update for tonight. This should be the only scratchbuilding on the kit, and only as necessary due to the missing panel.
Thanks as always for watching and commenting.
G
Joel_W
Associate Editor
New York, United States
Joined: December 04, 2010
KitMaker: 11,666 posts
AeroScale: 7,410 posts
Joined: December 04, 2010
KitMaker: 11,666 posts
AeroScale: 7,410 posts
Posted: Wednesday, October 12, 2016 - 05:08 AM UTC
G,
Now that's thinking outside of the box. The end result looks better then the master IP.
Joel
Now that's thinking outside of the box. The end result looks better then the master IP.
Joel
GidGar
Alaska, United States
Joined: August 22, 2005
KitMaker: 47 posts
AeroScale: 19 posts
Joined: August 22, 2005
KitMaker: 47 posts
AeroScale: 19 posts
Posted: Sunday, October 16, 2016 - 12:31 AM UTC
Okay, project updates.
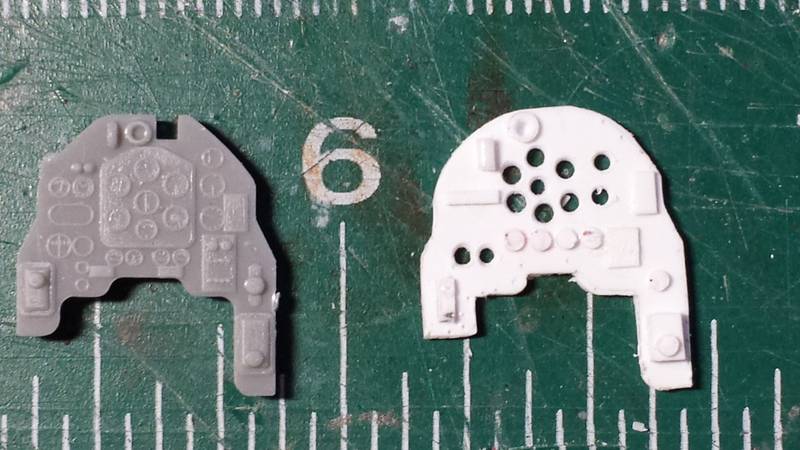
Finished up what I wanted to do with the instrument panel. since the original kit only called for a decal to be glued to the fuselage, but there was no decal in the kit, I scratchbuilt the following.
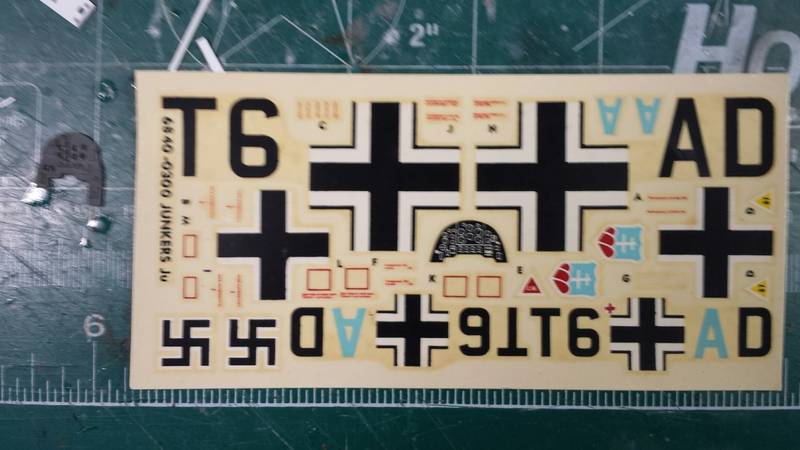
I ended up ordering another Monogram Ju-87 for the missing wheel spats. That kit came with the aforementioned instrument panel decal. It was my donor for the dials.
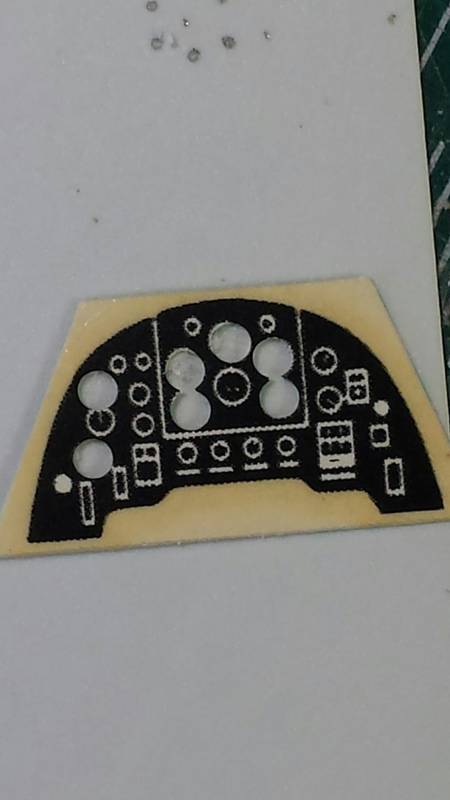
With my trusty punch and die set, punched out the dials I wanted to use.
That left a decal with holes and a nice collection of dials.
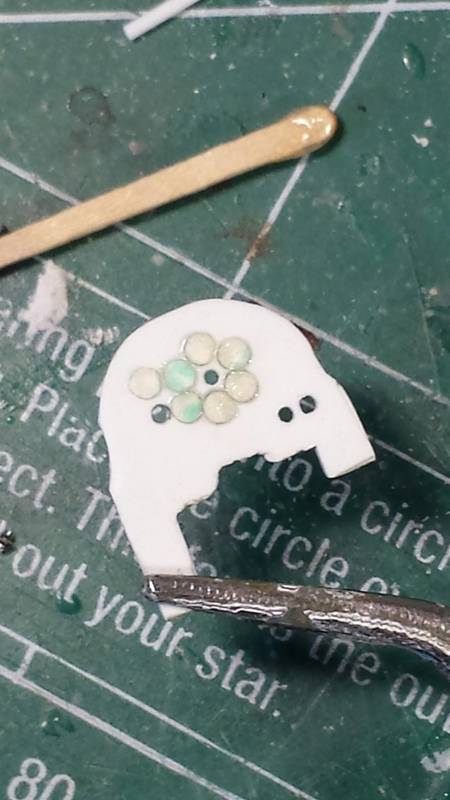
I then used Pledge Multi Surface Floor stuff (formerly known as Future) to attach the dials to the back of the panel. a drop of Future in the dial holes also gives the glassy gloss finish.
And the final IP next to the Hasegawa IP used as a pattern. Good enough for this kit and what I'm working on.
And finally, painted up the pilot/gunners joined up the fuselage. The kit came with the pilots already glued into the seats. I just went with it, because that's what I would have done as a kid!
Have joined fuselage and wings. Sanding and seam work underway. Updates to follow soon.
Enjoy and thanks for watching.
GidGar
Alaska, United States
Joined: August 22, 2005
KitMaker: 47 posts
AeroScale: 19 posts
Joined: August 22, 2005
KitMaker: 47 posts
AeroScale: 19 posts
Posted: Saturday, November 05, 2016 - 11:47 PM UTC
Been a while since last update! No good excuses, so let's just get on with it.
Two pics of kit prepped for primer. Had some typical seam lines to fill with squadron white putty. I really like Alclad primer, even though this won't be in a bare metal finish.
had to do some minor seam repairs on the fuselage. Always odd with raised panel lines. Used two strips of Tamiya thin tape to form the boundary of the raised panel line, then used a light application of putty to recreate the raised panel line. Pretty quick and efficient way to repair raised panel lines.
More pics to come later today. Have a free day to catch up on projects!
Posted: Sunday, November 06, 2016 - 01:45 AM UTC
I'm enjoying following this build. As with some of the others here I'm a big fan of some of the old Monogram kits, having several P-47s and 6 P-61 kits in the stash.
Looking forward to some colour going on.
Cheers, D
Looking forward to some colour going on.
Cheers, D
GidGar
Alaska, United States
Joined: August 22, 2005
KitMaker: 47 posts
AeroScale: 19 posts
Joined: August 22, 2005
KitMaker: 47 posts
AeroScale: 19 posts
Posted: Sunday, November 06, 2016 - 11:06 AM UTC
D, Thanks for the note, appreciate the comments.
Here are three shots after a busy day in the airbrush booth. Doesn't help I have model attention deficit disorder and am trying to paint three models throughout the day.
Anyhow, basecoat RLM 70 green on the Ju. Used Testor's model master paints, shot through my Iwata HP-CS airbrush. Light coats, some pre shading on the top.
Yellow ID band and wing tips Tamiya paint. It's what I had in the stash.
Underside panel lines highlighted with an artists 4B pencil and a Qtip to blend out the graphite a bit. New approach for me, but I like the look.
Spent an hour or so masking the splinter camo section for the RLM 71 black green to follow. Maybe not tomorrow, Monday Night Football with my Seahawks!
simon64
United Kingdom
Joined: August 19, 2013
KitMaker: 29 posts
AeroScale: 23 posts
Joined: August 19, 2013
KitMaker: 29 posts
AeroScale: 23 posts
Posted: Sunday, November 06, 2016 - 07:17 PM UTC
Realy injoying this one - as a freind of mine has just given me a P-61 (I'll decide if I still like him afterwards). As for the Seahawks usualy a good game, but I support the Buc's so what do I know
Joel_W
Associate Editor
New York, United States
Joined: December 04, 2010
KitMaker: 11,666 posts
AeroScale: 7,410 posts
Joined: December 04, 2010
KitMaker: 11,666 posts
AeroScale: 7,410 posts
Posted: Monday, November 07, 2016 - 05:39 AM UTC
Impressive progress. I really like how the top base color and shading looks, and the bottom really has a well weathered look to it.
Joel
Joel
GidGar
Alaska, United States
Joined: August 22, 2005
KitMaker: 47 posts
AeroScale: 19 posts
Joined: August 22, 2005
KitMaker: 47 posts
AeroScale: 19 posts
Posted: Wednesday, November 09, 2016 - 12:19 PM UTC
Quoted Text
Realy injoying this one - as a freind of mine has just given me a P-61 (I'll decide if I still like him afterwards). As for the Seahawks usualy a good game, but I support the Buc's so what do I know
Thanks Simon, appreciated. Enjoy the P-61, I still have one in the stash. I built the GWH 1/48 one last year. Really nice kit, but the top 4x.50cal turret wasn't nearly as nice as the "ancient" Monogram P-61. Bit better detail in the cockpit and really nice recessed panel lines. Monogram is still holding up well after all these years!
...and about the Bucs, well, at least you have a team! Enjoy the games, I love this time of year; modeling, beer, and Sunday afternoon football!
More to come.
GidGar
Alaska, United States
Joined: August 22, 2005
KitMaker: 47 posts
AeroScale: 19 posts
Joined: August 22, 2005
KitMaker: 47 posts
AeroScale: 19 posts
Posted: Wednesday, November 09, 2016 - 12:21 PM UTC
Thanks Joel.
Tried something new with the 4B pencil for panel lines. Will upload some higher res pictures as I get more finishing and then let you be the judge.
More to come soon!
Tried something new with the 4B pencil for panel lines. Will upload some higher res pictures as I get more finishing and then let you be the judge.
More to come soon!
Joel_W
Associate Editor
New York, United States
Joined: December 04, 2010
KitMaker: 11,666 posts
AeroScale: 7,410 posts
Joined: December 04, 2010
KitMaker: 11,666 posts
AeroScale: 7,410 posts
Posted: Thursday, November 10, 2016 - 12:45 AM UTC
GidGar
Alaska, United States
Joined: August 22, 2005
KitMaker: 47 posts
AeroScale: 19 posts
Joined: August 22, 2005
KitMaker: 47 posts
AeroScale: 19 posts
Posted: Friday, November 11, 2016 - 12:02 PM UTC
Joel, right on, Jessica did you right on the turret trade. Nice looking Widow too!
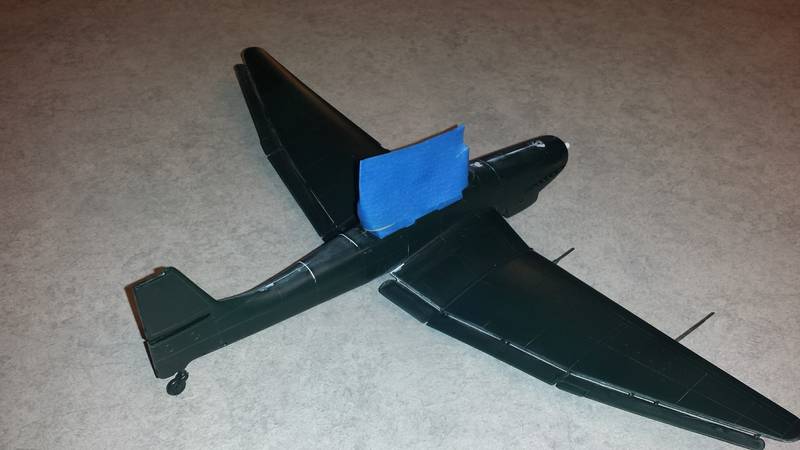
Okay, daughter is at overnight slumber party, wife is busy and doesn't need me, so airbrush time.
Two shots; one masked and ready for Schwarzgrun, the second shows it after the paint applied. Going to let it dry overnight, will unmask tomorrow and share some shots then.
Okay, daughter is at overnight slumber party, wife is busy and doesn't need me, so airbrush time.
Two shots; one masked and ready for Schwarzgrun, the second shows it after the paint applied. Going to let it dry overnight, will unmask tomorrow and share some shots then.
GidGar
Alaska, United States
Joined: August 22, 2005
KitMaker: 47 posts
AeroScale: 19 posts
Joined: August 22, 2005
KitMaker: 47 posts
AeroScale: 19 posts
Posted: Sunday, November 20, 2016 - 04:18 AM UTC
Progress to report.
Canopy parts dipped in Pledge/Future, masked and painted.
Then the big experiment - decals. The first Monogram kit I bough of off eBay was missing the sprue with the wheel spats and bomb racks. So I found another on eBay, and then, last week, found a sealed 1969 version of the kit still sealed for sale at our local model club meeting. Of course, it was added to the collection.
Of note, there were two versions of the decals between the classic 1973 kitting of the box (of my youthful memories) and the 1983 kitting of the kit (the one I bought on line). 1973 version is the yellower of the two.
Note the differences between blue and green aircraft designation and of course, the lack of swastikas in the 1983 version. Also the "T6" in each was of different sizes as well. From a very rudimentary research online, I went with the smaller "T6" fuselage markings. I'm sure there was a reason for the color changes and size of font, but again, this is a for fun, nostalgic build. Not meant to correct any historical inaccuracies. Remember, this kit has raised panel lines....
Okay, then on to gloss coat of Pledge/Future and decals. the decals had an abundance of a milky white glue like substance on them. Per the instructions, they let you know that the stuff will dry clear. With trepidation, I applied and trusted Monogram. And they worked! Dried clear and looked pretty sharp all things considered. Used the swastikas from the 1973 boxing. Granted, they took about 20 minutes to soak before coming loose from the backing, but they laid down very nicely with just a touch of micro-set on all.
Joel_W
Associate Editor
New York, United States
Joined: December 04, 2010
KitMaker: 11,666 posts
AeroScale: 7,410 posts
Joined: December 04, 2010
KitMaker: 11,666 posts
AeroScale: 7,410 posts
Posted: Sunday, November 20, 2016 - 11:43 PM UTC
I'm amazed that decals that old, not sealed in a plastic sleeve didn't just come apart once put in the warm water. the decaling really does look fine even if you didn't tell anyone that the decals are the original kit ones.
Joel
Joel
GidGar
Alaska, United States
Joined: August 22, 2005
KitMaker: 47 posts
AeroScale: 19 posts
Joined: August 22, 2005
KitMaker: 47 posts
AeroScale: 19 posts
Posted: Sunday, July 30, 2017 - 10:22 AM UTC
Well, final update is here.
You know how these projects go, "it will only take a week to finish this up" and then three other shiny, new kits get in front of me....
Okay, completed the classic Ju-87 and drug out the ancient one I built as a 7 year old over 40 years ago. As you can see, I've learned a few things along the way. Still have areas to improve on, but I'm still having fun!
I thought I was pretty high speed at 7 to use yellow painted masking tape for the fuselage band. Good quality tape, it's still on the model. Note also the remnant of string that used to hold the model from my ceiling!
Anyhow, enjoy. Fun trip down memory lane. Now off to finish the other 7 projects on the desk....