_GOTOBOTTOM
World War II
Discuss WWII and the era directly before and after the war from 1935-1949.
Hosted by Rowan Baylis
1:48 Bücker Bü 181
Merlin
Staff MemberSenior Editor
AEROSCALE
#017
_VISITCOMMUNITY
United Kingdom
Joined: June 11, 2003
KitMaker: 17,582 posts
AeroScale: 12,795 posts
Posted: Wednesday, October 19, 2016 - 09:59 PM UTC
Hi there

A fantastic package of samples arrived today from Special Hobby, so watch out for reviews from myself and others very soon. Among the items is the new little Bestmann, which is just so tempting, I'll go straight for a Build instead of "In-Boxing":


I've got a day off work tomorrow, so I'll aim to make a bit of quick progress and then try to maintain the momentum...

All the best

Rowan
alpha_tango
_VISITCOMMUNITY
Germany
Joined: September 07, 2005
KitMaker: 5,609 posts
AeroScale: 5,231 posts
Posted: Thursday, October 20, 2016 - 01:29 AM UTC
God speed!

I'd like to see another one finished from you!

cheers

Steffen
simonn
_VISITCOMMUNITY
Australia
Joined: October 15, 2016
KitMaker: 62 posts
AeroScale: 36 posts
Posted: Thursday, October 20, 2016 - 03:15 AM UTC
Interesting subject. I'm hoping Special Hobby have done a good job so am looking forward to this build.

Simon
Merlin
Staff MemberSenior Editor
AEROSCALE
#017
_VISITCOMMUNITY
United Kingdom
Joined: June 11, 2003
KitMaker: 17,582 posts
AeroScale: 12,795 posts
Posted: Thursday, October 20, 2016 - 12:16 PM UTC
Cheers Steffen and Simonn

I started having a tinker last night and can see the Bestmann is that classic Special Hobbies combination of semi-limited run main parts, but with a detail sprue that is noticeably crisper moulded. I cleaned up a couple of irritating ejection pin marks that are visible in the cockpit and generally got a feel for things. Hopefully, I'll make some proper progress today and have some pics to show for it.

All the best

Rowan
Merlin
Staff MemberSenior Editor
AEROSCALE
#017
_VISITCOMMUNITY
United Kingdom
Joined: June 11, 2003
KitMaker: 17,582 posts
AeroScale: 12,795 posts
Posted: Friday, October 21, 2016 - 01:01 AM UTC
Hi again

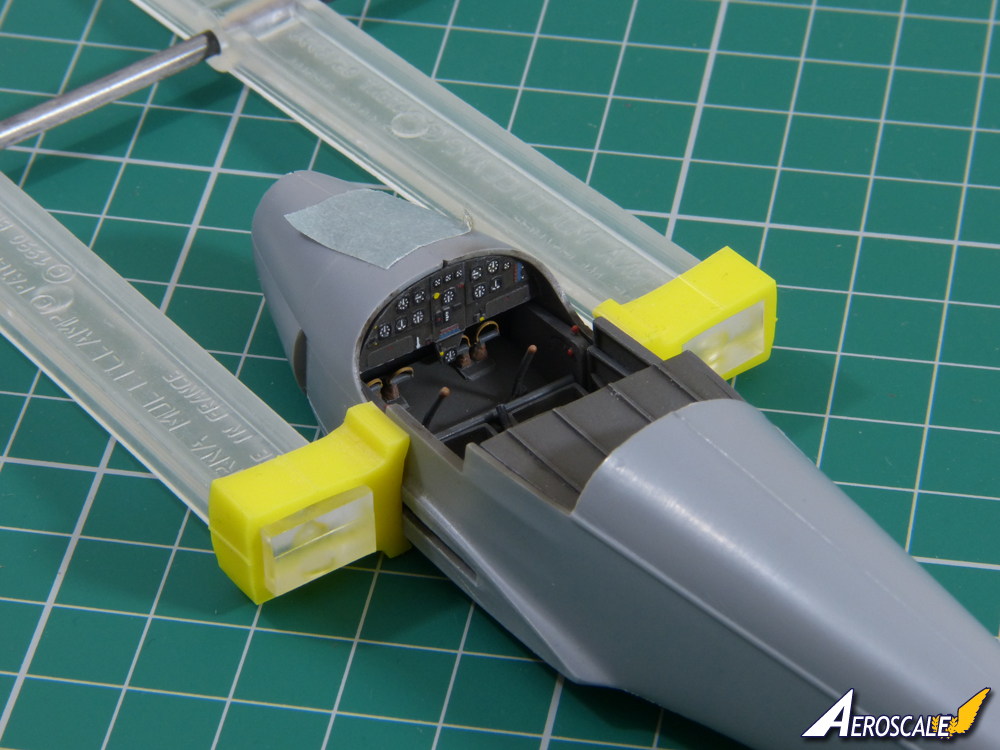
No photos yet, but I got a fair bit done today. The cockpit is basically painted and I'll leave it overnight before some weathering. I'm not going to go crazy, because it'll all be tucked away under a closed canopy. I'll even use the instruments decal as a single item (as against punching out each dial) - something I wouldn't normally do, but I'm interested to see how it works (plus, as I say, it won't be "in your face" if it doesn't work out brilliantly.

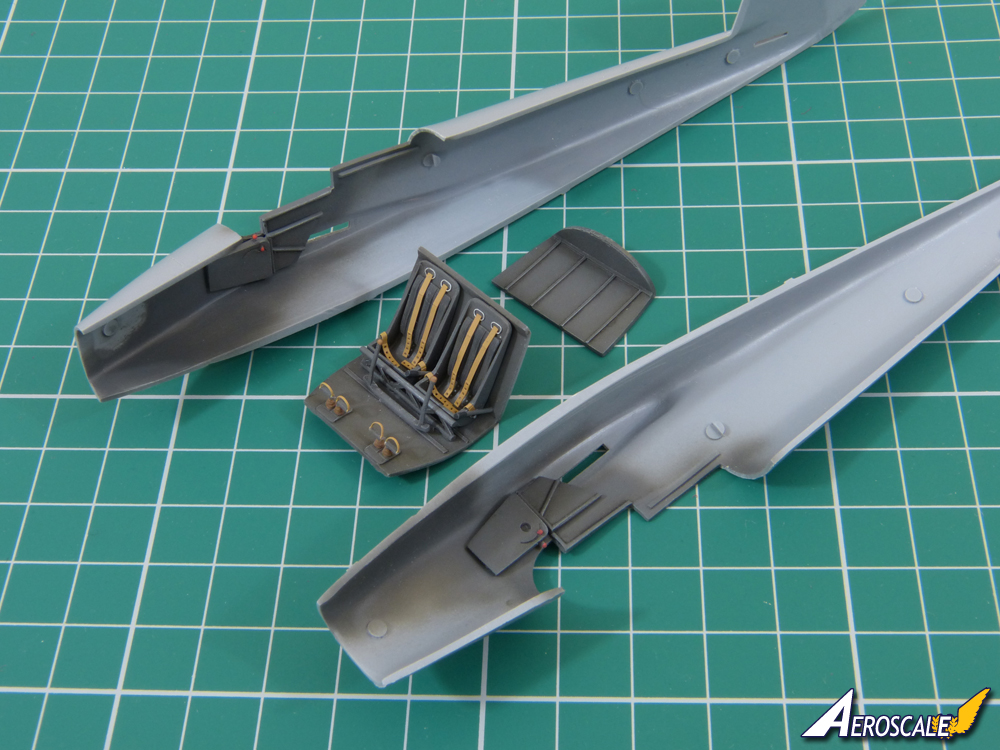
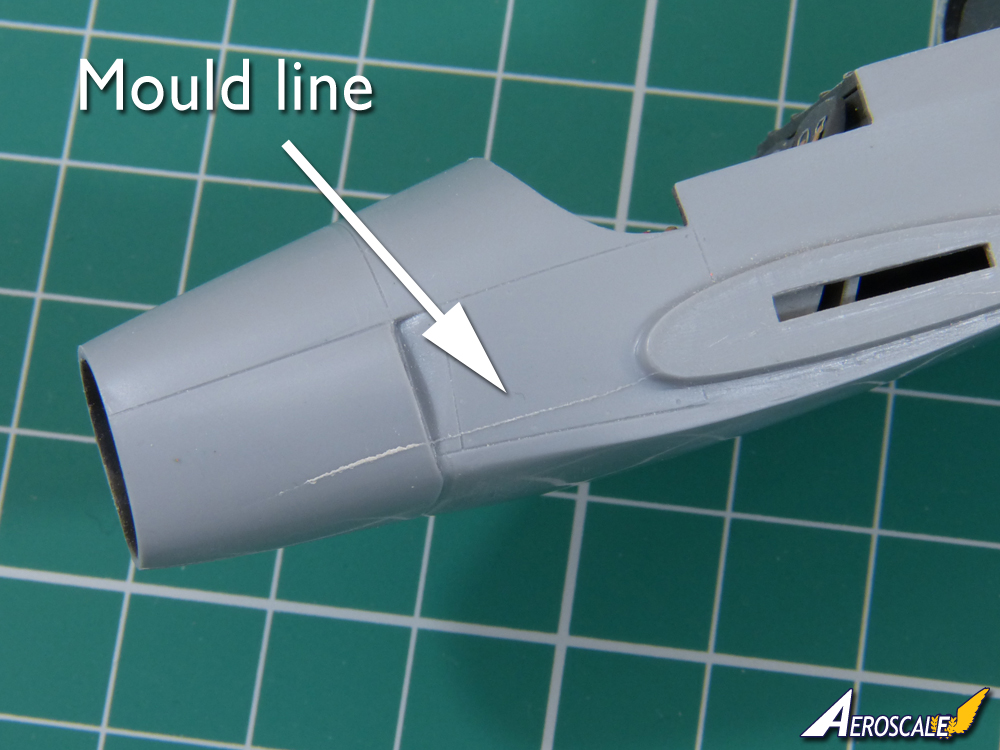
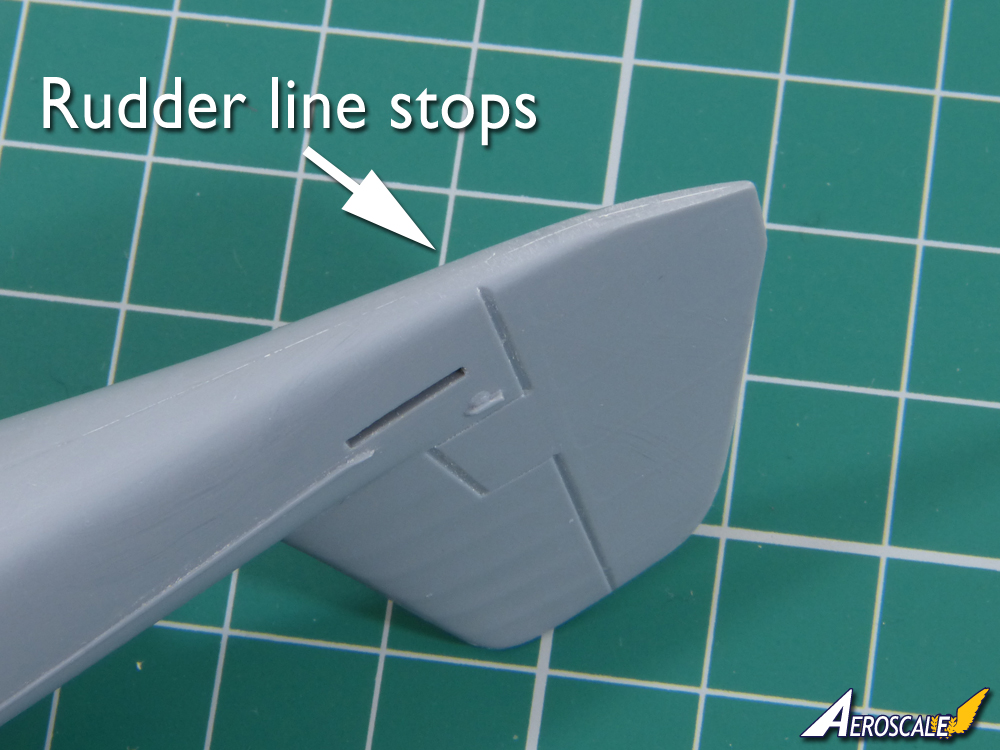
Cockpit parts have gone together pretty well. There's definitely more clean-up needed than in a mainstream kit, but the basic fit seems fine.

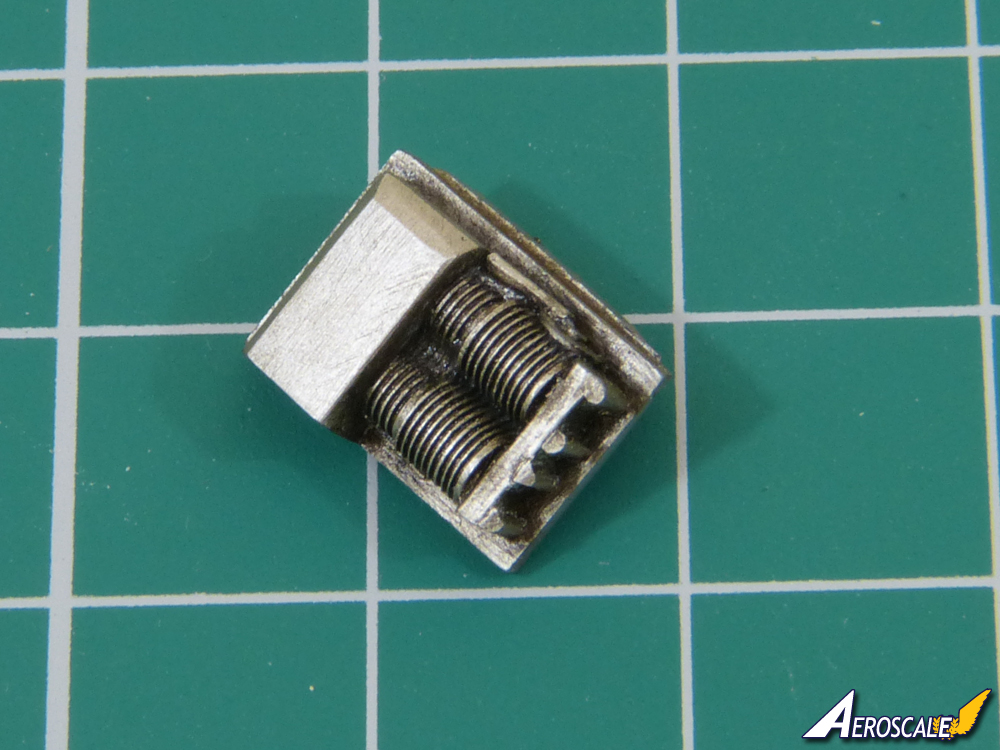
The kit includes a very nicely detailed resin engine "blank" to prevent a see-through look in the intake. It's so nice, you can't help but think the cockpit would have benefited from some resin parts too.

All the best

Rowan
Merlin
Staff MemberSenior Editor
AEROSCALE
#017
_VISITCOMMUNITY
United Kingdom
Joined: June 11, 2003
KitMaker: 17,582 posts
AeroScale: 12,795 posts
Posted: Saturday, October 22, 2016 - 08:05 PM UTC
Hi again

A quick update as promised to show where I've got to. I've given the cockpit parts a coat of Alclad II Klear Kote Matt. It's the first time I've used it and I'm really impressed. I normally use Windsor & Newton Galeria, but the Alclad is really good.


The instrument panel's decal is coming along. It needs to dry thoroughly to snuggle down, but should look more than good enough for a closed "office".

Strike what I said about the resin engine blank preventing a see-through look. It only half-prevents it. I'll probably just put a bit of grey kabuki tape over the gap.


More soon.

All the best

Rowan
Merlin
Staff MemberSenior Editor
AEROSCALE
#017
_VISITCOMMUNITY
United Kingdom
Joined: June 11, 2003
KitMaker: 17,582 posts
AeroScale: 12,795 posts
Posted: Saturday, October 22, 2016 - 10:12 PM UTC
Hi again

With the panel and cockpit sub slotted in, I'll leave the fuselage clamped while it dries overnight:


The fit's pretty good, but I've noticed a mould line that'll need dealing with, and the rudder isn't scribed all the way under the tail.

Touch wood, they'll be easy fixes and I can power on a bit from here on in.

All the best

Rowan
Redhand
#522
_VISITCOMMUNITY
New Jersey, United States
Joined: January 20, 2013
KitMaker: 1,460 posts
AeroScale: 1,443 posts
Posted: Saturday, October 22, 2016 - 10:29 PM UTC
Damn Rowan, that looks nice!
Joel_W
Staff MemberAssociate Editor
AUTOMODELER
_VISITCOMMUNITY
New York, United States
Joined: December 04, 2010
KitMaker: 11,666 posts
AeroScale: 7,410 posts
Posted: Saturday, October 22, 2016 - 11:09 PM UTC
Rowan,
Nice start to a rather unique aircraft. It's always nice to see a limited run kit tackled here. I'm with Steffen on hoping that you take this one to the finish line as well.
Joel
Merlin
Staff MemberSenior Editor
AEROSCALE
#017
_VISITCOMMUNITY
United Kingdom
Joined: June 11, 2003
KitMaker: 17,582 posts
AeroScale: 12,795 posts
Posted: Sunday, October 23, 2016 - 07:30 PM UTC
Hi Brian and Joel

Many thanks for the kind words of encouragement.

Here are shots of the little glitches I found. The mould line reminds me of what you sometimes find on resin kits, so I imagine an RTV mould was used at some stage for the pattern.


Today's target is to get the wings on. I'll be quite chuffed if I manage that, because I also need to work on reviews.

All the best

Rowan
 _GOTOTOP