_GOTOBOTTOM
World War II: Germany
Aircraft of Germany in WWII.
Hosted by Rowan Baylis
Hobbyboss fw-190 D-12 r14
lespauljames
_VISITCOMMUNITY
England - South West, United Kingdom
Joined: January 06, 2007
KitMaker: 3,661 posts
AeroScale: 369 posts
Posted: Monday, October 31, 2016 - 02:18 AM UTC


Build complete, photos at the bottom.


Hello all!I will try to make this one a build log to encourage patience, and to show my process
Ta-Da!


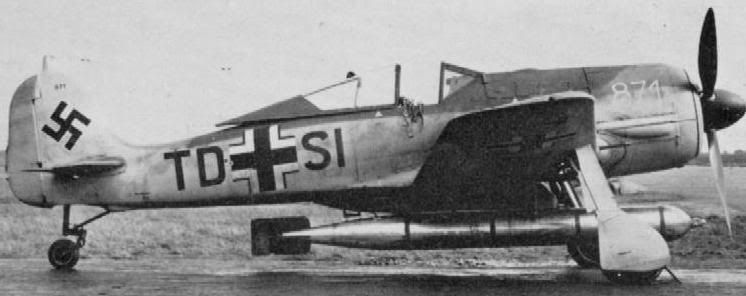
I Bought this for my birthday during a trip away. the price and the fact thati really like hobbyboss kits sold it to me! plus, who doesnt like a 190.( really want to build an A-8)

So,first up, some parts that won't really be seen.

Cockpit.
So far,preshaded and coated with Tamiya black and dark raf grey mixed.the dials have been picked out by hand, and there is still weathering to do.the seat was painted with vallejo leather brown, and some highlights with white and a red yellow mix.


Rear of engine.
This willreally be well hidden, hiding away above the wheel bay. lifecolour Grau,and various Alclads ( Duraliminium, Polished aluminium, dull aluminium,Exhaust manifold, and polished Brass)
Weathered with ultramarine and burnt sienna mixed to a dark( thankyou oil painting) and black for the very deep areas and splatters.


I work quickly so expect more soon.
James
CReading
#001
_VISITCOMMUNITY
California, United States
Joined: February 09, 2002
KitMaker: 1,726 posts
AeroScale: 89 posts
Posted: Monday, October 31, 2016 - 02:21 AM UTC
Nice! I'm following

C.
lespauljames
_VISITCOMMUNITY
England - South West, United Kingdom
Joined: January 06, 2007
KitMaker: 3,661 posts
AeroScale: 369 posts
Posted: Monday, October 31, 2016 - 05:20 AM UTC
Hey Charles, glad to have you along. Lets hope I actually finish this and post plenty of pics. And don't mess it up !

Upper cockpit panel painted. I prefer to paint than use decals when possible inside. It looks a bit more organic.
Humbrol clear for the glass dials.
Redhand
#522
_VISITCOMMUNITY
New Jersey, United States
Joined: January 20, 2013
KitMaker: 1,460 posts
AeroScale: 1,443 posts
Posted: Monday, October 31, 2016 - 07:10 AM UTC
Beautiful detail: jewel like!
simonn
_VISITCOMMUNITY
Australia
Joined: October 15, 2016
KitMaker: 62 posts
AeroScale: 36 posts
Posted: Monday, October 31, 2016 - 11:44 AM UTC
James

You did a fine job painting the instrument panel. Those dials look very well detailed.

Simon
Antilles
_VISITCOMMUNITY
Nordrhein-Westfalen, Germany
Joined: March 22, 2015
KitMaker: 671 posts
AeroScale: 614 posts
Posted: Monday, October 31, 2016 - 01:42 PM UTC
James,

great kick-off. The engine comes out great and the work-space looks fine, too!

Was this a special evolution of the Langnasen Dora for torpedos? Has this one seen action or trials?

Oliver
lespauljames
_VISITCOMMUNITY
England - South West, United Kingdom
Joined: January 06, 2007
KitMaker: 3,661 posts
AeroScale: 369 posts
Posted: Monday, October 31, 2016 - 05:45 PM UTC
Thankyou guys, much appreciated.
Oliver, I cant find anything online whatsoever about this variant, apart from kits, so perhaps a prototype or a drawing board idea ? Maybe someone can clear this up
lespauljames
_VISITCOMMUNITY
England - South West, United Kingdom
Joined: January 06, 2007
KitMaker: 3,661 posts
AeroScale: 369 posts
Posted: Tuesday, November 01, 2016 - 09:48 PM UTC
Ok guys, I have an aesthetic dilemma. After closing the fuselage up I was faced with this.


Open or closed :-)
simon64
_VISITCOMMUNITY
United Kingdom
Joined: August 19, 2013
KitMaker: 29 posts
AeroScale: 23 posts
Posted: Tuesday, November 01, 2016 - 11:11 PM UTC
Can't resist a 190 build. will be following
lespauljames
_VISITCOMMUNITY
England - South West, United Kingdom
Joined: January 06, 2007
KitMaker: 3,661 posts
AeroScale: 369 posts
Posted: Wednesday, November 02, 2016 - 02:13 AM UTC
Thanks Simon !

wheel well. Preshade black. Rlm 02 grau lifecolour, I also picked out a few bits in lighter green for interest and painted the wires yellow. Gun barrels are metalcote gunmetal and need to be polished. Micro flat and oil wash too


Its looking that there might be gap in the wing/fuselage join, it might just be the dry fitting though.
lespauljames
_VISITCOMMUNITY
England - South West, United Kingdom
Joined: January 06, 2007
KitMaker: 3,661 posts
AeroScale: 369 posts
Posted: Saturday, November 05, 2016 - 07:40 PM UTC
hey all i have had a lot of trouble with photobucket account and limited bench time but i have managed to fill the gaps at the wing root with some 0.3 mm styrene.

annoying gap..


and archaic repair


it too a little sanding but i got it to a point where i was happy. then ended up doing some pre shading.


more soon
james
lespauljames
_VISITCOMMUNITY
England - South West, United Kingdom
Joined: January 06, 2007
KitMaker: 3,661 posts
AeroScale: 369 posts
Posted: Sunday, November 06, 2016 - 07:07 AM UTC

Hey guys, I have been busy painting. Blue is Tamiya, grauviolet and graugrun on top so far.


Redhand
#522
_VISITCOMMUNITY
New Jersey, United States
Joined: January 20, 2013
KitMaker: 1,460 posts
AeroScale: 1,443 posts
Posted: Sunday, November 06, 2016 - 09:48 AM UTC
Coming along very nicely! Gotta love those styrene strips for gap filling. I used that method on my Monagram TBD-1, among others.

lespauljames
_VISITCOMMUNITY
England - South West, United Kingdom
Joined: January 06, 2007
KitMaker: 3,661 posts
AeroScale: 369 posts
Posted: Monday, November 07, 2016 - 03:37 AM UTC
Thanks Brian ! Its surprising that a new kit like this has gaps !

Does anyone know the what colour the torpedo would be? Its calling out for silver body and steel nose and tail. I have seen a photo of a ju88 that seemed to have darker uppers. It could have been just shadow but it looked too uniform to be that ?
lespauljames
_VISITCOMMUNITY
England - South West, United Kingdom
Joined: January 06, 2007
KitMaker: 3,661 posts
AeroScale: 369 posts
Posted: Monday, November 07, 2016 - 04:54 AM UTC
Quick update. The clear is down. Now, drying and decals before weathering and adding the smaller bits. Excuse the mess. I have a small workspace and it all accumulates 'til the next build. I'm getting excited because there have been (touch wood) no major hiccups.
CReading
#001
_VISITCOMMUNITY
California, United States
Joined: February 09, 2002
KitMaker: 1,726 posts
AeroScale: 89 posts
Posted: Tuesday, November 08, 2016 - 02:39 AM UTC
Coming along famously.
you show serious skill at each phase of this build! Looking forward to the finished product.

Cheers,
C.


lespauljames
_VISITCOMMUNITY
England - South West, United Kingdom
Joined: January 06, 2007
KitMaker: 3,661 posts
AeroScale: 369 posts
Posted: Wednesday, November 09, 2016 - 04:08 AM UTC
Charles, very kind words indeed, thankyou
The torpedo photos helped a lot, looking at the variations that there were I went with the kit instructions as it wasn't far fetched.
So.. Progress. Decals down. Spinner painted white, strip of tape. Bam masked spiral. Torpedo painted and glued in place. Second clearcoat done. Sorry for the very few on progress shots. I get carried away.


One thing that was a late addition was the PE smoke deflector. That still needs to be painted and then on to weathering. !
thegirl
_VISITCOMMUNITY
Alberta, Canada
Joined: January 19, 2008
KitMaker: 6,743 posts
AeroScale: 6,151 posts
Posted: Wednesday, November 09, 2016 - 06:39 AM UTC
Nicely done camo James .


Terri
lespauljames
_VISITCOMMUNITY
England - South West, United Kingdom
Joined: January 06, 2007
KitMaker: 3,661 posts
AeroScale: 369 posts
Posted: Wednesday, November 09, 2016 - 10:12 PM UTC
Thankyou Terri.
The gloss should be dry by the time i get home so it woull be time for a bit of post shading (primarily the blue and over decals) then wash and flatcoat. Not sure how weathered to have this one. I can never get chips on aircraft looking as well as they could.
lespauljames
_VISITCOMMUNITY
England - South West, United Kingdom
Joined: January 06, 2007
KitMaker: 3,661 posts
AeroScale: 369 posts
Posted: Friday, November 11, 2016 - 11:18 PM UTC
So She's done. fun build, highly recommended.


all feedback and constructive critisism welcome. anything to help me be better!
after these photos were taken i enhanced the wash a bit on the panel lines. nothing worth re shooting the model for though.

best
James
Redhand
#522
_VISITCOMMUNITY
New Jersey, United States
Joined: January 20, 2013
KitMaker: 1,460 posts
AeroScale: 1,443 posts
Posted: Friday, November 11, 2016 - 11:27 PM UTC
Very nicely done. Looks just great and I really like your research.
lespauljames
_VISITCOMMUNITY
England - South West, United Kingdom
Joined: January 06, 2007
KitMaker: 3,661 posts
AeroScale: 369 posts
Posted: Saturday, November 12, 2016 - 06:56 PM UTC
Cheers Brian ! Charles has the credit for all research though !
thegirl
_VISITCOMMUNITY
Alberta, Canada
Joined: January 19, 2008
KitMaker: 6,743 posts
AeroScale: 6,151 posts
Posted: Saturday, November 12, 2016 - 07:57 PM UTC
She looks wonderful James , just the right amount of weathering .


Terri
lespauljames
_VISITCOMMUNITY
England - South West, United Kingdom
Joined: January 06, 2007
KitMaker: 3,661 posts
AeroScale: 369 posts
Posted: Sunday, November 13, 2016 - 05:55 PM UTC
Thankyou Terri
goodn8
_VISITCOMMUNITY
Berlin, Germany
Joined: October 12, 2008
KitMaker: 709 posts
AeroScale: 651 posts
Posted: Sunday, November 13, 2016 - 08:34 PM UTC
Nice! Very well done on build and paint, James. And the pics are great as well. Love the first b&w teasing-pic

Thomas
 _GOTOTOP