Very impressive progress Michael. A really useful build log so far. It certainly is not putting me of acquiring the kit in the near future. As the other build followers have already stated, your blending of the resin and plastic parts is very well done. Looking forward to more progress.
All the best.
tim
Cold War (1950-1974)
Discuss the aircraft modeling subjects during the Cold War period.
Hosted by Tim Hatton
Trumpeter's 1/32 Skyhawk A-4
litespeed
News Reporter
England - North West, United Kingdom
Joined: October 15, 2009
KitMaker: 1,976 posts
AeroScale: 1,789 posts
Joined: October 15, 2009
KitMaker: 1,976 posts
AeroScale: 1,789 posts
Posted: Sunday, March 05, 2017 - 02:52 AM UTC
Posted: Sunday, March 05, 2017 - 03:41 AM UTC
Quoted Text
Very impressive progress Michael. A really useful build log so far. It certainly is not putting me of acquiring the kit in the near future. As the other build followers have already stated, your blending of the resin and plastic parts is very well done. Looking forward to more progress.
All the best.
tim
Thanks Tim,
Certainly don't let any of my comments put you off the kit. Most of the issues are self inflicted by the decision to use resin. I would certainly buy this kit again and an OOB of the kit would be very straight forward as it builds well if built as intended.
cheers
Michael
Posted: Monday, March 13, 2017 - 01:57 PM UTC
An update on the A4
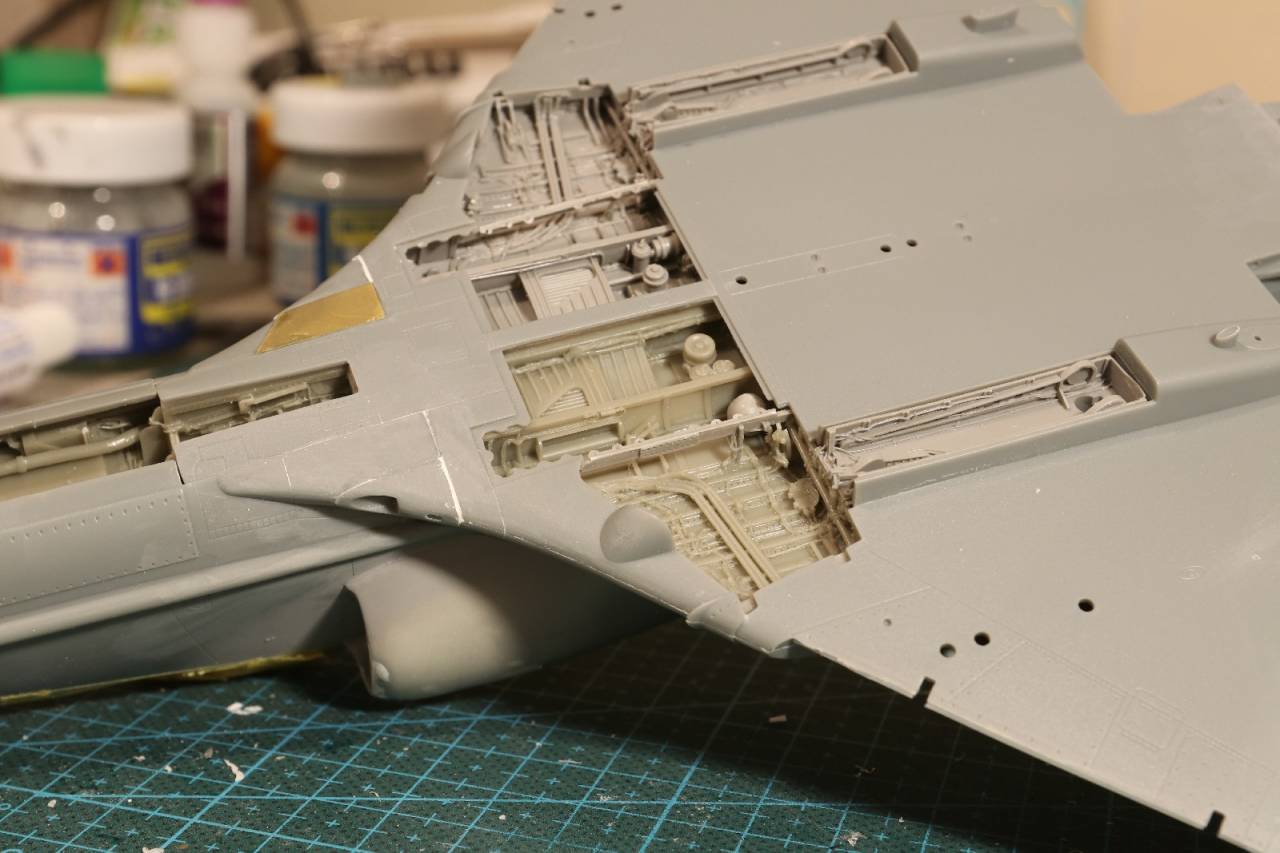
The wings are on and the fit was "good" with minimal filler with required.
I say good because what was under the wings made it anything but straightforward.
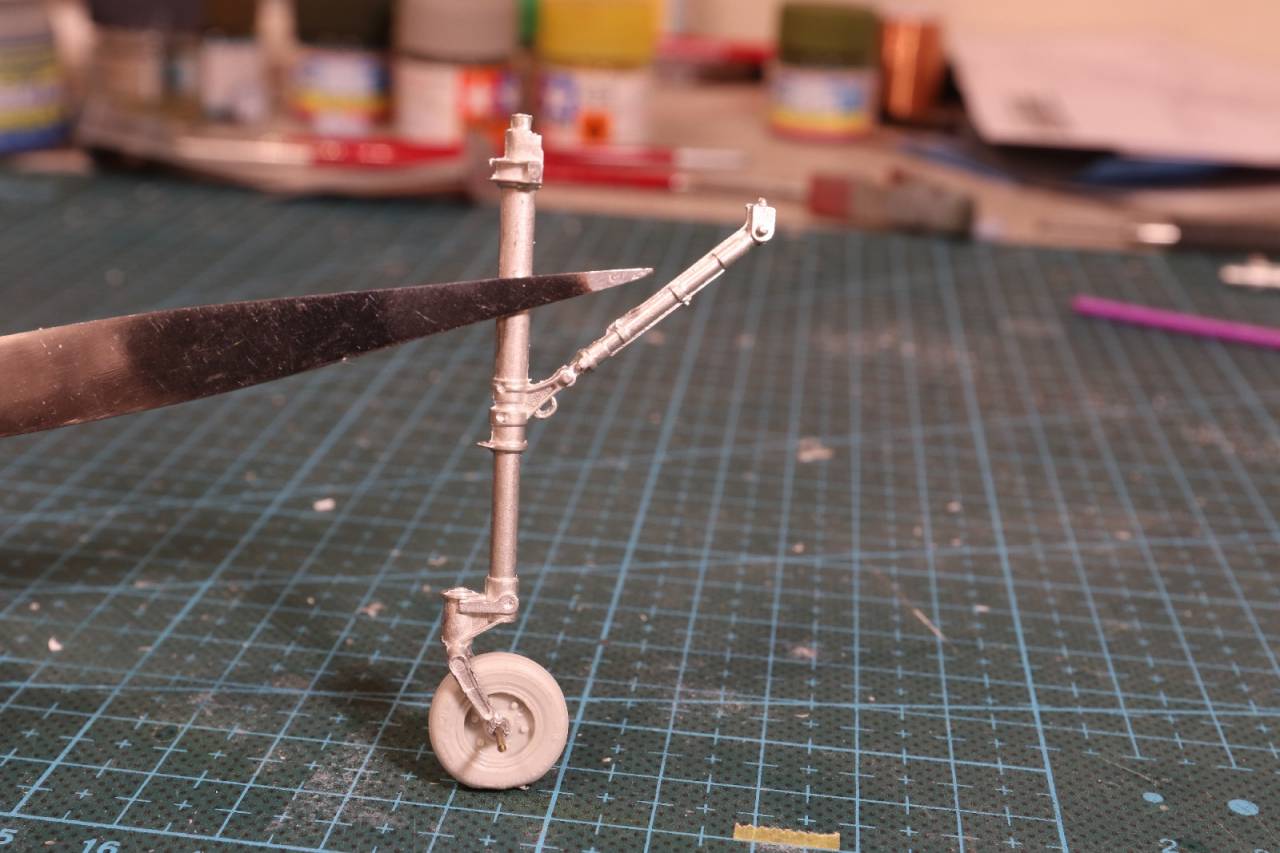
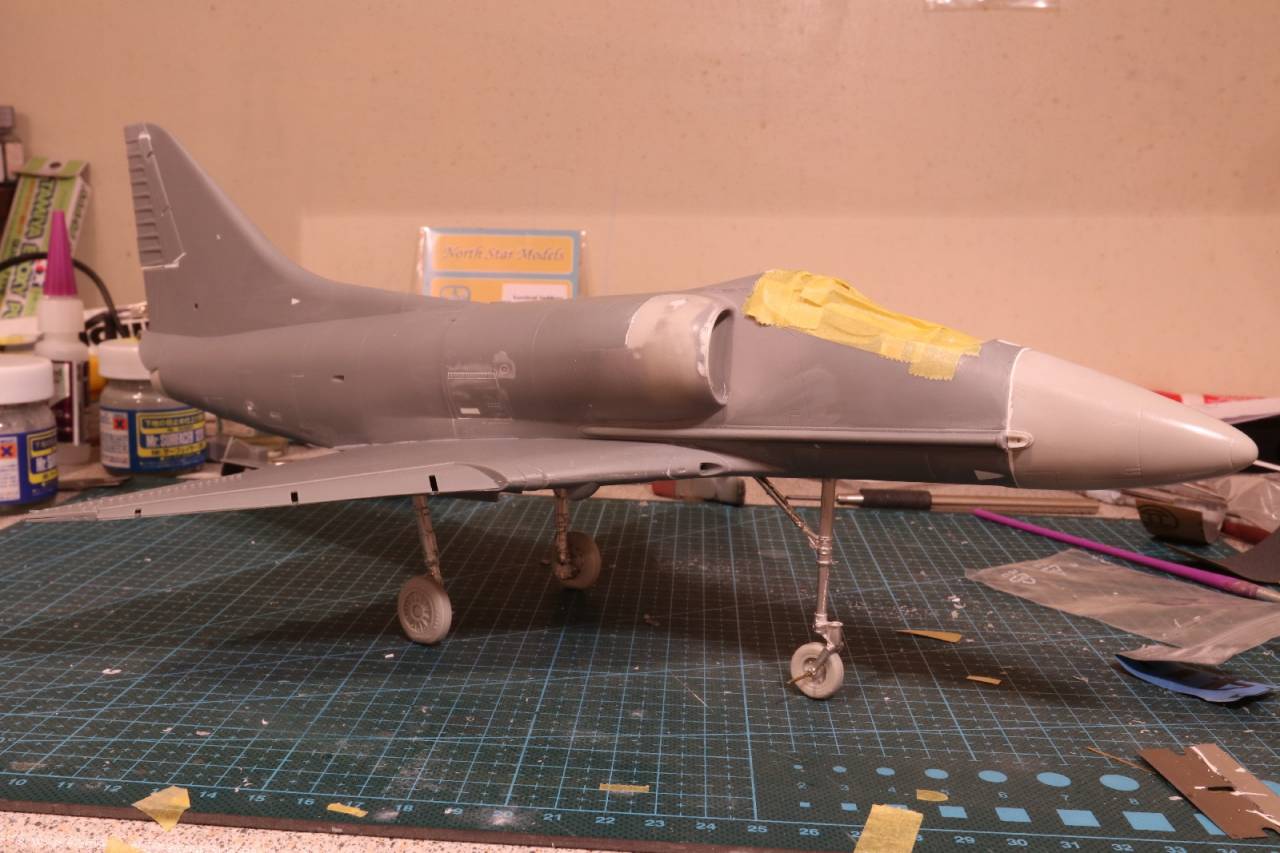
As previously mentioned I decided to use the Aires wheel wells for this build. A first for me. The instructions say trim to fit. I removed so much resin and styrene that the workroom floor looked like it had snowed and then some. They look great but I am not sure I would do that again.
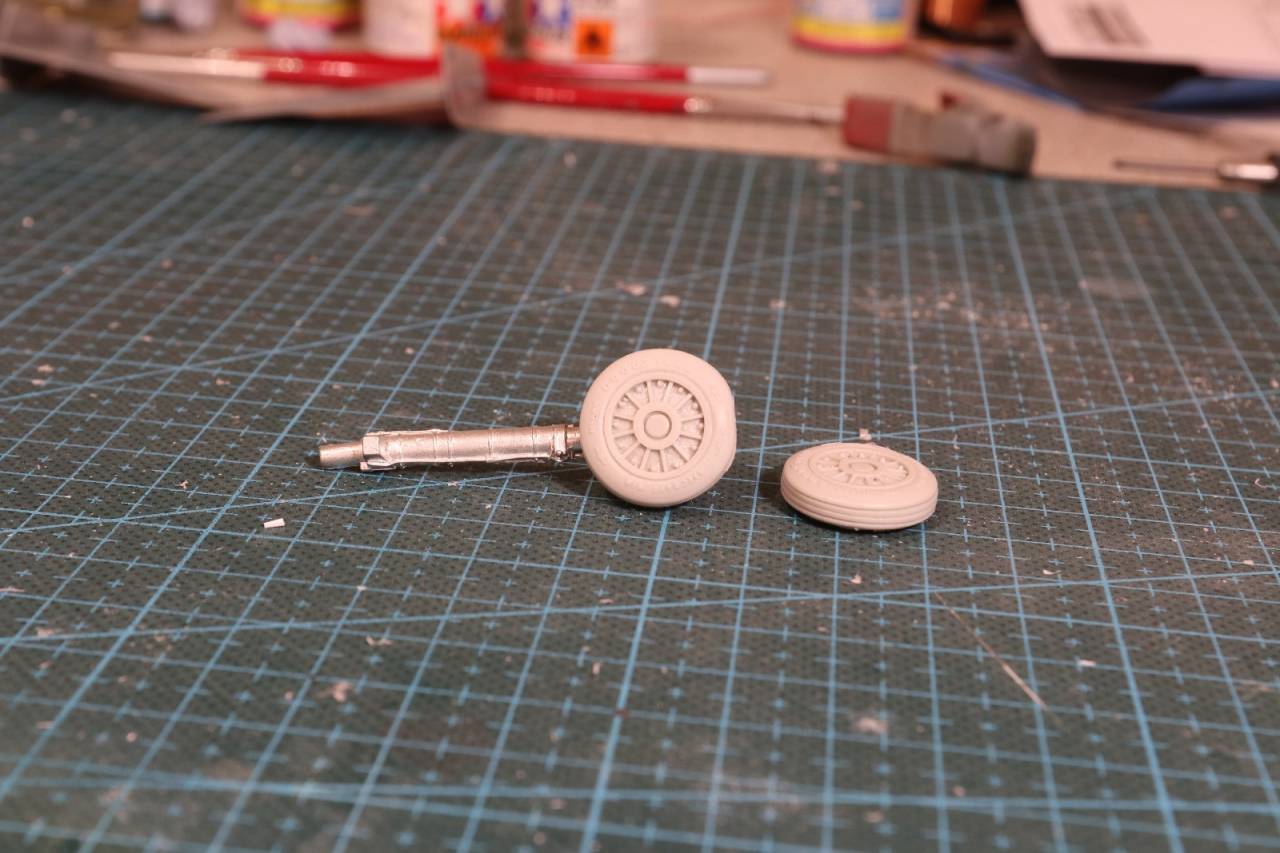
What also came with the Aires set was the wheel struts. The resin wheels came from the AMS set to convert this kit to a "c" version and very nice they are with the thinner main wheels more suitable for this bird.
And here it is on its pins, dry fitted for the moment.
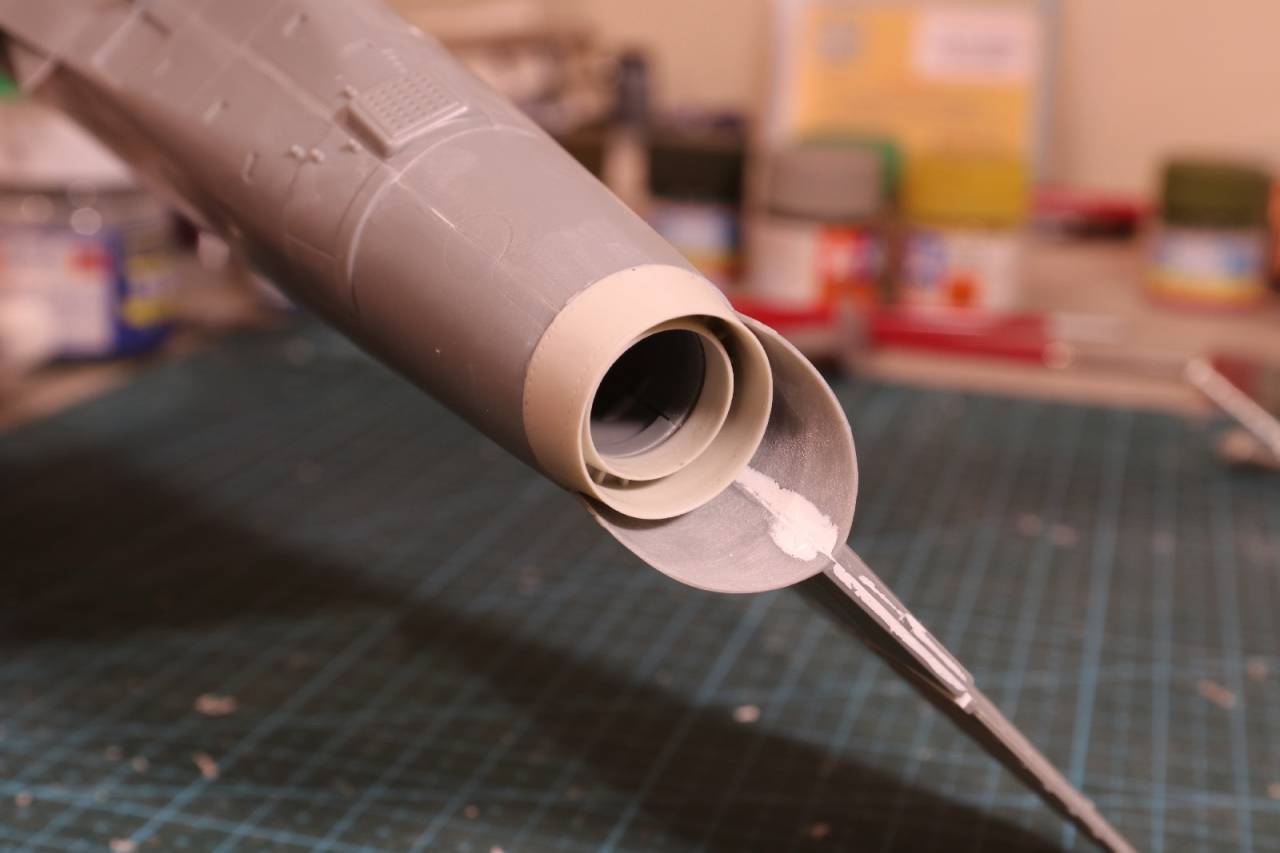
Also from AMS is a shorter exhaust. The fit was close to perfect.
Looking at that photo I see a gap in the tail pipe I've missed. Oops.
Next on the agenda for transforming are the wings.
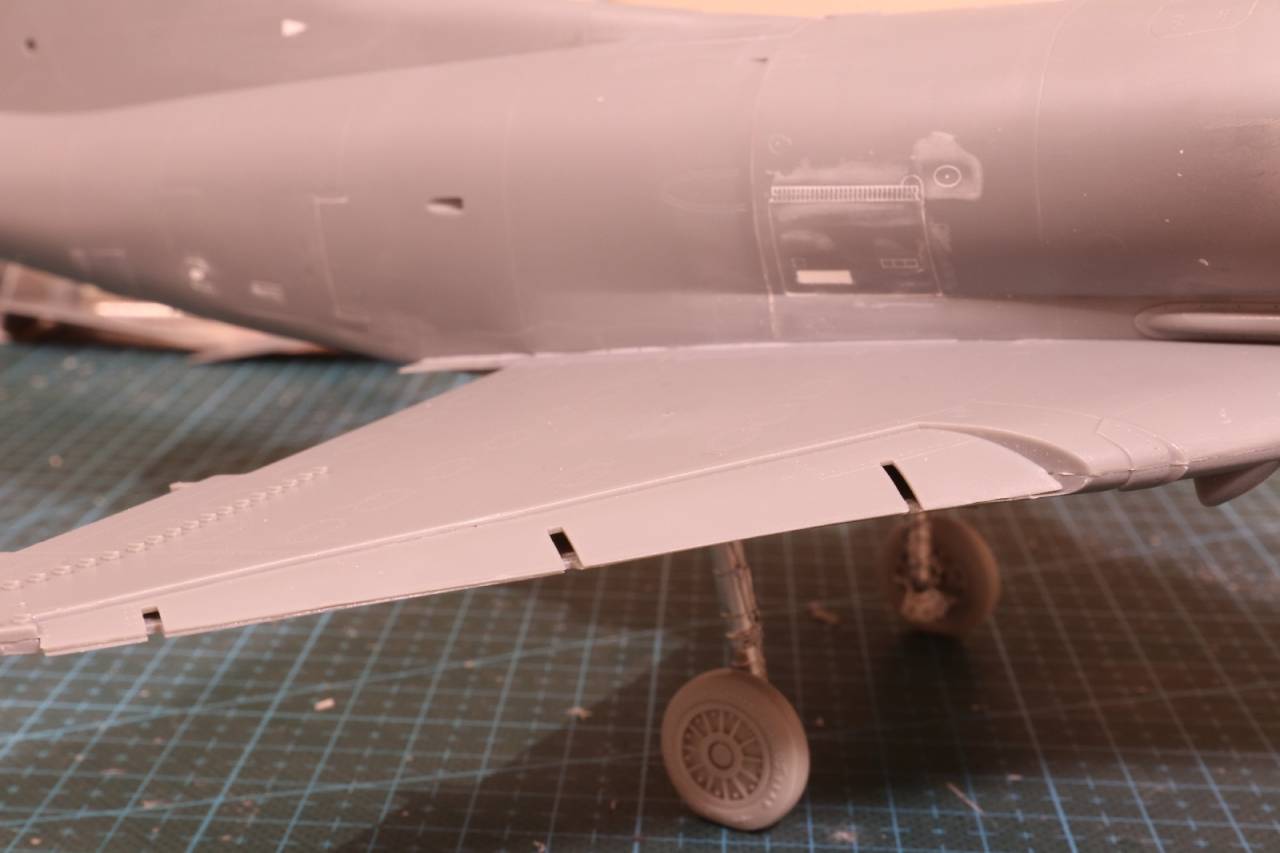
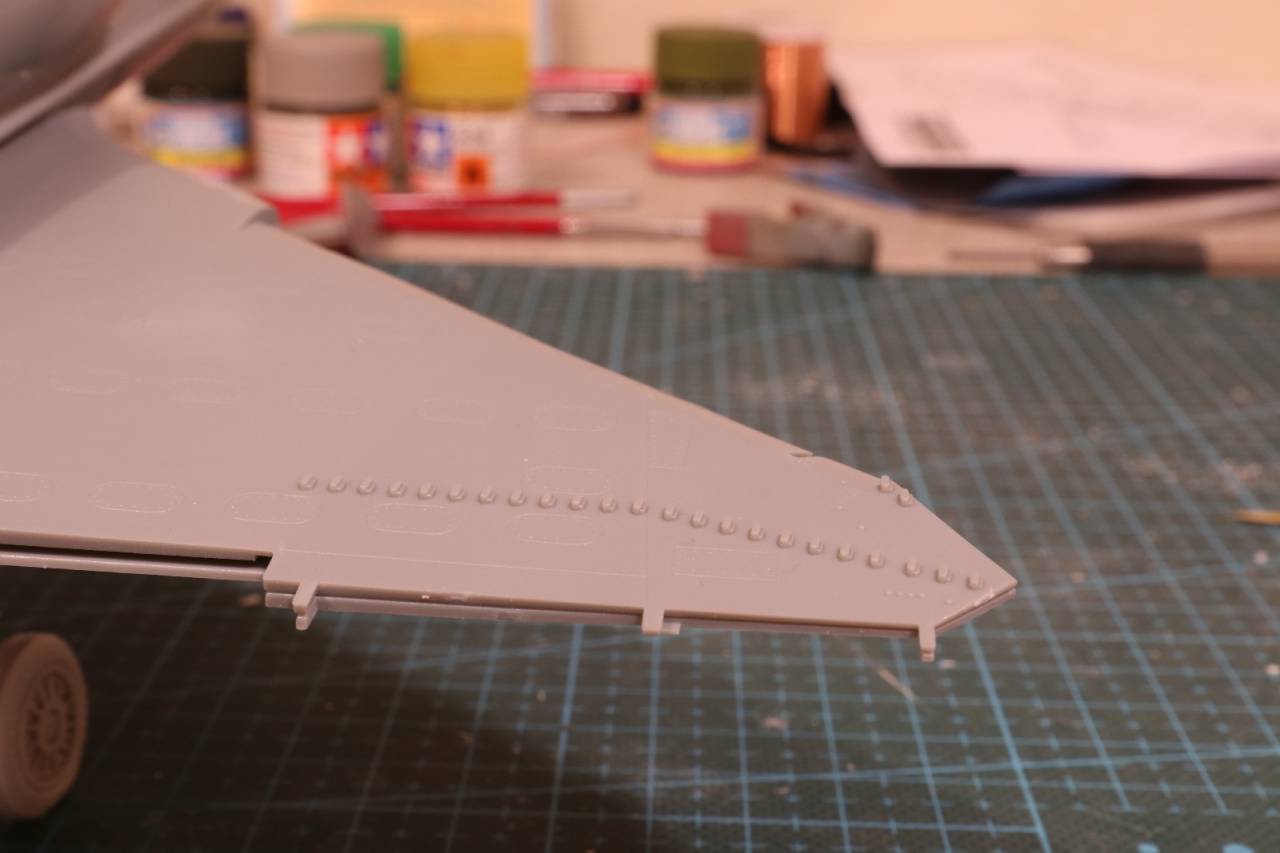
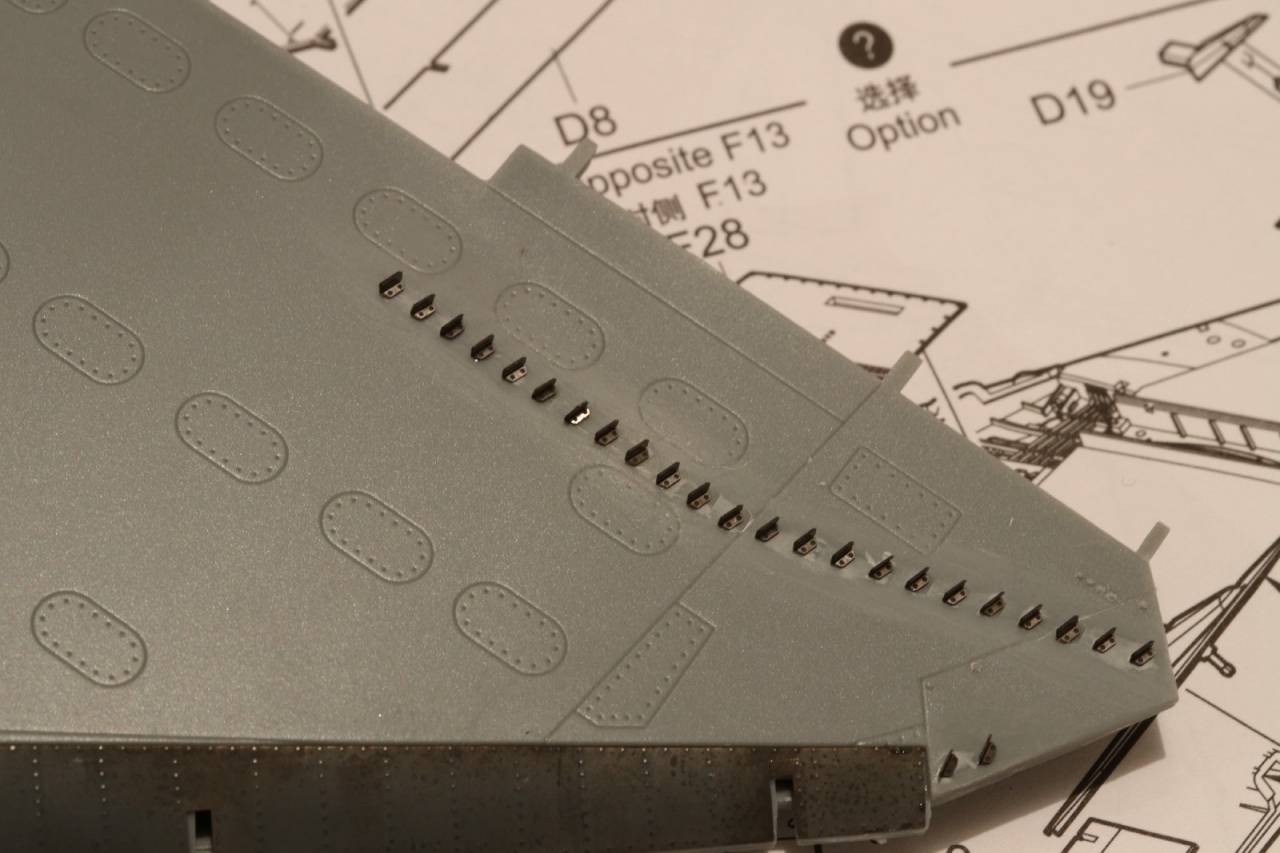
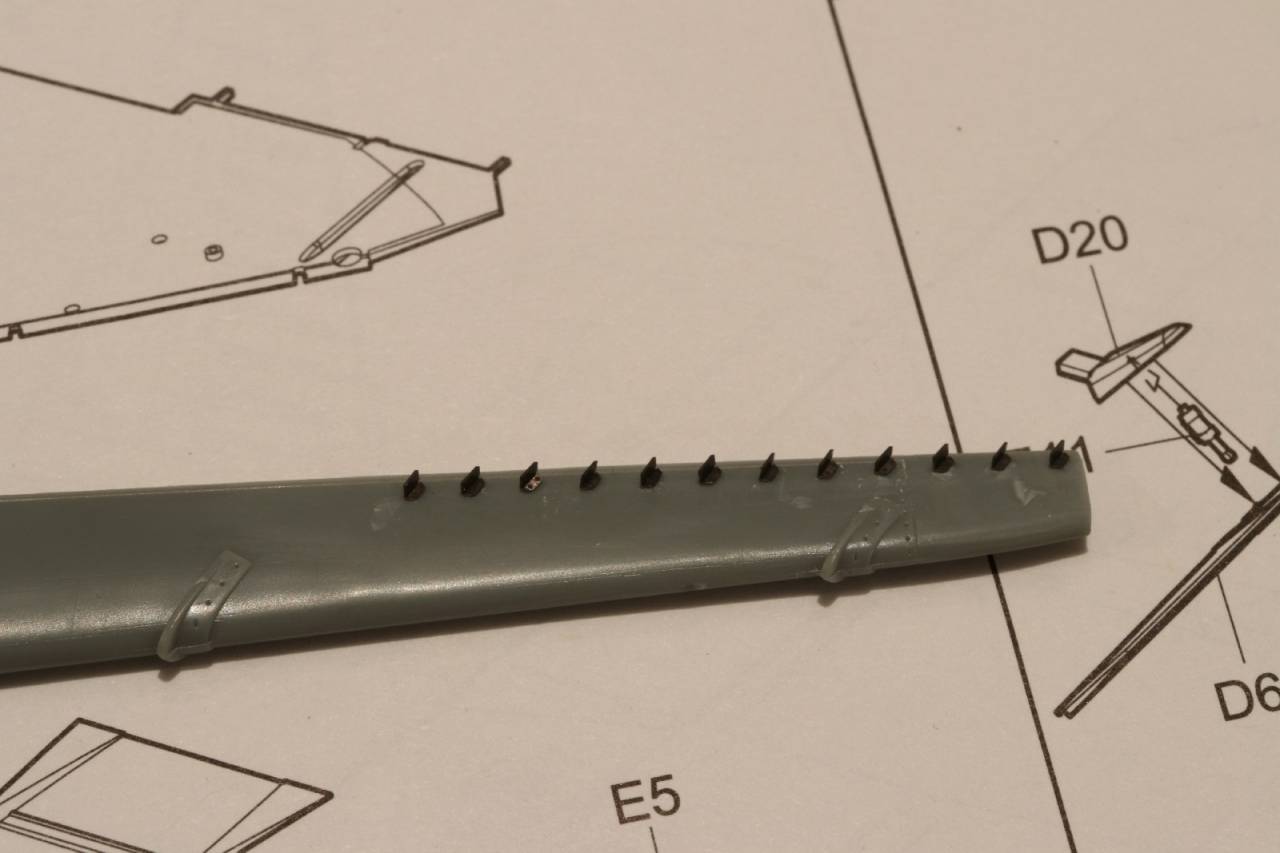
The wing has a slat step. This would be OK if the slats were up but most pictures show the slats down when the planes are parked. It is not a huge step and I intend to use the Eduard slat offering to ensure there is no step. Also, the vortex generators are rather fat blobs.
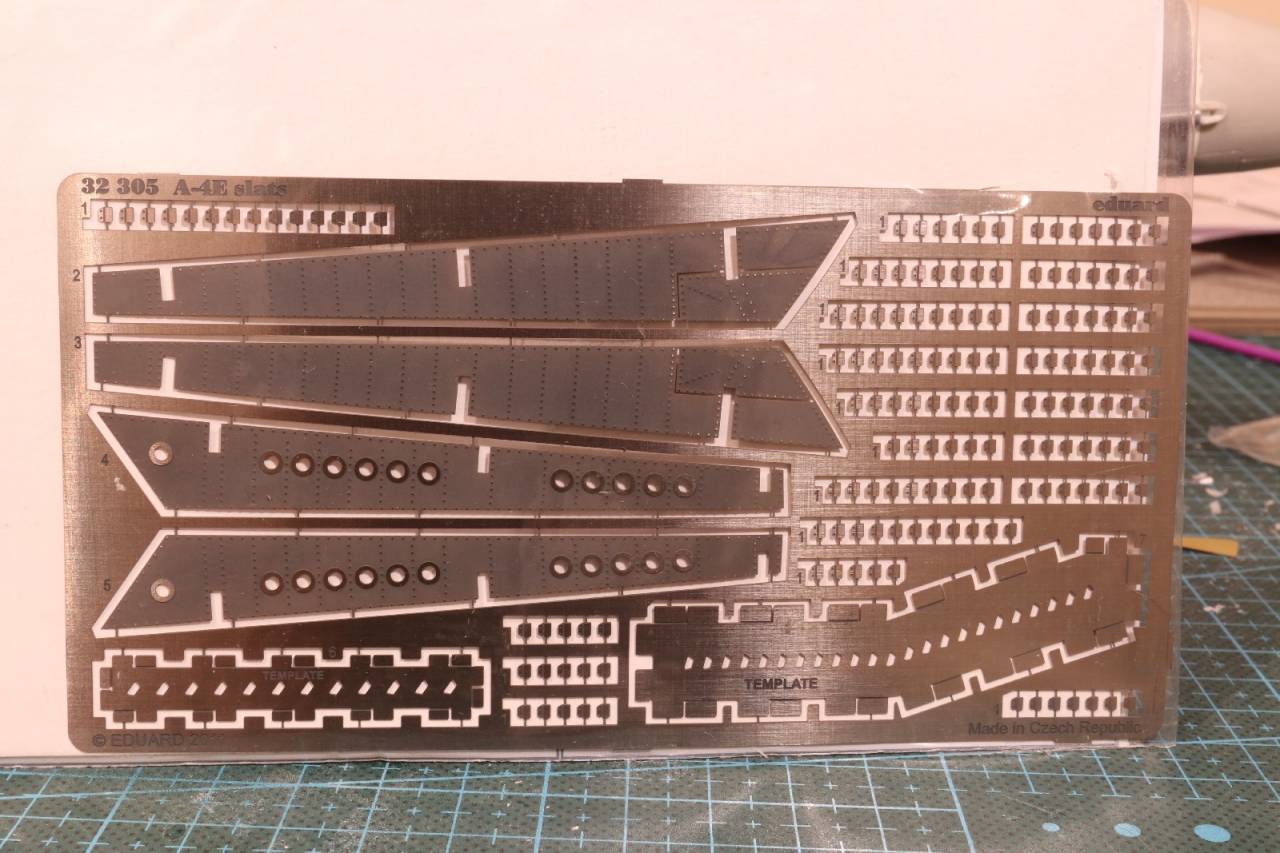
Eduard comes to the rescue with the same set fortunately.
The drawback of course being there are 70 of those vortex generators to replace. That's a lot of folding to be done.
I am happy with how it is looking so far. It still needs a clean up in some areas but I will leave that until the wings are complete and go for a coat of primer.
cheers
Michael
Posted: Sunday, March 26, 2017 - 01:46 PM UTC
Slow but steady progress.
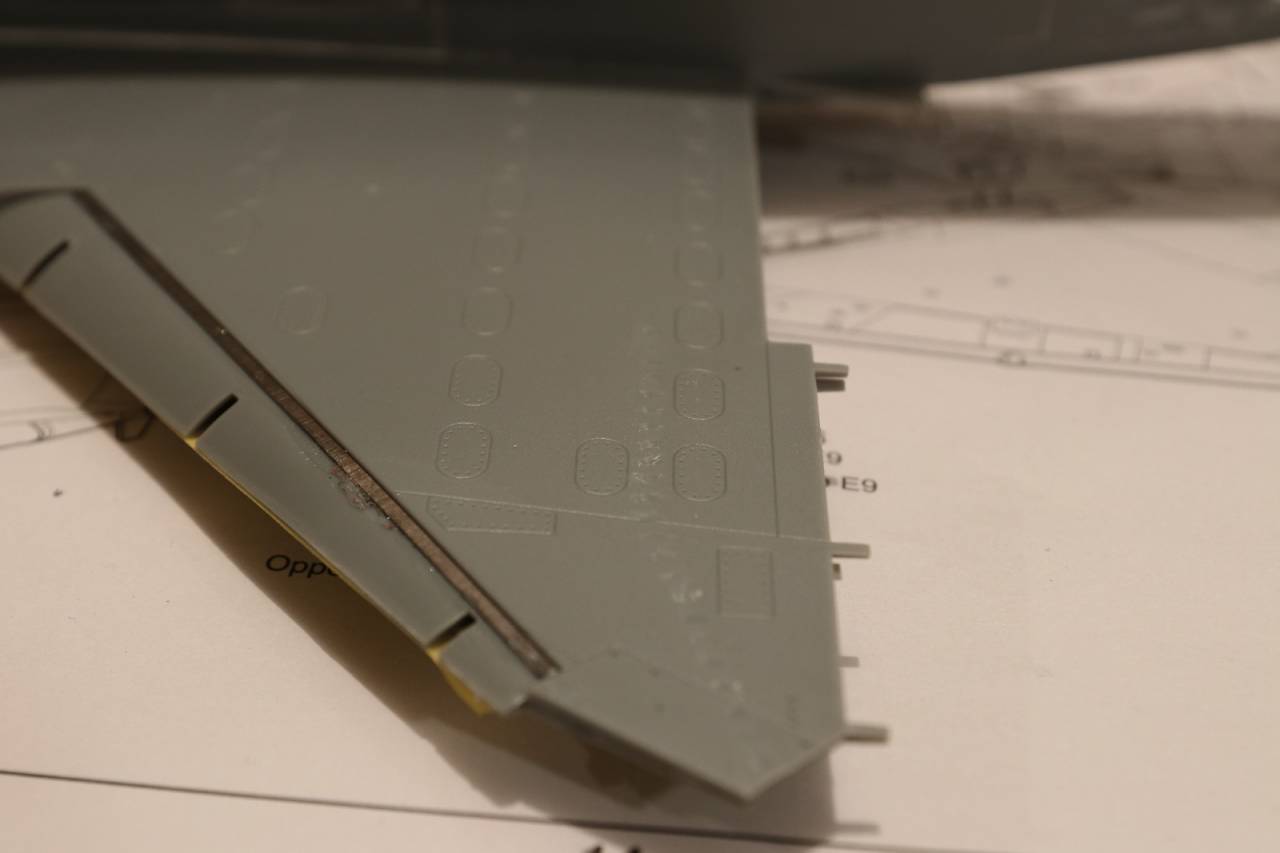
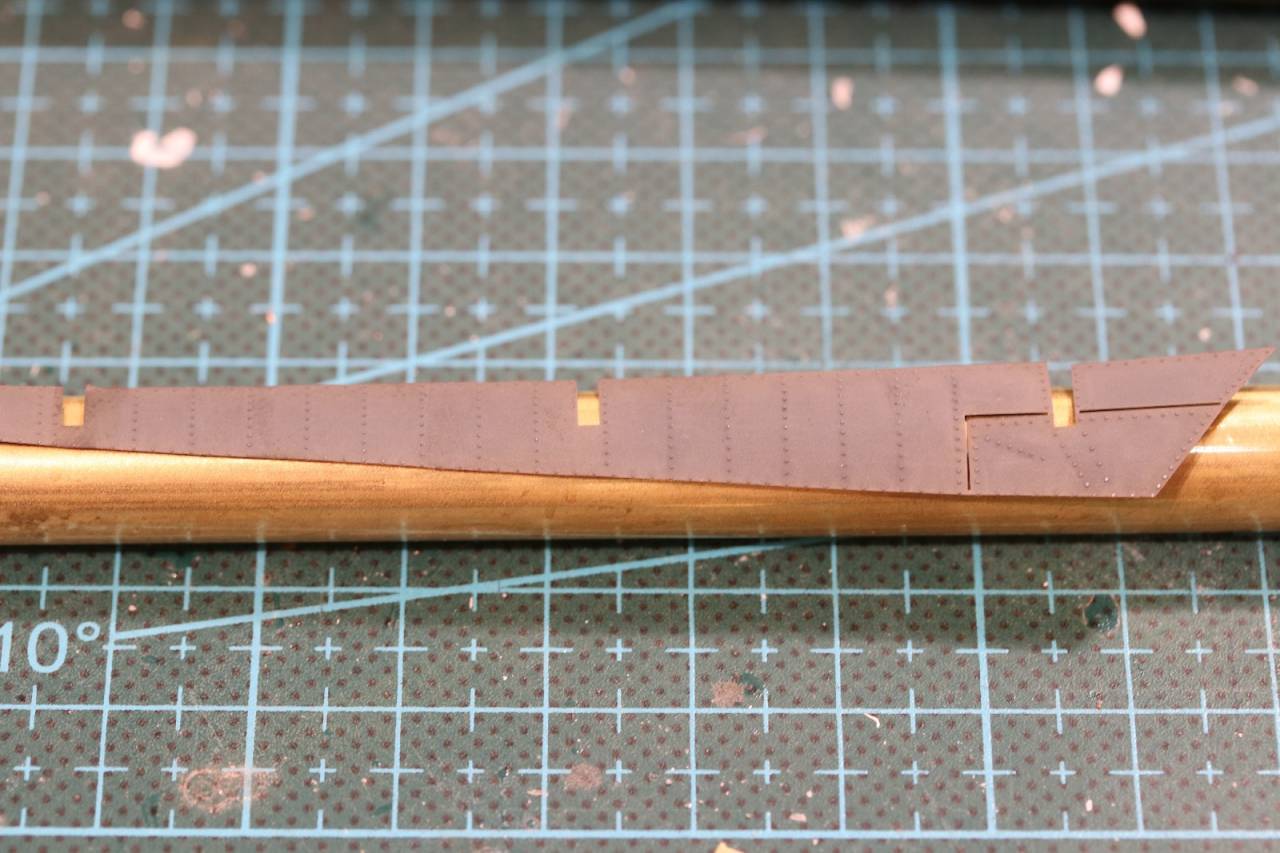
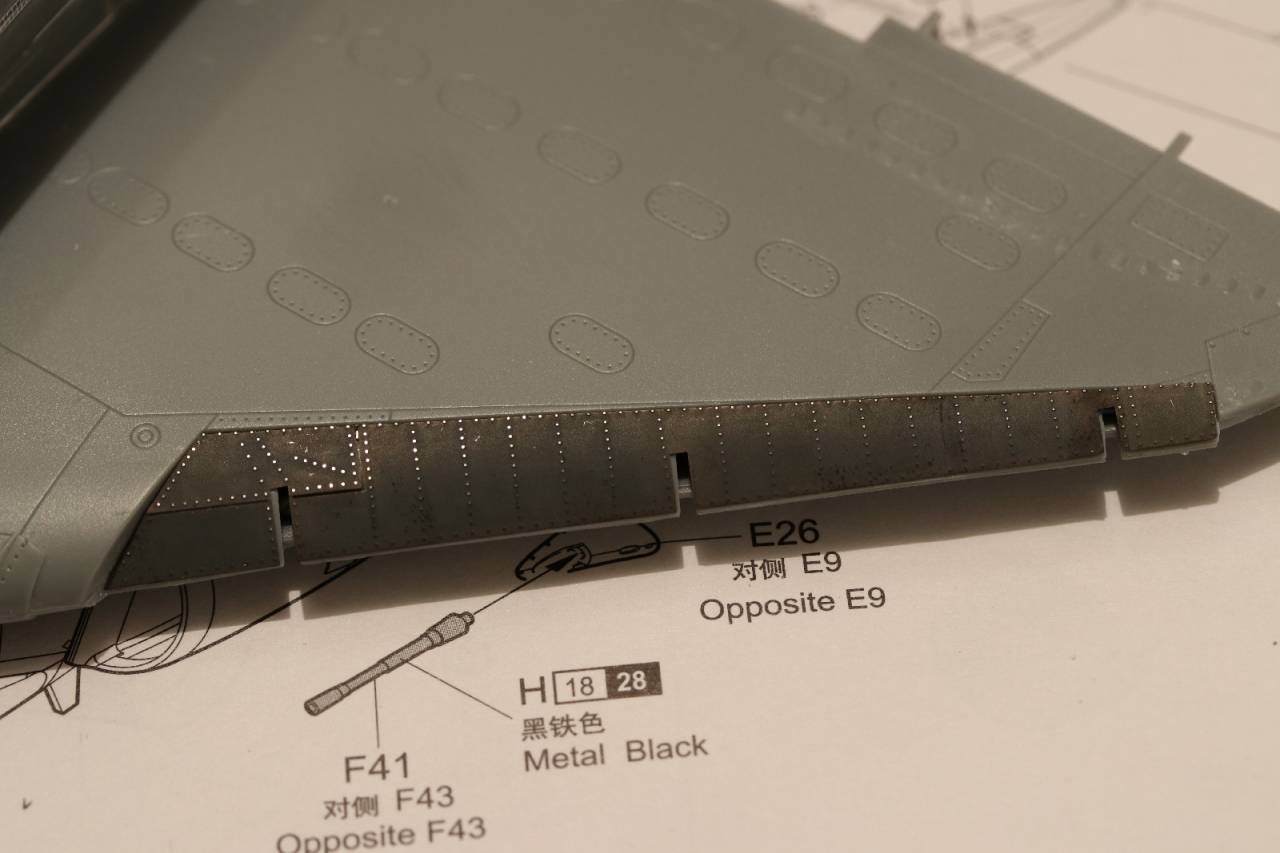
I addressed the step in the wing by attaching a strip of metal from the etch frame. It looks a bit messy because I was using a rubber to hold it down and some glue seeped out. But it will all be hidden.
I used a brass tube to roll the piece to shape.
The strip plus the photo-etched piece see the slat step dealt with.
Something not unusual I have found with Eduard etch before, the cuts don't quite line up.
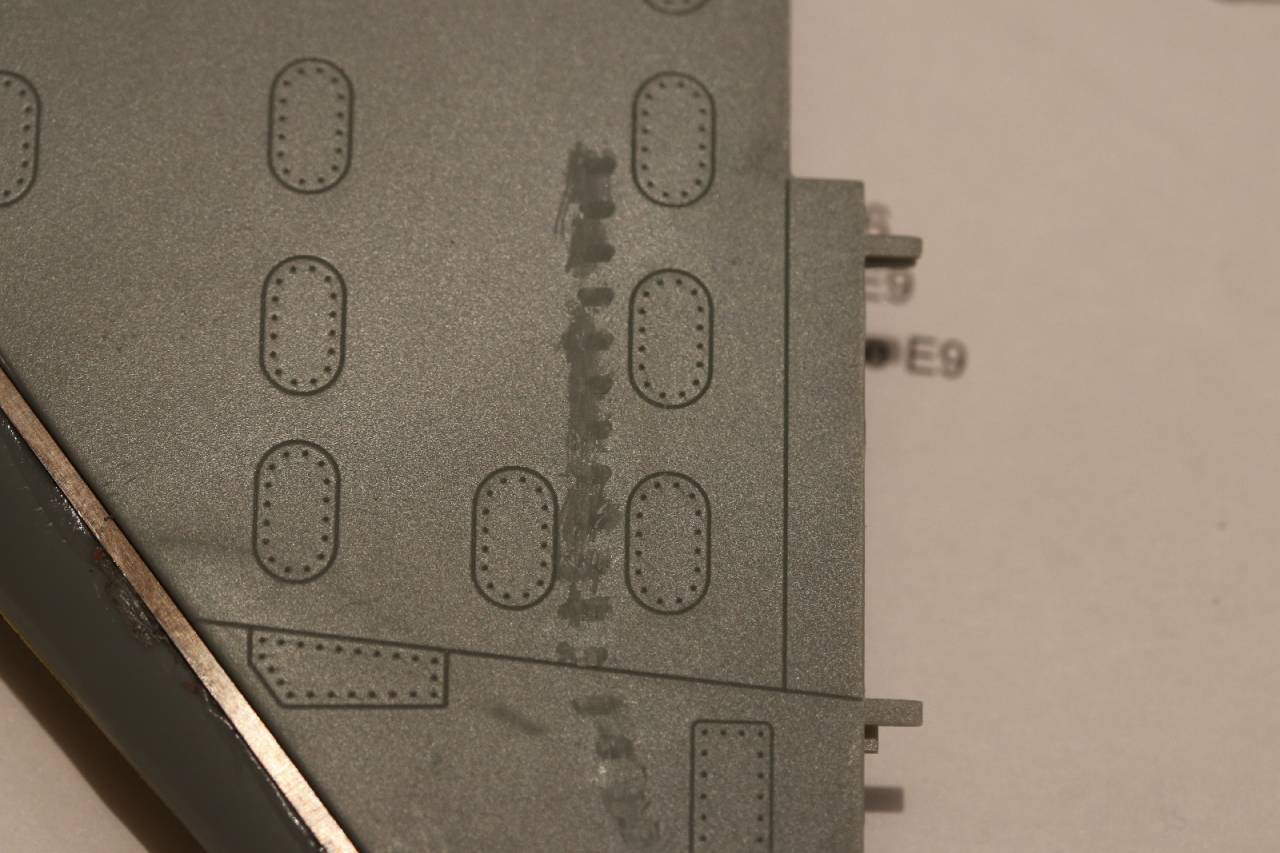
The plastic blobs have been excised
I painted a layer of Mr Surfacer over the top and sanded back to remove my divots.
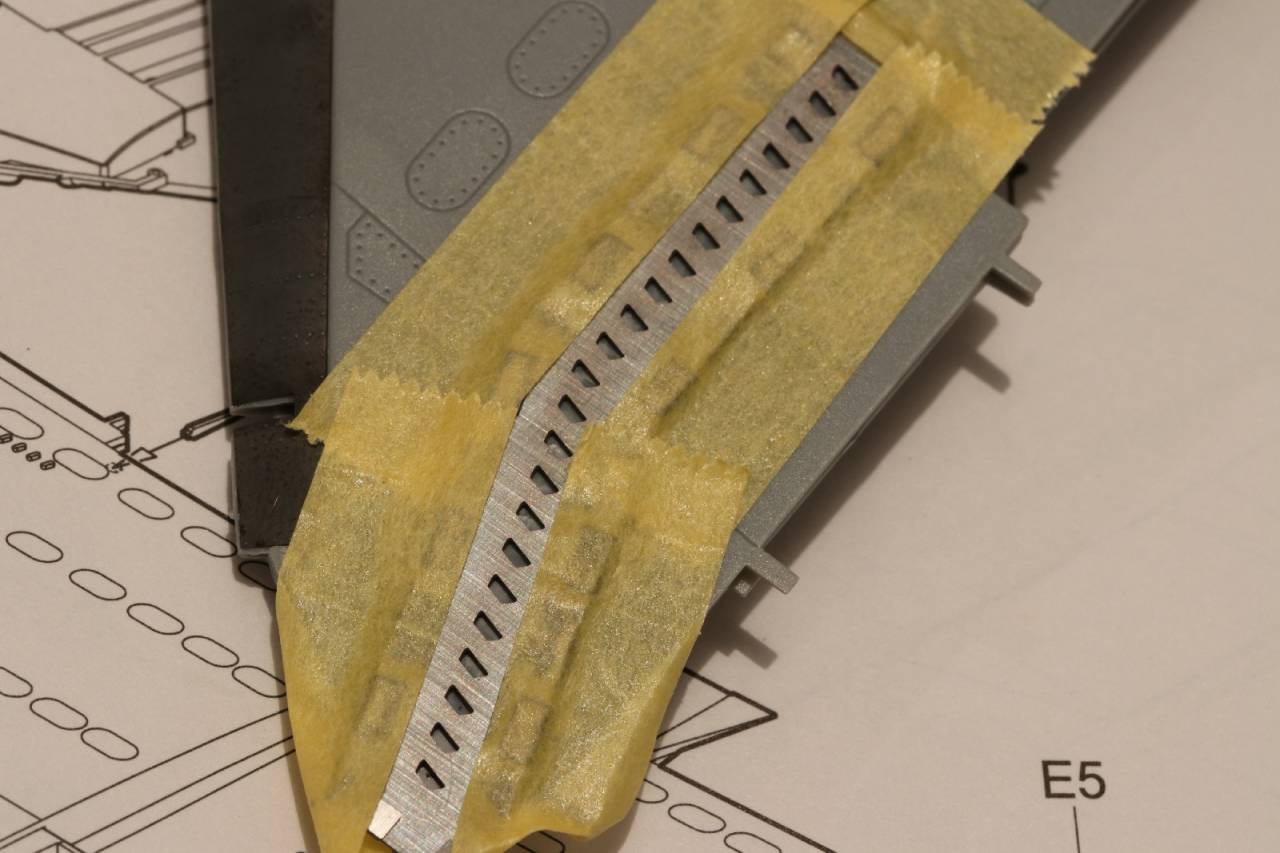
The template is taped into place.
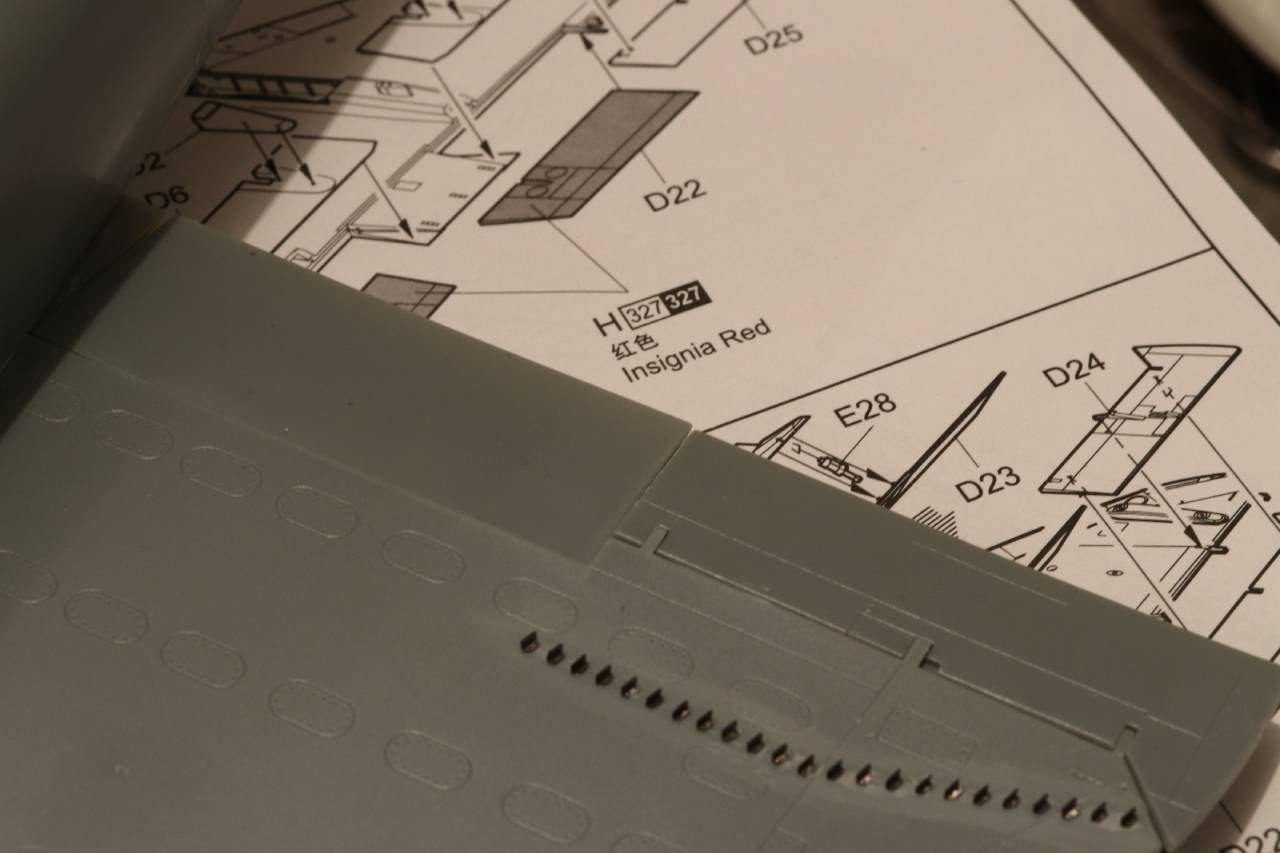
Et voila! sharp looking vortex generators. There are 74 in total over the two wings.
The slat is dealt with as well with a separate template.
Flaps are dry fitted.
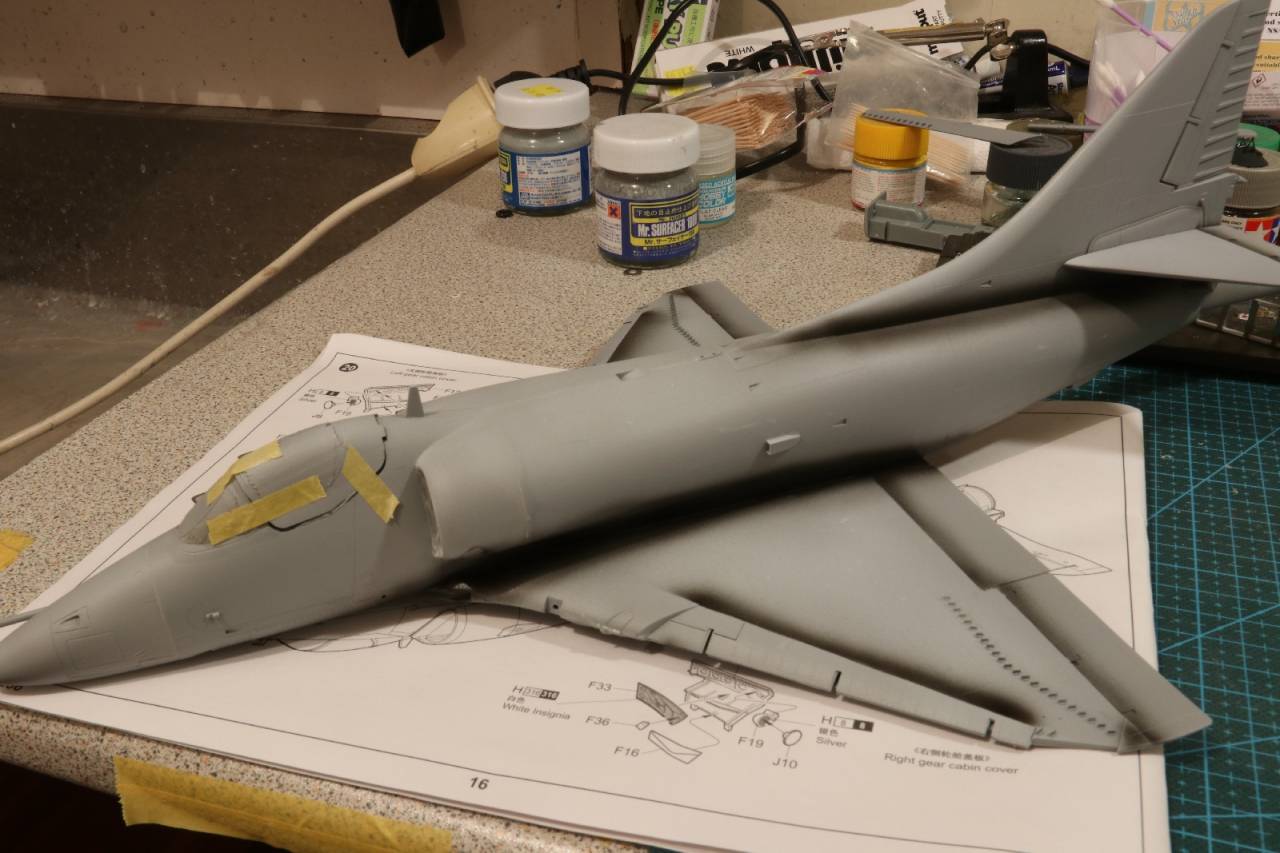
Getting close to the primer coat and the reveal of missed errors.
cheers
Michael
Posted: Sunday, April 09, 2017 - 03:25 PM UTC
Not a lot of progress, just continuing to tidy bits and pieces up and trying to solve for the consequences of conversion.
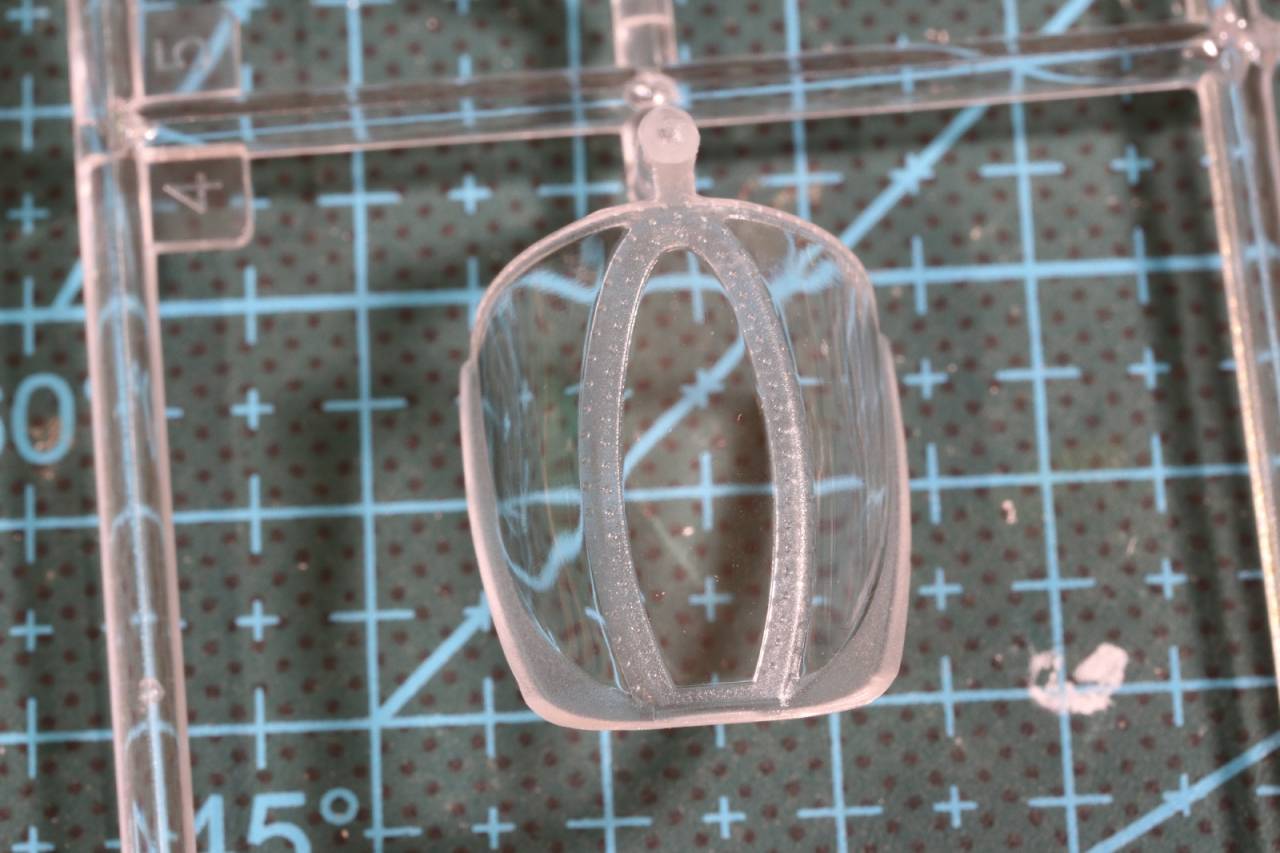
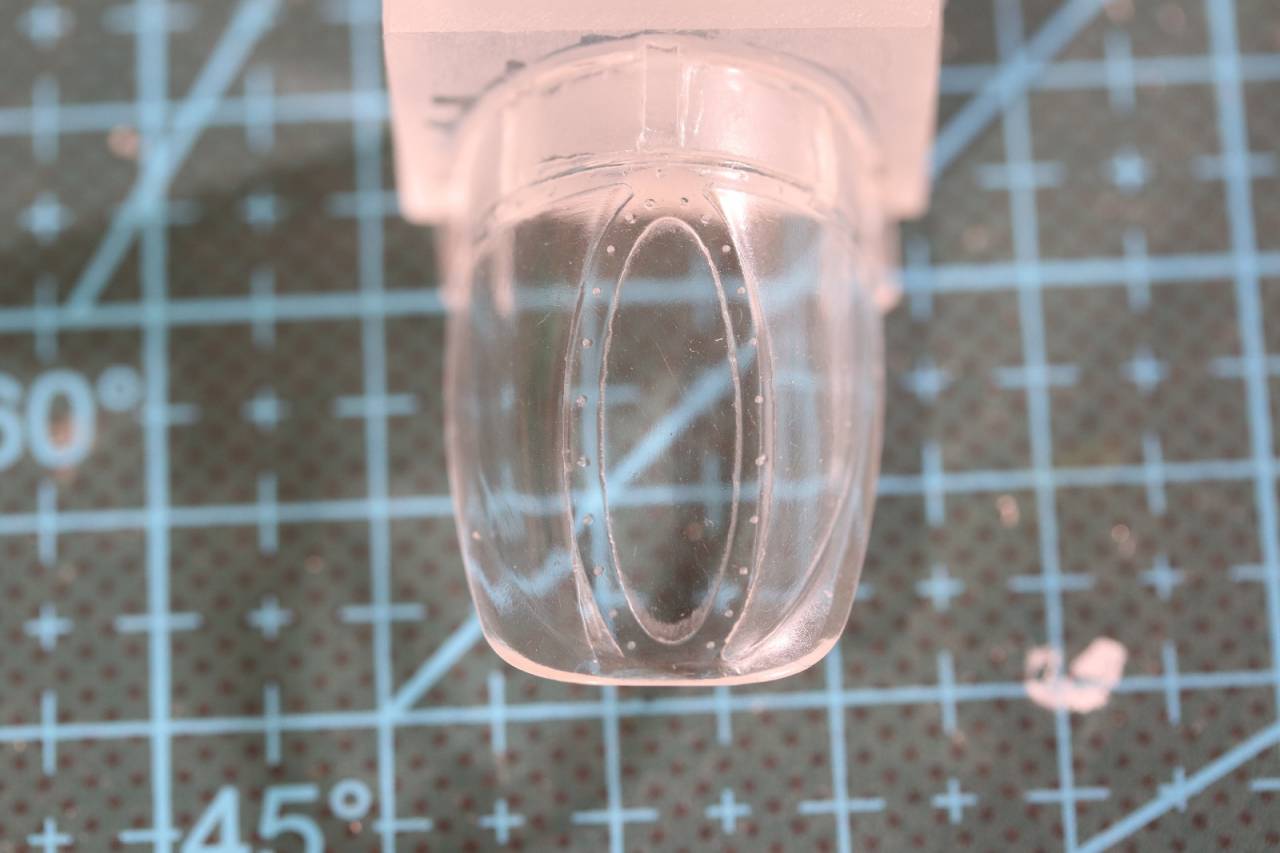
Firstly, the front canopy. The Trumpeter one is wrong in that the centre oval has been chopped at the bottom.
As you can see from the replacement version from Alley Cat the shape it should be. The drawback of the replacement piece is that it is made from clear resin I think and not as clear as the kit piece.
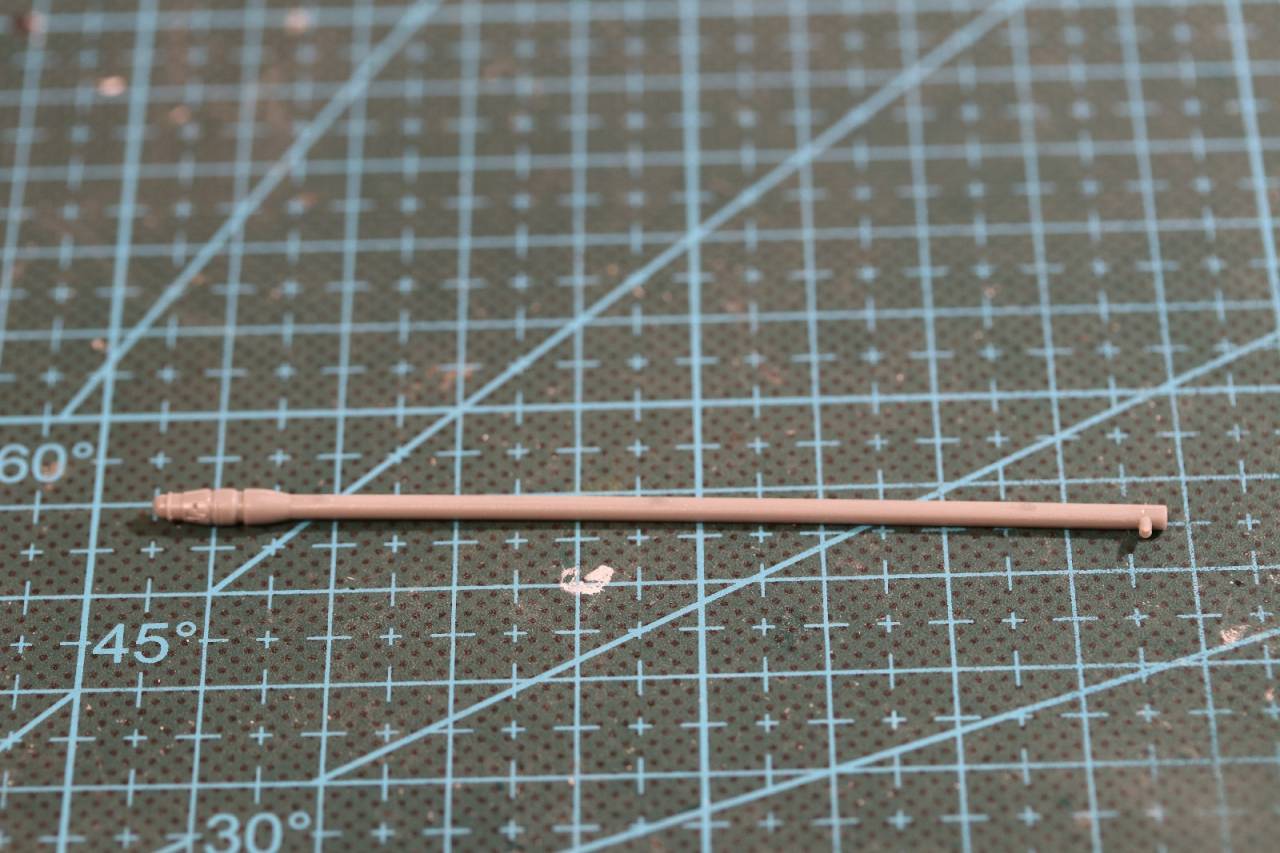
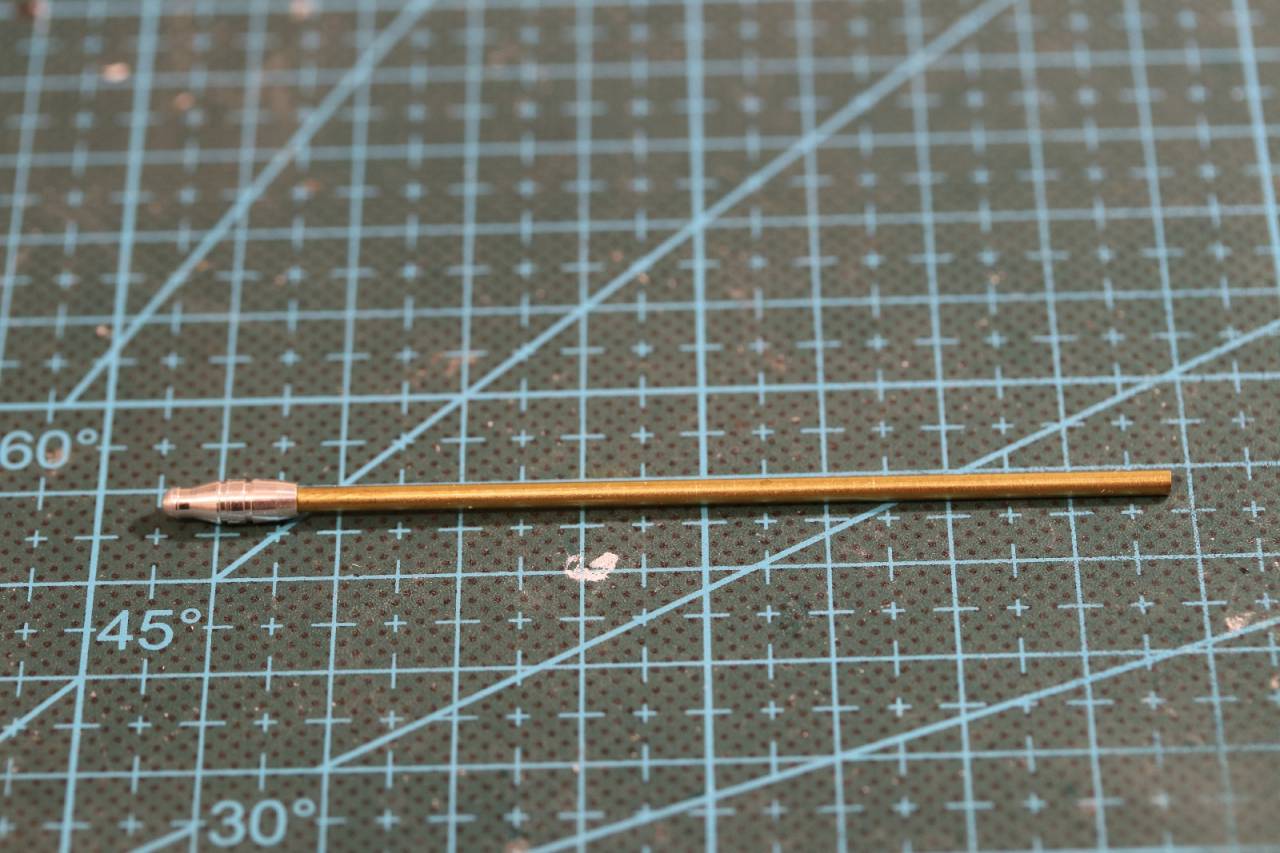
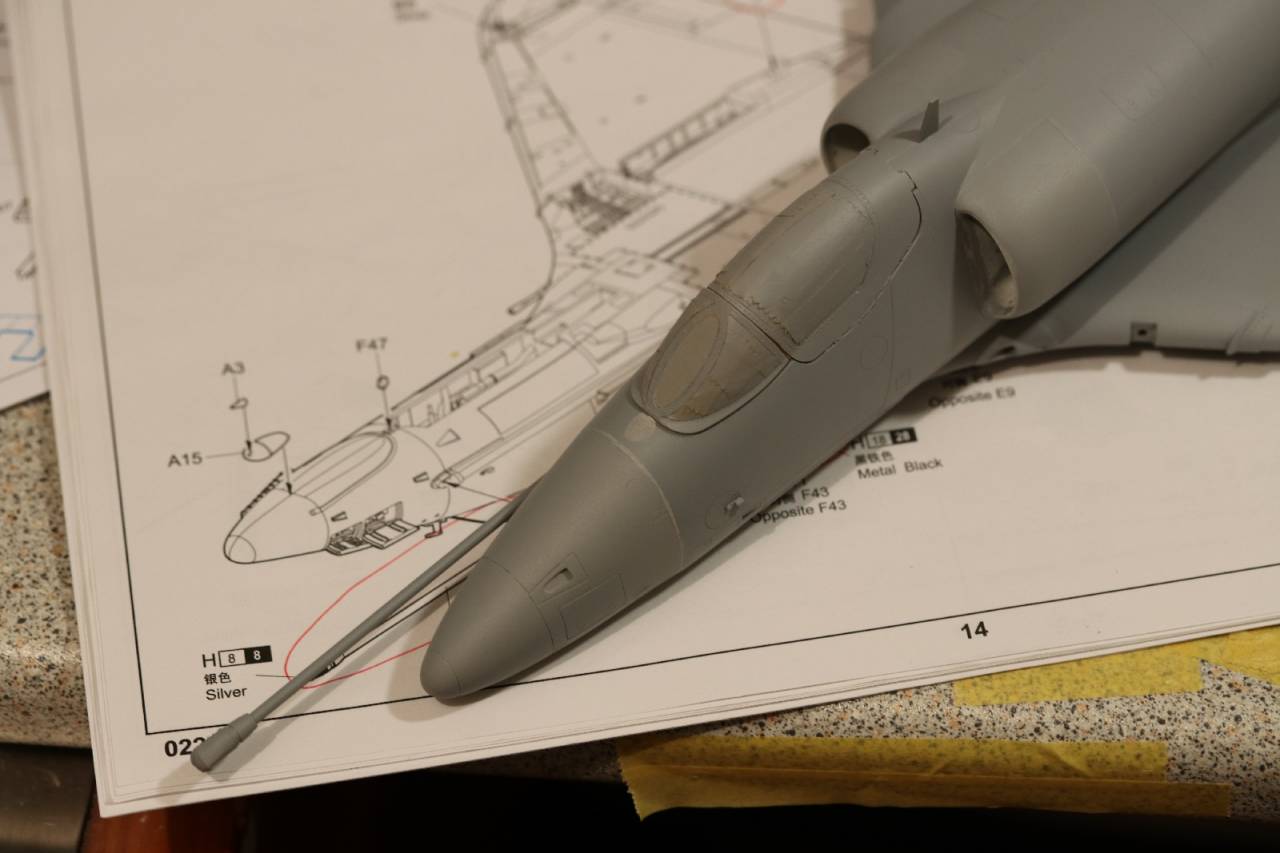
The refuelling probe was up next. The kit piece was bent and also as often happens the moulds were slightly out of alignment and on a prominent tube like this removing the seam lines tends to flatten it out.
I used a replacement probe from Profimodeller (which came as part of a three piece set with the two guns) with a piece of brass rod.
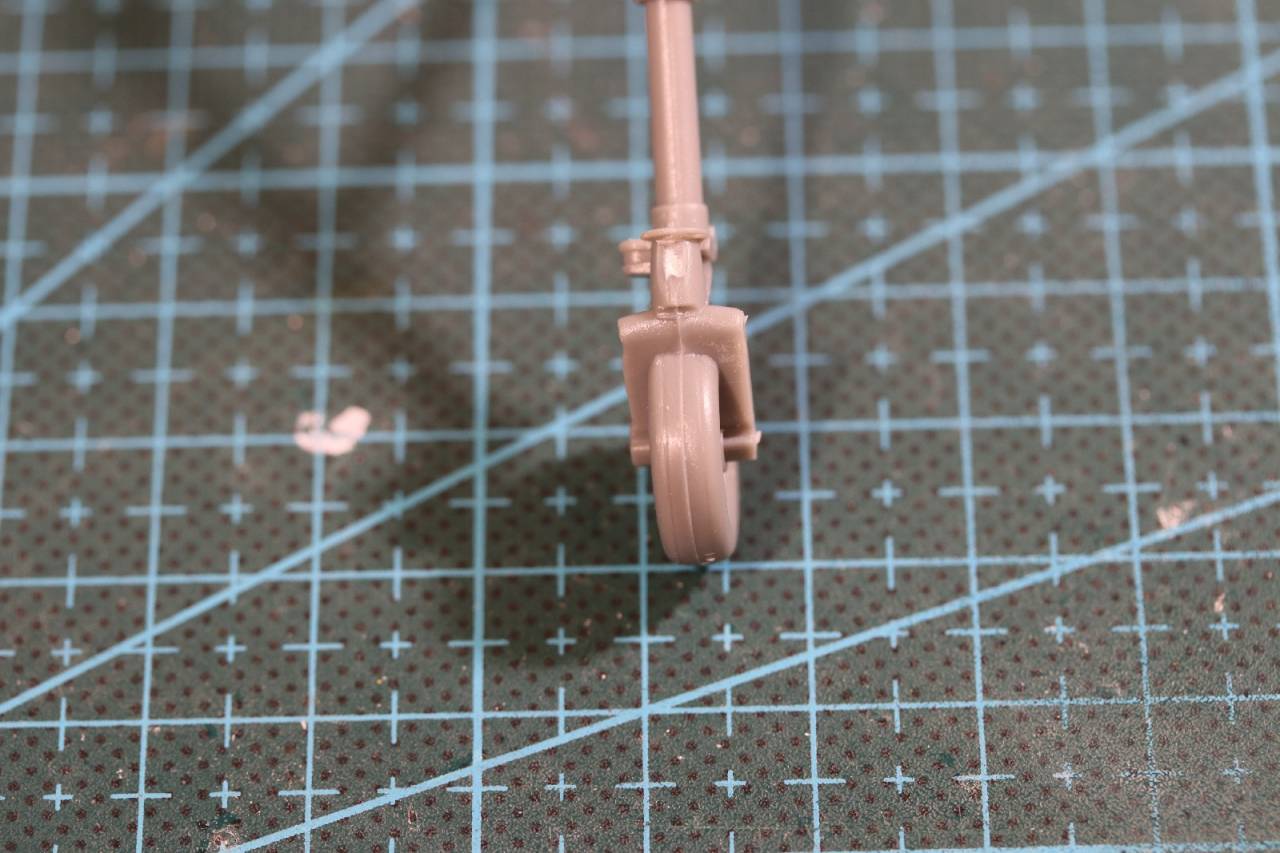
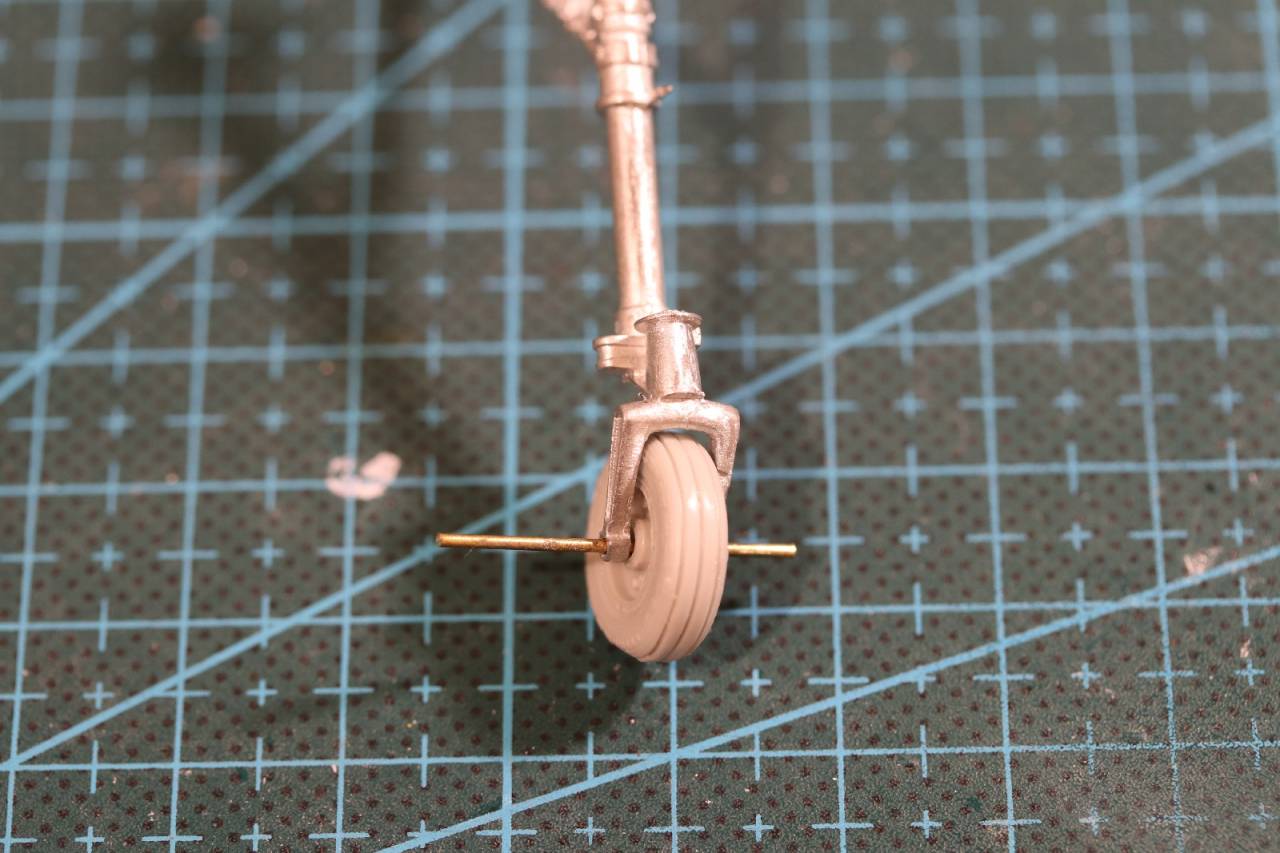
The next piece is the oddest thing in this otherwise pretty excellent kit. Trumpeter have mould the front wheel as a single piece. Given the myriad of little pieces they give you in the kit for the engine and other hidden parts, to not have separate parts on a very prominent feature of a Skyhawk, is, well odd.
The replacement leg comes from the Aires set and the resin wheel from AMS as part of the 'C' conversion set. Brass axle from the spares.
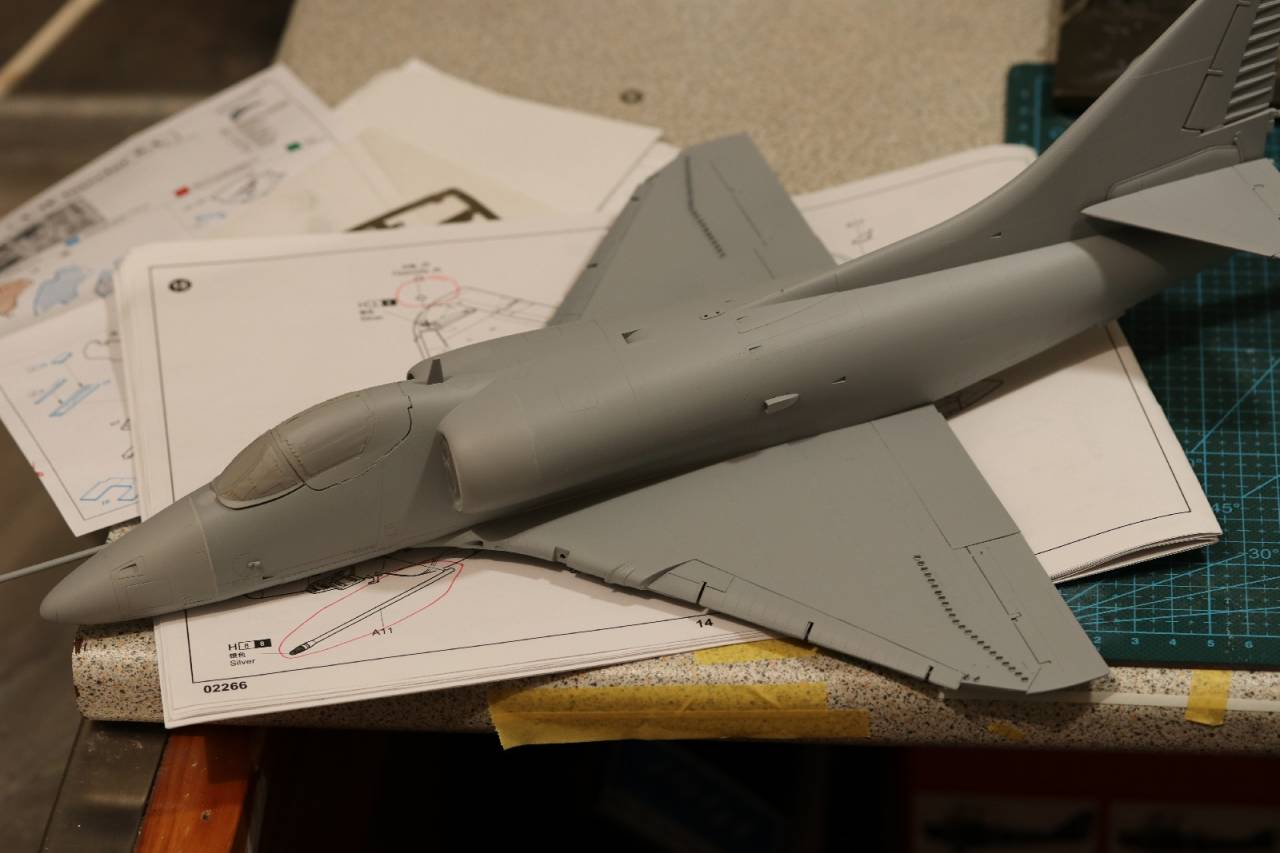
So, finally a coat of Tamiya primer to find the areas that still need work.
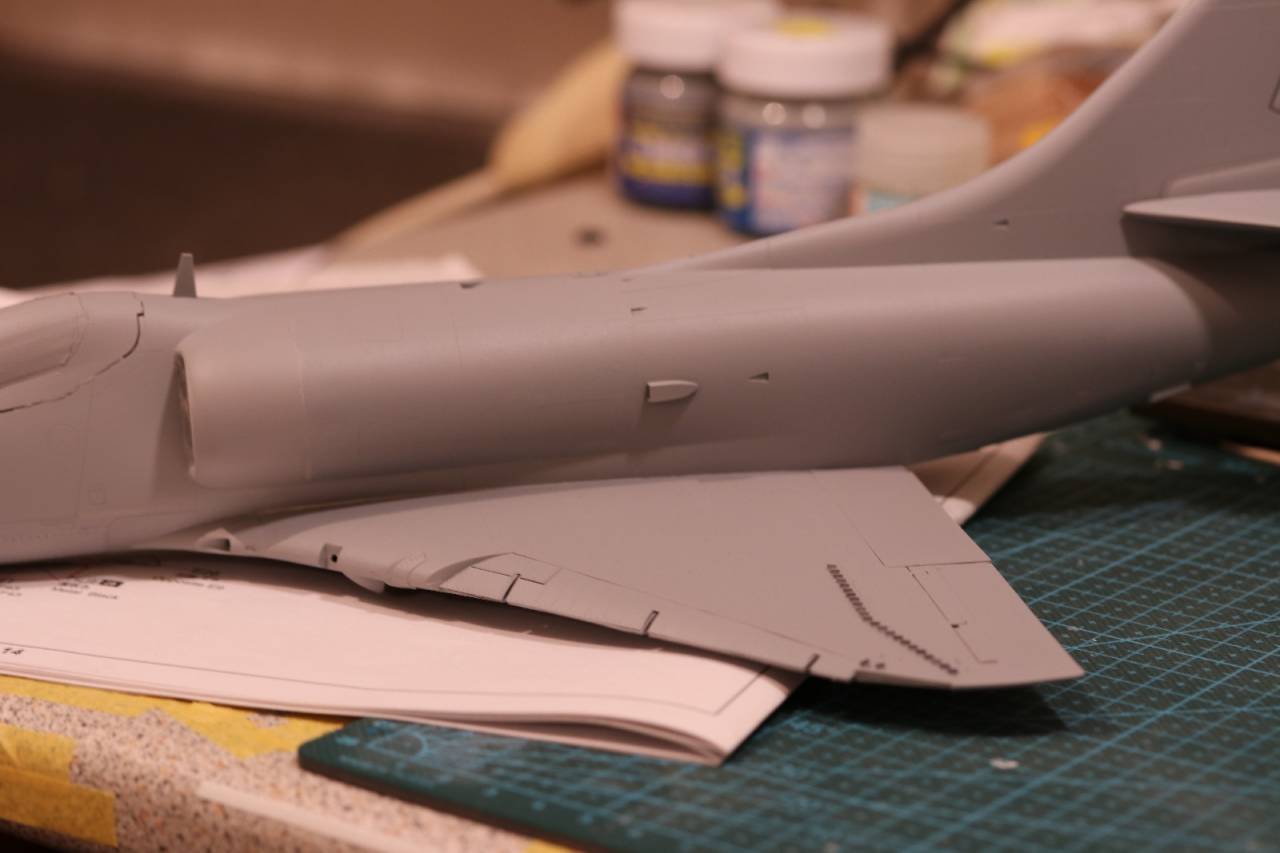
I do like the way the vortex generators turned out under a coat paint especially since they were so fiddly, but worth it for sure.
Some obvious points to work on. You couldn't model this kit with the canopy closed. Though they are just bluetac'd in place the resin piece is slightly too narrow. The rear canopy is also narrow but is a consequence of the effort to get the front of the plane squeezed so the nose correctly fitted which lead to gap as discussed earlier behind the cockpit. I didn't intend to have it closed but I am sure it would fit otherwise.
Overall the plane is looking clean and tidy
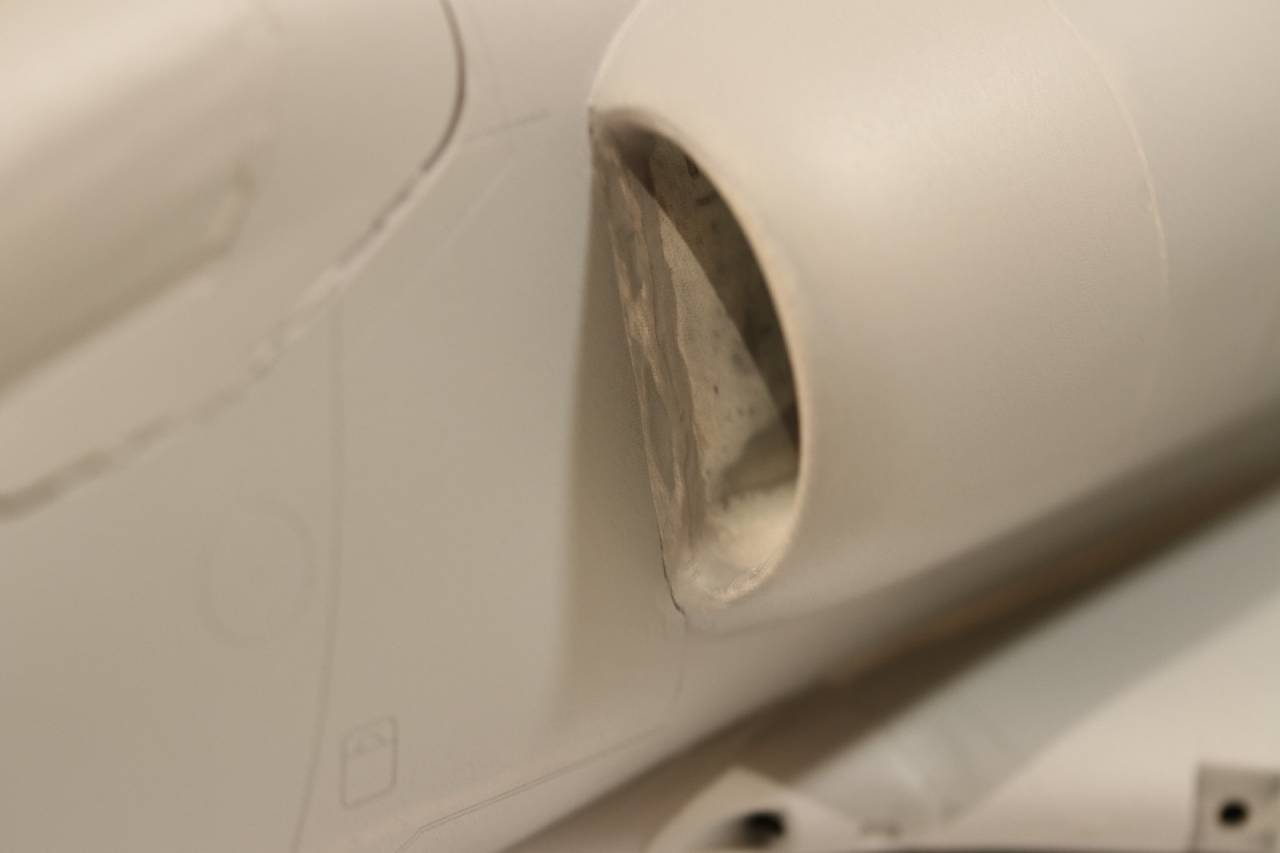
One of the intakes shows a crack and still needs some smoothing.
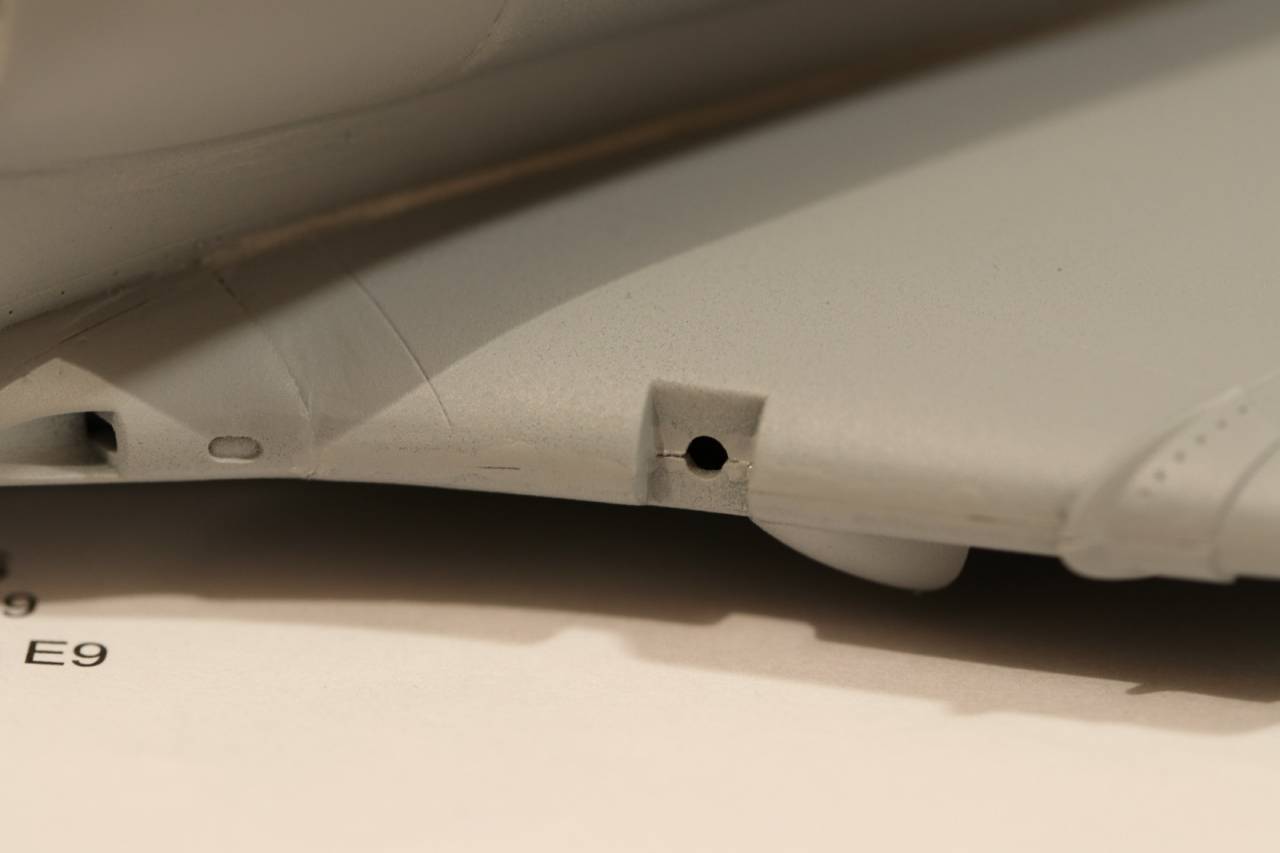
A few bits missed on the wing leading edge.
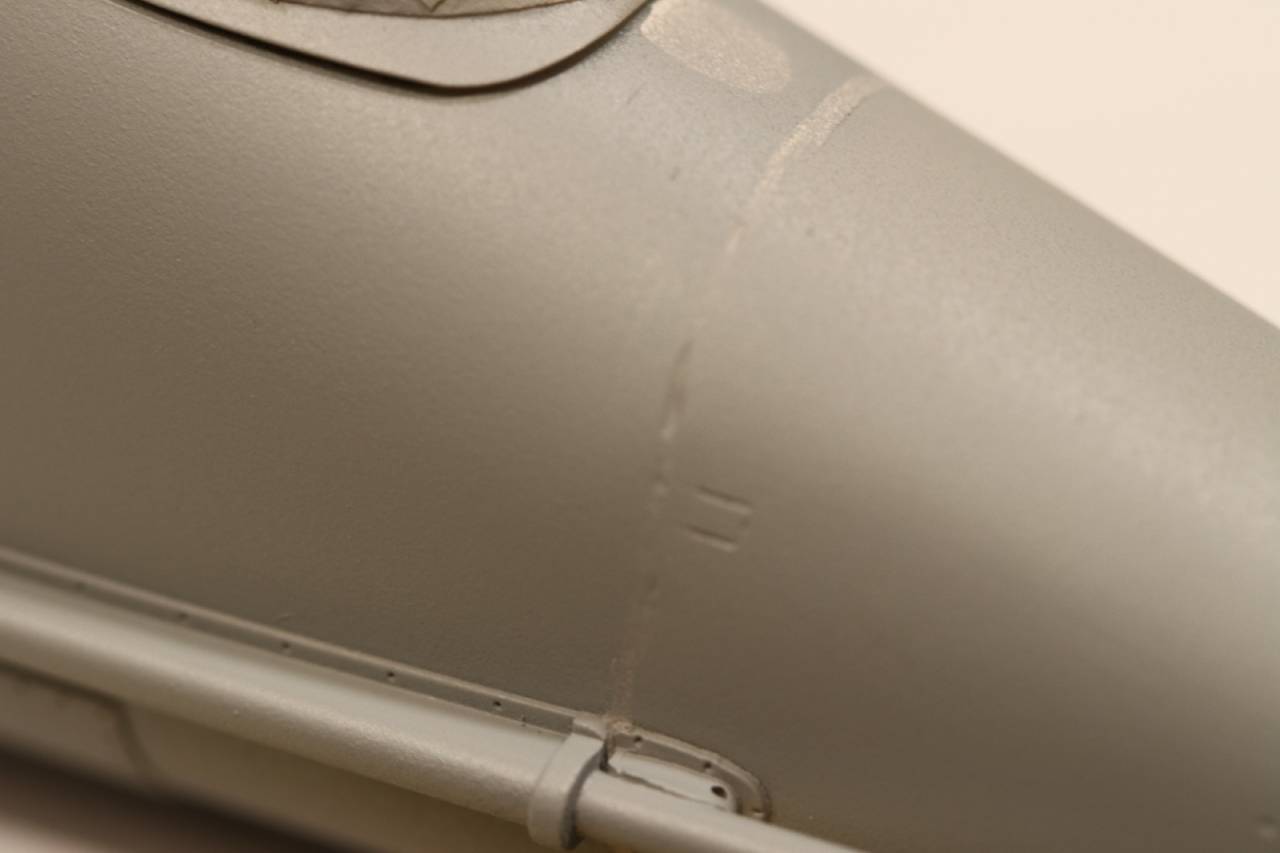
And the nose job also needs more work and there is an air hole by the refuelling probe I hadn't notice.
Hopefully some true colour can't be far away.
cheers
Michael
Posted: Wednesday, April 26, 2017 - 12:37 PM UTC
Well the build has hit a bit of a road block for the moment.
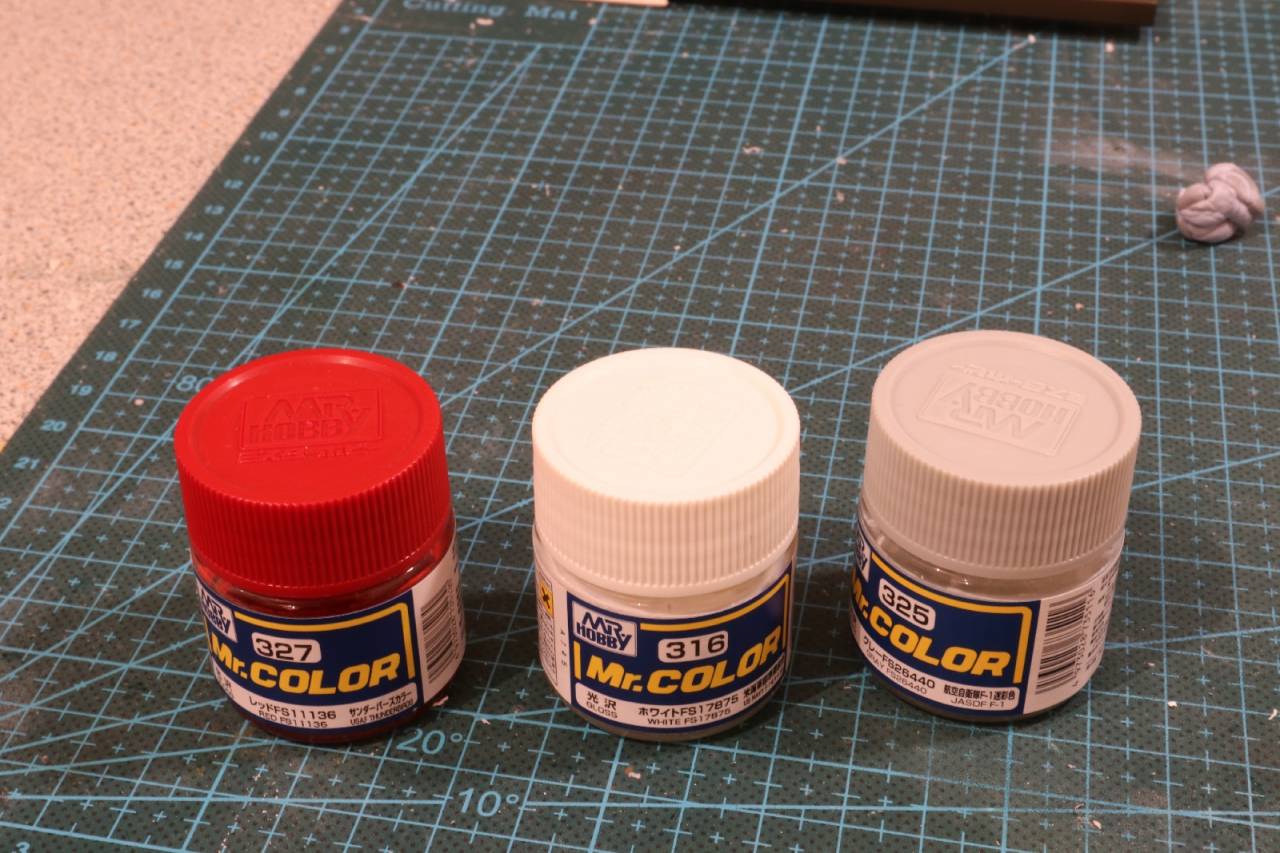
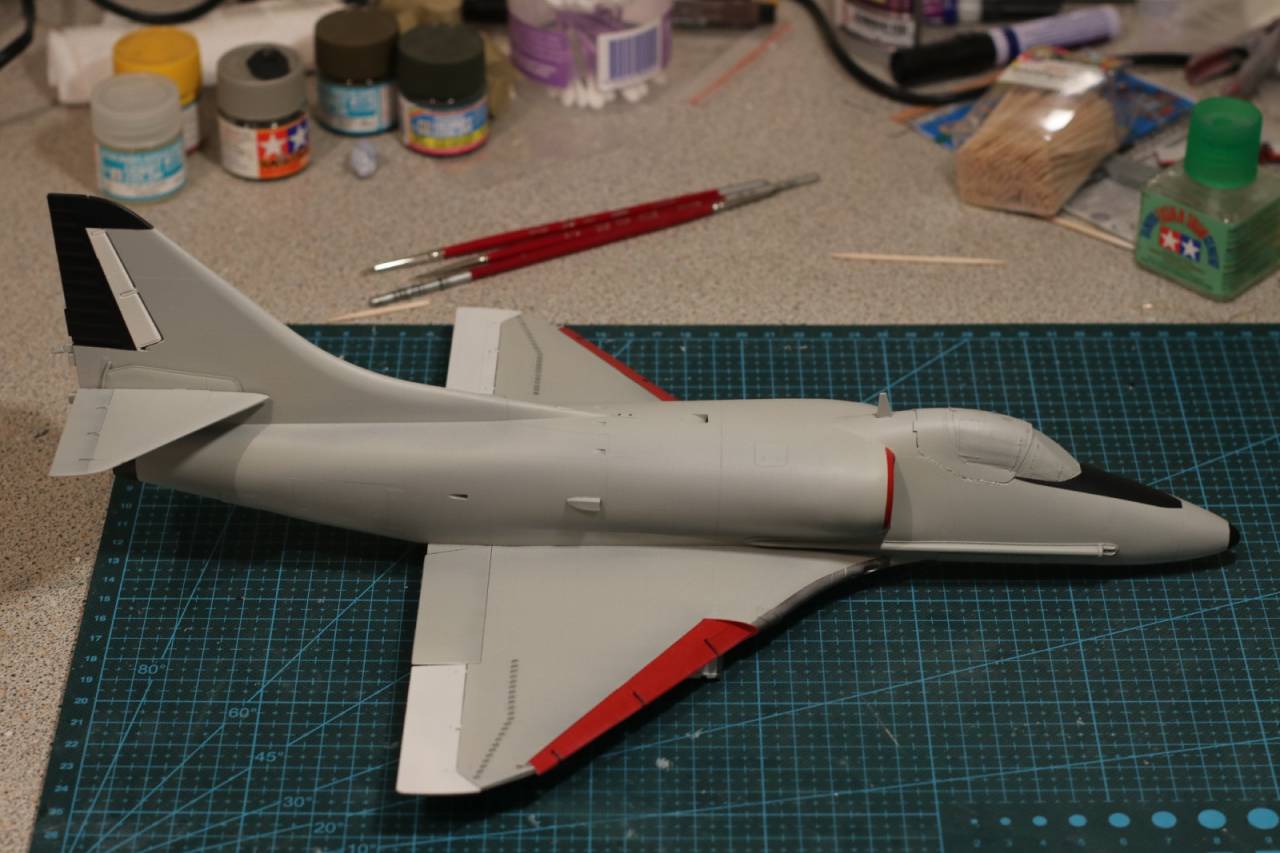
For this kit I thought I would try the MrColor range which they have just started stocking in my part of the world.
Except as I found you really need Mr Color levelling thinner which the LHS, seller of above paints doesn't stock. So i have ordered some from Japan, which has taken two attempts. The first Lucky Model said they had it in stock, took my money and then they didn't have in stock. Hmm, somewhat dodgy business model. I hadn't used them before and won't be in future. So I tried Amazon, who had it in stock, but it still hasn't arrived four weeks later. I may just revert to standard Gunze if no luck soon.
In the meantime I have been working on other things. I have tried some pre-shading for the first time.
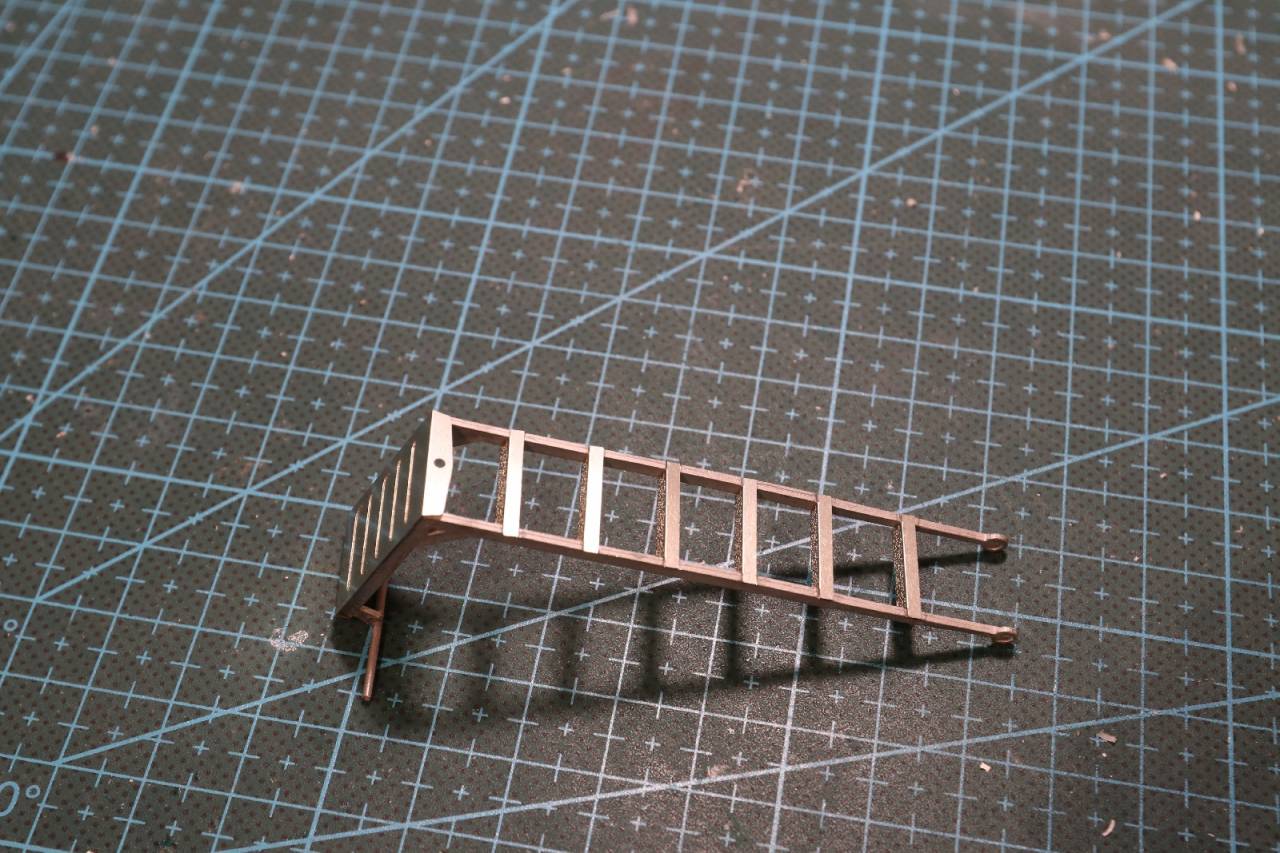
Built an access ladder from Flightpath.
And then decided to focus on the ordnance which has me confused.
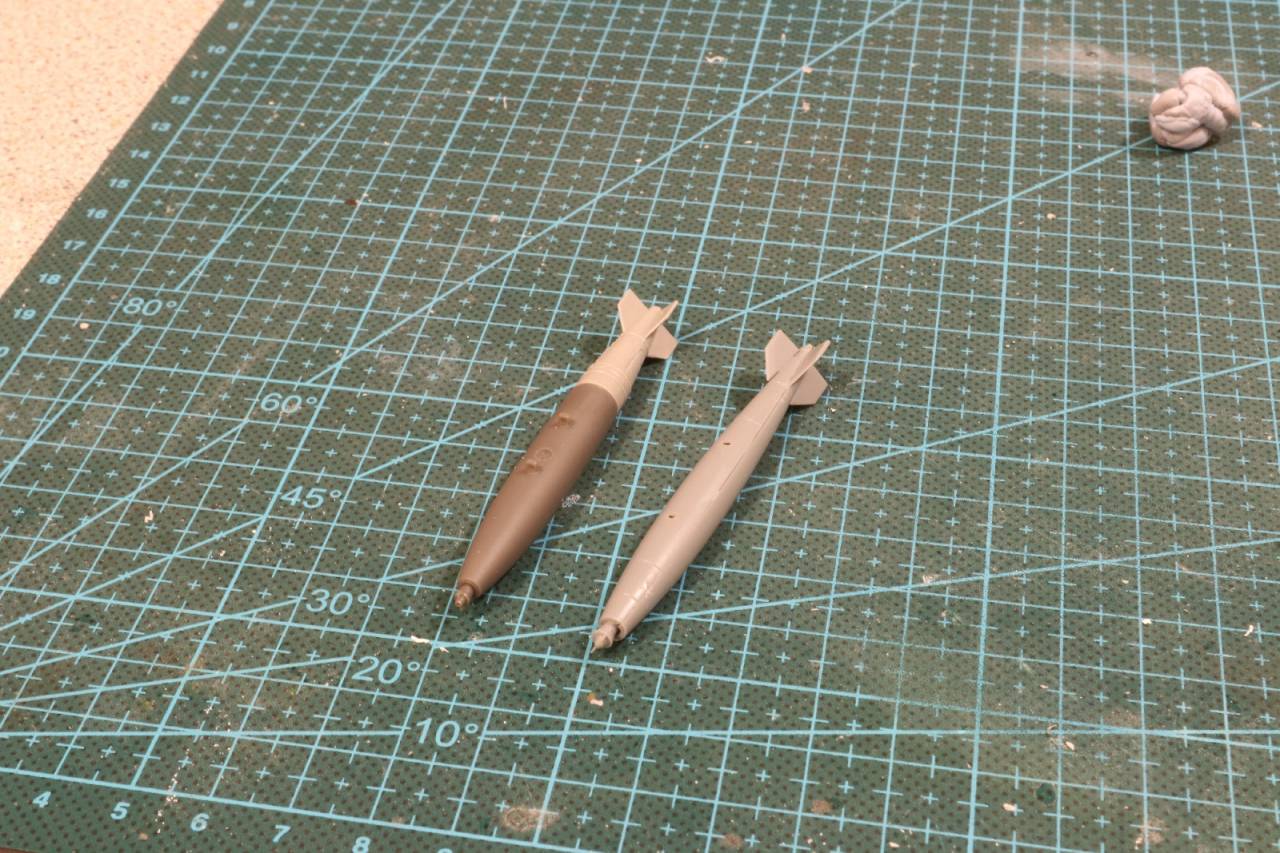
Being a "c" version I was just going with a loadout of MK82s courtesy of Eduard's Brassin range. They look better than the kit offering and have read are more accurate in shape.
They come in sets of six
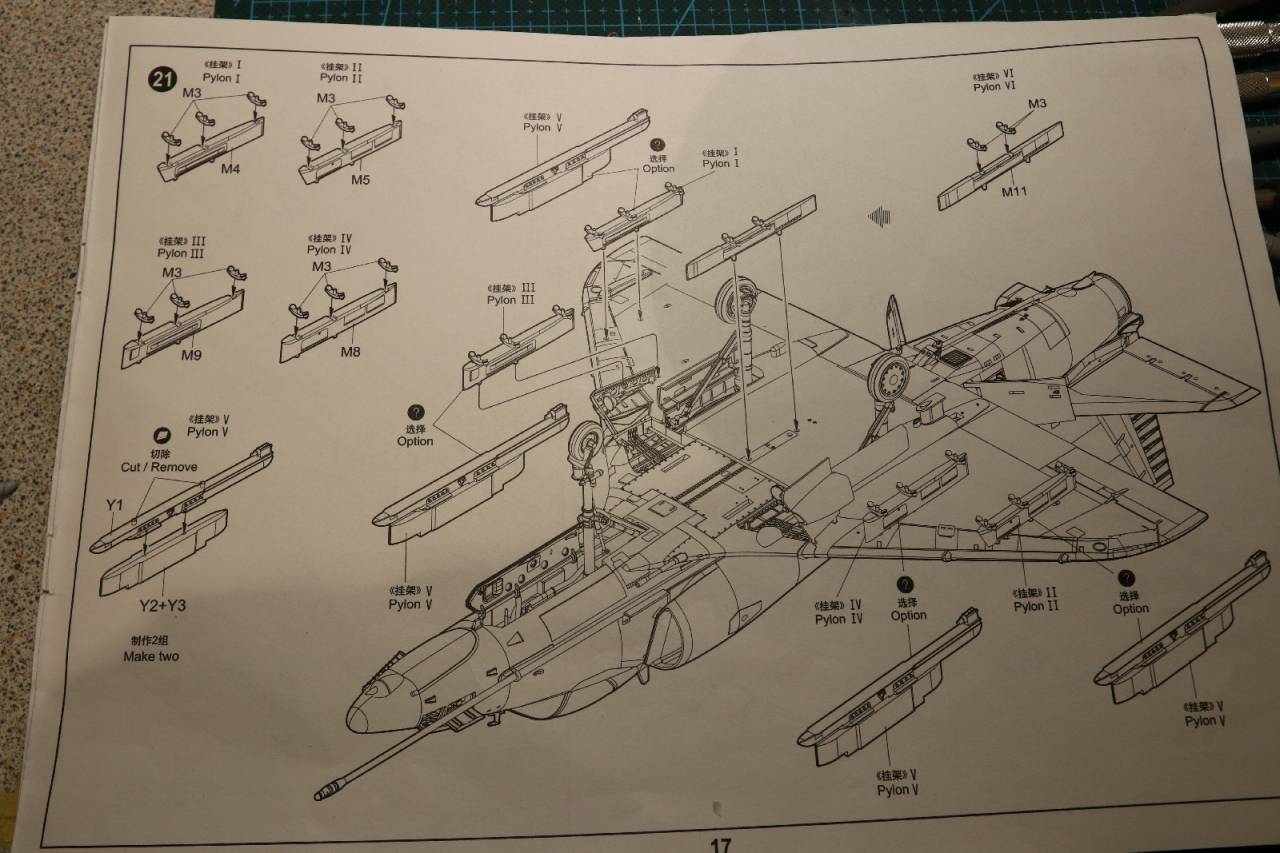
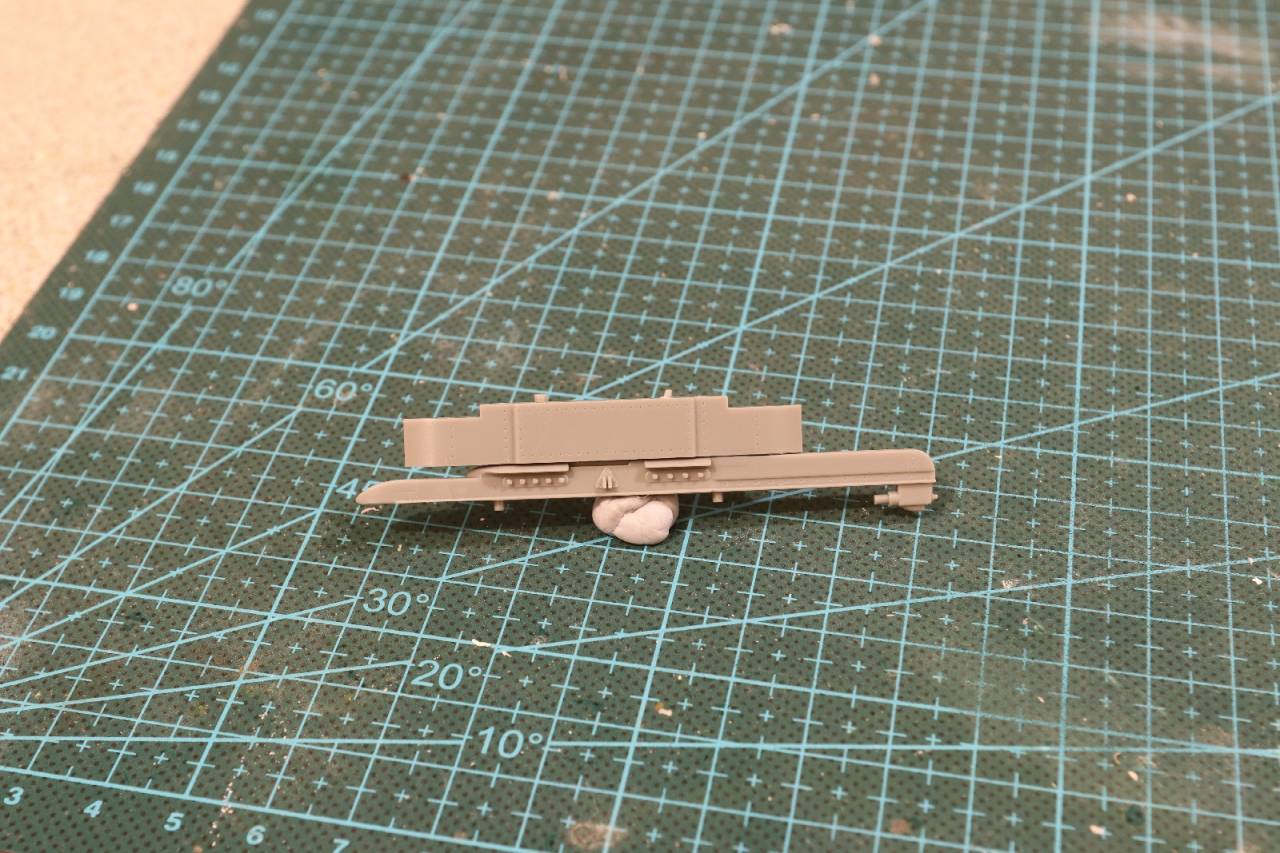
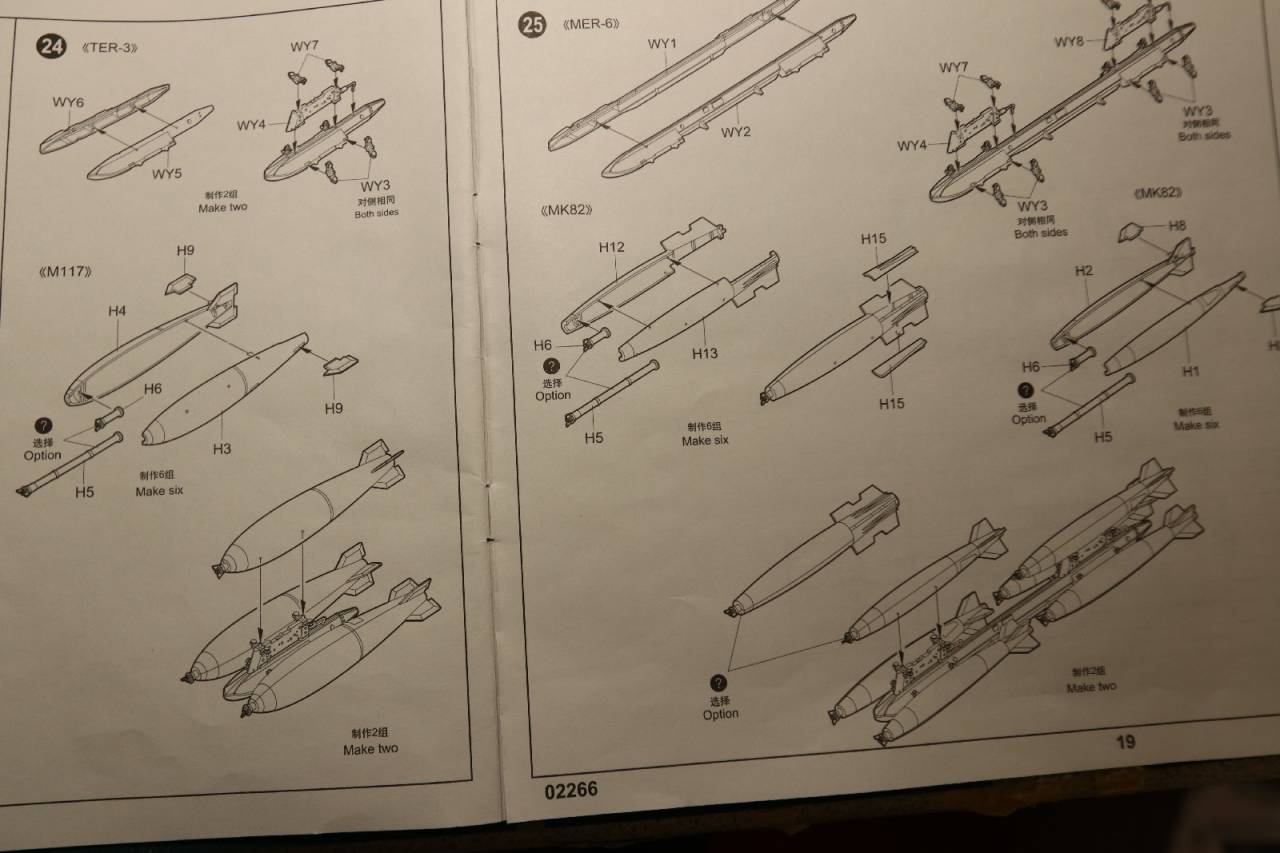
That's all pretty straight forward but here is where the confusion arises. Trumpeter offer several different types of attachments points (pylons) but they don't say what ordnance goes with which pylon.
Now I have figured out the MK82s go on a TER or MER so I guessed these attach to Pylon V as shown in the instructions.
In plastic it looks like this
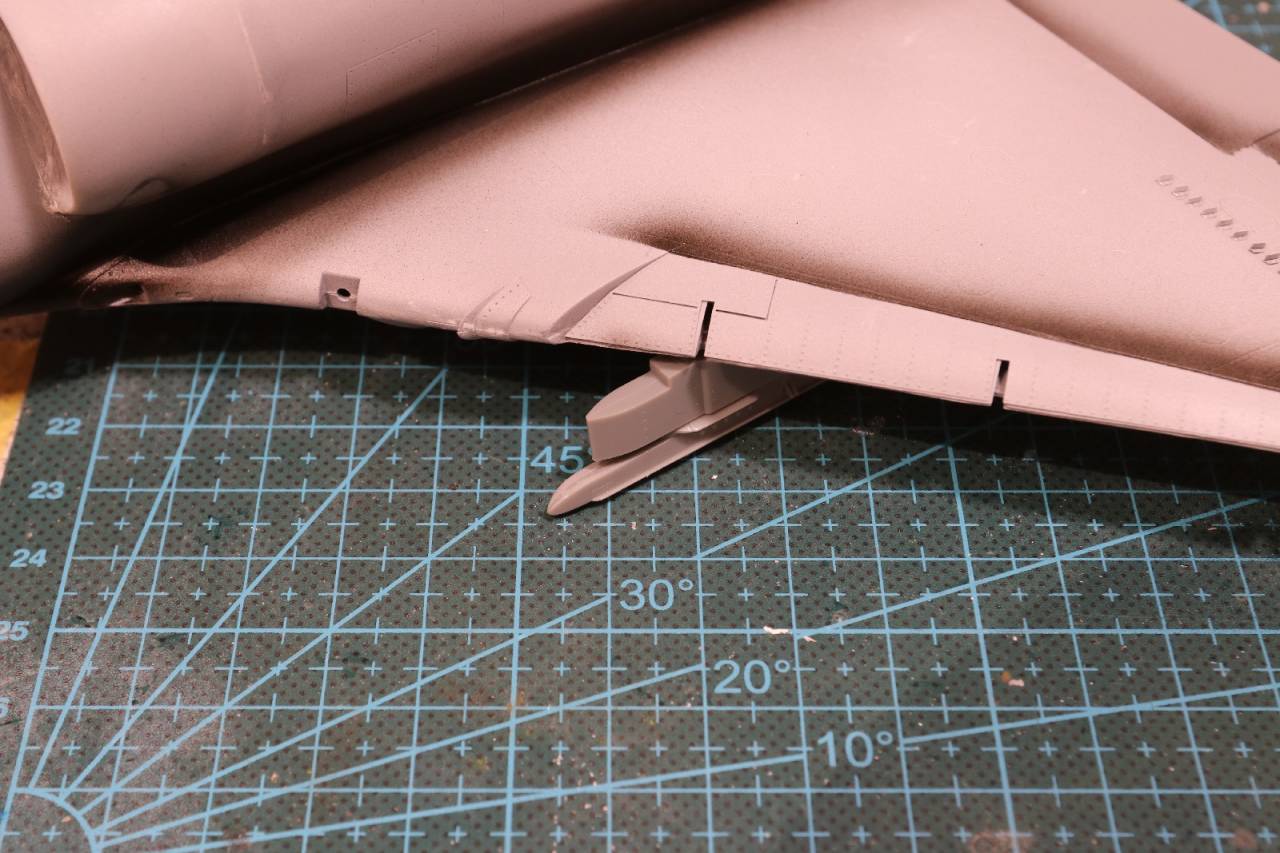
but on the wing it sticks well forward of the leading edge and would prevent the slats from being deployed
Have I chosen the wrong Pylon or is this a Trumpeter mistake. I have looked at several photos but none are clear enough to give me the answer.
Any assistance gratefully received.
cheers
Michael
SpeedyJ
Bangkok, Thailand / ไทย
Joined: September 17, 2013
KitMaker: 1,617 posts
AeroScale: 212 posts
Joined: September 17, 2013
KitMaker: 1,617 posts
AeroScale: 212 posts
Posted: Wednesday, April 26, 2017 - 07:07 PM UTC
Hi, I don't think, for some reason you can speak of TER or MER. They had different descriptions for that particular period the Skyhawk was serving (C version). TER is Triple MER is multiple (2 TER inline) Pylons should wear upside down triangle shaped attaching for the specific bombs. Don't see them in the instructions.
Kind regards,
Robert Jan
Kind regards,
Robert Jan
Posted: Thursday, April 27, 2017 - 11:34 AM UTC
Thanks Jan for coming back. It is Trumpeter that use the TER/MER designation. The instructions show them with the bombs and I probably should have included this earlier
but it doesn't show which of the various pylons the TER/MER would be attached to which is where I am lost. I am sure they don't go straight on the wing.
cheers
Michael
but it doesn't show which of the various pylons the TER/MER would be attached to which is where I am lost. I am sure they don't go straight on the wing.
cheers
Michael
Posted: Thursday, April 27, 2017 - 12:25 PM UTC
Michael,
I've been kinda busy with other things, but have enjoyed reading this one. All of that AM helps make it look better. Truly impressed by the vortex generators.
Hope to see it rolling again, soon.
Gaz
I've been kinda busy with other things, but have enjoyed reading this one. All of that AM helps make it look better. Truly impressed by the vortex generators.
Hope to see it rolling again, soon.
Gaz
Posted: Friday, April 28, 2017 - 08:28 AM UTC
Thanks Gaz,
Amazon came through today so I can get some paint on the plane.
Hopefully next post I'll have some colour.
cheers
Michael
Amazon came through today so I can get some paint on the plane.
Hopefully next post I'll have some colour.
cheers
Michael
Posted: Sunday, May 07, 2017 - 03:45 PM UTC
Hi Michael,
not sure how I missed this one, but I'm all caught up now and on board for the ride!
A great build so far & I'm looking forward to seeing more!
not sure how I missed this one, but I'm all caught up now and on board for the ride!
A great build so far & I'm looking forward to seeing more!
Posted: Monday, May 08, 2017 - 05:26 AM UTC
Quoted Text
Hi Michael,
not sure how I missed this one, but I'm all caught up now and on board for the ride!
A great build so far & I'm looking forward to seeing more!
Thanks Russ, glad to have you aboard and hope you enjoy the flight!
cheers
Michael
Scrodes
Ontario, Canada
Joined: July 22, 2012
KitMaker: 771 posts
AeroScale: 763 posts
Joined: July 22, 2012
KitMaker: 771 posts
AeroScale: 763 posts
Posted: Monday, May 08, 2017 - 06:13 AM UTC
Lots of Scooters being built these days.
You're making a good go of it! I just finished a conversion myself and I know how much of a struggle it can be - no matter how clean the conversion looks to fit!
Posted: Monday, May 08, 2017 - 01:59 PM UTC
Quoted Text
Lots of Scooters being built these days.
You're making a good go of it! I just finished a conversion myself and I know how much of a struggle it can be - no matter how clean the conversion looks to fit!
Thanks for the support Matt!
Construction is all finished. I just have to find some time to paint it.
cheers
Michael
redcap
England - East Midlands, United Kingdom
Joined: November 06, 2005
KitMaker: 753 posts
AeroScale: 311 posts
Joined: November 06, 2005
KitMaker: 753 posts
AeroScale: 311 posts
Posted: Monday, May 08, 2017 - 02:39 PM UTC
Great work Michael and it is all coming together nicely now.
That rudder fit is just outrageous - shame on Trumpeter in this day and age. I have this kit also so I am taking notes on the build and your resolving of problems encountered along the way; thank you!
Gary
That rudder fit is just outrageous - shame on Trumpeter in this day and age. I have this kit also so I am taking notes on the build and your resolving of problems encountered along the way; thank you!
Gary
Posted: Tuesday, May 09, 2017 - 01:57 PM UTC
Quoted Text
Great work Michael and it is all coming together nicely now.
That rudder fit is just outrageous - shame on Trumpeter in this day and age. I have this kit also so I am taking notes on the build and your resolving of problems encountered along the way; thank you!
Gary
Thanks Gary,
Despite the rudder issue I think out of the box this is pretty good kit. It goes together well, the parts count is quite low. I think if I hadn't gone for the conversion kit and Aires wheel wells this would have been done and dusted by now.
cheers
Michael
Scrodes
Ontario, Canada
Joined: July 22, 2012
KitMaker: 771 posts
AeroScale: 763 posts
Joined: July 22, 2012
KitMaker: 771 posts
AeroScale: 763 posts
Posted: Tuesday, May 09, 2017 - 09:29 PM UTC
Quoted Text
Construction is all finished.
cheers
Michael
Run!!! Knock on wood!!!
Posted: Friday, June 23, 2017 - 12:58 PM UTC
Ha, I should have listen Matt!
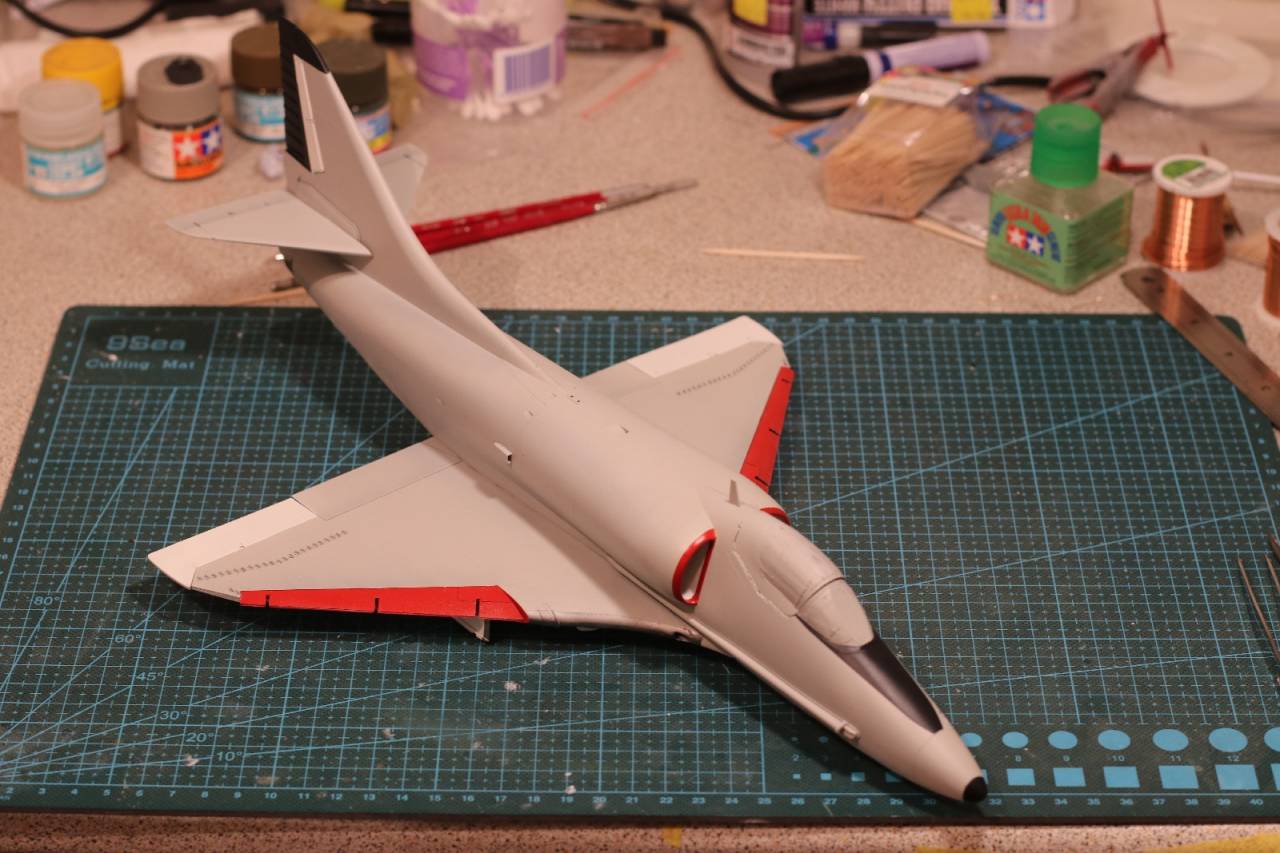
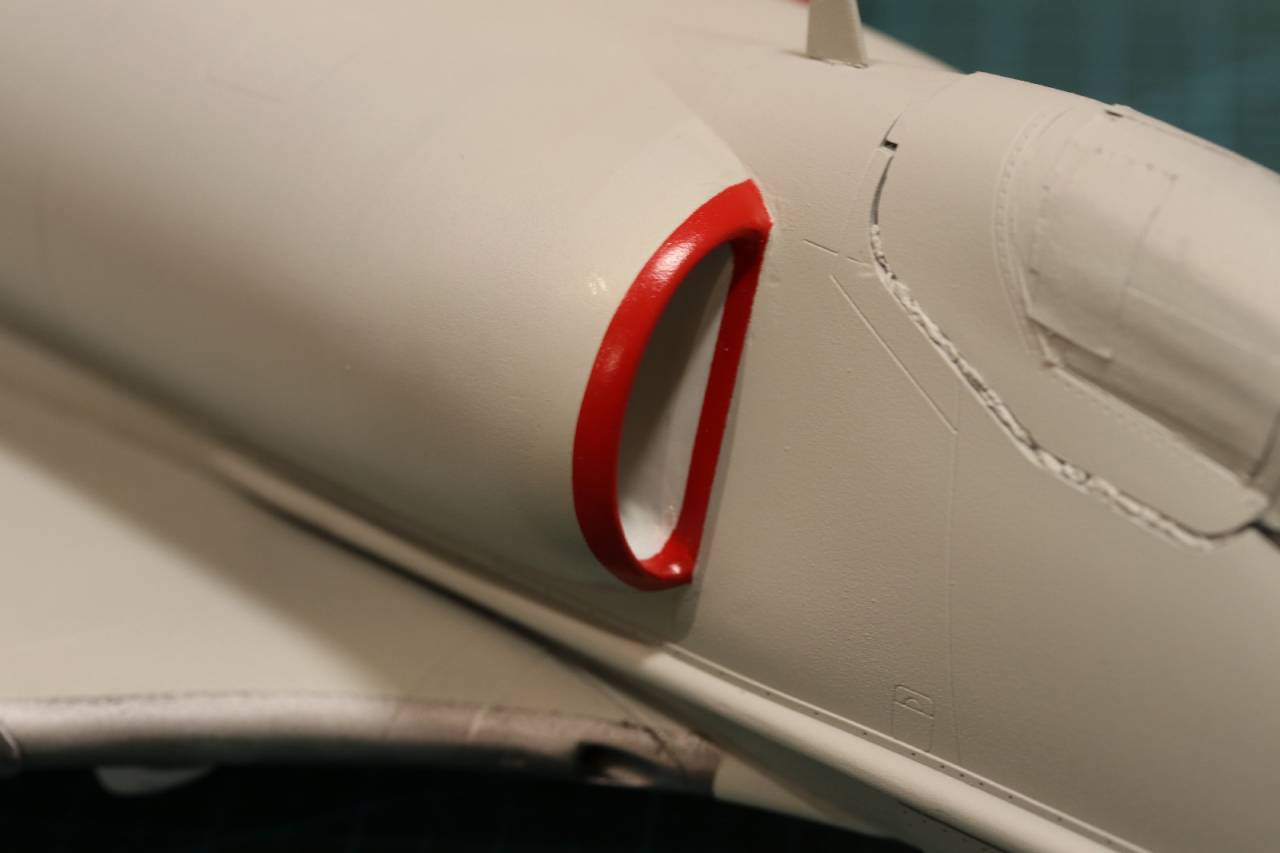
I don't know where the last seven weeks went but I have finally got some colour on the plane. Being dressed for delivery to the Marine Corp.
The red around the intakes was a difficult masking job and probably doesn't deserve a macro lens photo
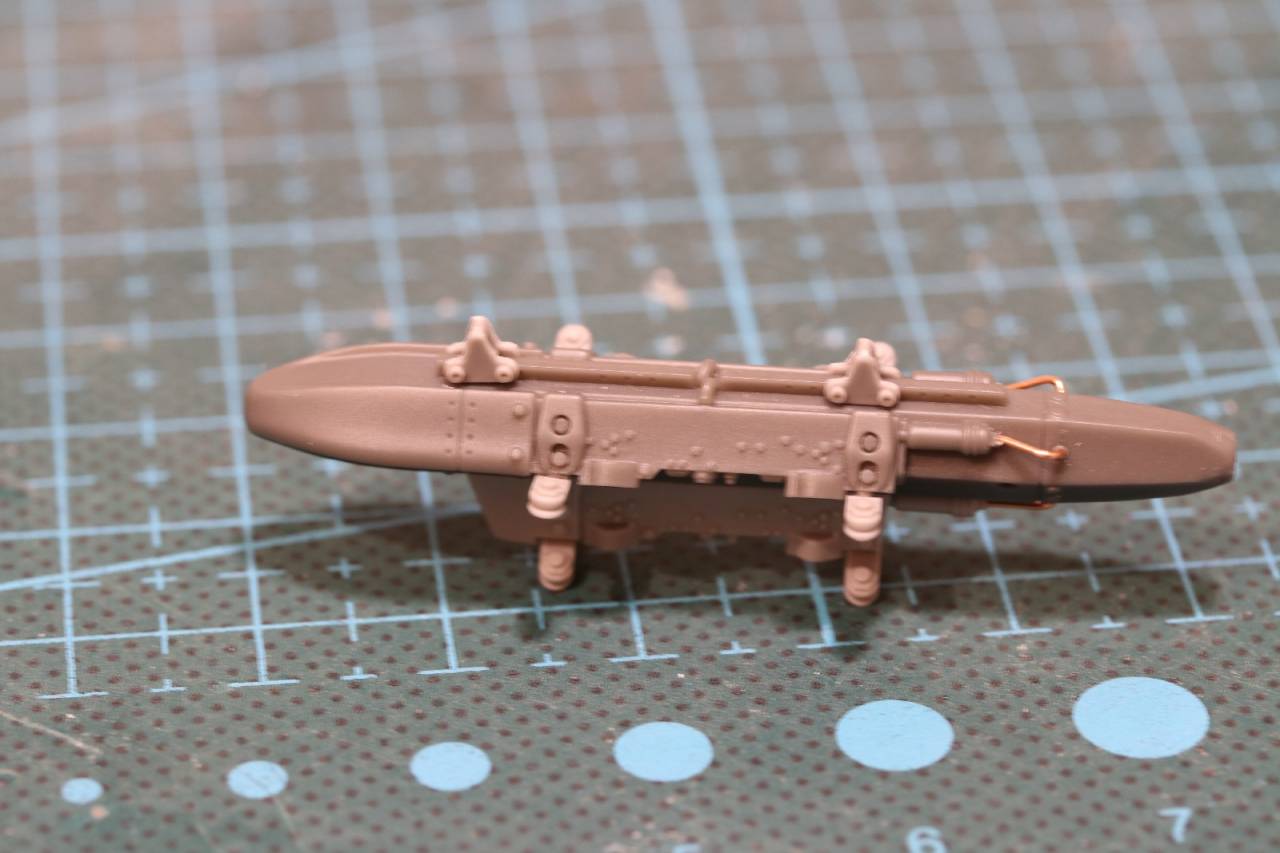
Over that time I had also ordered some ejection racks from Eduard in their Brassin range. They are an improvement over the kit offering.
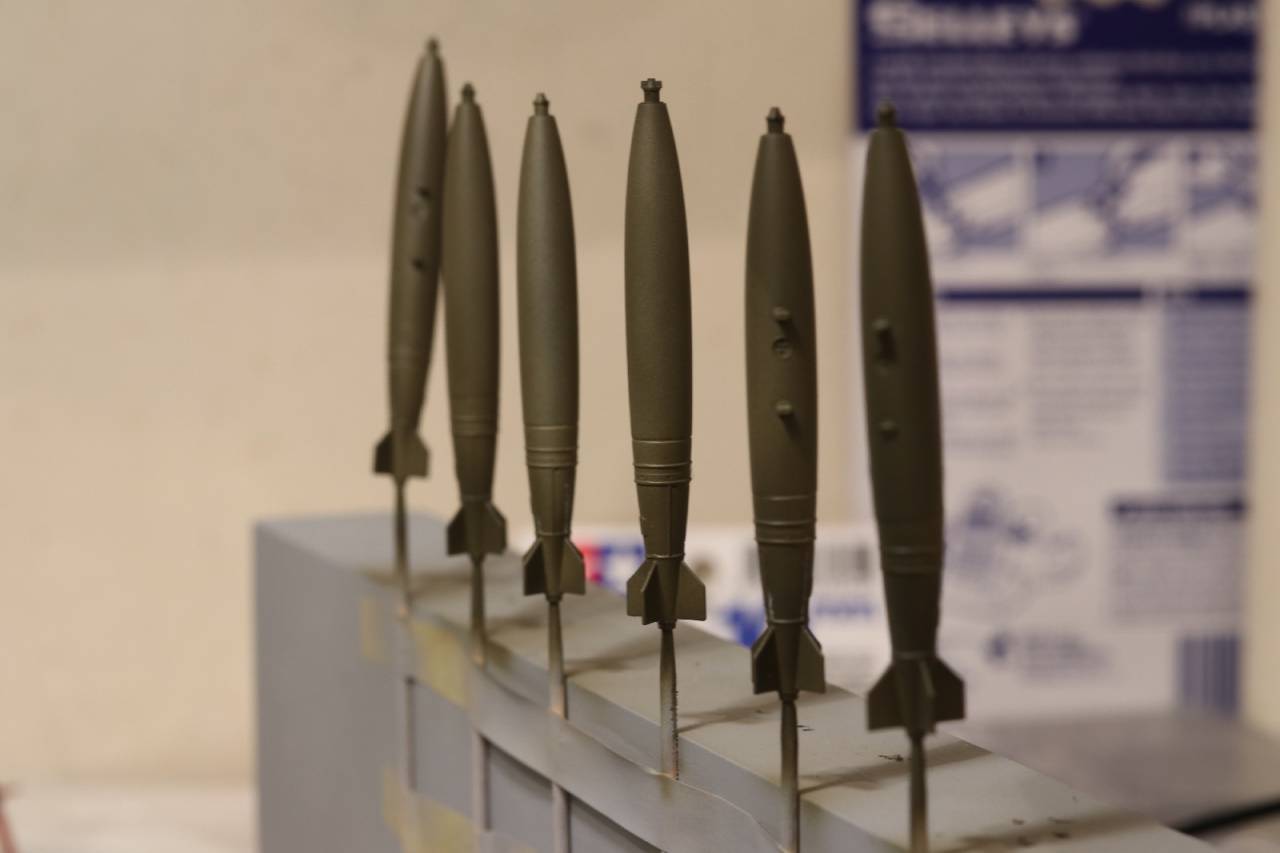
I have also put some paint on the load.
I have thought about doing a diorama display for this build, a first for me, and if anybody knows where I can get some ground crew, Vietnam era, that would be great.
Next up some clear coat and then the markings.
Some major humble pie to be consumed here. I was very happy with the way the vortex generators turned out
But Now looking at the placement of the US star and bar marking on the left wing and the plane number on the right wing, the vortex generators run right through the middle. I will never get the decals to settle over that so I think my only solution is to take some off and replace then after the decal is applied. Any other options? Also, would the generators have been painted to match the red, white and blue?
cheers
Michael
rdt1953
New Jersey, United States
Joined: February 06, 2015
KitMaker: 1,098 posts
AeroScale: 900 posts
Joined: February 06, 2015
KitMaker: 1,098 posts
AeroScale: 900 posts
Posted: Friday, June 23, 2017 - 04:30 PM UTC
Hi Michael- Very nice work - glad to see it back. How about laying out the locations of the generators in question on the decal and slitting the ink / slash film before wetting ? Make a paper copy of the decal sheet and use it for test fitting until you are satisfied with the locations of the slits then lay it over the actual decal and transfer the slits- worth a shot - at least to the paper copy stage .
Cheers - Richard
Cheers - Richard
Posted: Monday, June 26, 2017 - 12:05 PM UTC
Quoted Text
Hi Michael- Very nice work - glad to see it back. How about laying out the locations of the generators in question on the decal and slitting the ink / slash film before wetting ? Make a paper copy of the decal sheet and use it for test fitting until you are satisfied with the locations of the slits then lay it over the actual decal and transfer the slits- worth a shot - at least to the paper copy stage .
Cheers - Richard
Hi Richard,
Thanks for that it is worth a try. I have few Trumpeter decals of US markings to practice with and I can use the Eduard template provided to layout the PE to mark the decals up.
cheers
Michael
Posted: Monday, June 26, 2017 - 12:09 PM UTC
Oops!
While spraying a clear coat on I managed somehow (actually I am not sure how) to spill some on the wing.
Wiping it off may have not been the best thing but I will sand it lightly and respray.
While spraying a clear coat on I managed somehow (actually I am not sure how) to spill some on the wing.
Wiping it off may have not been the best thing but I will sand it lightly and respray.
Posted: Saturday, July 01, 2017 - 06:52 AM UTC
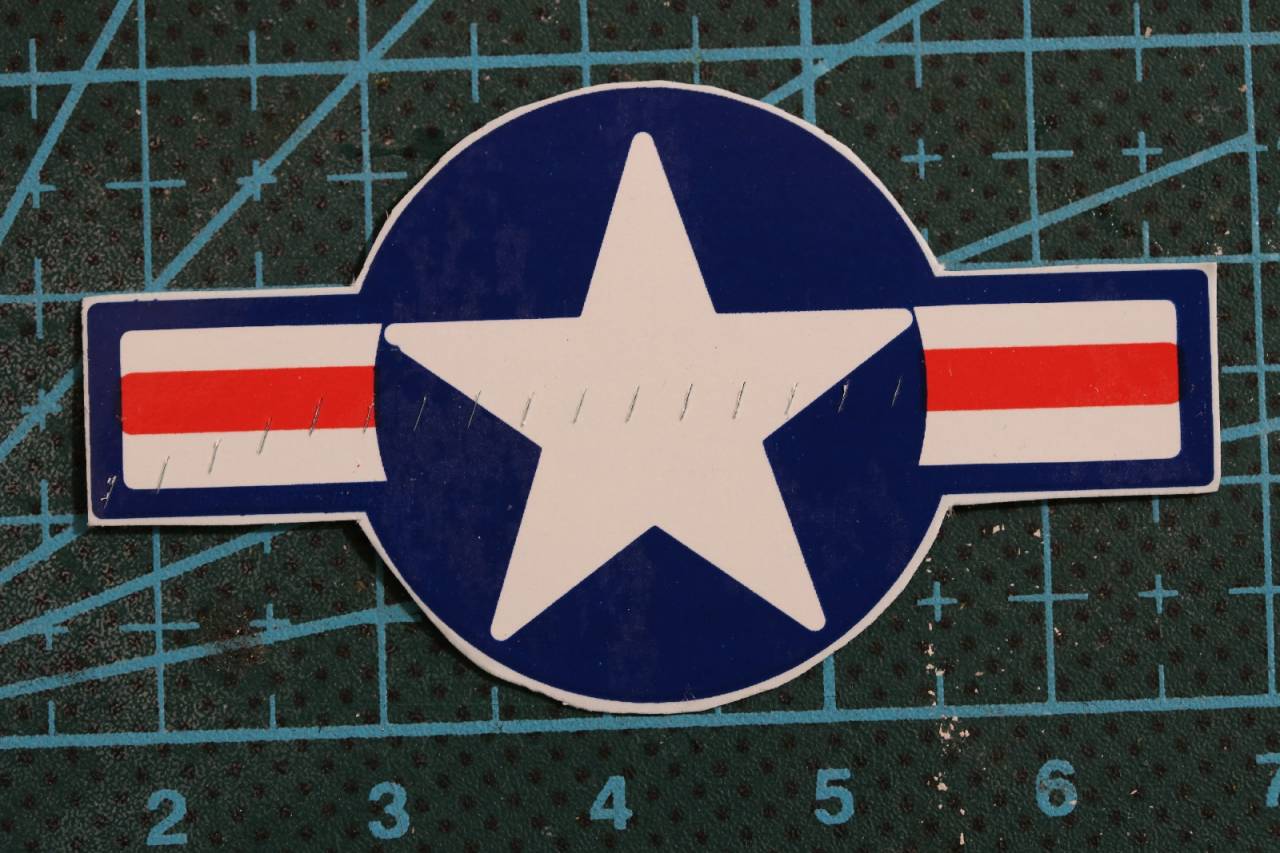
So going with Richard's idea of slitting the decal before wetting. Well I have the kit decals to practice with so off we go.
Using the template I cut the decal with a new #11 blade.
Slightly clumsy in places but I wet the decal and laid it on the wing.
As you see I didn't get the slits quite right through the star. It was also quite difficult to move the decal around to line up. What I did learn was you need to put little cross cuts perpendicular to the top and bottom of the slit to ensure the cut itself doesn't spread.
But it's going to work I think so fingers crossed.
cheers
Michael
Posted: Saturday, July 01, 2017 - 06:56 AM UTC
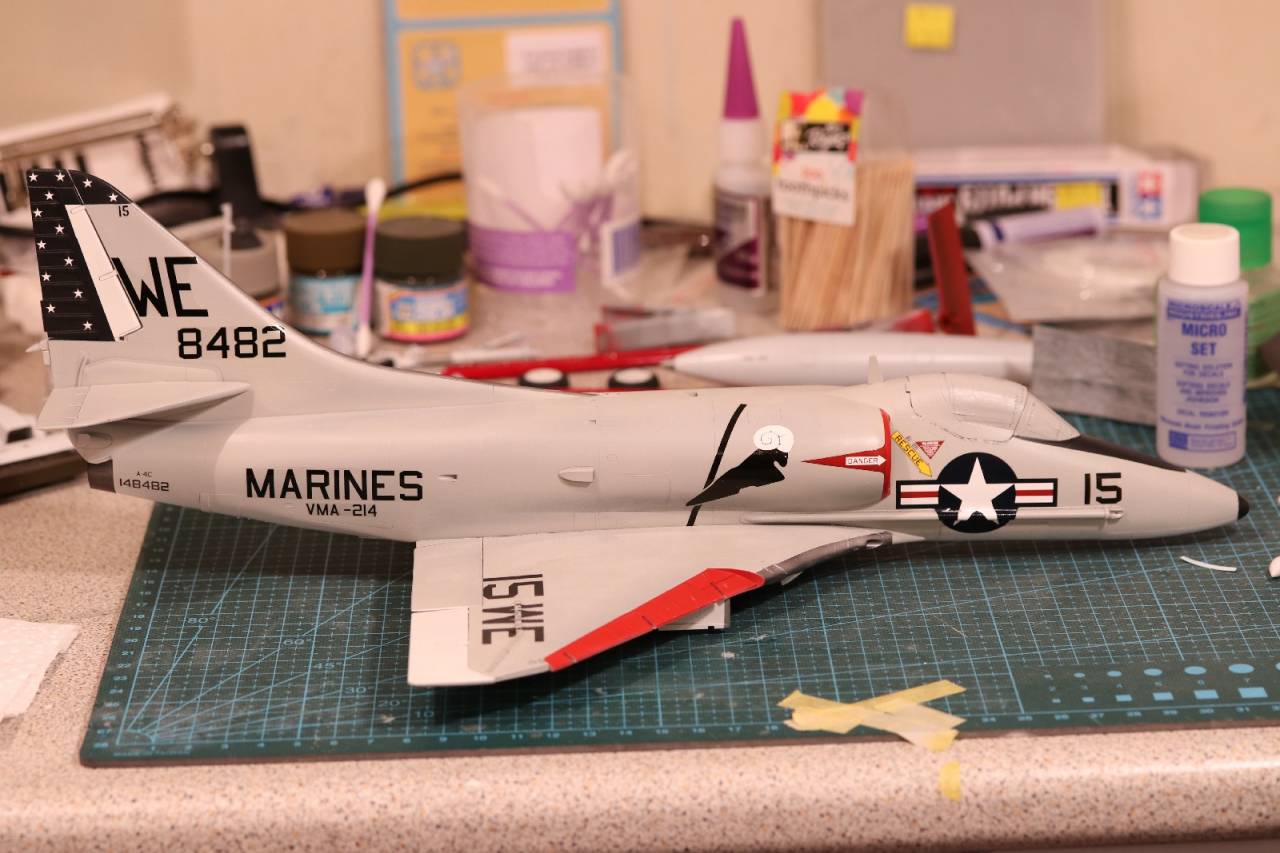
Well I laid out the right side of the aircraft. One stuff up which I am annoyed about but the rest worked. The star under the cockpit split slightly when moulding it over the fuel pipe. The AoA decals are very easy to work with though. Easy to move into place and settle down well. They're by Microscale.
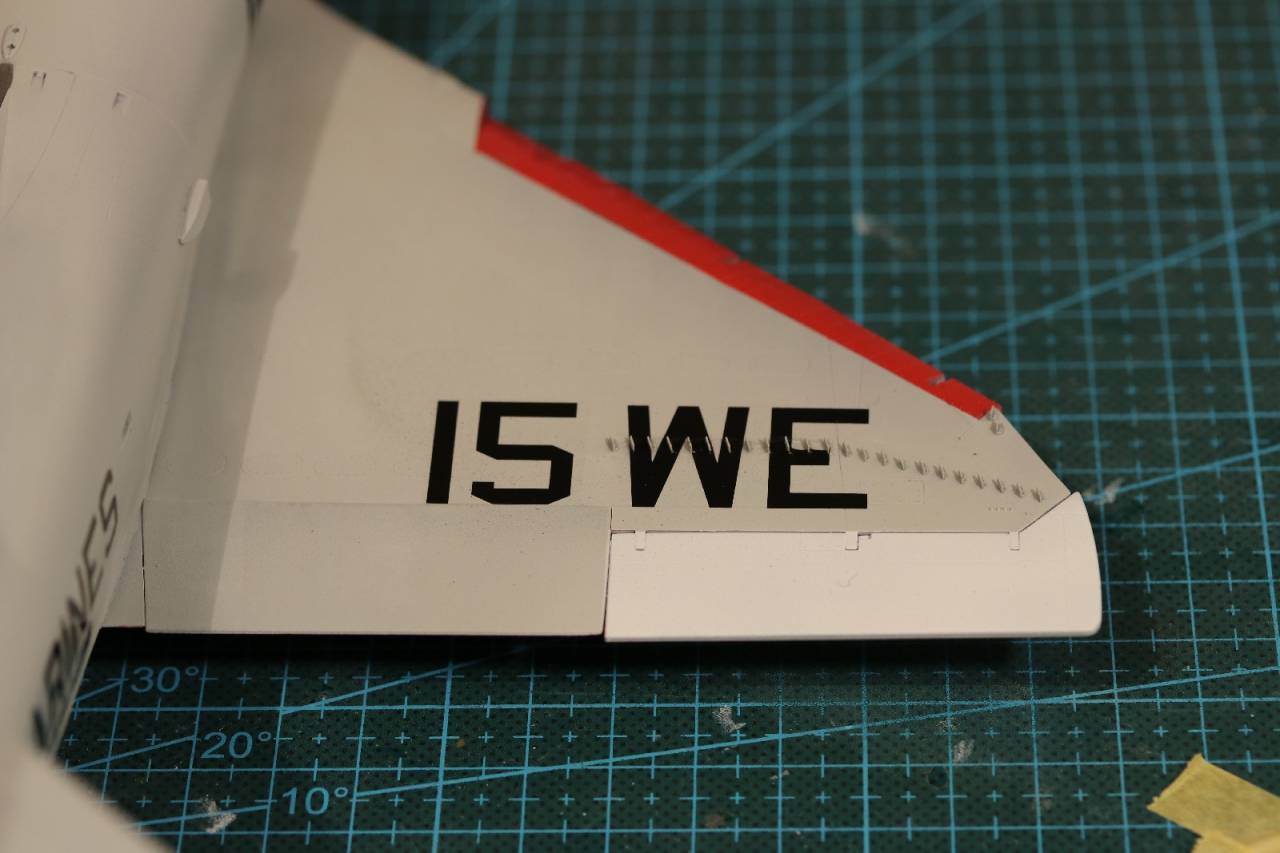
And the wing?
The slits worked perfectly on this side.
Great idea Richard
cheers
Michael
And the wing?
The slits worked perfectly on this side.
Great idea Richard
cheers
Michael
Posted: Tuesday, July 11, 2017 - 02:38 AM UTC
Not sure how it happened either Michael-these last few weeks have raced by! Seems to go faster the older we get
Your Skyhawk is looking the business now with colours and decals going!
Great effort mate.
Your Skyhawk is looking the business now with colours and decals going!
Great effort mate.
Posted: Sunday, July 16, 2017 - 03:28 PM UTC
Quoted Text
Not sure how it happened either Michael-these last few weeks have raced by! Seems to go faster the older we get
Your Skyhawk is looking the business now with colours and decals going!
Great effort mate.
Thanks Russ, I'm glad you like it.
For sure time flies, I thought this build would have been done a while back now but still it remains.
cheers
Michael