Hello!
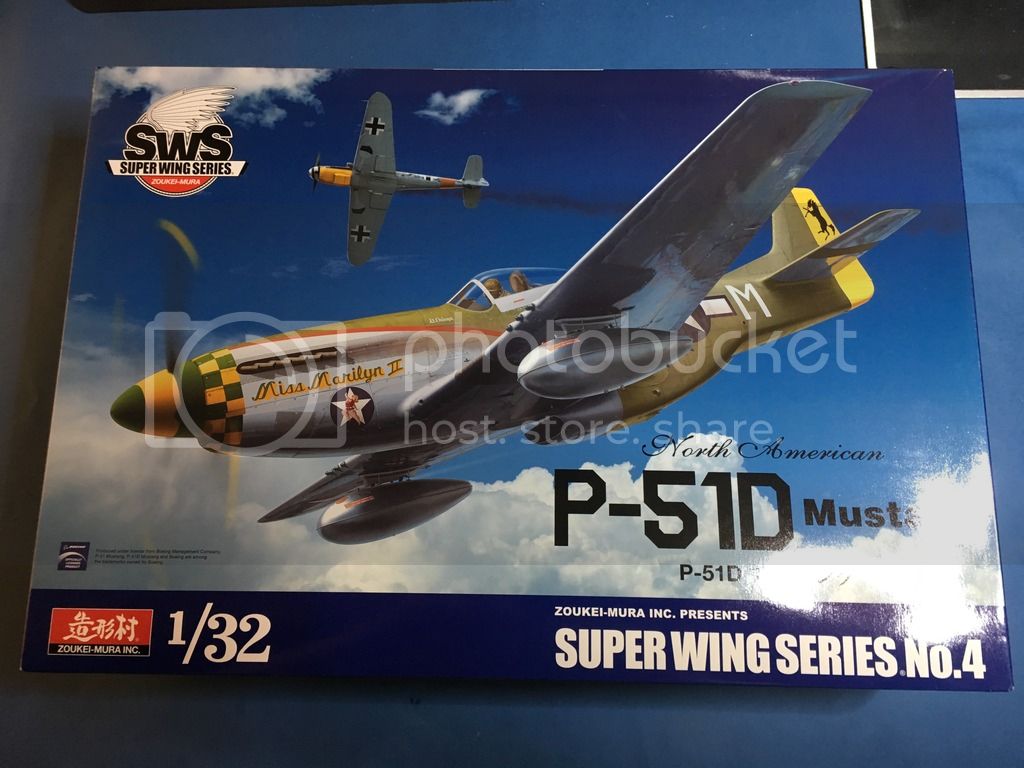
As a part of ETO campaign I entered with Zoukei Mura's P-51D in 32nd scale. Model was waiting quite a long time on the shelf so I'm really looking forward to have some fun with it
World War II
Discuss WWII and the era directly before and after the war from 1935-1949.
Hosted by Rowan Baylis
P-51D 1/32 by Zoukei Mura
Xirrcom
Gdańsk, Poland
Joined: February 18, 2016
KitMaker: 92 posts
AeroScale: 90 posts
Joined: February 18, 2016
KitMaker: 92 posts
AeroScale: 90 posts
Posted: Wednesday, February 01, 2017 - 03:43 AM UTC
Xirrcom
Gdańsk, Poland
Joined: February 18, 2016
KitMaker: 92 posts
AeroScale: 90 posts
Joined: February 18, 2016
KitMaker: 92 posts
AeroScale: 90 posts
Posted: Wednesday, February 01, 2017 - 03:51 AM UTC
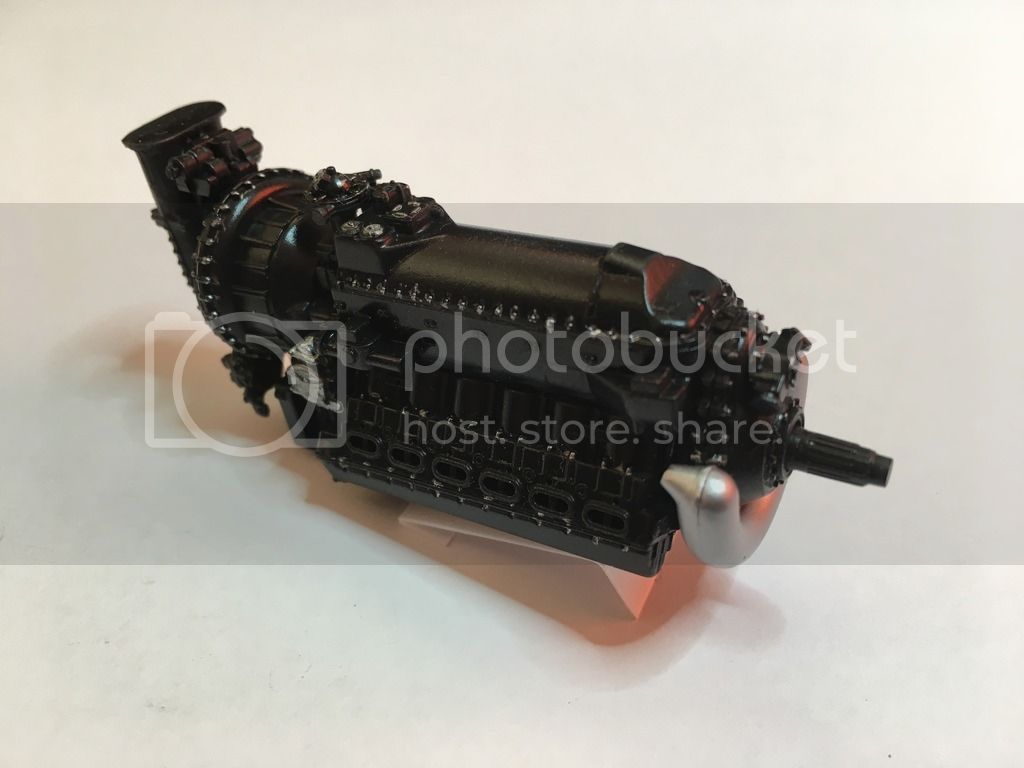
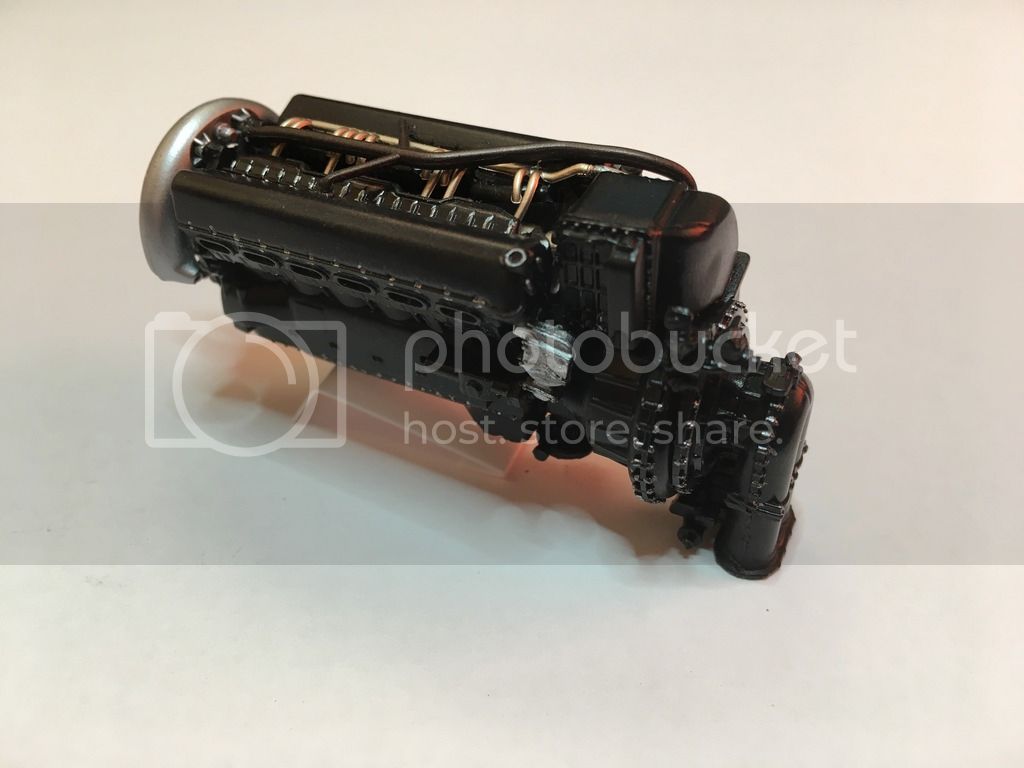
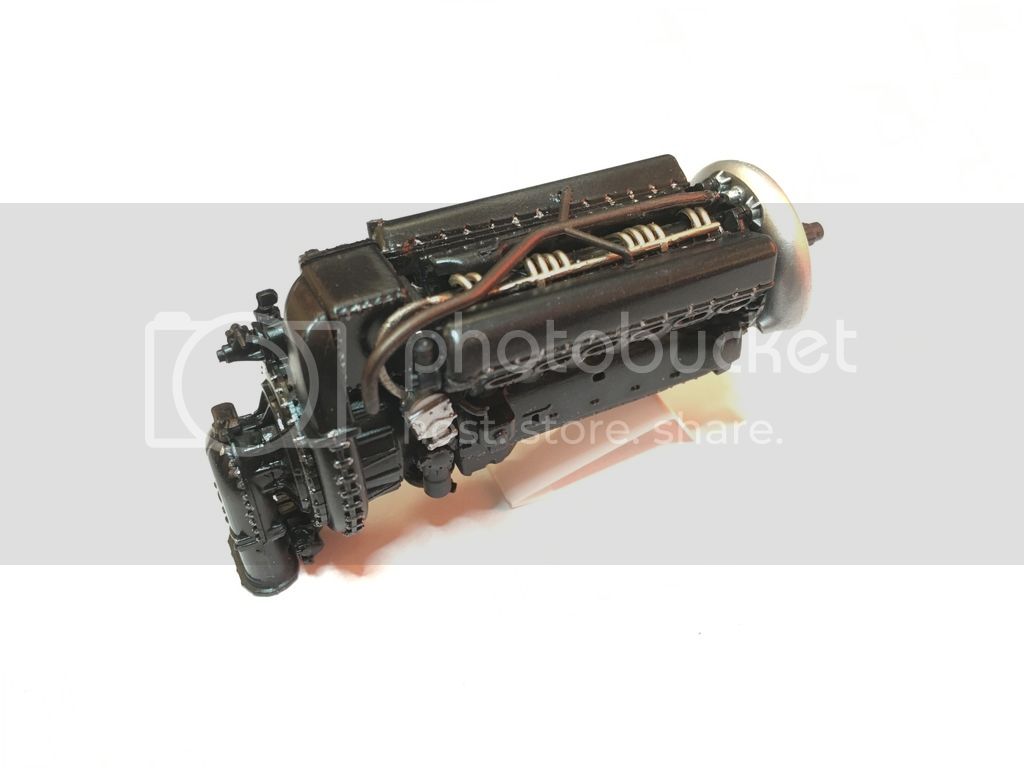
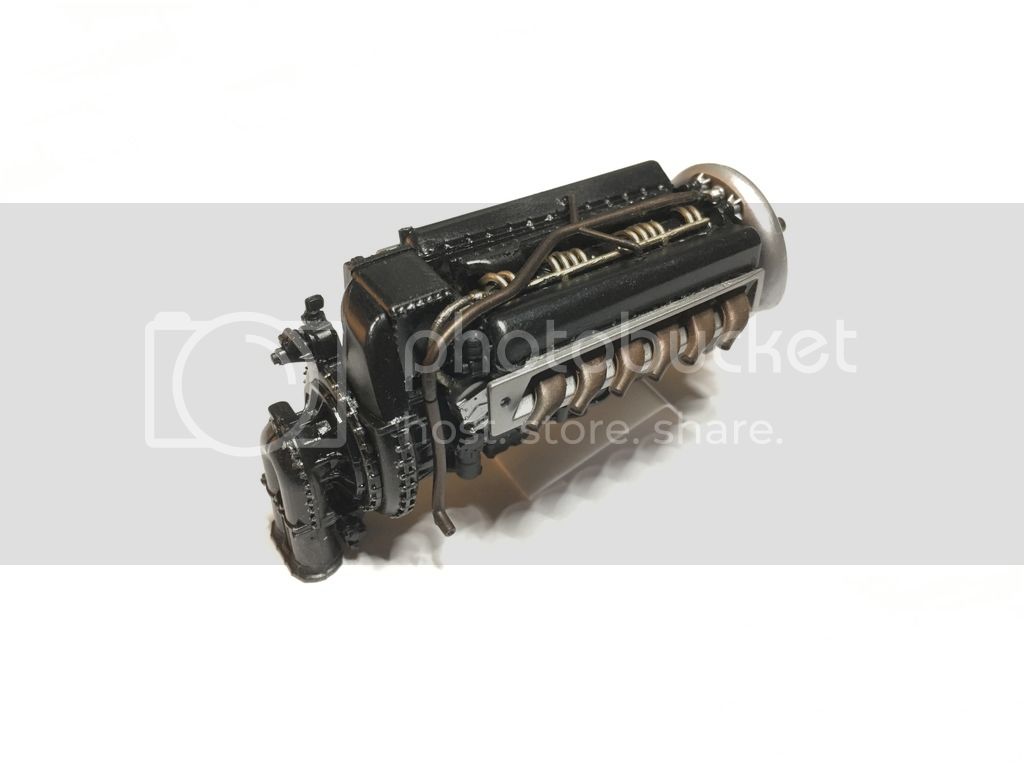
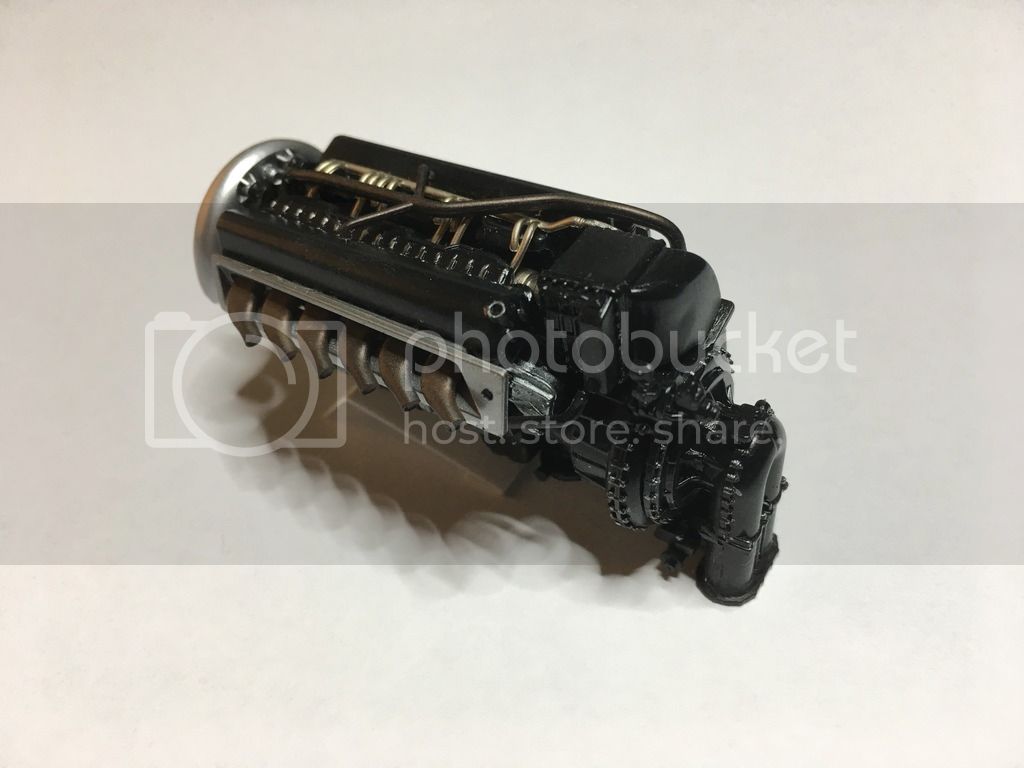
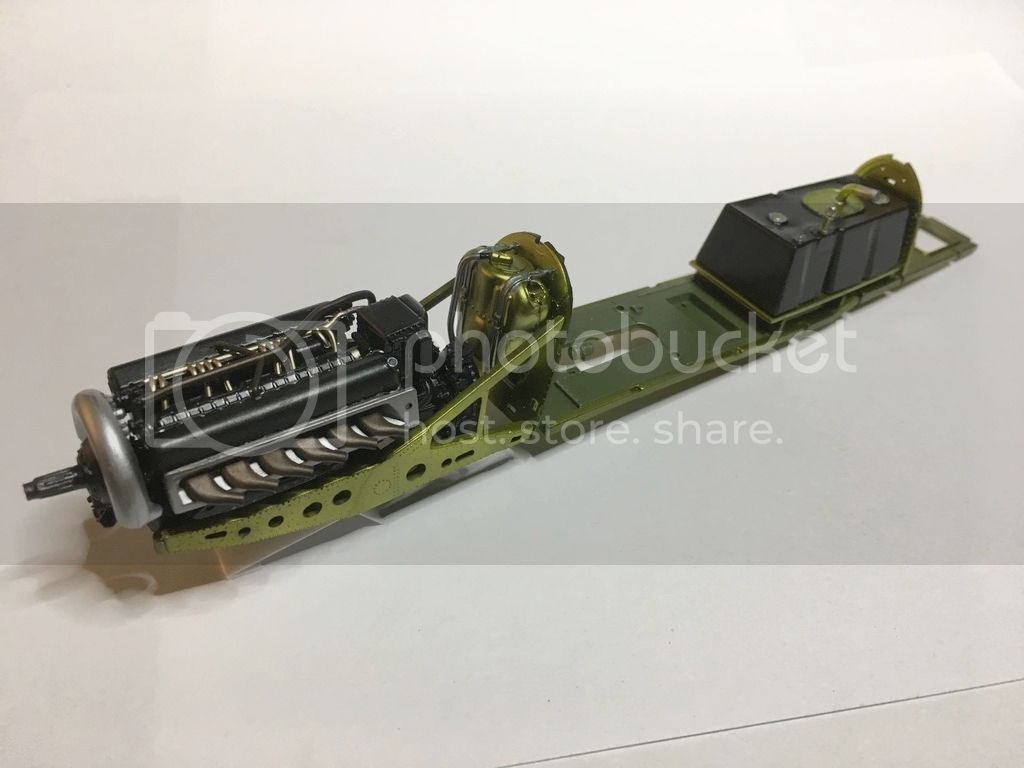
Started with an engine
lespauljames
England - South West, United Kingdom
Joined: January 06, 2007
KitMaker: 3,661 posts
AeroScale: 369 posts
Joined: January 06, 2007
KitMaker: 3,661 posts
AeroScale: 369 posts
Posted: Wednesday, February 01, 2017 - 04:07 AM UTC
Bart beautiful engine. What metallics did you use ?
Xirrcom
Gdańsk, Poland
Joined: February 18, 2016
KitMaker: 92 posts
AeroScale: 90 posts
Joined: February 18, 2016
KitMaker: 92 posts
AeroScale: 90 posts
Posted: Wednesday, February 01, 2017 - 04:18 AM UTC
Quoted Text
Bart beautiful engine. What metallics did you use ?
Hi James, mainly Alclad, details done with Xtreme Metal plus some drybrushed pigments. Interestingly Alclad's Black Base was perfect for the overall black
thegirl
Alberta, Canada
Joined: January 19, 2008
KitMaker: 6,743 posts
AeroScale: 6,151 posts
Joined: January 19, 2008
KitMaker: 6,743 posts
AeroScale: 6,151 posts
Posted: Wednesday, February 01, 2017 - 04:49 AM UTC
Will follow along on this build . It will be interesting to see how this compares with Tamiya's kit . Nice start on the merlin so far . Do you know what scheme she will wear ?
Terri .
Terri .
berndm
Niedersachsen, Germany
Joined: March 26, 2014
KitMaker: 844 posts
AeroScale: 630 posts
Joined: March 26, 2014
KitMaker: 844 posts
AeroScale: 630 posts
Posted: Wednesday, February 01, 2017 - 09:52 AM UTC
Thats indeed a very nice engine. Great start.
Xirrcom
Gdańsk, Poland
Joined: February 18, 2016
KitMaker: 92 posts
AeroScale: 90 posts
Joined: February 18, 2016
KitMaker: 92 posts
AeroScale: 90 posts
Posted: Friday, February 03, 2017 - 03:30 AM UTC
Quoted Text
Will follow along on this build . It will be interesting to see how this compares with Tamiya's kit . Nice start on the merlin so far . Do you know what scheme she will wear ?
Terri .
Thanks Terri! Probably I'll go for Miss Marylin II
but not decided yet
Xirrcom
Gdańsk, Poland
Joined: February 18, 2016
KitMaker: 92 posts
AeroScale: 90 posts
Joined: February 18, 2016
KitMaker: 92 posts
AeroScale: 90 posts
Posted: Friday, February 03, 2017 - 03:31 AM UTC
Thanks Bernd!
Xirrcom
Gdańsk, Poland
Joined: February 18, 2016
KitMaker: 92 posts
AeroScale: 90 posts
Joined: February 18, 2016
KitMaker: 92 posts
AeroScale: 90 posts
Posted: Friday, February 03, 2017 - 03:37 AM UTC
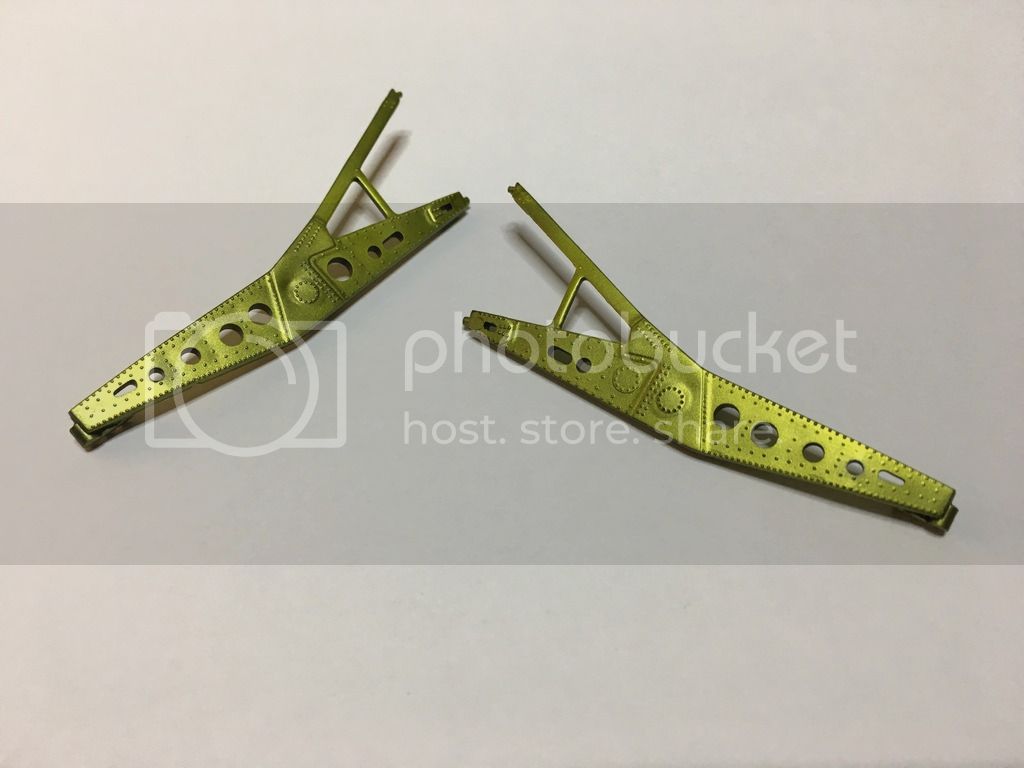
Hi guys, a small update.
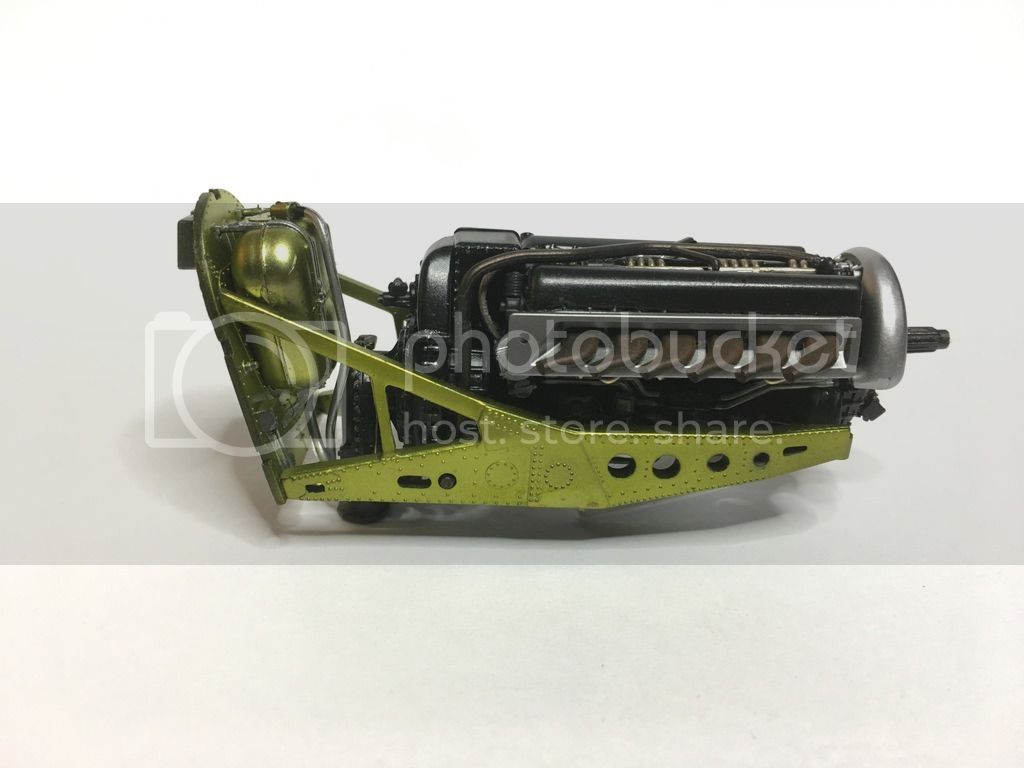
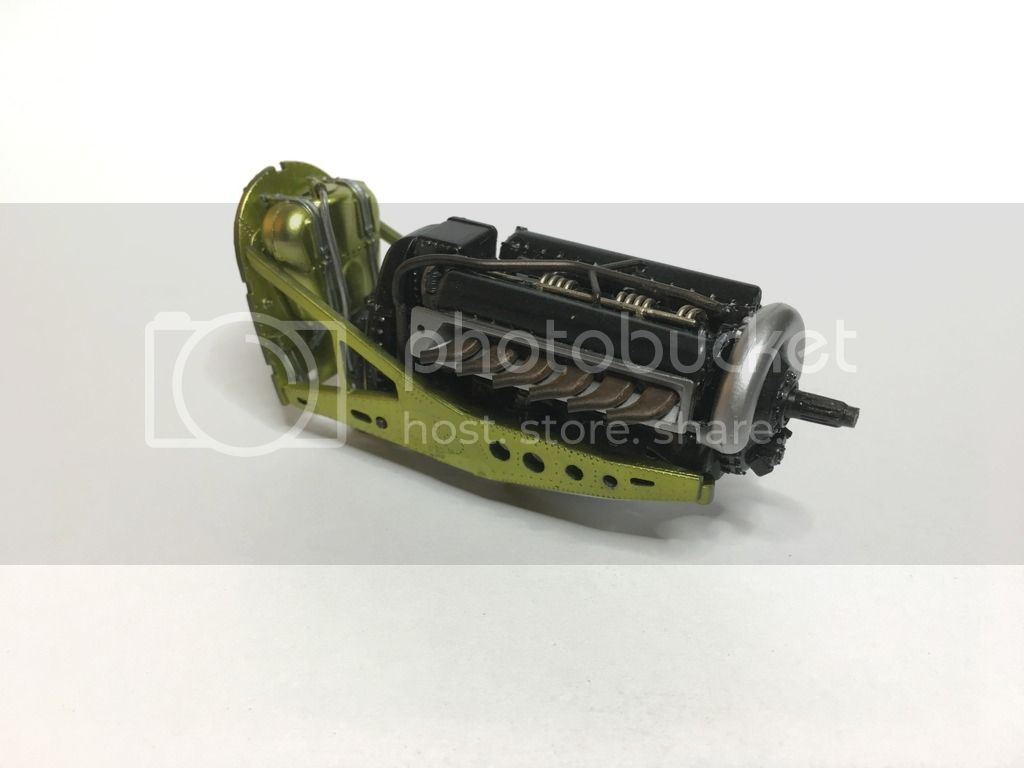
Spent few hours to find a good way to paint Zinc Chromate primer. Generally I didn't like the look of standard paints and was searching for my own way I know it's like a quest for the Holy Grail... but anyway here's the result which looks quite appealing to me:

Xirrcom
Gdańsk, Poland
Joined: February 18, 2016
KitMaker: 92 posts
AeroScale: 90 posts
Joined: February 18, 2016
KitMaker: 92 posts
AeroScale: 90 posts
Posted: Friday, February 03, 2017 - 03:46 AM UTC
Following that I did finish the engine mounting and started with next part which was the tank.
Antilles
Nordrhein-Westfalen, Germany
Joined: March 22, 2015
KitMaker: 671 posts
AeroScale: 614 posts
Joined: March 22, 2015
KitMaker: 671 posts
AeroScale: 614 posts
Posted: Friday, February 03, 2017 - 04:06 AM UTC
Very nice start Bart,
I follow this thread, it is very promising! The metal colors look great!
Oliver
I follow this thread, it is very promising! The metal colors look great!
Oliver
Xirrcom
Gdańsk, Poland
Joined: February 18, 2016
KitMaker: 92 posts
AeroScale: 90 posts
Joined: February 18, 2016
KitMaker: 92 posts
AeroScale: 90 posts
Posted: Wednesday, February 08, 2017 - 01:23 AM UTC
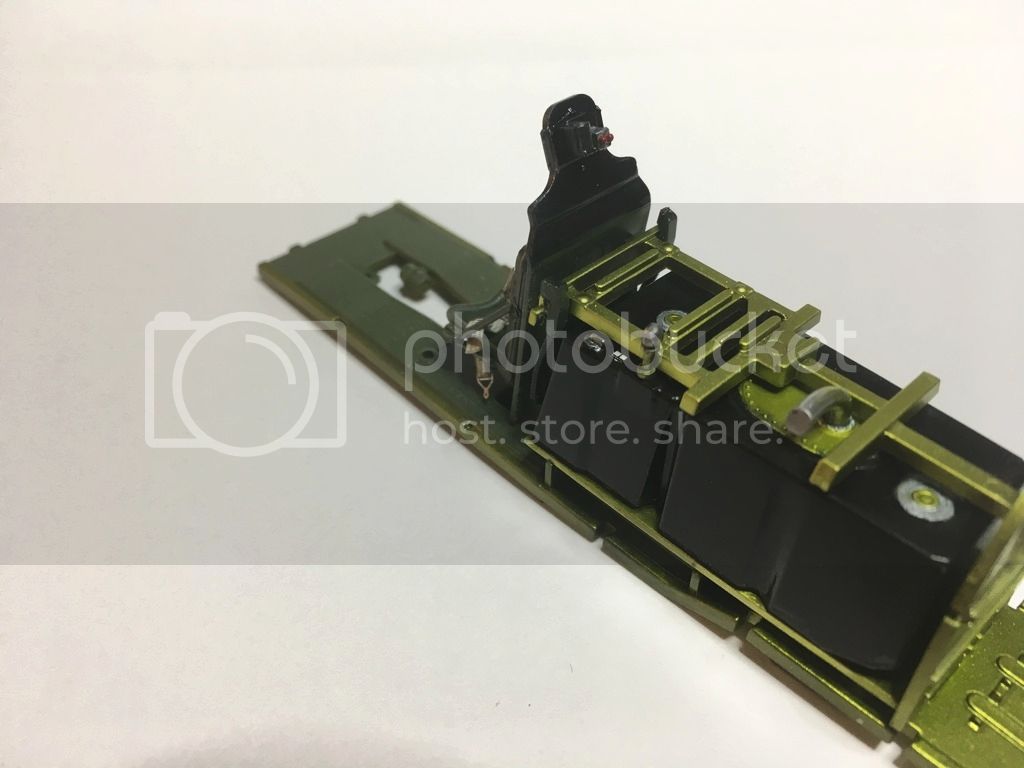
Hi,
Added framing for radio pack and battery:
Xirrcom
Gdańsk, Poland
Joined: February 18, 2016
KitMaker: 92 posts
AeroScale: 90 posts
Joined: February 18, 2016
KitMaker: 92 posts
AeroScale: 90 posts
Posted: Wednesday, February 08, 2017 - 01:24 AM UTC
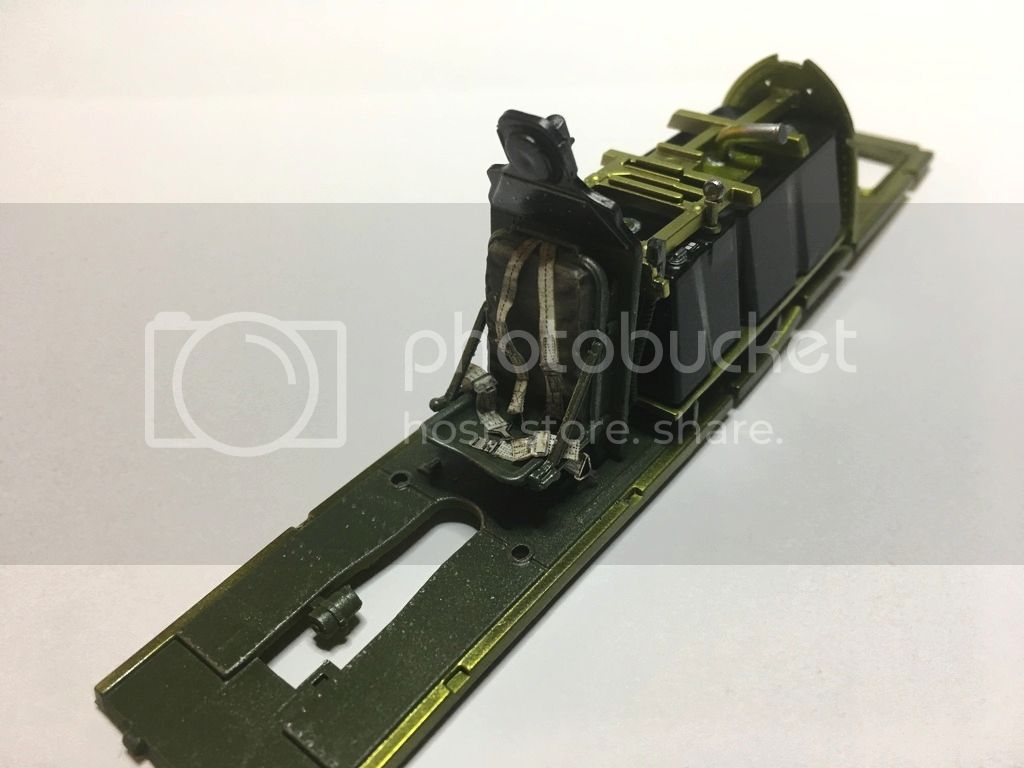
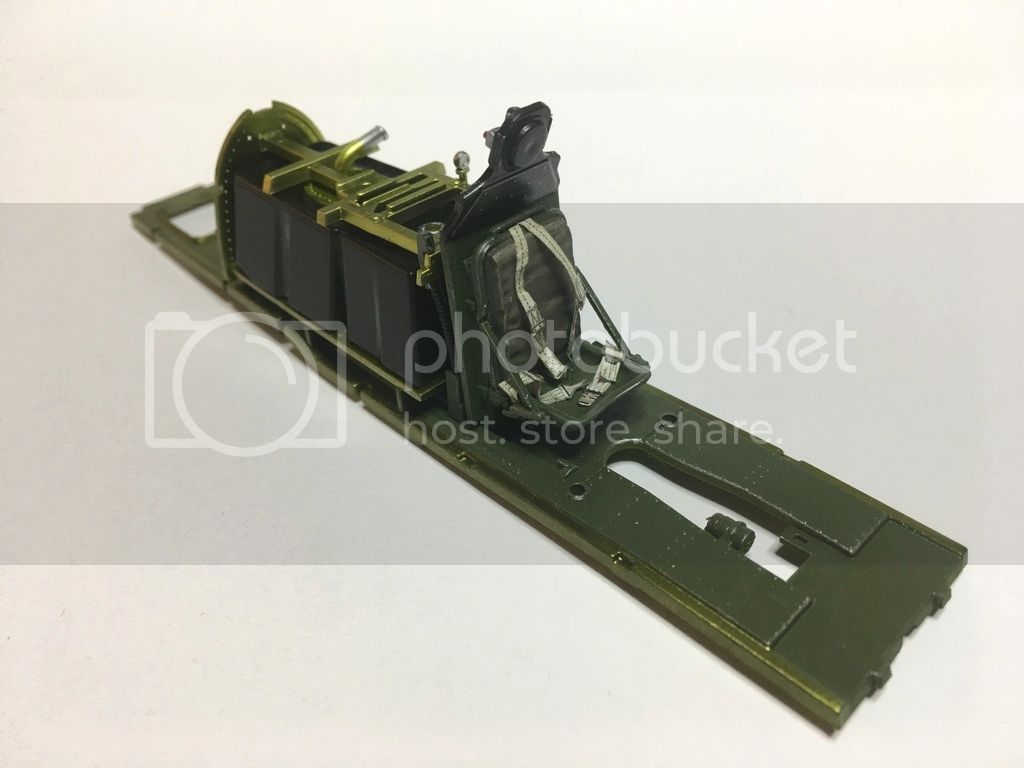
Seating done with seat-belts:
Xirrcom
Gdańsk, Poland
Joined: February 18, 2016
KitMaker: 92 posts
AeroScale: 90 posts
Joined: February 18, 2016
KitMaker: 92 posts
AeroScale: 90 posts
Posted: Wednesday, February 08, 2017 - 01:28 AM UTC
Started with the 'office furnishing' - that's for starters:
thegirl
Alberta, Canada
Joined: January 19, 2008
KitMaker: 6,743 posts
AeroScale: 6,151 posts
Joined: January 19, 2008
KitMaker: 6,743 posts
AeroScale: 6,151 posts
Posted: Wednesday, February 08, 2017 - 04:52 AM UTC
Interesting choice of colour of the inter green , it's different . Lovely job on the painting . Looking quit sharp so far . Are you using any aftermarket for this build or is this out of box ?
Terri
Terri
SpeedyJ
Bangkok, Thailand / ไทย
Joined: September 17, 2013
KitMaker: 1,617 posts
AeroScale: 212 posts
Joined: September 17, 2013
KitMaker: 1,617 posts
AeroScale: 212 posts
Posted: Wednesday, February 08, 2017 - 07:17 AM UTC
Looks very cool Bart. Going to follow this build for sure.
Regards,
Robert Jan
Regards,
Robert Jan
lespauljames
England - South West, United Kingdom
Joined: January 06, 2007
KitMaker: 3,661 posts
AeroScale: 369 posts
Joined: January 06, 2007
KitMaker: 3,661 posts
AeroScale: 369 posts
Posted: Thursday, February 09, 2017 - 01:18 AM UTC
Bart, faultless construction and paint work thus far. That instrument panel is fantastic.
Scrodes
Ontario, Canada
Joined: July 22, 2012
KitMaker: 771 posts
AeroScale: 763 posts
Joined: July 22, 2012
KitMaker: 771 posts
AeroScale: 763 posts
Posted: Thursday, February 09, 2017 - 06:44 AM UTC
Quoted Text
Hi guys, a small update.
Spent few hours to find a good way to paint Zinc Chromate primer. Generally I didn't like the look of standard paints and was searching for my own way I know it's like a quest for the Holy Grail... but anyway here's the result which looks quite appealing to me:
Care to enlighten us?
Xirrcom
Gdańsk, Poland
Joined: February 18, 2016
KitMaker: 92 posts
AeroScale: 90 posts
Joined: February 18, 2016
KitMaker: 92 posts
AeroScale: 90 posts
Posted: Thursday, February 09, 2017 - 02:12 PM UTC
Quoted Text
Interesting choice of colour of the inter green , it's different . Lovely job on the painting . Looking quit sharp so far . Are you using any aftermarket for this build or is this out of box ?
Terri
Thanks Terri, Robert Jan and James! Generally I wanted to make this one quite quick build as OOB, so didn't buy anything additional. But! I had some spare elements from previous builds, so I used seat belts (by HGW) - definitely what kit offered needed the upgrade, and placards (by Eduard) which gave the detailing.
Bart
Xirrcom
Gdańsk, Poland
Joined: February 18, 2016
KitMaker: 92 posts
AeroScale: 90 posts
Joined: February 18, 2016
KitMaker: 92 posts
AeroScale: 90 posts
Posted: Thursday, February 09, 2017 - 04:56 PM UTC
Quoted Text
Care to enlighten us?
Hello Matt, sure I can share my thoughts on this. First of all I wanted to keep the general look of aluminium structure with all its details and shine covered with untinted, raw zinc chromate. Secondly my idea was trying to follow the manufacturing process to see how will it affect the look of the model (treating the whole process more like small study). Besides that I generally assumed a slight drift towards licencia artistica than strictly keeping to 'ready-made' colors.
As Zinc Chromate does not refer to a paint color, but to a protective coating, (the precise color of it was not as important as the chemical composition) its natural tone is a bright greenish-yellow coming from crystalline salts.
Raw Zinc Chromate would also seem as semi-translucent not opaque like ready-made paints, and additionally aircraft manufacturing instructions often referred to just one coat of primer, thus the underlying surface would have distinct effect on the final look - raw untinted Zinc Chromate applied to aluminium would look like lime or apple green. On top of that my thought was that bright interior coating added to aluminium surfaces underneath caused excessive glare and eyestrain for the crews therefore a directive issued by the USAAF during the war specifically prohibiting the use of plain Zinc Chromate in occupied areas (not ot mention its toxic characteristics).
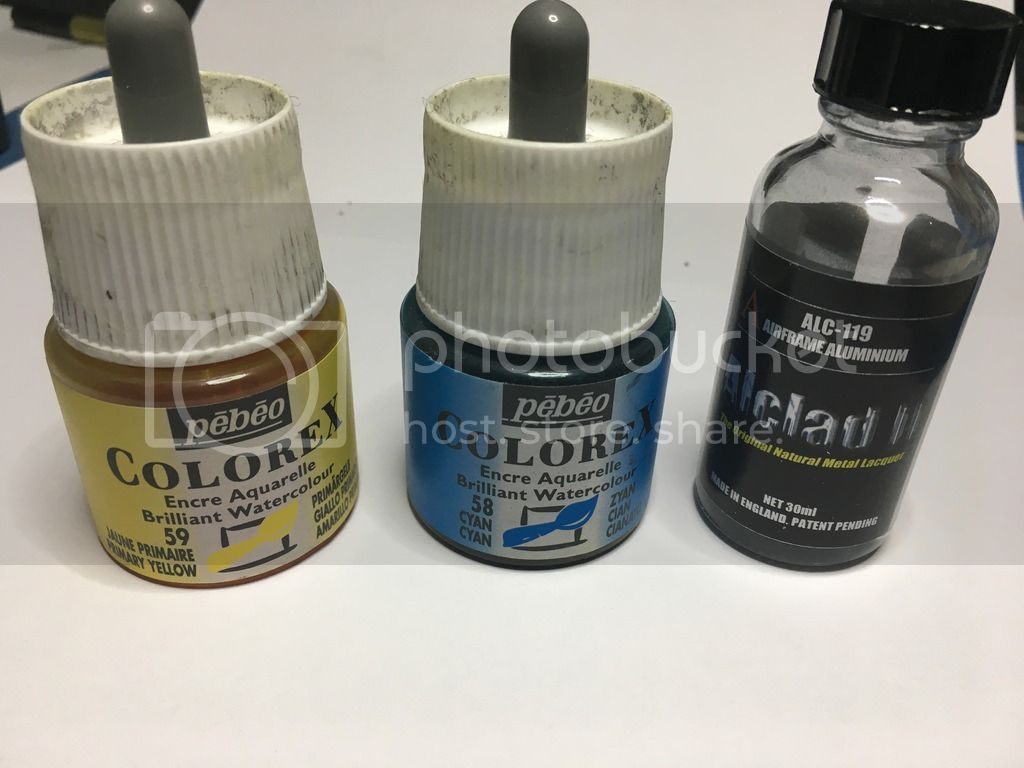
Keeping all that in mind I started with shiny black Base (Alclad) and followed with Aluminium Airframe (Alclad). Then using undiluted water-based inks prepared a heavy filter. Going with yellow and cyan gives the opportunity to balance in your own green shade. Application is quite straightforward with an airbrush. One tip tho - undiluted inks force very thin and delicate airbrushing as each layer shifts the color significantly from yellow to green - but on the other hand it gives you also the possibility to control the final color to your liking.
What is still left to be done what I'm considering is to cover it with semi-matte or Klear Kote Light Sheen to slightly reduce the reflectivity.
cheers
Bart
Products used:
Joel_W
Associate Editor
New York, United States
Joined: December 04, 2010
KitMaker: 11,666 posts
AeroScale: 7,410 posts
Joined: December 04, 2010
KitMaker: 11,666 posts
AeroScale: 7,410 posts
Posted: Friday, February 10, 2017 - 10:35 PM UTC
Bart,
A excellent start to the ZM P-51D. I really like the glossy black that you applied to the engine and gear housing. The Alcad Glossy Black is an enamel based paint rather then a true primer. I'm just not a big fan of enamel paints these days just for the drying time aspect. Some times it dried quickly for me, other times it took days and was still a little tacky. Never did figure that issue out as back in the 70s all we used was enamel based paints and can't honestly remembering having that issue.
I'm really interested in your interpretation of Zinc Chromate, and in this case GZC. You've certainly done your homework as ZC is a clear chemical coating that has a hue towards a shiny Greenish yellow apple color to it once dried. GZC usually is the end result of it being applied over Aluminum, and is somewhat translucent. Every aircraft manufacture usually added a dark/black enamel paint pigment and some kind of Aluminum paste to it as it degraded from UV light issues. The Black is what actually caused it to look Greener and less translucent. I've seen what seems like hundreds of old color photographs, and no two seem to show the same hue. YZC is the same coating with different enamel color pigments.
I do like your interpretation as it stands out from the usual greens we have been using for years. the variation in color tone of GZC and what I'm assuming is Interior Green really drives home the tonal differences and types of coatings each are. Very well done.
Joel