_GOTOBOTTOM
Pre-Flight Check
Constructive critique of your finished or in-progress photos.
My first plane... hehehe
jrnelson
_VISITCOMMUNITY
Iowa, United States
Joined: May 23, 2002
KitMaker: 719 posts
AeroScale: 0 posts
Posted: Sunday, February 22, 2004 - 10:07 AM UTC
Hi Guys-

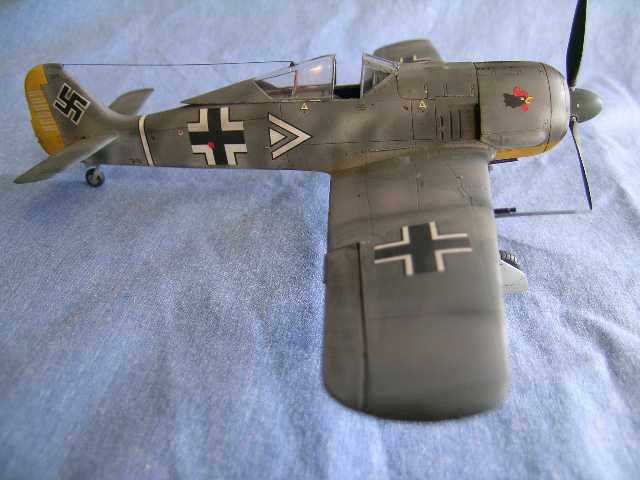
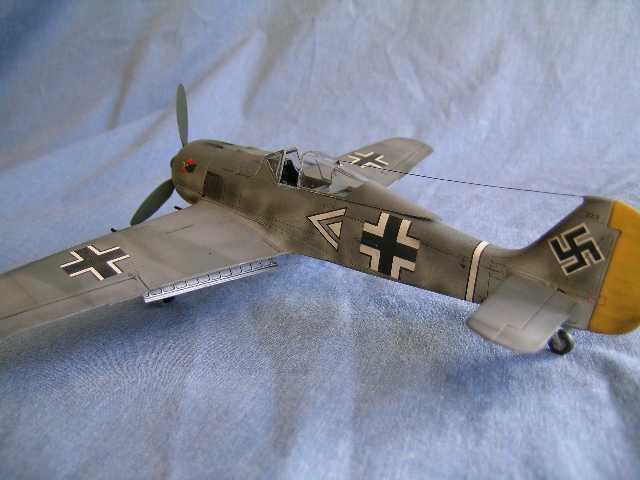
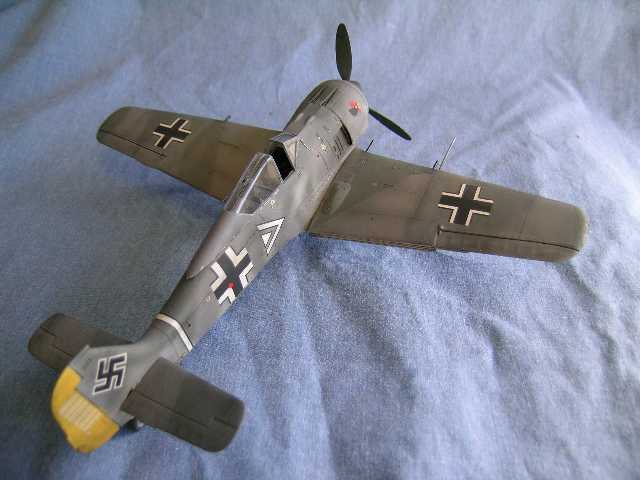
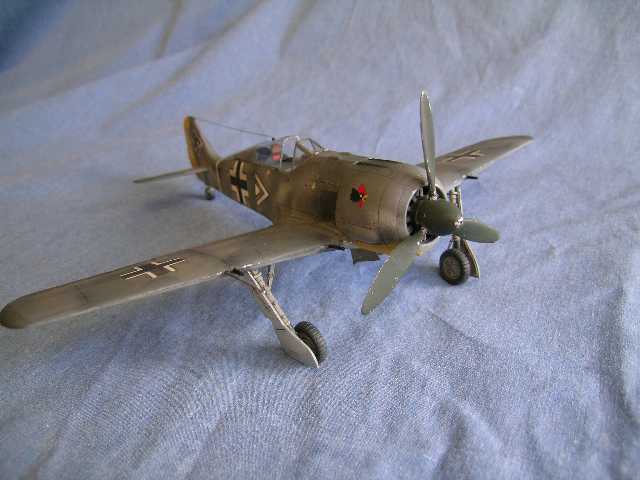
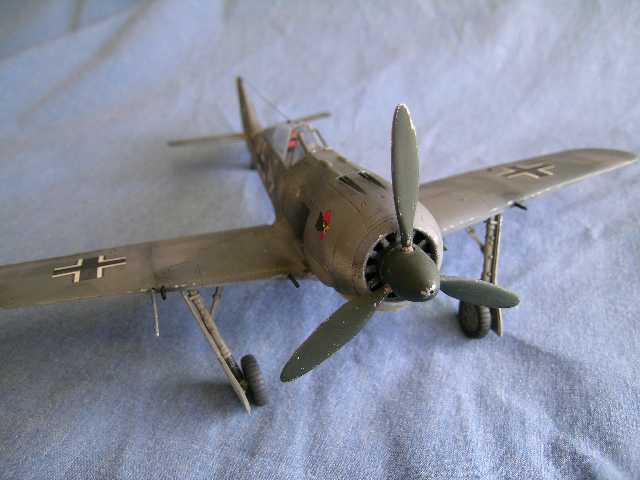
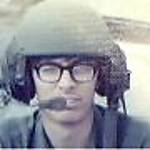
This is Tamiya's 1/48th FW-190 A3 kit. As most of you know, I build armor normally, so this was a fun little change of pace for me.

I had canopy issues... and man planes have alot of decals.... lol, but other than that - it went together quite nicely. I think I am done, except for some minor pastel dusting.....

Please lemme know if I missed anything.
Thanks-
Jeff


Teacher
_VISITCOMMUNITY
England - North West, United Kingdom
Joined: April 05, 2003
KitMaker: 4,924 posts
AeroScale: 0 posts
Posted: Sunday, February 22, 2004 - 10:34 AM UTC
Looks great! Wouldn't the antennae wire be slack though? Since the canopy is open?

Vinnie
MrRoo
_VISITCOMMUNITY
Queensland, Australia
Joined: October 07, 2002
KitMaker: 3,856 posts
AeroScale: 0 posts
Posted: Sunday, February 22, 2004 - 10:49 AM UTC
Looks good jr especially for a first effort! I agree though that the antennae wire would be slack due to the canopy being open. Also is the undercarriage meant to be on an angle like that? It looks as if it is going to fall over:-H

It was real nice of you to do this plane for me jr! How do I know it's my plane? Easy! it has a ROO-ster on the cowling...lol #:-)
jrnelson
_VISITCOMMUNITY
Iowa, United States
Joined: May 23, 2002
KitMaker: 719 posts
AeroScale: 0 posts
Posted: Sunday, February 22, 2004 - 10:54 AM UTC
Hi Guys-

Thanks for the comments :-)

The antenna wire on the A3 190 was run over a pully on the top of the canopy. It was under tension with the canopy open as well as closed. The wire runs through the top of the canopy down behind the head rest for the seat, into a slot behind the pilot. When the canopy was opened and closed, the pully allowed the wire to roll along and keep it's tension.

lol - of course, I don't know this for sure..... I had the same question about that wire while I was building the thing.... lol The aircraft guys gave me that explanation.... hahaha

Later-
Jeff
Yellow_Snow
_VISITCOMMUNITY
Alabama, United States
Joined: May 23, 2002
KitMaker: 39 posts
AeroScale: 0 posts
Posted: Sunday, February 22, 2004 - 11:08 AM UTC
I believe the position of the radio antennae is correct, as JR pointed out in his post. The landing gear legs are also correct, on the 190 they splayed forward and inward. Looks kinda odd, but they were very strong. Looks really nice for a first attempt (I won't be showing my first plane model anytime soon!). The dropped flaps, are those PE or did the kit come that way?
Pnzr-Cmdr
_VISITCOMMUNITY
Pennsylvania, United States
Joined: July 16, 2003
KitMaker: 483 posts
AeroScale: 0 posts
Posted: Sunday, February 22, 2004 - 11:20 AM UTC
jeff this looks great for you first plane.. i think once you do the pastel dutsin you will be set.. i hope we didn't lose you.
WeWillHold
_VISITCOMMUNITY
Wisconsin, United States
Joined: April 17, 2002
KitMaker: 2,314 posts
AeroScale: 82 posts
Posted: Sunday, February 22, 2004 - 12:13 PM UTC
Lord Wingster aka "Armor and PE god"

Very impressive 190. I especially like the wear shown on the prop and leading wing edges.

Thanks for the concise explanation on the antennae -- you are starting to scare me here as this is a move away from your traditional (and outstanding), armor efforts---this could potentially jeapordize your Armor PE god status, returning it to OBE (gasp hehe) .

Seriously this one looks great Jeff. What was the issue with canopy as it looks clear and sharp?

A real keeper here Jeff. Congrats.

Signed
"Worried about my armor buddie going over the the wingy side "
TankCarl
_VISITCOMMUNITY
Rhode Island, United States
Joined: May 10, 2002
KitMaker: 3,581 posts
AeroScale: 0 posts
Posted: Sunday, February 22, 2004 - 02:31 PM UTC
Verie nices JR, (++) (++) (++) (++) (++) (++) (++) (++) (++)

I would extend the wear on the leading edge of the prop blades farther towards the hub.
SS-74
_VISITCOMMUNITY
Vatican City
Joined: May 13, 2002
KitMaker: 3,271 posts
AeroScale: 0 posts
Posted: Sunday, February 22, 2004 - 02:38 PM UTC
Lord Nelson!

Finally! Man!

This is looking very good for a first attempt in the wonderful world of Planes. The panel lines are well defined, and the decals are well placed, and no silvering as far as I can tell.

Just wonder what you have used for the cannons on the wings? in the future you can use needles to replace the kit barrels and save yourself the drill time if you haven't already done so.

A very good piece of work. Now you need to do something modern. If you like decals, then modern plane is your thing.
warlock0322
_VISITCOMMUNITY
North Carolina, United States
Joined: January 13, 2003
KitMaker: 1,036 posts
AeroScale: 286 posts
Posted: Sunday, February 22, 2004 - 11:37 PM UTC
jr:

She looks great!! Only two things I can think of is:
1: A litle more exhaust stain by the cowling and wing roots.
2: the other is it looks lonely.. you need to do another plane to make it feel like it not alone among all that armor

Paul
flitzer
_VISITCOMMUNITY
England - North West, United Kingdom
Joined: November 13, 2003
KitMaker: 2,240 posts
AeroScale: 743 posts
Posted: Monday, February 23, 2004 - 02:55 AM UTC
My, my Jeff,
your wings have sprouted just fine. Welcome to the (H)-airy side.
Very good first effort....if only my first effort had been this good...
Nice mottling and the exhaust is great.
What next????
Have you got the bug now.....????
Cheers
Peter
jrnelson
_VISITCOMMUNITY
Iowa, United States
Joined: May 23, 2002
KitMaker: 719 posts
AeroScale: 0 posts
Posted: Monday, February 23, 2004 - 11:12 AM UTC
Thanks guys for all of the positve feedback :-) I appreciated it...

Yellow - the flaps are the eduard PE set for the plane.... I am a sucker for aftermarket goodies, so I had to use em :-)

Lord WeWillHold- I had some serious trouble with masking the canopy the first time. I used black magic masks the first time, and they just didn't stick - I had some bleed under. I was origonally gonna have the canopy closed, but the seam in the front - between the moving part and the fixed part was not tight - so I got some spray though on the inside as well..... lol What a fiasco :-) So I had to carve the darn thing off and start over on it. The second time I masked with tape and trimmed with an exacto - much better!!! I also painted it off the plane and masked the inside - seemed to work much better. You don't need to worry too much about me though - armor is still my love - the plane was fun... but.... I have the urge to do a Panther now... lol

Warlock- I agree, this poor 190 does look kinda lonely :-) I'll probably pick up the Tamiya ME-109 to keep this one company down the road... hehehe, but first I gotta knock out a couple of ships over on the warship side :-) To be honest... I am really looking foreward to that Konig kit - it just came in the mail today, along with the Toms etch set... I'm rearing to go on it.......... lol

Flitzer - hehehe, yea I'll admit it.. this plane was fun to do... and it definately won't be my last :-) I appreciate the kind words... take care :-)

Later-
Jeff
 _GOTOTOP