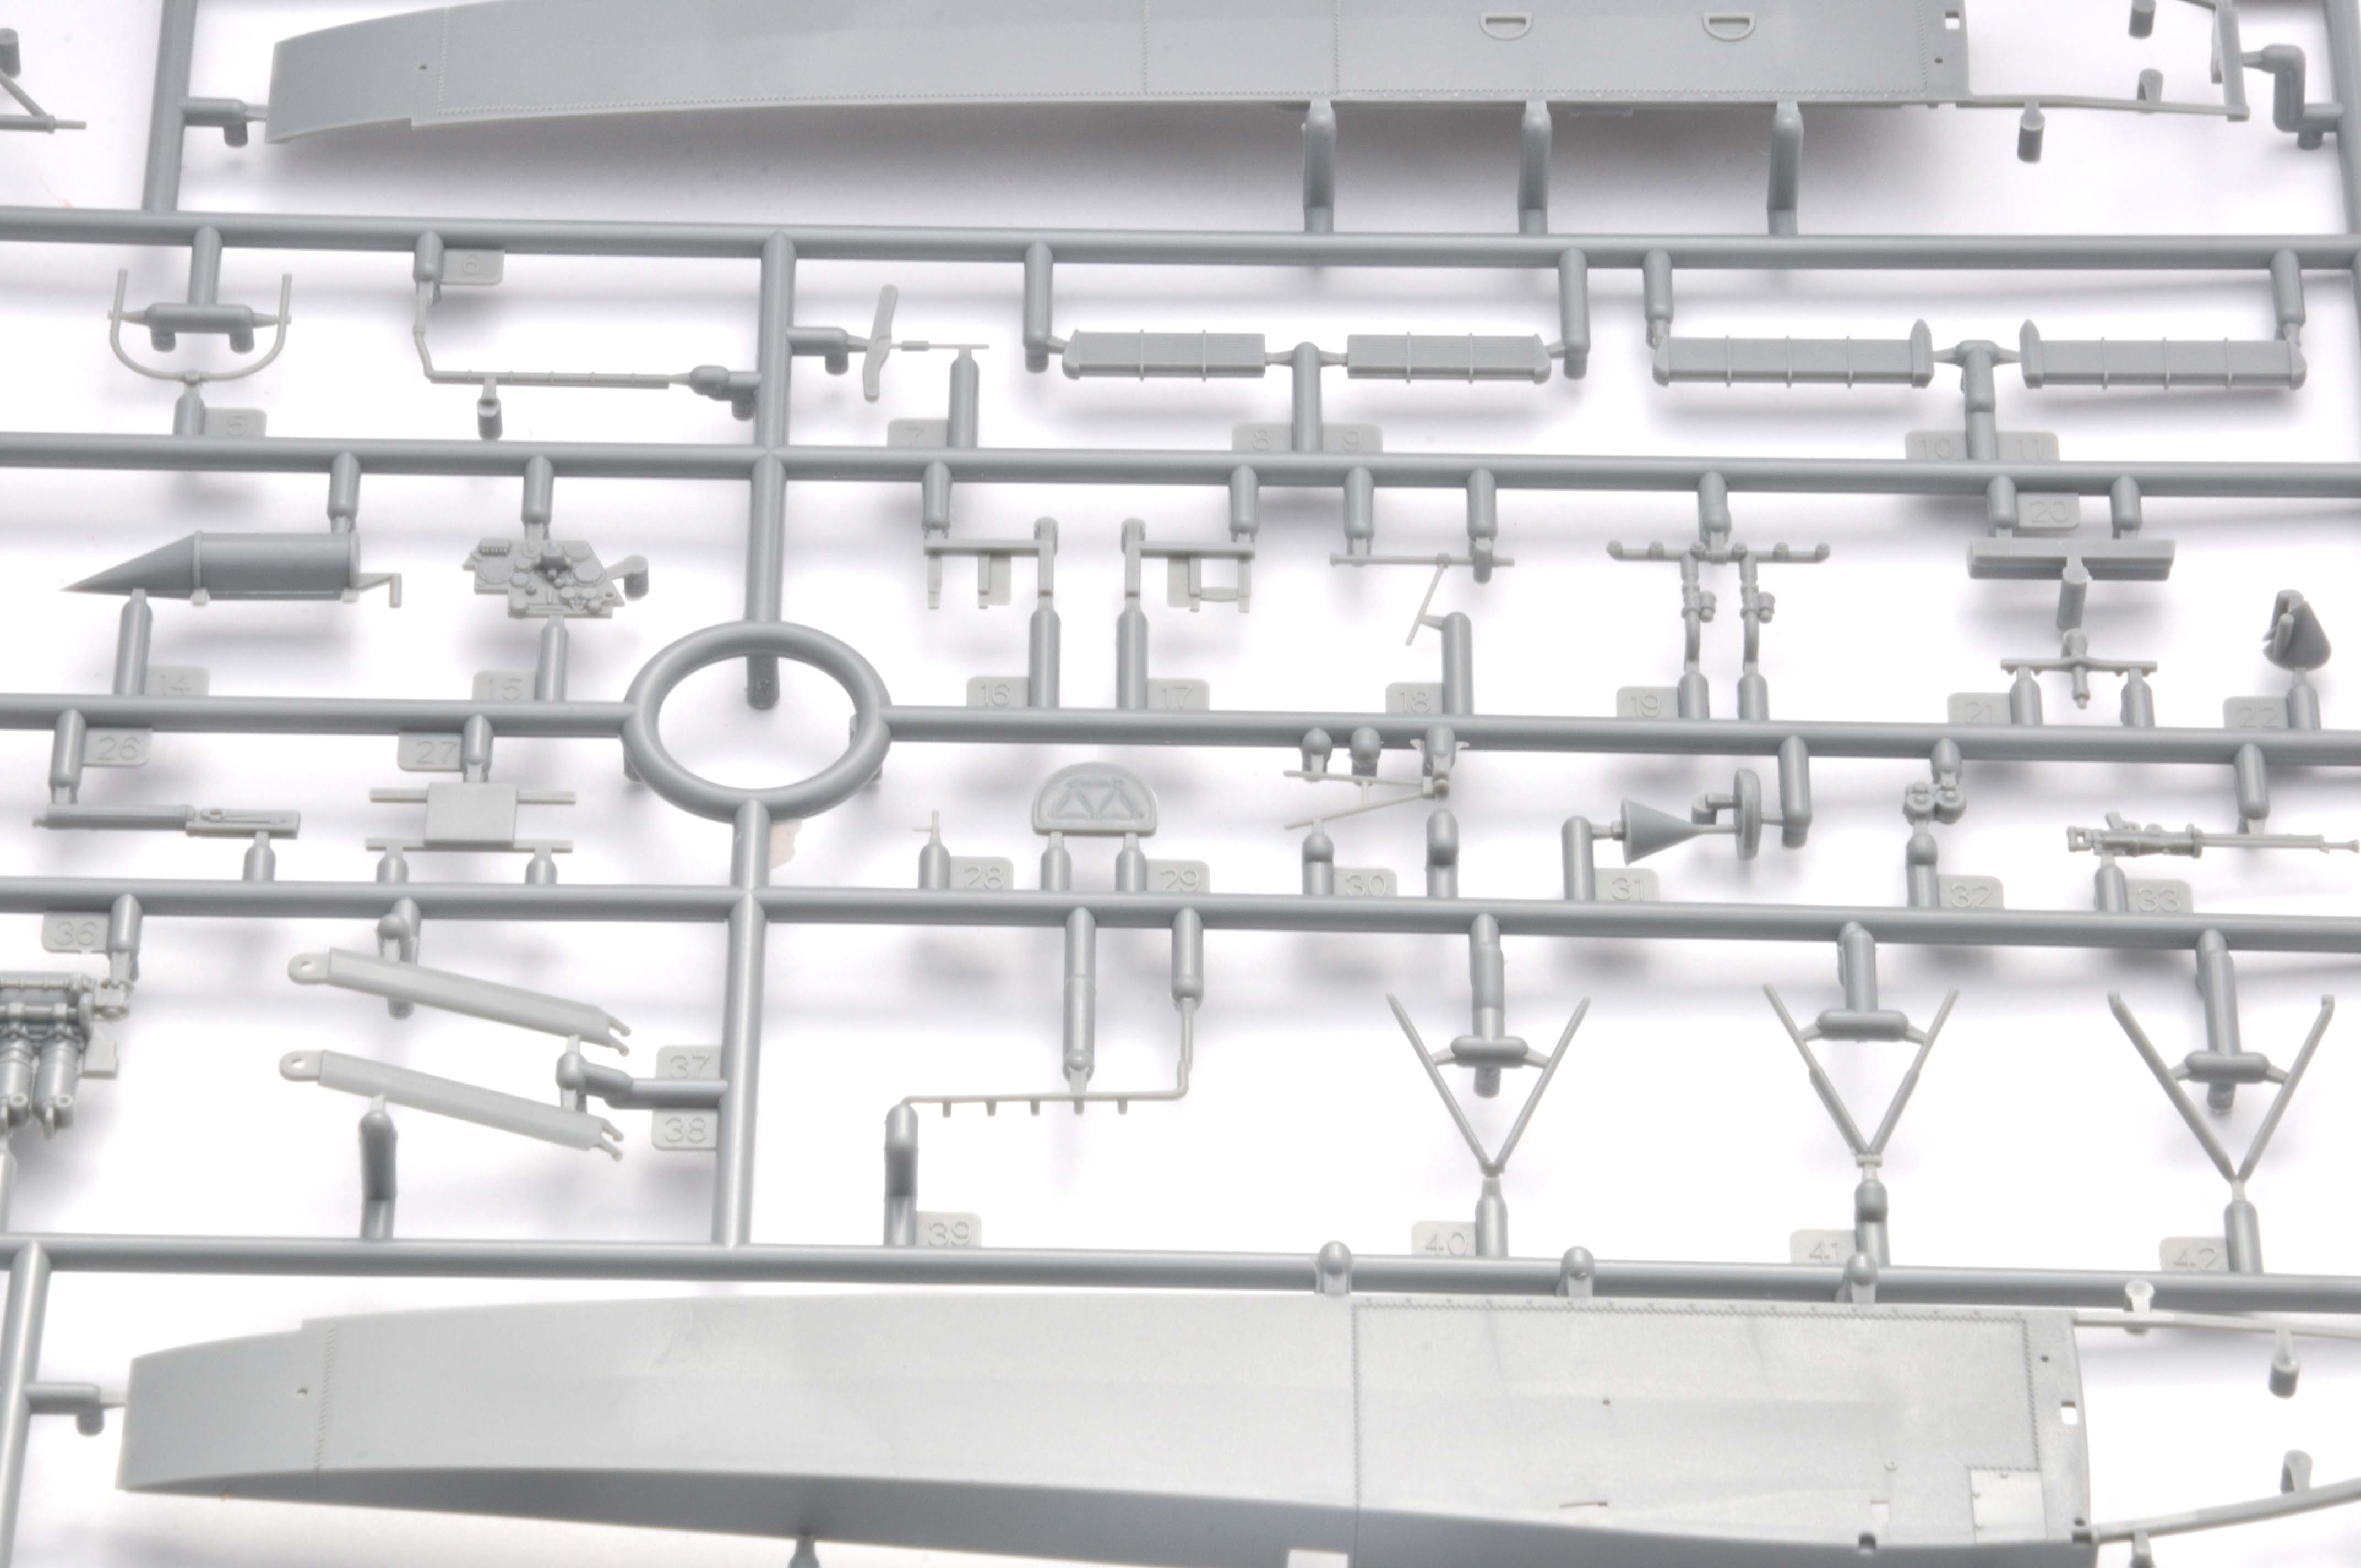
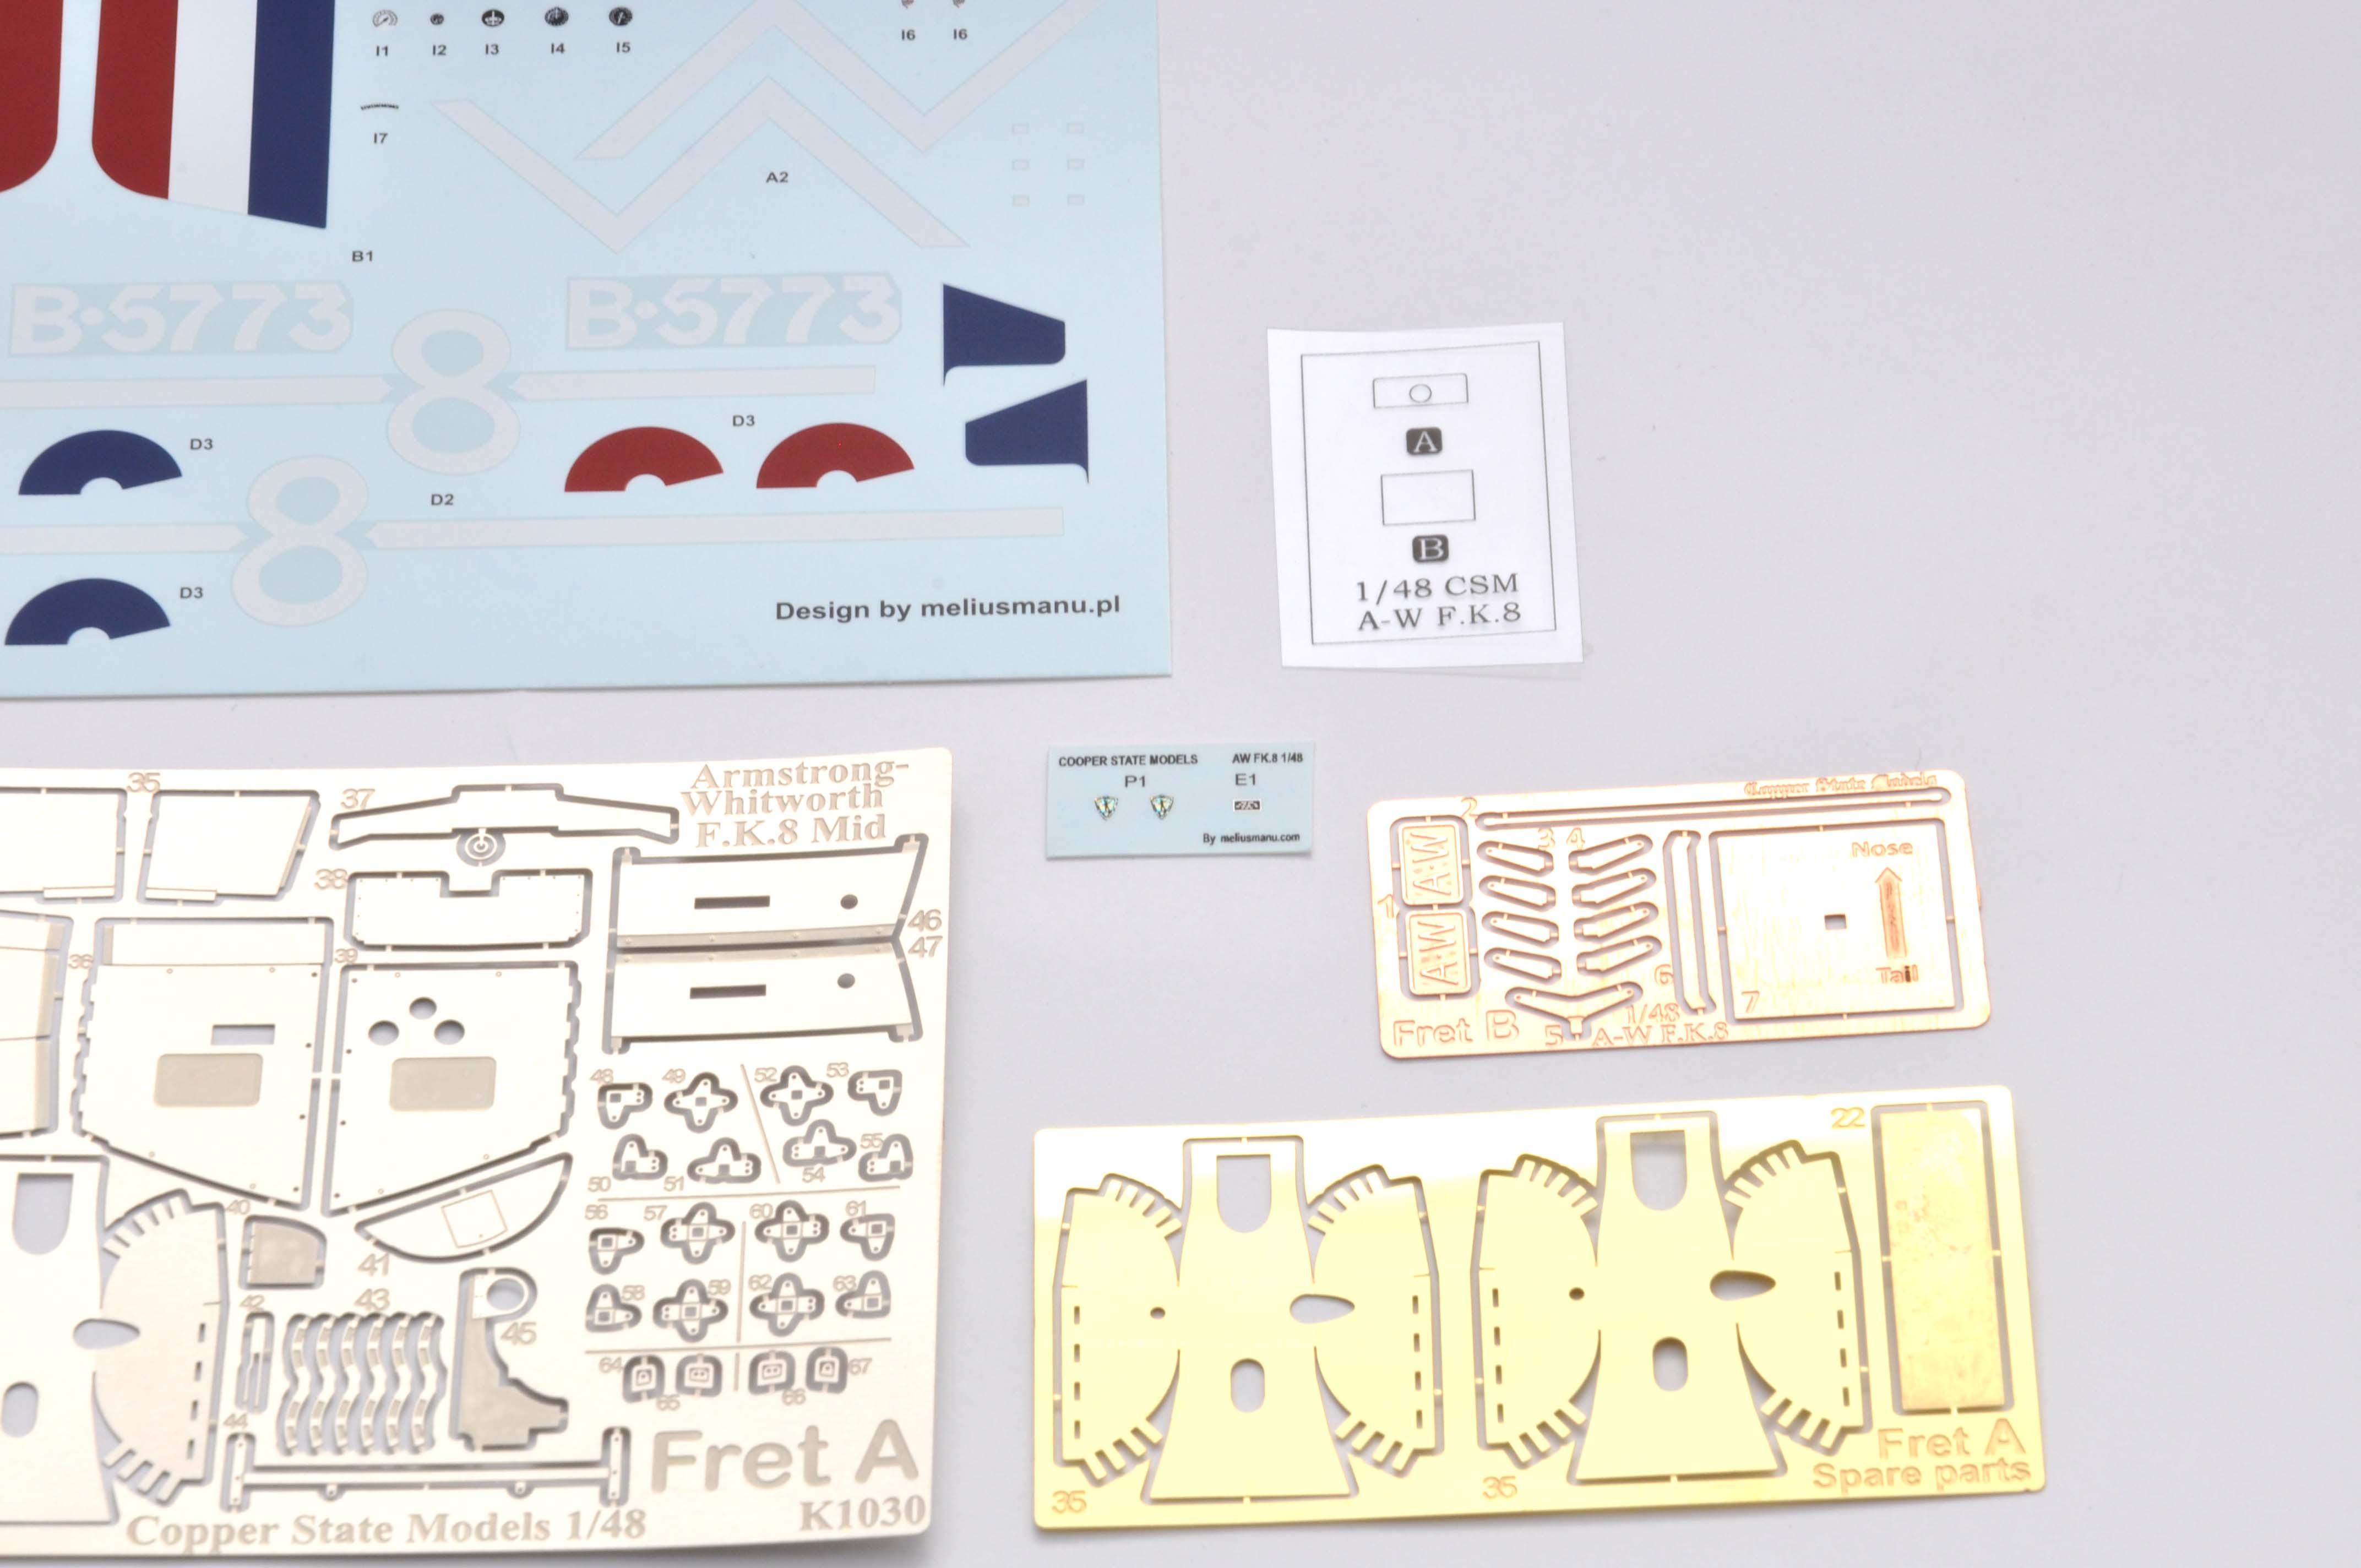
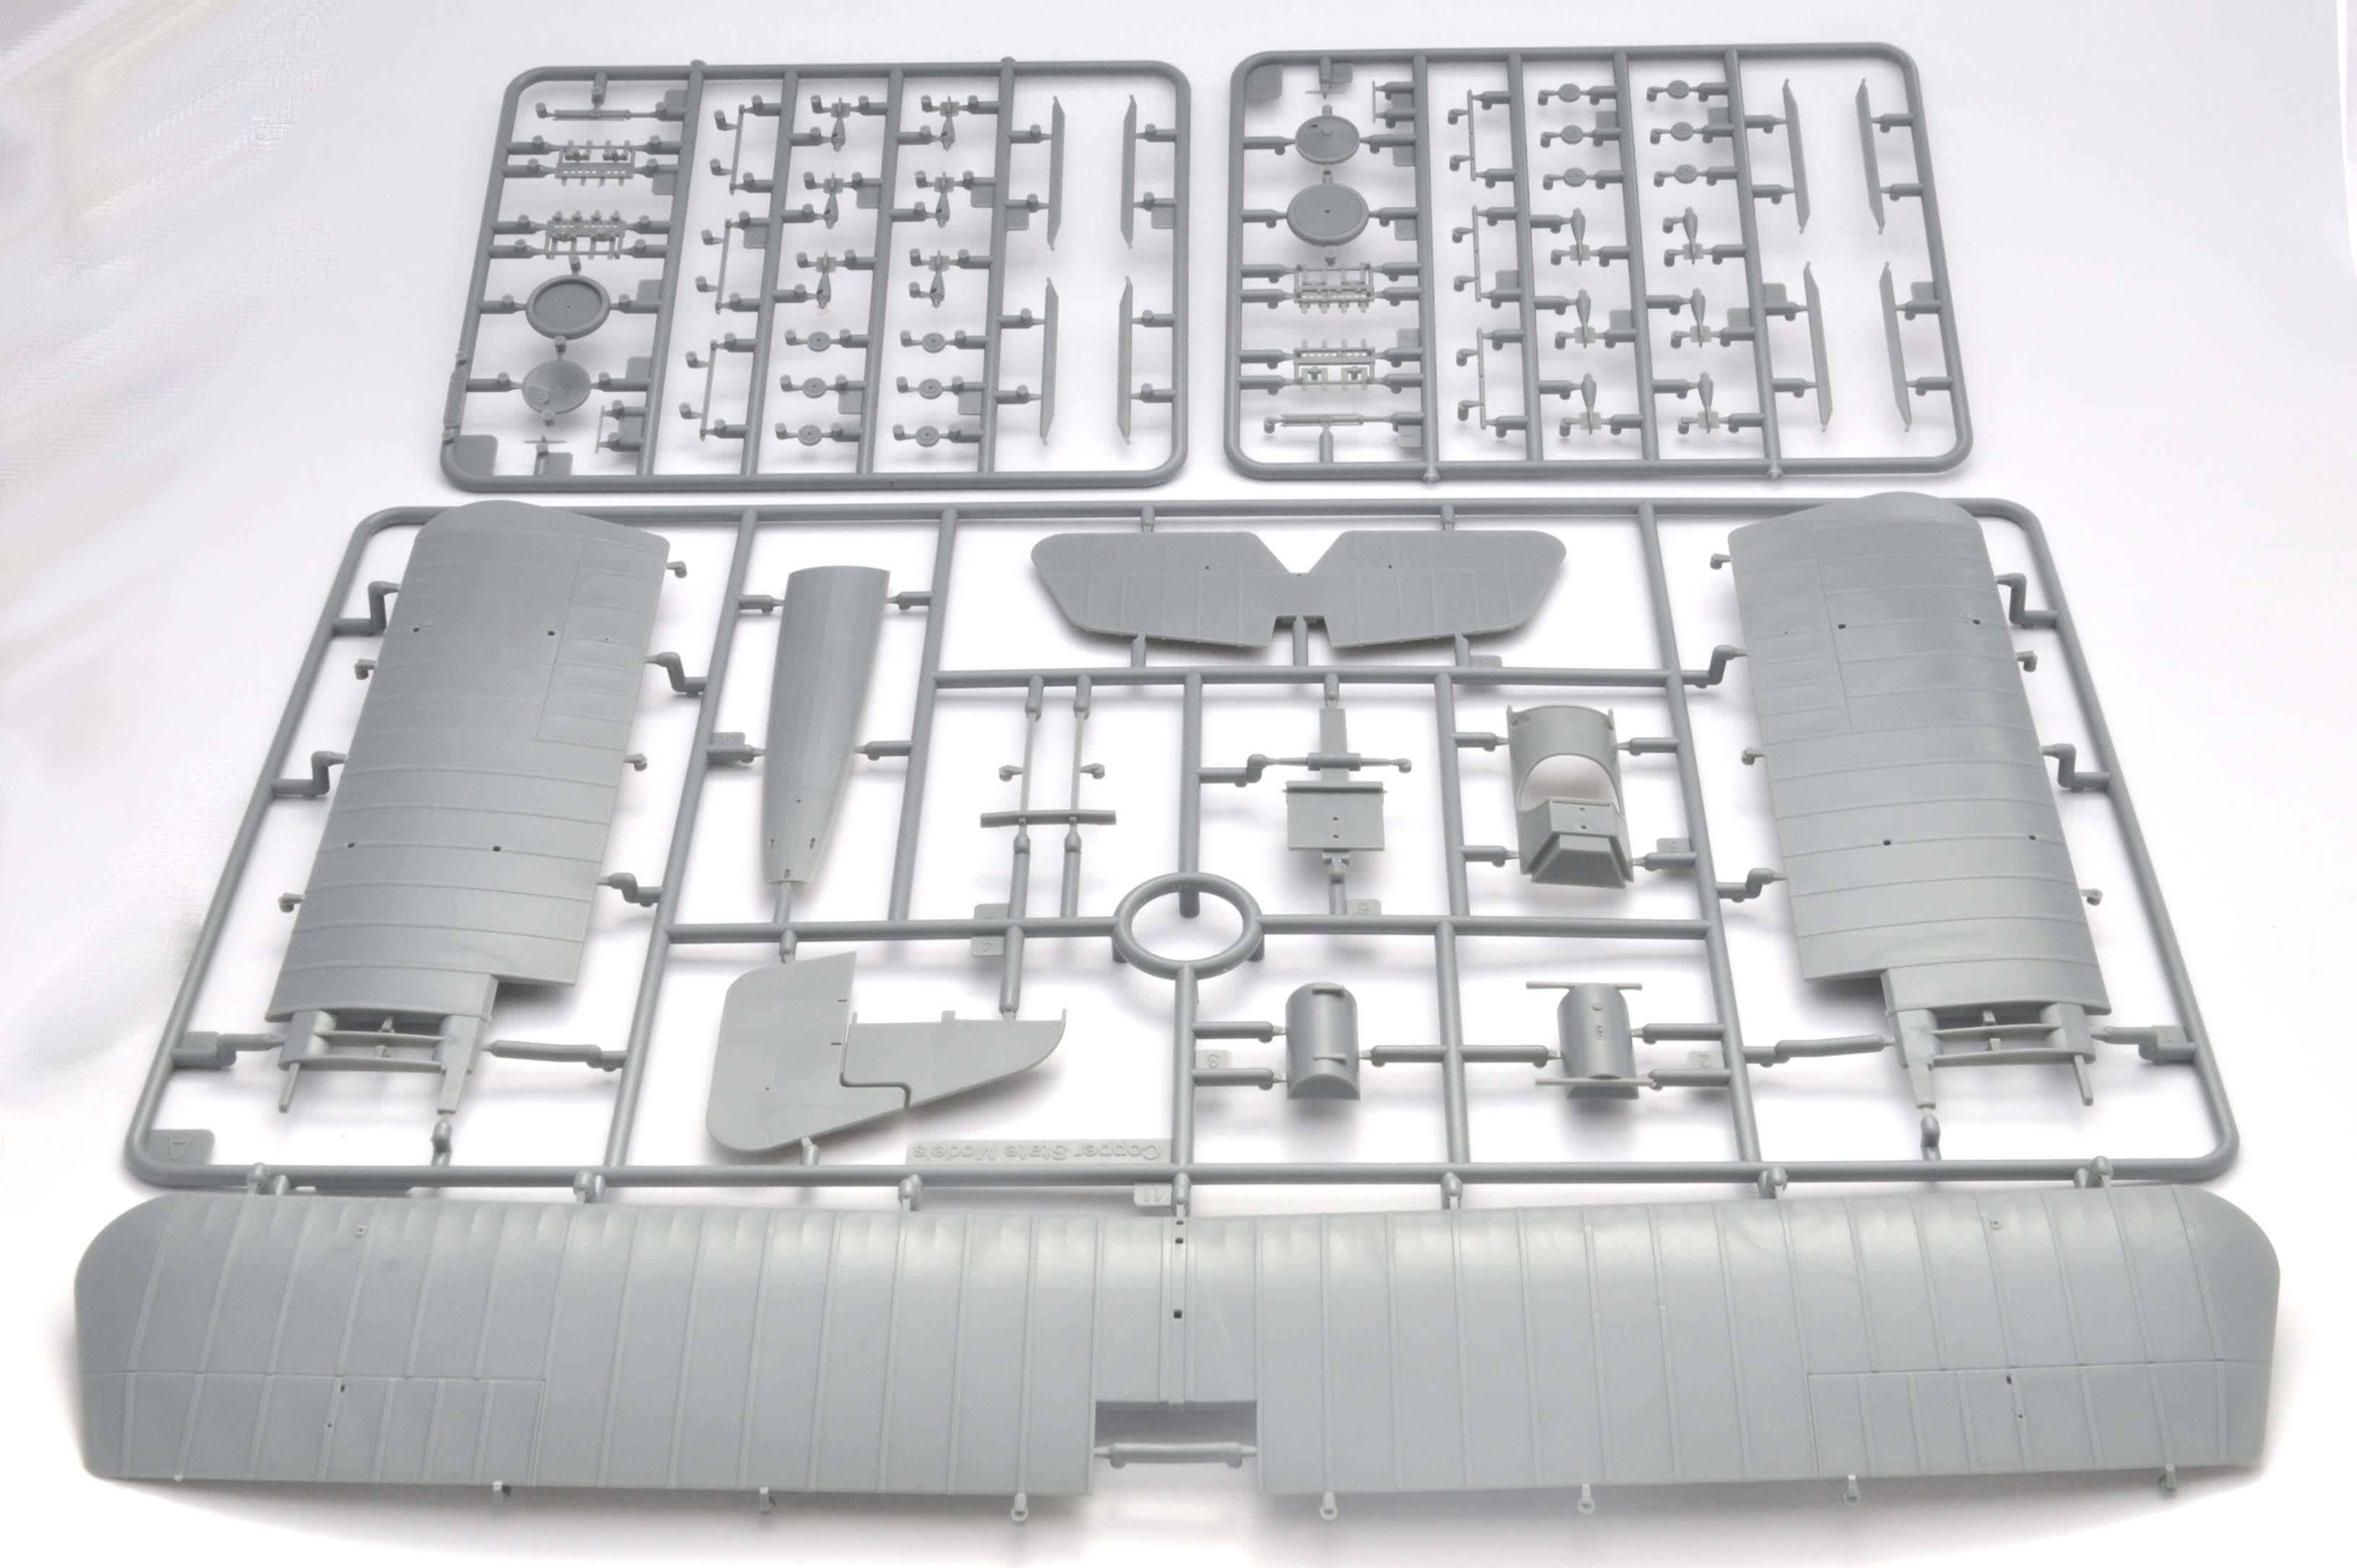
Armstrong Whitworth F.K. 8 MID - Copper State
Wojewodztwo Wielkopolskie, Poland
Joined: March 18, 2012
KitMaker: 135 posts
AeroScale: 135 posts
Posted: Wednesday, May 17, 2017 - 01:52 AM UTC
Wojewodztwo Wielkopolskie, Poland
Joined: March 18, 2012
KitMaker: 135 posts
AeroScale: 135 posts
Posted: Tuesday, June 27, 2017 - 01:51 PM UTC
SgtRam
 Editor-at-Large
#197
Ontario, Canada
Joined: March 06, 2011
KitMaker: 3,971 posts
AeroScale: 511 posts
Posted: Tuesday, June 27, 2017 - 04:10 PM UTC
Looking very good, looking forward to see more as it progresses.
Thanks
Merlin
Senior Editor #017
United Kingdom
Joined: June 11, 2003
KitMaker: 17,582 posts
AeroScale: 12,795 posts
Posted: Tuesday, June 27, 2017 - 06:17 PM UTC
Hi Filip
Fantastic work as usual!

I'm a little bit behind you on my build - time at the workbench has been at a premium here too. But the decks are clearing slowly but surely, so I hope to make some more progress soon.

All the best
Rowan
BEWARE OF THE FEW...
As I grow older, I regret to say that a detestable habit of thinking seems to be getting a hold of me. - H. Rider Haggard
Wojewodztwo Wielkopolskie, Poland
Joined: March 18, 2012
KitMaker: 135 posts
AeroScale: 135 posts
Posted: Monday, July 03, 2017 - 06:52 PM UTC
Wojewodztwo Wielkopolskie, Poland
Joined: March 18, 2012
KitMaker: 135 posts
AeroScale: 135 posts
Posted: Monday, July 03, 2017 - 06:56 PM UTC
Merlin
Senior Editor #017
United Kingdom
Joined: June 11, 2003
KitMaker: 17,582 posts
AeroScale: 12,795 posts
Posted: Tuesday, July 04, 2017 - 01:27 PM UTC
Hi again Filip
It's looking fantastic!
All the best
Rowan
BEWARE OF THE FEW...
As I grow older, I regret to say that a detestable habit of thinking seems to be getting a hold of me. - H. Rider Haggard
Wojewodztwo Wielkopolskie, Poland
Joined: March 18, 2012
KitMaker: 135 posts
AeroScale: 135 posts
Posted: Thursday, July 06, 2017 - 10:47 PM UTC
Many thanks Merlin!
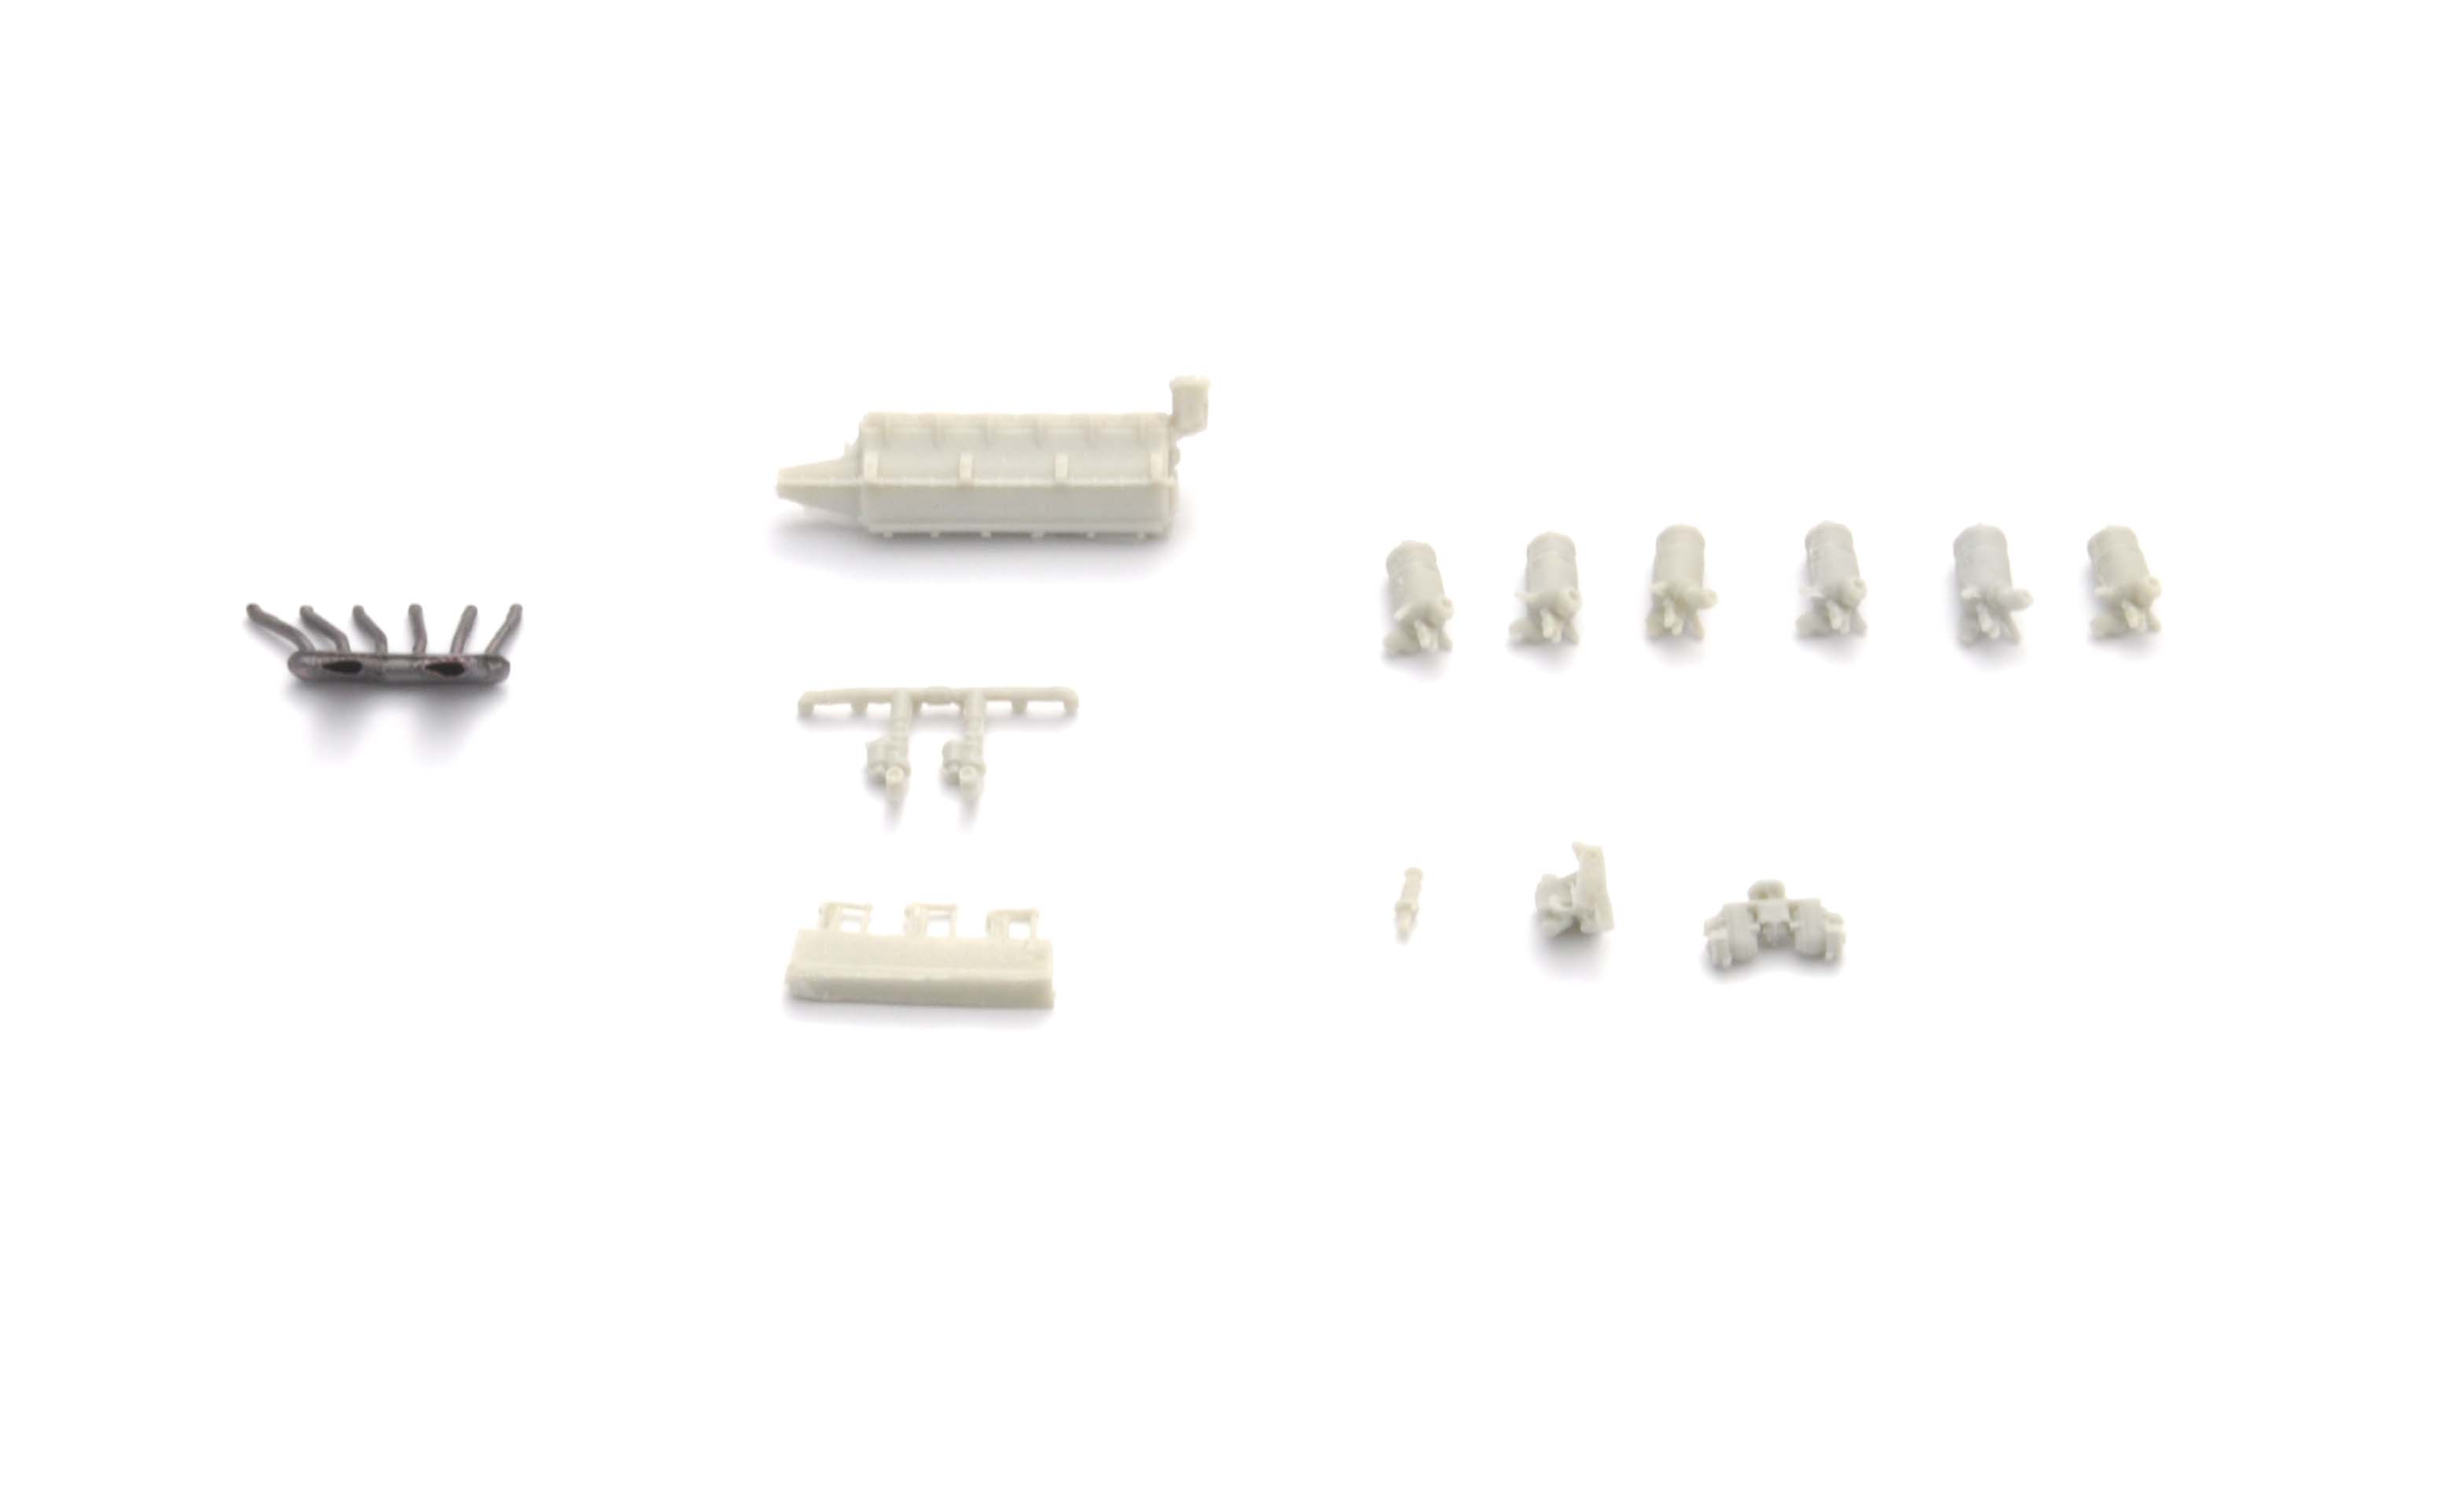
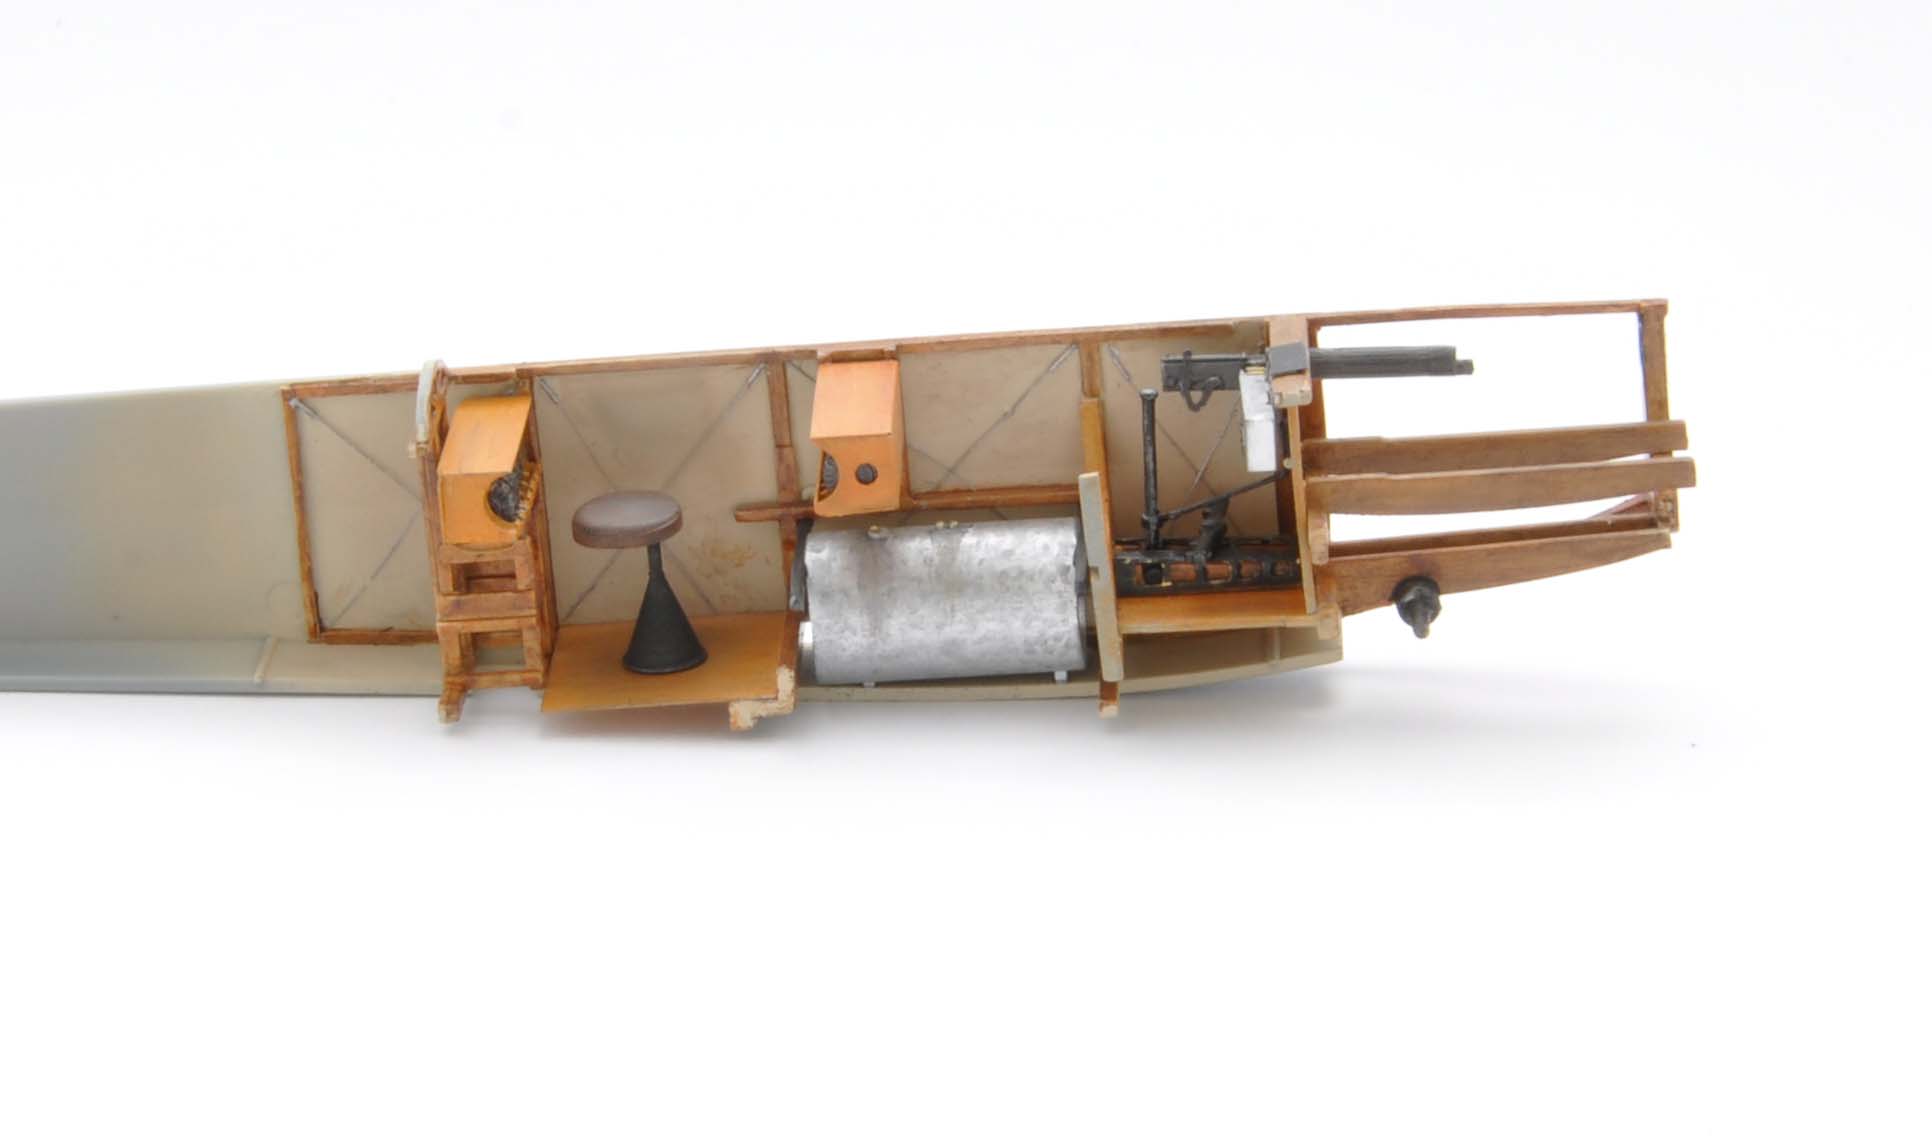
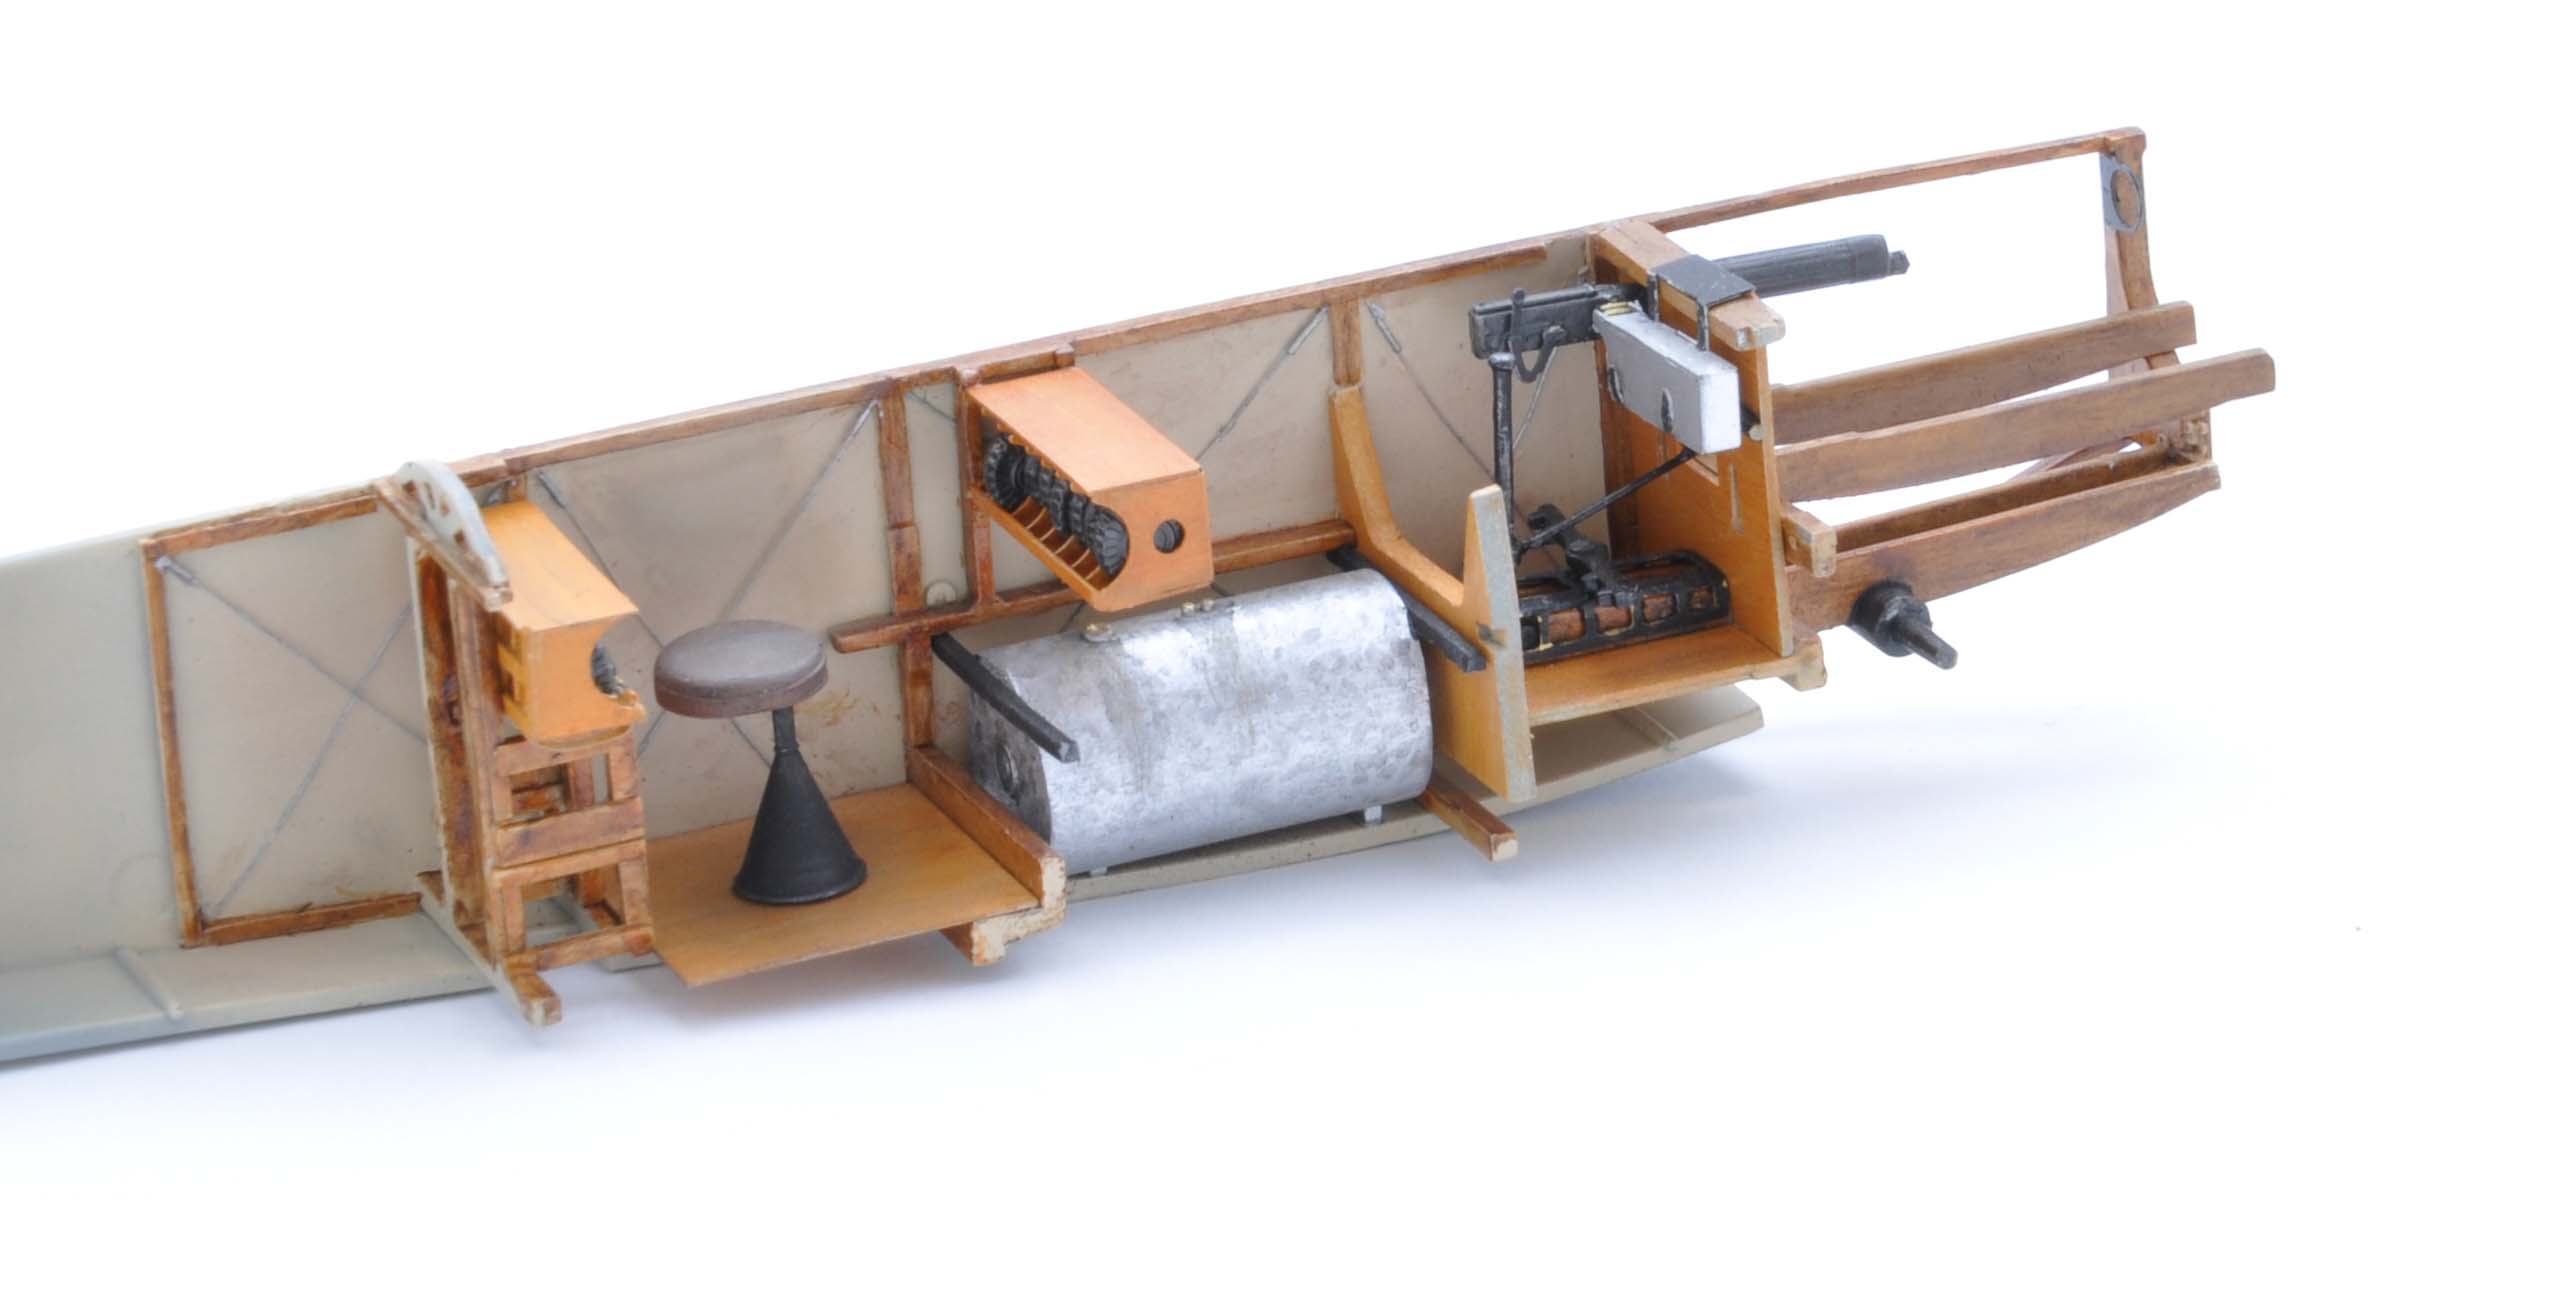
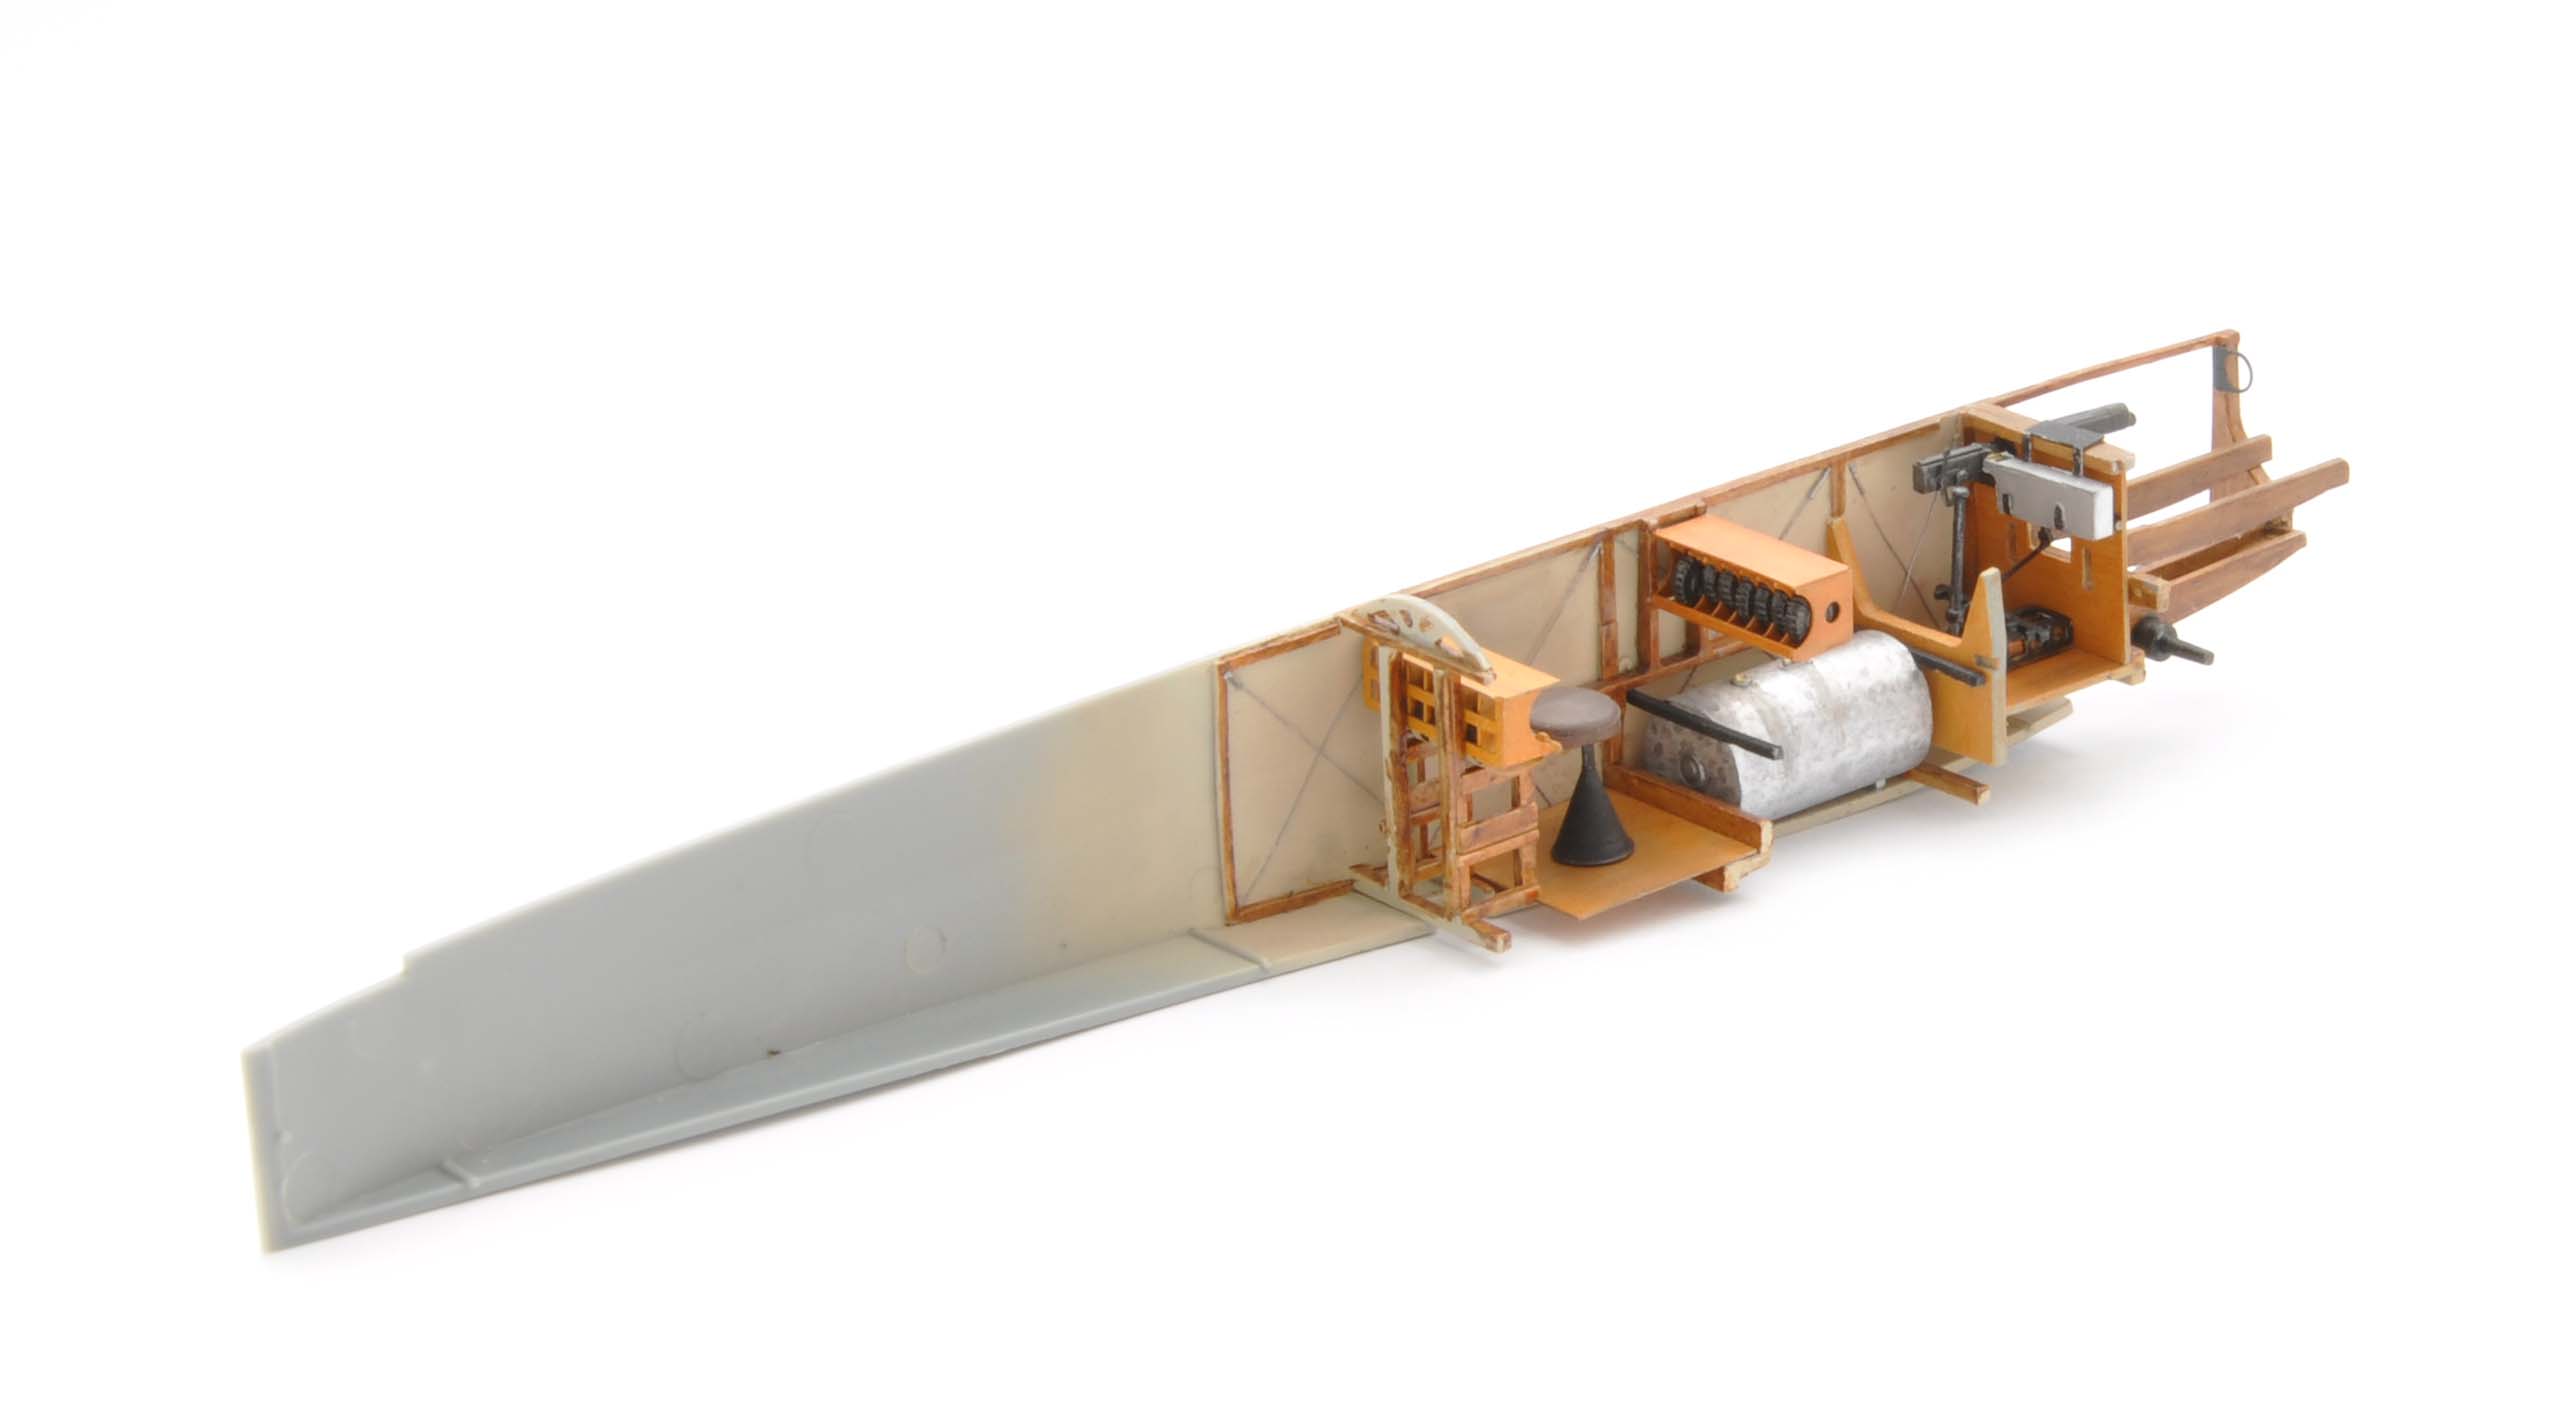
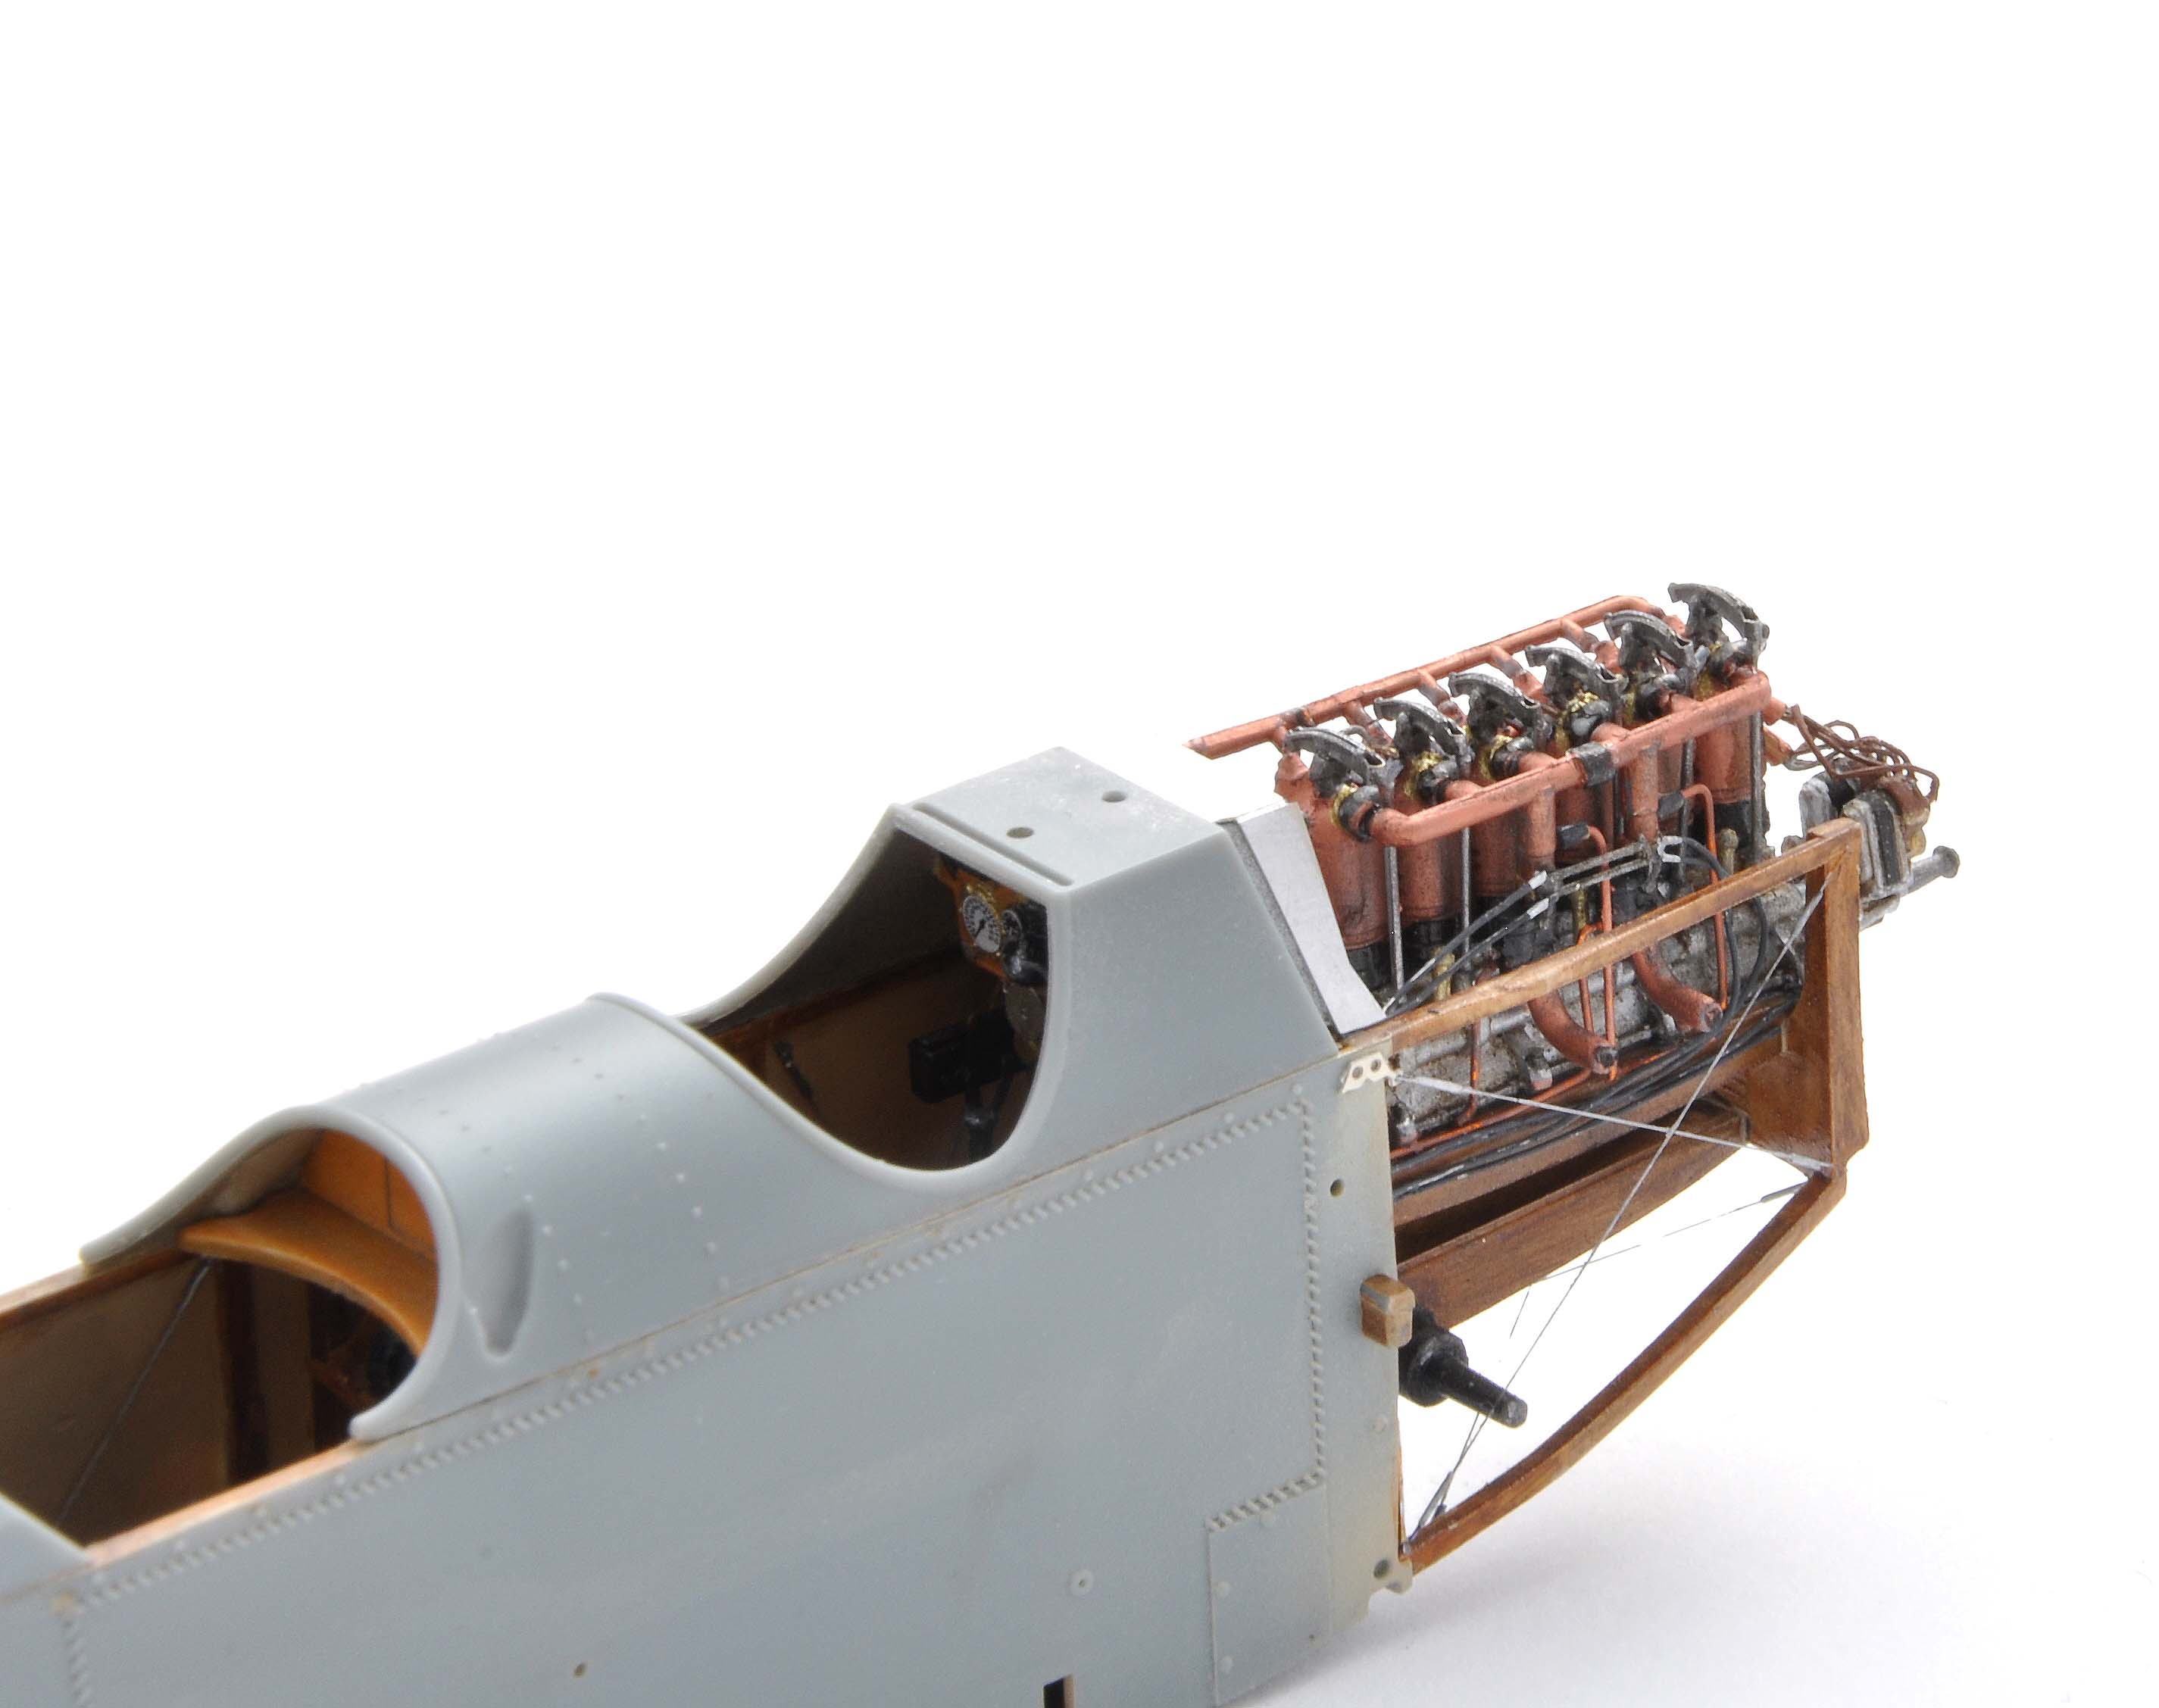
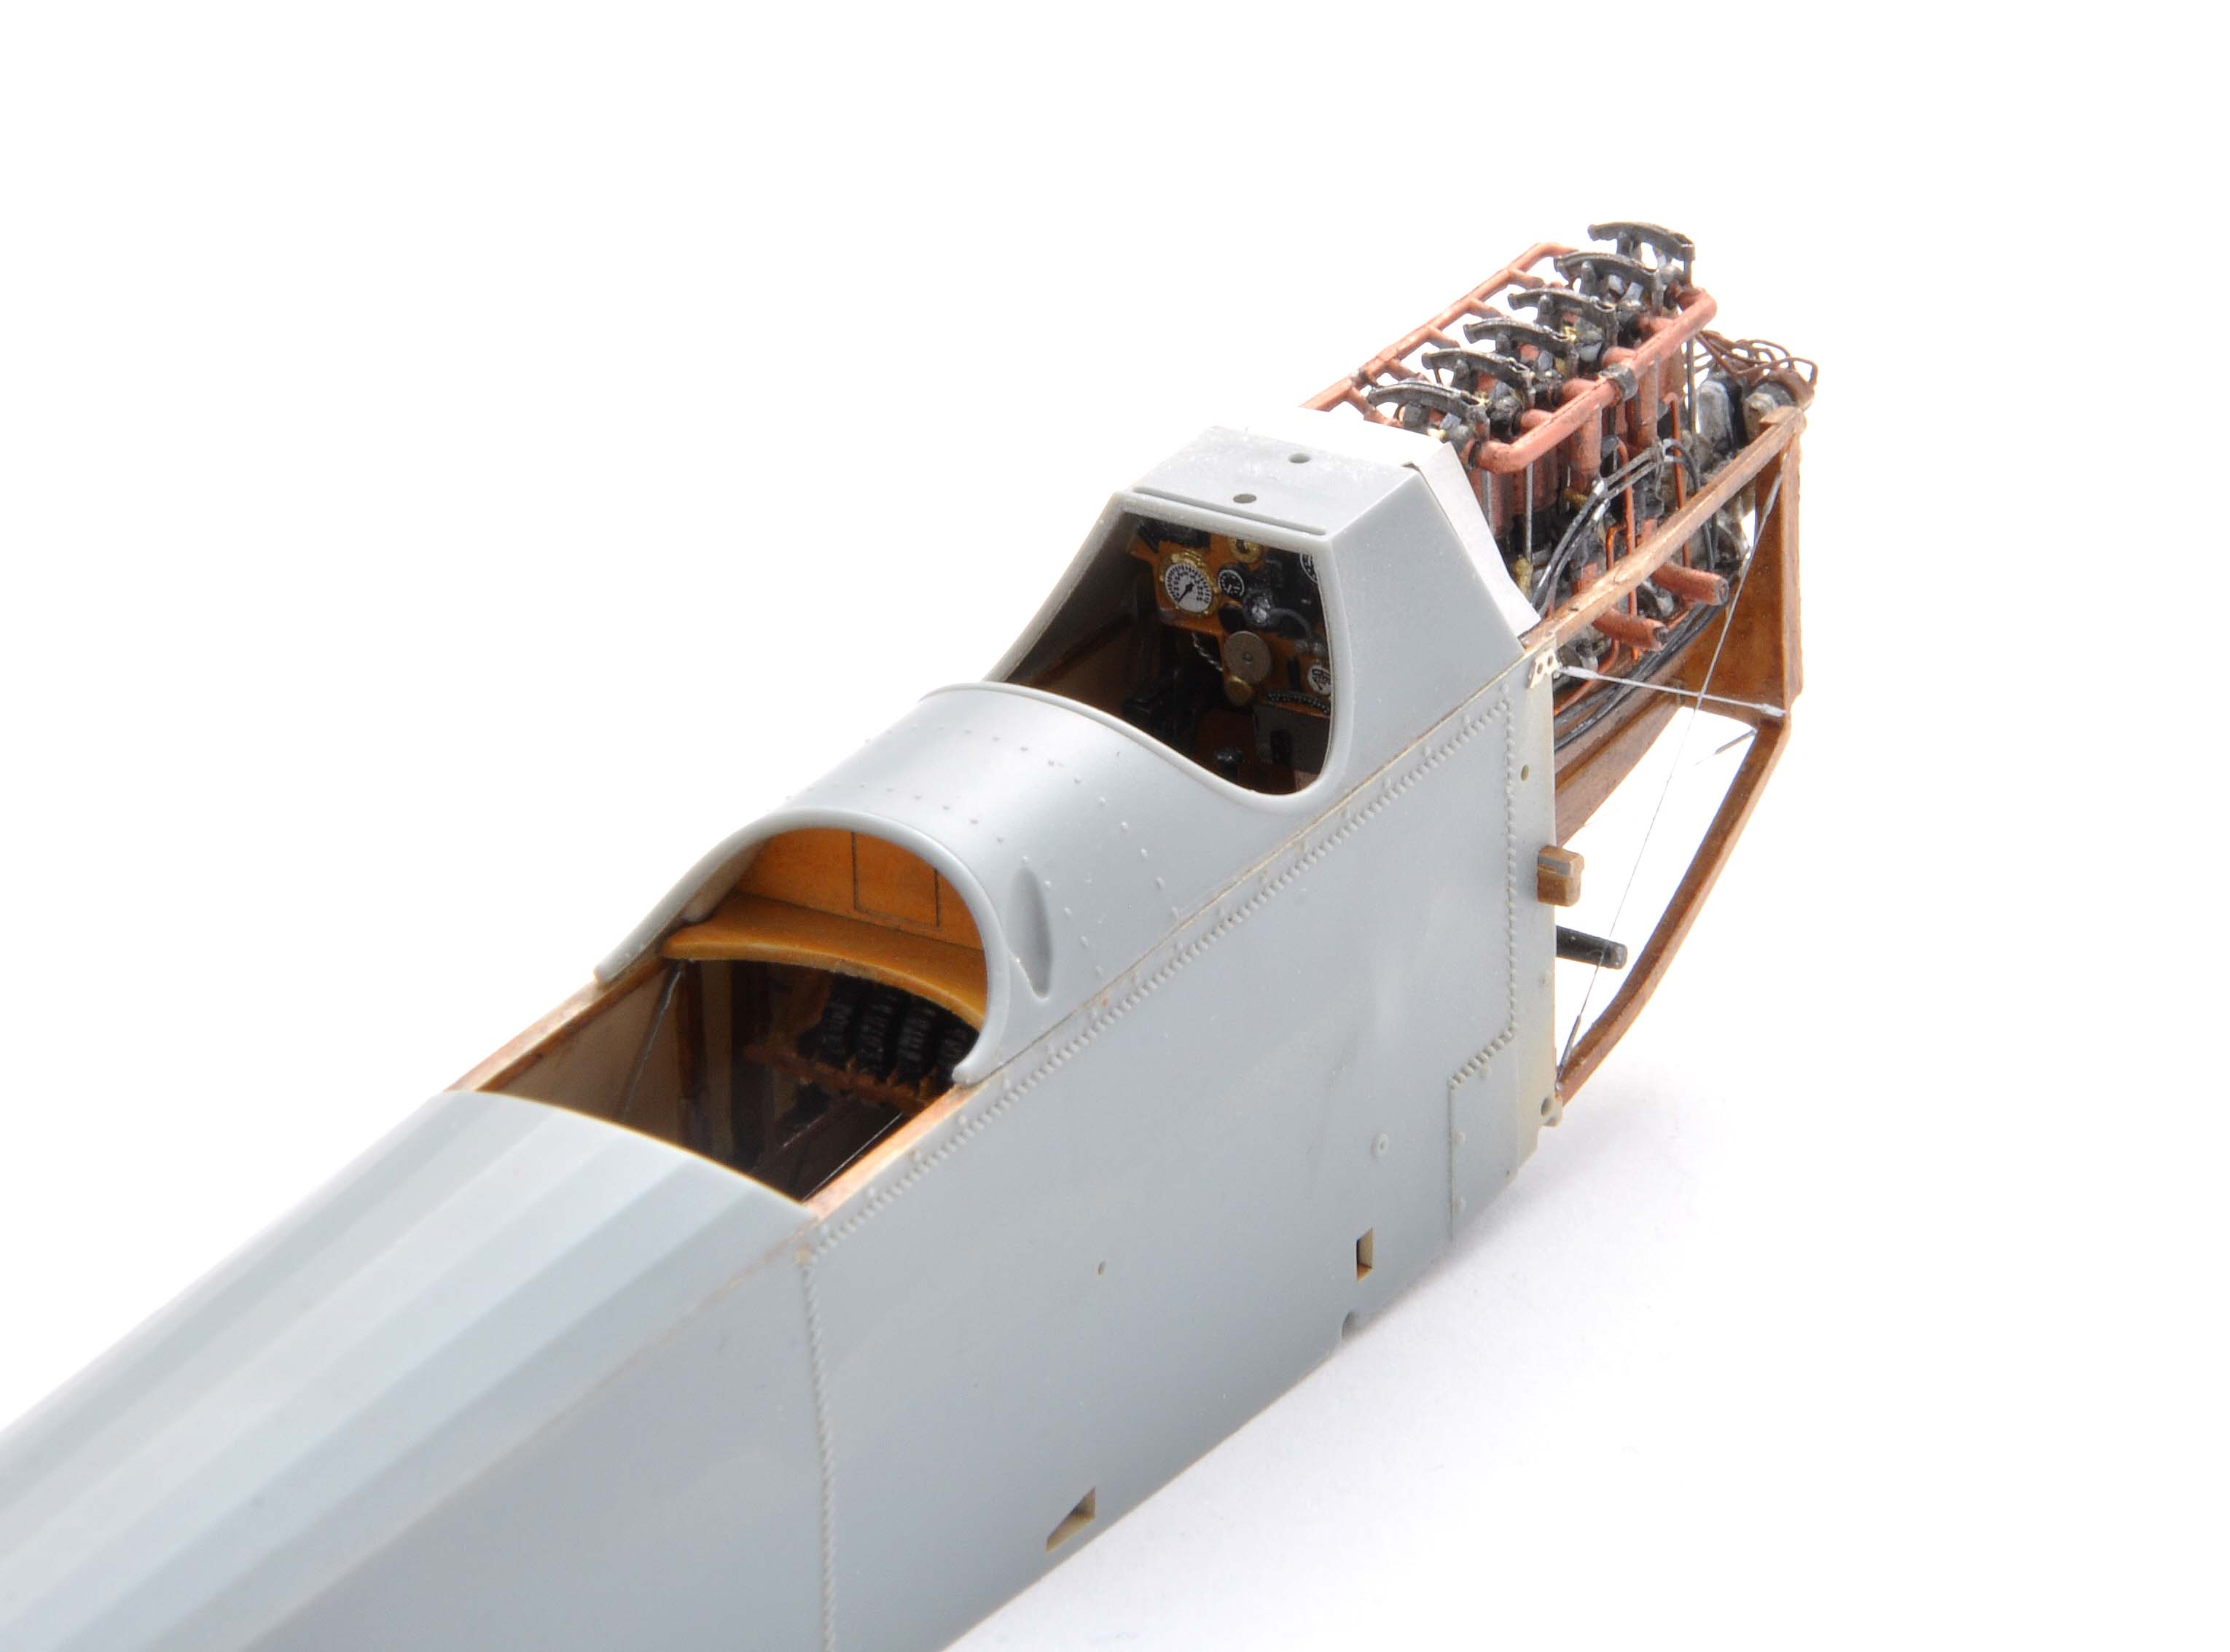
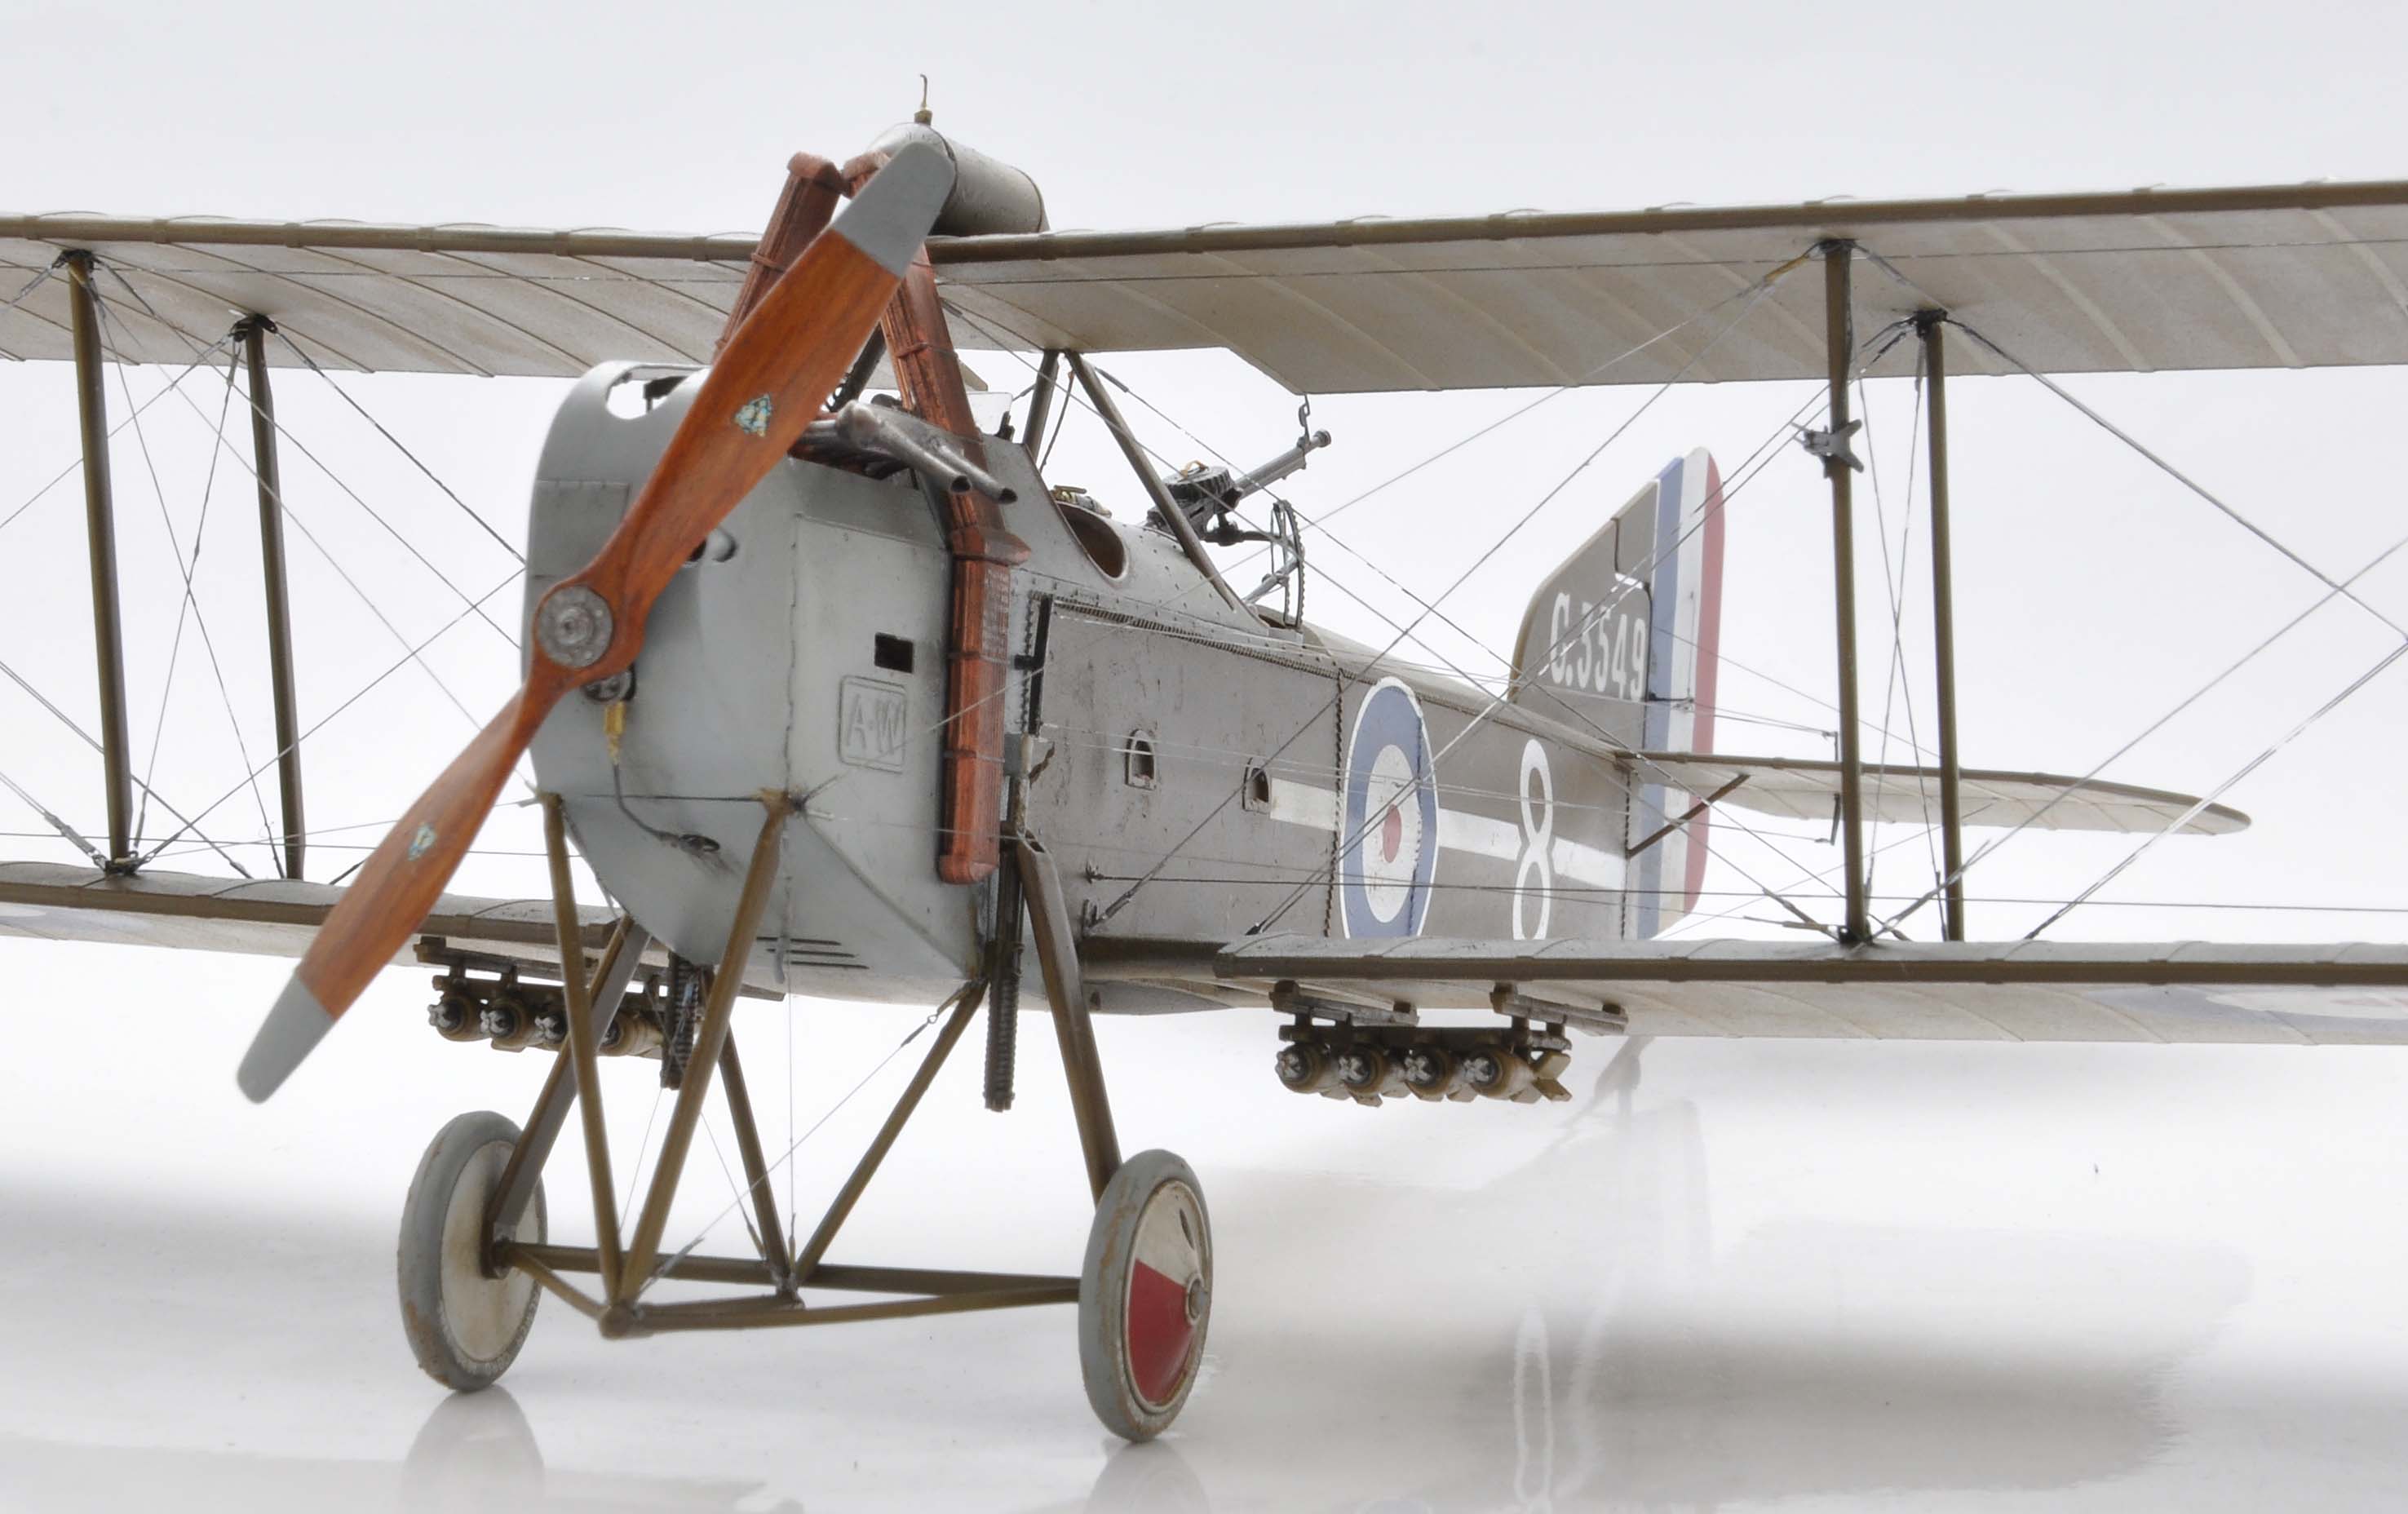
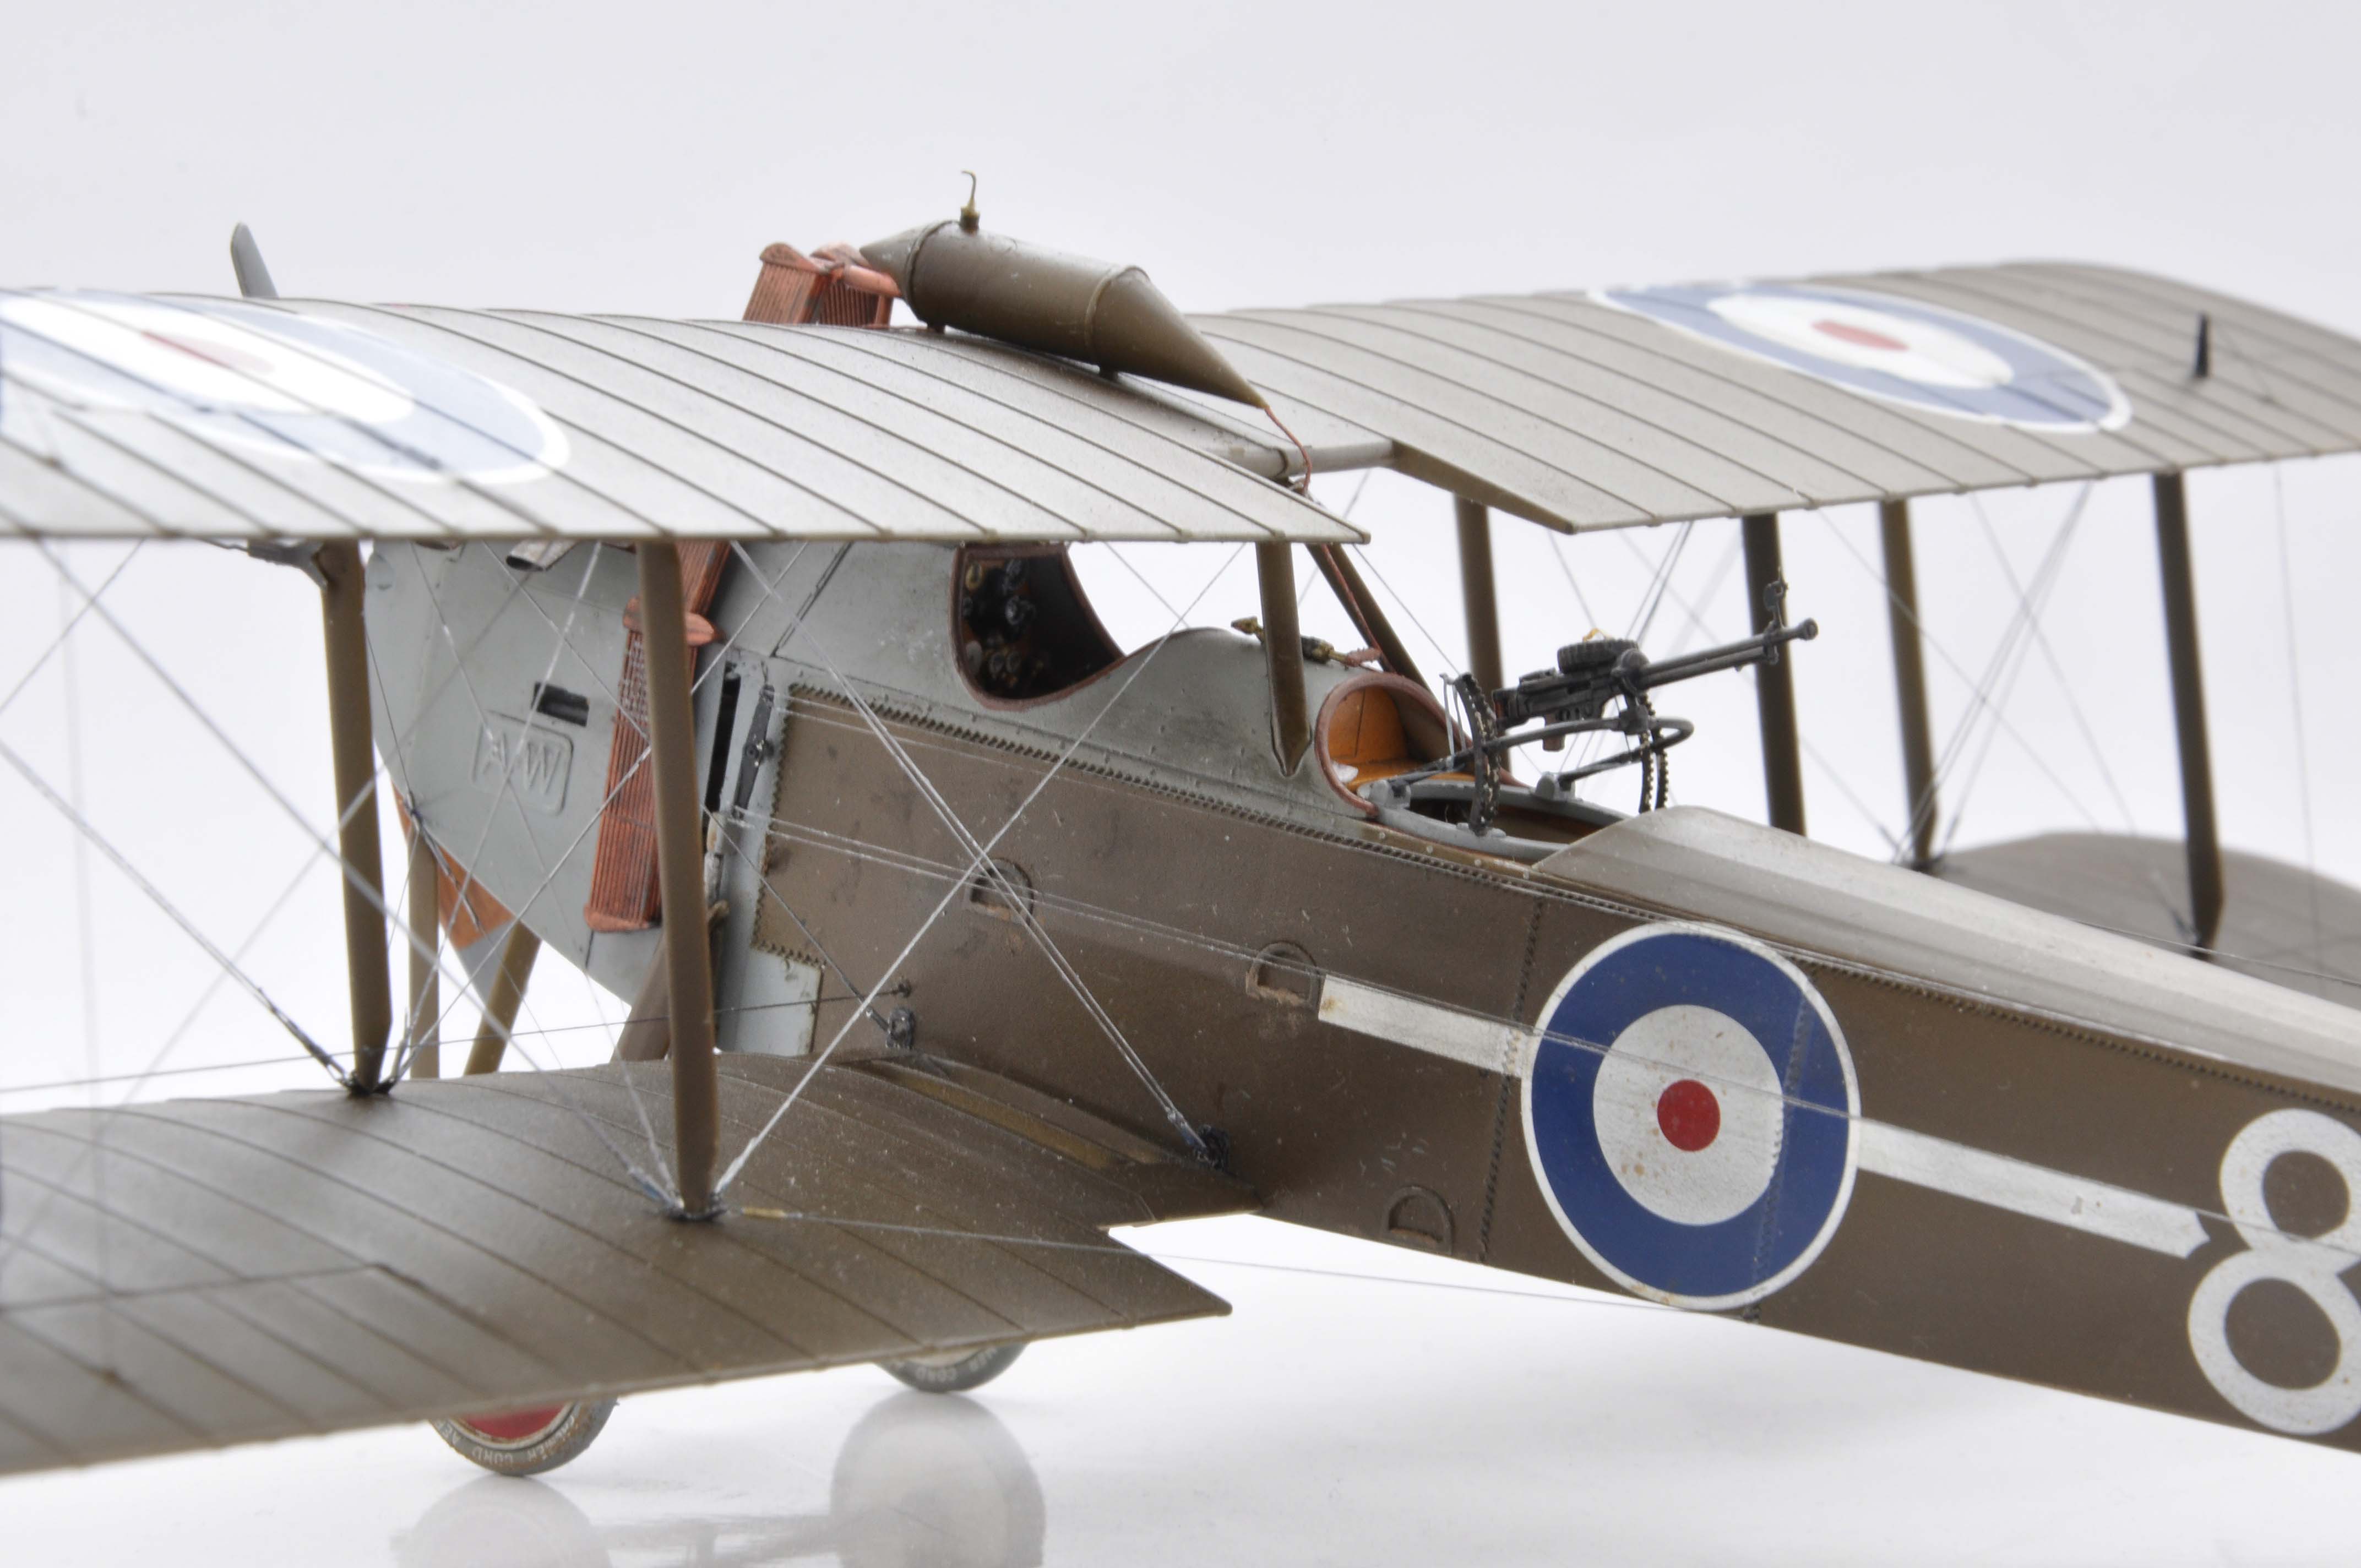
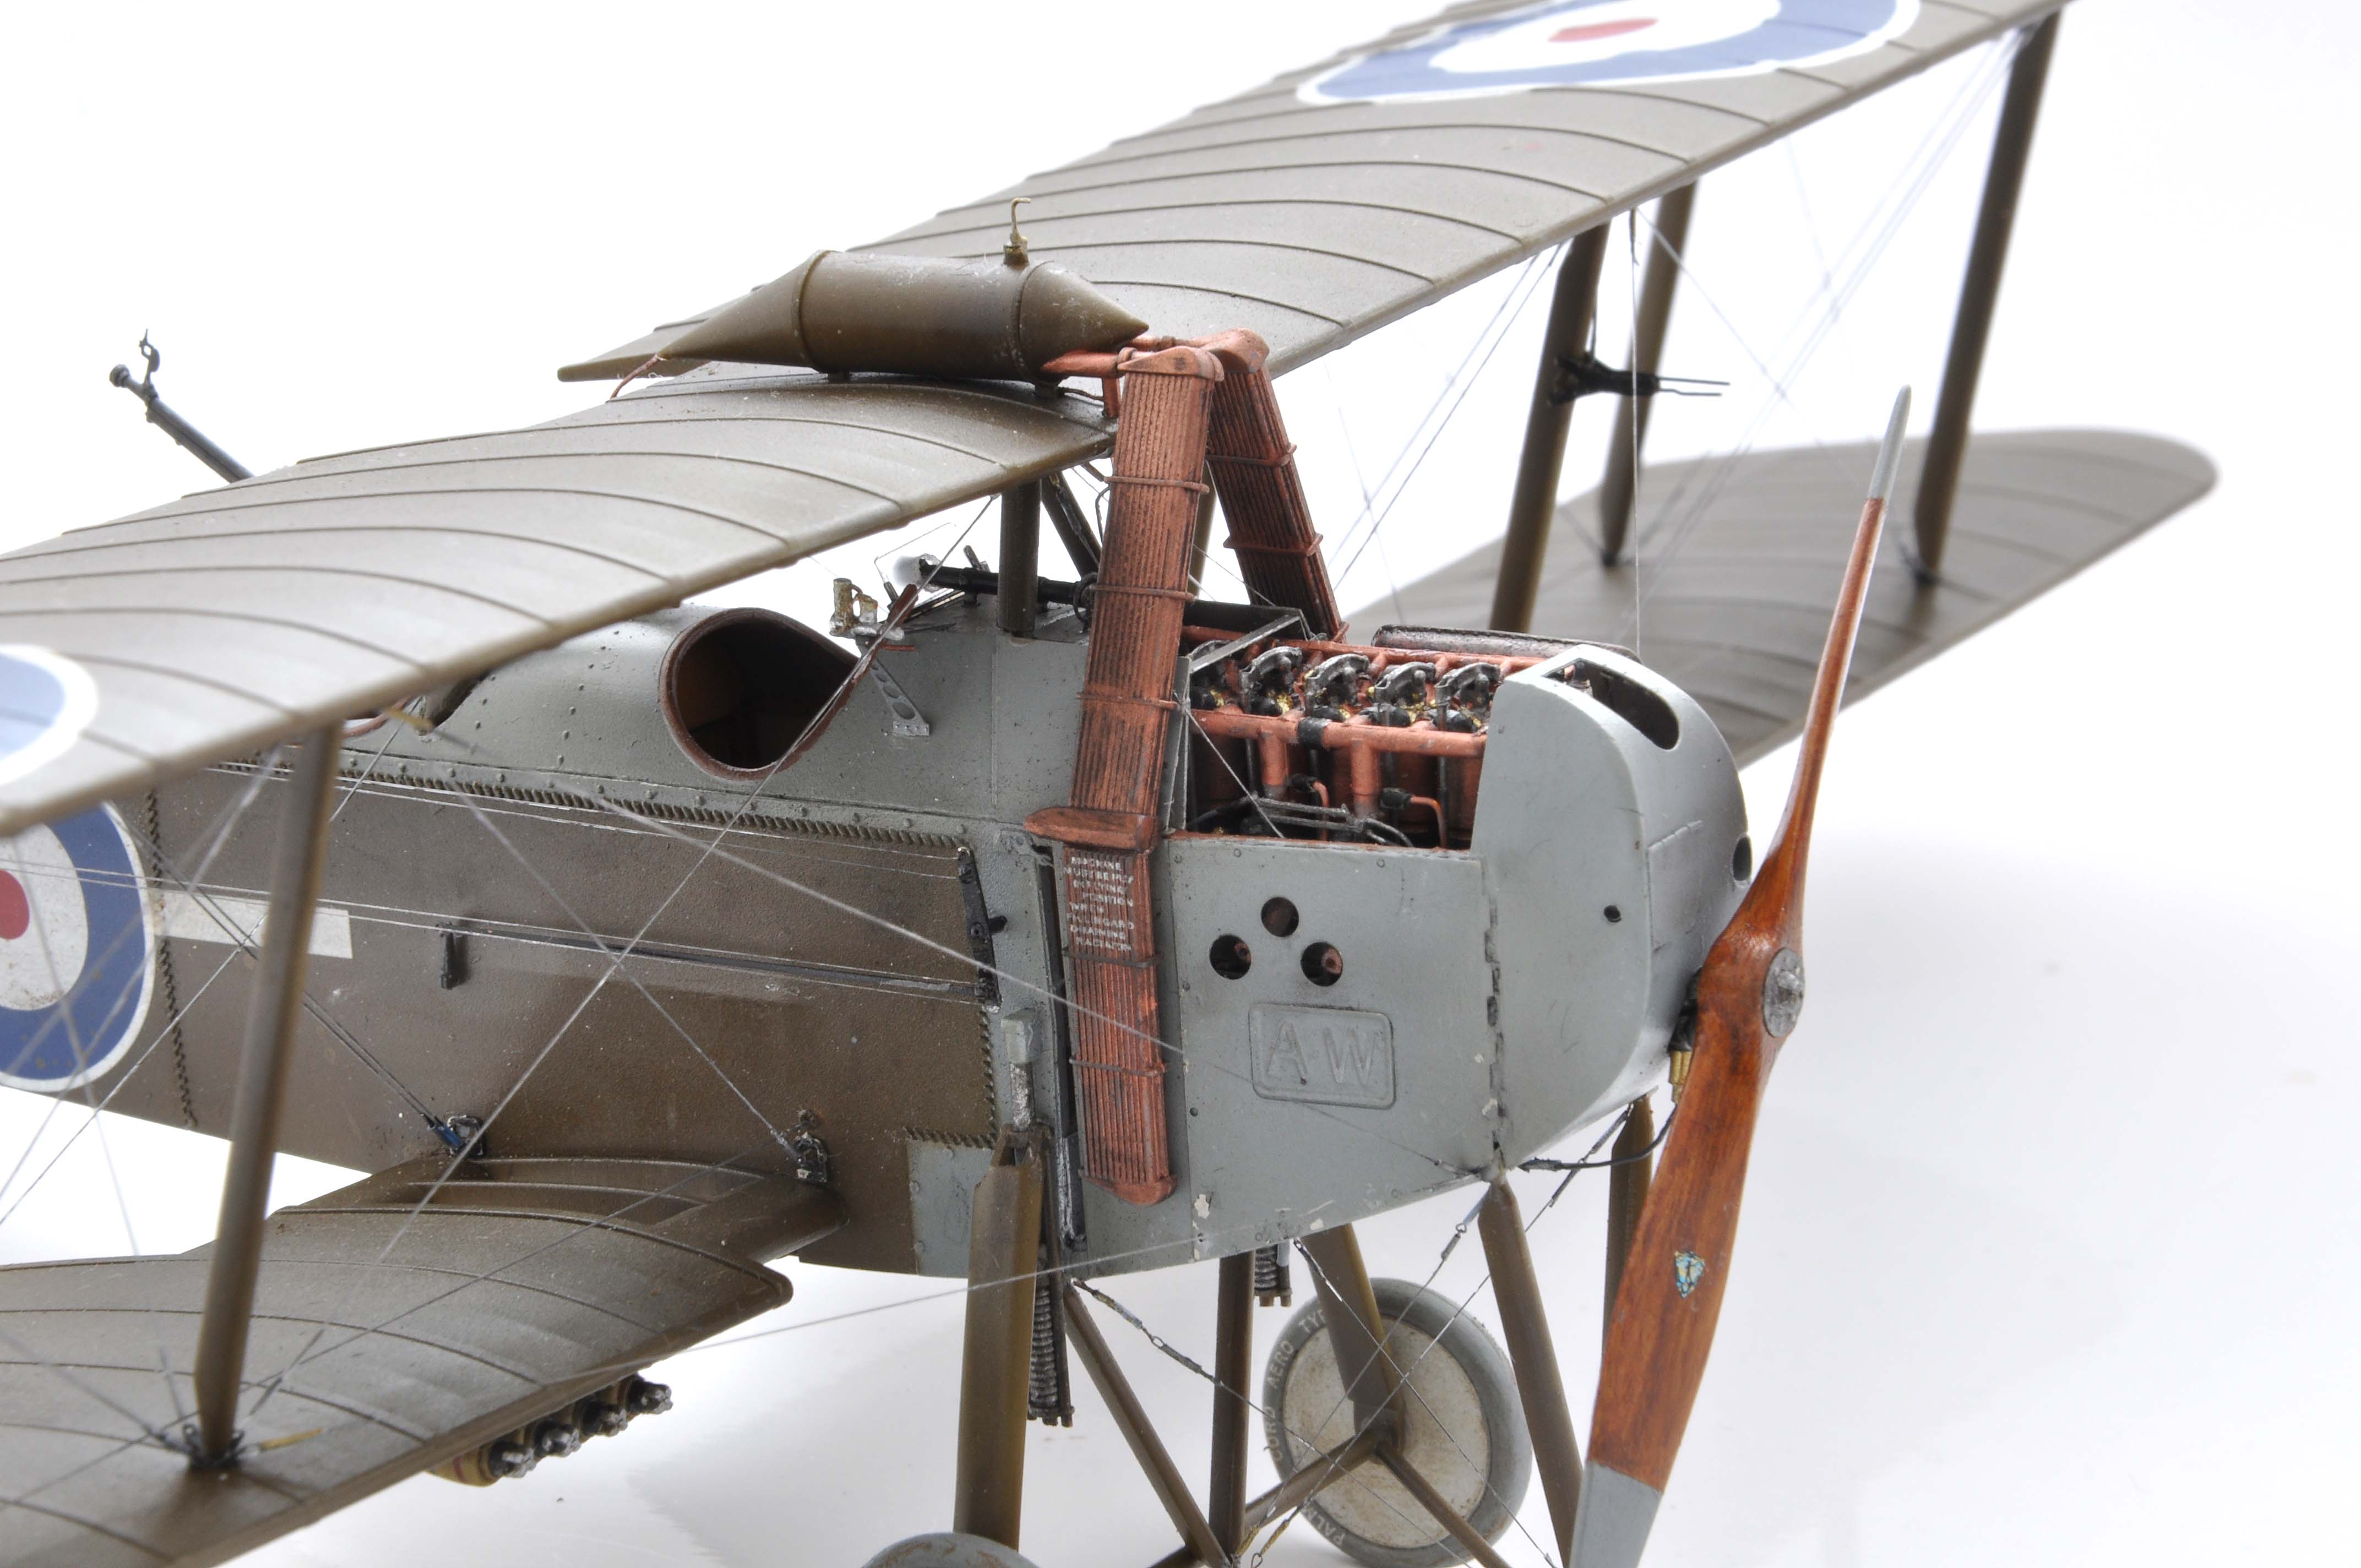
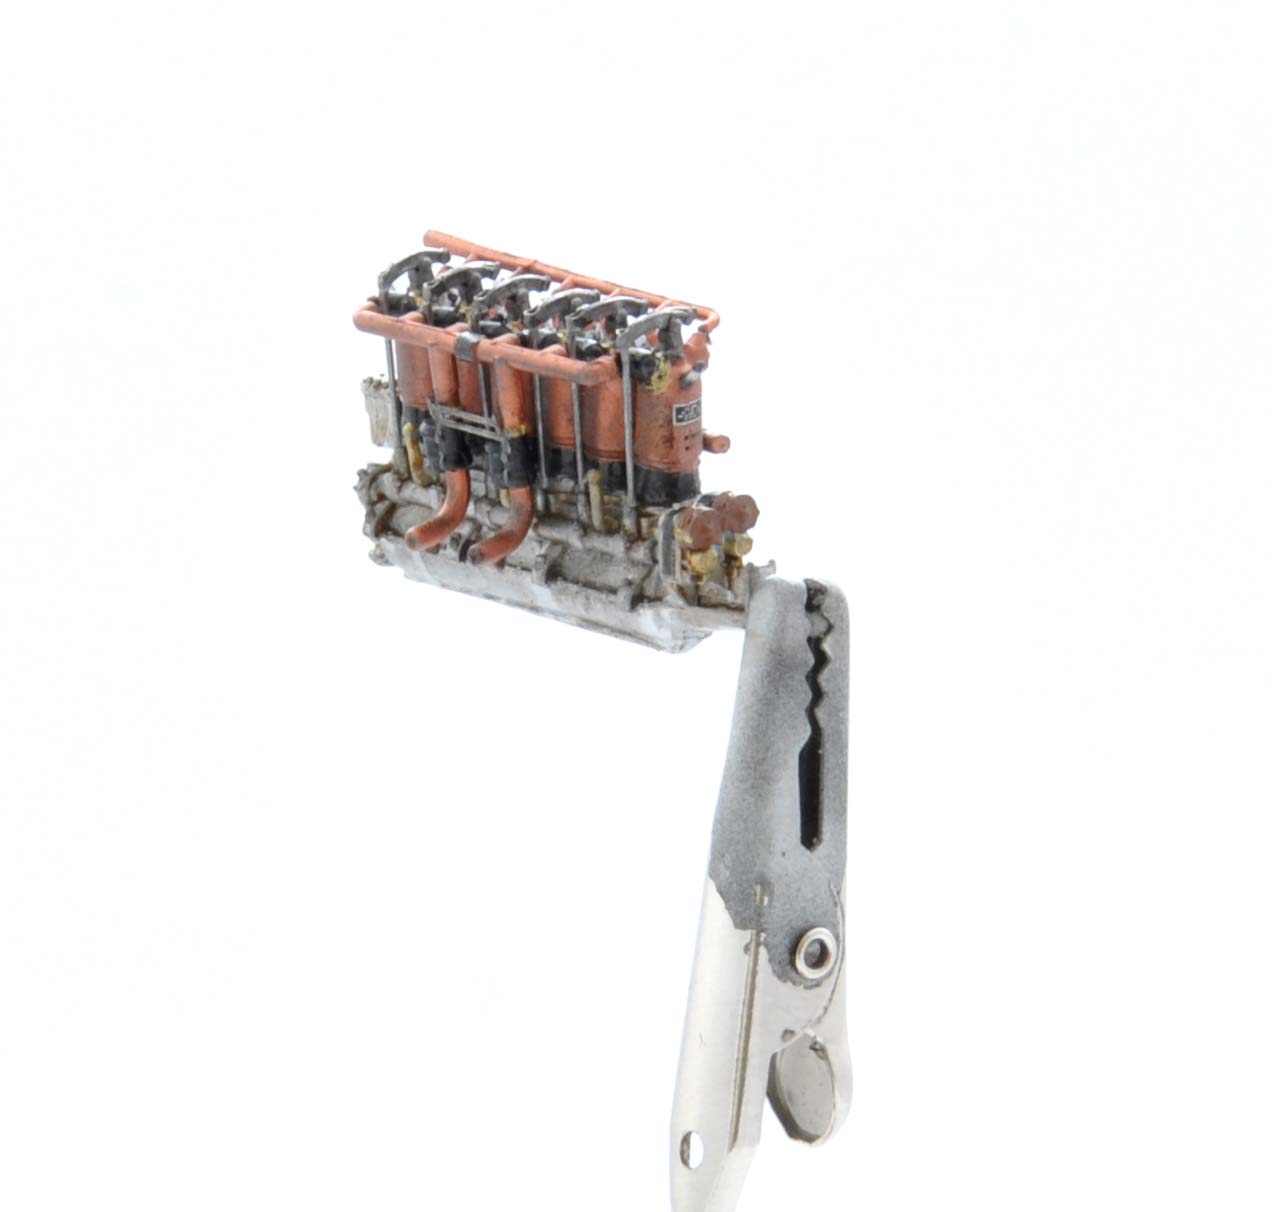
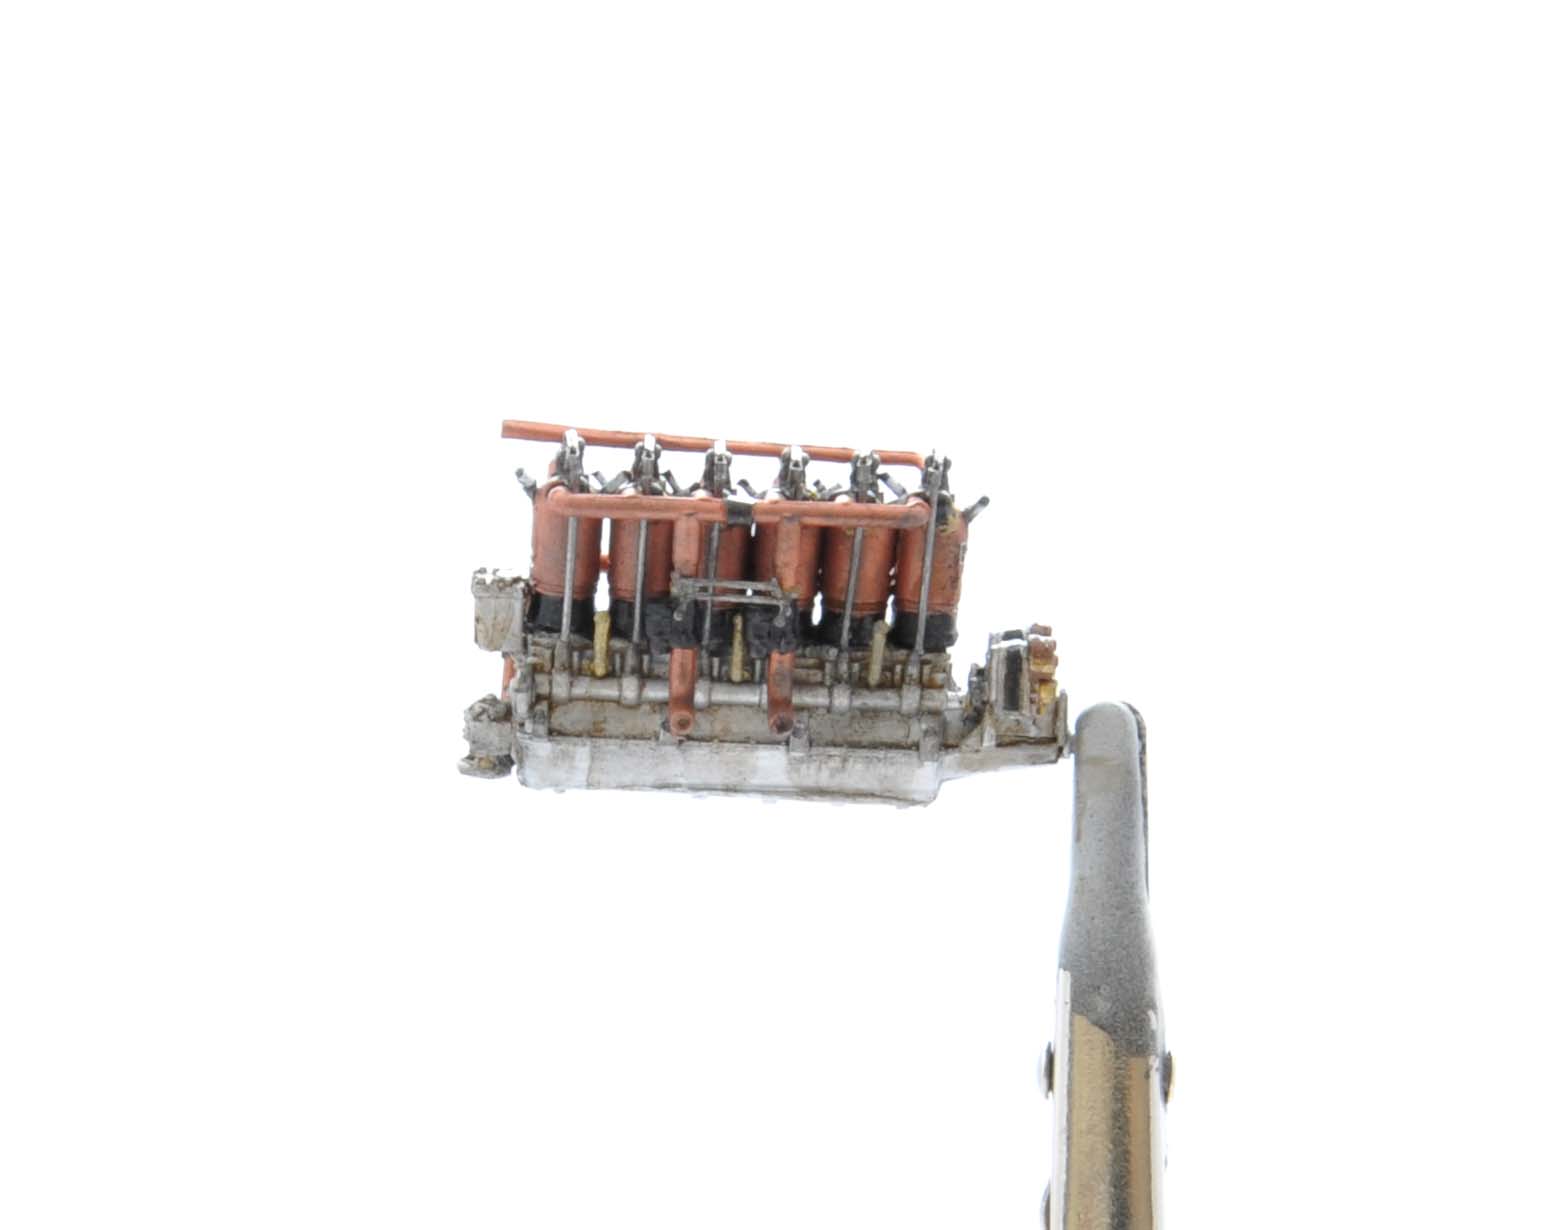
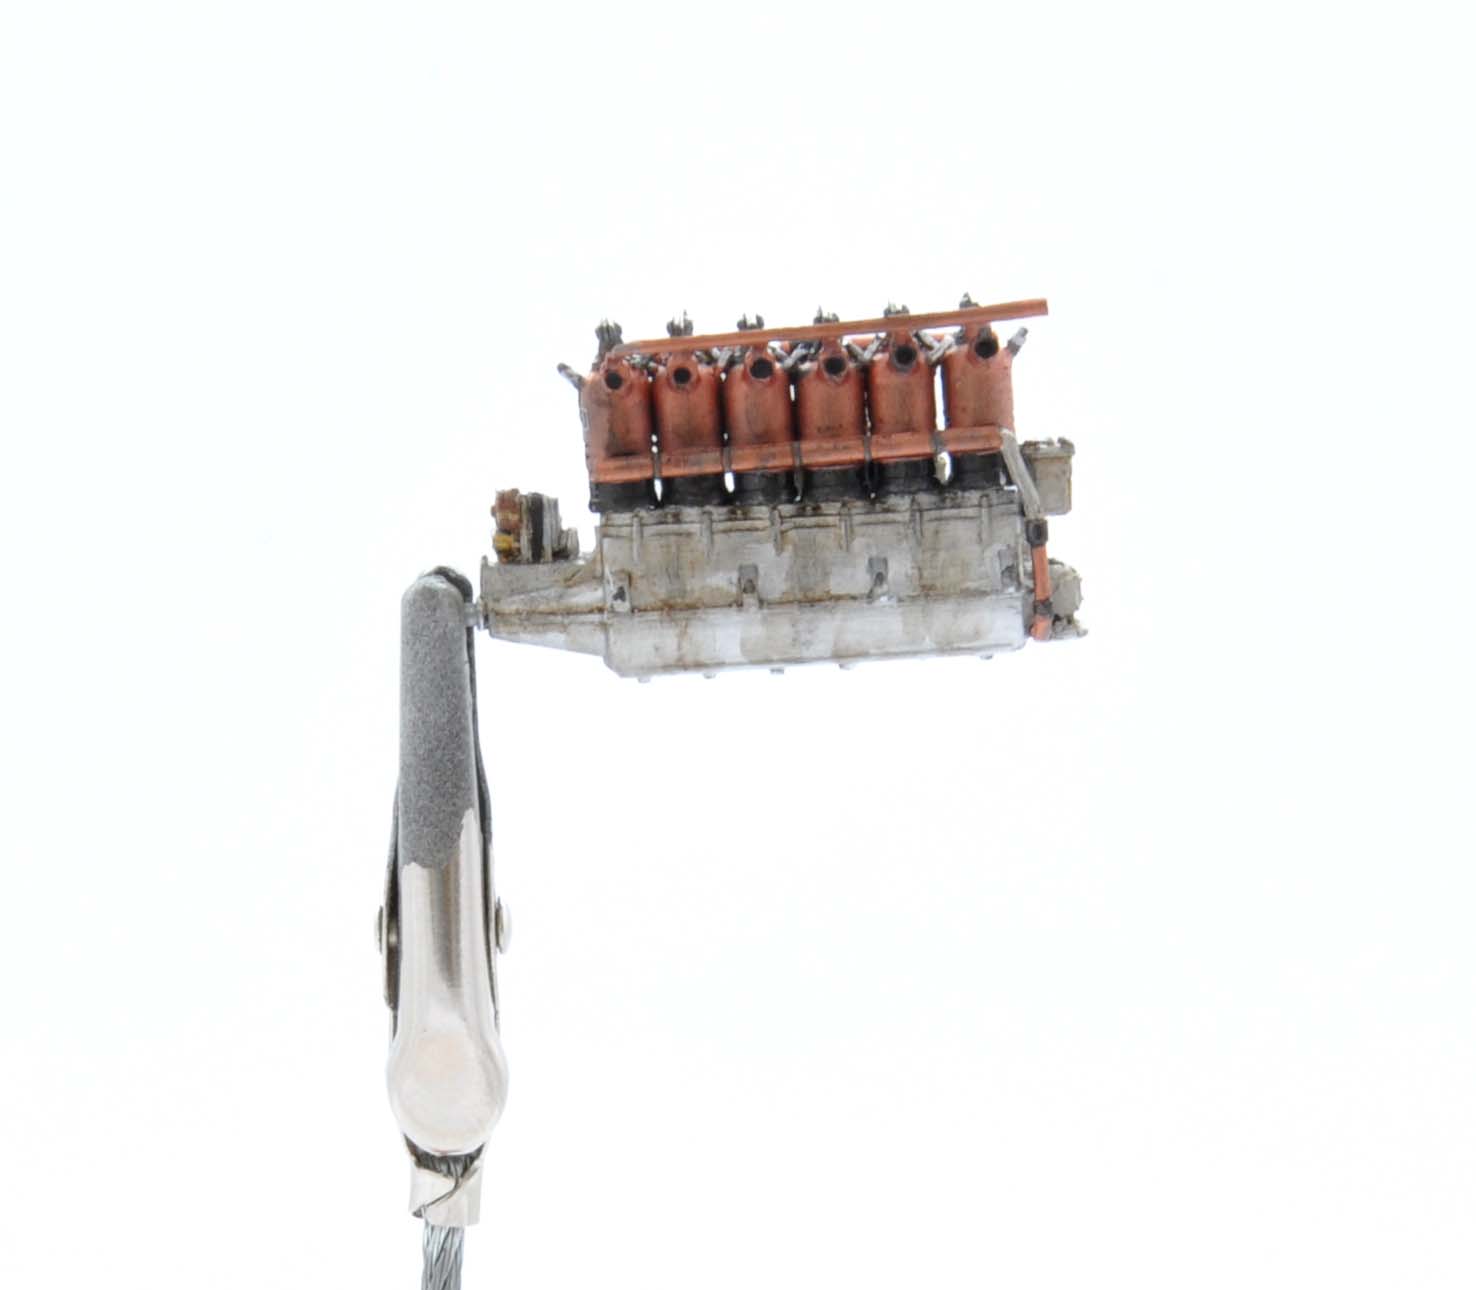
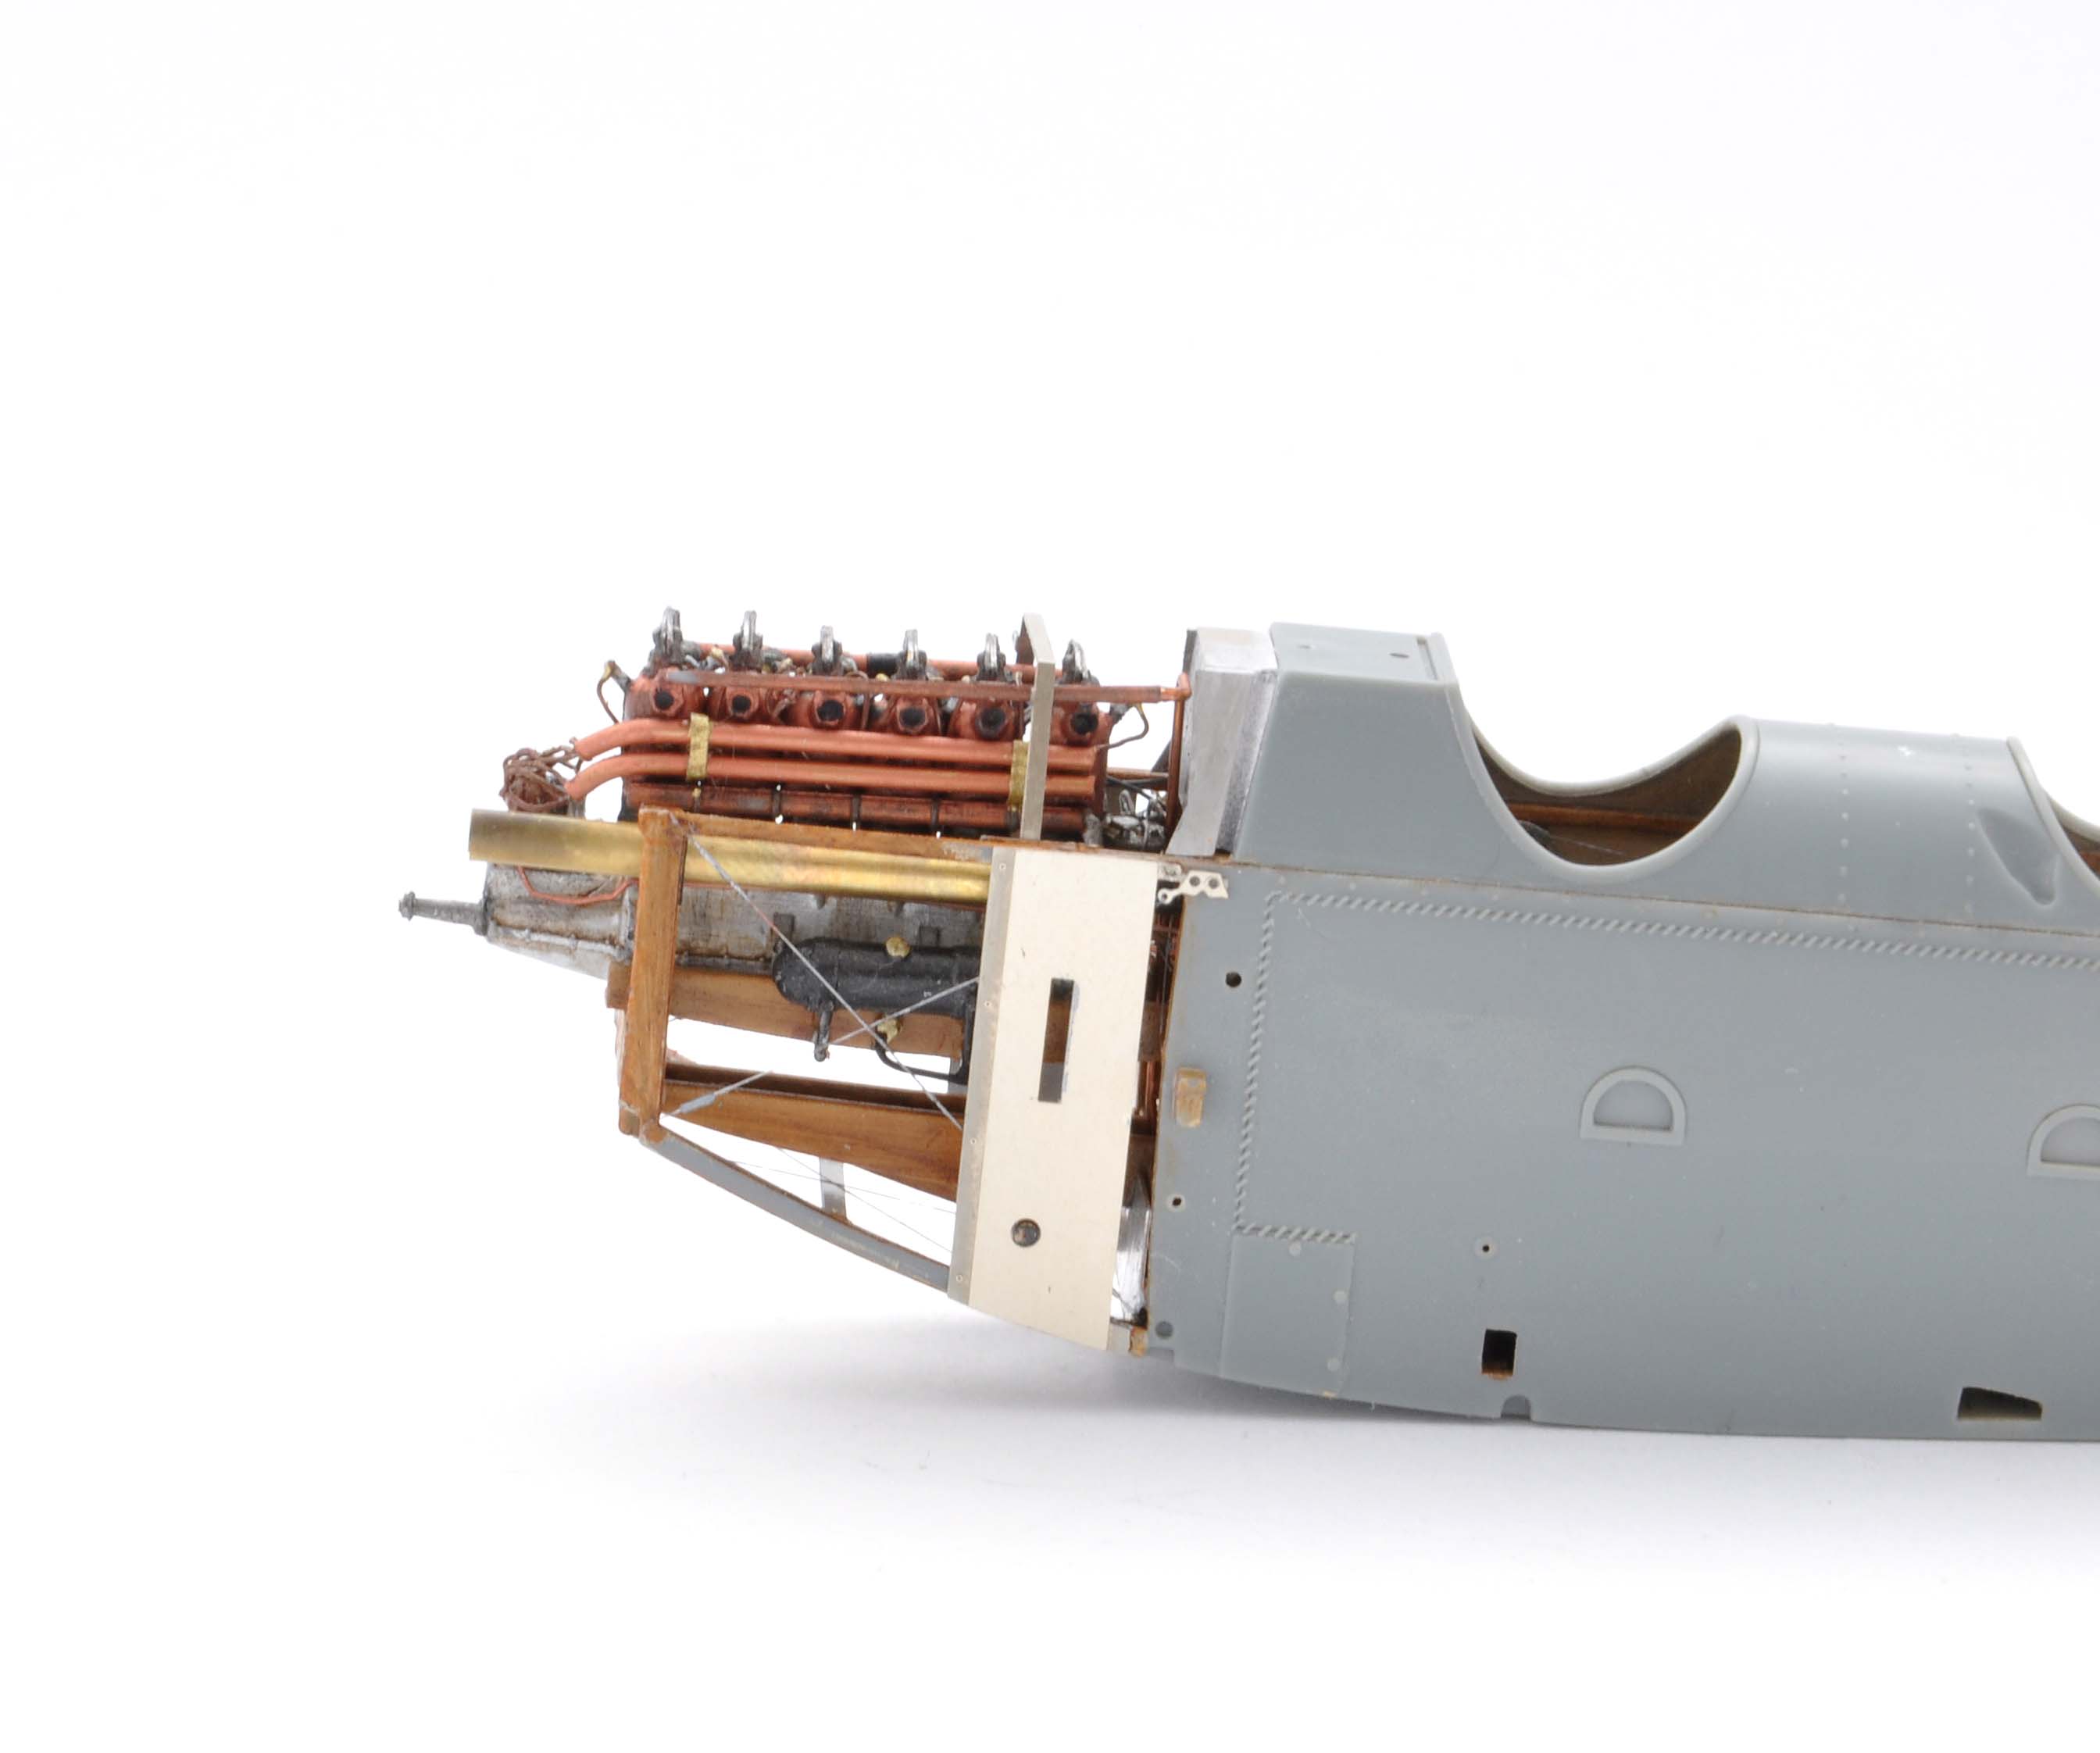
In the meanwhile, I`m working on the Beardmore 160HP resin engine. I think it`s very nice with all the details like the spark plugs and the PE rocker arms.
The plastic one is also very decent. There is one thing that made my heart beat faster with joy - the little nameplate decal printed on a separate sheet - I think becuase there are some metallic colours used.
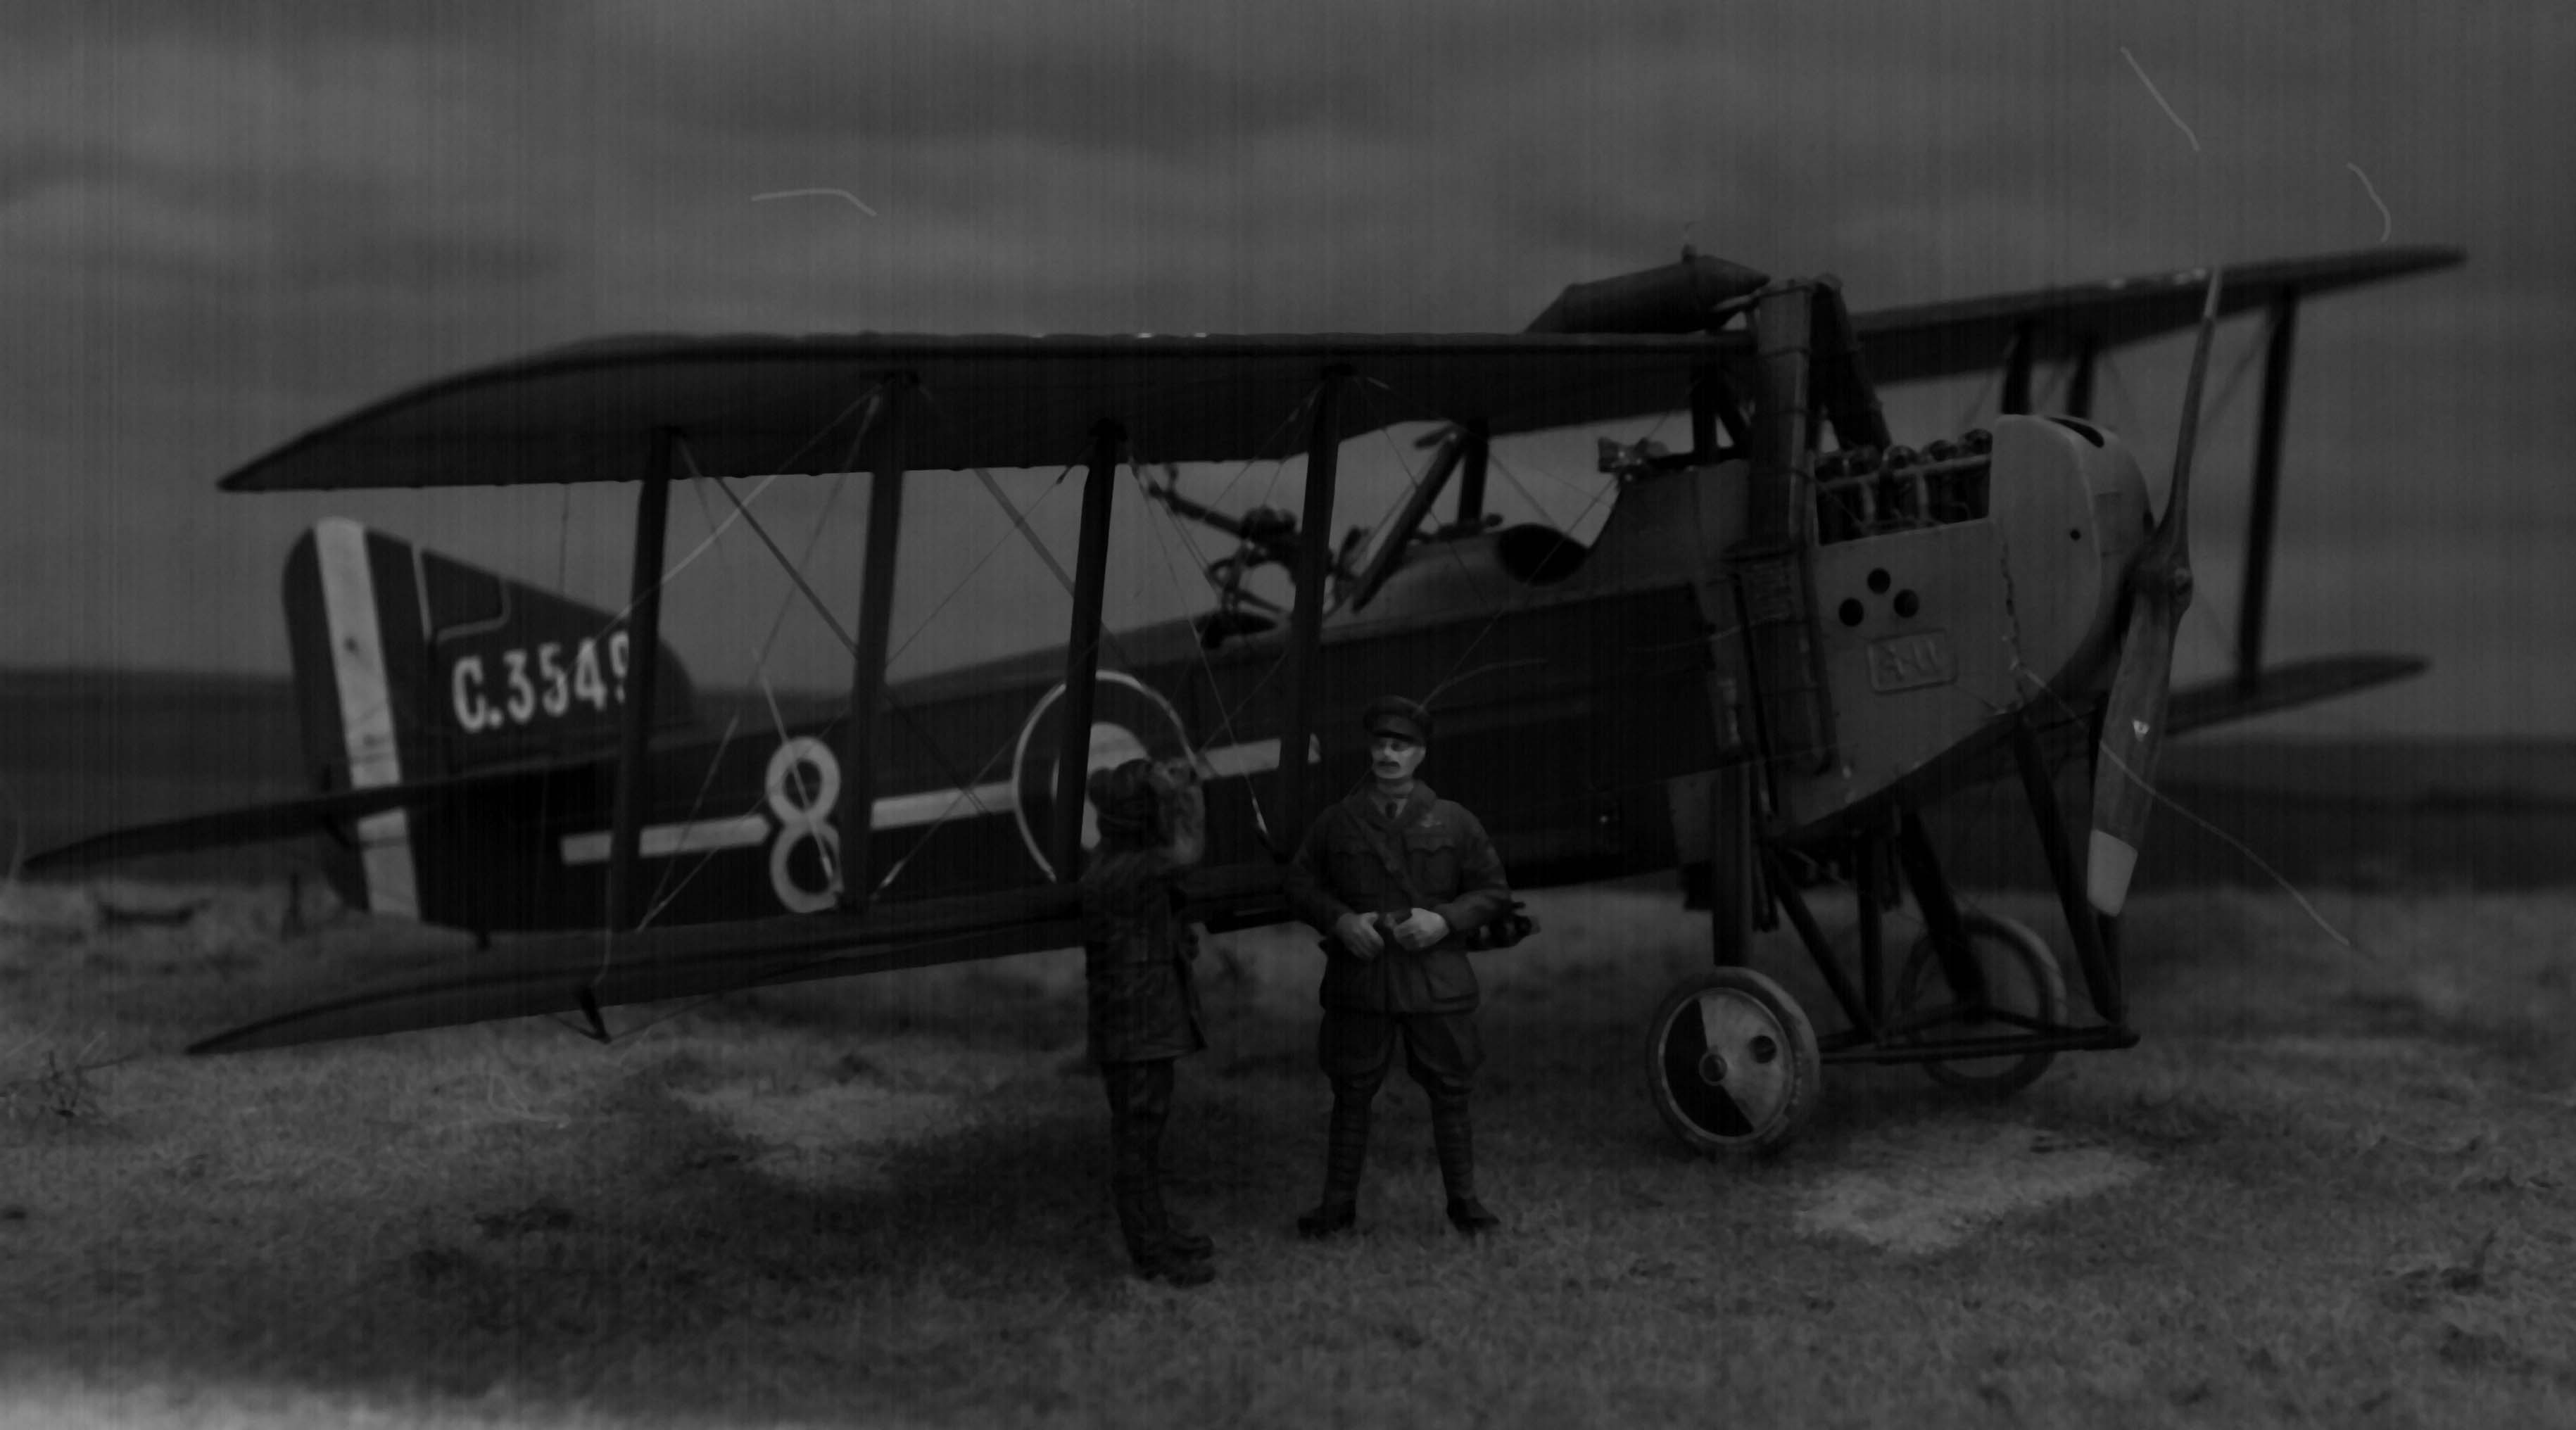
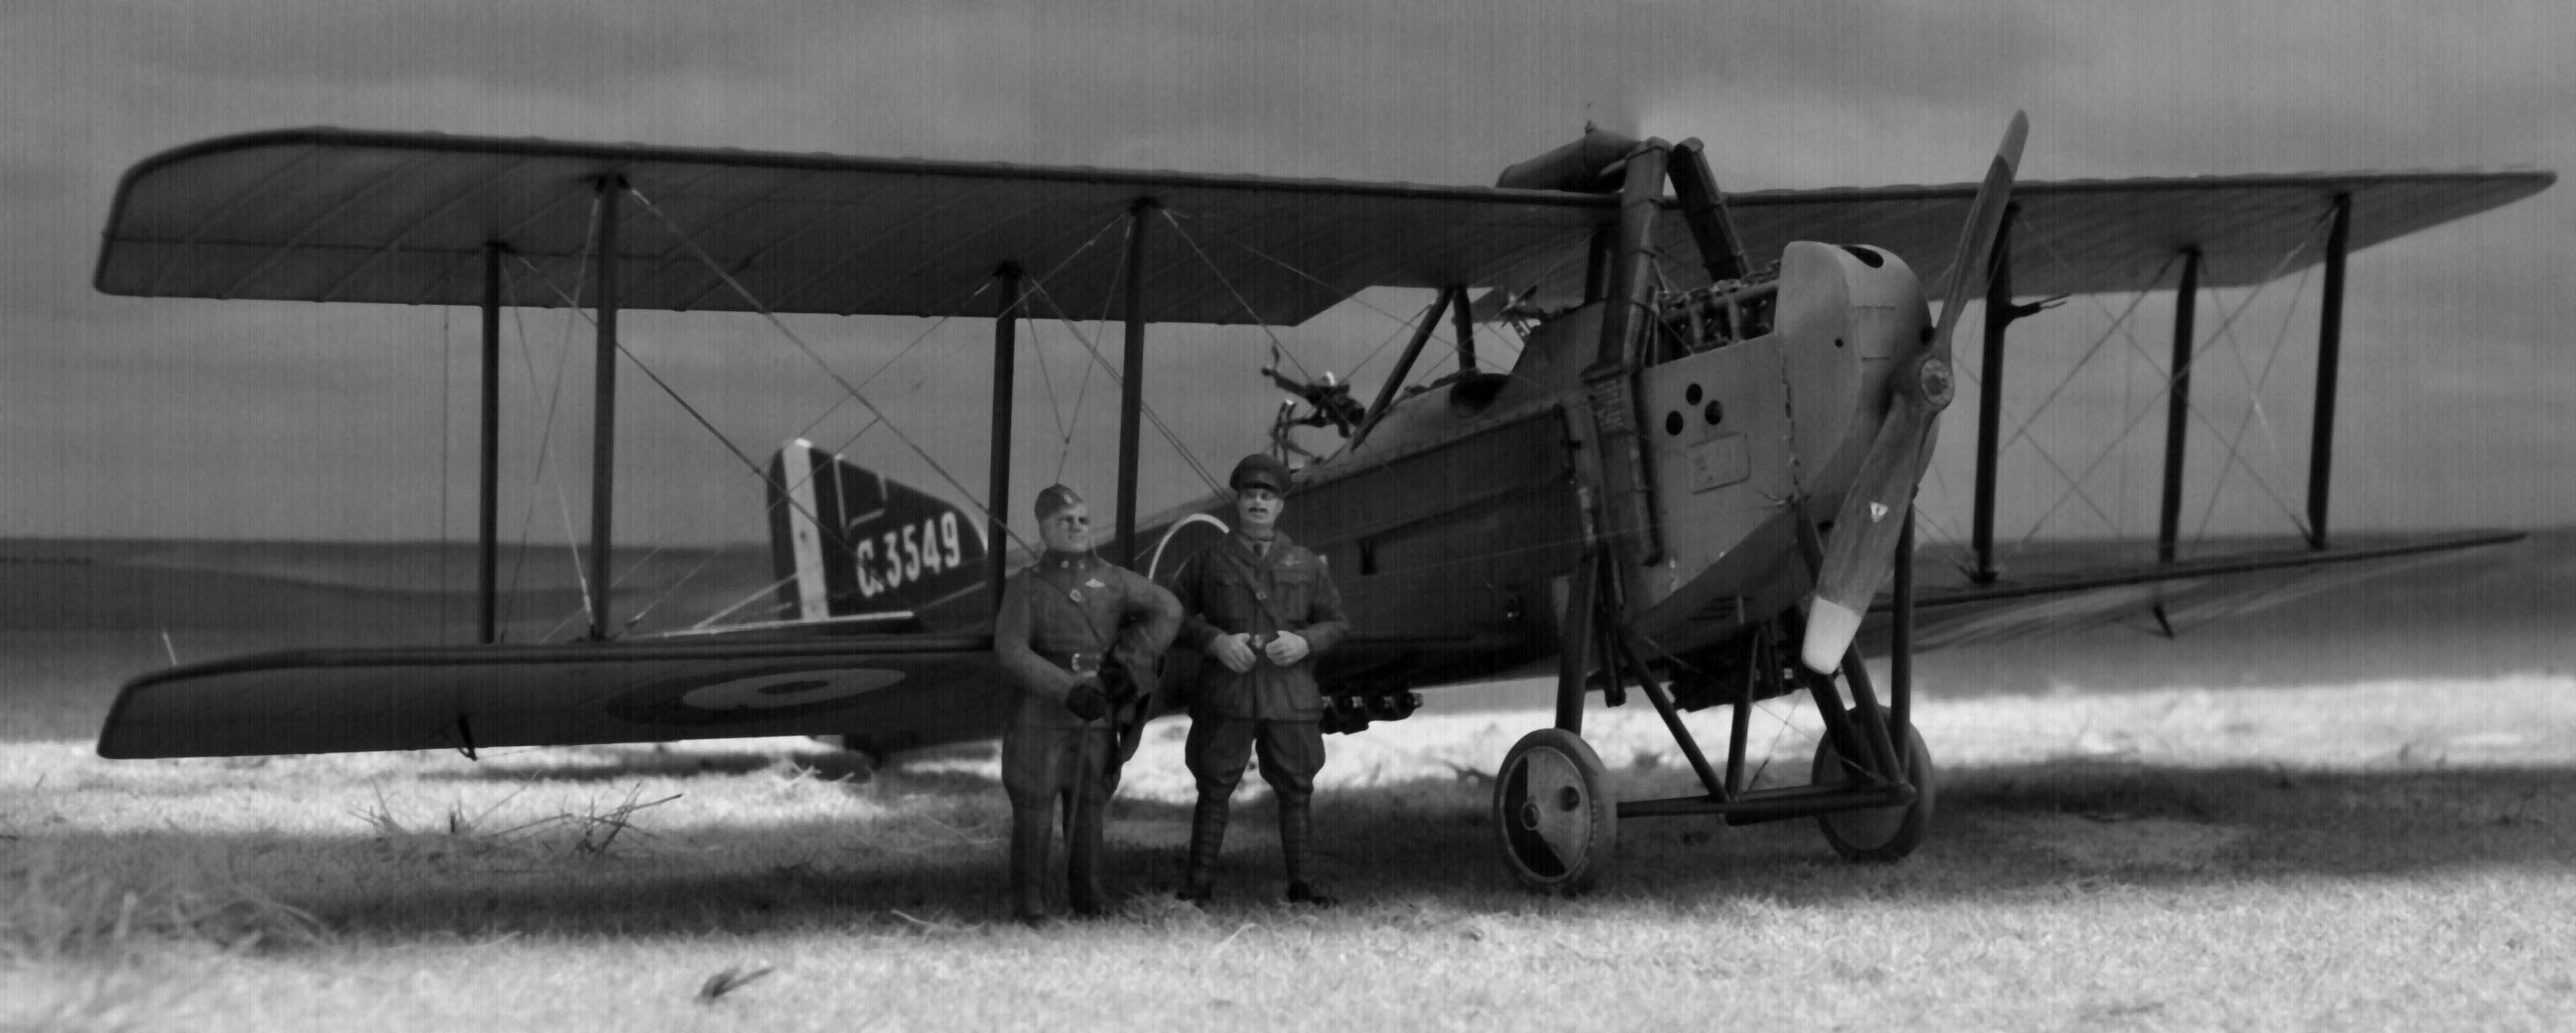
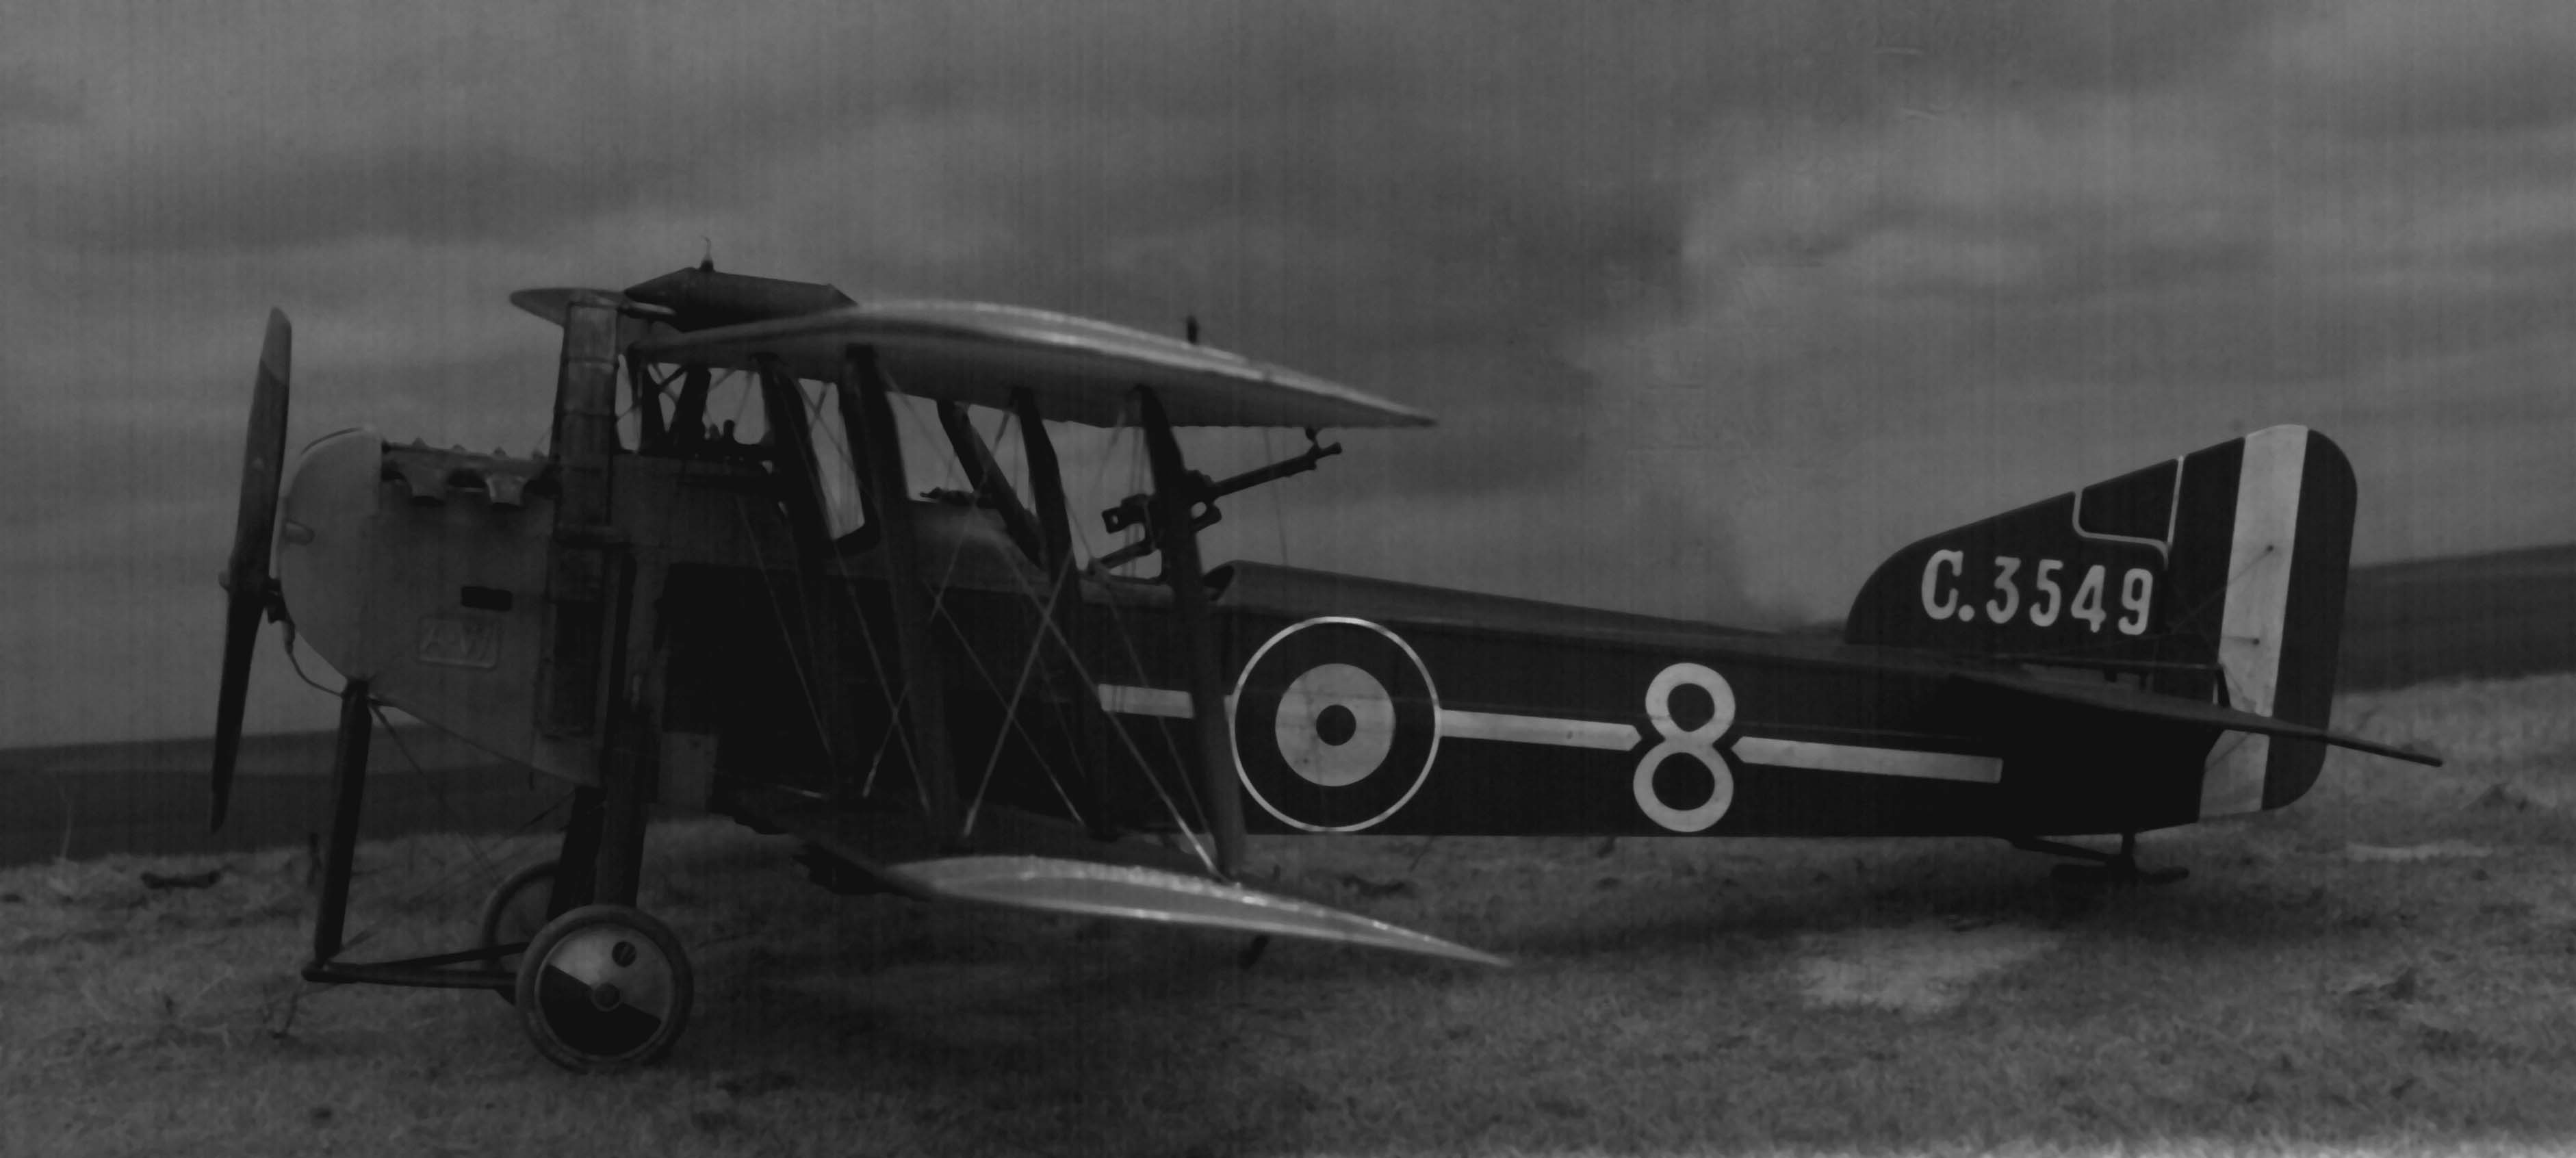
The engine in the pictures is built OOB with an extensive weathering. Now, I`m planning to add some wires, pipes and an oil tank - which will be similar to the Beardmore used with the FE2B flying replica. I use the pictures of the latter taken by Jamo_kiwi.
What do you think - may I use them and apply an analogy to the F.K.?
It`s important because I want to leave some of the cowling off to show the engine.
The resin Beardmore is great but pictures show a lot of spots, where I need to do touch ups.
Merlin
Senior Editor #017
United Kingdom
Joined: June 11, 2003
KitMaker: 17,582 posts
AeroScale: 12,795 posts
Posted: Saturday, July 08, 2017 - 12:18 AM UTC
Hi Filip
Lovely work again!
I was also struck by how good the styrene engine looks when I reviewed the kits, but the resin version is a gem - and the Premium edition exhaust stack is almost beyond belief!
I've got a day off work tomorrow, so I hope to get a bit of modelling done. Trouble is... I've got too many projects on the go, all fighting for attention. Now, there's a change...

All the best
Rowan
BEWARE OF THE FEW...
As I grow older, I regret to say that a detestable habit of thinking seems to be getting a hold of me. - H. Rider Haggard
Wojewodztwo Wielkopolskie, Poland
Joined: March 18, 2012
KitMaker: 135 posts
AeroScale: 135 posts
Posted: Sunday, July 09, 2017 - 03:08 PM UTC
Wojewodztwo Wielkopolskie, Poland
Joined: March 18, 2012
KitMaker: 135 posts
AeroScale: 135 posts
Posted: Monday, July 17, 2017 - 01:13 PM UTC
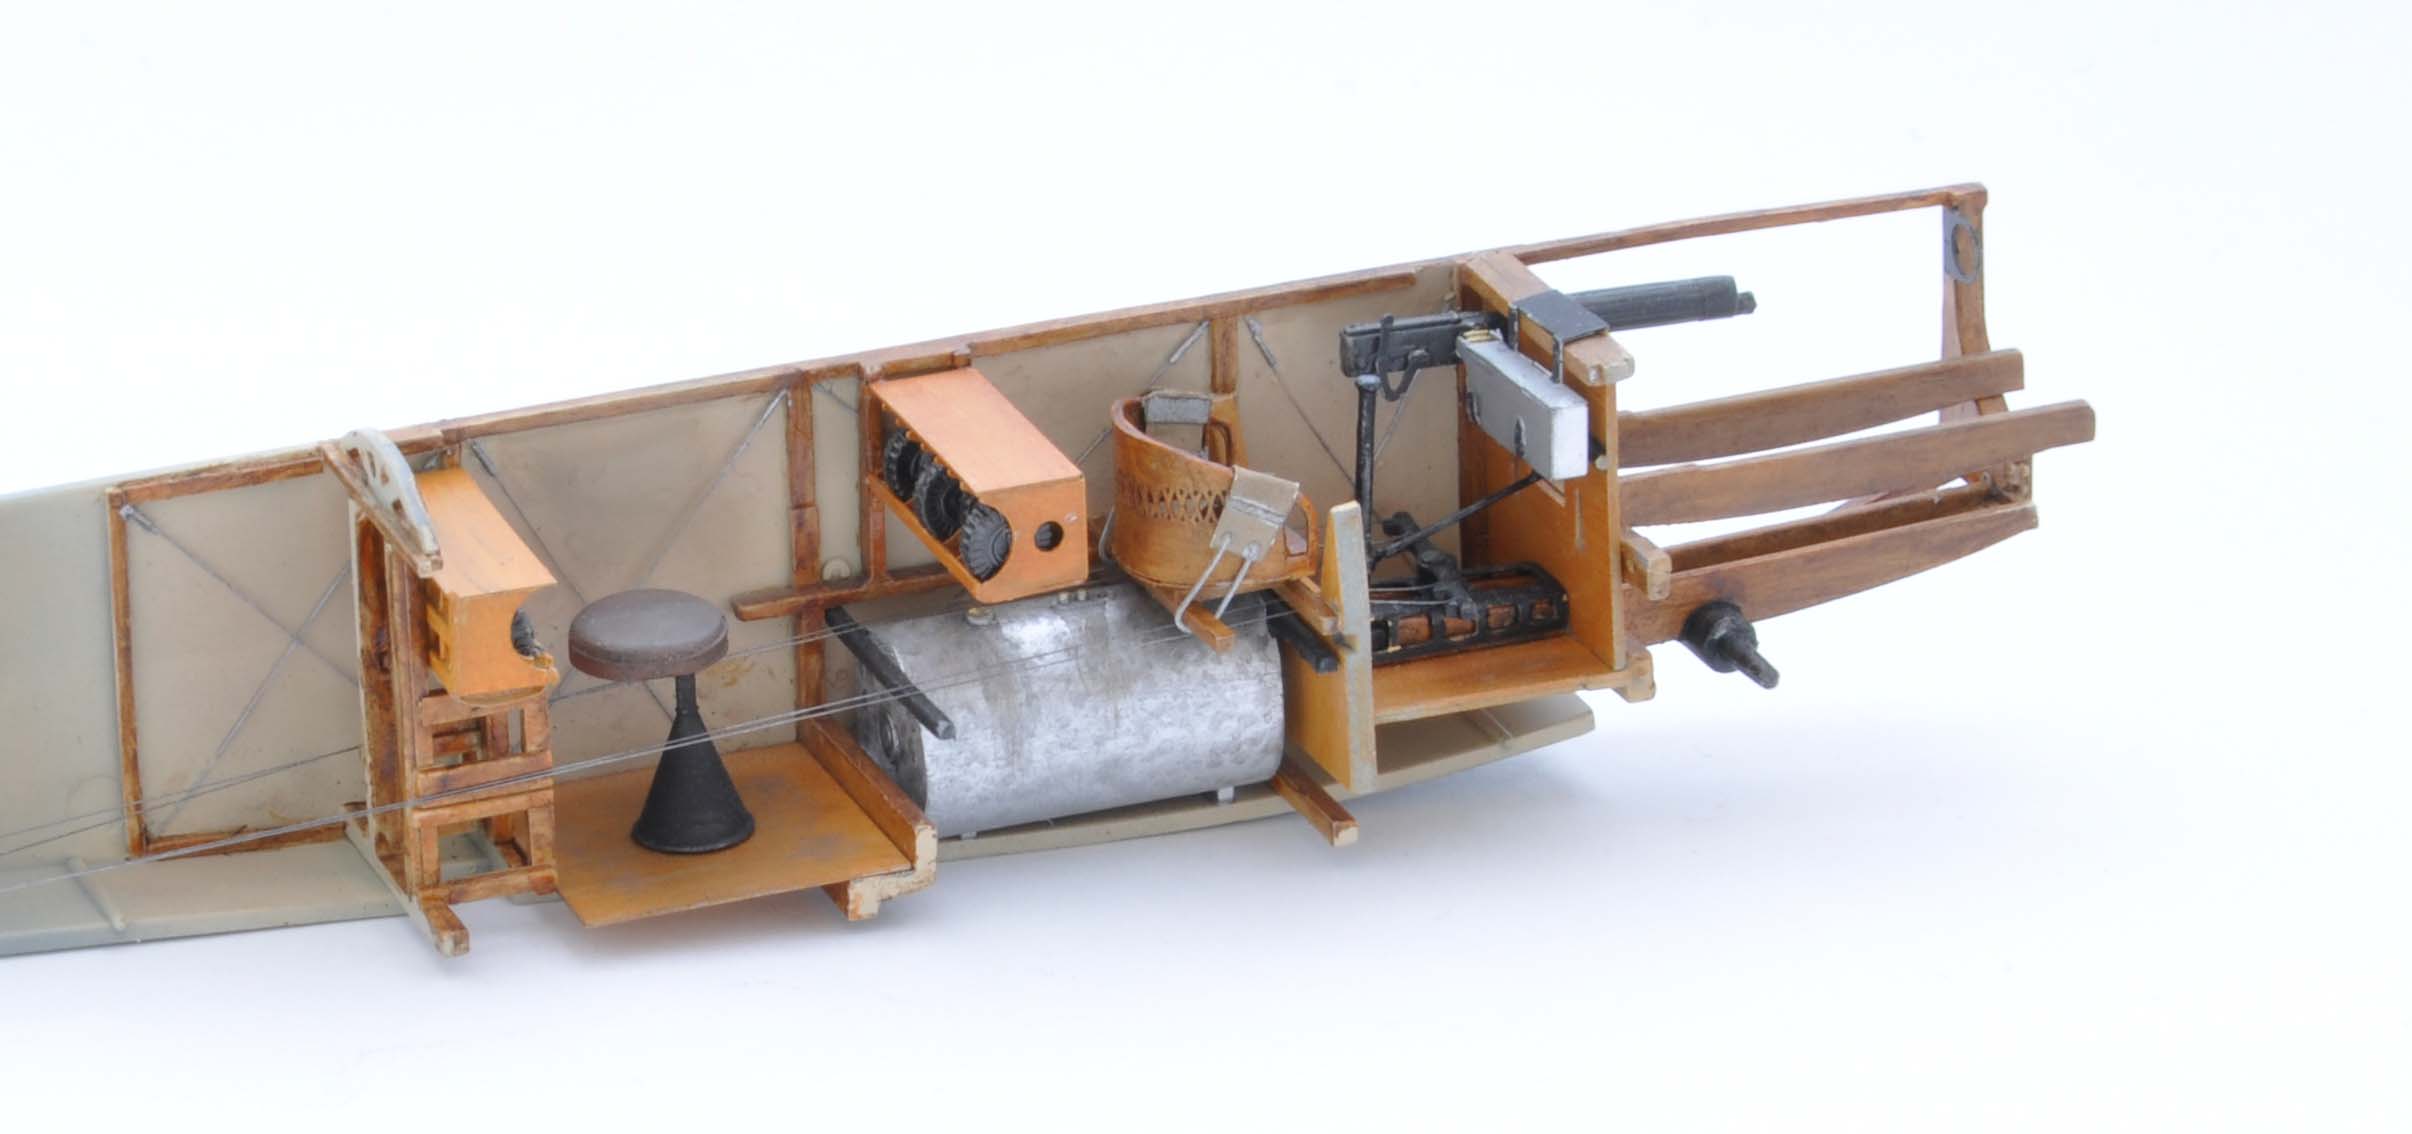
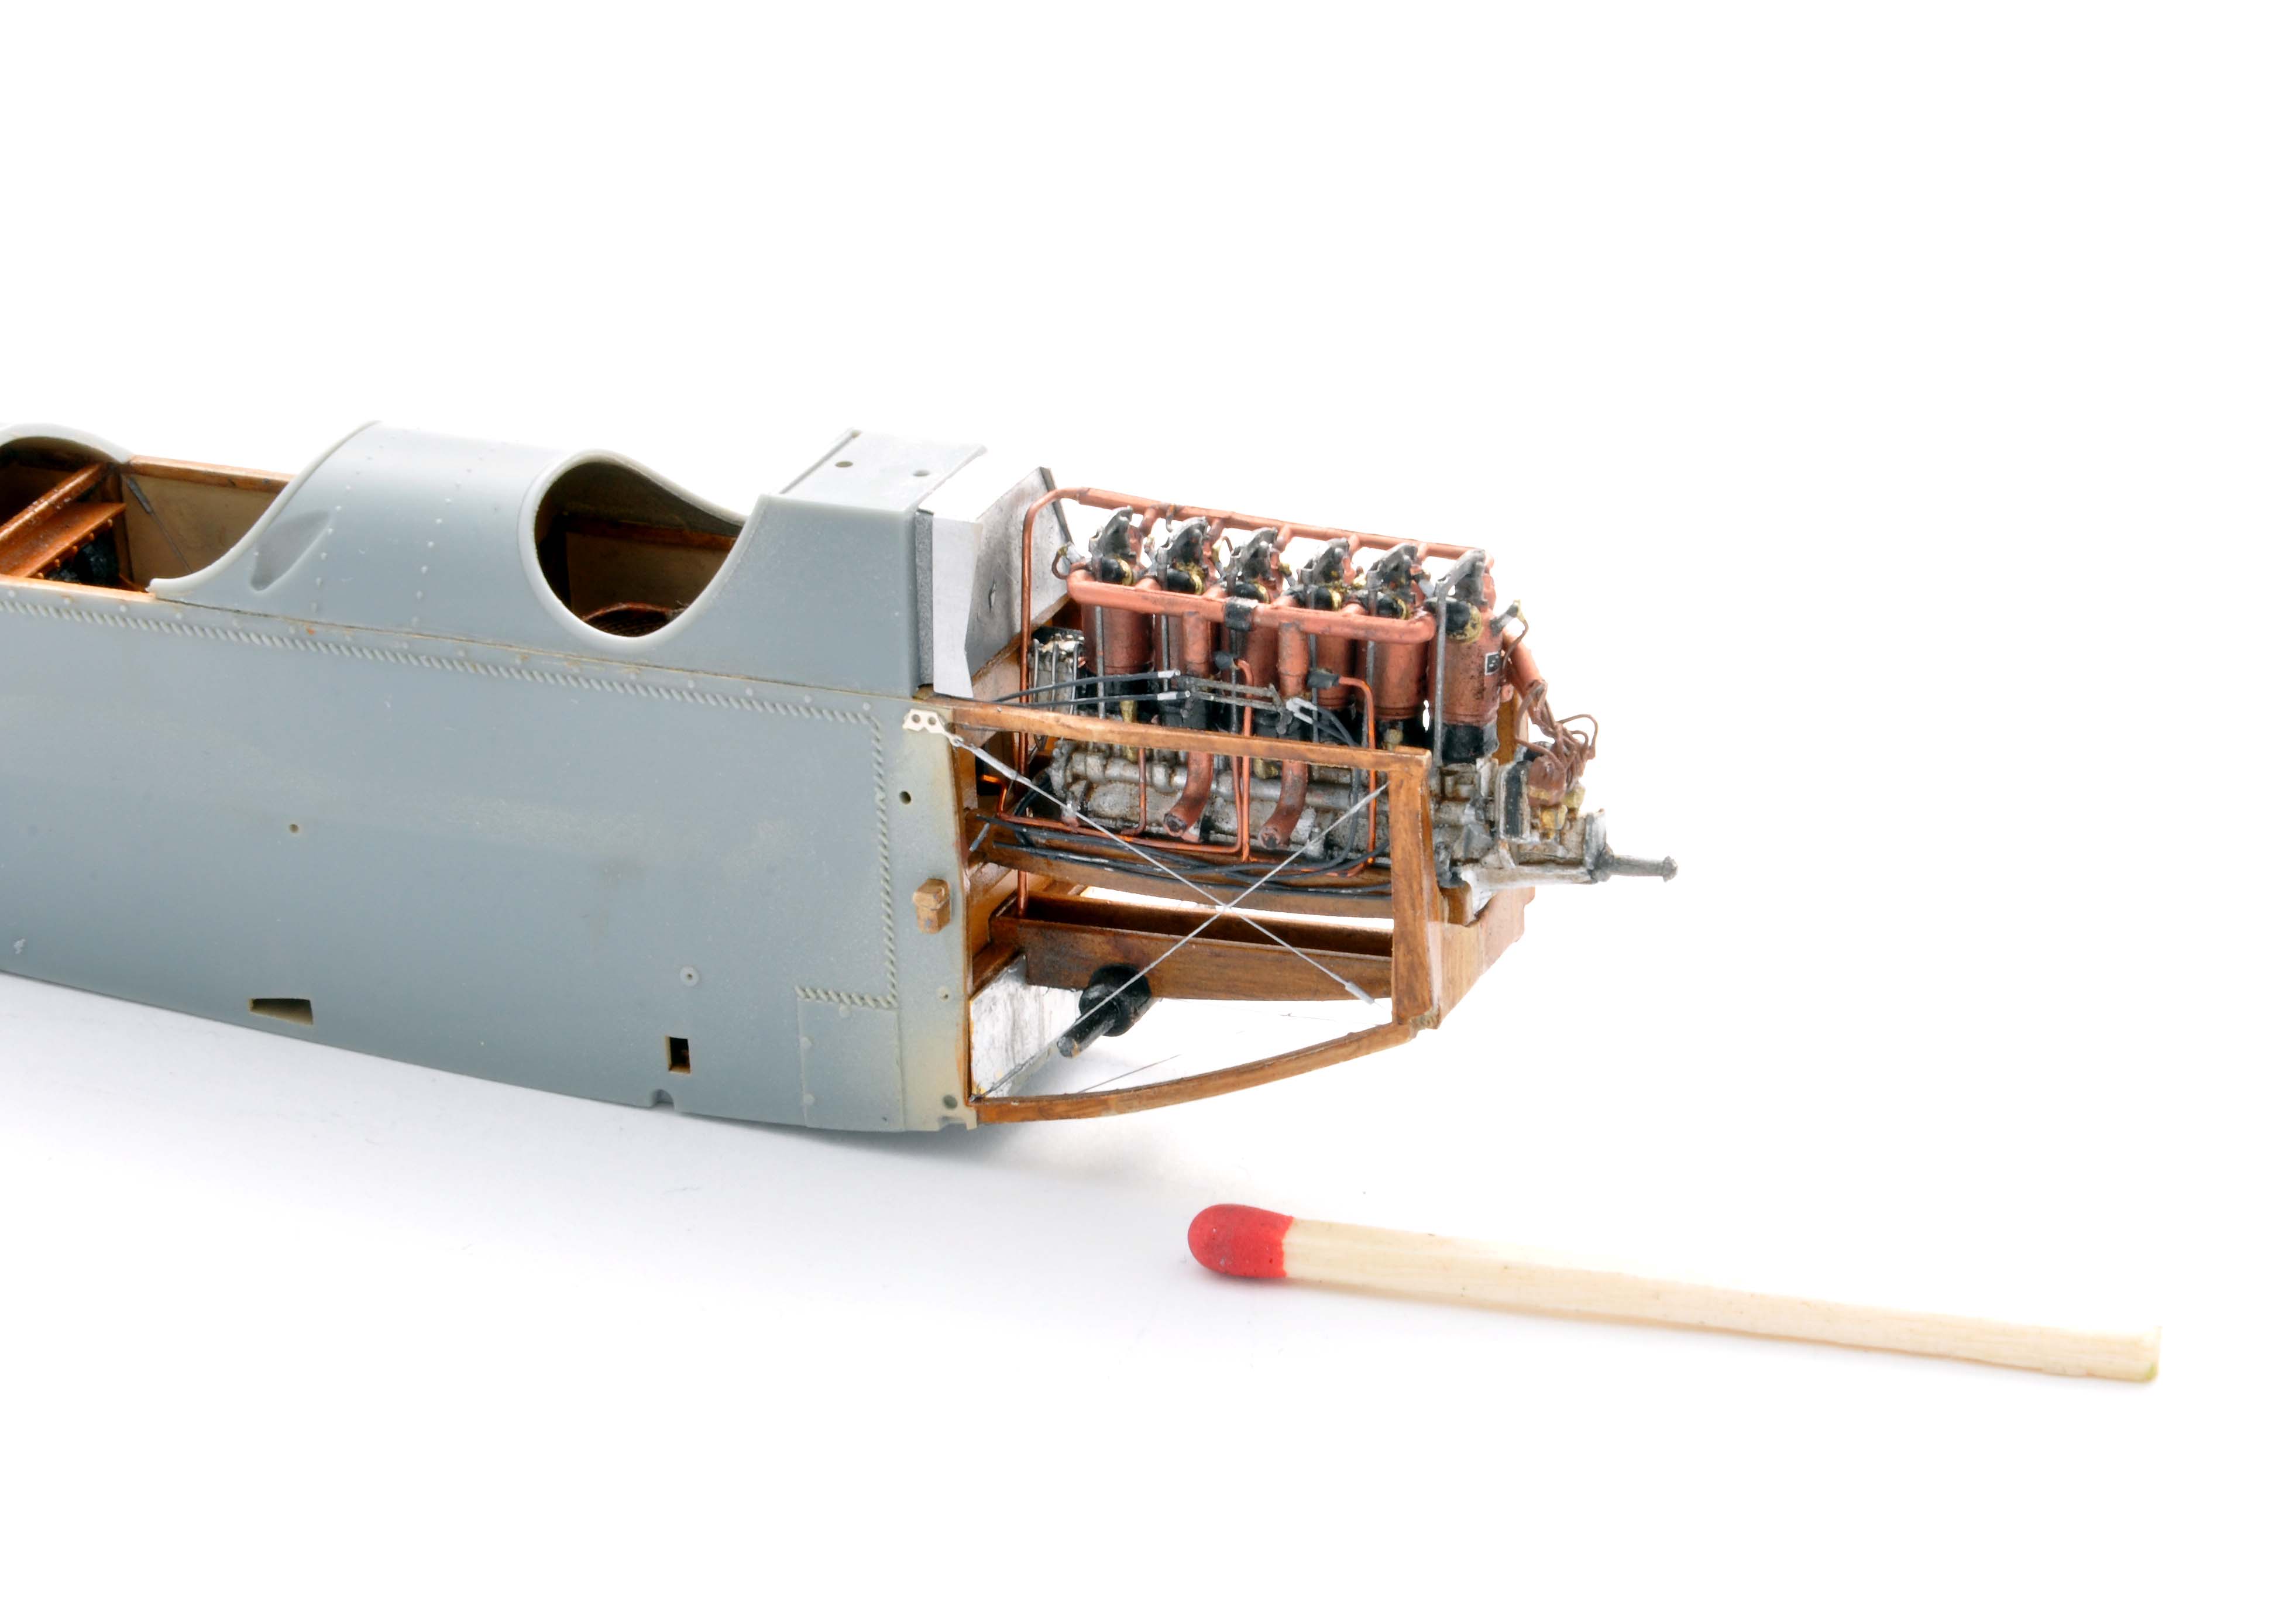
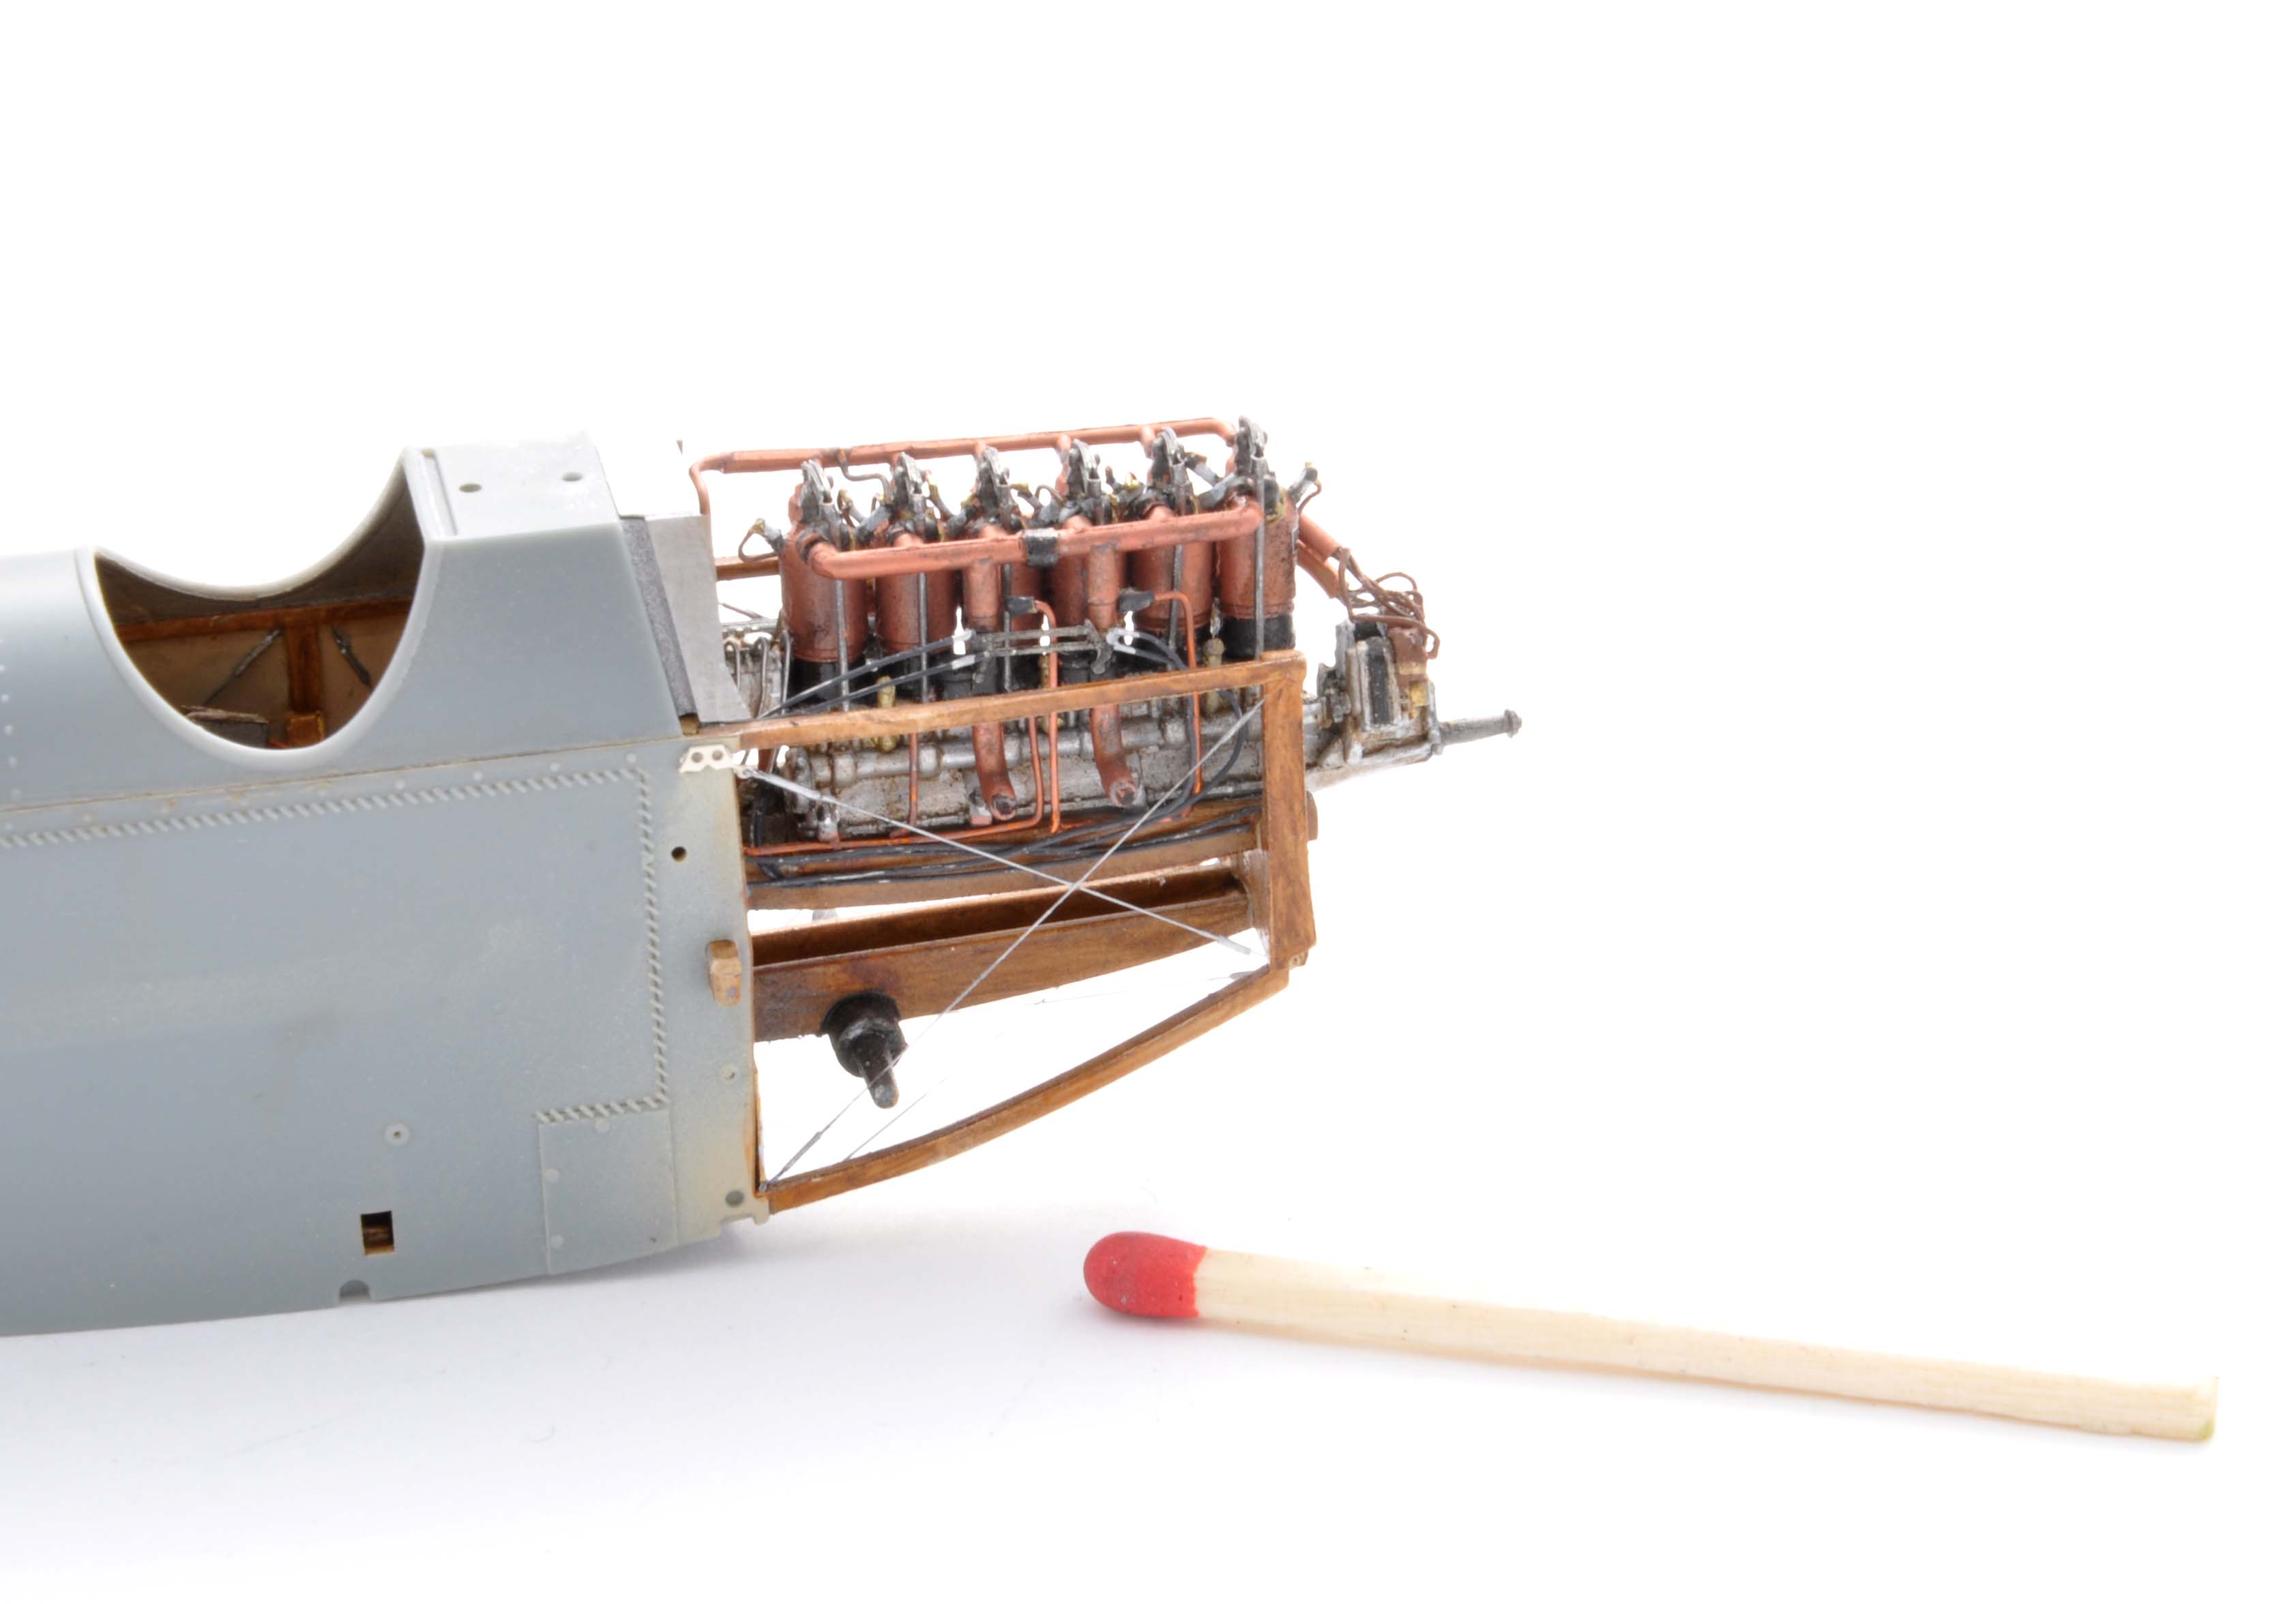
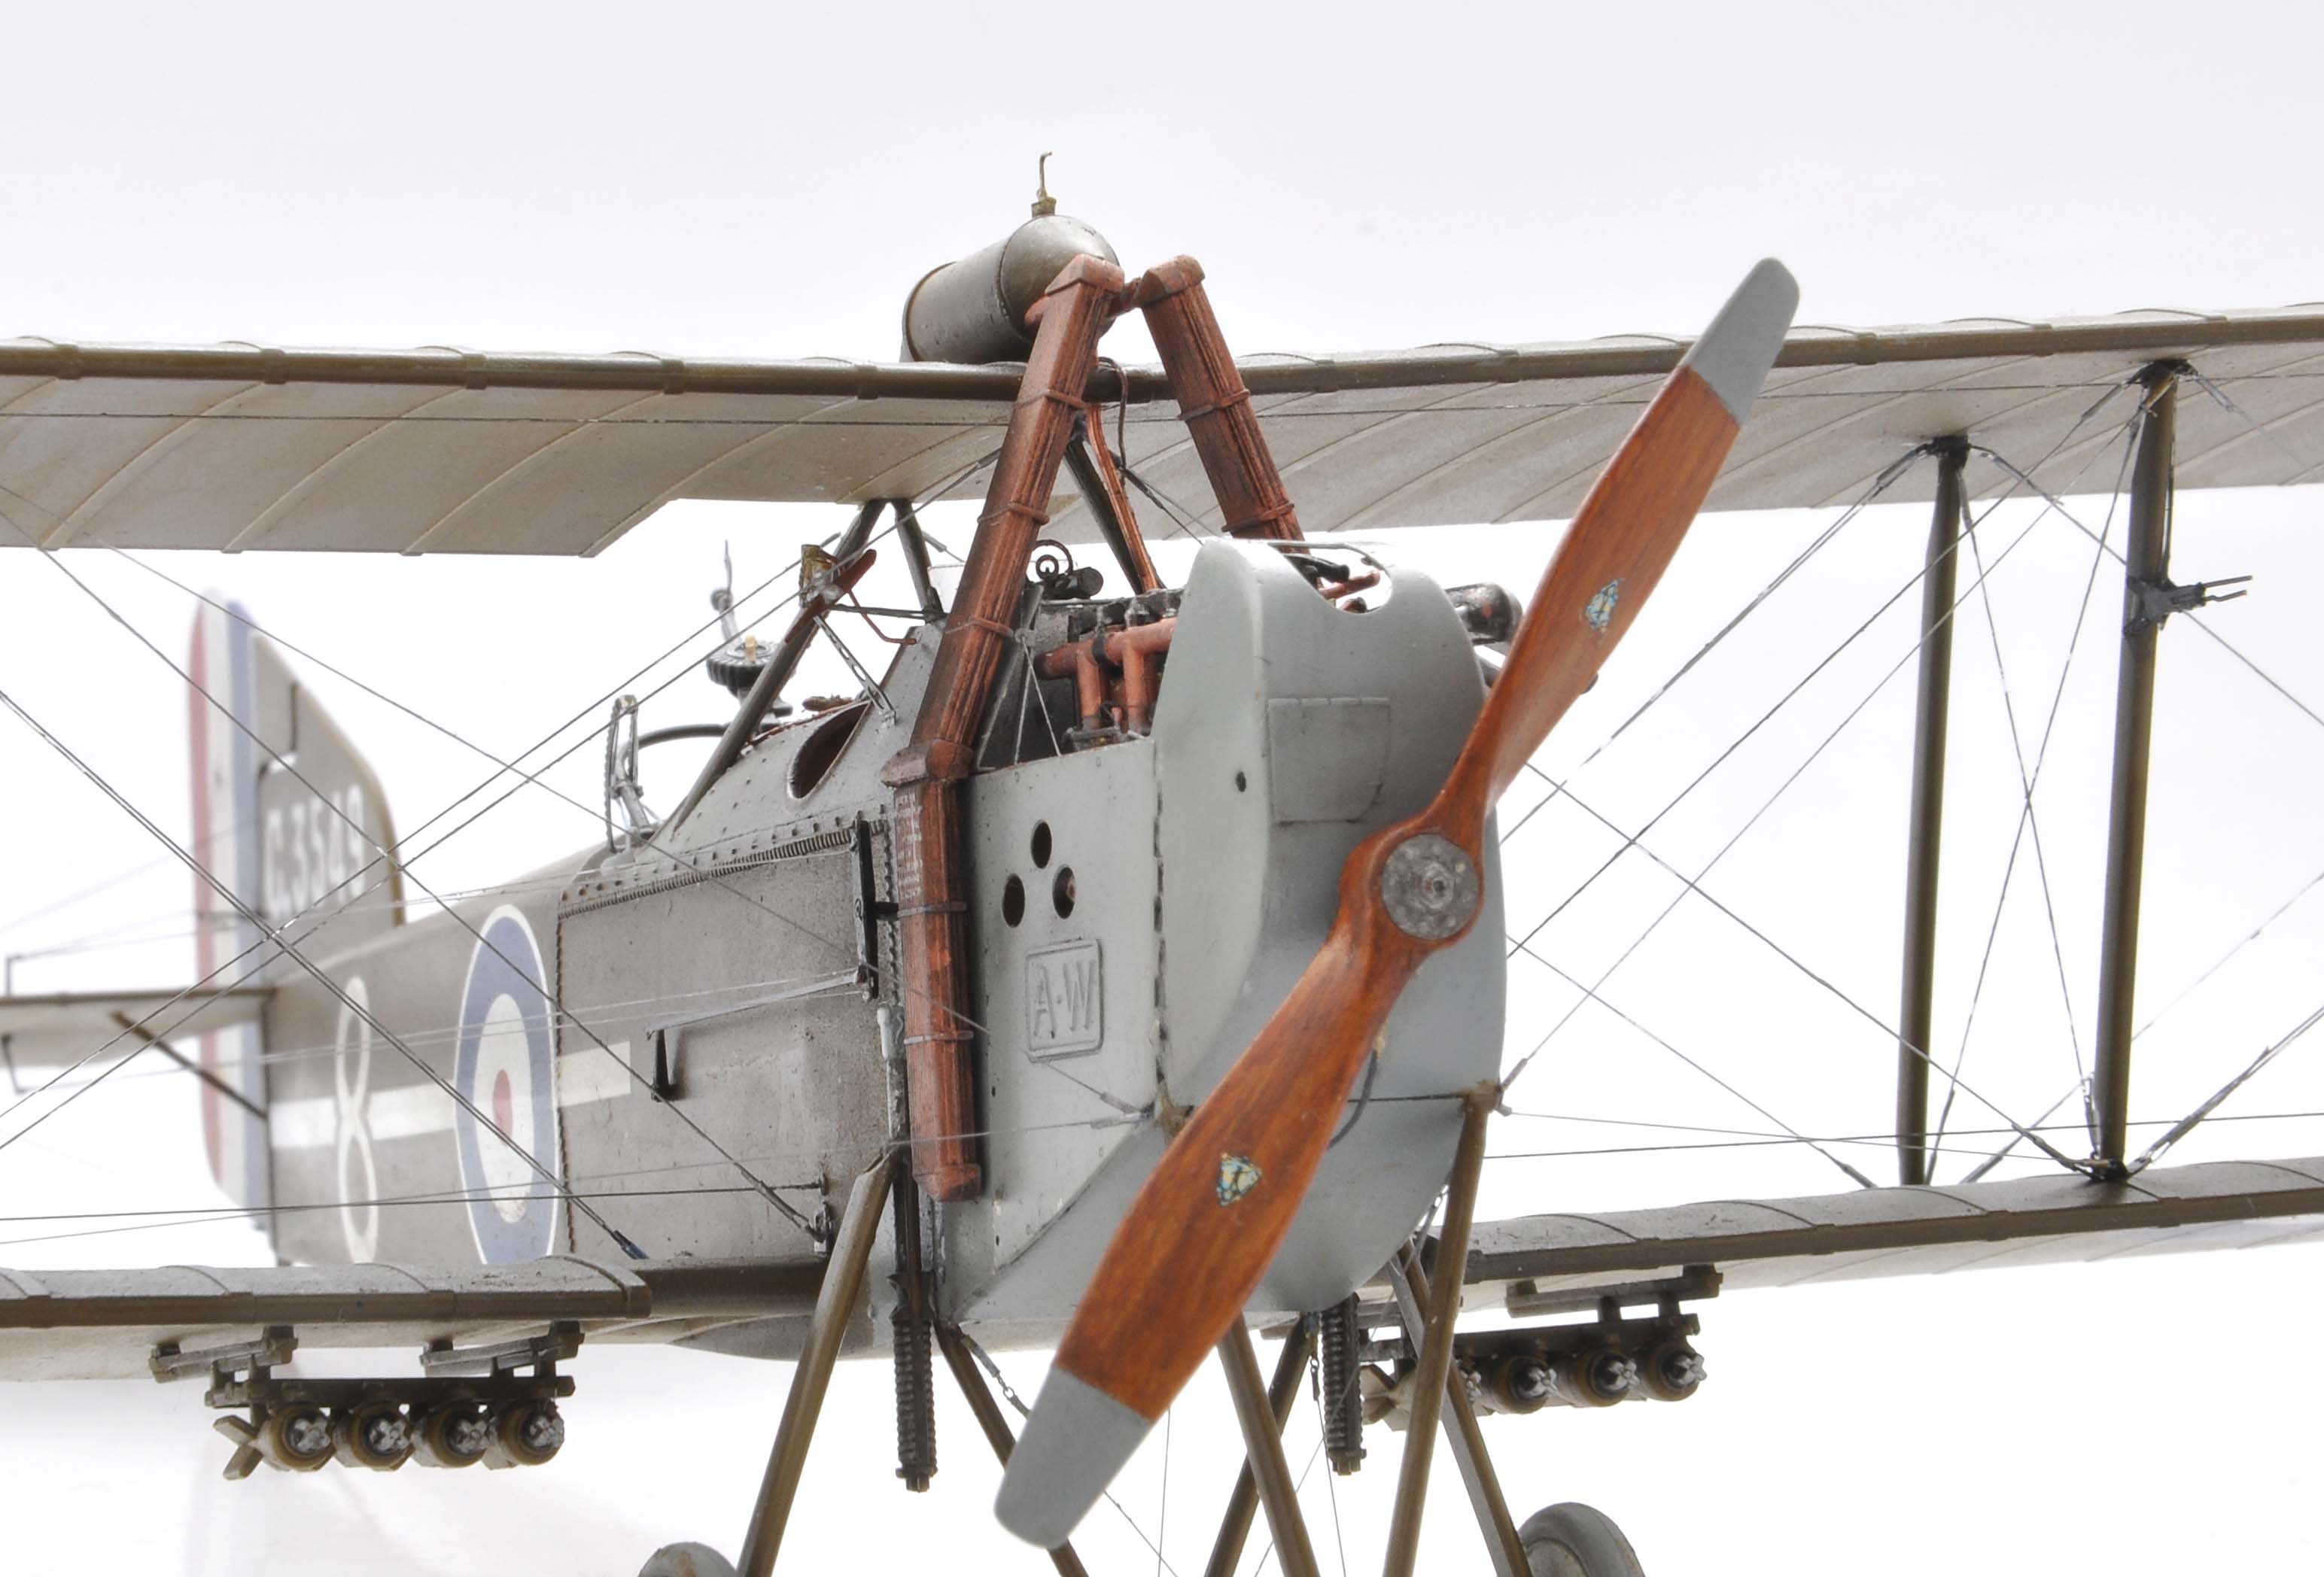
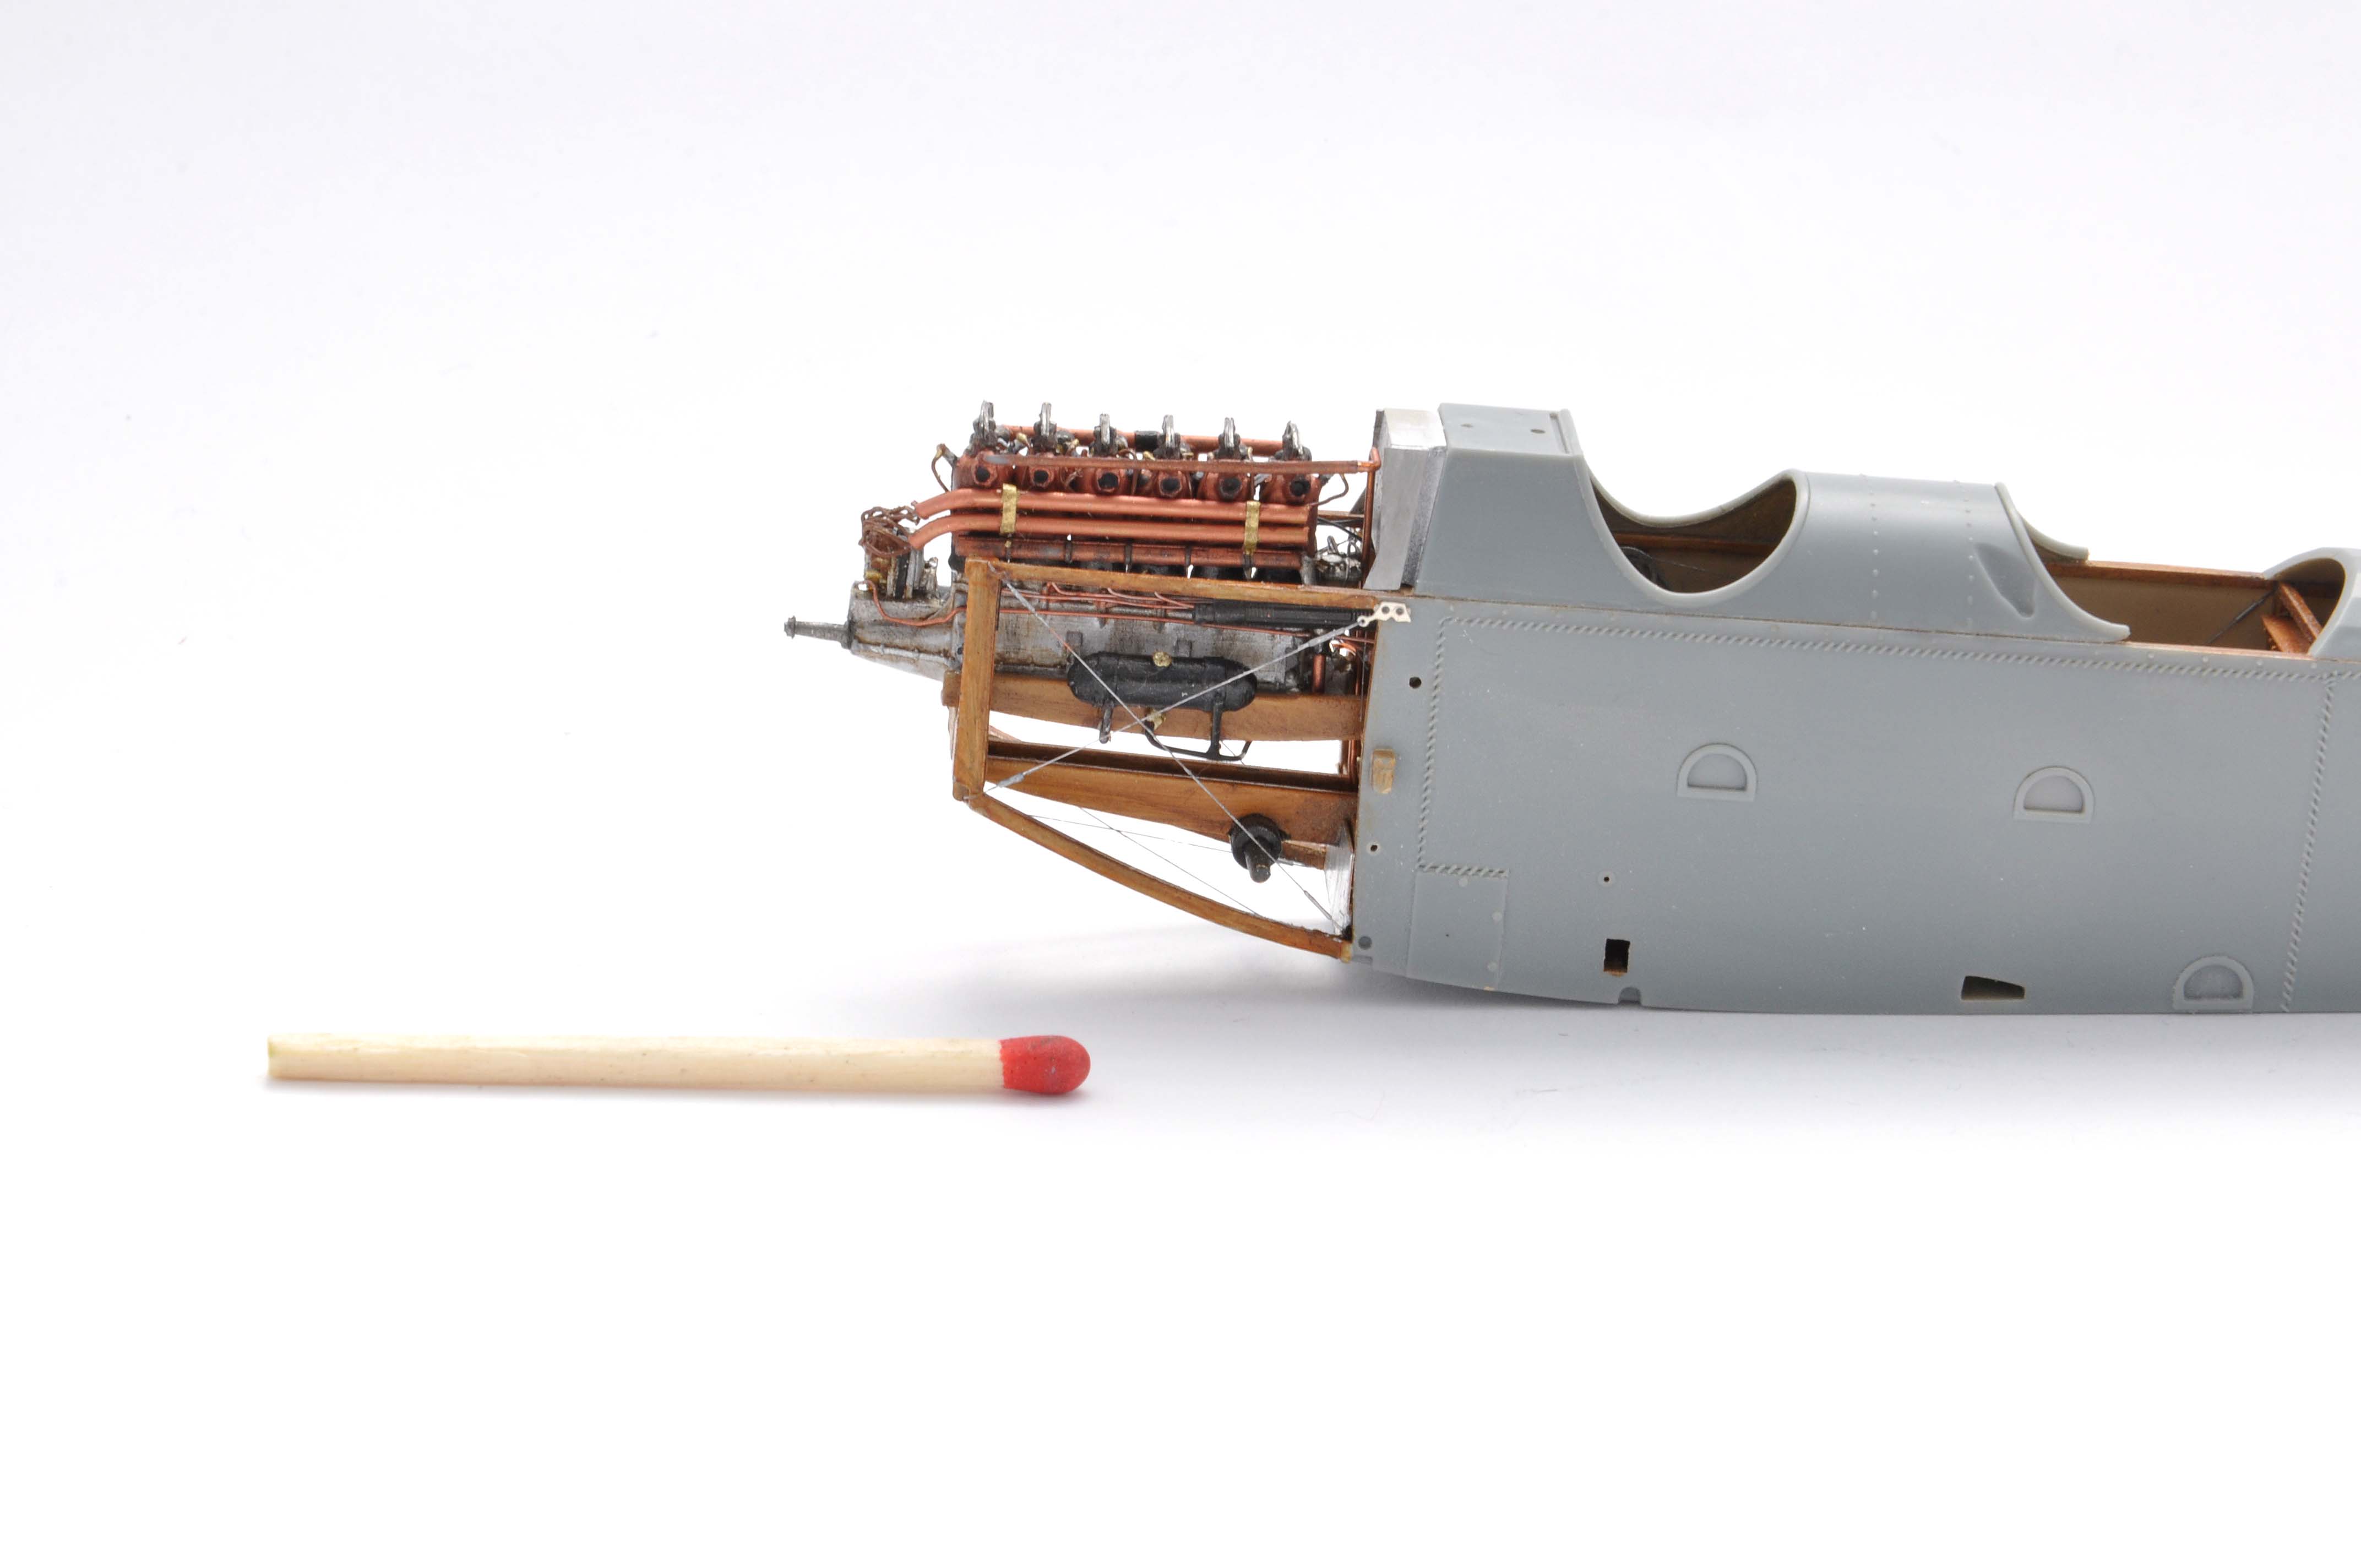
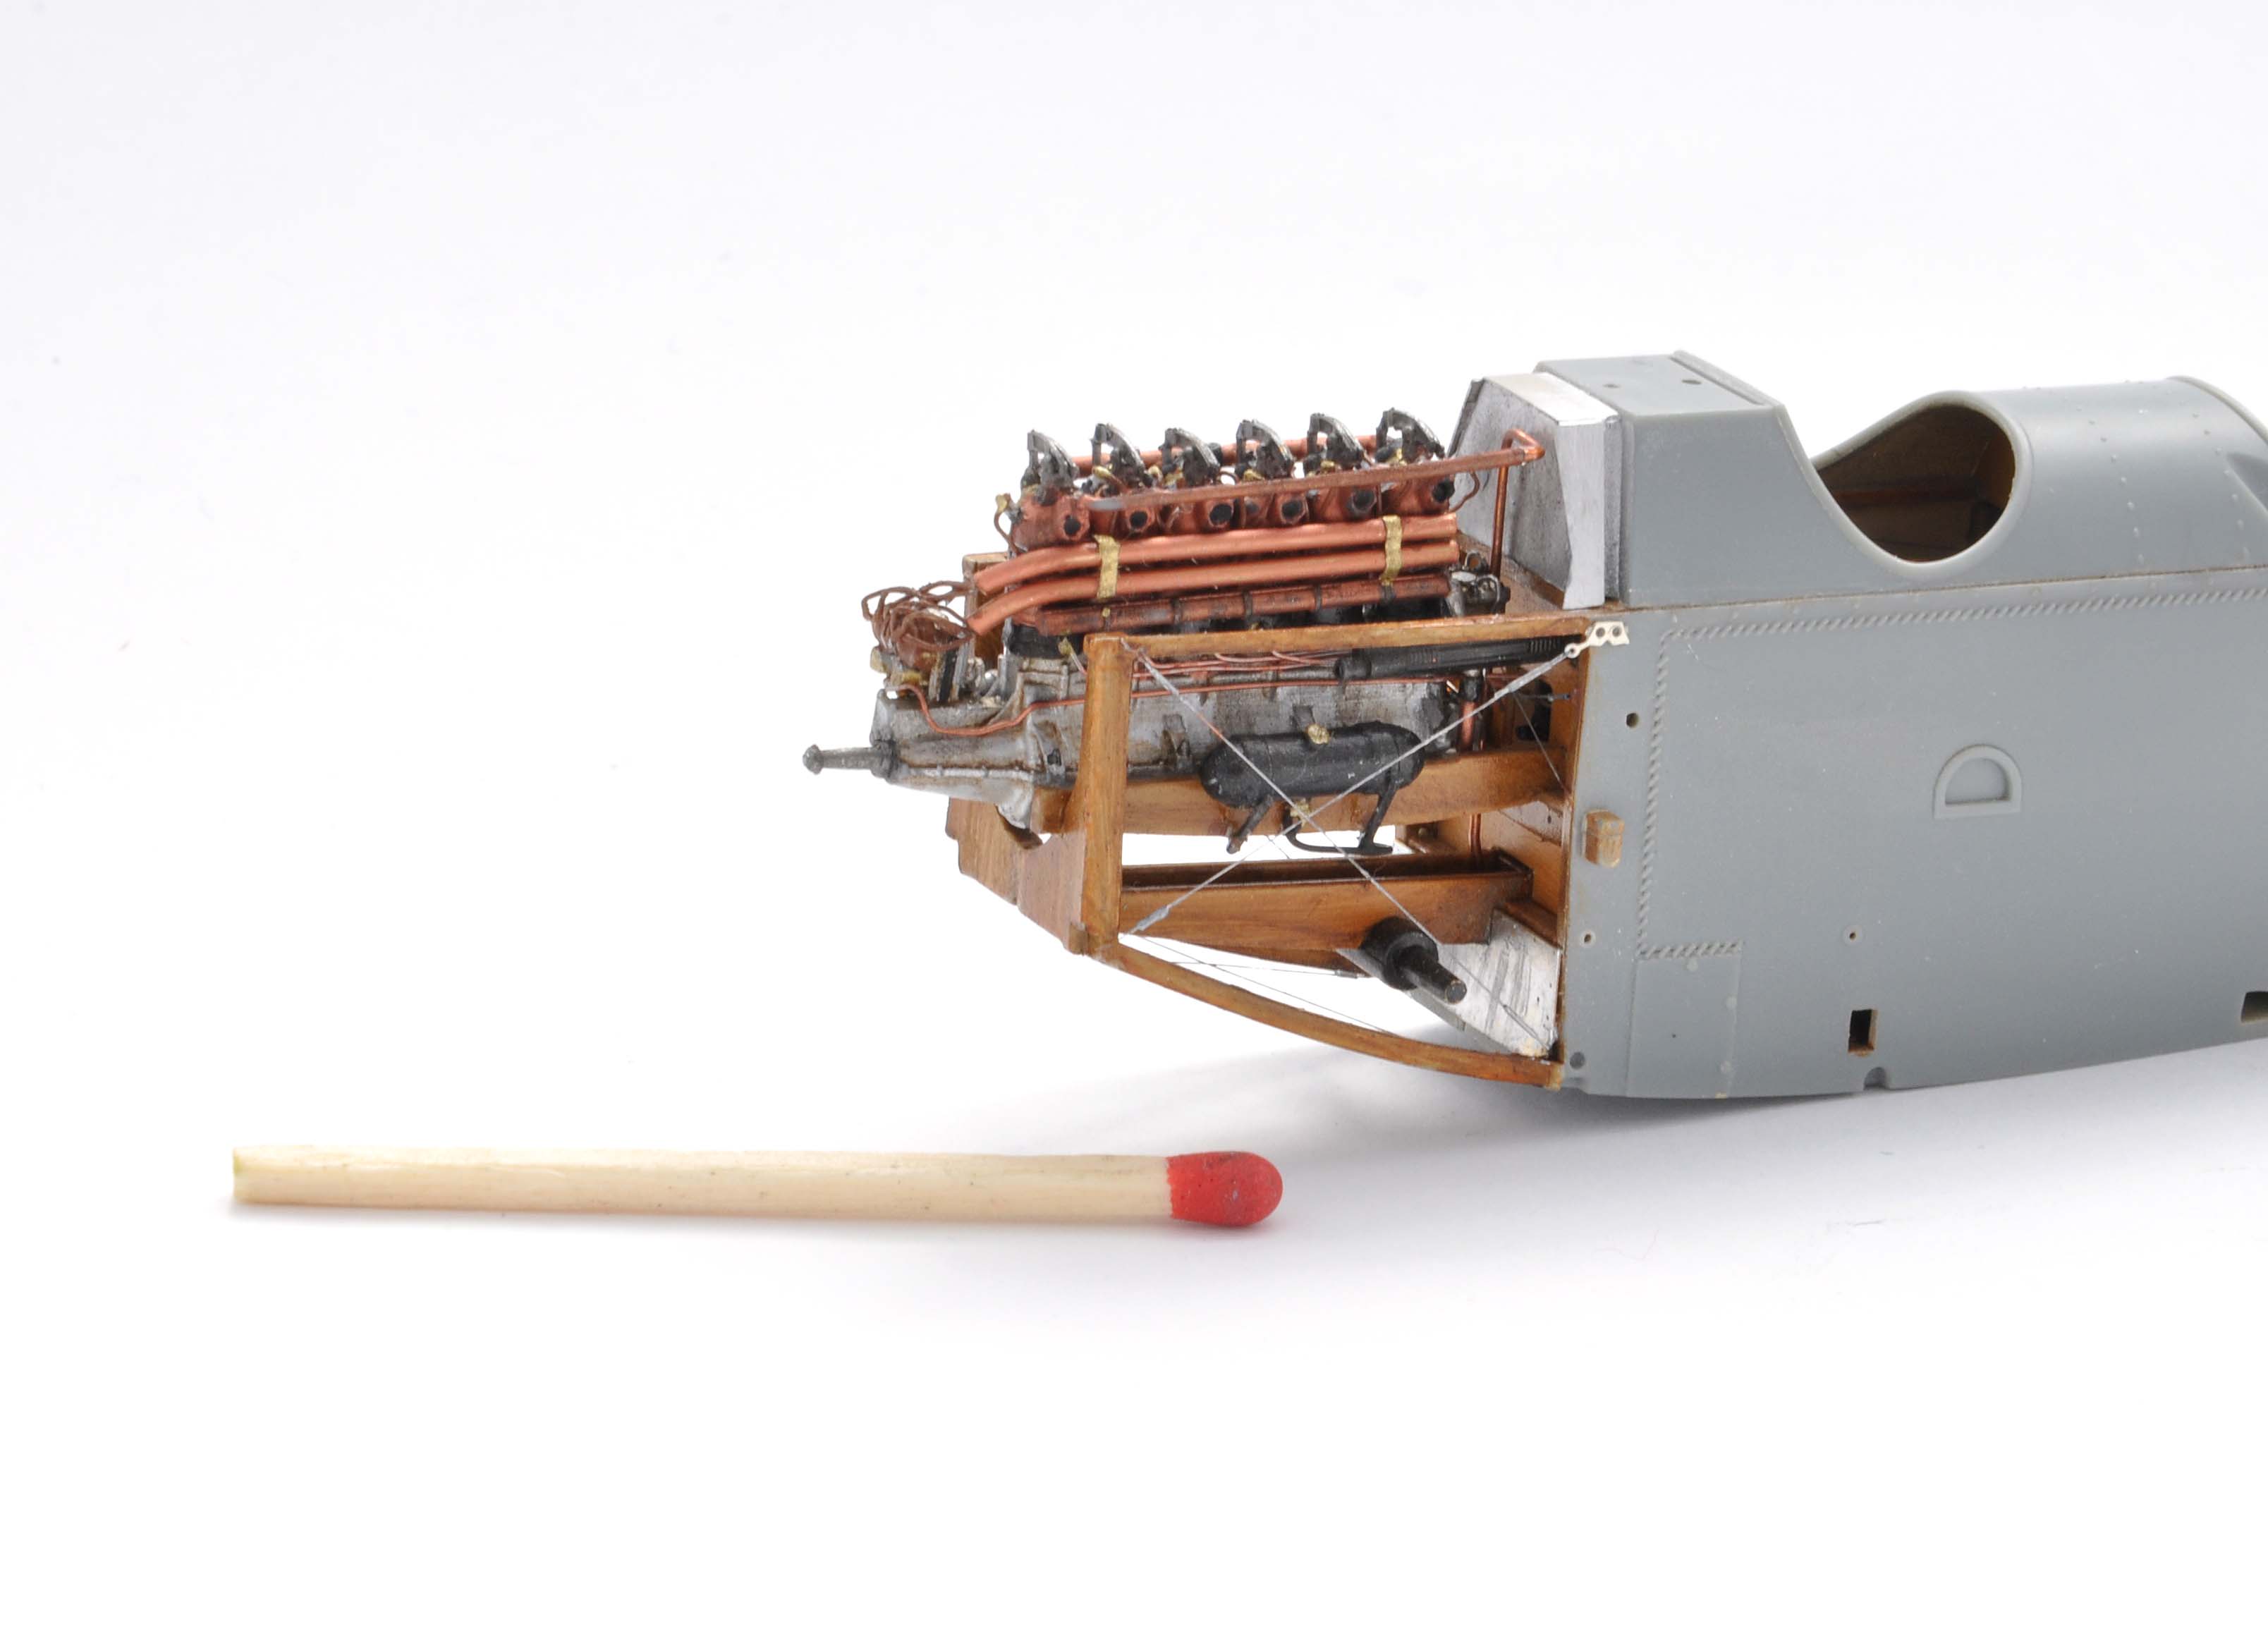
Another small update - I`ve scratched the oil tank since there are no pictures of the port of the engine bay of F.K.8 (at least to my knowledge) I had to figure things out on my own.
Ontario, Canada
Joined: July 22, 2012
KitMaker: 771 posts
AeroScale: 763 posts
Posted: Monday, July 17, 2017 - 06:41 PM UTC
Matt Odom
I've been known to build a few things
Merlin
Senior Editor #017
United Kingdom
Joined: June 11, 2003
KitMaker: 17,582 posts
AeroScale: 12,795 posts
Posted: Tuesday, July 18, 2017 - 01:55 AM UTC
Hi again Filip
That engine is looking magnificent!
I'm afraid I haven't had a chance to progress my build at all, but I did put in a few hours on a little surprise project that's going reasonably well (touch wood!). It's usually the kiss of death if I do a thread on what I'm working on, so I'm tempted to keep it under wraps until it's finished.

All the best
Rowan
BEWARE OF THE FEW...
As I grow older, I regret to say that a detestable habit of thinking seems to be getting a hold of me. - H. Rider Haggard
New Mexico, United States
Joined: June 16, 2014
KitMaker: 681 posts
AeroScale: 14 posts
Posted: Wednesday, July 19, 2017 - 05:01 AM UTC
You're doing some lovely work on your FK 8. I'll enjoy seeing how this project progresses.
Cheers,
Paul H
On the Bench
MiniArt Grant Mk I with Interior
IBG Marmon-Herrington MKII
Wojewodztwo Wielkopolskie, Poland
Joined: March 18, 2012
KitMaker: 135 posts
AeroScale: 135 posts
Posted: Thursday, July 20, 2017 - 10:42 PM UTC
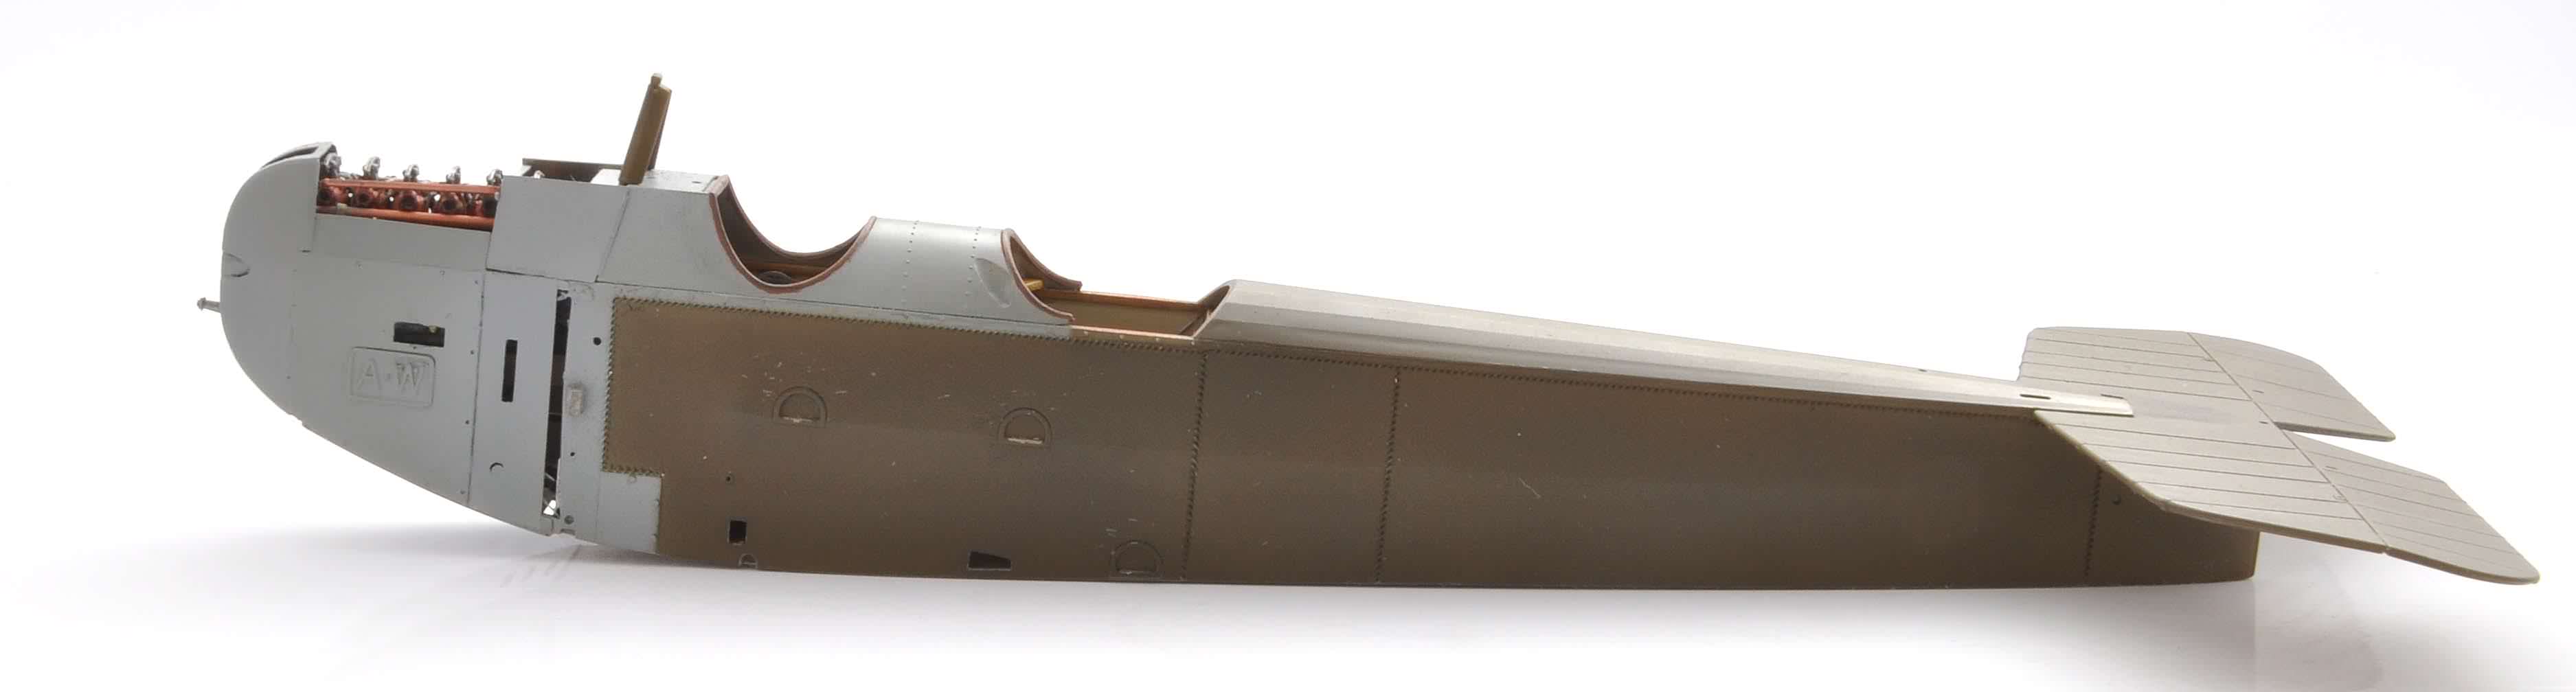
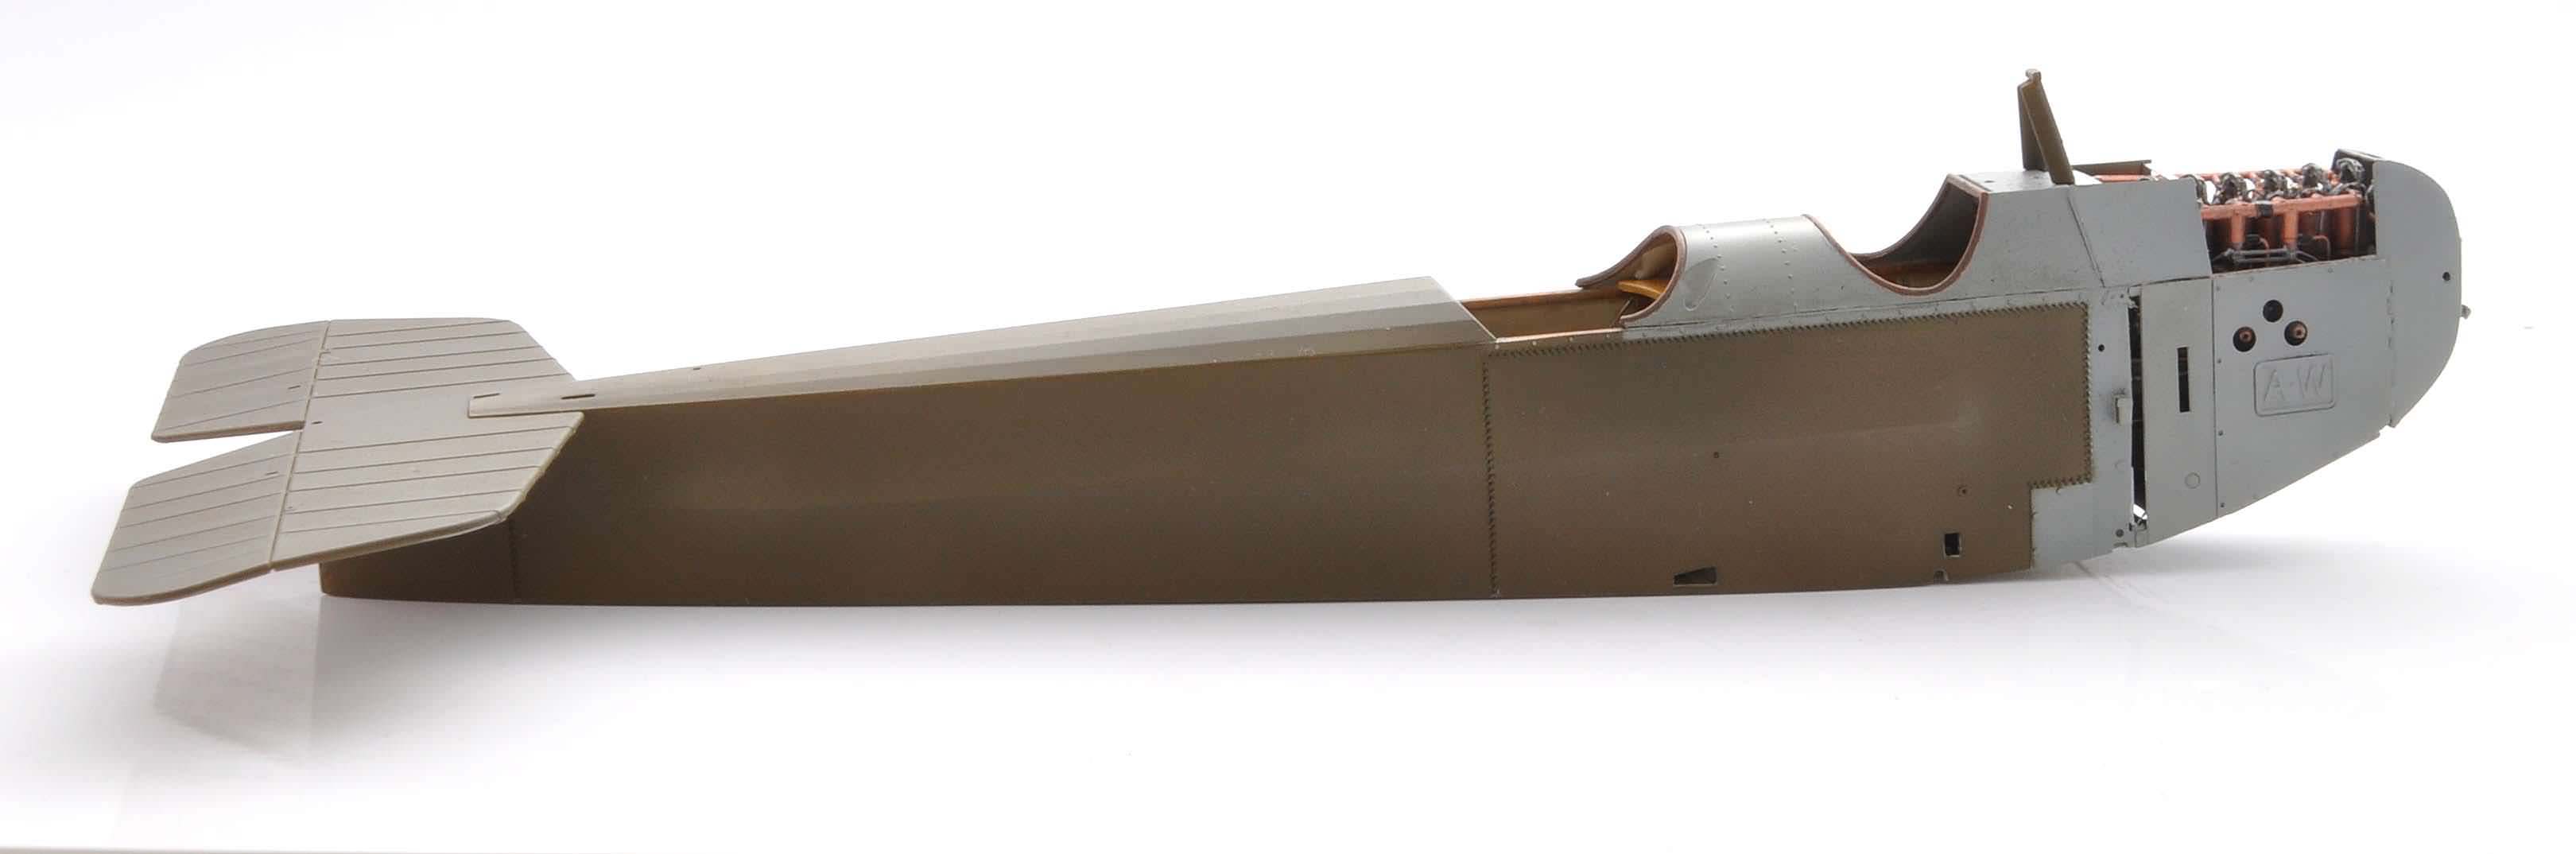
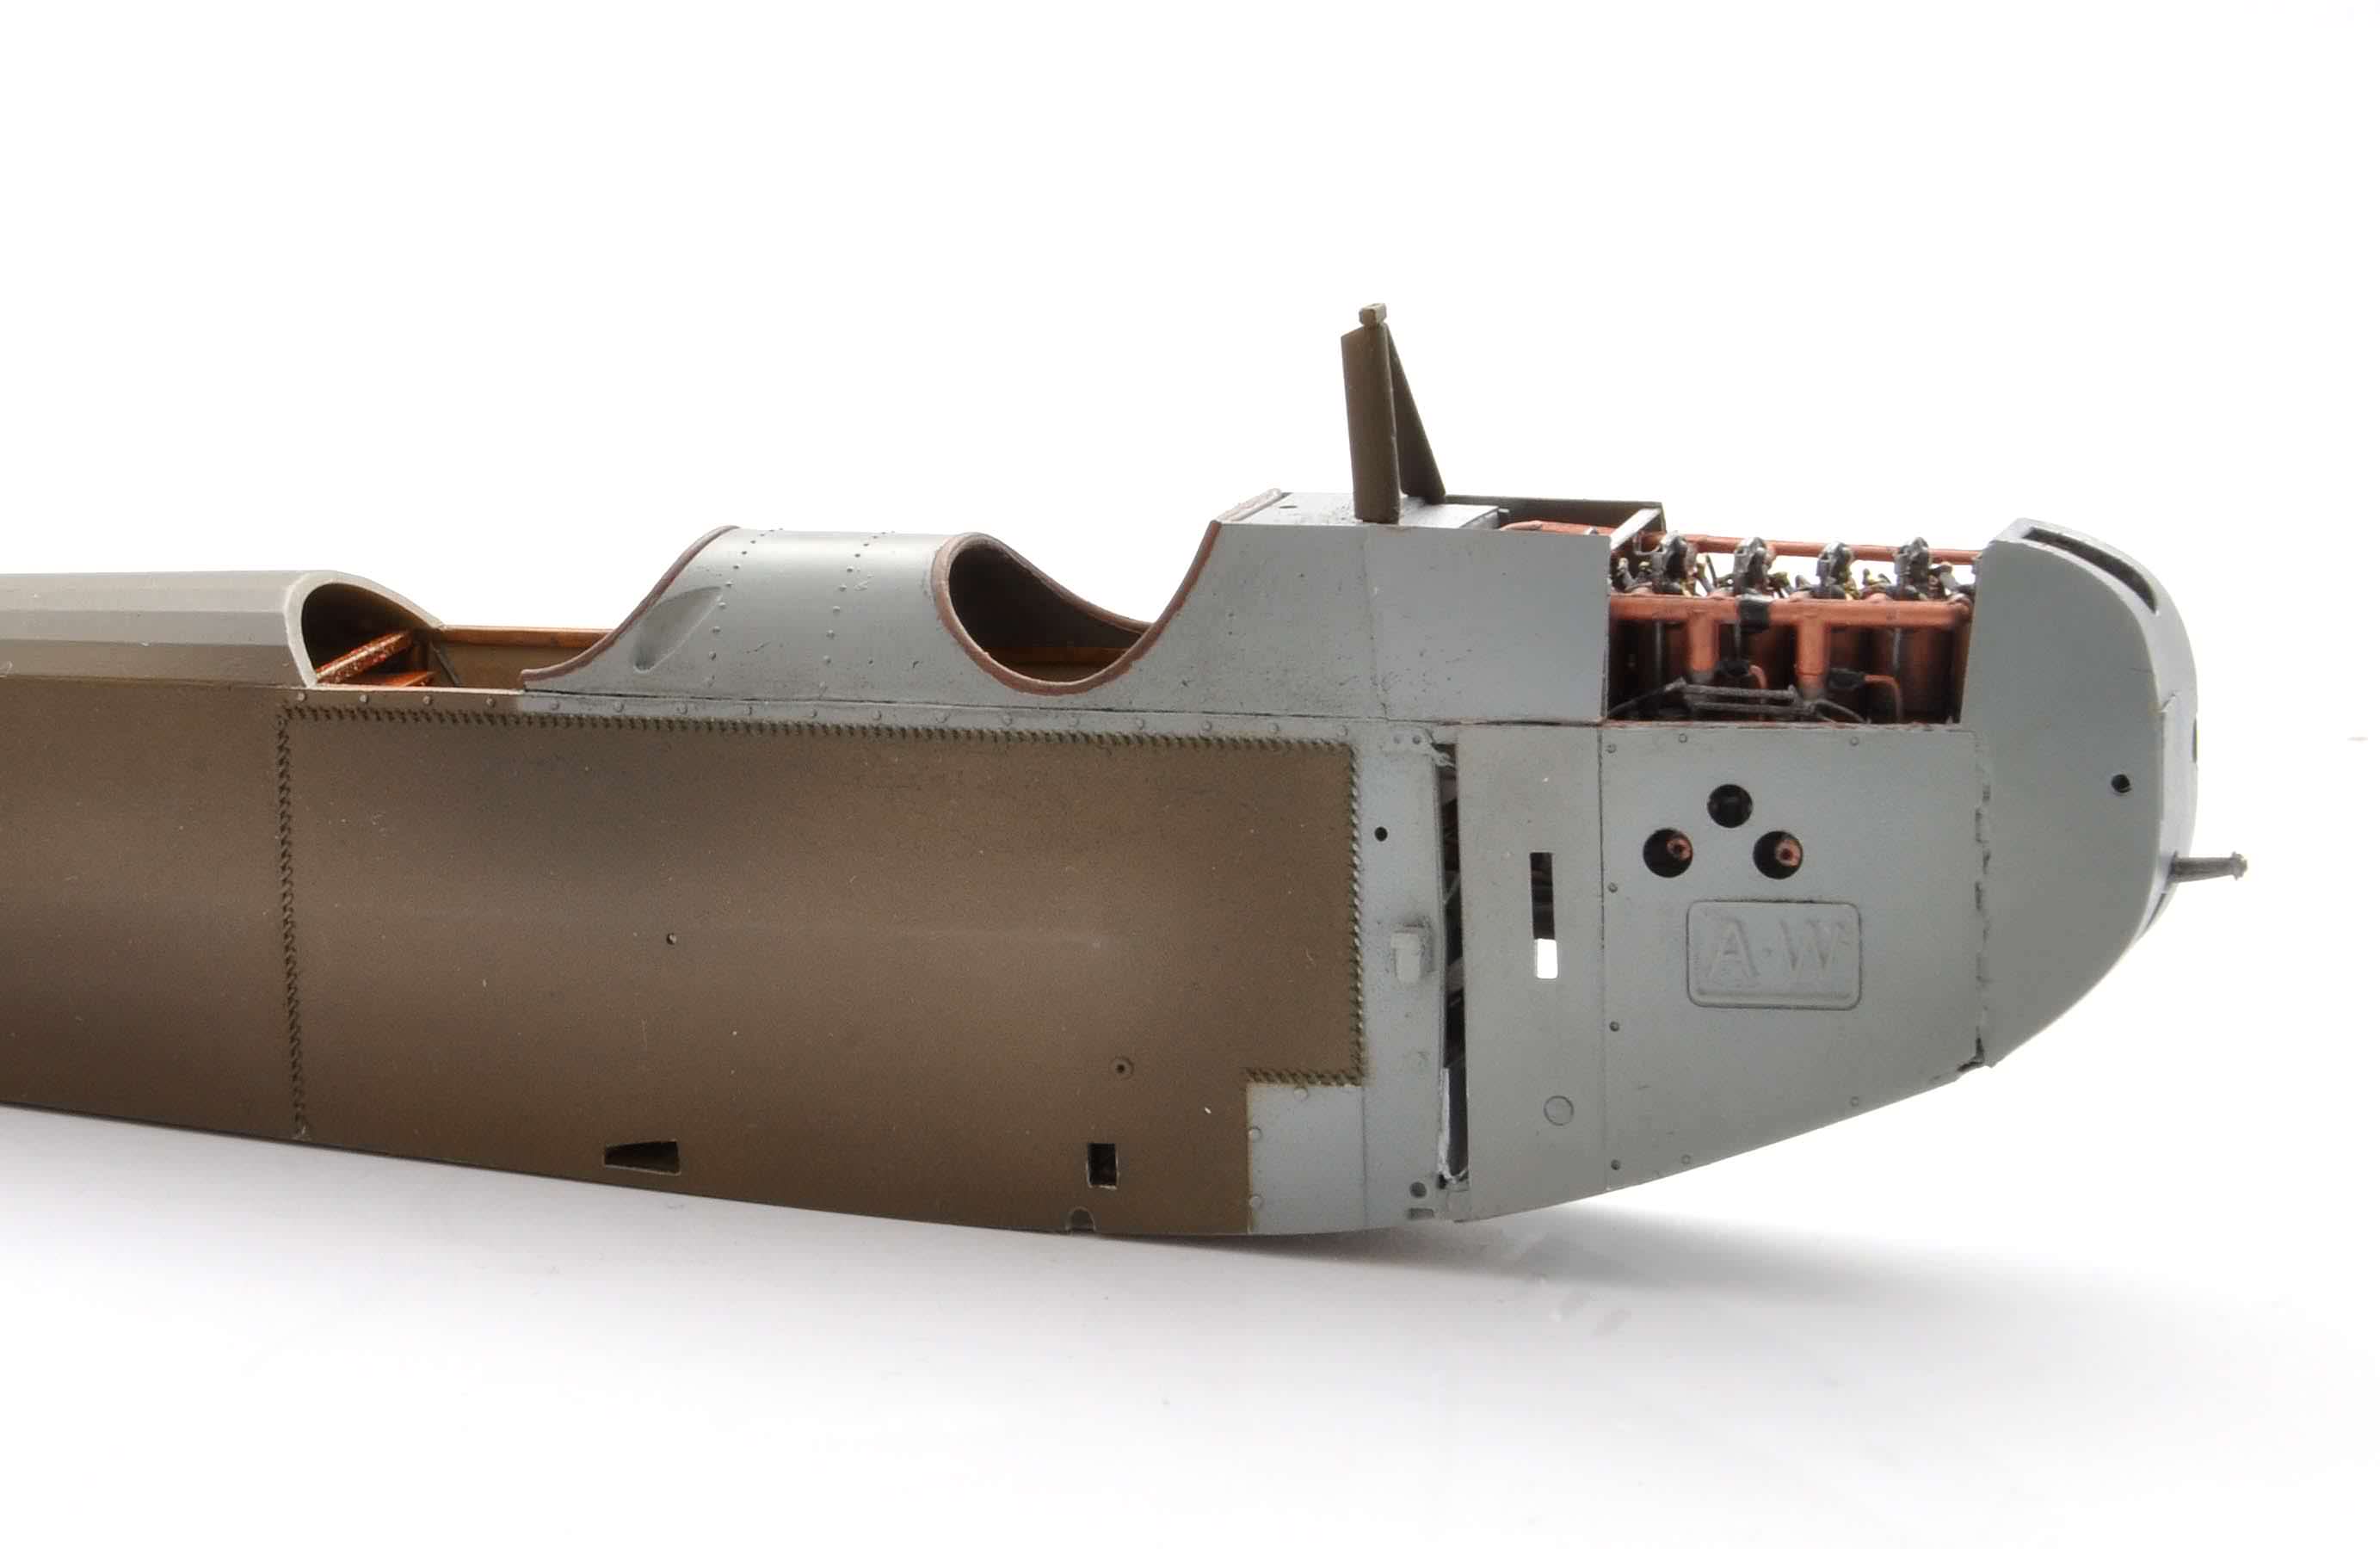
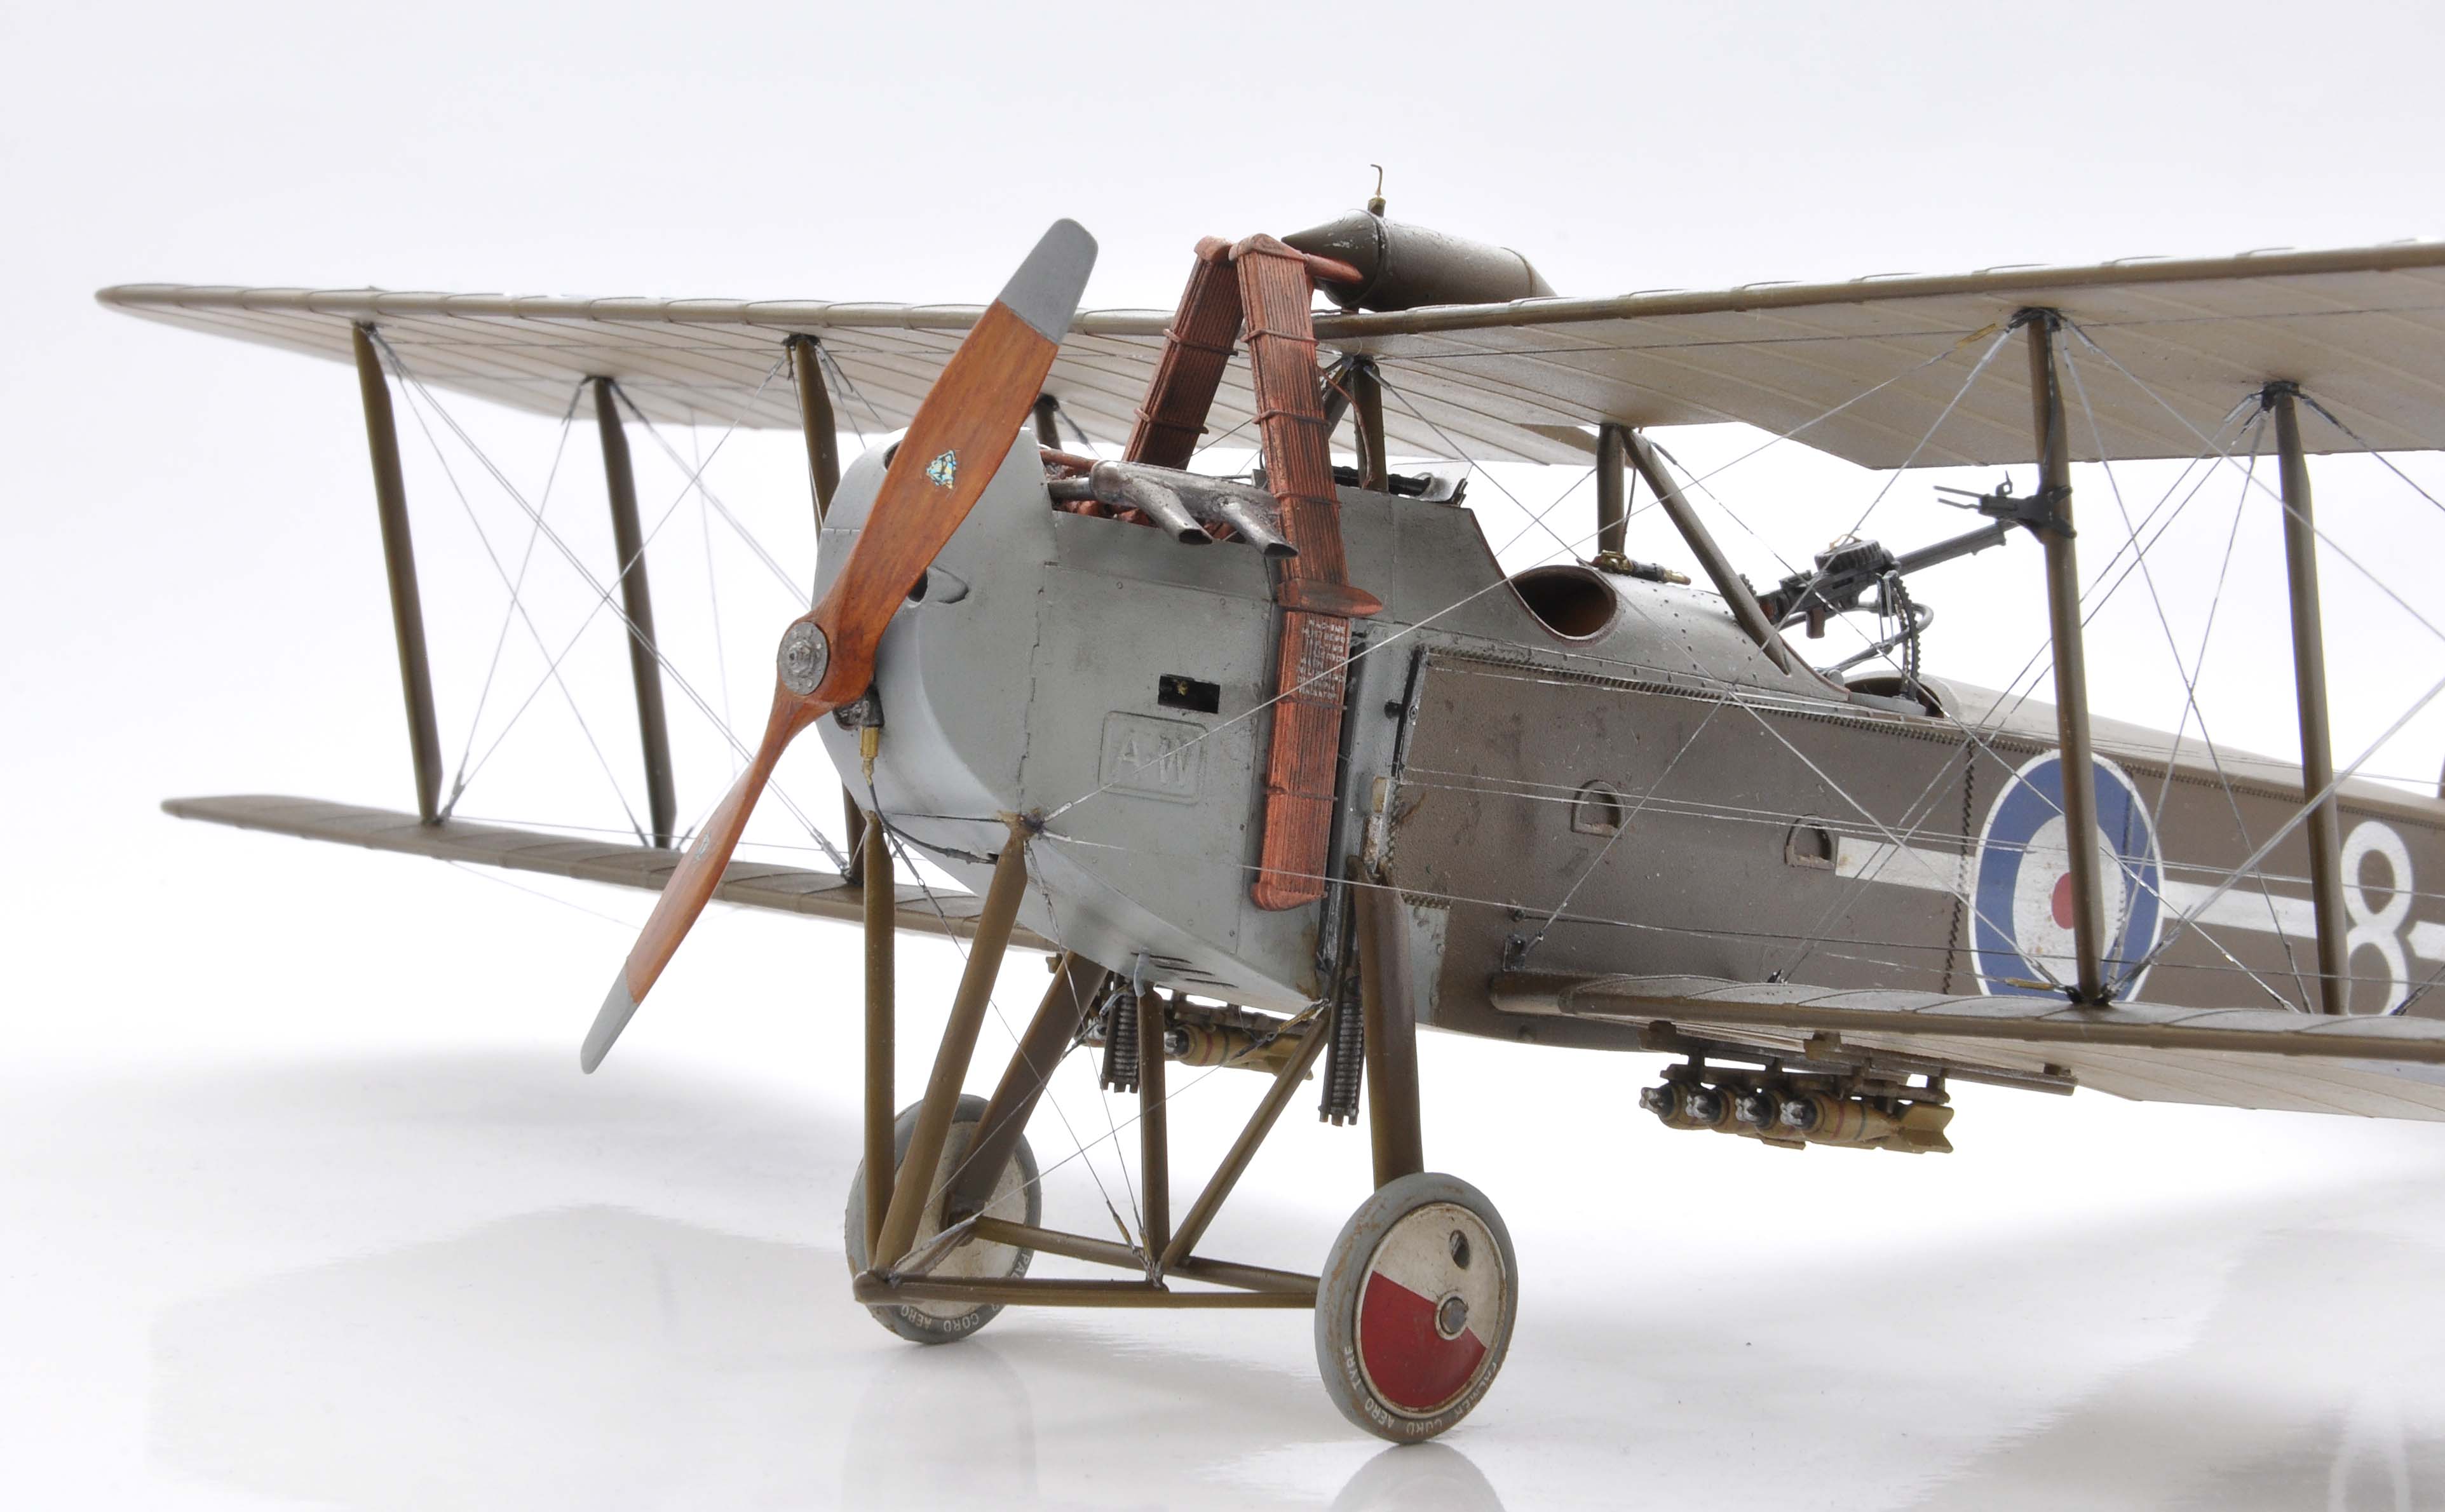
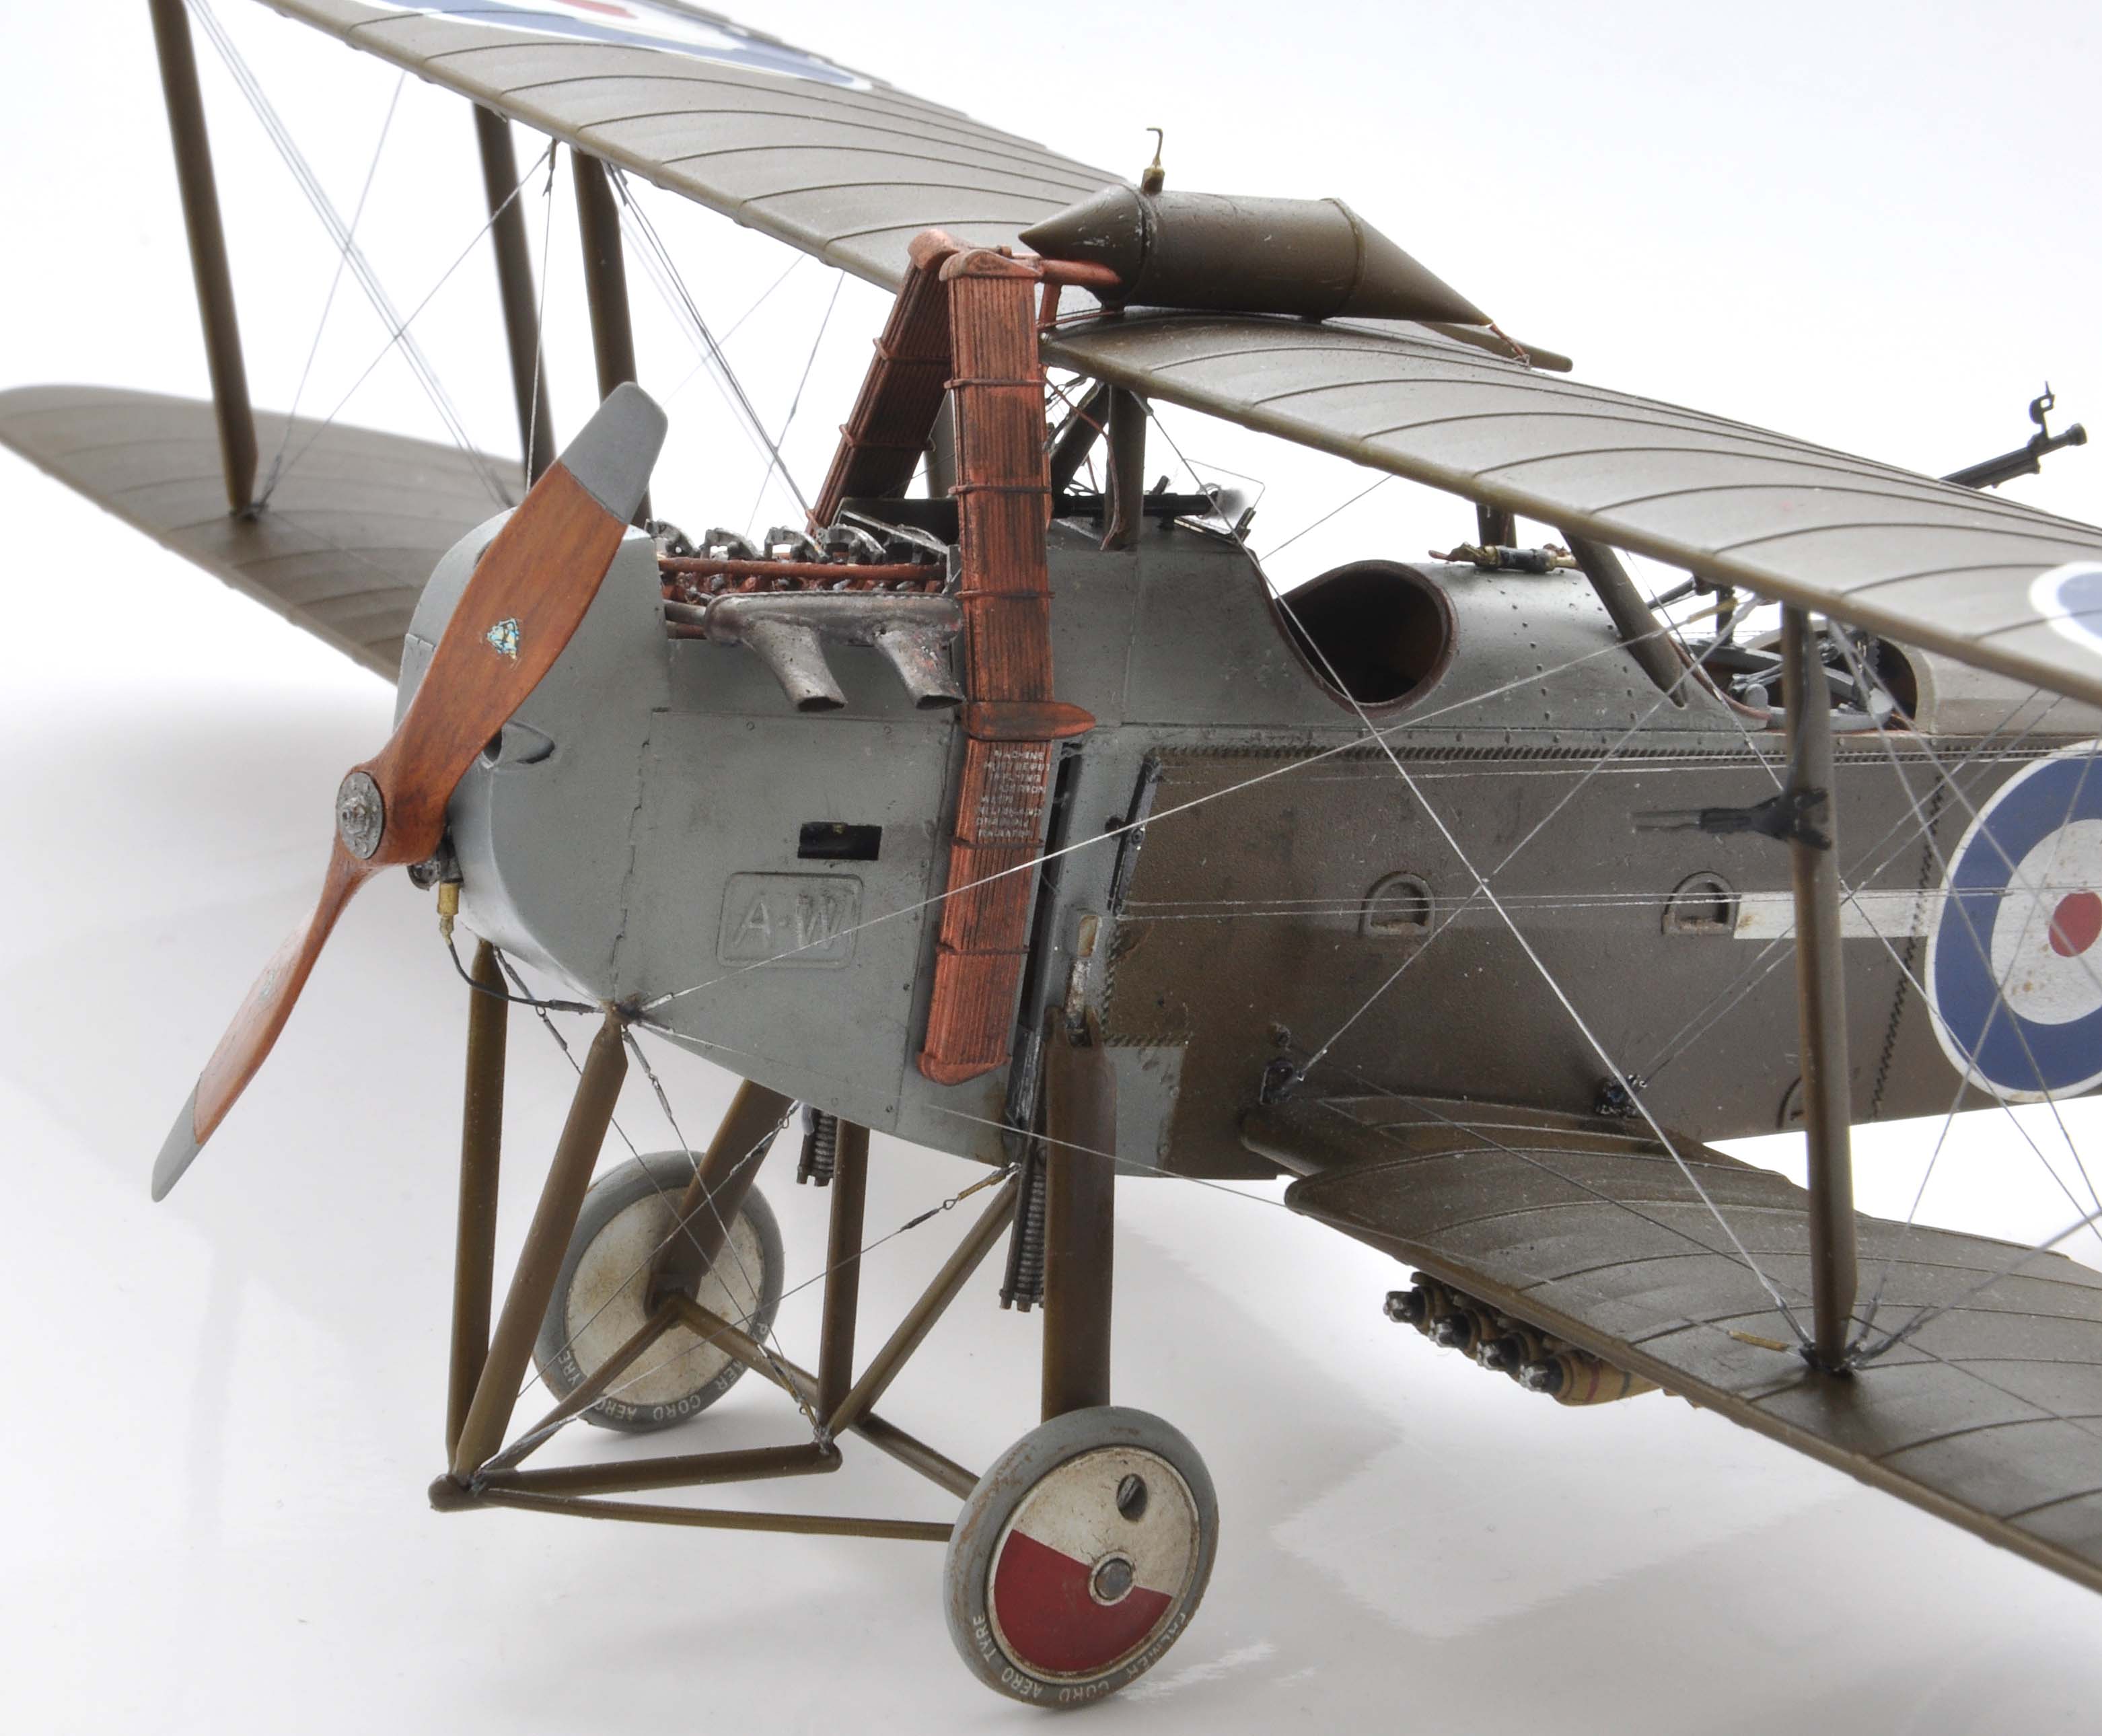
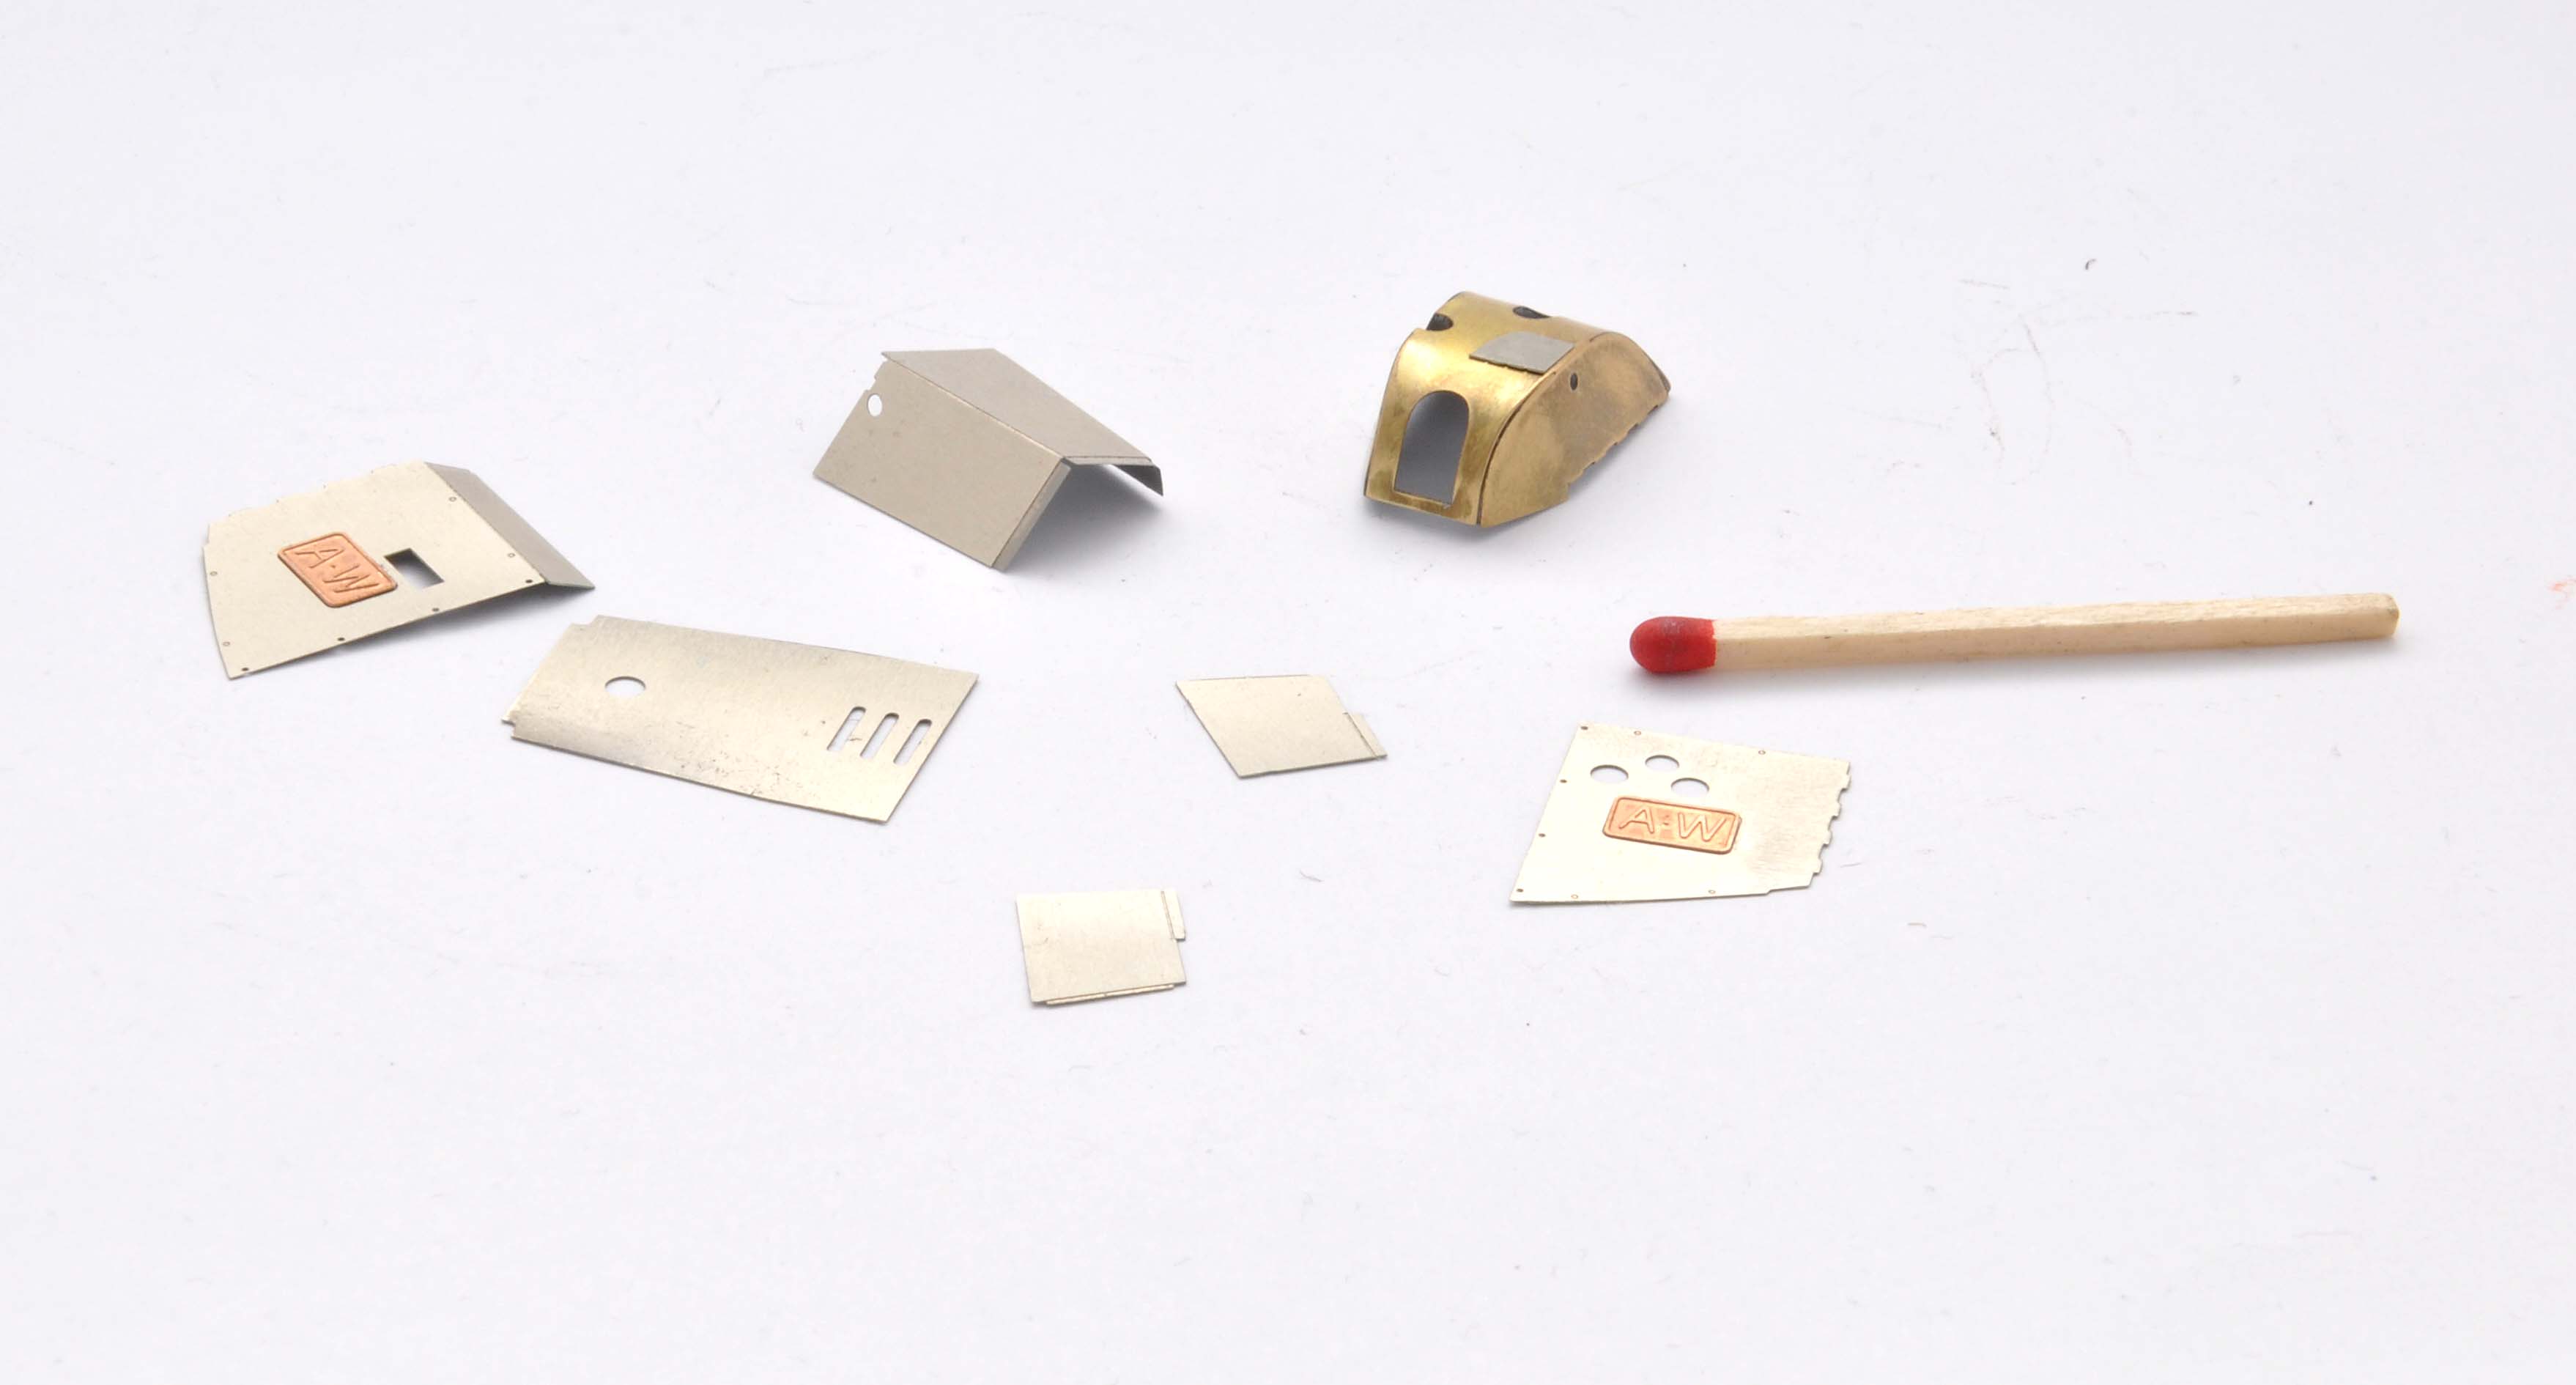
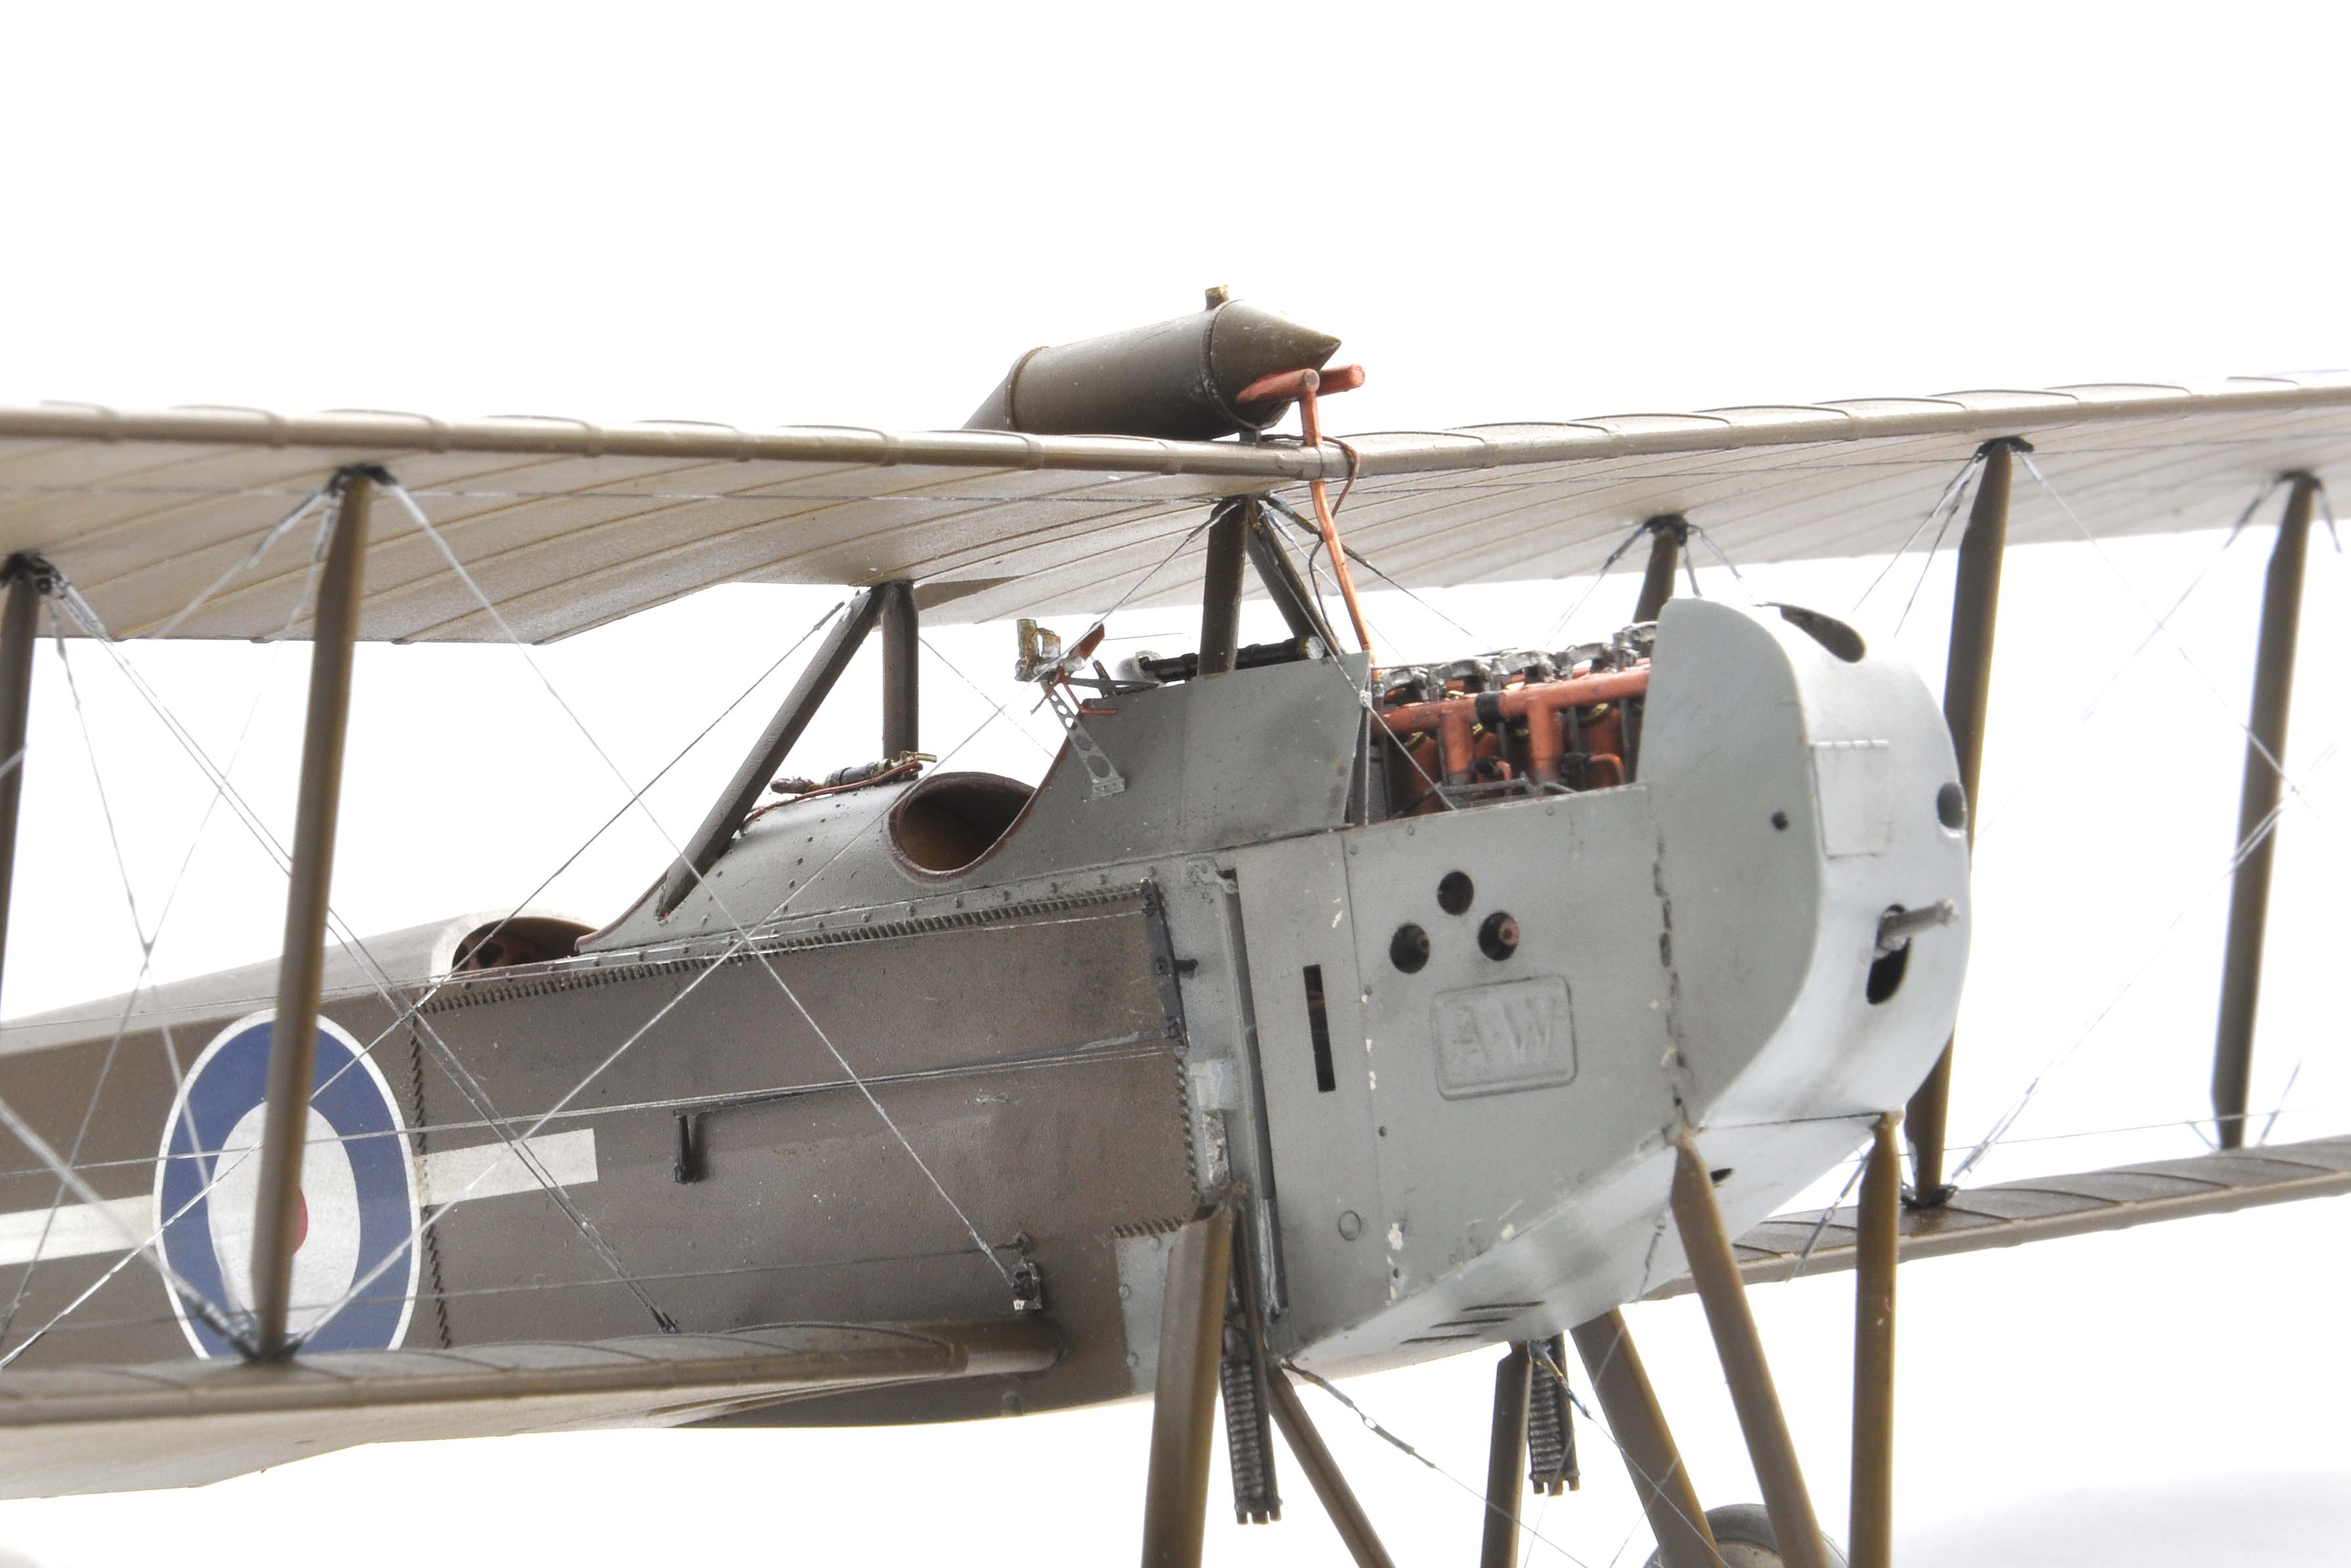
Thanks, guys! I use my leave as constructively as I can... Another small but important update. I`ve managed to prepare the cowling elements for the paint job. I must admit the nose cowling is time-consuming but well rewarding at the end. I simply love the AW logos. Again everything falls into its place. Just notice the small nuts in one part of the side cowling and the holes to accept them in the other. WOW!
Merlin
Senior Editor #017
United Kingdom
Joined: June 11, 2003
KitMaker: 17,582 posts
AeroScale: 12,795 posts
Posted: Friday, July 21, 2017 - 12:29 AM UTC
Hi again Filip
Fantastic work again! It's great to see the cowls folded and shaped and looking so good - they are the parts that might scare people on this model.
All the best
Rowan
BEWARE OF THE FEW...
As I grow older, I regret to say that a detestable habit of thinking seems to be getting a hold of me. - H. Rider Haggard
SgtRam
Editor-at-Large #197
Ontario, Canada
Joined: March 06, 2011
KitMaker: 3,971 posts
AeroScale: 511 posts
Posted: Friday, July 21, 2017 - 02:11 AM UTC
@Filip - that engine and mount are out of this world, I am amazed by every update. Looking forward to seeing more.
Thanks
Wojewodztwo Wielkopolskie, Poland
Joined: March 18, 2012
KitMaker: 135 posts
AeroScale: 135 posts
Posted: Sunday, July 30, 2017 - 04:55 PM UTC
Connecticut, United States
Joined: October 26, 2009
KitMaker: 424 posts
AeroScale: 389 posts
Posted: Sunday, July 30, 2017 - 08:11 PM UTC
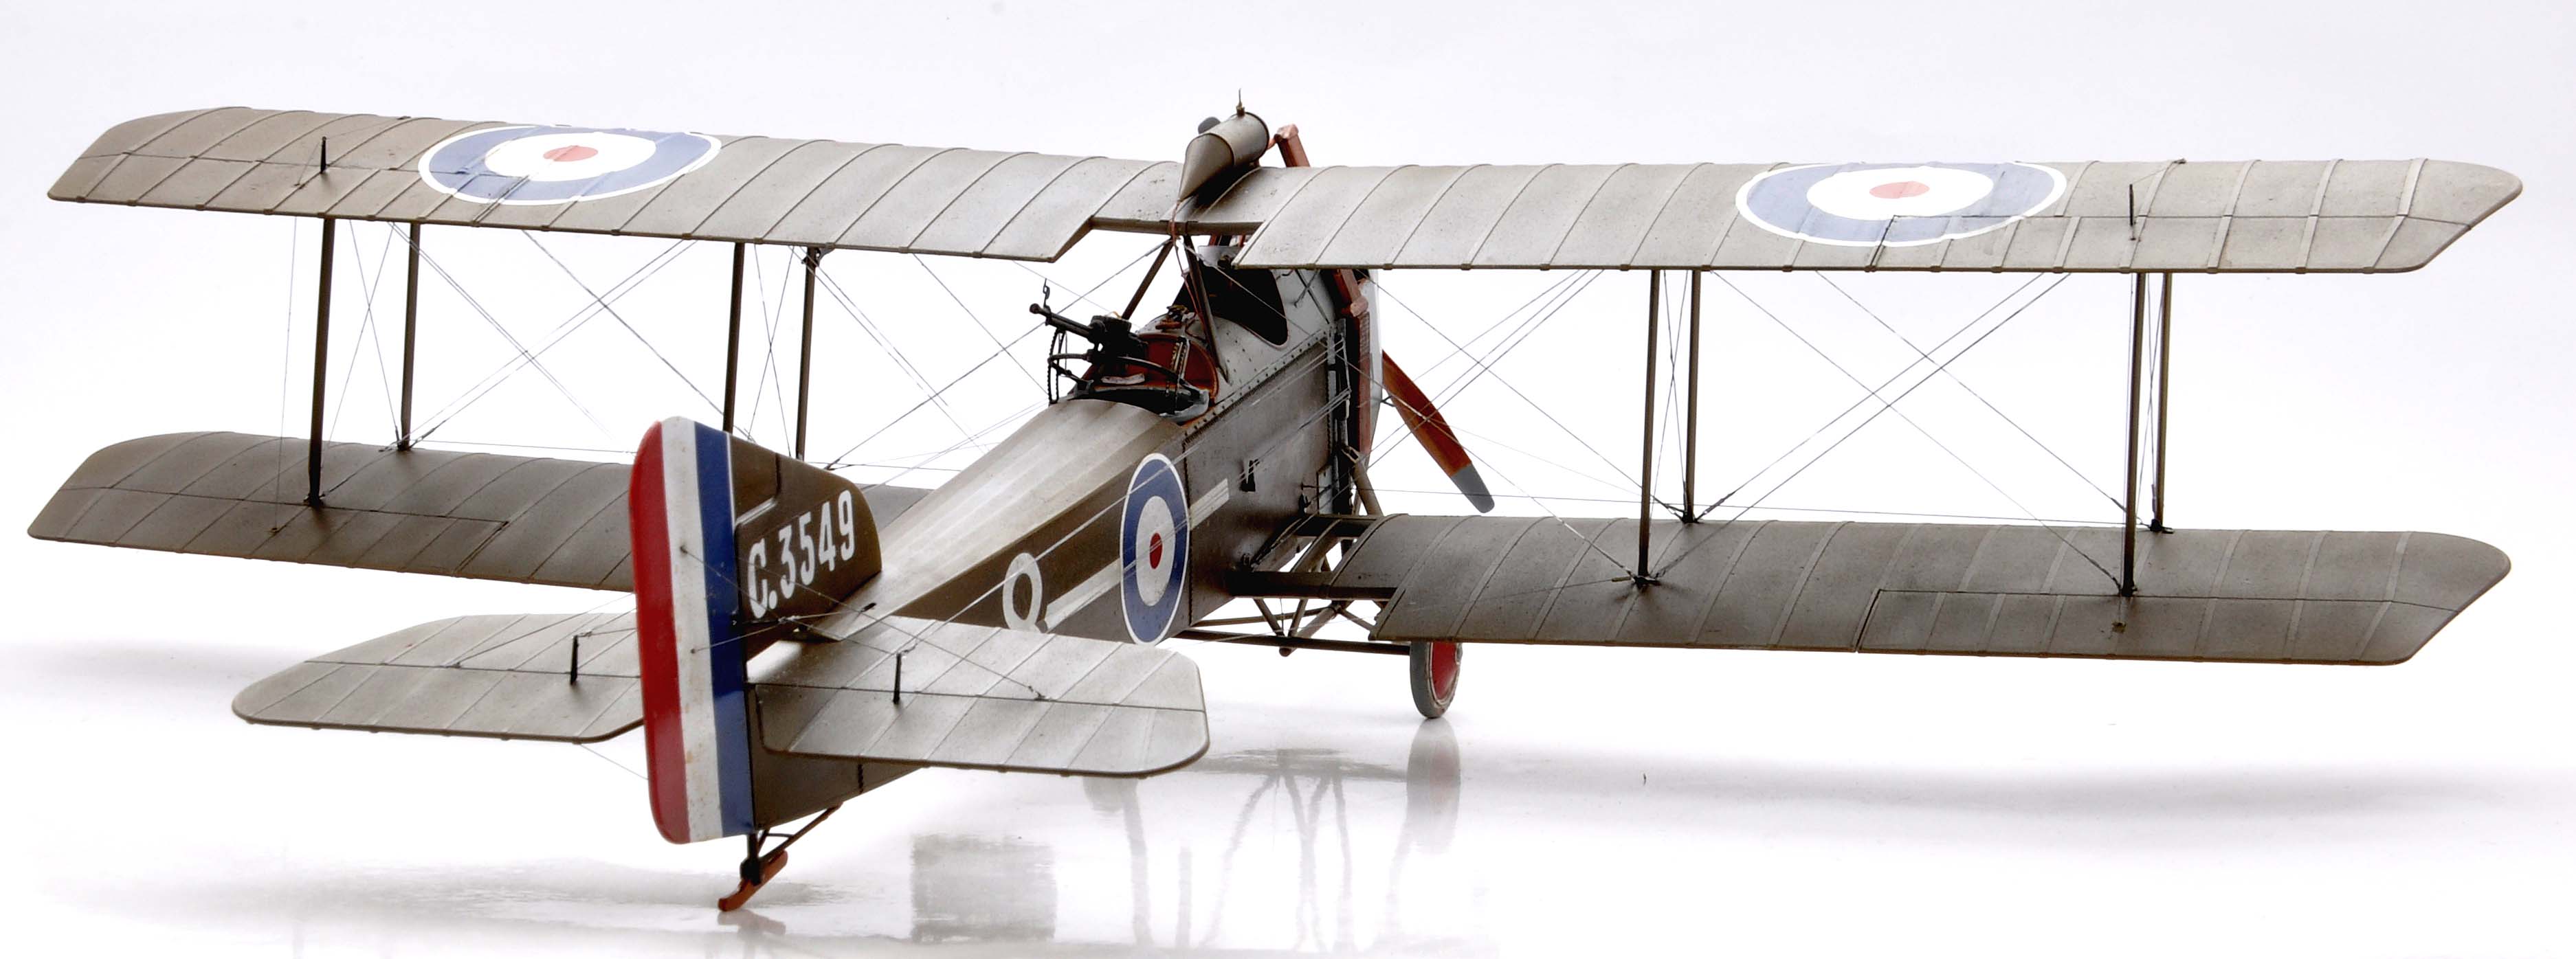
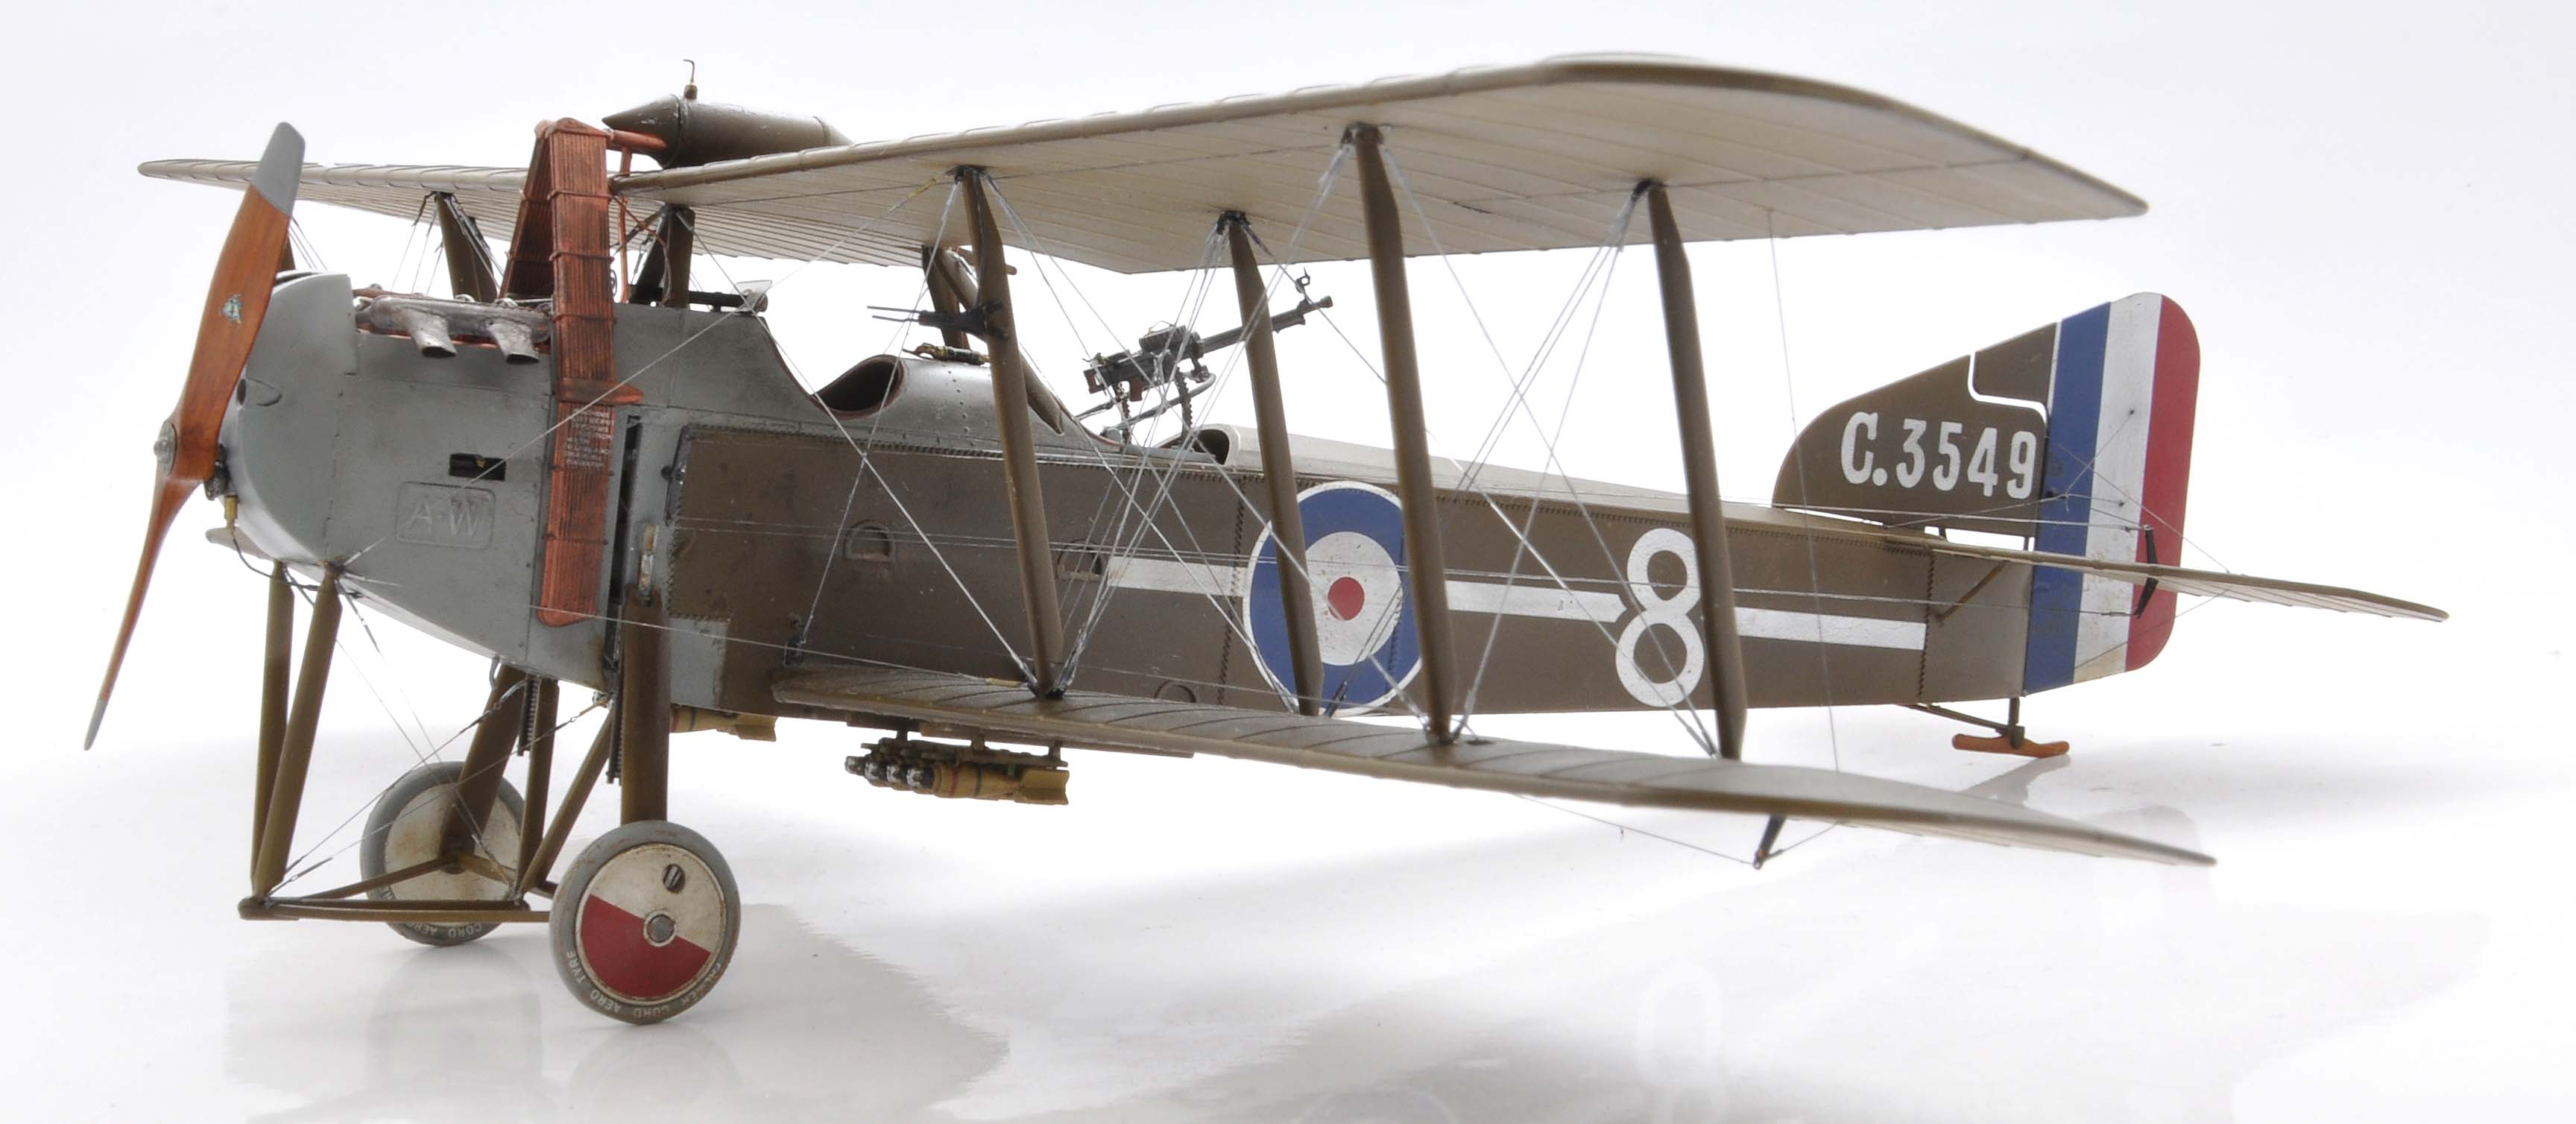
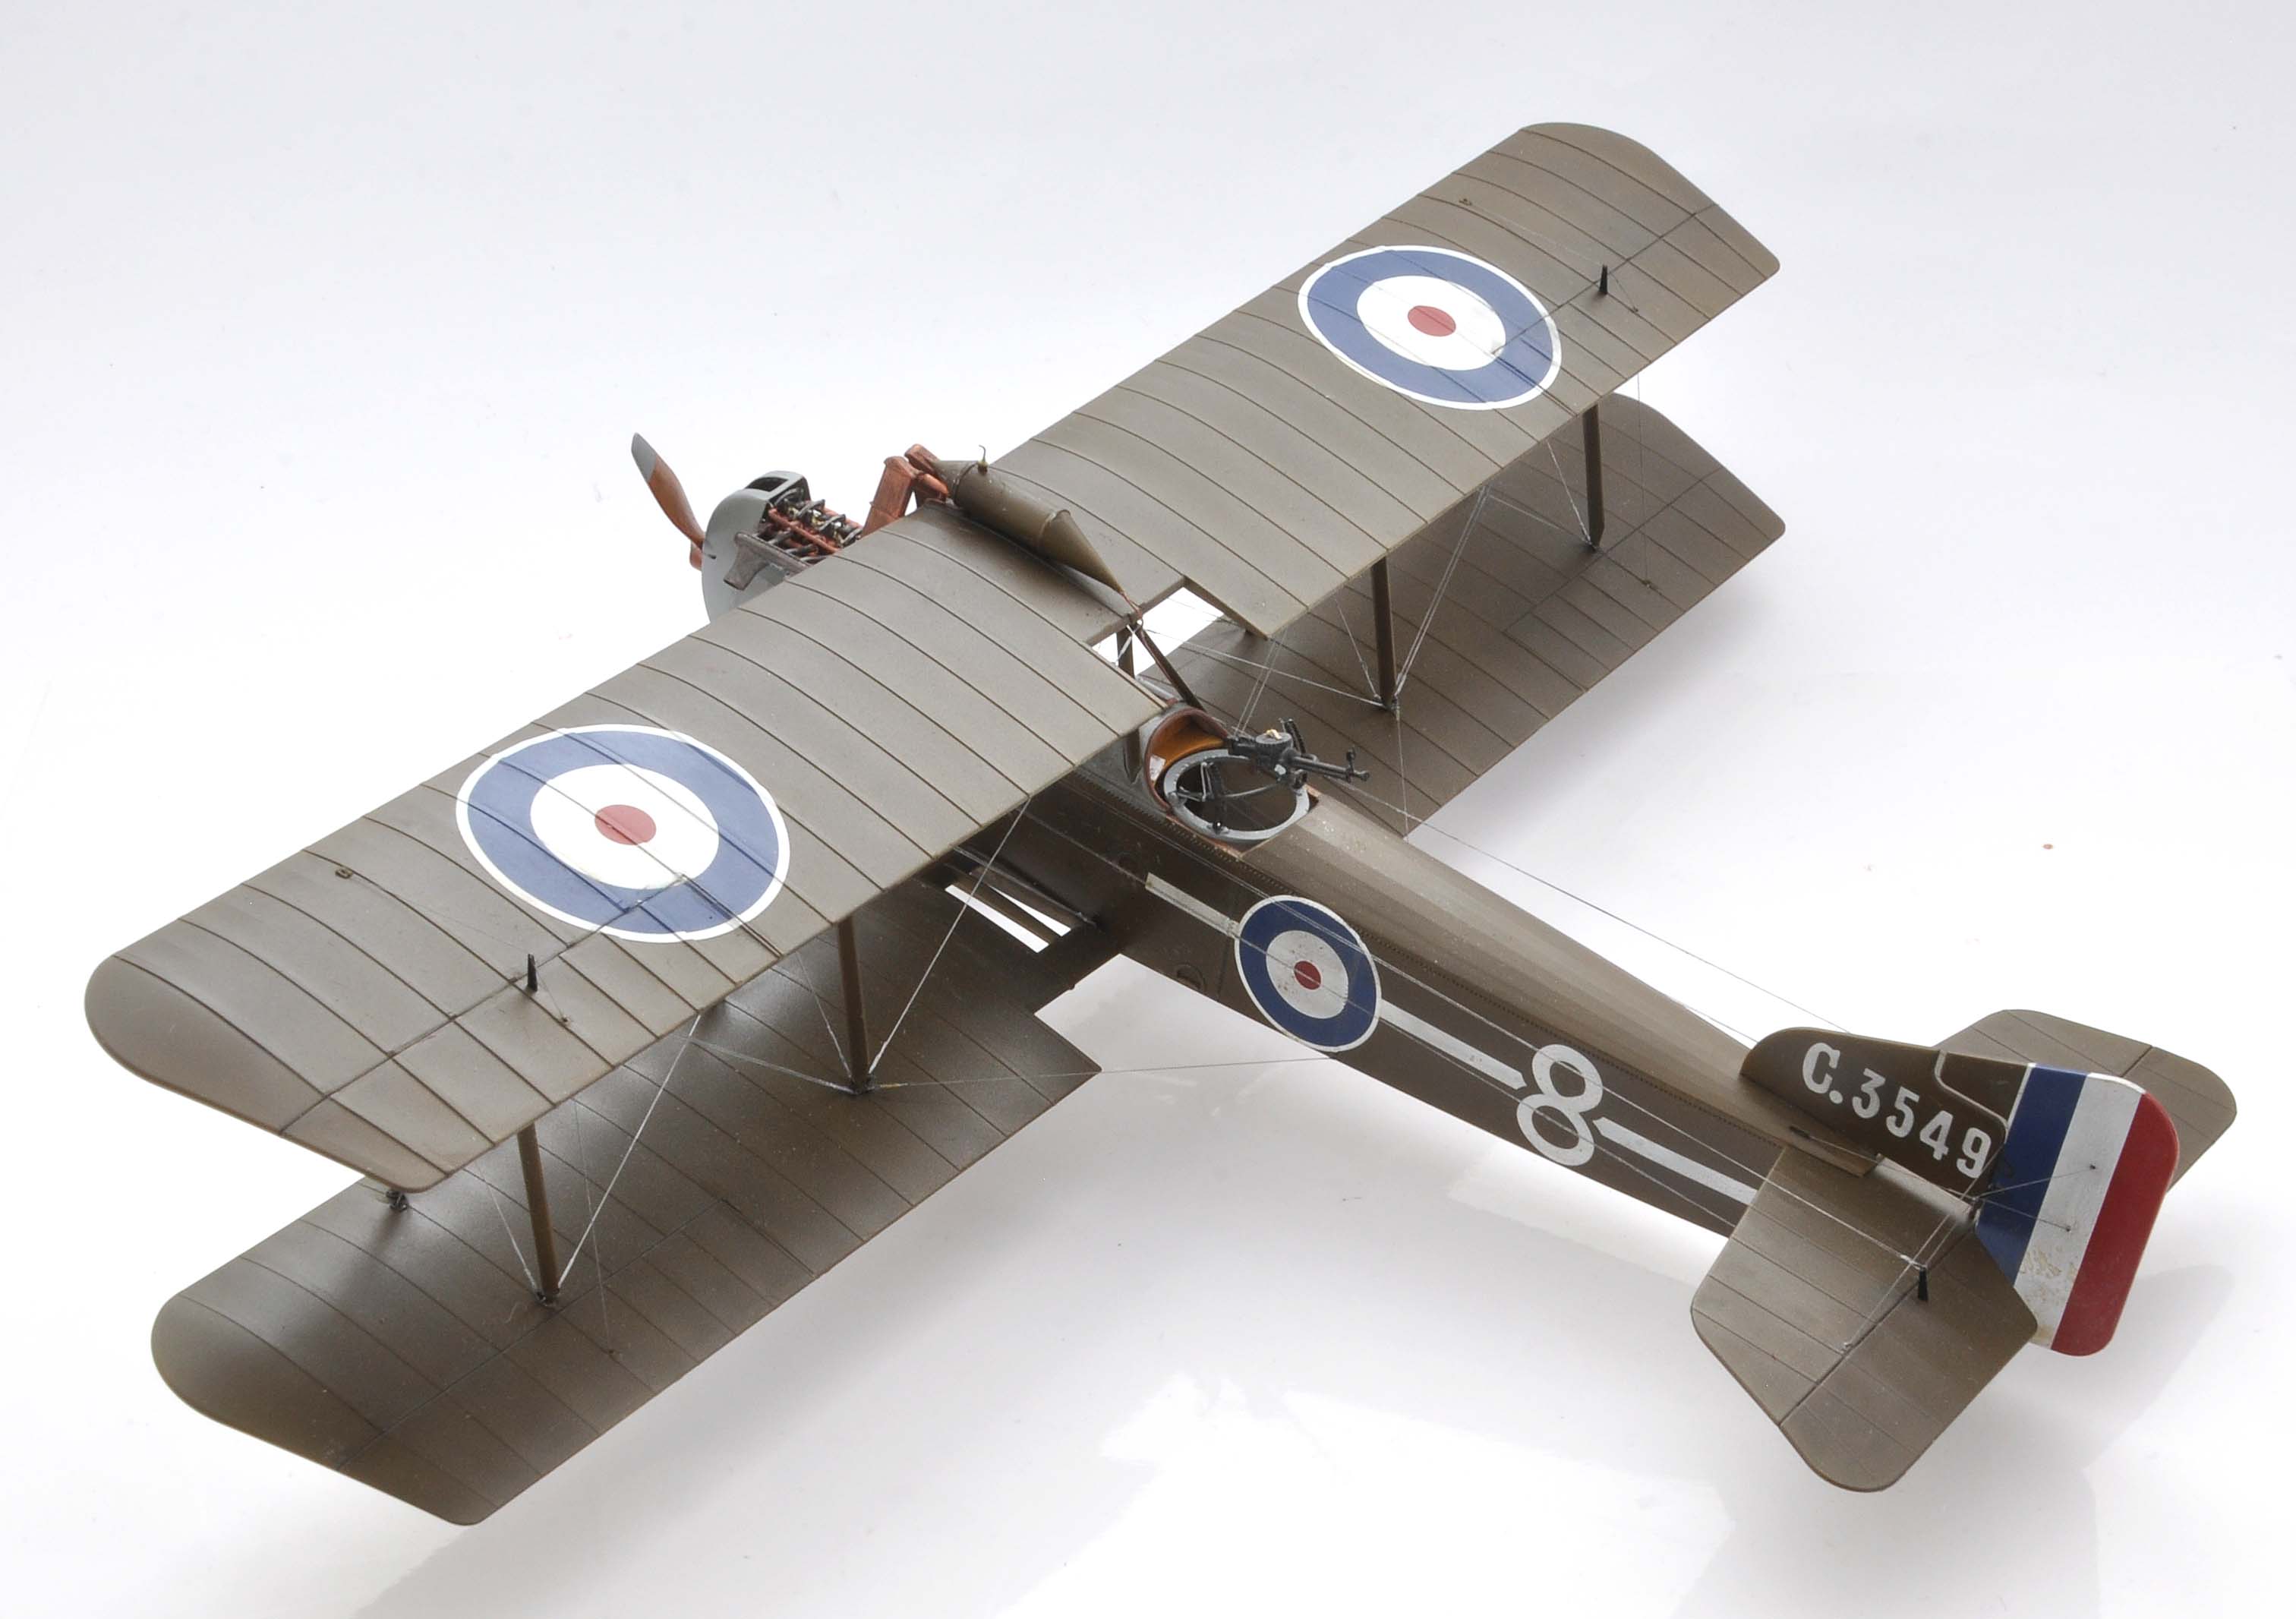
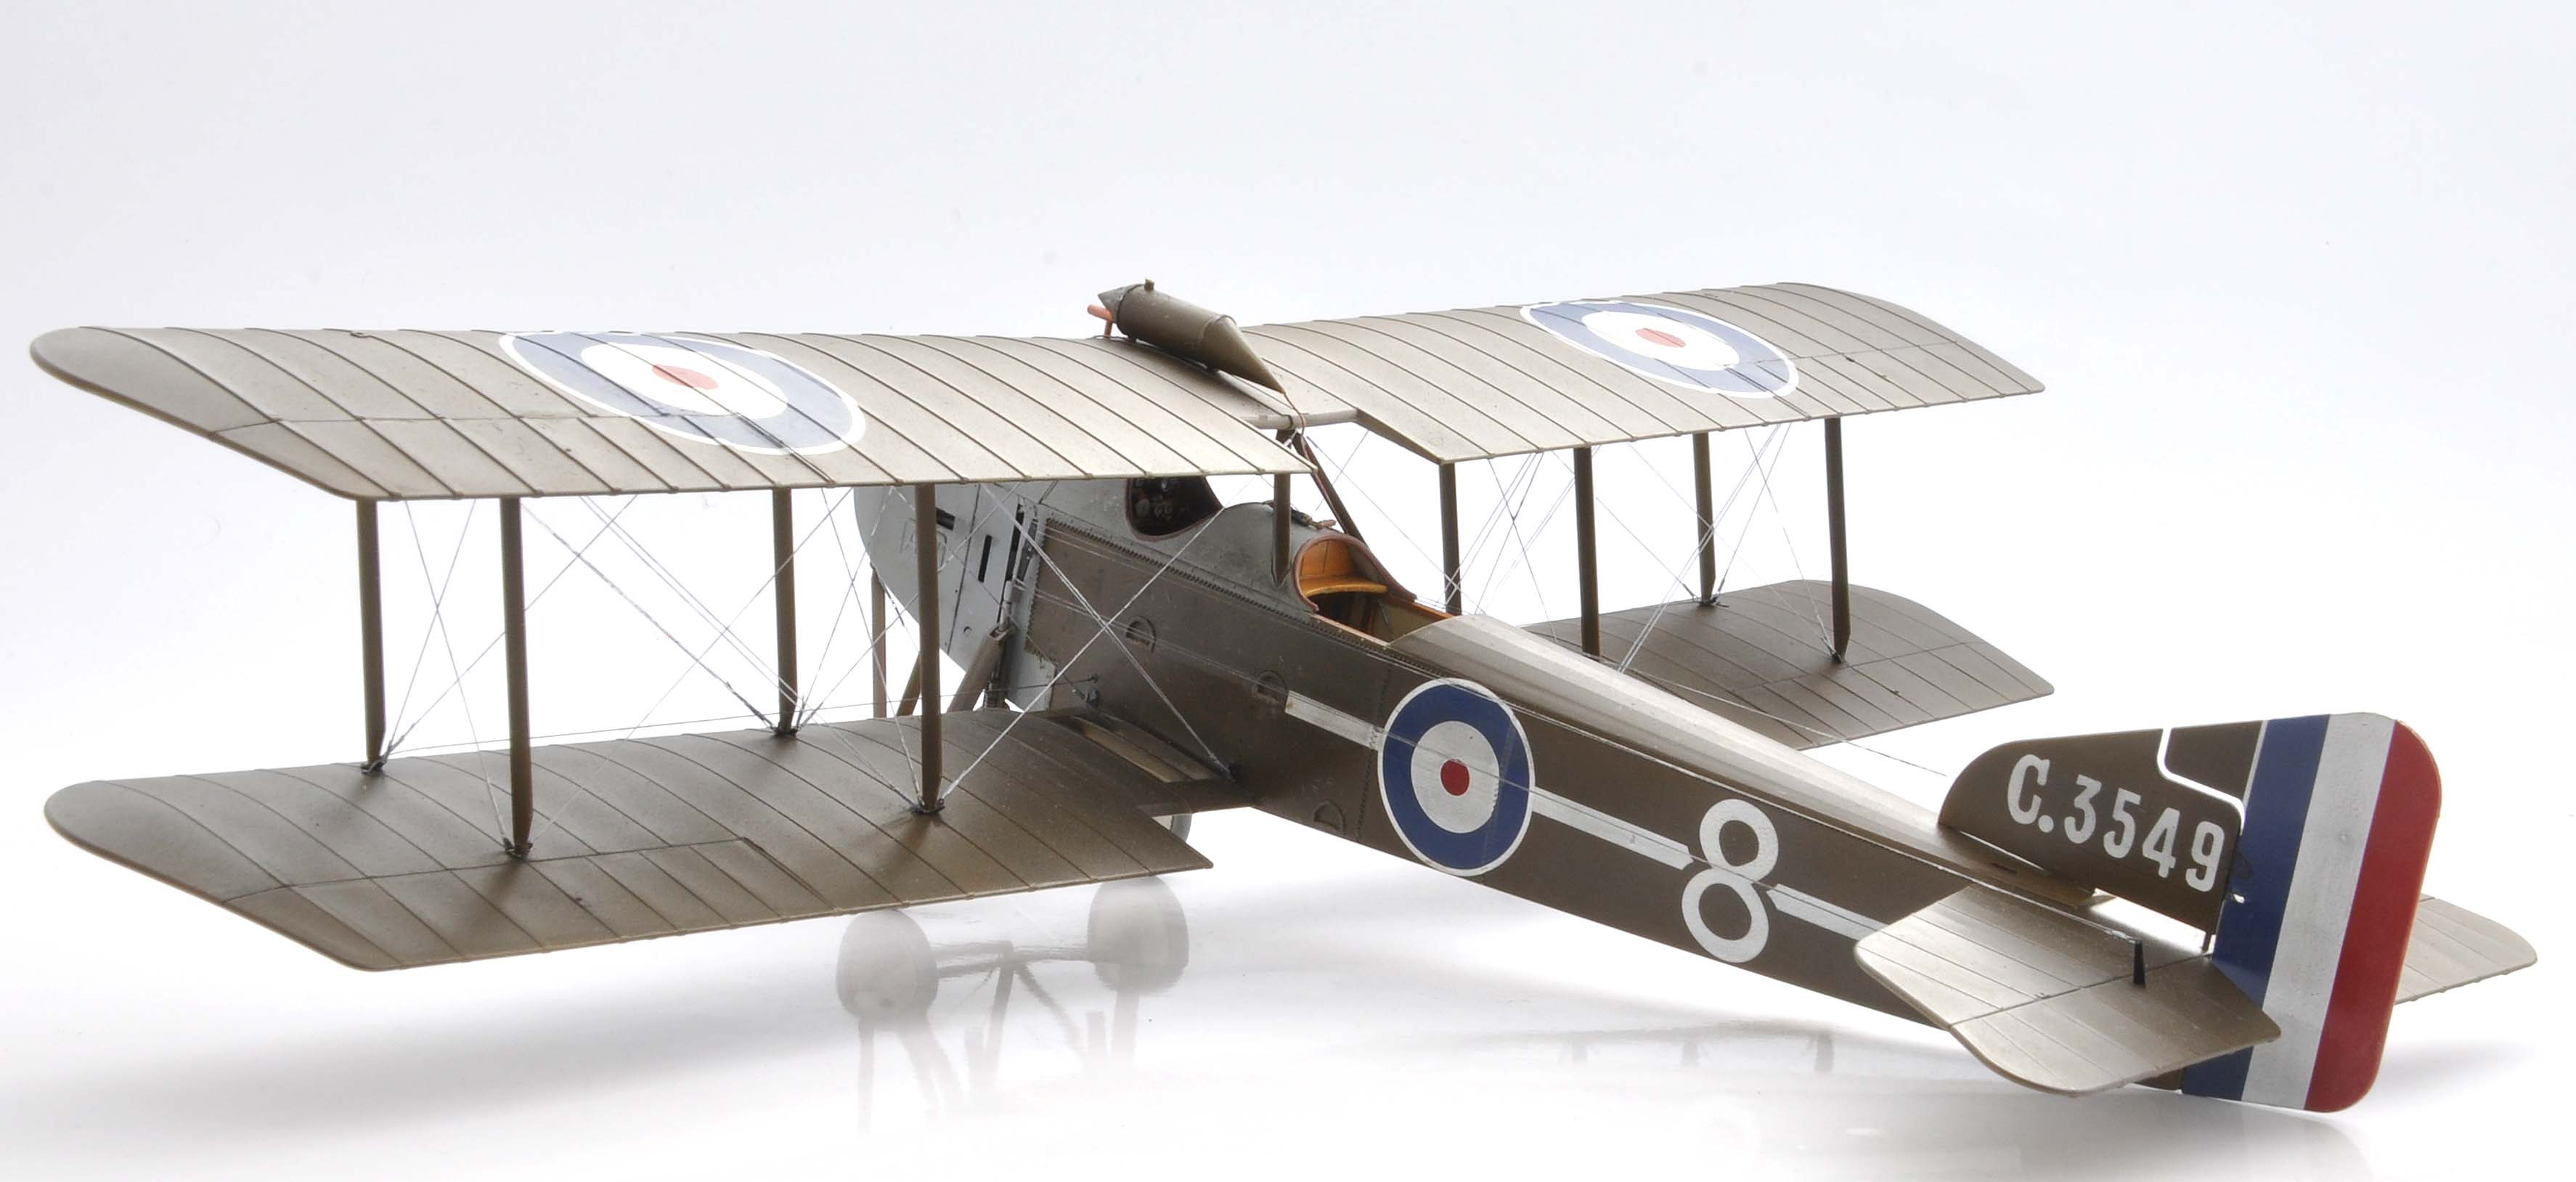
PC-10
Interesting color of PC10, Knowing it is equal parts yellow ochre and lamp black I would not have thought it would be so, But then there were hundreds of manufacturers of the finish or the various dopes. It could be anything from browns to greens
the chocolate looks great, the model outstanding. Love the engine work.
Captn Tommy
Connecticut, United States
Joined: October 26, 2009
KitMaker: 424 posts
AeroScale: 389 posts
Posted: Sunday, July 30, 2017 - 08:14 PM UTC
I am going to use the alligator clip method to work on my engines.
thanks
Captn Tommy
Wojewodztwo Wielkopolskie, Poland
Joined: March 18, 2012
KitMaker: 135 posts
AeroScale: 135 posts
Posted: Wednesday, August 02, 2017 - 12:57 AM UTC
Wojewodztwo Wielkopolskie, Poland
Joined: March 18, 2012
KitMaker: 135 posts
AeroScale: 135 posts
Posted: Wednesday, August 09, 2017 - 05:01 PM UTC
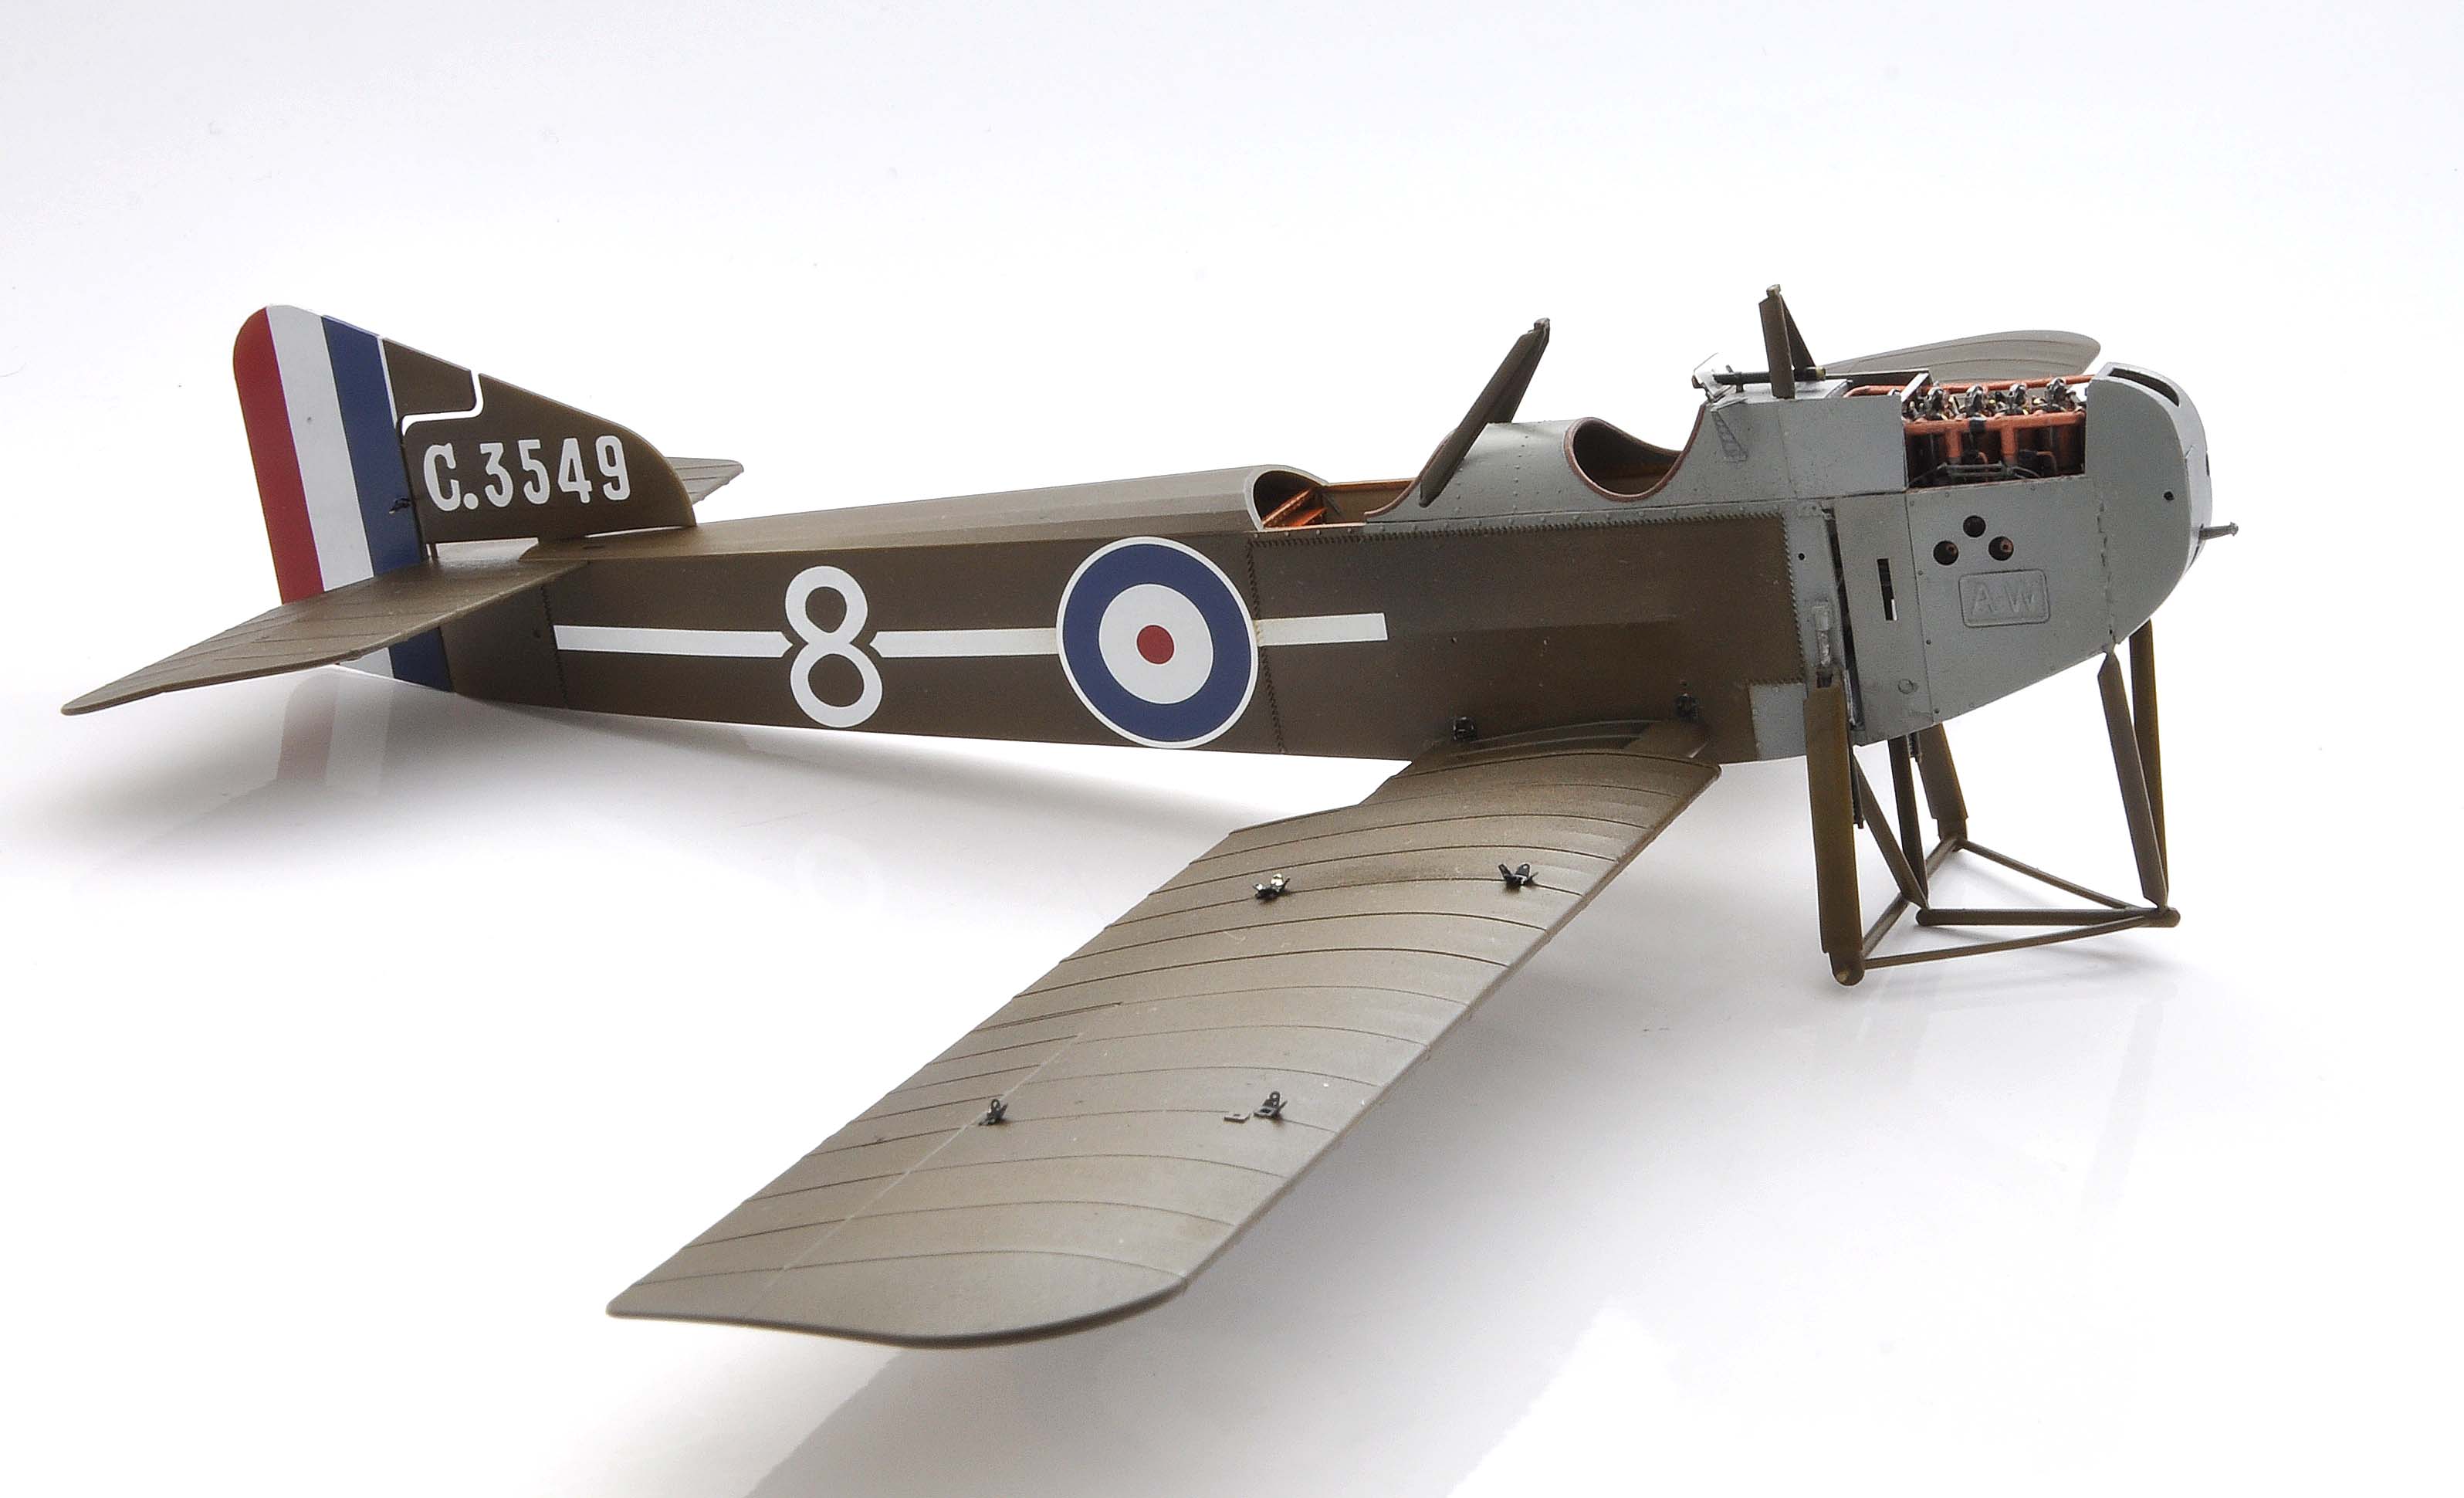
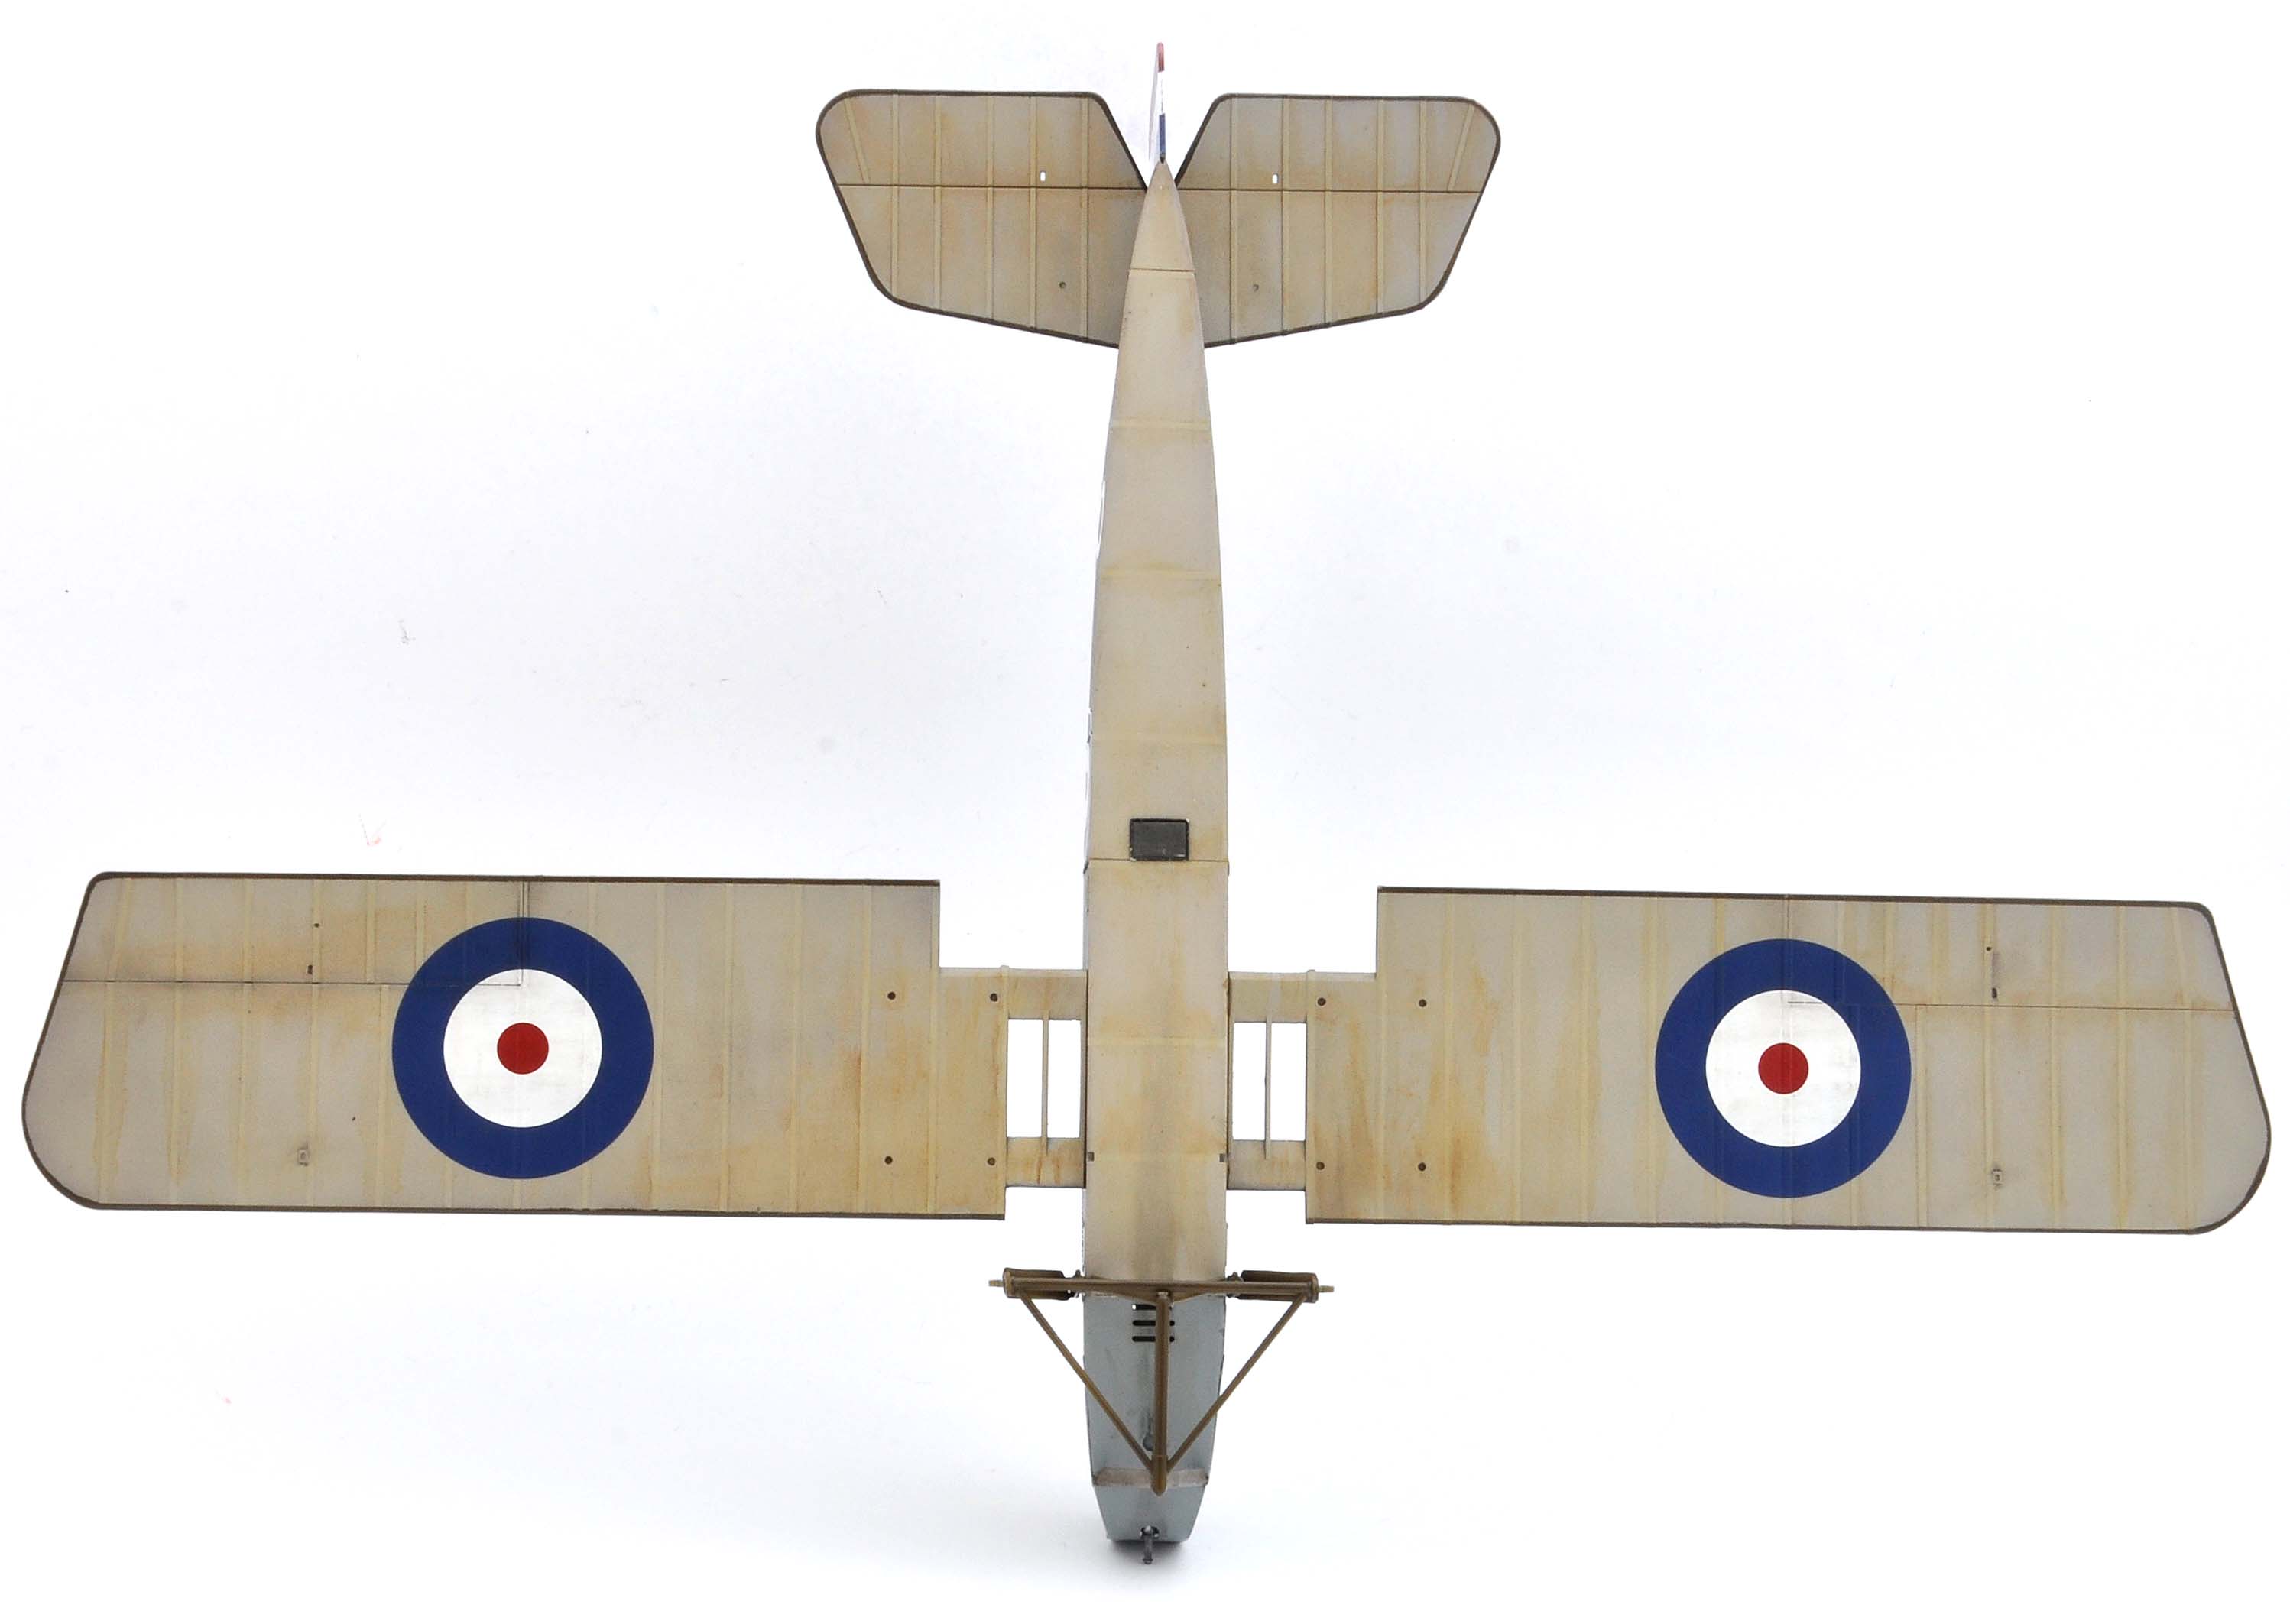
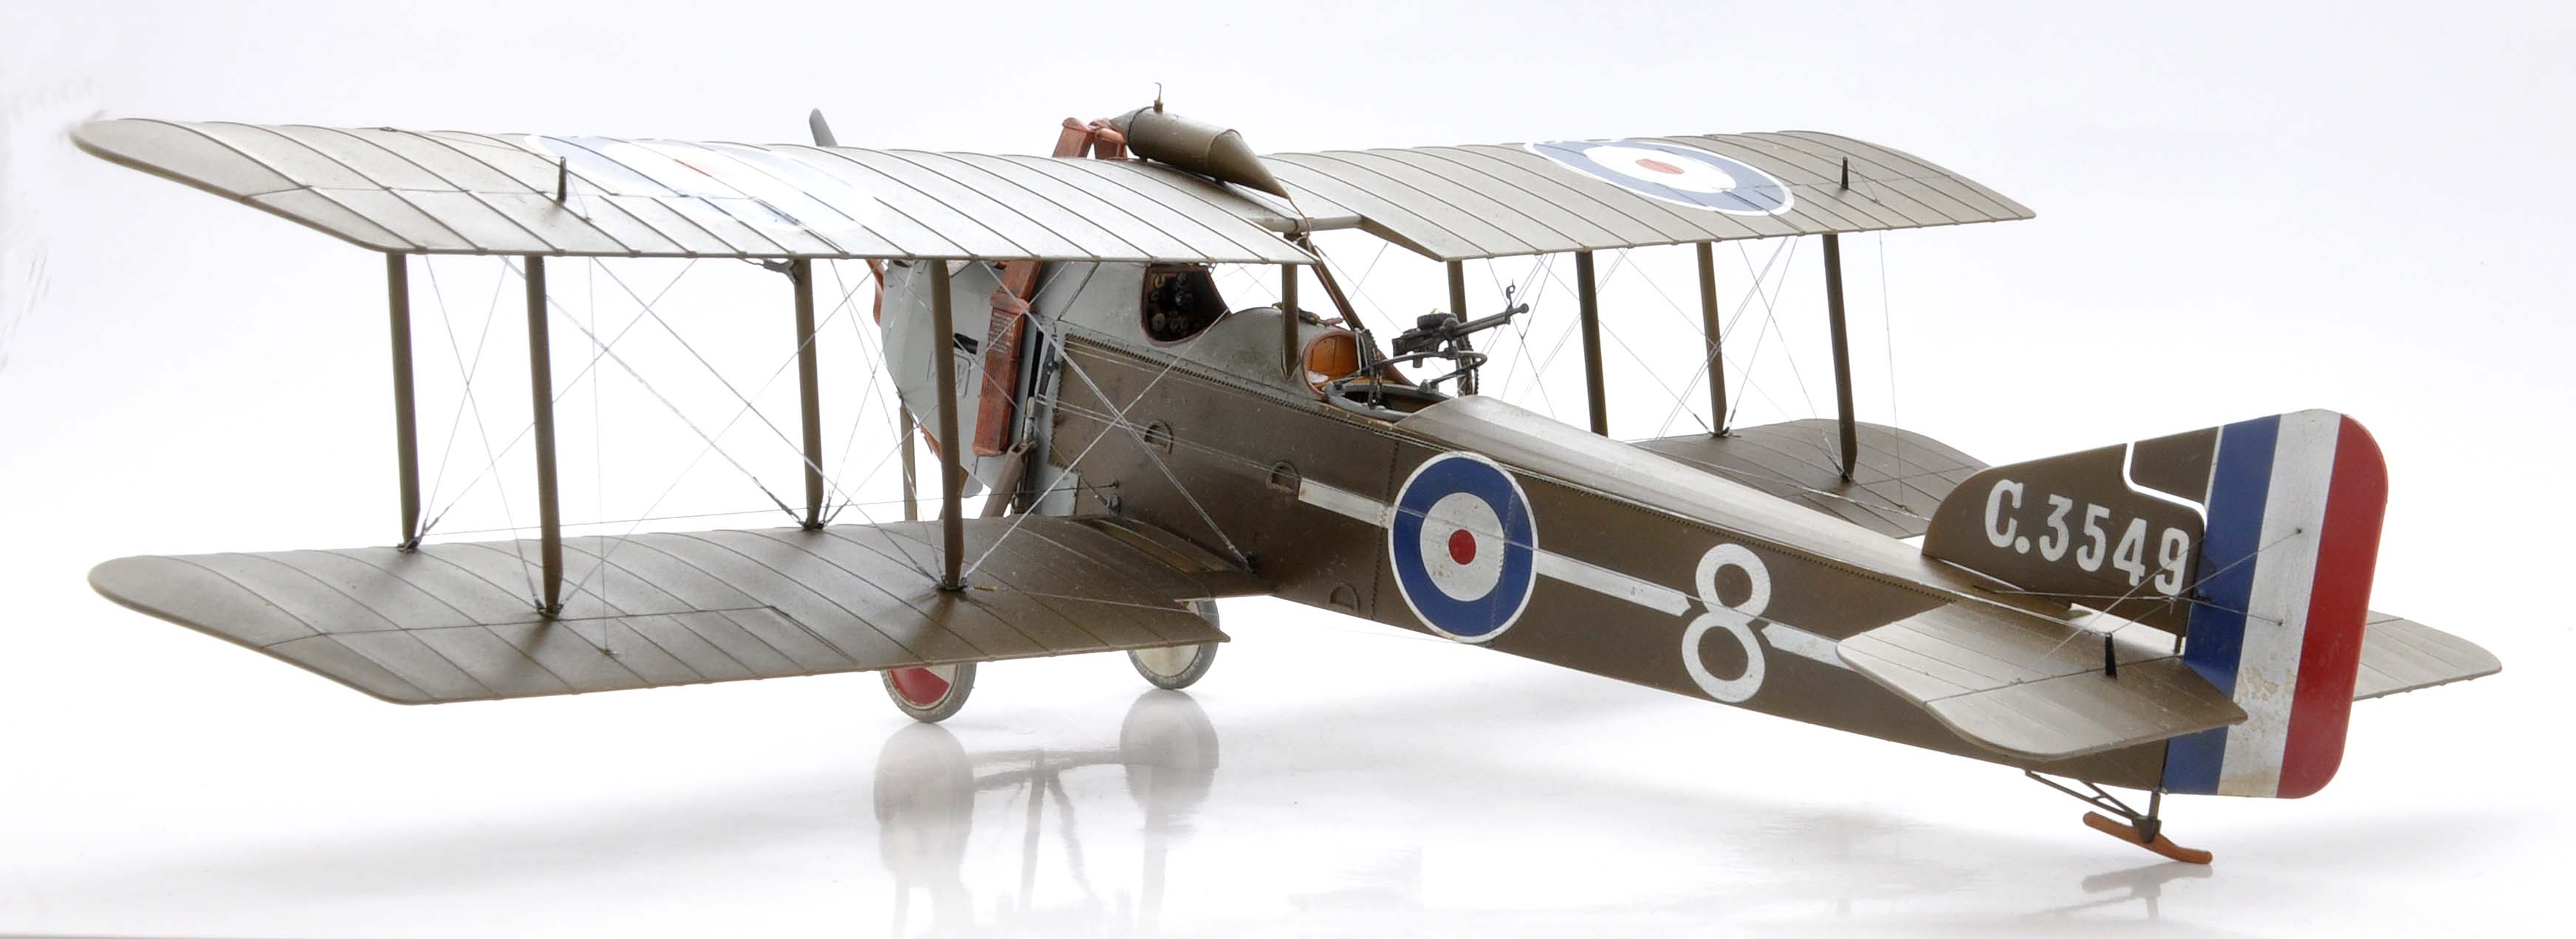
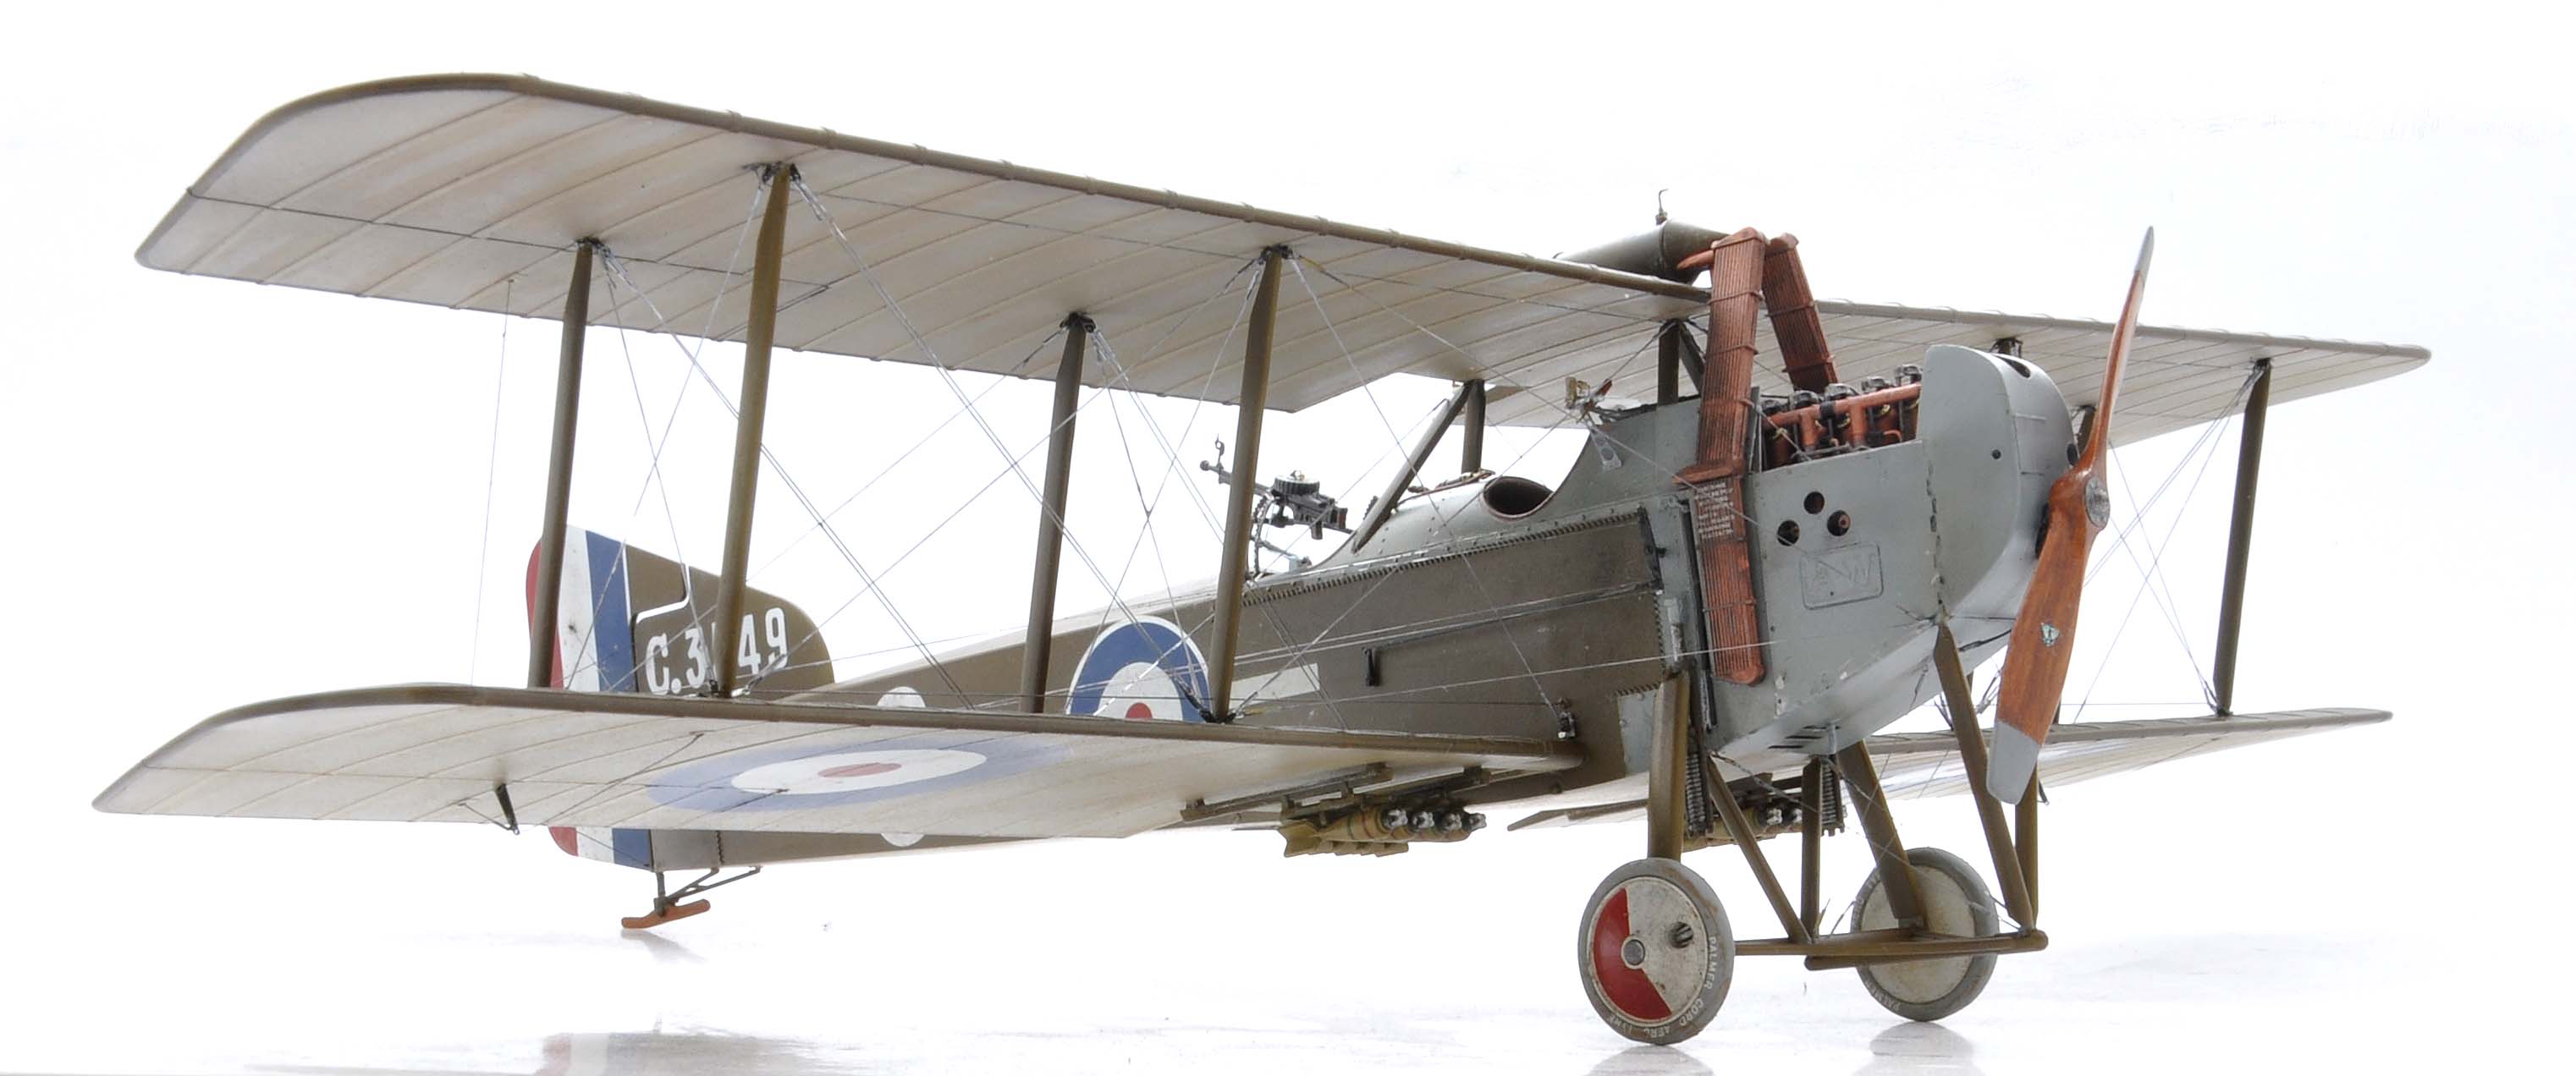
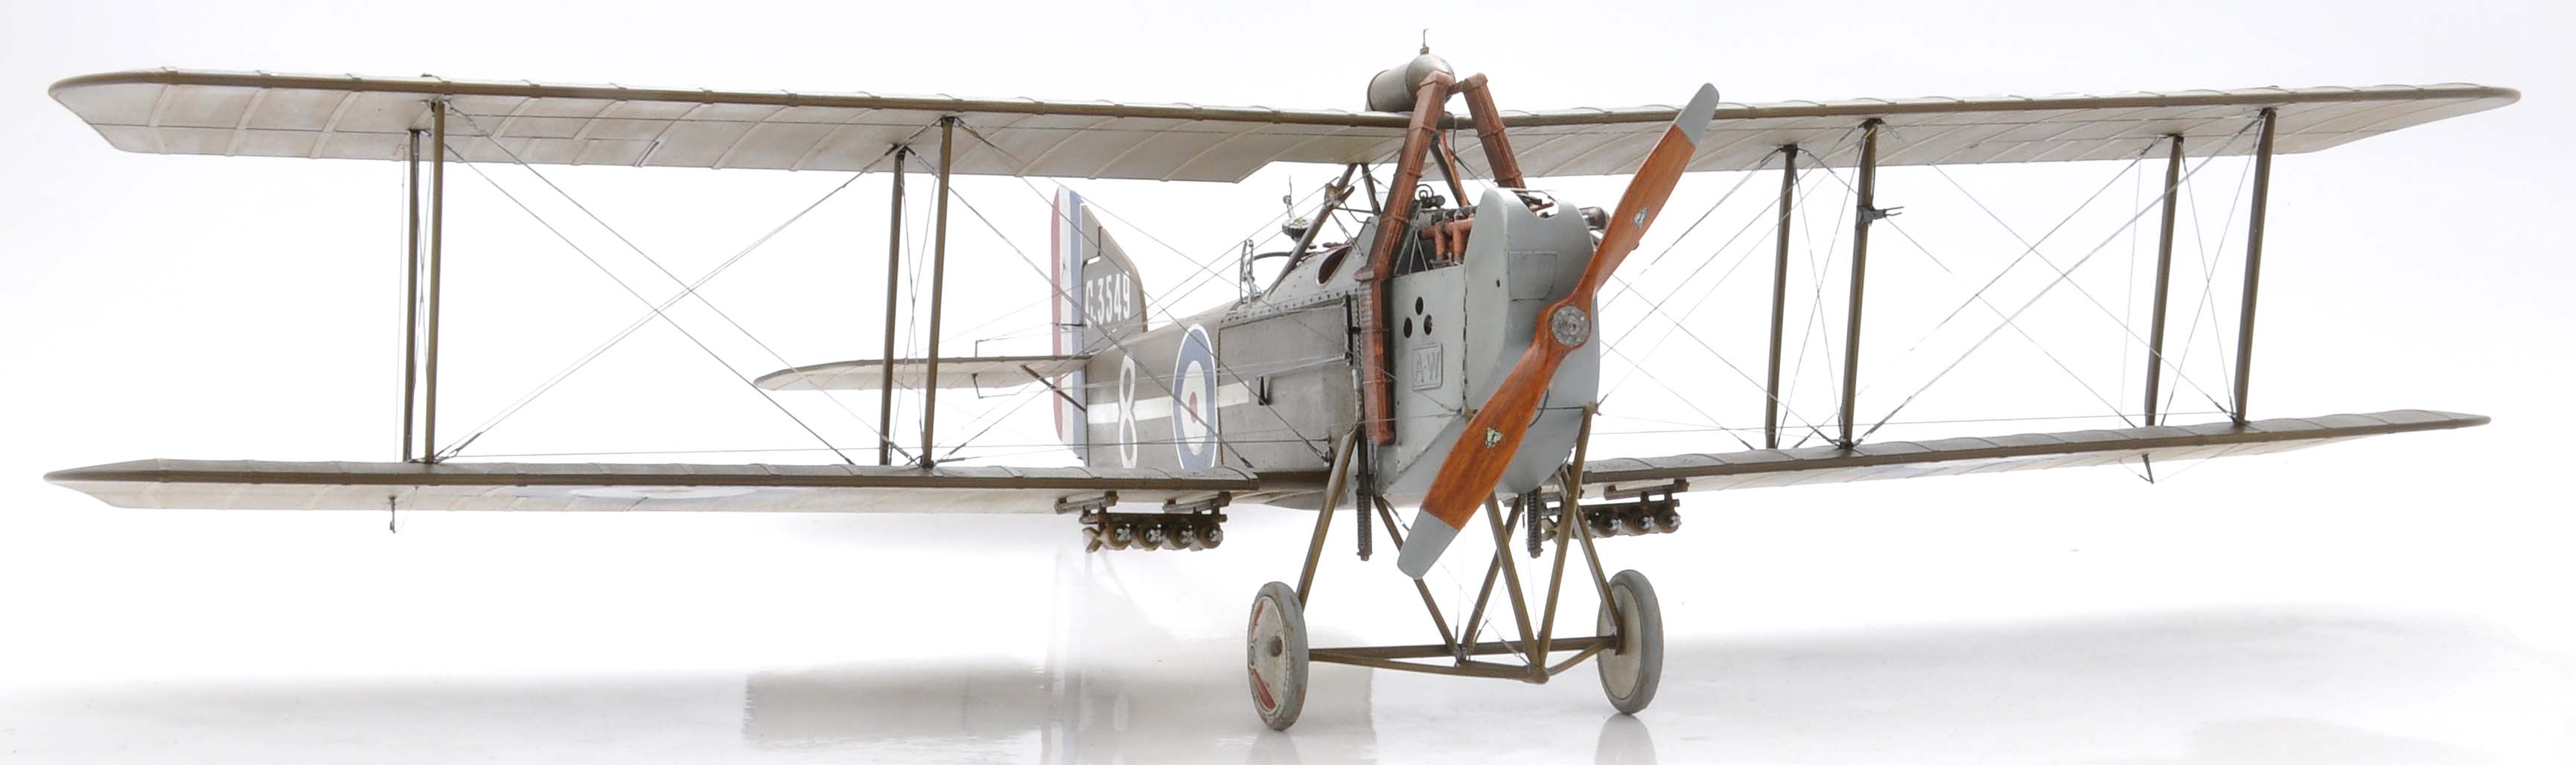
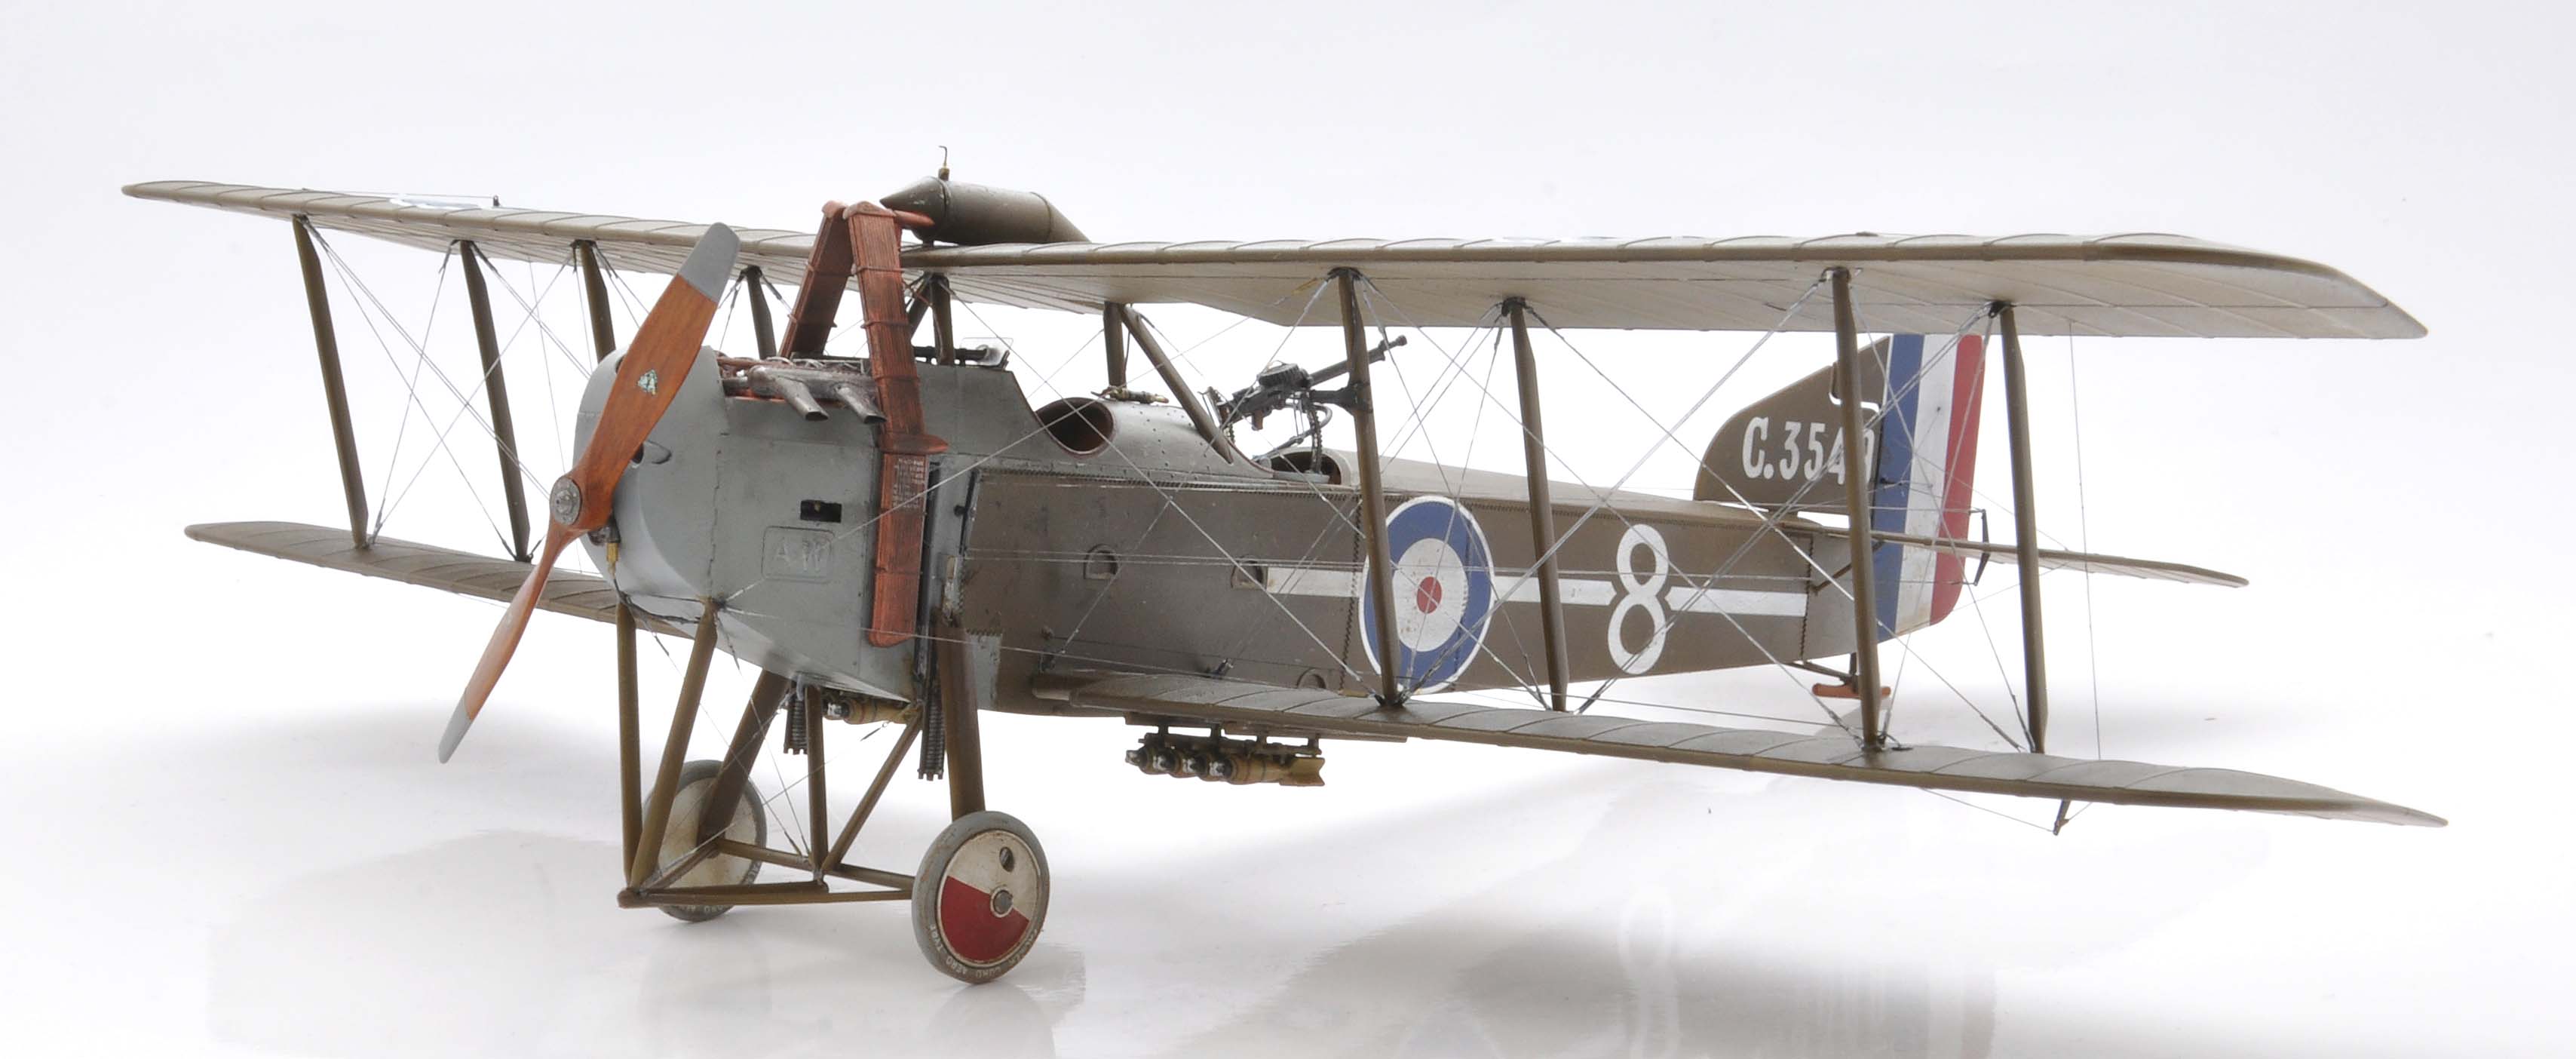
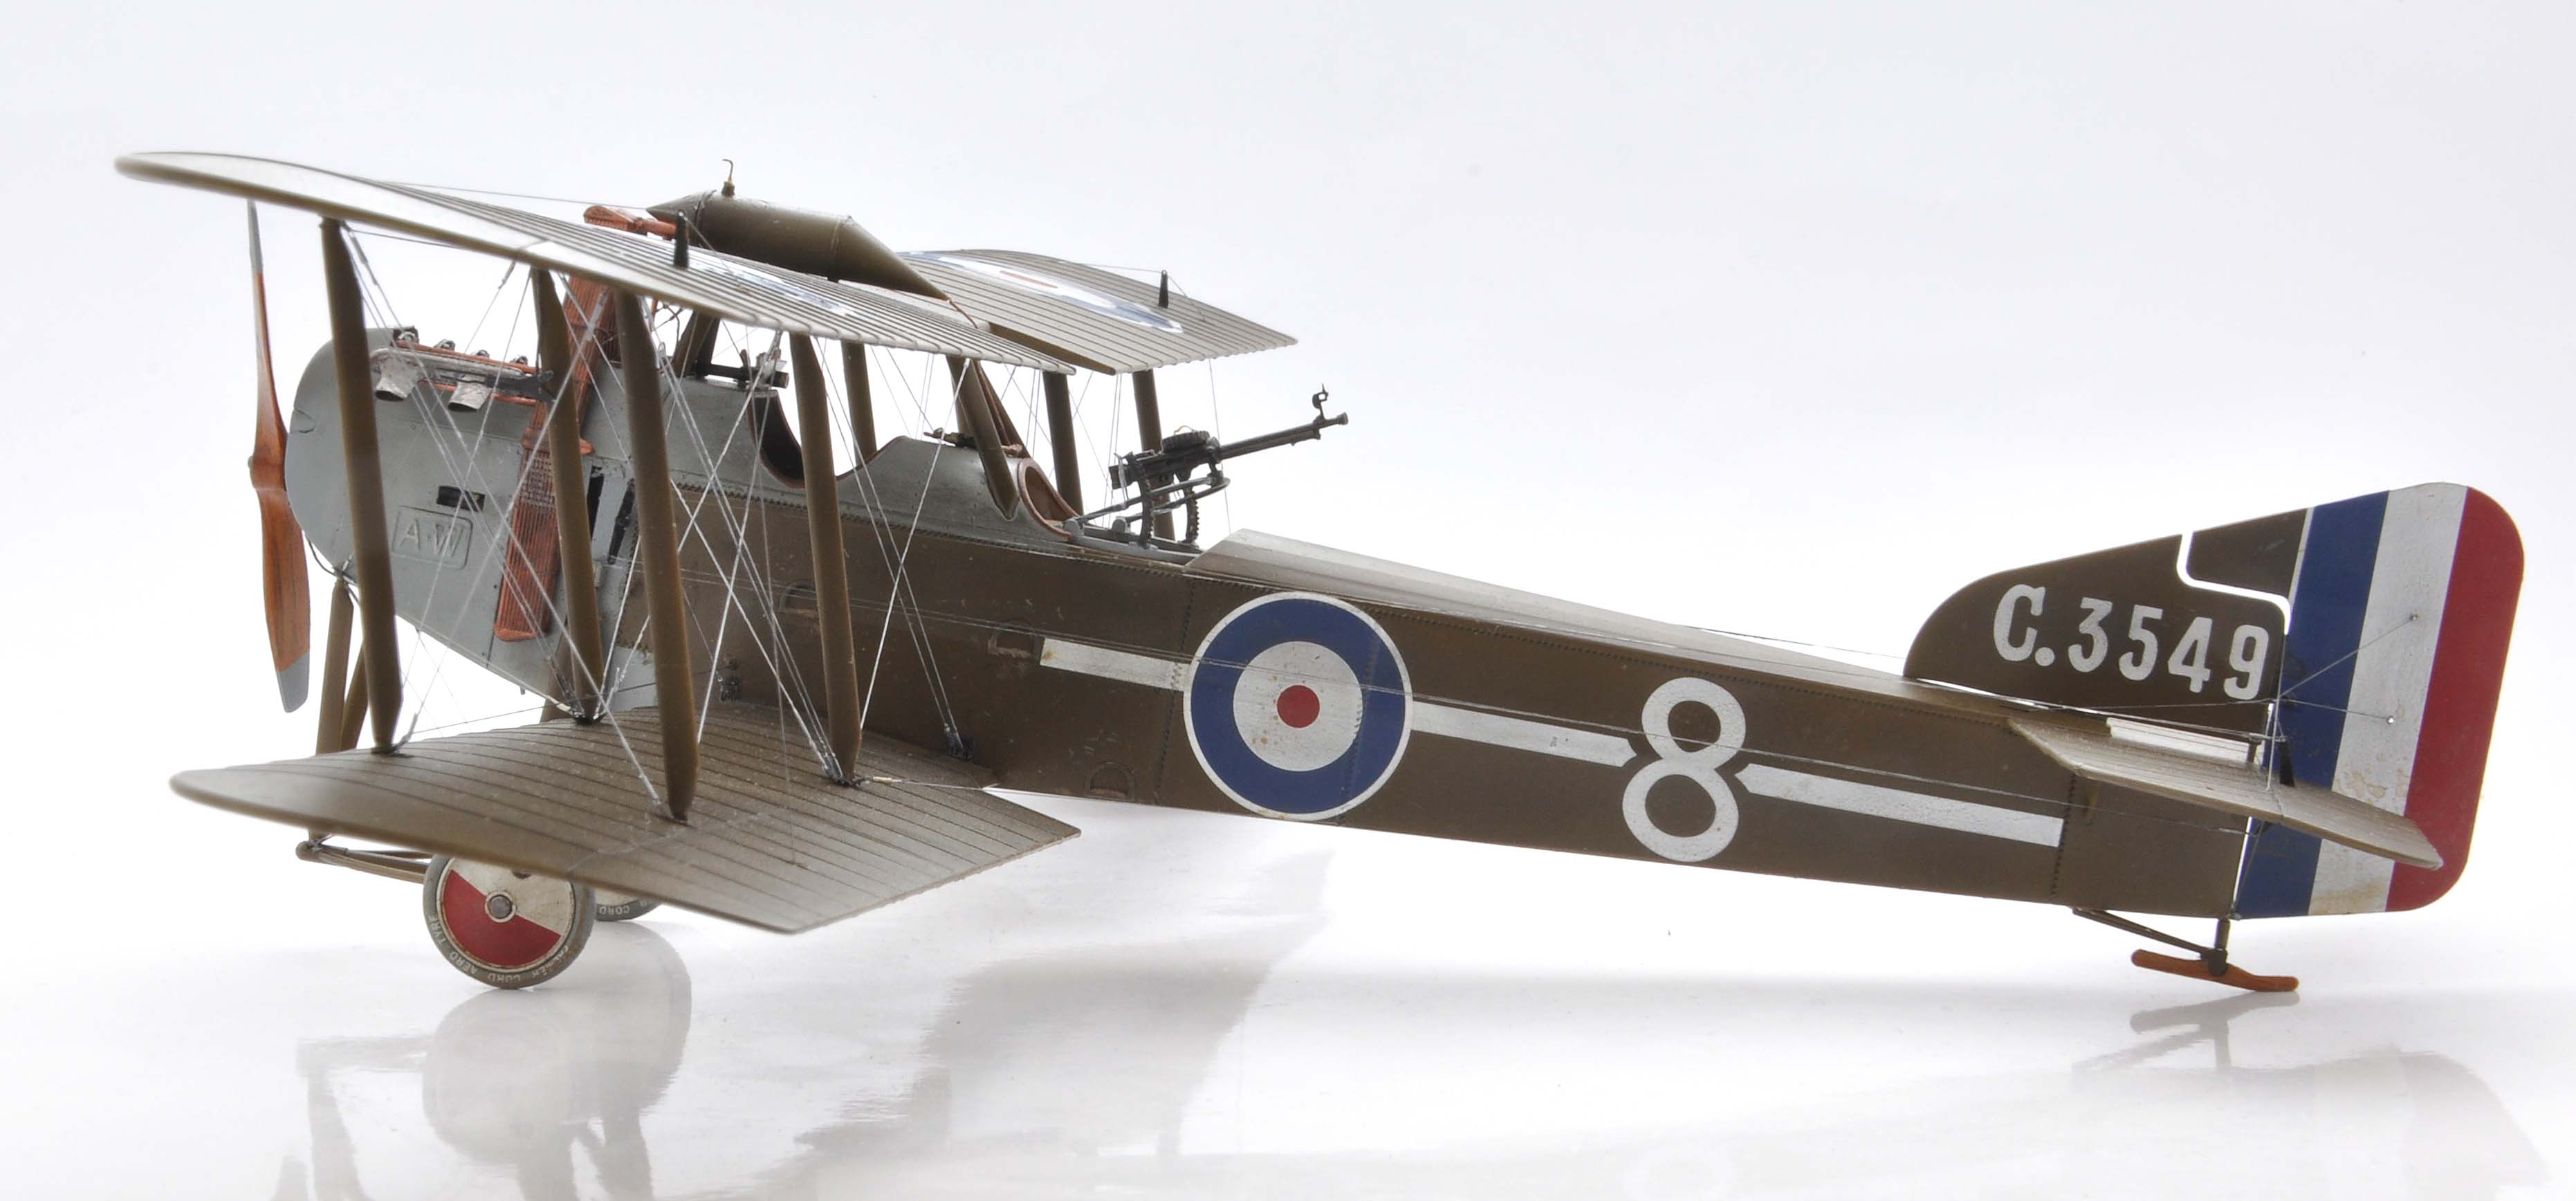
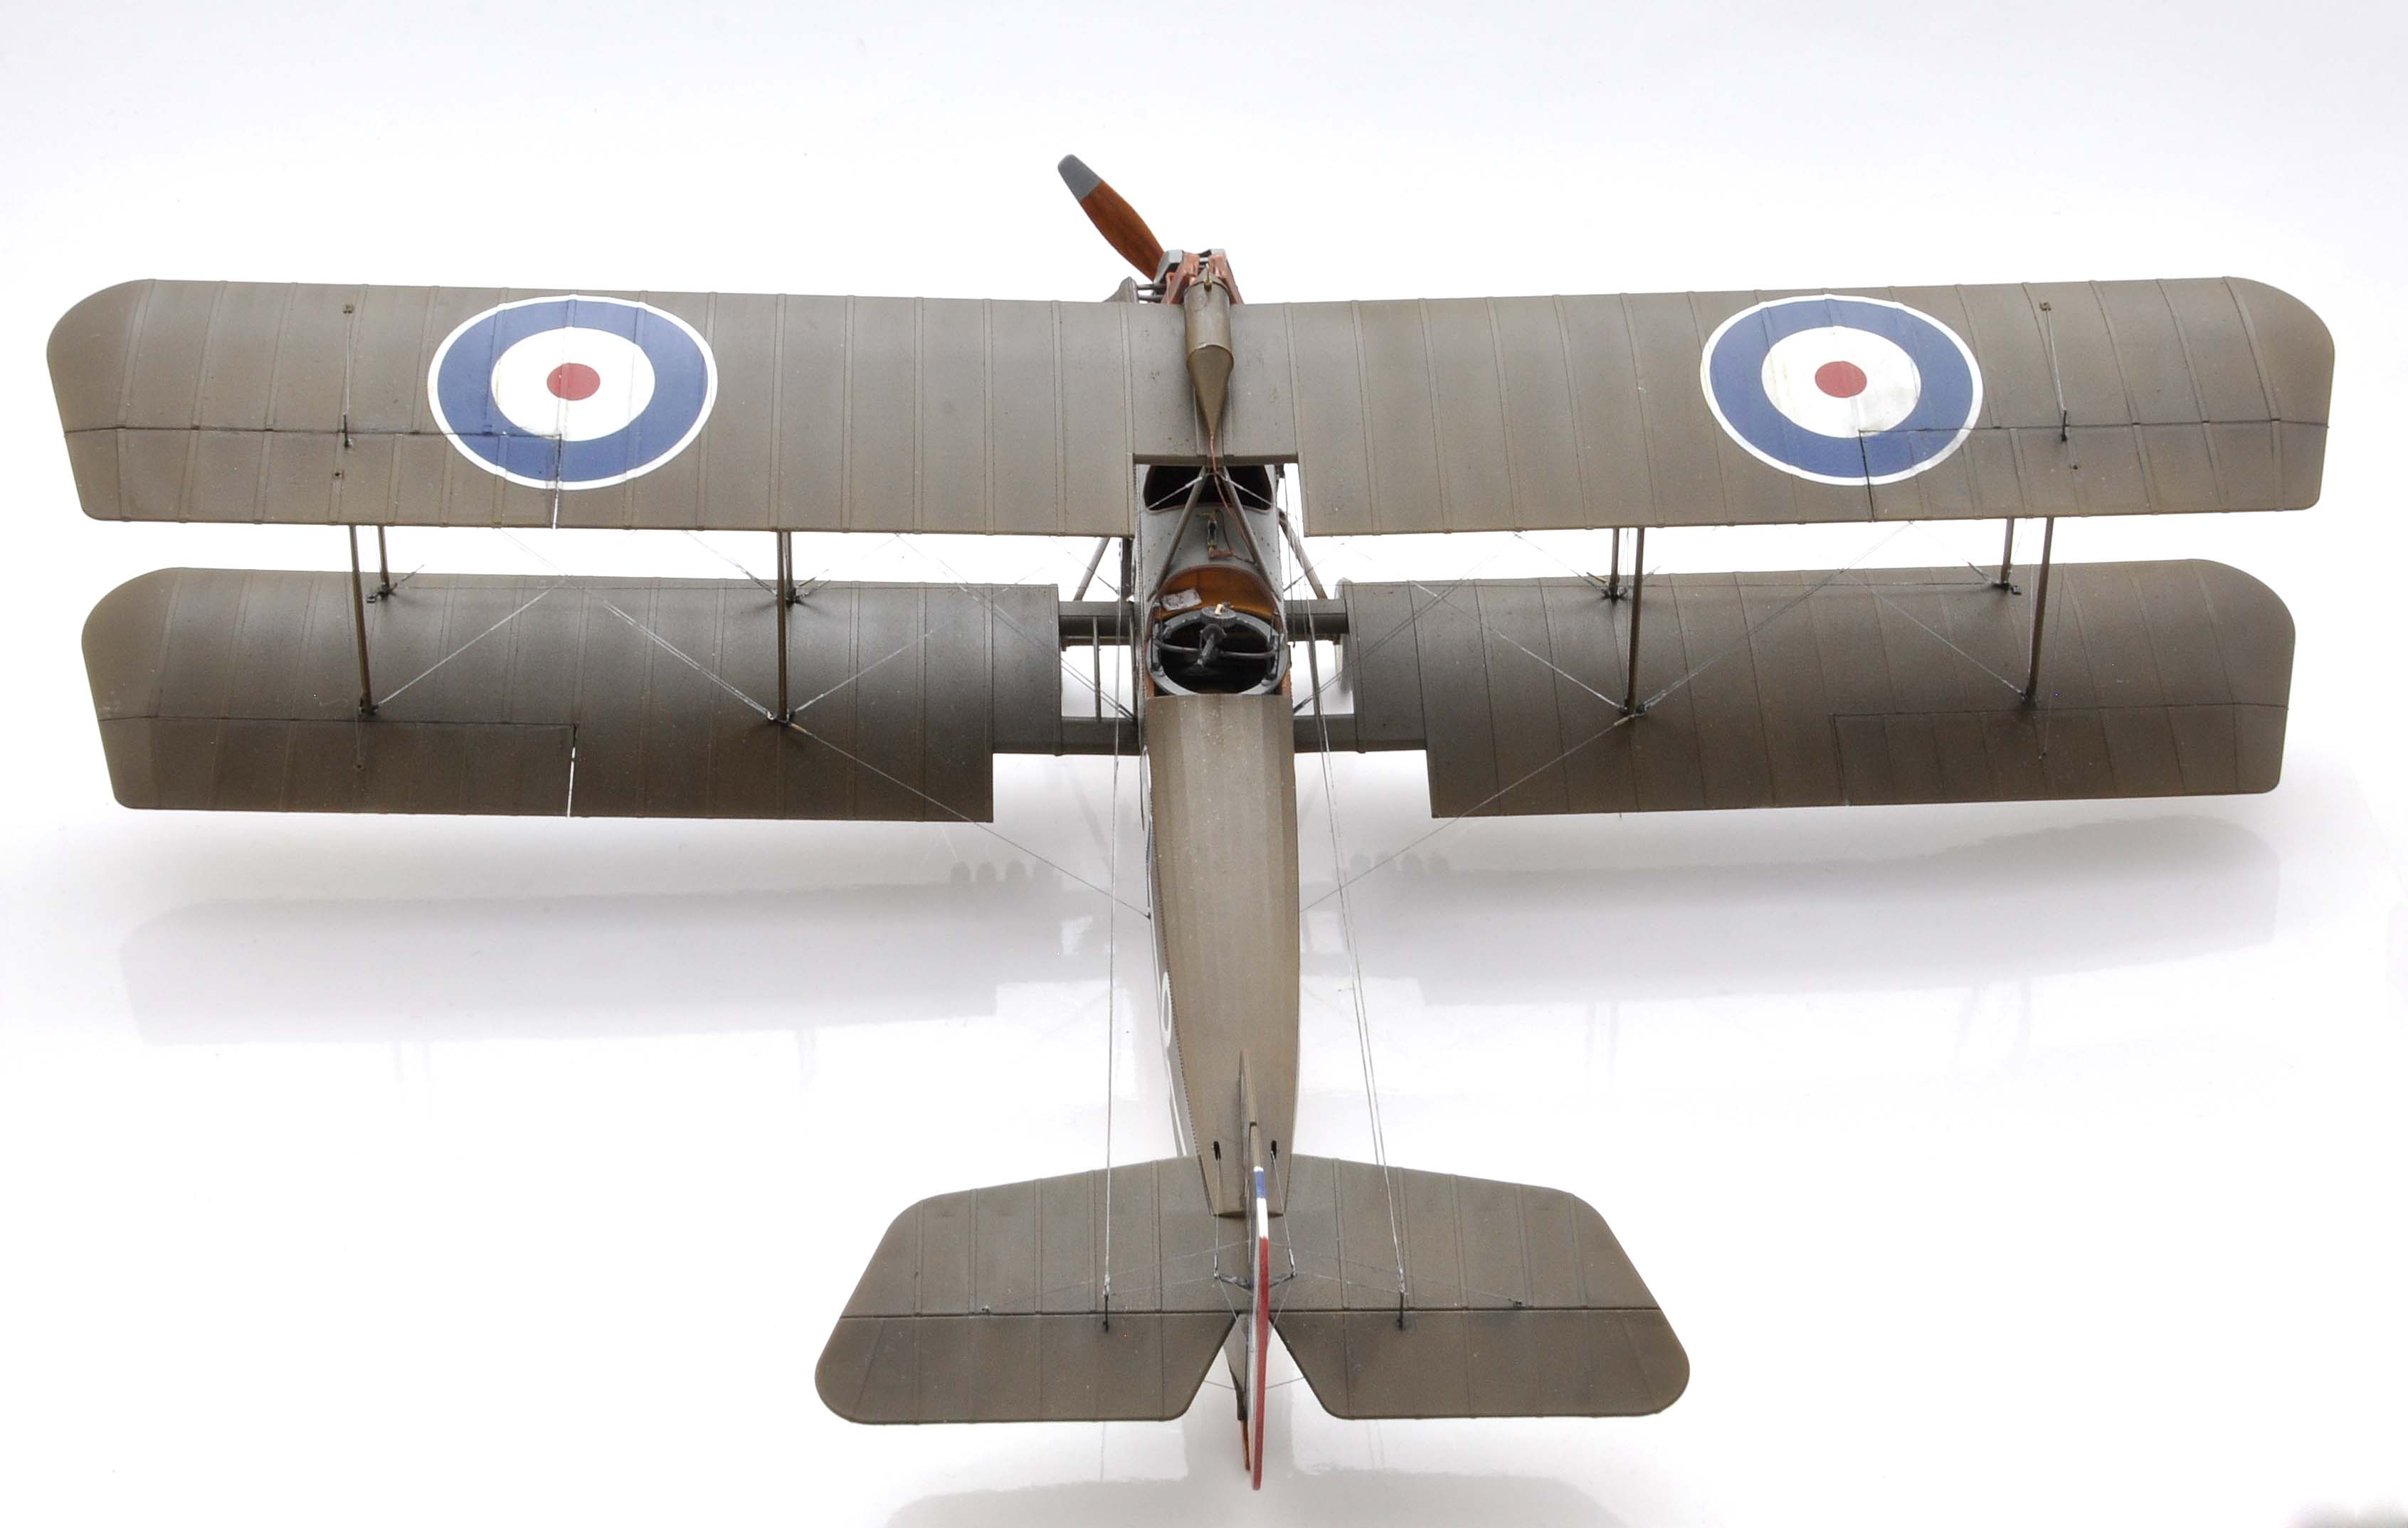
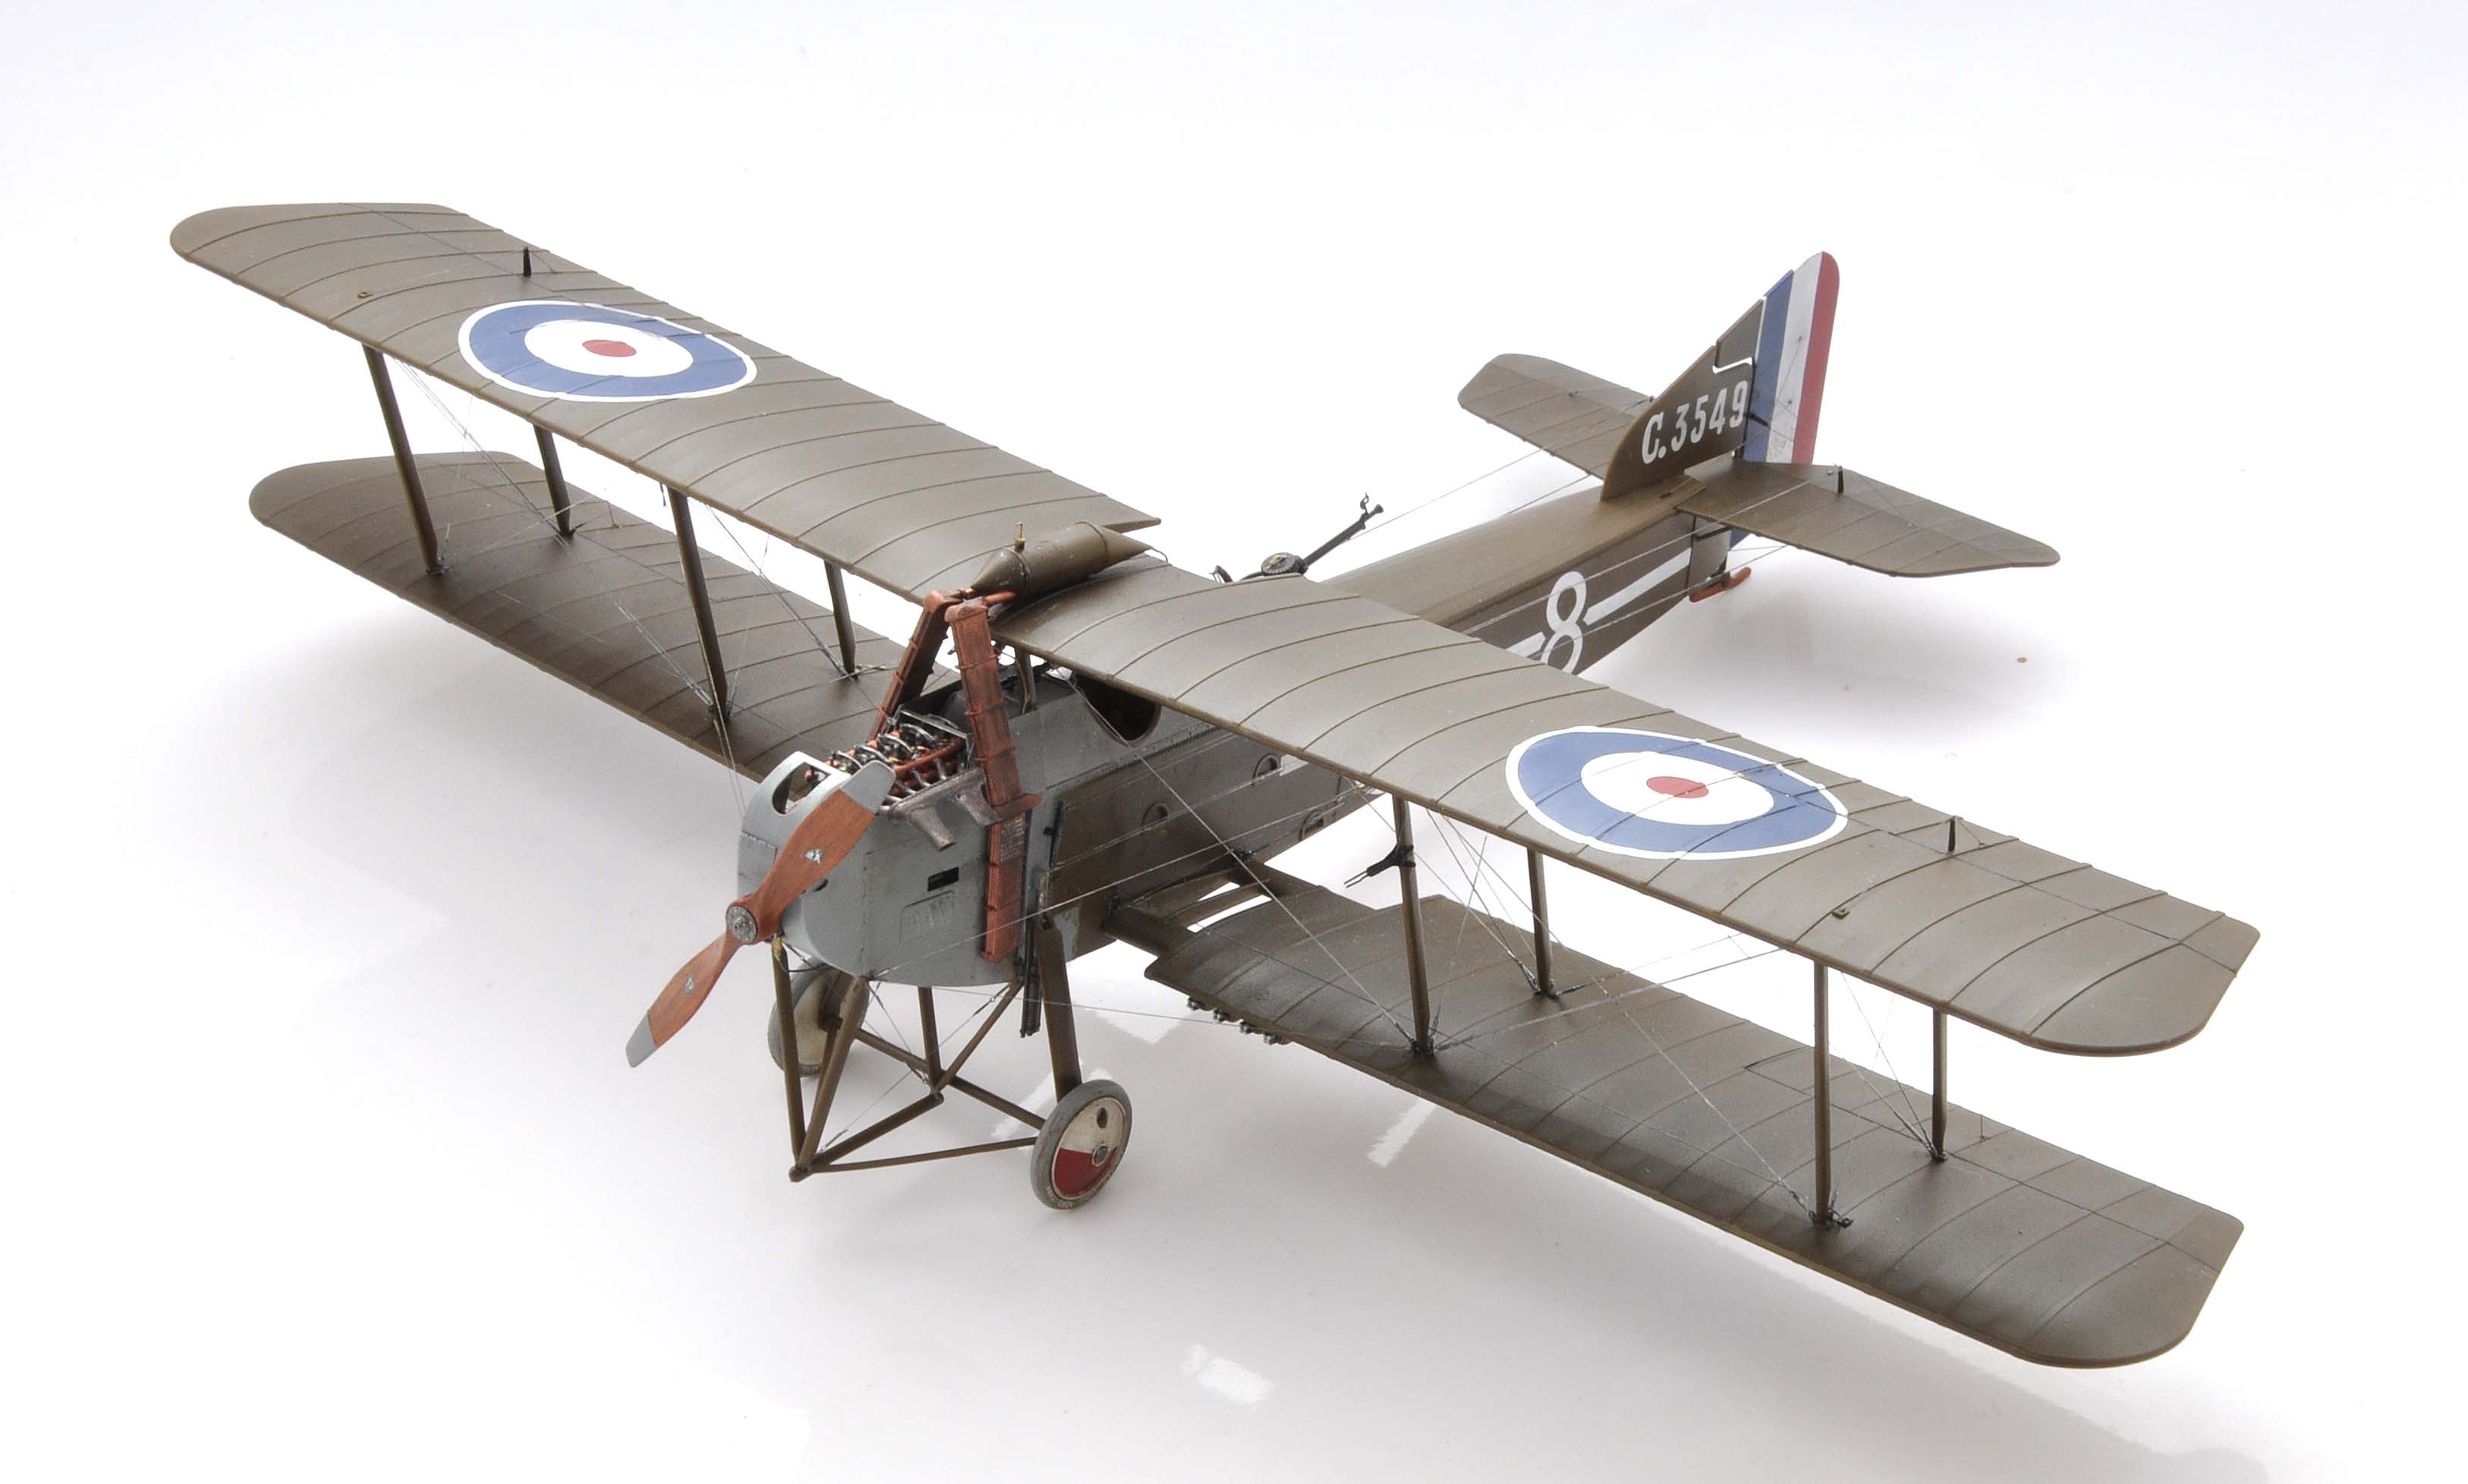
I`ve cut the ailerons to make them look as separate surfaces. I`ve scratched the Rotherham pump and made most of the rigging. Gee, you can see how much is to be corrected in the pics...
I really like the wheels decals - they`re very well designed. I`ve also painted the Cooper bombs.
Not much work left till she`s finished.
I really fell in love with the Big Ack.

Merlin
Senior Editor #017
United Kingdom
Joined: June 11, 2003
KitMaker: 17,582 posts
AeroScale: 12,795 posts
Posted: Saturday, August 12, 2017 - 06:24 PM UTC
Hi Filip
It's looking superb as expected!
It's funny - I actually logged on all set to ask if anyone had any advice for a good PC10 colour and you and Tom have already posted very useful pointers.
All the best
Rowan
BEWARE OF THE FEW...
As I grow older, I regret to say that a detestable habit of thinking seems to be getting a hold of me. - H. Rider Haggard
Wojewodztwo Wielkopolskie, Poland
Joined: March 18, 2012
KitMaker: 135 posts
AeroScale: 135 posts
Posted: Monday, August 14, 2017 - 03:45 PM UTC