Greetings Group,
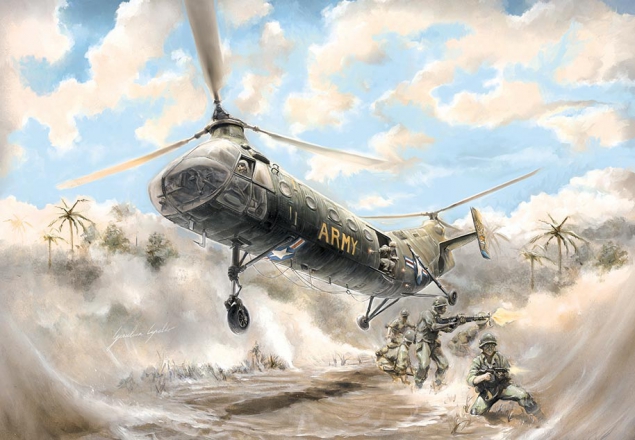
This is my build-review of Italeri H-21C Shawnee ''Flying Banana'' In-box Review.
If you want to spring ahead to my final summary, please go here: Final Thoughts
My first thoughts: good looking model with that weird Italeri mix of nuke-proof sprue connectors and maddeningly delicate parts. Incredibly fine external surface detail and mushy interior parts.
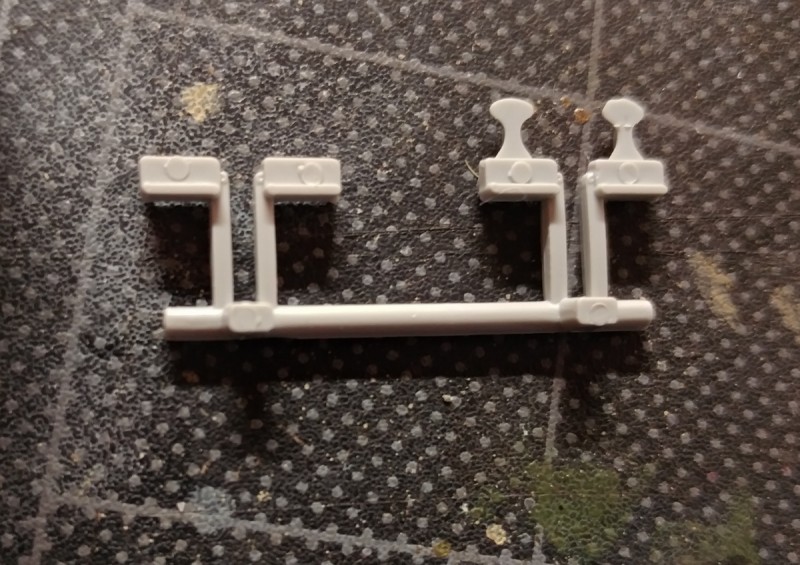
First, the nicely detailed anti-torque pedals have ugly ejector pins.
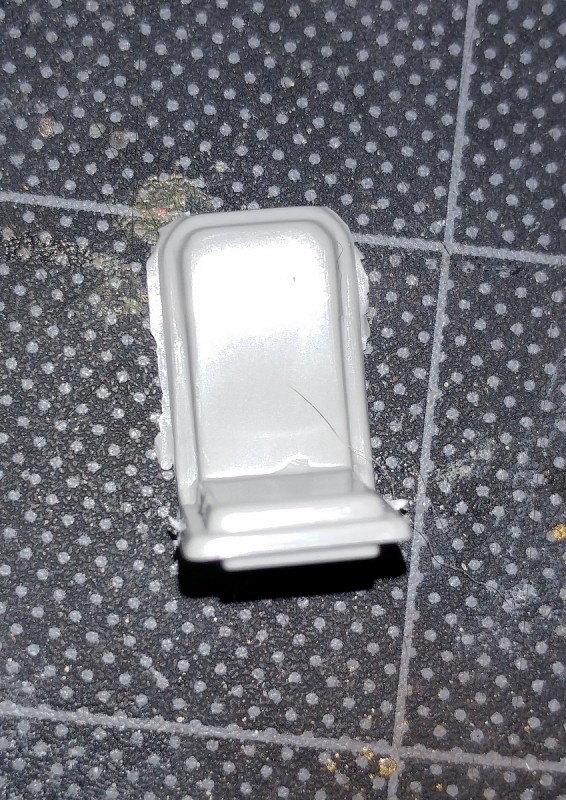
The seats have light but annoying flash.
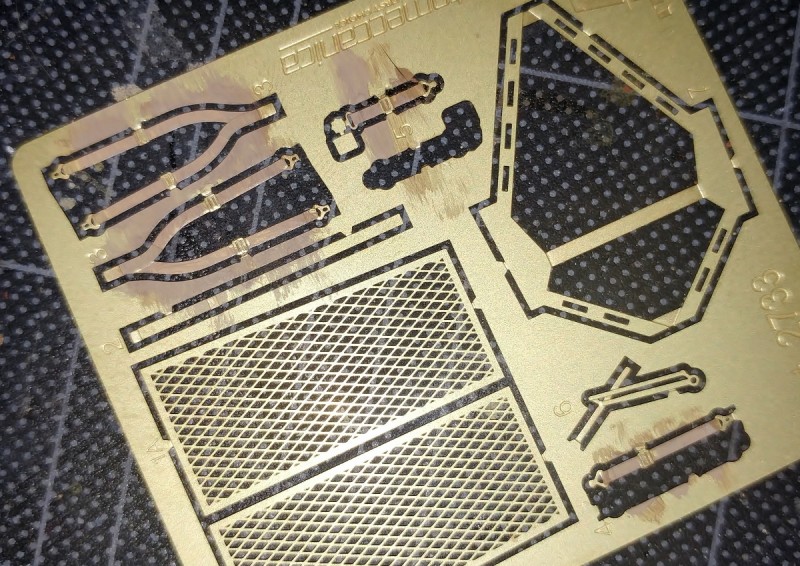
Italeri includes a nice P/E frett.
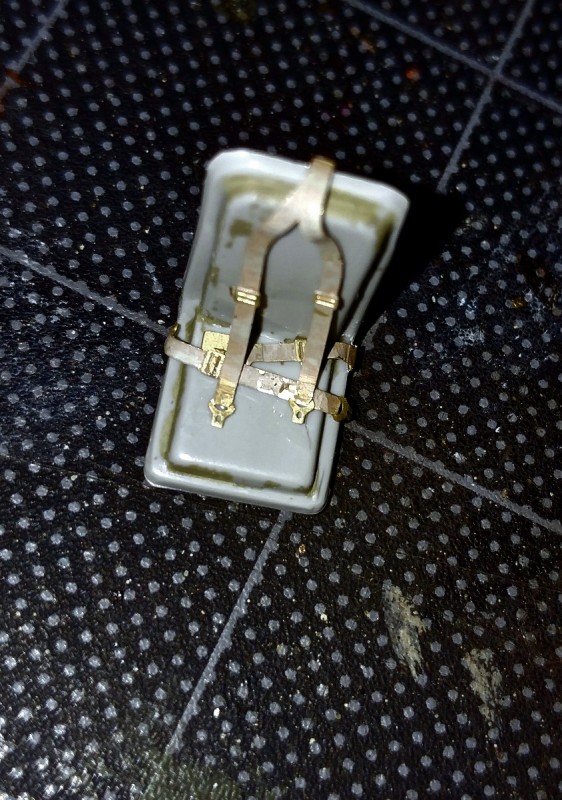
It makes the seats look like this.
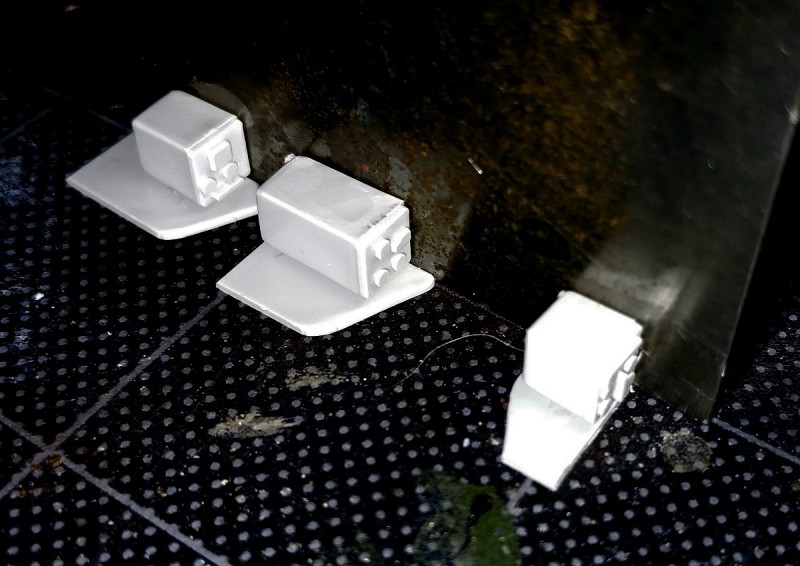
A detailed radio area is included. The radios rest on individual tables. They lack any holes or slots or other alignment things. That is a problem because Italeri's instructions are unclear concerning a little secret about these. I used my machinist square to make them looking okay. Bad move - the little secret is that those radios must be a bit offset from the edges because those edges are to be inserted into slots in the cockpit bulkhead.
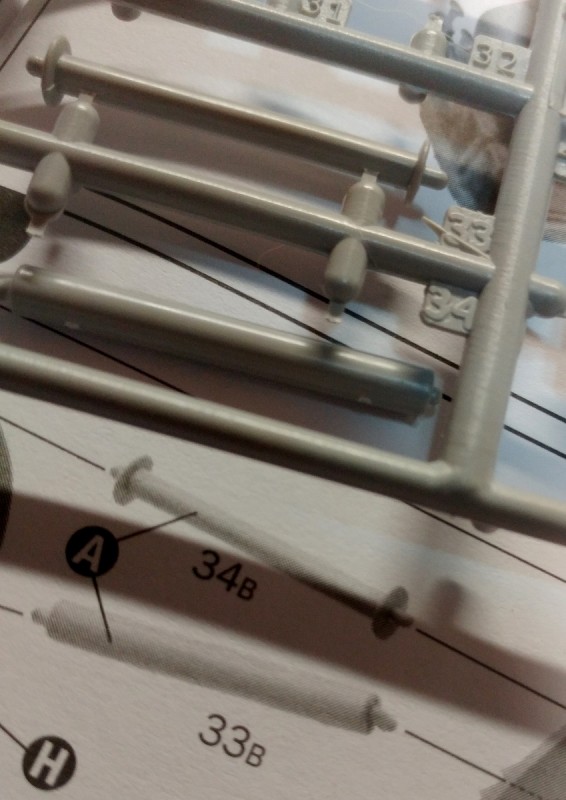
I have to be careful. Italeri's instruction sheet designers made at least two mistakes. Note the mismatch of the parts numbers between the instructions and the sprue.
Okay. Now for some paint. Come back and look.
Rotary Wing
Discuss helicopters and other rotary wing aircraft from any era.
Hosted by Gino P. Quintiliani
Italeri H-21C "Flying Banana" Blog
Posted: Friday, May 26, 2017 - 04:19 AM UTC
roygdarwin
Canada
Joined: February 25, 2017
KitMaker: 69 posts
AeroScale: 15 posts
Joined: February 25, 2017
KitMaker: 69 posts
AeroScale: 15 posts
Posted: Friday, May 26, 2017 - 10:53 AM UTC
cool build ,I have being the kit for sum time ,I will foloul your build .thanks for shareing .
drabslab
European Union
Joined: September 28, 2004
KitMaker: 2,186 posts
AeroScale: 1,587 posts
Joined: September 28, 2004
KitMaker: 2,186 posts
AeroScale: 1,587 posts
Posted: Sunday, May 28, 2017 - 01:24 AM UTC
Cool, I'll watch this with interest
Italeri often gives a strange combination of quality and rudimentary solutions but usually, it build nicely together
Posted: Tuesday, May 30, 2017 - 09:04 AM UTC
Drabslab, Roy,
Thanks for watching. Let's see what I did last night.
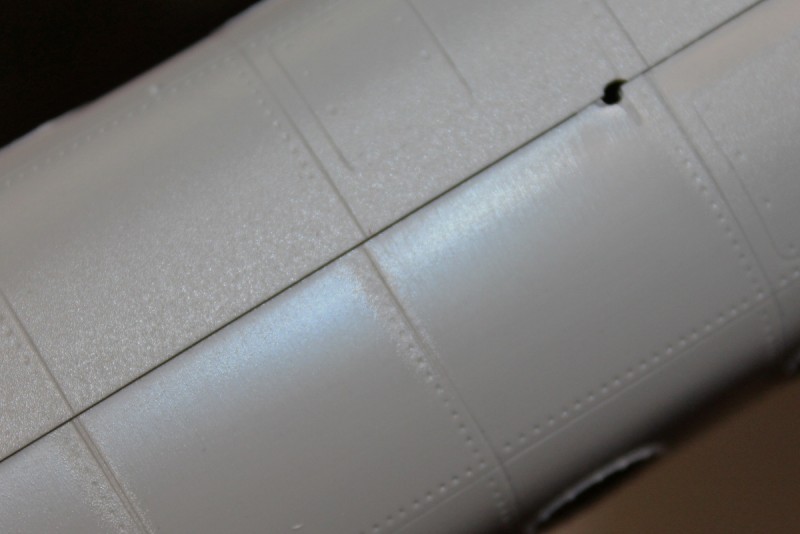
If you have already read the in-box review, you may recall the model has some surface texturing. You may recall I complained about the inconsistent molding. Well, it is more pronounced than I realized. I discovered that Italeri made half of the fuselage with texturing and the other half without.
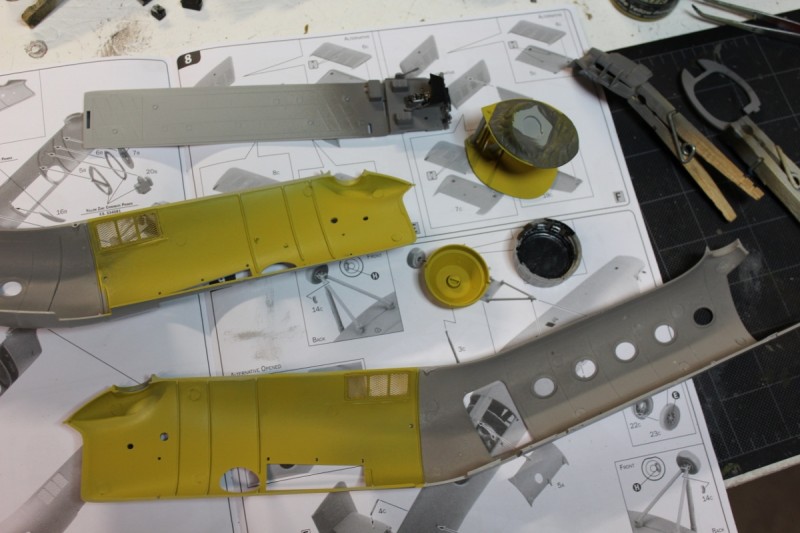
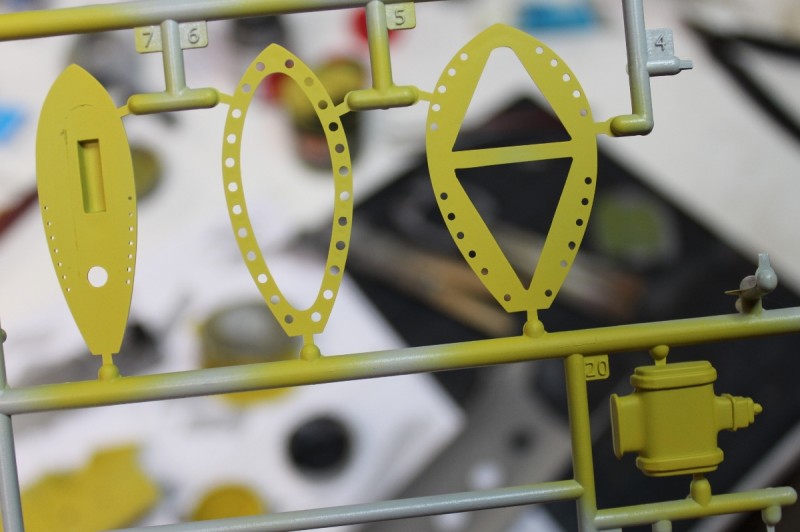
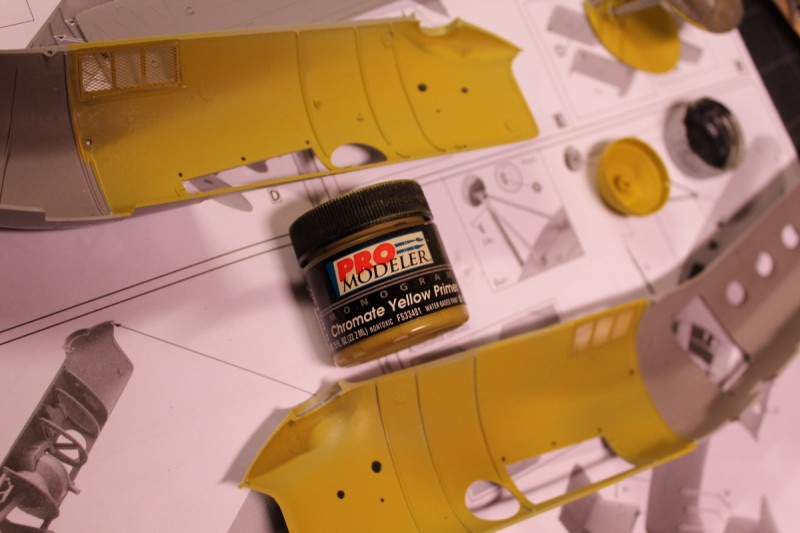
Aside from that, I did some spraying. I love yellow zinc chromate and enjoyed covering the working areas of the 'copter with it.
Ain't these pretty?
(Anyone remember that brand of paint? Glad I got the last dregs out of it for this model.)
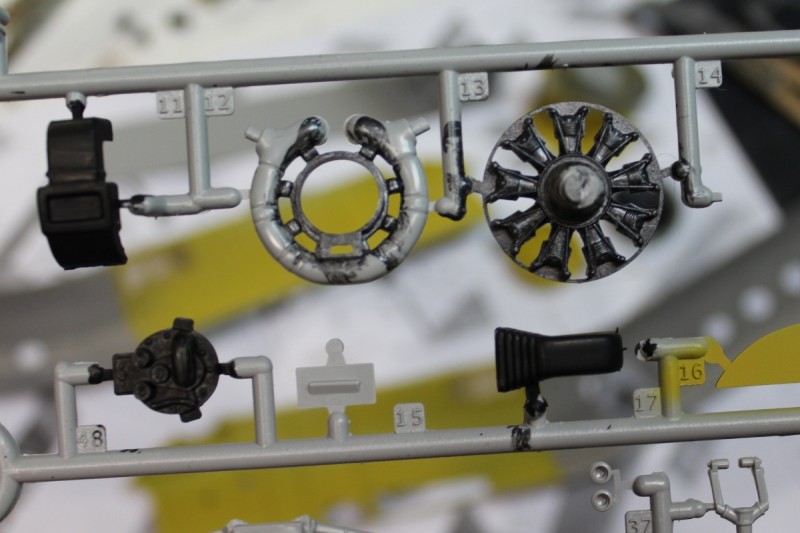
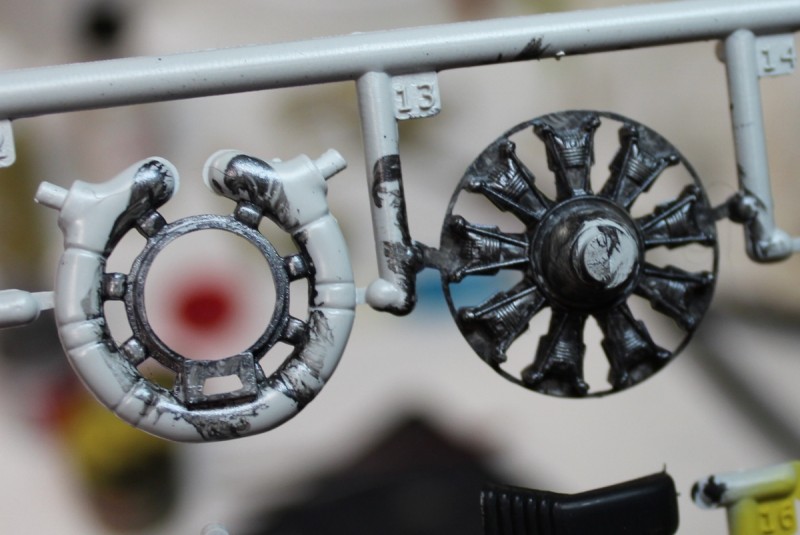
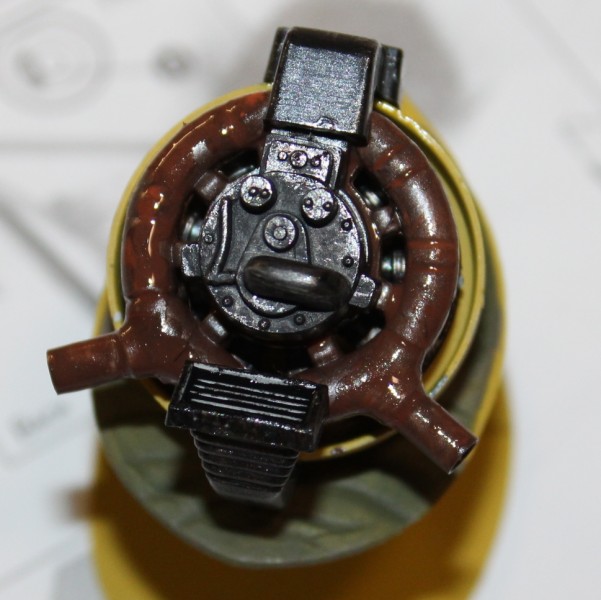
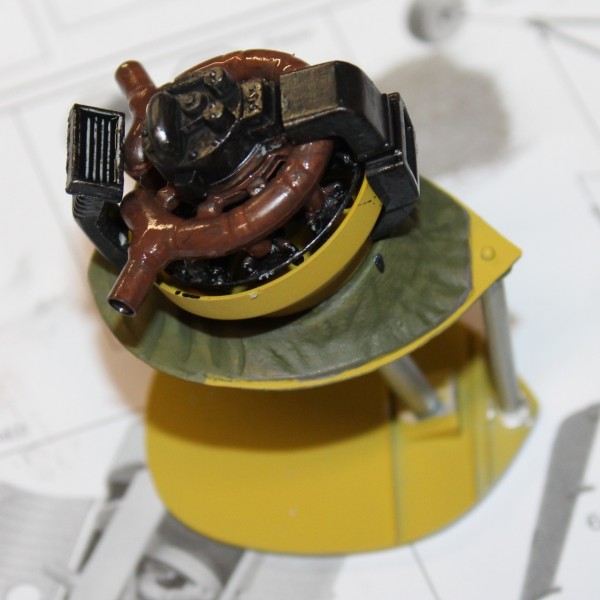
Italeri's Wright R-1820-103 looks pretty good. It features carburetor ducting, too. Whether one builds this model with the engine access doors open or just peeks at it through the "nostrils", that powerplant is ripe for super-detailing wiring and plumbing.
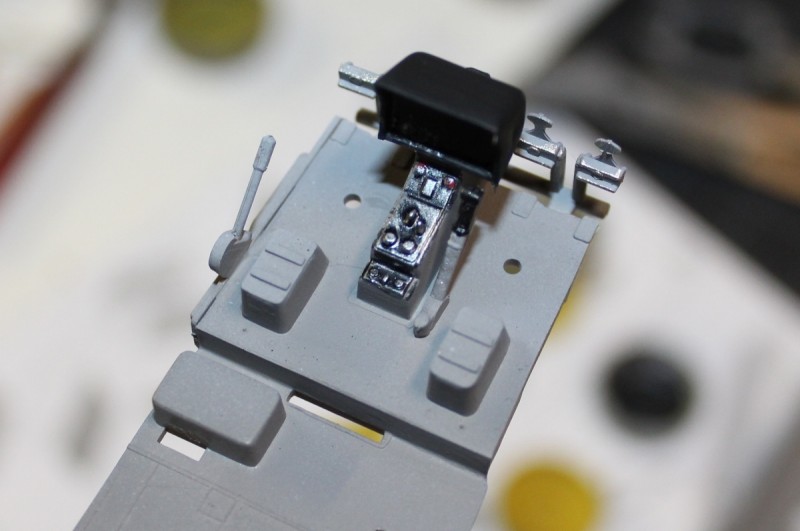
Finally, a bit of cockpit detail accentuating. Don't worry, it needs a little more work.
Come back and see what the radio/nav suite looks like.
rdt1953
New Jersey, United States
Joined: February 06, 2015
KitMaker: 1,098 posts
AeroScale: 900 posts
Joined: February 06, 2015
KitMaker: 1,098 posts
AeroScale: 900 posts
Posted: Tuesday, May 30, 2017 - 03:39 PM UTC
Fred - This is fun to watch - I haven't built a whirlybird in centuries but this is giving me the itch !
Cheers- Richard
Cheers- Richard
Bigrip74
Texas, United States
Joined: February 22, 2008
KitMaker: 5,026 posts
AeroScale: 2,811 posts
Joined: February 22, 2008
KitMaker: 5,026 posts
AeroScale: 2,811 posts
Posted: Tuesday, May 30, 2017 - 09:01 PM UTC
I want one of these.
Bob
Bob
Posted: Tuesday, May 30, 2017 - 09:33 PM UTC
I like it! The addition of the PE is very nice.
I am more concerned that the panel lines do not match up across the center seam of the body. I assume this is the same model tooling as in years gone by so alignment and texturing of the molds may be getting a little long in the tooth?
As to the lack of texturing on half the fuselage I would suggest hitting the untextured half with a lite coat of matte clear. Hold the can a good distance from the model so the spray goes on as almost dry paint. This should give you a similar texture to start your painting. Then a coat of Tamiya gray primer and finally your finish color. This should almost totally solve your texture problem.
Can't wait to see your progress.
chrism
United States
Joined: January 05, 2012
KitMaker: 160 posts
AeroScale: 156 posts
Joined: January 05, 2012
KitMaker: 160 posts
AeroScale: 156 posts
Posted: Wednesday, May 31, 2017 - 12:42 AM UTC
It's coming along nicely Fred. I do remember the Pro-modeler paint but I never used any.
Posted: Wednesday, May 31, 2017 - 01:10 AM UTC
Not to sound like a broken record but; I would really like to see this model done in 1/35th.
drabslab
European Union
Joined: September 28, 2004
KitMaker: 2,186 posts
AeroScale: 1,587 posts
Joined: September 28, 2004
KitMaker: 2,186 posts
AeroScale: 1,587 posts
Posted: Wednesday, May 31, 2017 - 08:29 PM UTC
Quoted Text
I am more concerned that the panel lines do not match up across the center seam of the body.
Does the real thing have a panel line along the spine of the fuselage?
roygdarwin
Canada
Joined: February 25, 2017
KitMaker: 69 posts
AeroScale: 15 posts
Joined: February 25, 2017
KitMaker: 69 posts
AeroScale: 15 posts
Posted: Monday, June 05, 2017 - 03:43 AM UTC
your build is doing great so far ,any real big at this time .
Posted: Saturday, July 29, 2017 - 08:44 AM UTC
Hi Bob, Drabslab, Michael, Richard, Roy, et.al.,
Thank you for checking out this build. I am annoyed that I took the following photos back on the 9th, took them on a 3-week training trip to post, and then forgot about them. Three weeks late - hope this is worth the wait.
First, to answer some questions.
Drabslab - I do not know about the panel lines on the real thing.
Michael - I assume this is the same model tooling as in years gone by so alignment and texturing of the molds may be getting a little long in the tooth? I do not know. I recall Italeri makes a 1/72 H-21 but otherwise the only other 1/48 H-21s I know of are the ancient Aurora model and the ones by Fonderie Miniature or Special Hobby.
Roy - Fit might be tricky closing the fuselage. The fuselage interior lacks substantial alignment lines and troughs for the bulkheads, and that might make closing the fuselage challenging. But my main complaint is that the instruction sheet has some vague instructions, and some of the parts lack distinct attachment parts.
So now, some model updates!
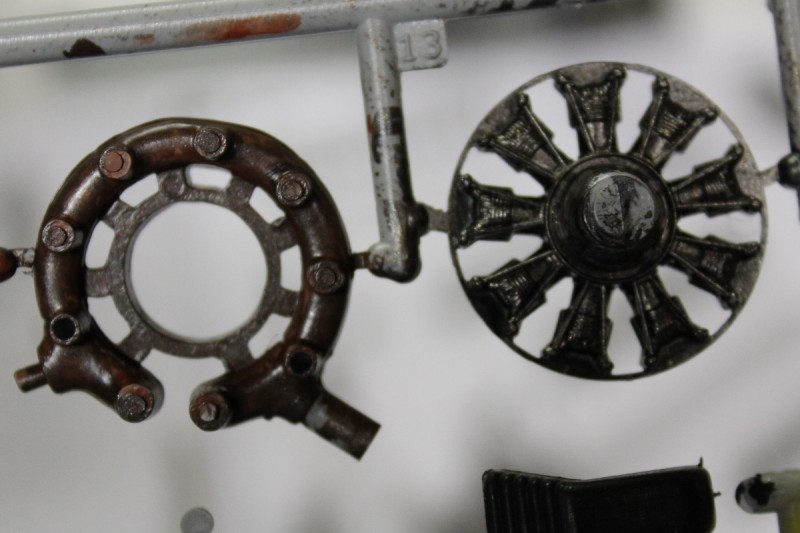
First, the powerplant. It is well rendered and has a separate manifold ring with separate exhaust outlets.
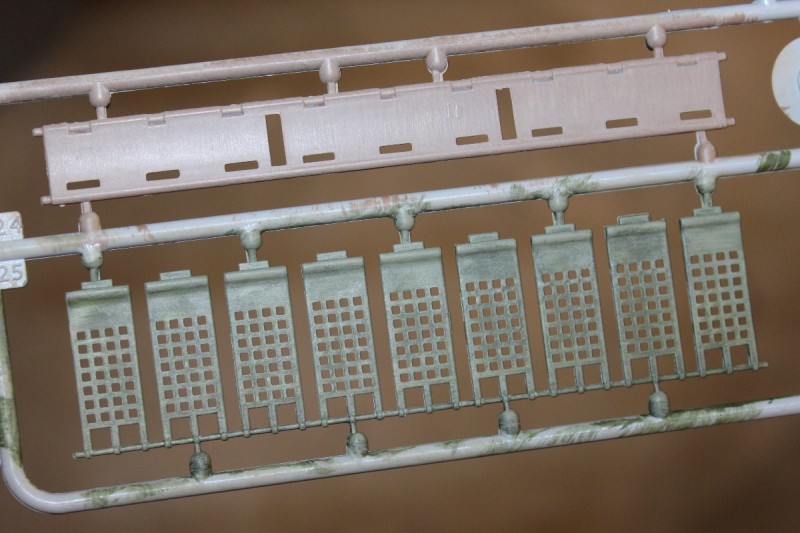
The seating for passengers:
Italeri handles the instrument panel with a decal, a common method. But the bezels are so faint, as are the dial details.
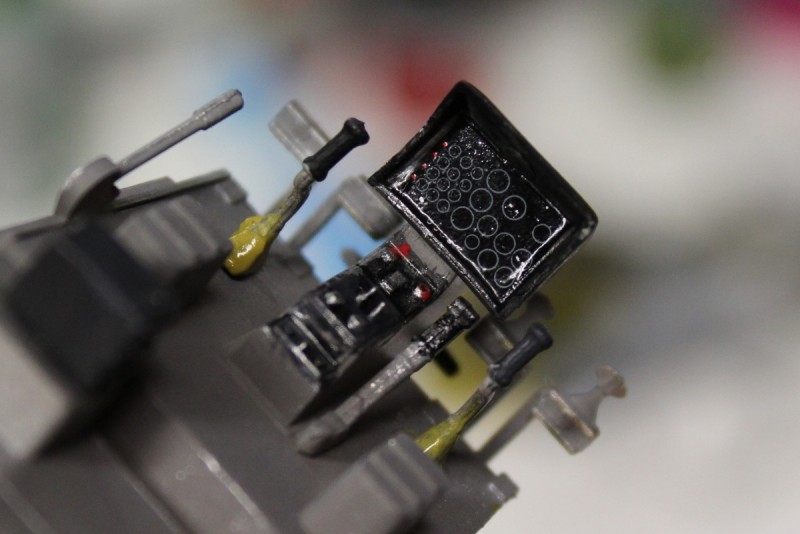
One of you helo experts may be able to tell me why the seat of the seat is so detailed?
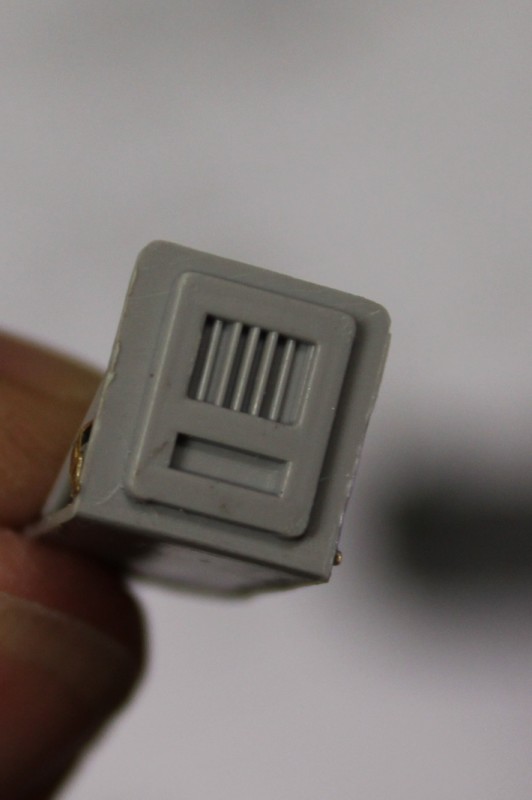
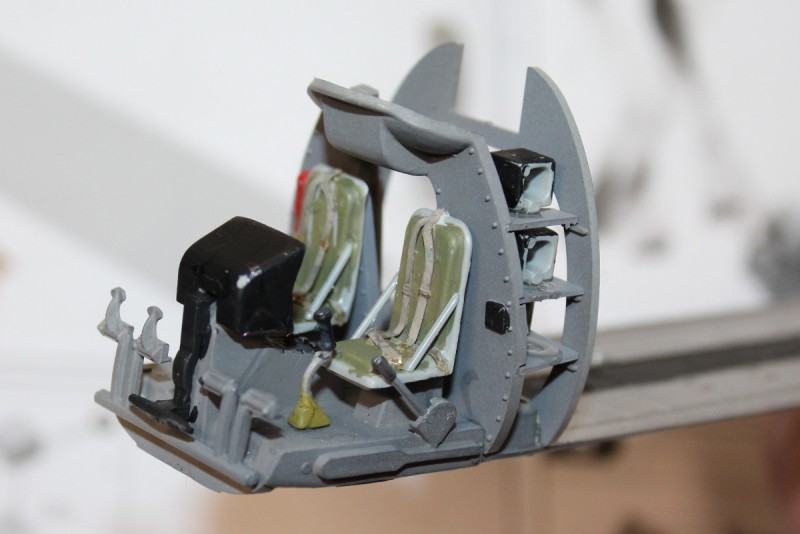
Assembly of the comm stack is interesting. Four radios set upon three shelves and a lump molded on the floor. The shelves are separate pieces and fit between bulkheads - slots behind the pilot and ridges fore the passenger /cargo area. Each radio fits onto its shelf via a protrusion under the radios. There is nothing to indicate alignment. I put a lot of effort into lining up the radios on the shelves, only to find out that they did not fit well against the cockpit bulkhead. So I plucked them off, joined the shelves to both bulkheads, and reinstalled the radios.
There is a piece of P/E that is shown to be involved with the assembly, but I can not figure where it is supposed to be attached.
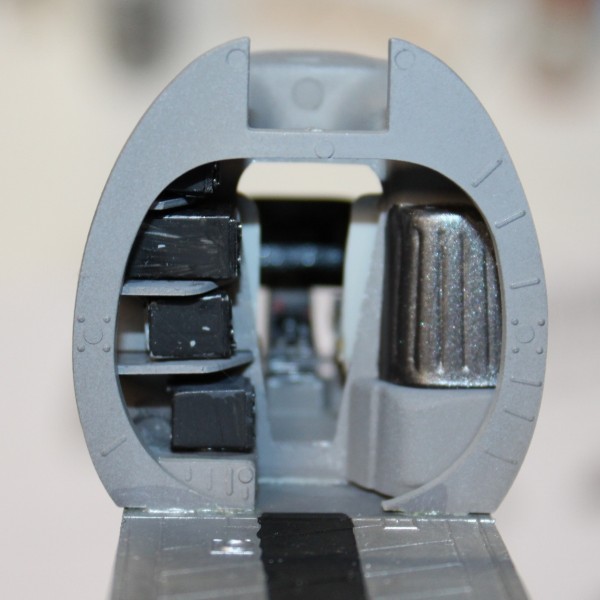
The cockpit is assembled.
Yes, your see that correctly. The forward bulkhead does slope forward. To prove it, I put the assembly next to a reference photo in the instructions.
Yes, Italeri's instructions are a mixed bag. I'll comment more during the build if need be.
I apologies for the delay in posting this update and hope you check back for the next one.
Thank you for checking out this build. I am annoyed that I took the following photos back on the 9th, took them on a 3-week training trip to post, and then forgot about them. Three weeks late - hope this is worth the wait.
First, to answer some questions.
Drabslab - I do not know about the panel lines on the real thing.
Michael - I assume this is the same model tooling as in years gone by so alignment and texturing of the molds may be getting a little long in the tooth? I do not know. I recall Italeri makes a 1/72 H-21 but otherwise the only other 1/48 H-21s I know of are the ancient Aurora model and the ones by Fonderie Miniature or Special Hobby.
Roy - Fit might be tricky closing the fuselage. The fuselage interior lacks substantial alignment lines and troughs for the bulkheads, and that might make closing the fuselage challenging. But my main complaint is that the instruction sheet has some vague instructions, and some of the parts lack distinct attachment parts.
So now, some model updates!
First, the powerplant. It is well rendered and has a separate manifold ring with separate exhaust outlets.
The seating for passengers:
Italeri handles the instrument panel with a decal, a common method. But the bezels are so faint, as are the dial details.
One of you helo experts may be able to tell me why the seat of the seat is so detailed?
Assembly of the comm stack is interesting. Four radios set upon three shelves and a lump molded on the floor. The shelves are separate pieces and fit between bulkheads - slots behind the pilot and ridges fore the passenger /cargo area. Each radio fits onto its shelf via a protrusion under the radios. There is nothing to indicate alignment. I put a lot of effort into lining up the radios on the shelves, only to find out that they did not fit well against the cockpit bulkhead. So I plucked them off, joined the shelves to both bulkheads, and reinstalled the radios.
There is a piece of P/E that is shown to be involved with the assembly, but I can not figure where it is supposed to be attached.
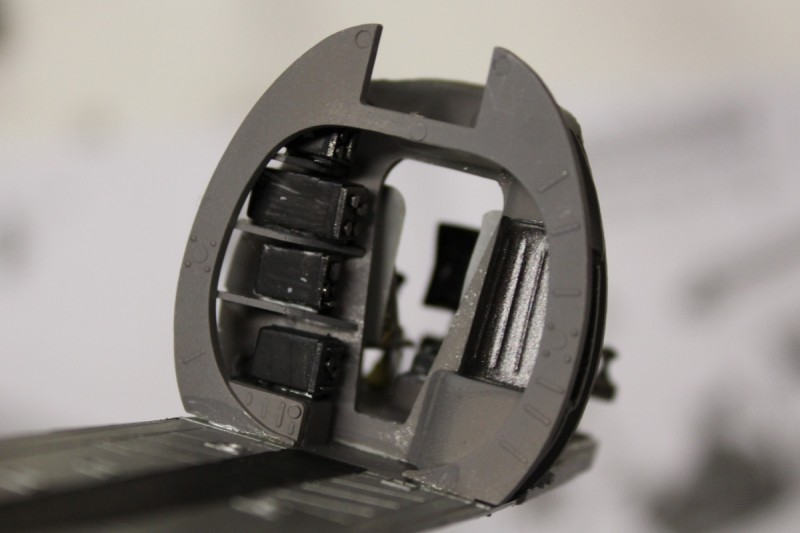
The cockpit is assembled.
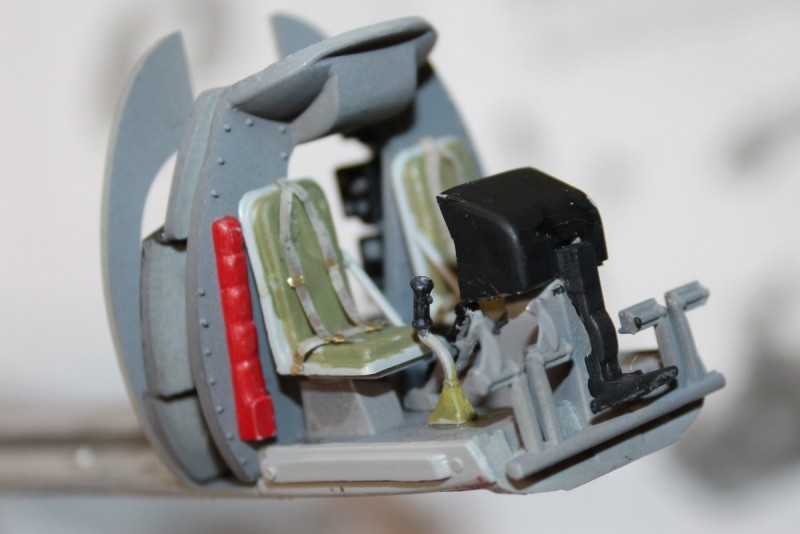
Yes, your see that correctly. The forward bulkhead does slope forward. To prove it, I put the assembly next to a reference photo in the instructions.
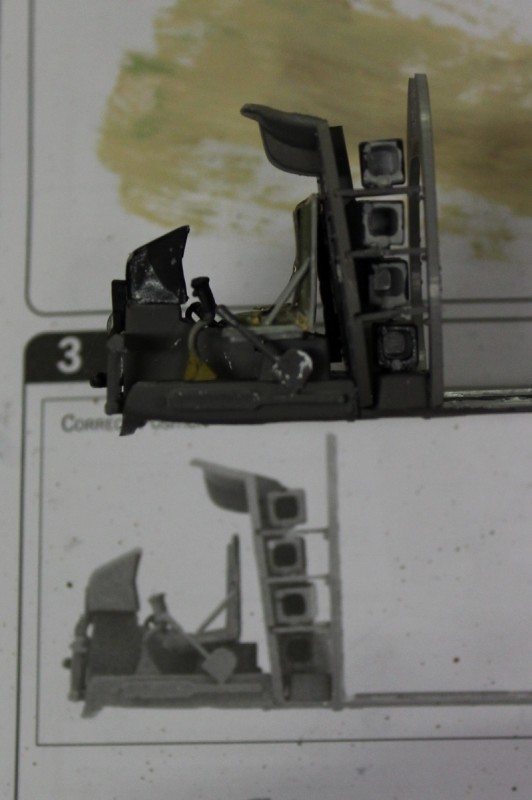
Yes, Italeri's instructions are a mixed bag. I'll comment more during the build if need be.
I apologies for the delay in posting this update and hope you check back for the next one.
roygdarwin
Canada
Joined: February 25, 2017
KitMaker: 69 posts
AeroScale: 15 posts
Joined: February 25, 2017
KitMaker: 69 posts
AeroScale: 15 posts
Posted: Sunday, July 30, 2017 - 03:17 AM UTC
seems like you are doing a great job so far ,cant wait to see some more pics .
Posted: Tuesday, August 08, 2017 - 04:16 AM UTC
Hi Gang,
What's new?
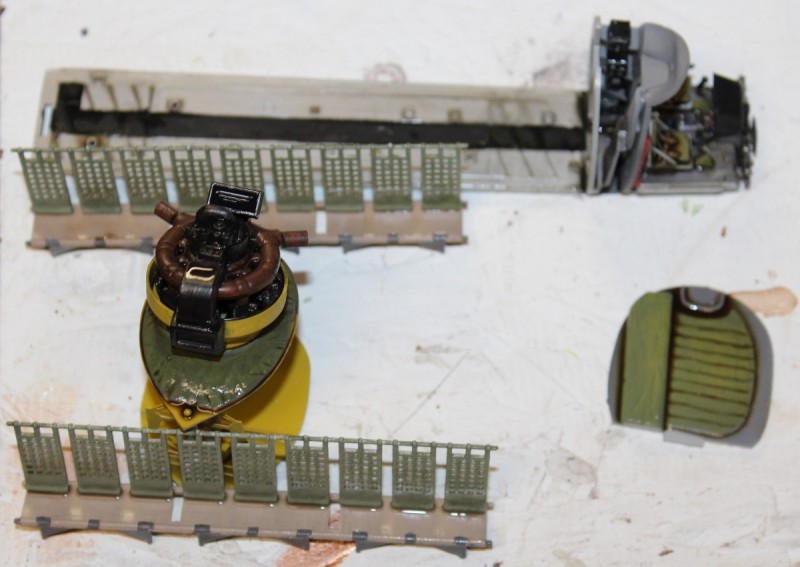
The powerplant has been assembled. That nicely detailed engine is almost completely hidden.
It looks a little glossy because it has a fresh wash on it.
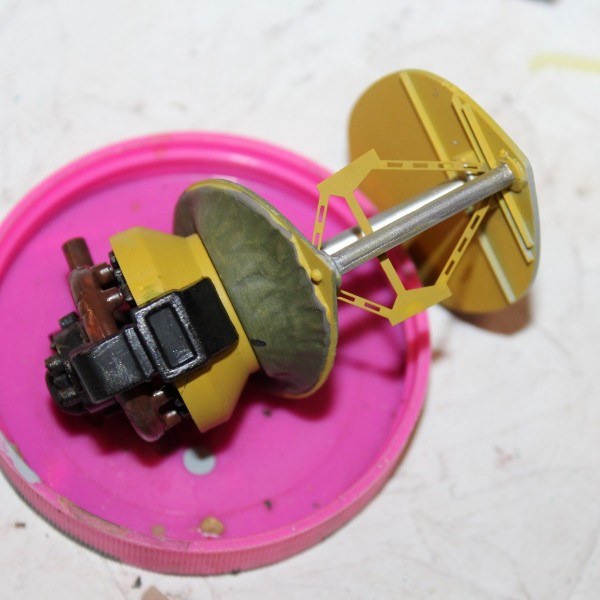
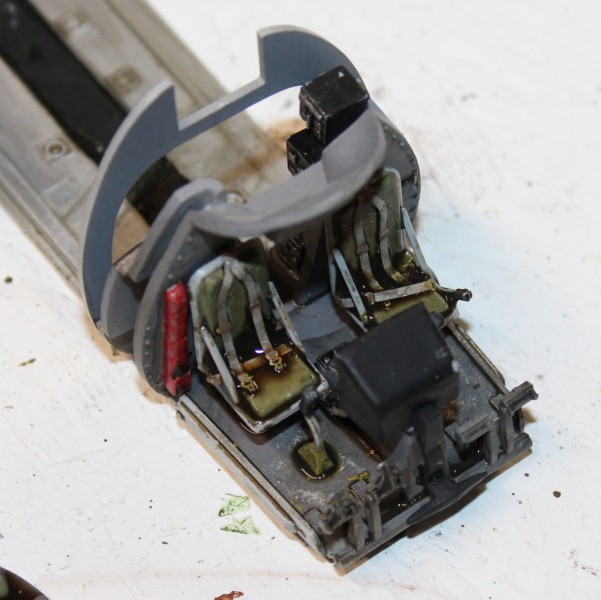
Sub-components ready for the fuselage to be closed up.
I painted the passenger seats and webbing tan and olive grab. I have seen examples of red seats. Can anyone confirm olive and khaki is accurate?
The cockpit is washed. Note the puddles. But I'll re-post when it is dry.
Posted: Tuesday, August 08, 2017 - 04:20 AM UTC
Okay, here's a question for you. This model has 6 windows per side for the passengers. My past attempts to mask them have been disappointing. So I ma trying a different method. I have gone 'new guy' and painted the fuselage exterior first. Then glossed it. I will decal it and dull it, THEN add the window 'glass' and then join the fuselage.
How do you handle painting fuselages with many windows?
drabslab
European Union
Joined: September 28, 2004
KitMaker: 2,186 posts
AeroScale: 1,587 posts
Joined: September 28, 2004
KitMaker: 2,186 posts
AeroScale: 1,587 posts
Posted: Tuesday, August 08, 2017 - 05:37 PM UTC
Quoted Text
Okay, here's a question for you. This model has 6 windows per side for the passengers. My past attempts to mask them have been disappointing. So I ma trying a different method. I have gone 'new guy' and painted the fuselage exterior first. Then glossed it. I will decal it and dull it, THEN add the window 'glass' and then join the fuselage.
How do you handle painting fuselages with many windows?
Great minds think alike!
Said differently, I had difficulties masking the windows of my MH-53 and thought that it might be an idea to do what you described above.
But with a small twist:
I only finish the area close to the windows and mask it with tamiya tape to avoid dammage to the paint during the rest of the "montage".
I airbrush the whole aircraft after complete assembly (as usual) but now the painstaking masking of every individual window is replaced by removing the first tape and putting a slightly smaller piece of tape over the whole window area.
For quality purposes it is recommended to align that piece of tape with the panel lines.
in addition, this way of working can be also used for other details such as landing lights in the wings. The time you loose with the first airbrush session you win back later because masking goes much faster, and you don't have to fiddle with transparent parts after airbrushing.
drabslab
European Union
Joined: September 28, 2004
KitMaker: 2,186 posts
AeroScale: 1,587 posts
Joined: September 28, 2004
KitMaker: 2,186 posts
AeroScale: 1,587 posts
Posted: Tuesday, August 08, 2017 - 05:39 PM UTC
By the way, that banana is becoming a nice model
roygdarwin
Canada
Joined: February 25, 2017
KitMaker: 69 posts
AeroScale: 15 posts
Joined: February 25, 2017
KitMaker: 69 posts
AeroScale: 15 posts
Posted: Wednesday, August 09, 2017 - 04:30 AM UTC
like the way you are doing your build ,I hate small windows they are a big pain ,but I think you have the right idea .nice work .
Posted: Friday, August 11, 2017 - 08:42 AM UTC
Hi Gang,
Thanks for looking and commenting.
Drabslab,
Does that include after decals have been added? This model has many decals that go along the "belt" the windows occupy.
Thanks for looking and commenting.
Quoted Text
But with a small twist:
I only finish the area close to the windows and mask it with tamiya tape to avoid dammage to the paint during the rest of the "montage".
Drabslab,
Does that include after decals have been added? This model has many decals that go along the "belt" the windows occupy.
drabslab
European Union
Joined: September 28, 2004
KitMaker: 2,186 posts
AeroScale: 1,587 posts
Joined: September 28, 2004
KitMaker: 2,186 posts
AeroScale: 1,587 posts
Posted: Tuesday, August 15, 2017 - 01:47 PM UTC
Quoted Text
Hi Gang,
Thanks for looking and commenting.Quoted TextBut with a small twist:
I only finish the area close to the windows and mask it with tamiya tape to avoid dammage to the paint during the rest of the "montage".
Drabslab,
Does that include after decals have been added? This model has many decals that go along the "belt" the windows occupy.
I remove the tape just before adding the future and decaling
.
However some masking tape in strategic areas on a model during the final stages of adding decals and little details or wheels may be very handy for handling the model and avoiding finger prints.
Klaus-Adler
Campaigns Administrator
Scotland, United Kingdom
Joined: June 08, 2015
KitMaker: 1,505 posts
AeroScale: 193 posts
Joined: June 08, 2015
KitMaker: 1,505 posts
AeroScale: 193 posts
Posted: Tuesday, August 15, 2017 - 07:47 PM UTC
a very interesting build so far, i look forward to seeing more of it soon.
Posted: Friday, August 16, 2019 - 02:15 PM UTC
Hi Group, remember me?
Two years to the day since my last post here. My apologies. When I think of this model I think of the song Always On My Mind.
So I shoved all the constant distractors aside and got back to this kit. I hate masking little windows so I hit the model with two nice coats of clear, and applied decals around the windows.
The decals are good although the yellow stenciling is not opaque. That is common with many yellow decals. Fortunately, once they dried they darkened a bit.
One decal disappointment is that a couple of decals silvered despite plenty of Micro Set and Micro Sol, and two good coats of clear gloss. I wonder if that is due to the rough surface Italeri's molding created on some areas?
Another decal disappointment are the "cut here" decals. They have corner marks and are supposed to encompass the windows, but they are much too small. Yet another problem is that Italeri shows multiple copies of some stenciling in the instructions and yet not enough are printed.
Once the decals were dry, I hit the area with a flat coat. Then I installed the windows and set them with Tamiya Super Thin cement.
Moving on, the cockpit and cargo compartment assembly is complete.
Next, I inserted the rear fuselage frames and formers.
You have seen the powerplant before but here it is prior to being encased in the fuselage.
And the halves are mated together!
Posted: Friday, August 16, 2019 - 02:49 PM UTC
This is the step that has stalled my progress. Closing up the fuselage.
Italeri created an impressive interior. But it fits into a fuselage of numerous and changing compound curves, and large openings that erode rigidity. Thus, it is important that one assembles the interior accurately, and uses a generous amount of glue and cement to ensure the parts will never move again.
The main problem for me is that Italeri only molded four (4) peg-and-hole alignment pins for the entire fuselage. I think the interior assemblies are intended to help position everything. Italeri uses raised fencing to help position and hold the bulkheads, formers and frames. Maybe it is my failings but I found the fences do not align well with the interior components. Additionally, those bulkheads, formers and frames do not always match the curvature of the fuselage halves. Some set with large gaps along much of their outer surface and the fuselage surface.
Thus, the fuselage is challenging to mate together and keep aligned, resulting in gross steps between halves along some areas. To try to minimize this, I joined and aligned the halves and glued them together in sections. With all of the gaps and mounting holes along the bottom, this was easy. When the seams had cured overnight, I progress along other seams. I used liquid cements and relied on capillary action. This technique worked somewhat but could not overcome some of the aforementioned issues.
Posted: Friday, August 16, 2019 - 02:56 PM UTC
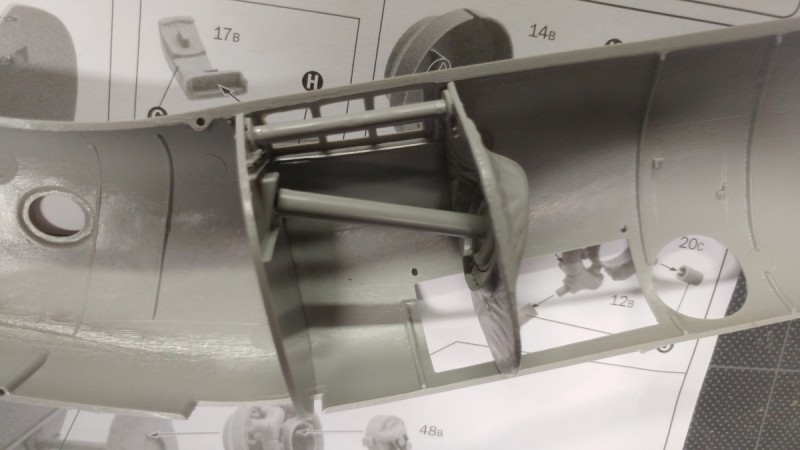
These two images show alignment and fit. This shows a bulkhead that does not fit far enough forward:
The access doors and vent openings for the engine create a narrow and angled keel of the fuselage. There are no alignment features aside from bulkheads and frames.
Prepare the sanding sticks!
The access doors and vent openings for the engine create a narrow and angled keel of the fuselage. There are no alignment features aside from bulkheads and frames.
Prepare the sanding sticks!
Posted: Friday, August 16, 2019 - 03:18 PM UTC
The cockpit floor front is intended to help conform the curvature of the fuselage halves. I joined these three (3) pieces with liquid cement, then followed up with CA.
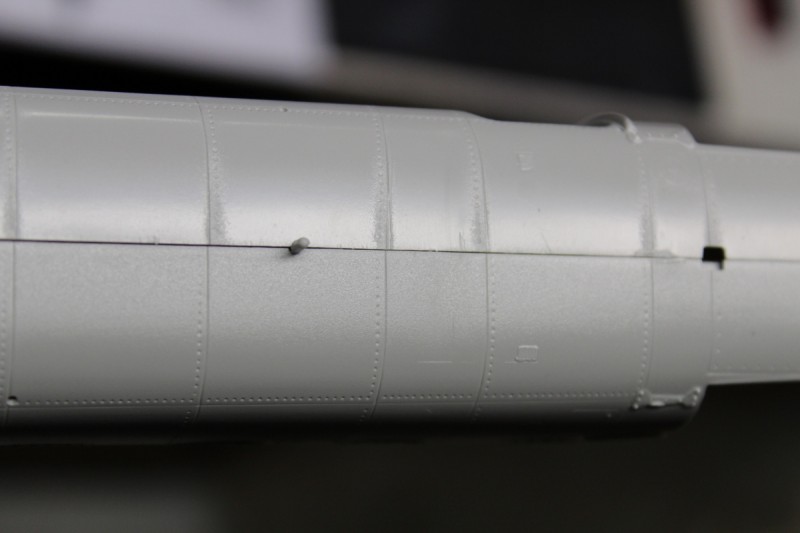
You can see how much of a step was left along the top of the fuselage after the seams cured.
So after the softened plastic cured and/or gap-filling CA was applied, sanding commenced. You can get an idea of where, and how, the halves did, and did not, close and align.
I hope this resumption of this build is helpful for you. Now back to the bench!