_GOTOBOTTOM
Pre-Flight Check
Constructive critique of your finished or in-progress photos.
My FW-190 A3
jrnelson
_VISITCOMMUNITY
Iowa, United States
Joined: May 23, 2002
KitMaker: 719 posts
AeroScale: 0 posts
Posted: Monday, March 08, 2004 - 04:06 PM UTC
Hi Guys... :-)

I couldn't let Merlin have all the fun here - so I thought I'd add my FW-190 A3 to the board, and balance out his Spitfire :-) The kit is the Tamiya 1/48th kit, Aries cockpit and Eduard etch. I normally build armor - and this was my first ever plane. All in all - alot of fun. You can be sure there will be more now..... lol I already have my eye on the Tamiya 109 to go along with this one ;-)


Later-
Jeff
hworth18
_VISITCOMMUNITY
Oklahoma, United States
Joined: January 10, 2003
KitMaker: 426 posts
AeroScale: 0 posts
Posted: Monday, March 08, 2004 - 04:31 PM UTC
Very nice work there Jeff...
The only thing I might add or touch on if I were you, would be to add a little more exhaust streaking.. Other than that, I wouldn't touch a thing..
Merlin
Staff MemberSenior Editor
AEROSCALE
#017
_VISITCOMMUNITY
United Kingdom
Joined: June 11, 2003
KitMaker: 17,582 posts
AeroScale: 12,795 posts
Posted: Monday, March 08, 2004 - 07:15 PM UTC
Hi Jeff

That's a beautiful job - I'm glad it's encouraged you to build more aircraft! :-)

I haven't tried any Aires sets - how well did it fit? Did you have to do much hacking?

I agree that you could add a little more exhaust staining with pastels. Also, it's not clear in the pics whether you've included the wingtip navigation lights. As a final point, the trim tabs on the control surfaces should theoretically be painted dull red with a white warning stencil.

Minor points... and easily sorted, if you think they're valid.

All the best

Rowan
jrnelson
_VISITCOMMUNITY
Iowa, United States
Joined: May 23, 2002
KitMaker: 719 posts
AeroScale: 0 posts
Posted: Tuesday, March 09, 2004 - 02:18 AM UTC
Thanks guys :-)


Quoted Text


That's a beautiful job - I'm glad it's encouraged you to build more aircraft! :-)

I haven't tried any Aires sets - how well did it fit? Did you have to do much hacking?


I had a great time with the plane, Merlin!! I actually got to use some different paint colors, as well as Future for the first time... hehehe (I use Archer transfers on my armor - so I never have to Future coat them)

Actually, the cockpit did require some minor surgery. In the first pic you can see that there was a gap between the sides of the dash and the fusalage... I had to go back and dremel out the firewall in order to slide the cockpit forward enough to eliminate this gap.


Quoted Text

Also, it's not clear in the pics whether you've included the wingtip navigation lights. As a final point, the trim tabs on the control surfaces should theoretically be painted dull red with a white warning stencil.


I did paint the navigation lights on the wing tips - just not very good pictures of them... hehe I used the Tamiya "clear" acrylics, and they are pretty subtle.

Please forgive the silly question... but, what is a "trim tab"? hehehe I'd love to paint em if I knew what they were :-) lol If you would have said "final drive housing", or "turret traverse muffler" I'd be with ya However - "trim tab" has me baffled.....

Thanks for the tips guys - I agree about the exhaust .... It could stand a bit more in that area.

Take care-
Jeff
Merlin
Staff MemberSenior Editor
AEROSCALE
#017
_VISITCOMMUNITY
United Kingdom
Joined: June 11, 2003
KitMaker: 17,582 posts
AeroScale: 12,795 posts
Posted: Tuesday, March 09, 2004 - 11:16 AM UTC

Quoted Text

If you would have said "final drive housing", or "turret traverse muffler" I'd be with ya


Oh dear... those sound like bits to do with tanks... HHHEEELLLPPP!

Actually trim tabs are quite simple - they are small "adjusters" on the control surfaces - ailerons, elevators and rudder. On the real aircraft they are offset slightly so the plane flies straight and level at a given speed (aircraft behave differently at different speeds and with different amounts of throttle...).

On the Fw190 they are really simple... just fixed tabs on the control surfaces, which were bent slightly to balance the aerodynamic forces. You can see them sticking out a little. Because they could easily be bent out of shape, they were painted red with a warning stencil.

Hope I explained that right and it helps

Rowan
onyoursix
_VISITCOMMUNITY
Arizona, United States
Joined: March 15, 2004
KitMaker: 1 posts
AeroScale: 0 posts
Posted: Sunday, March 14, 2004 - 04:10 PM UTC
Jeff

Very nice work but,,,the antenna seems a bit thick to me. I would also add more exhaust staining. Other than that..great build!!

Cheers

Mike Reeves
stm
_VISITCOMMUNITY
Florida, United States
Joined: March 07, 2004
KitMaker: 98 posts
AeroScale: 96 posts
Posted: Sunday, March 14, 2004 - 04:26 PM UTC
Hi Jeff,

The model itself looks great! I agree with the comments already posted so I will not repeat them.

The one thing that needs work I feel is the photography. Since this is the web and not a contest where we can walk right up to the model, photos are all we have to judge your work. The better the photo, the more objective we can be and the easier it is to concentrate on the model rather than the picture. I know this is not a photography critique forum but there are a few things that you can do to better your photos:

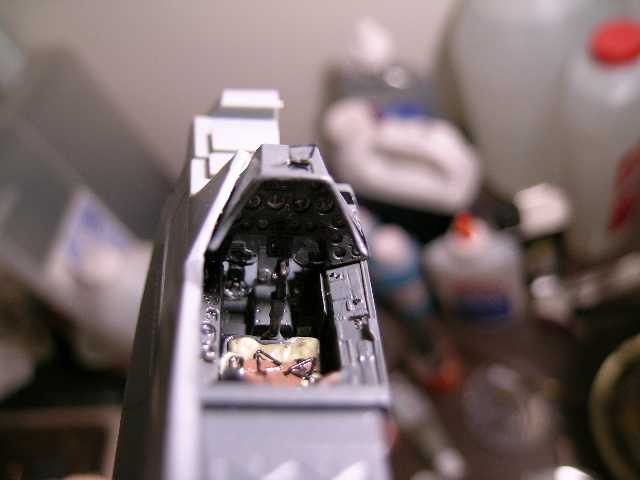
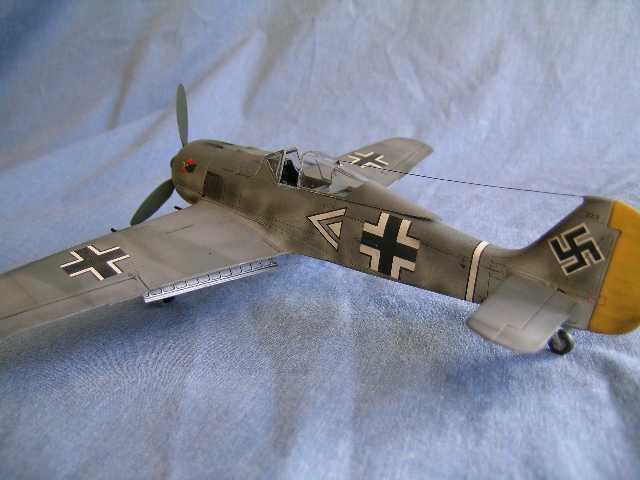
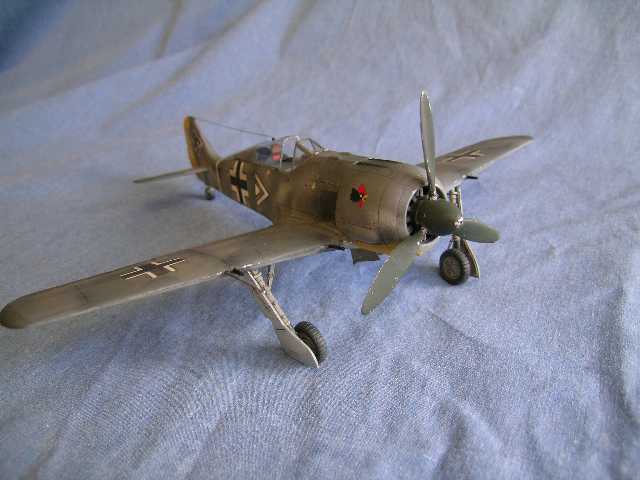
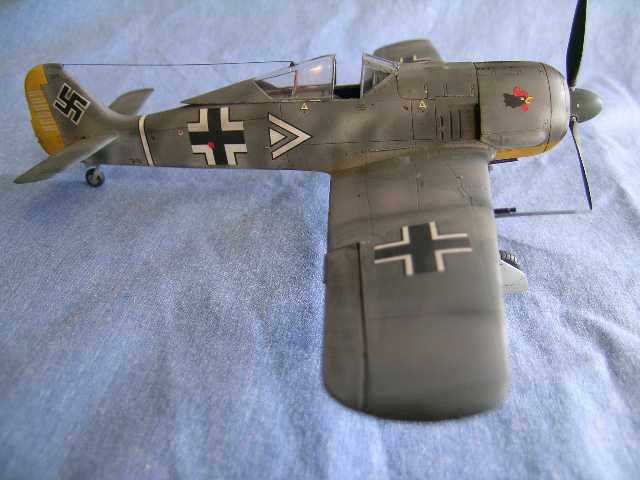
The depth of field on the photos is rather shallow. Try stopping the lens down to at least f/8 or smaller. This will require more light. You can do this with a longer exposure (not recommended as it can induce a blur if anything is bumped and can cause color shifts in the negative) or you can add lights. I personally prefer strobes bounced into an umbrella or through a softbox but photoflood bulbs in reflectors work very well also. They can be found in any photo store and often places like Ritz Camera in the mall will have to them too.

The other thing is perspective. These photos were taken with a wide angle lens. This distorts perspective, making things in the foreground appear larger in comparison to things farther back. Try moving back and using a longer focal length lens. When doing things with film I use a 55mm or even an 85mm lens. This flattens the perspective somewhat and gives the photos a more natural appearance. Keep in mind, the longer the focal length the shallower the depth of field for any given aperture.

Lastly, the wrinkles on your sheet are distracting. You can iron them out or go to a photo store and get some seamless background paper. I use white for a couple of reasons. One, it is a very neutral background and two, it will reflect light up and open up shadows under the model.

If you are using a digital camera, you are limited to probably an f/8 minimum aperture. This is usually sufficient for most applications. Try to keep your zoom mid range to correct the perspective problems.

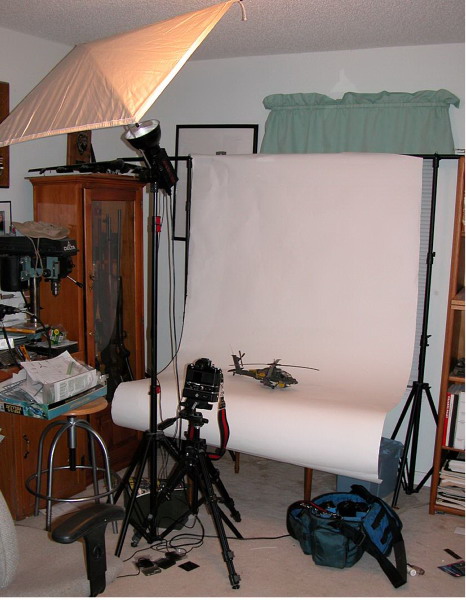
This is the set-up I use. It is a little cramped (an understatement if ever there was one) but it works well.


Again, great model, keep up the good work!


jrnelson
_VISITCOMMUNITY
Iowa, United States
Joined: May 23, 2002
KitMaker: 719 posts
AeroScale: 0 posts
Posted: Wednesday, March 17, 2004 - 03:38 PM UTC
Thank you!!!

Super information... I appreciate the input!

I will be making some changes in my "set-up" for pictures... :-)

Later-
Jeff
Scunge
_VISITCOMMUNITY
New York, United States
Joined: March 11, 2002
KitMaker: 254 posts
AeroScale: 0 posts
Posted: Wednesday, March 17, 2004 - 05:10 PM UTC
First off I would like to say Great job, especially for your first plane. The one suggestion I have though is about the prop. I like your chipped paint, but It looks to me as if you put a bit too much in the spinner whereas it should be more concentrated around the edges.
ladymodelbuilder
_VISITCOMMUNITY
Virginia, United States
Joined: February 26, 2002
KitMaker: 1,218 posts
AeroScale: 424 posts
Posted: Wednesday, May 26, 2004 - 02:18 AM UTC
Looks good Nelson.... Only other thing I think it needs is the panel lines to be alittle darker. Maybe do a sludge wash to bring them out.


(++)
jw73
_VISITCOMMUNITY
Wojewodztwo Zachodniopomorskie, Poland
Joined: April 08, 2002
KitMaker: 148 posts
AeroScale: 0 posts
Posted: Friday, May 28, 2004 - 12:17 PM UTC
Does this airplane put away landing gear ?
 _GOTOTOP