


Paints: Golden High Flow Acrylics; Duplicolor automotive primer
Weathering: Medea Com.Art transparent paints; salt, pigments, Windsor Newton Matte Varnish
 f4fair by Eric Bergerud, on Flickr
 rt-ft by Eric Bergerud, on Flickr
This project was done for the Finescale 1942 75th Anniversery World at War Group Build. Tamiya made splendid models in 1/48 of major WWII fighters in the late 90s - early 2000s and this is one of them. So, lets just say it was an easy build of a very nicely detailed model. And if what follows includes digressions, I spent several years of my life writing about the Pacific War - so modeling reviews on a subject like this can become a kind of occupational hazard.
This project is aimed at giving a model aircraft very heavy weathering. I want to learn to do this because, as noted, I have some close connections with the history of air operations in the South/Southwest Pacific and have several models waiting that will need the treatment. This Wildcat has the marking of a Marine Squadron flying for the Cactus Air Force on Guadalcanal in late 1942. The Solomon Islands (which included Guadalcanal) and New Guinea were a miserable place to fight a war for man and machine. The area is almost exactly on the equator which means its very wet and very hot every day - you could get rained on and get hit with a dust cloud at nearly the same time. Most fields were dirt on top of Marston matting - not even proper revetments until pretty late and right next to the sea. So add salt air 24X7 into the mix. According to an IPMS article American industry was using cadmium for armor plate instead of paint pigment so its matte paints faded quickly. Guadalcanal was a particularly "target rich environment" between August-December 1942, but the entire theater saw very heavy air activity for a year and a half. (The Japanese Navy's Air Force died defending Rabaul during late 1942-late 43: the Japanese Army Air Force died defending New Guinea in mid-43 to early 44.) Guadalcanal was under periodic air attack (two to five times a week) for three months. If you add in patrols, planes were in the air a lot, and many were flying craft that should have been at the airplane doctor. (Aircraft technology in WWII was very crude in our terms. So "reliable" is a completely relative term. American planes were all strong and reliable - for WWII fighters that were all "hot" and inherently dangerous aircraft. Think of aerial combat the way a Indy or Formula 1 driver would look at a race. Even if pilots were experienced enough to "feel" what the gauges were telling him, mechanical failure was extremely common. And men were flying over either the ocean or the jungle - either could inhale a pilot in a chute. A dicey proposition - but times were desperate and life cheap.) So if WWII planes were being worked too hard, it would have shown. And if you look at images of aircraft from the Pacific War, especially from the Solomons or New Guinea, they're a tired bunch, especially as the theater was very low on the allocation priority list for new aircraft - only China-India-Burma was lower.
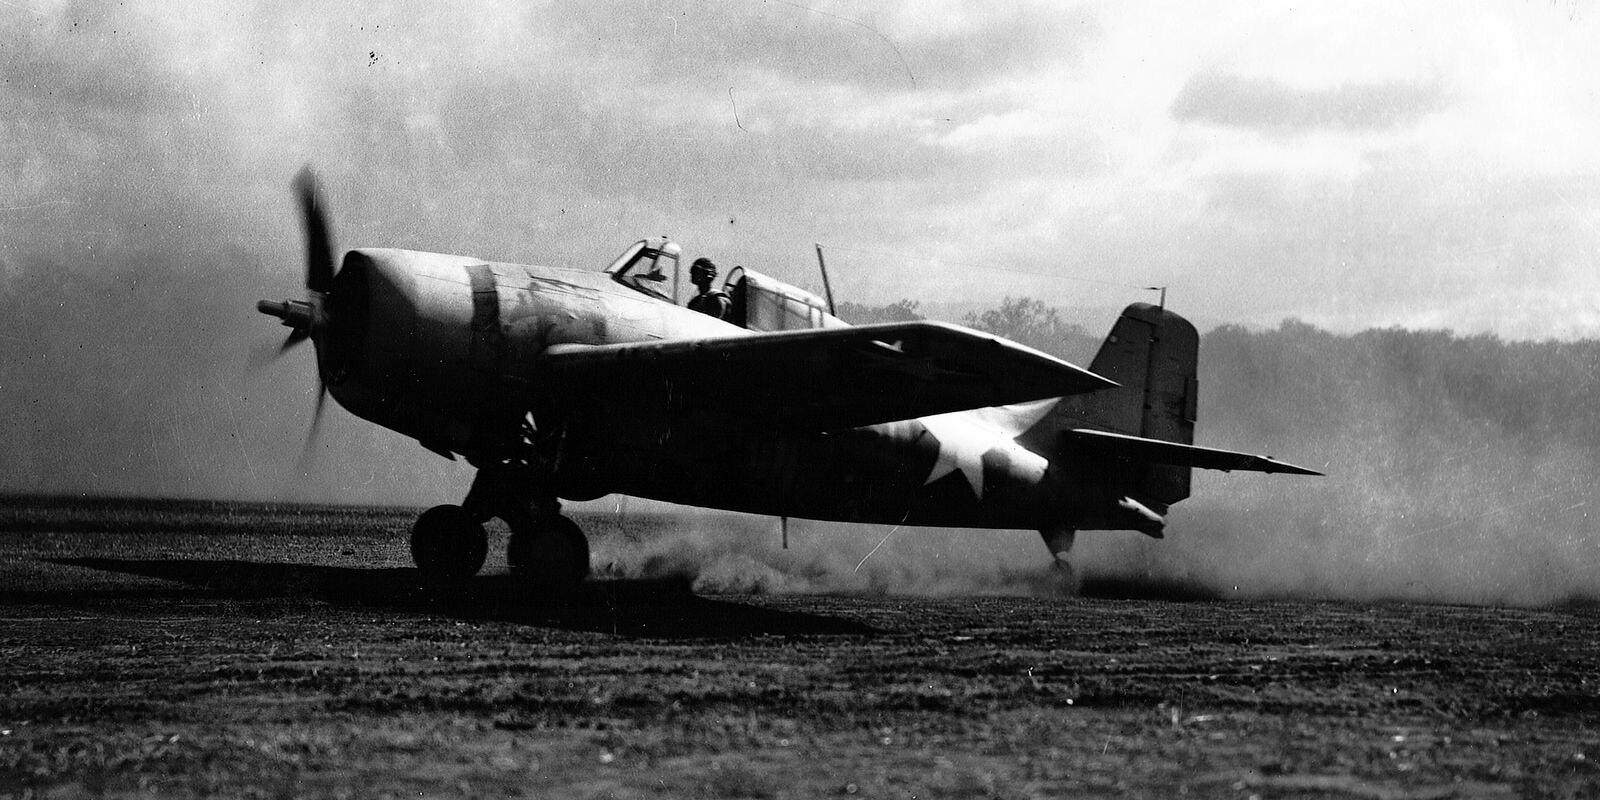
Above is a picture of a Wildcat above Guadalcanal. Here are Marine Wildcats on Henderson Field in October 1942.
 cactus6 by Eric Bergerud, on Flickr
There are blizzards of similar pictures of aircraft - both allied and Japanese - of all types serving in the Solomons or New Guinea that show the same kind of heavy fading, obvious staining and rough treatment of all sorts. So the question is, from my point of view, is what would one of these planes looked like in living color. The often excellent color photos and films from the European Theater (and some from the late war USN) show planes ranging from new to pretty tired. The ETO was easy street compared to the South Pacific (unless you're looking at casualties - where the rates were ugly in both theaters, especially if you were flying a German or Japanese airplane). Anyway, I'm trying to reproduce or evoke South Pacific wear and tear enhanced by a good dose of fatigue in at a time when planes were always few and missions many.
Although weathering was job one in this project let me say a bit about my paints because they're off most modeler's radar. I've moved toward all water-based modeling in the past two years and have settled on Golden High Flow acrylics as my paint. Golden is an art house, but so is Vallejo. Think of Golden Fluid Acrylics as Vallejo Model Color and High Flow as the equivalent of Model Air. Golden Fluids have 100% polymer binder - I'd guess Model Color is close. Model Air and High Flow are thinner, have a higher pigment load and carry leveling mediums and drying retarders. High Flow is simply better - the best water based paint for an airbrush I know of. Golden has no military colors, but includes several "mixing" colors in the about 45 colors offered so you can create anything. I know that High Flow will work much better than any water based paint I've used for "painting small" - highly thinned, low psi. This is an area where the solvent based paints like Tamiya or Gunze excel. As we'll see there was a lot of "painting small" in this project and I think High Flow worked fine. Maybe Gunze or the new Eastern European paints are better, but High Flow still works. That will have to do.
Color mixing is great fun in my book and has become a neat part of the hobby for me. I have several sources, but my best is USAAF Colors and Camouflage 1940-1945 by Robert Archer (and son). It's a large format Schiffer special of 400 pages including actual directives outlining every change made in concerning paint and the USAAF in the war. Twenty pages of excellent color samples are included. As the USN usually cooperated with the Army, it includes all ANA bulletins so the samples include all USN aircraft paints. Archer documents the decision to use a light gray green in early war US aircraft - it's closer to RAF interior green than the more olive US interior green that appeared after mid-42. There's no easy way to check on museum examples for colors because there is only one true F4F-4 in existence (presently in transit between museums): the others are either F4F-3s that were never deployed abroad or the late war FM-2. I did see a color photo of an early war USN fighter's innards and there was Archer's color spot on. Here's a look at - sorry if there's no detail but I can't get excited about portions of the model that nobody sees but me. (Not an attitude that would win medals - but neither would my skills).
 interior by Eric Bergerud, on Flickr
More fun was creating the early war USN light blue-gray over light gray camo scheme. (In illustrations it's usually shown as a soft camo - photos show a much harder version and I followed the pics). I had Vallejo Model Air and Model Color renditions of the blue-gray and checked other brands via the monitor. In almost every case there is too much blue in the model paint, sometimes almost a teal. I do ships and the USN loves gray. Even their Navy Blue is a gray. (USN model guru Tracy White claims US crewmen were given big pots of white and dark purple paste to make the common #21 scheme of haze gray, navy blue and deck blue. That purple paste was a chromatic black. You do the same thing at home. One of the top guns at the redoubtable Model Warship board is Chris Floodberg who is also one of Canada's leading painters. He pointed me to High Flow and the road from chromatic black to an entire range of "cool" grays.) Anyway, I mixed ultramarine (a mixing color) with shading gray, titanium white and just a drop of carbon black for my blue gray. The bottom is a fairly light gray - maybe a little warm, but close to neutral. That was neutral gray, titanium white and I chanted the word "green" as I mixed it. If I can get ahead of myself here are pics of the colors created:
 2tone by Eric Bergerud, on Flickr
 This project is an exercise in the technique of "black basing." I don't doubt this techniqe is ancient - it's rare when something is really new - but I didn't know about until I stumbled on a video by Doog on YouTube. (Doog is a terrific modeler, has a splendid web site and does lovely videos: highest recommendation.) Doog believes that standard aircraft technique with preshading etc leaves a surface that doesn't show the very irregular wear pattern found on aircraft - or other military subjects for that matter. I might add that I share Doog's philosophy toward what a modeler wants to create. Mig Jimenez argues that it's impossible to make a small plastic thing look like a big metal thing - thus the modeler should let the artistic juices flow and if you end up with something really striking - good for you - even if a clinical eye would conclude "war is the enemy of art." Doog doesn't want to create "plane art" or anything like it - he wants to evoke what things really look like. He thinks that military aircraft, unless brand new (quite a few of them of course), and all armor showed considerable wear, and evoking the wear is what weathering is for. I'm with Doog entirely.
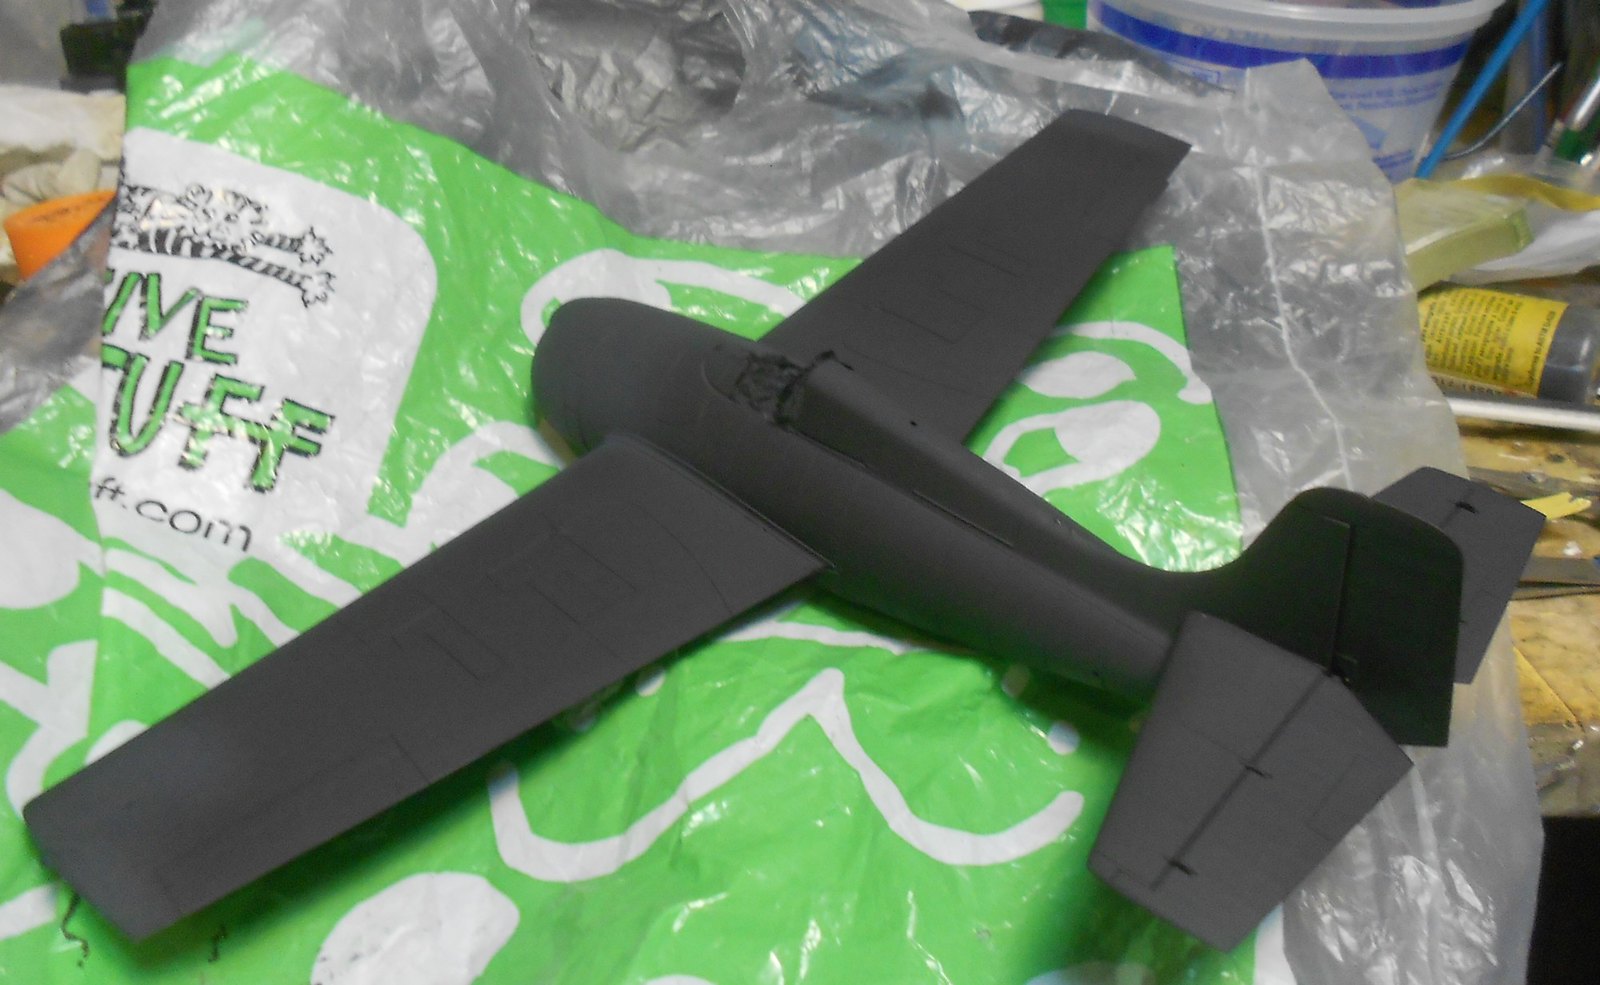
Anyway, you start with a black primer. After building the Wildcat I primed it with Duplicolor automotive sandable, fillable, automotive lacquer primer. This brew has the approval of uber guru Paul Budzik (if you don't watch his amazing videos, try some out - most are just a few minutes and show outstanding video skills to match his modeling wizardry). I use a rattle can for the lacquer (a concession to solvent free modeling - but I have to do it outside) and the result is amazing. The stuff bonds with the plastic but doesn't harm the smallest detail, although scratches and many errors will disappear. And as Doog notes, at least your model is going to look "bad ass" at least for a few minutes. Here's a very black Wildcat:
 primed by Eric Bergerud, on Flickr
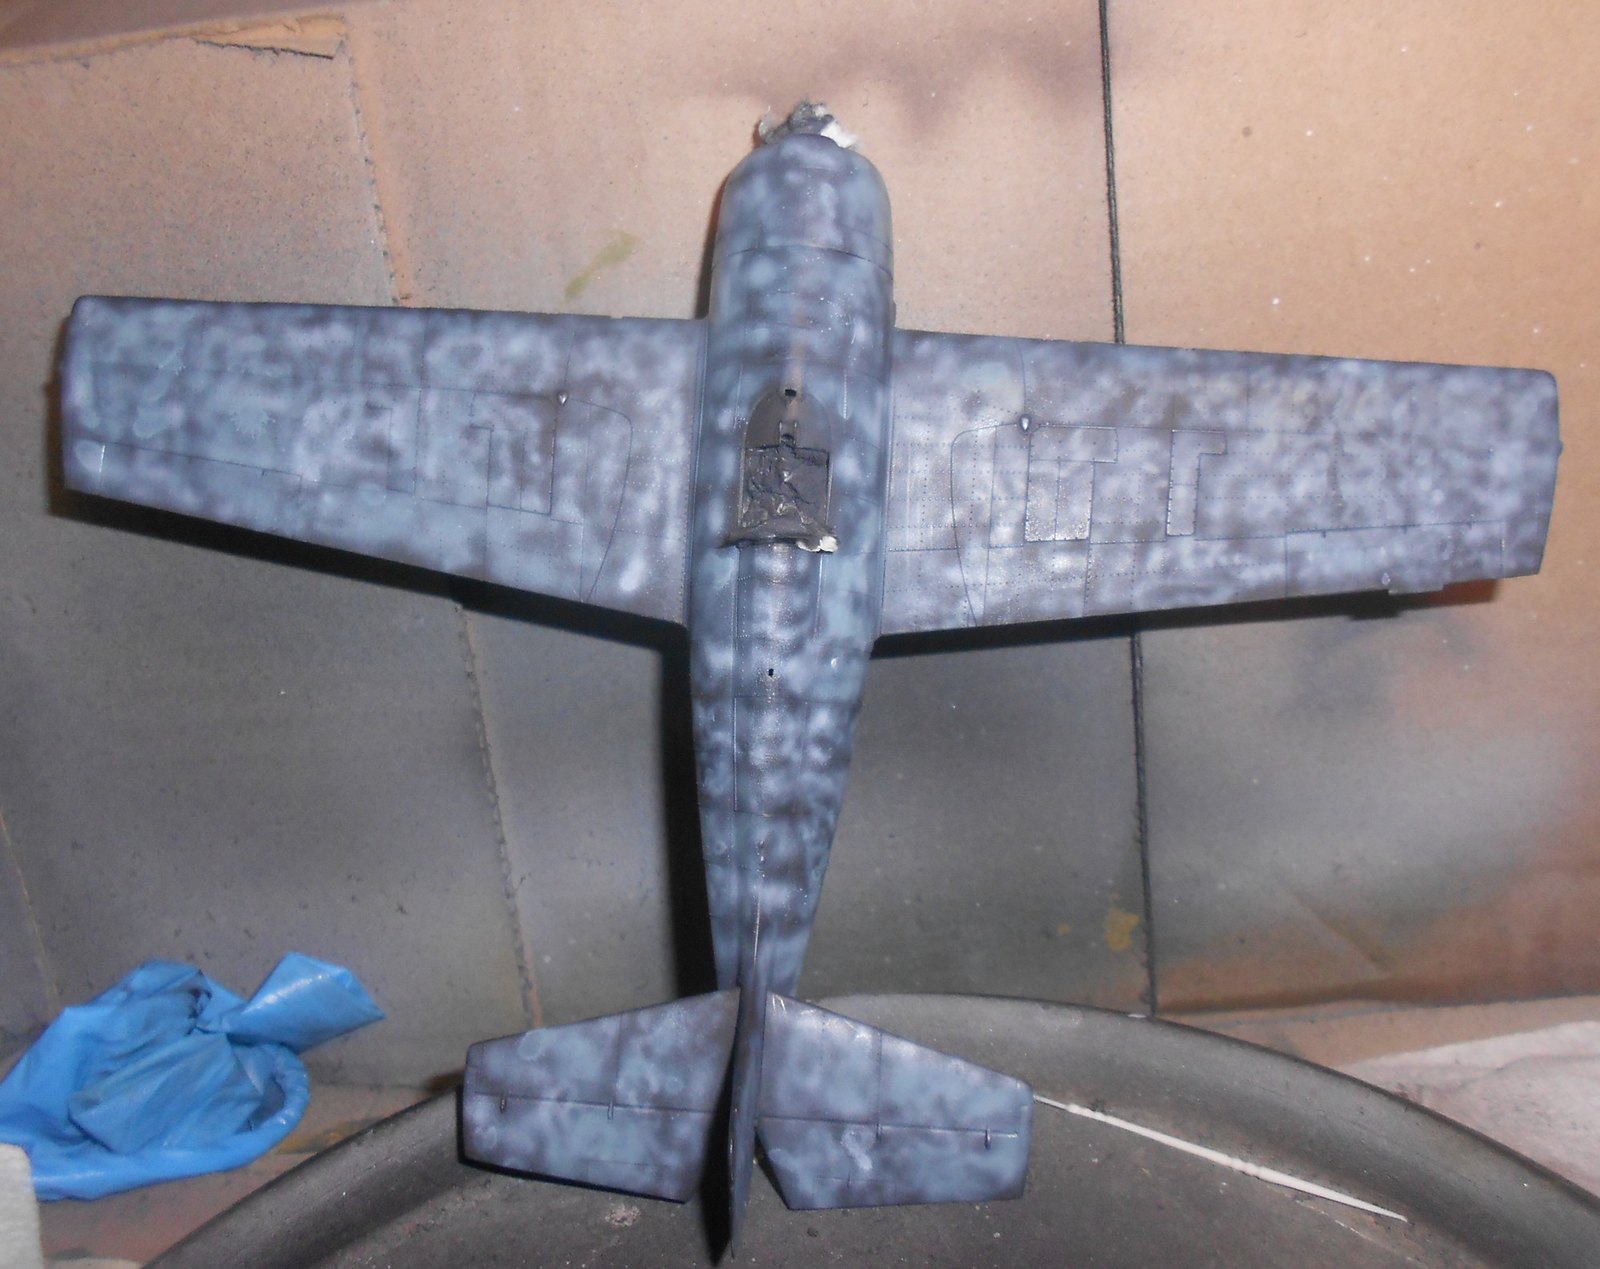
 Then there is a "mottling" stage when you "paint small" - what you want are very thin squiggles of what is going to be the base coat. Differ the hues if you like. This is to take the place of pre and post shading. The paint is thinned heavily - maybe 40% paint - and sprayed very close at about 10 psi. Here's is mottling on the top and bottom:
 mottle by Eric Bergerud, on Flickr
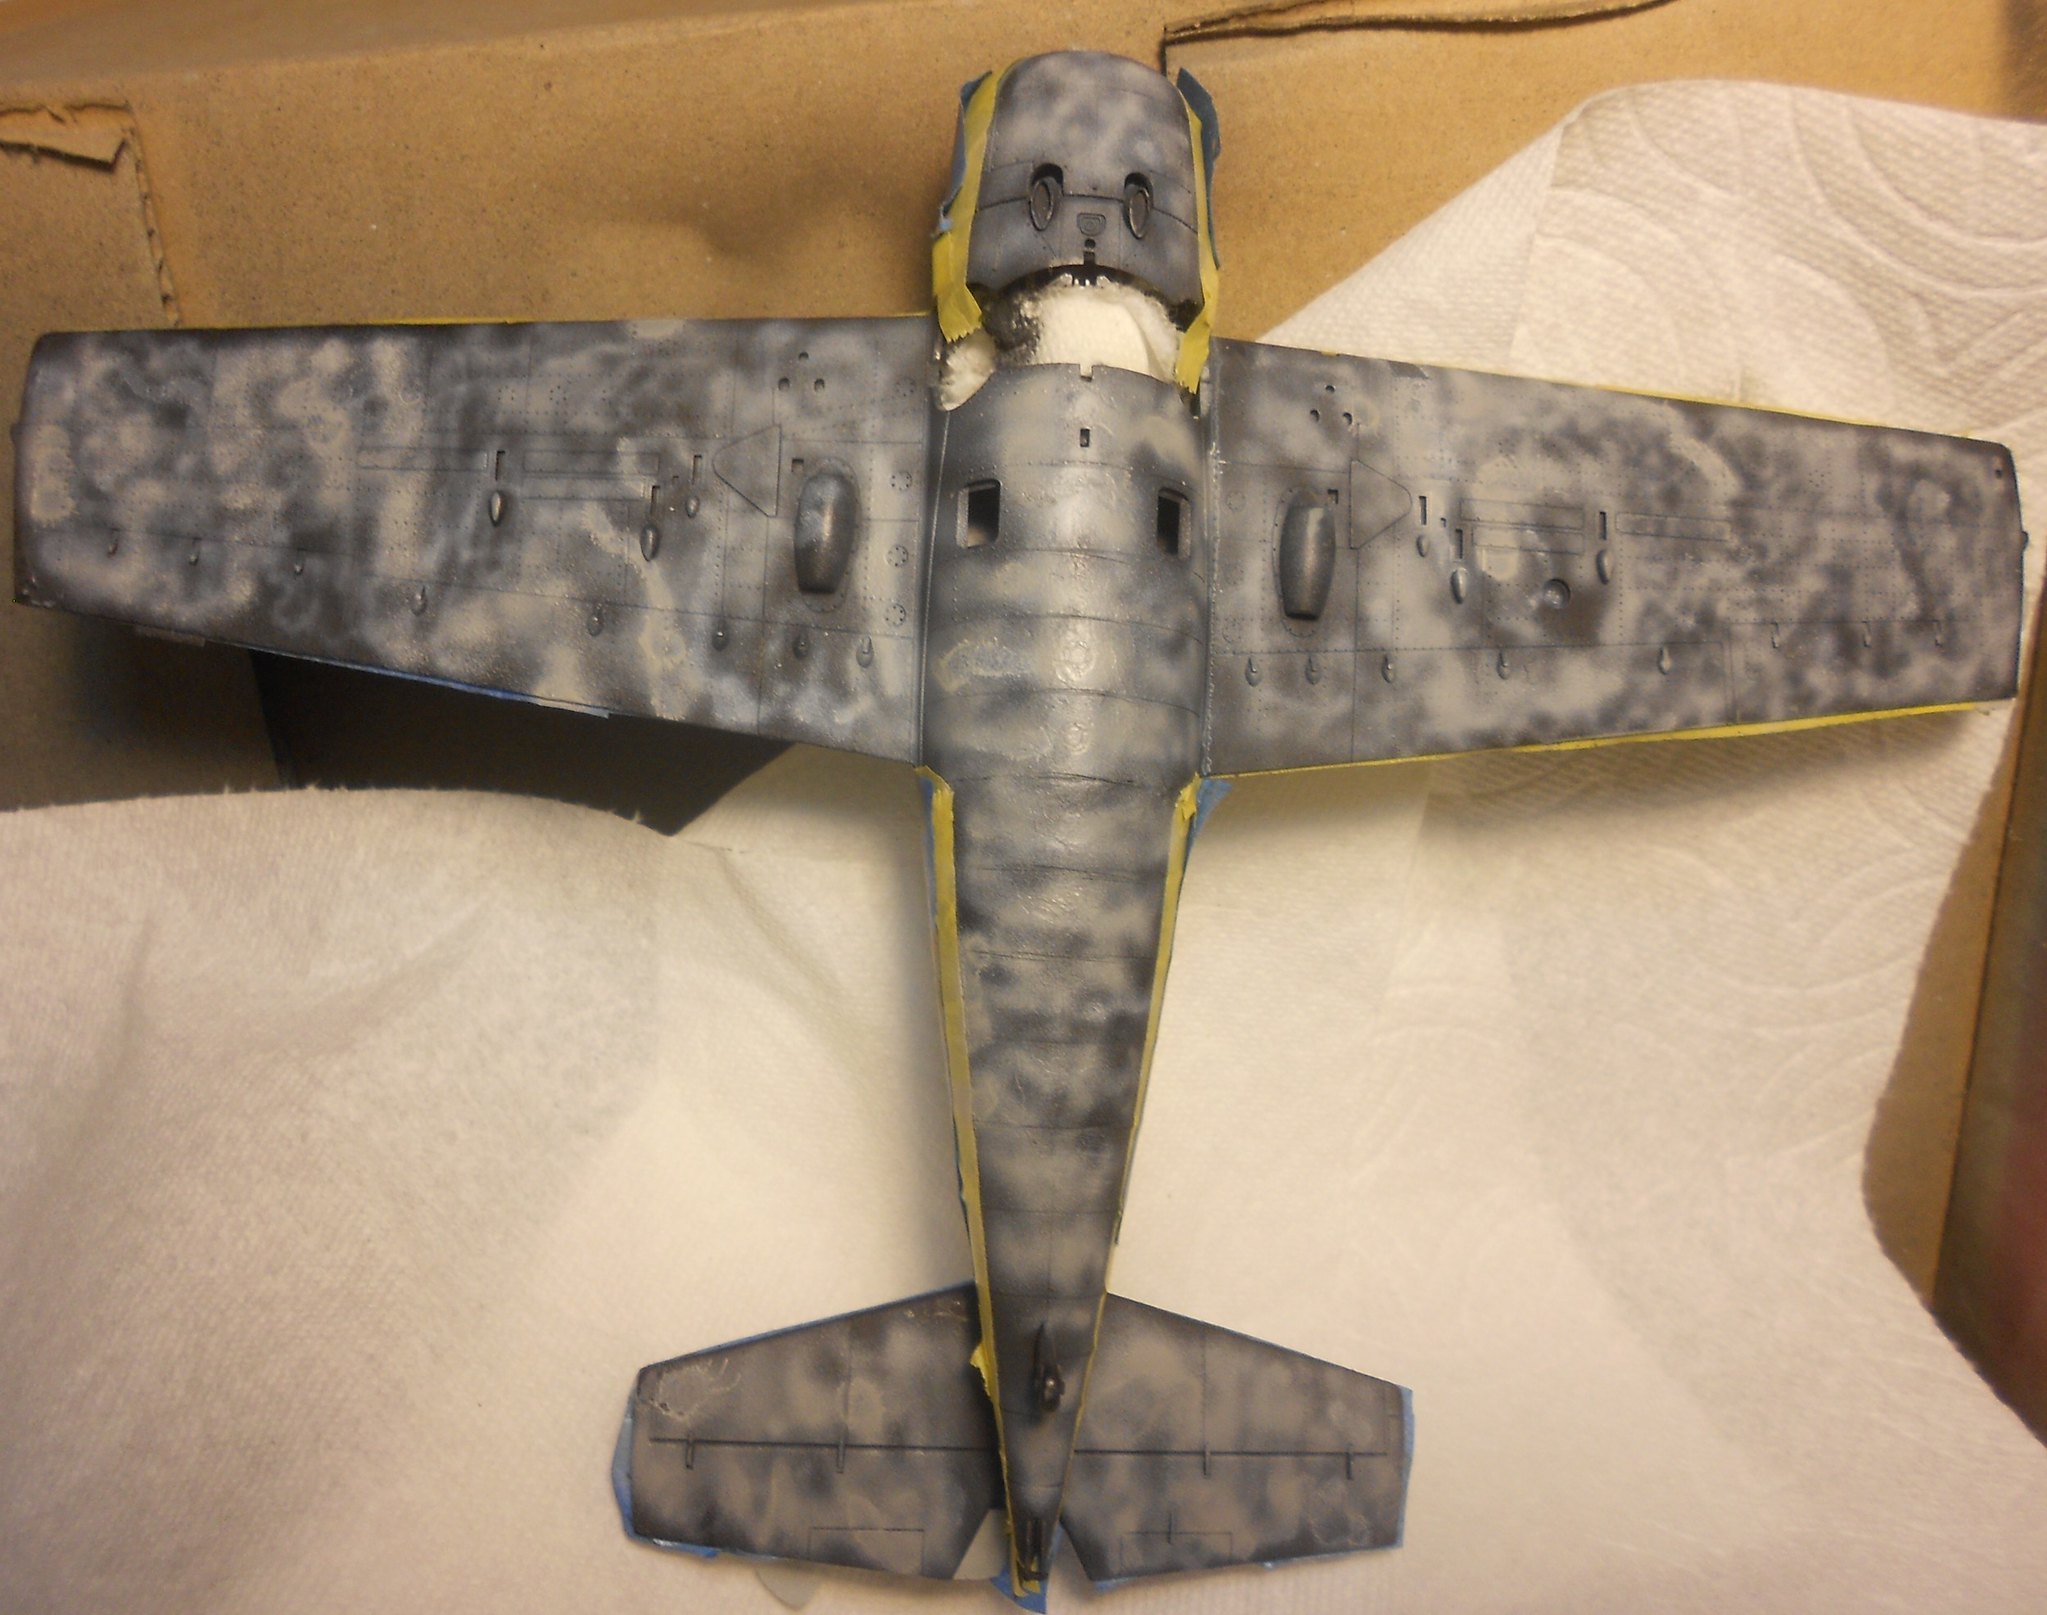 botmottl by Eric Bergerud, on Flickr
You follow mottling with the blending stage - this is the base color almost very heavily thinned (maybe 30% paint) put on slowly but from a couple of inches up and a little higher psi. You want to stop before the black disappears or the whole exercise is pointless. (A little like preshading and then overwhelming the shading with the base color: sound familiar?) You want the tonal variation to be very random: order is the enemy of black basing.
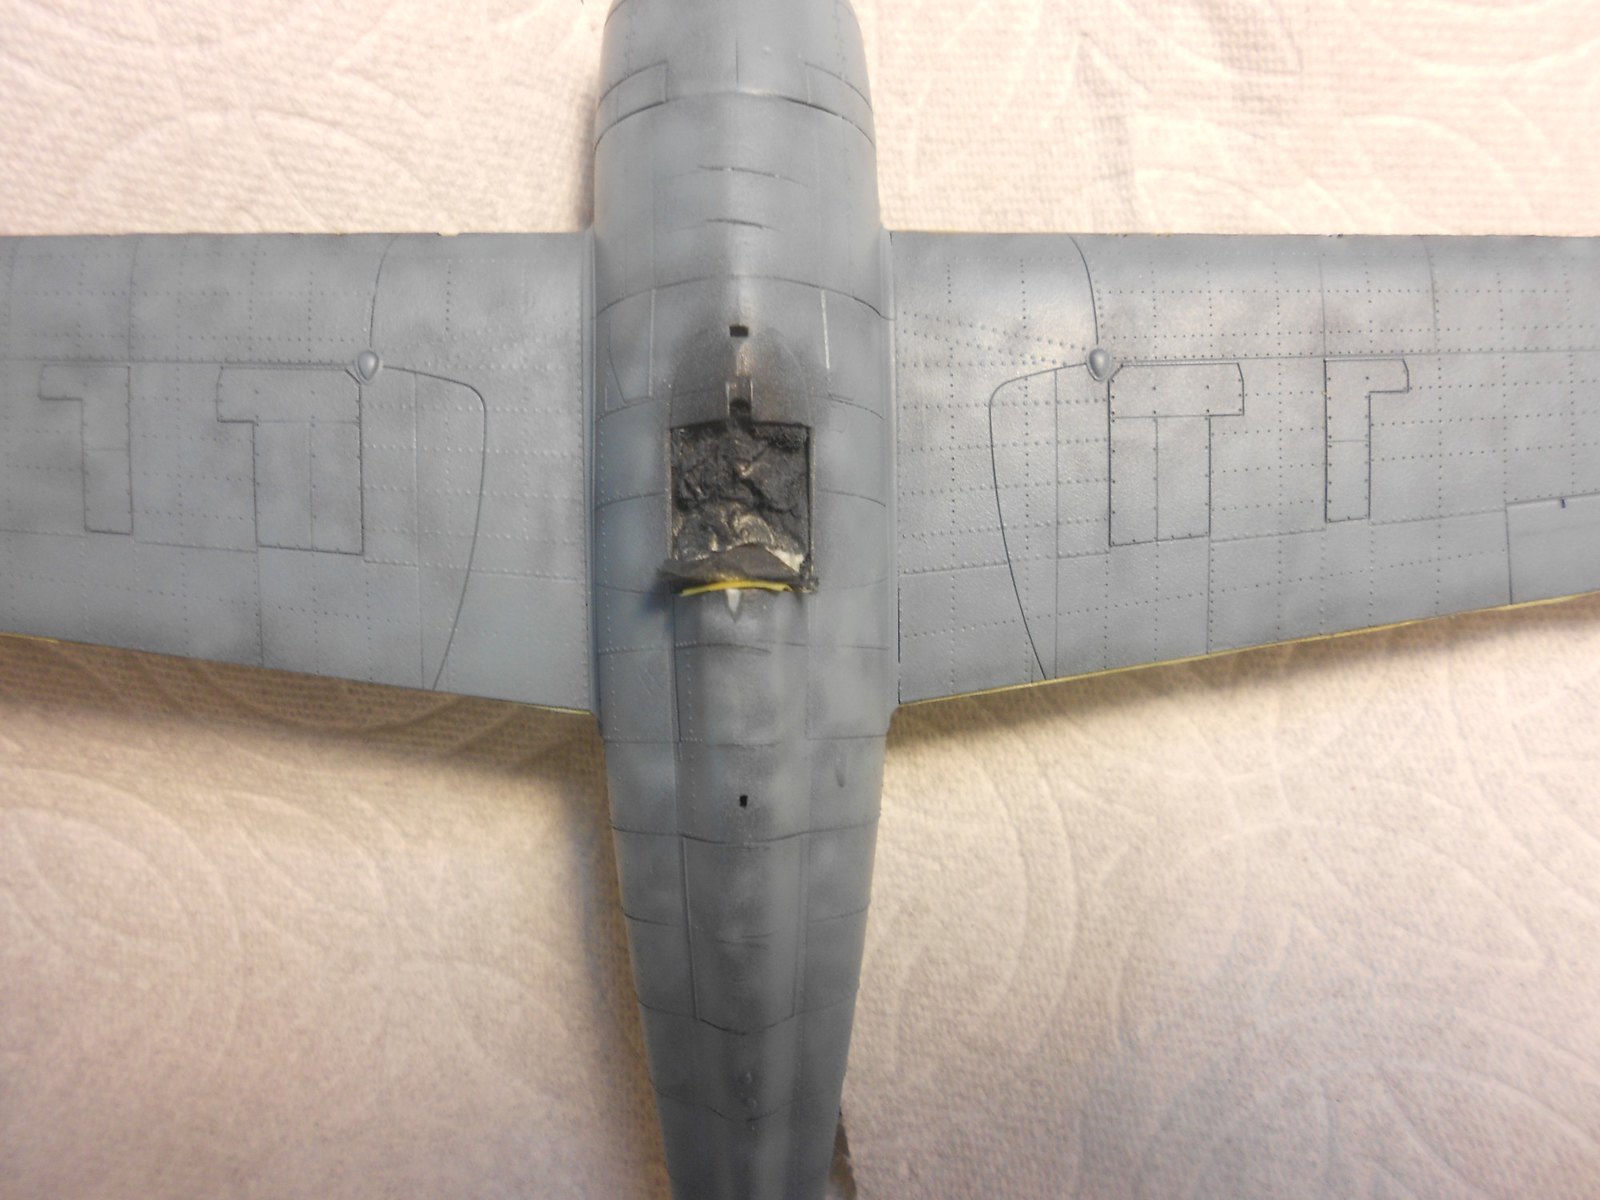 base1 by Eric Bergerud, on Flickr
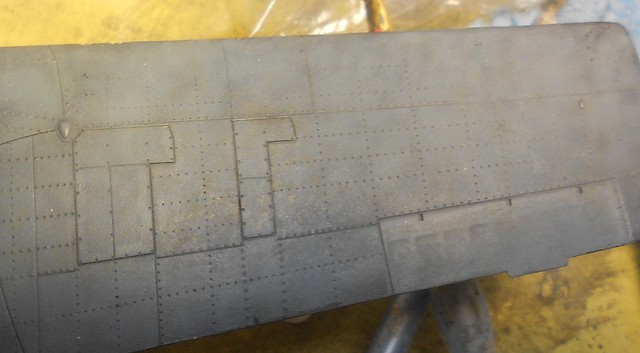
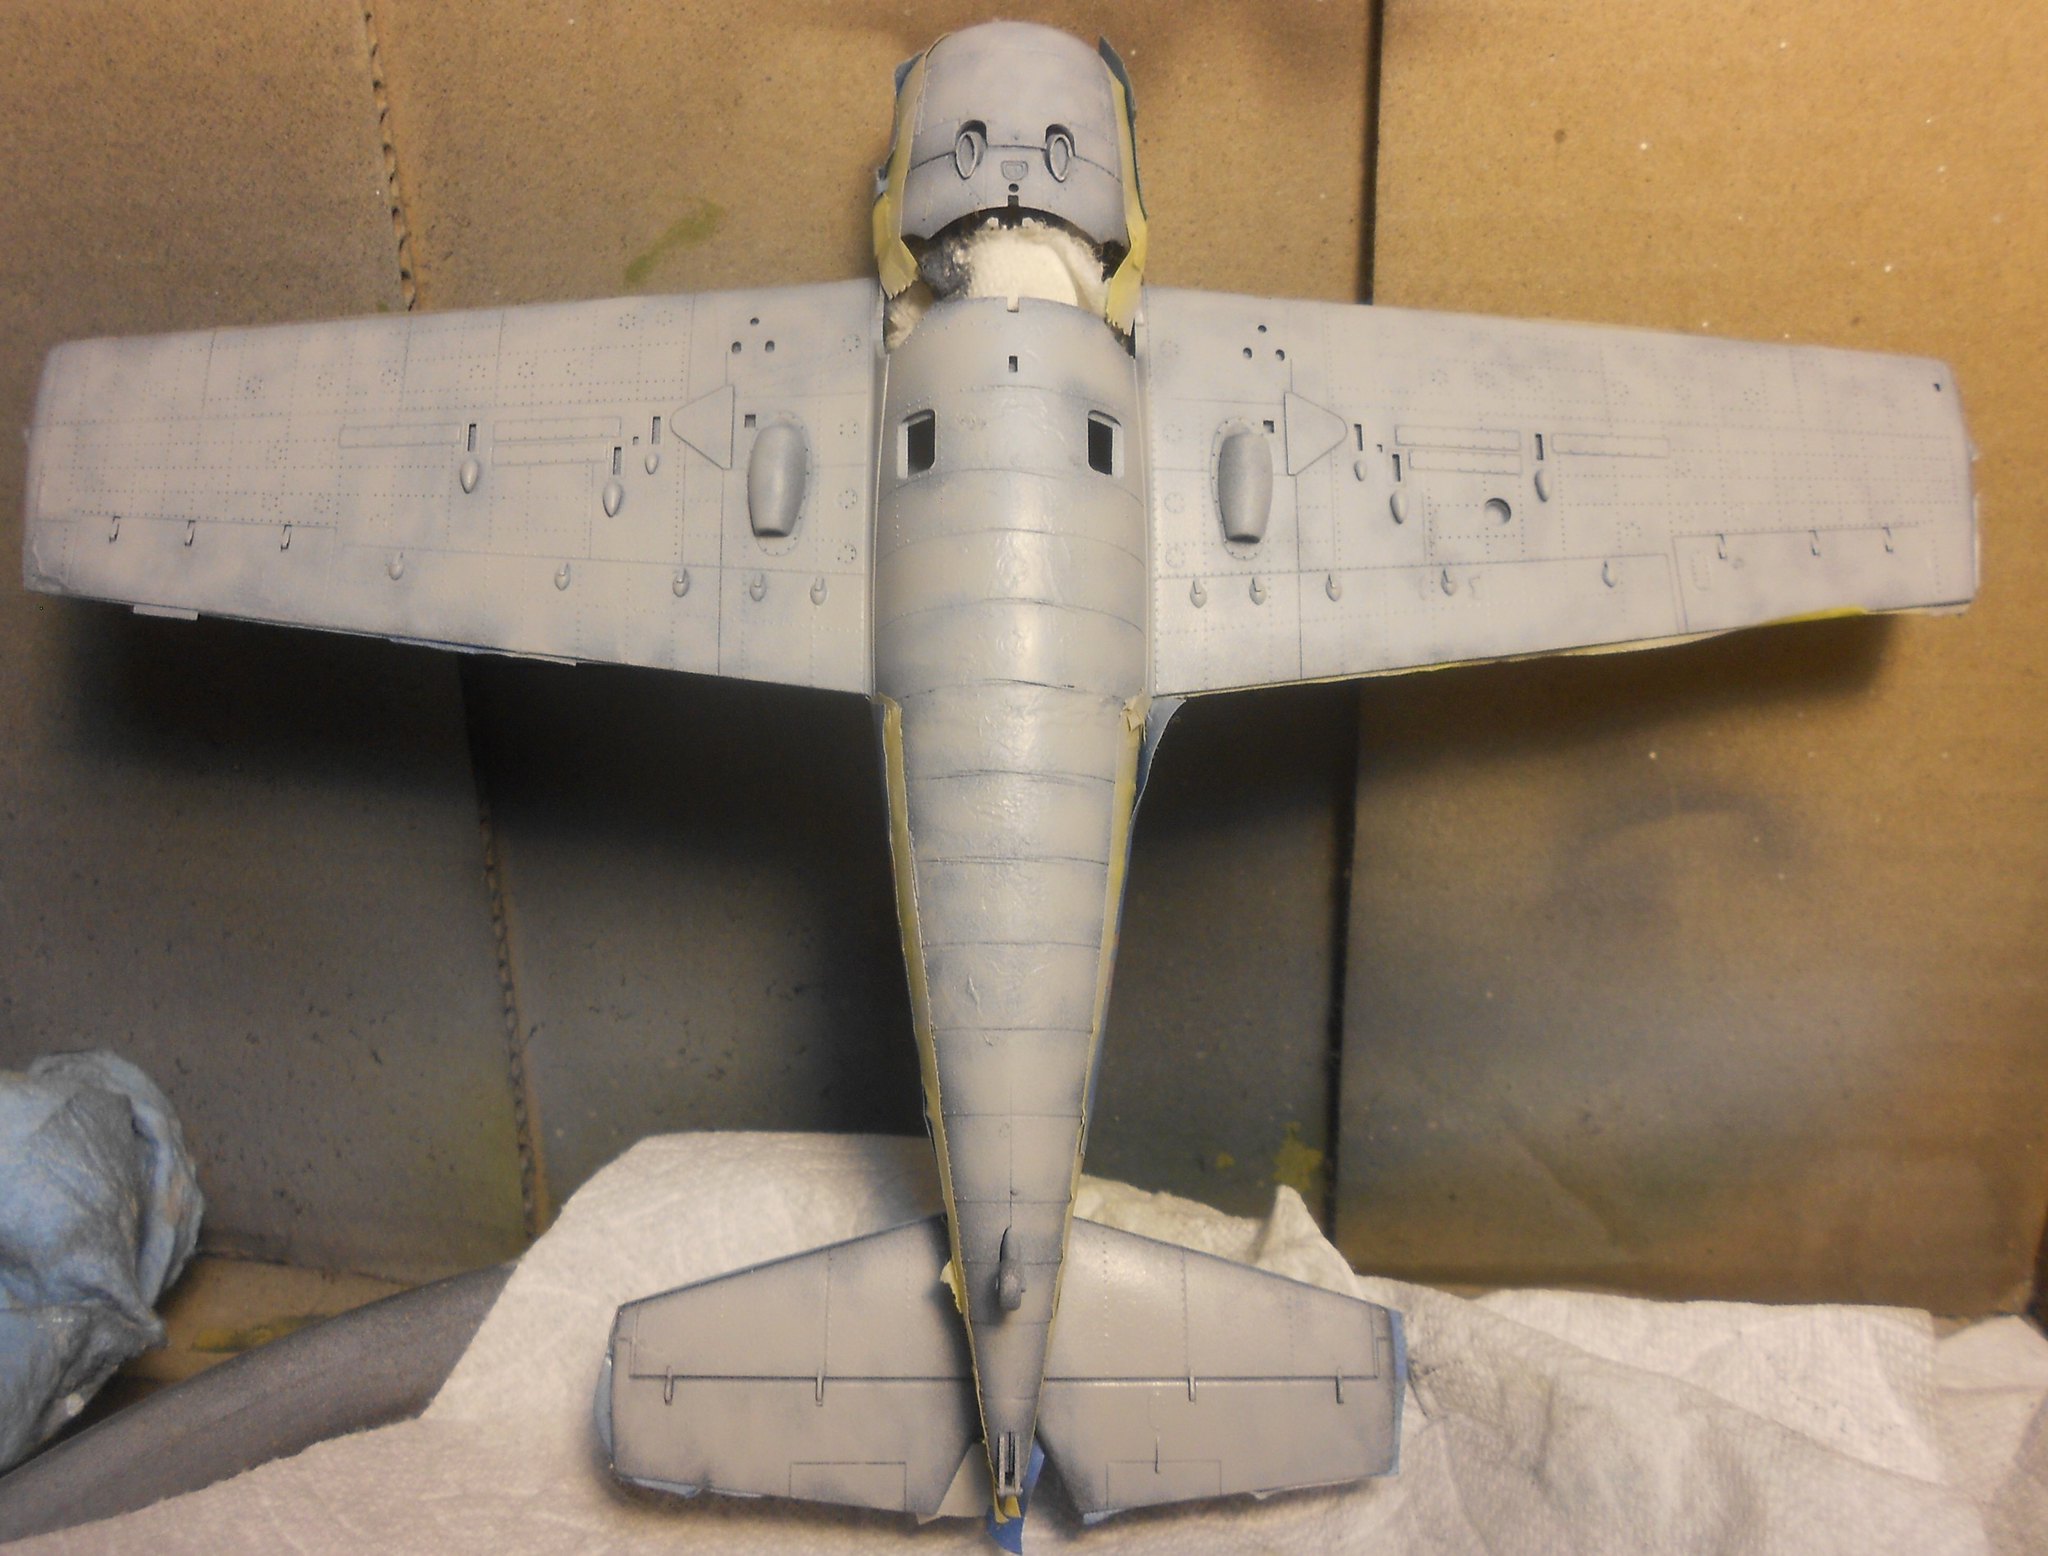 Botbase by Eric Bergerud, on Flickr
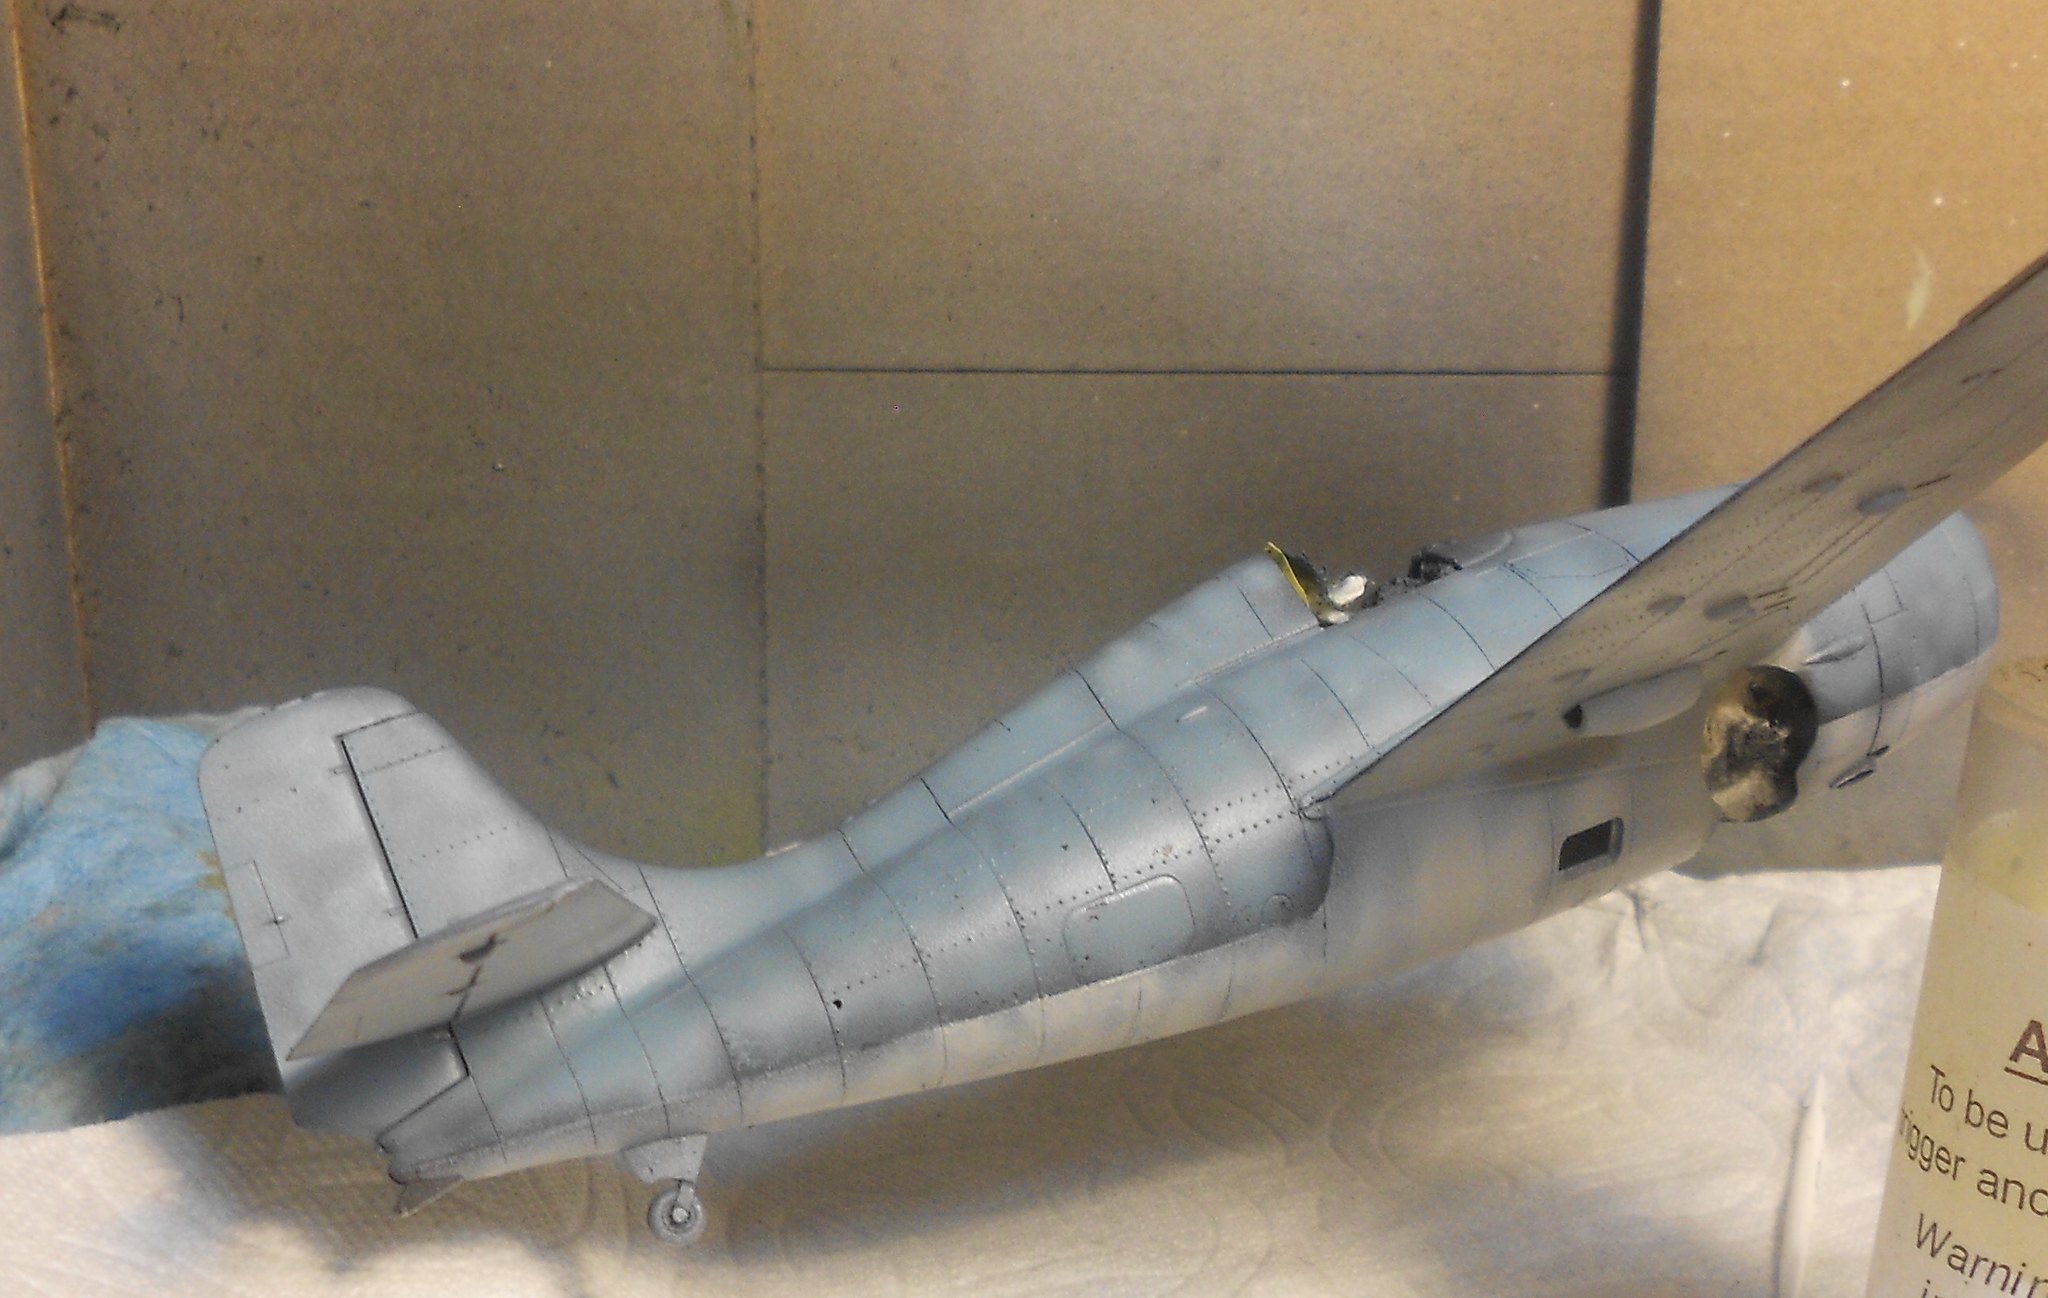
Also painting small requires a remarkably small amount of paint. So even if there's a lot of weathering to follow, the details will still be there. Here's a detail from completed kit. It has black primer, gray mottling, gray base color, Flory Dark Dirt wash, Com.Art washes and some pigments. The detail remains. I like it.
 belodet by Eric Bergerud, on Flickr
Anyway, after the blending is done I gave plane a hand coat of Pledge which I still like for decals. They all set up nicely after Micro Sol/Set and this is what we're looking at before heavy weather starts.
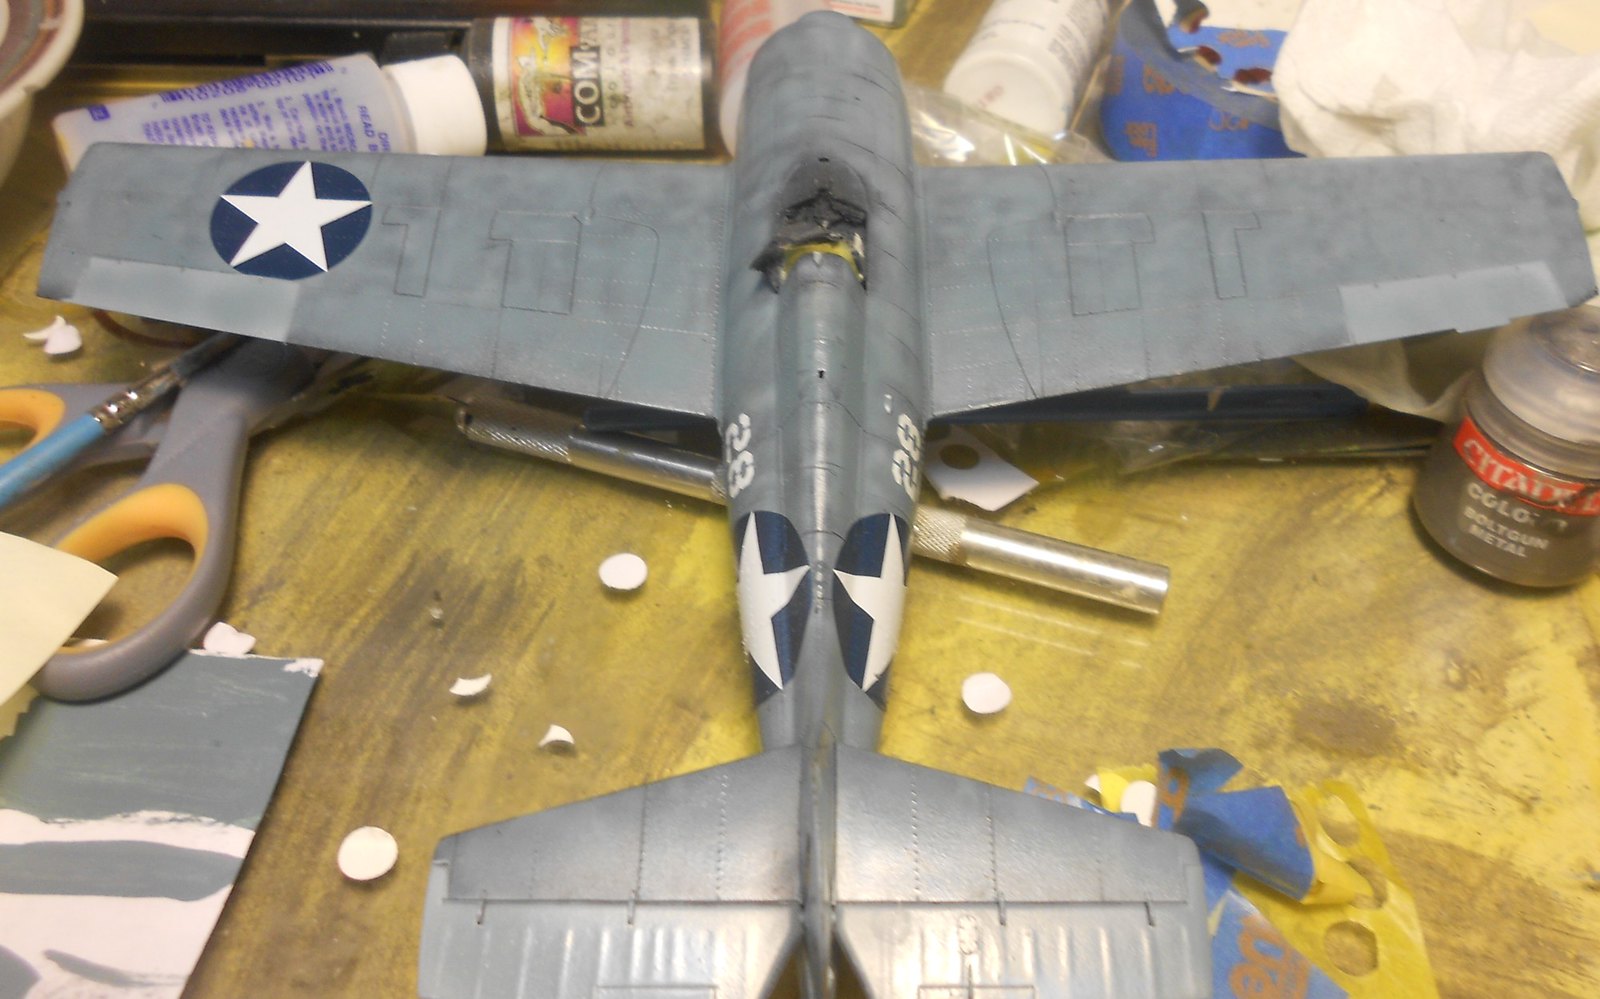 control1 by Eric Bergerud, on Flickr
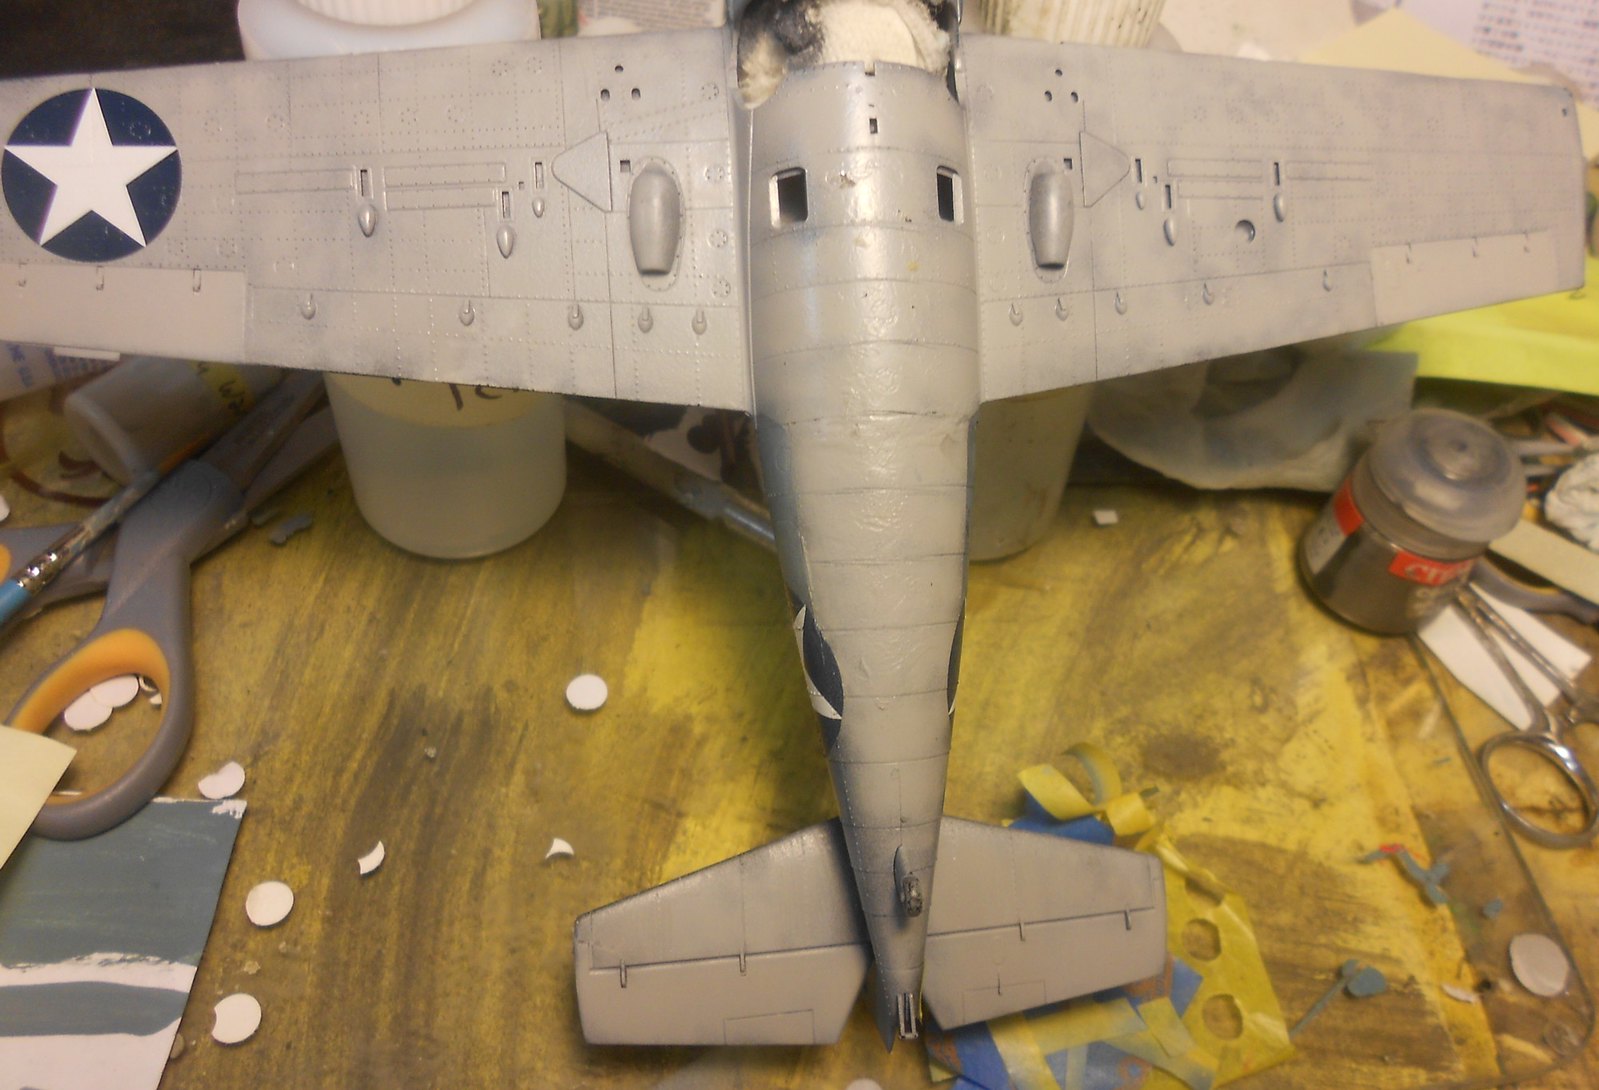 control2 by Eric Bergerud, on Flickr
For serious weathering I used a build log created by Doog for his splendid Tamiya 1/32 Corsair available for inspection on his terrific web site. (Doog did a lot of chipping which is accurate for Corsairs. Elite Marine and Navy Squadrons like the Jolly Rogers flew off Munda Point which is a rolled coral strip - think sandpaper. I see little heavy chipping on planes flying from Guadalcanal or New Guinea. Why Japanese planes so often appear heavily chipped is an argument for another time.) First we want some salt fading. Some people use salt for chipping but I think other methods better for that. However, it makes for an interesting fade. You wet the model and cover it with salt. Mist it with a highly thinned gray acrylic filter. Let dry. Wash off salt. Repeat process with a another mist of a brownish filter. You're not trying to change the color just add in an extra variable. Meanwhile the salt is keeping the mist off some parts of the surface adding another variable. The salt also creates a kind of a salty white filter all of its own. The result is not dramatic but you can tell it. The detail picture shows the irregular surface colors and even texture. These pics are all taken at night. The two faded examples are still distinctly blue-gray it's a little more blue than the color you see under the salt on the first pic. I get better ones down the road.
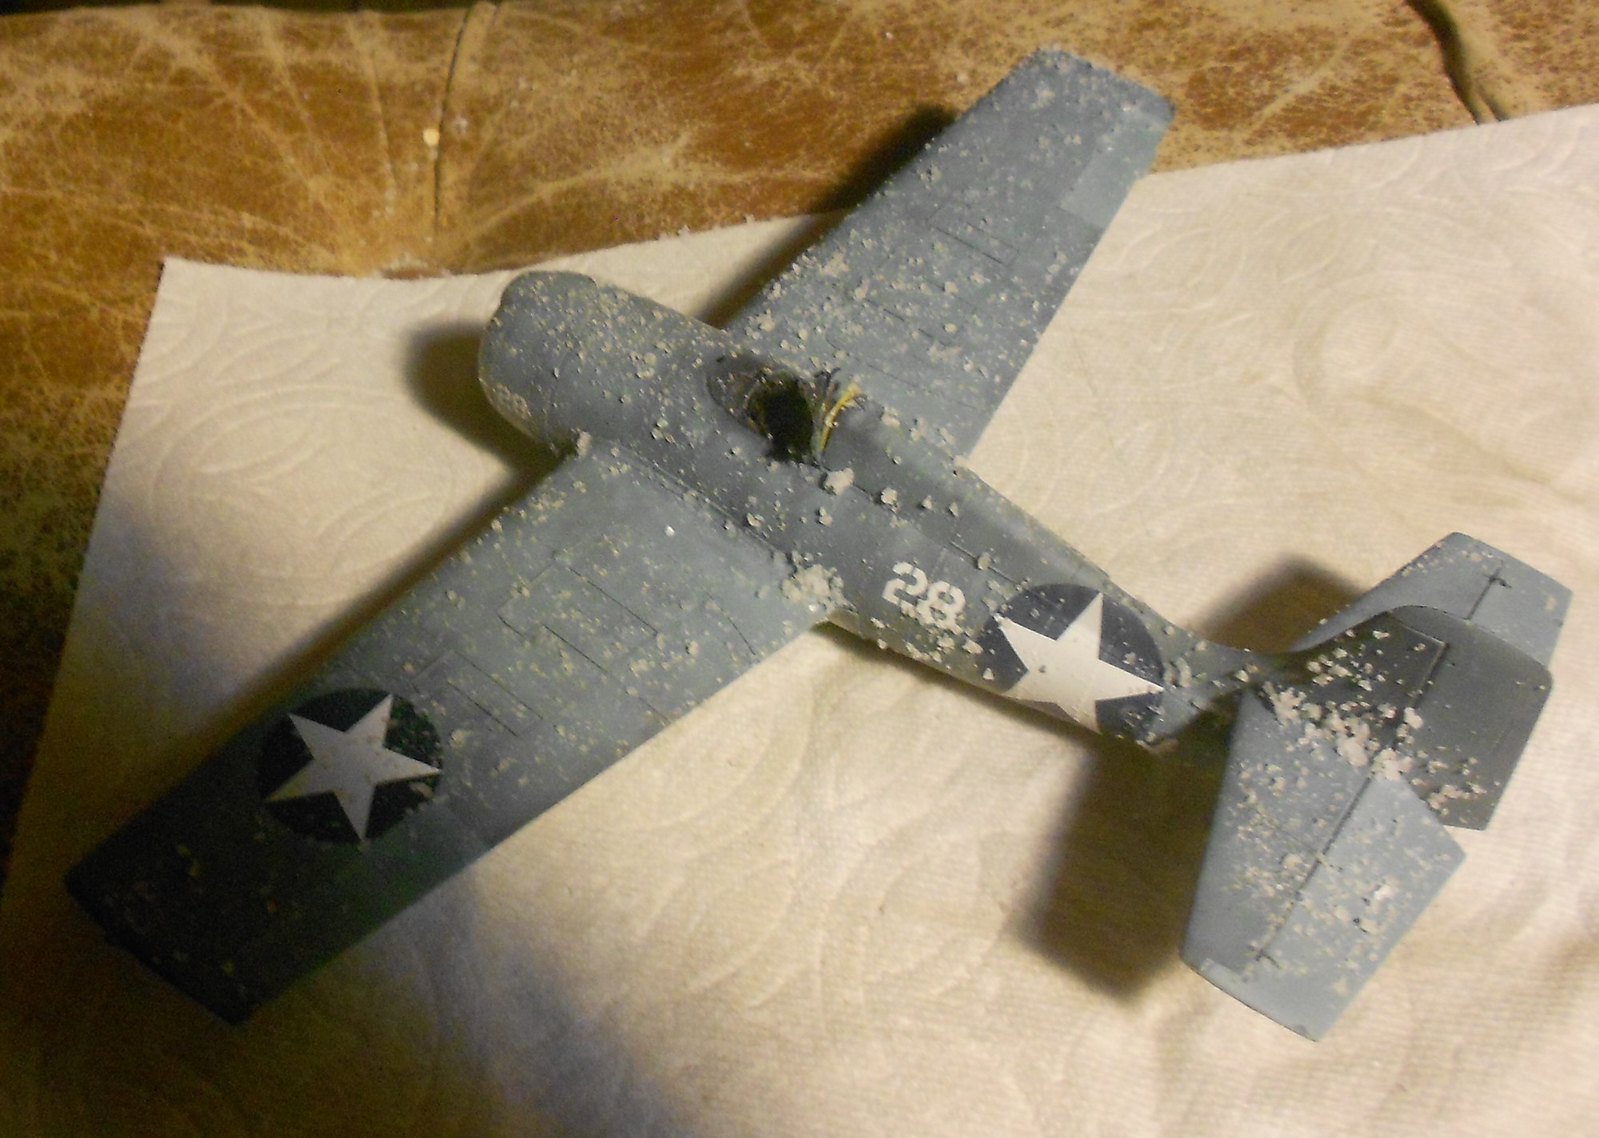 salt1 by Eric Bergerud, on Flickr
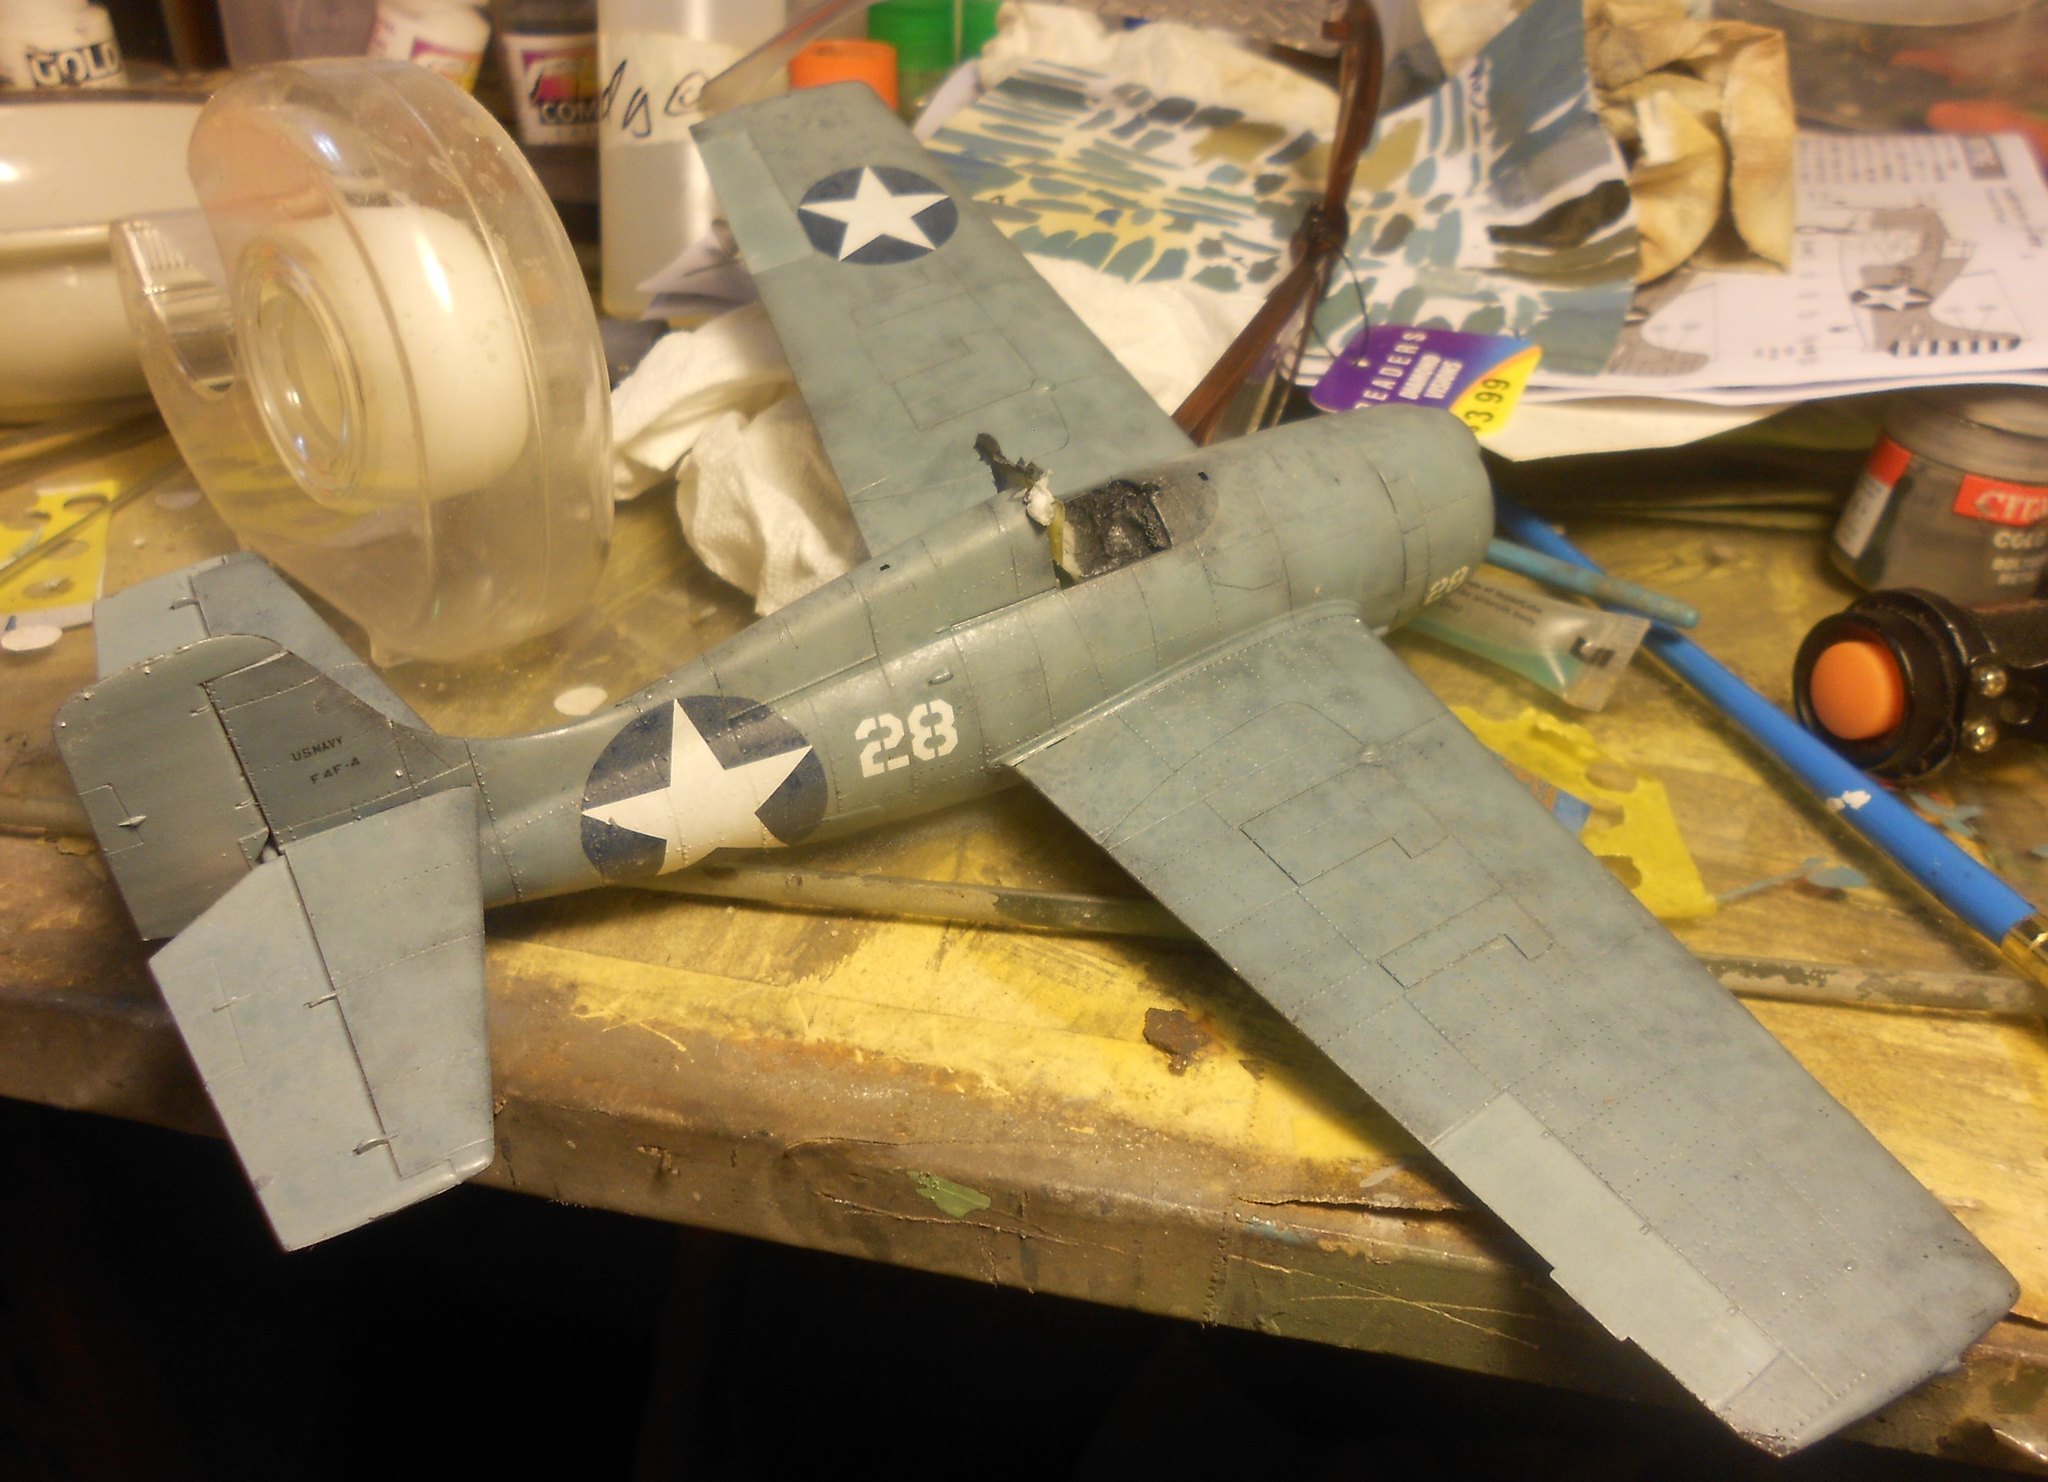 salt2 by Eric Bergerud, on Flickr
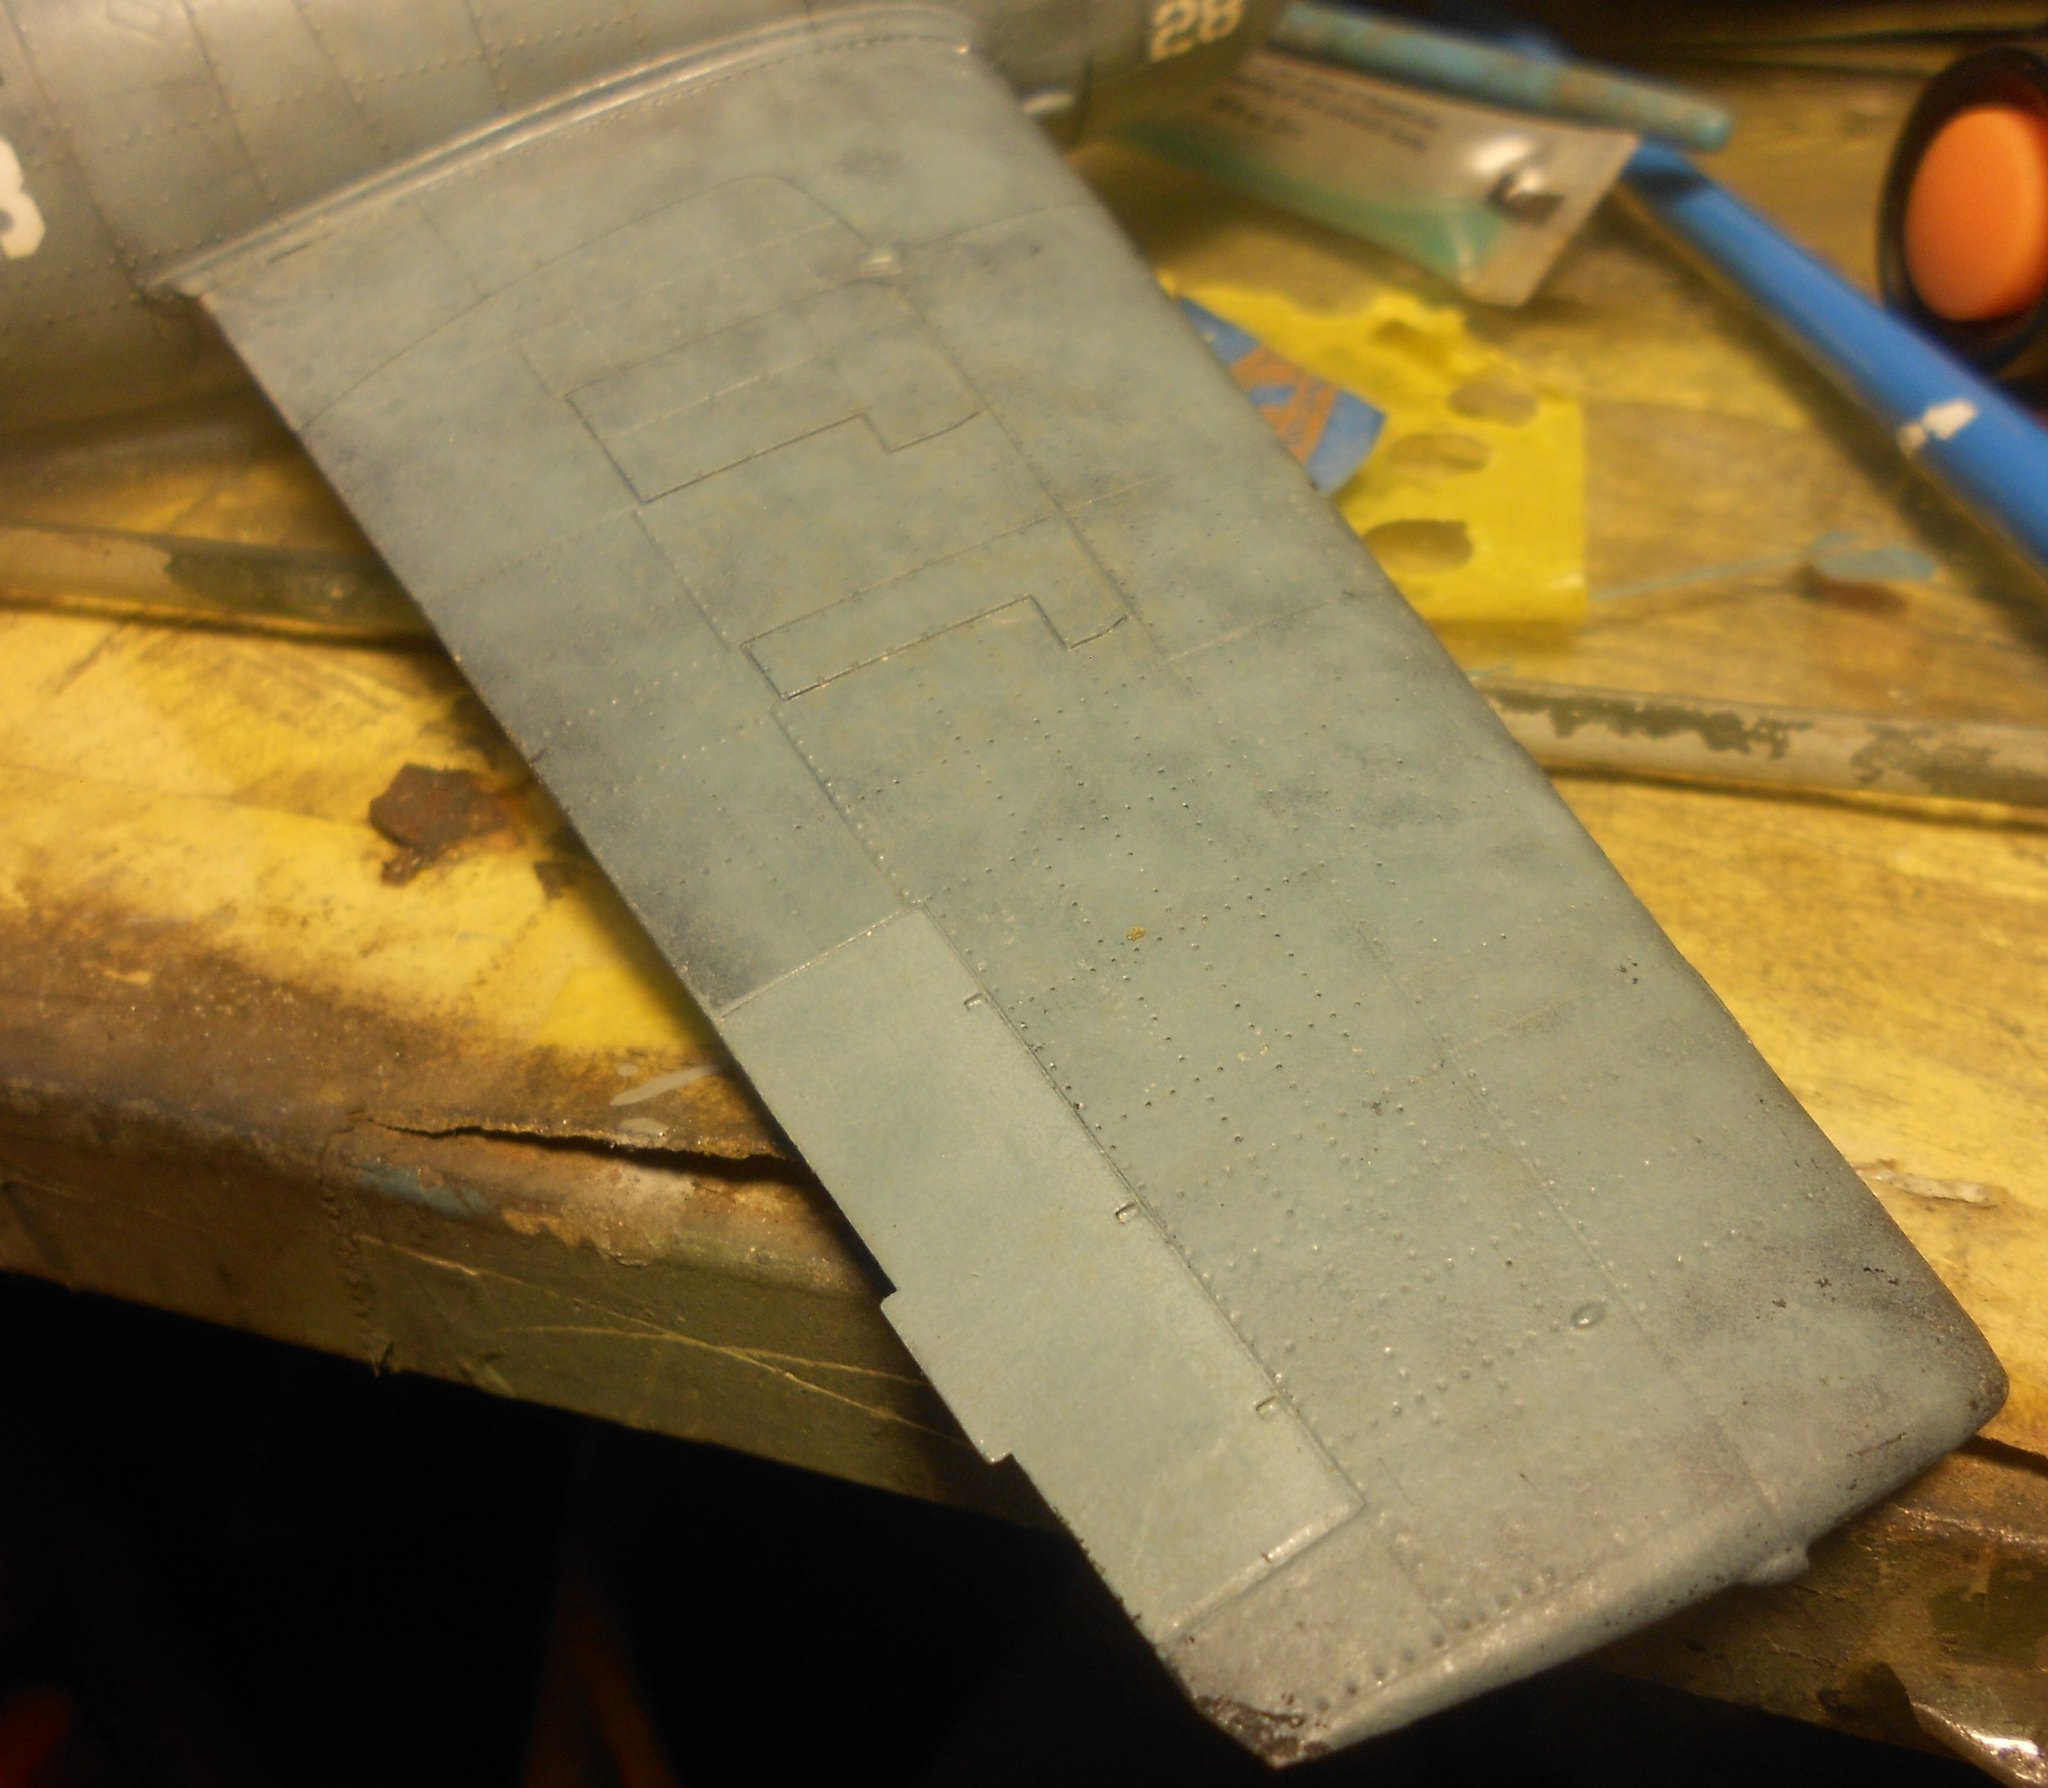 saltdet by Eric Bergerud, on Flickr
Next step is an oil dot filter. This is another fading technique - if I was just trying to change colors I would use filters & washes on a tank. But we want fade. I used Wilder Oils which dry extremely fast. (Gamblin "FastDry Matte Oils" dry just as fast but I didn't have one of the colors I wanted.) I used white, black, buff and light blue. At least half the dots are white. And less is more for dot filters. Doog recommends - correctly I think - applying the dots with a toothpick. Then grind the colors in with a large brush. You can use a second brush with mineral spirits on it (I use Gamblin's Gamsol solvent - the most benign solvent I've ever used and perfect for this kind of stuff) to take colors off if you've got too much blue or black on there. The effect is pretty subtle. The pic below shows a segment with the dots applied: note the wing to the left of the dots has been given the oils, rest of the plane to the right of the dots hasn't. You can see, I think, that the filtered section is distinctly lighter and has a different tonality variation.
 dot1 by Eric Bergerud, on Flickr
The next two pics are of the upper surface after the dot filter has been applied. The detail shows the intricate segments of lighter (more faded) surface appearing randomly. The difference in hue I earlier created between the metal and fabric has also been reduced which is fine.
 Dotdet by Eric Bergerud, on Flickr
 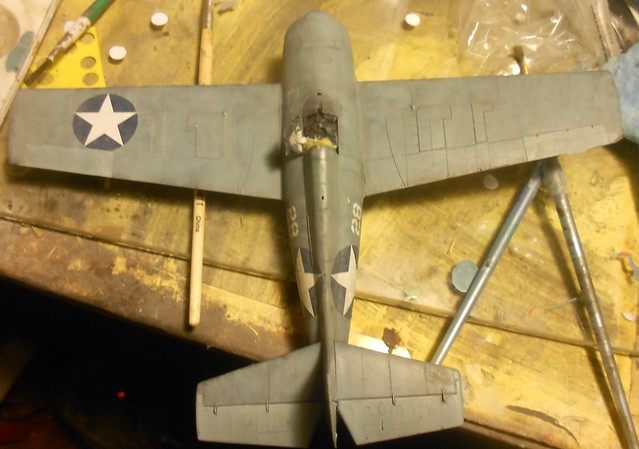 dot2 by Eric Bergerud, on Flickr
Last are panel lines, filters and pigments. Here I'm on my own. Doog used AK enamel products which are very good in my experience. But I want to see if I can get solvent free, so I decided to rely on Medea Com.Art paints, Flory washes and some pigments. I treated the underside of the Wildcat very differently than topside. I did the black basing but skipped the oils. I figured that fading would not have been a major factor below, but that dust and mud would have been worse. The reason should be obvious. I used the Flory Dark Dirt Wash for most of the effect.
 cactakoff by Eric Bergerud, on Flickr
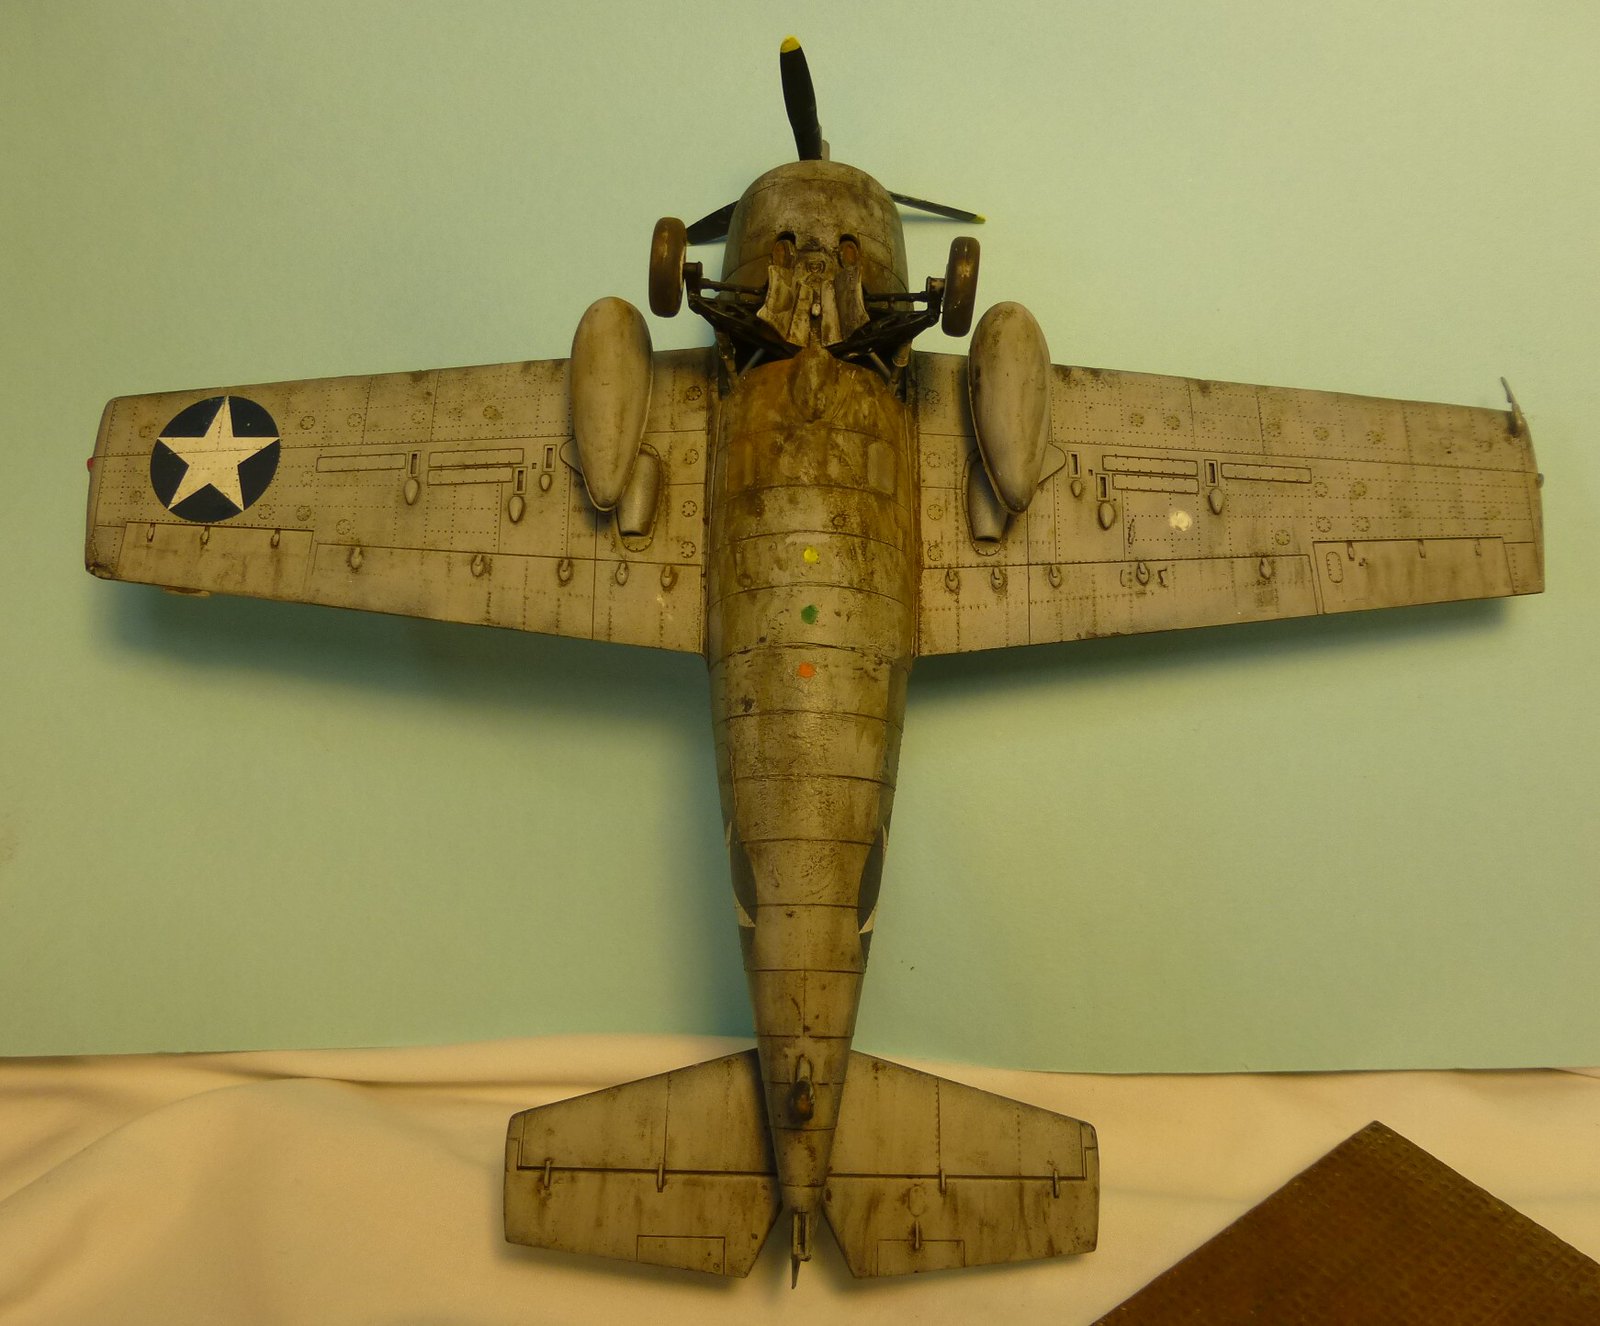 below by Eric Bergerud, on Flickrbelodet by Eric Bergerud, on Flickr
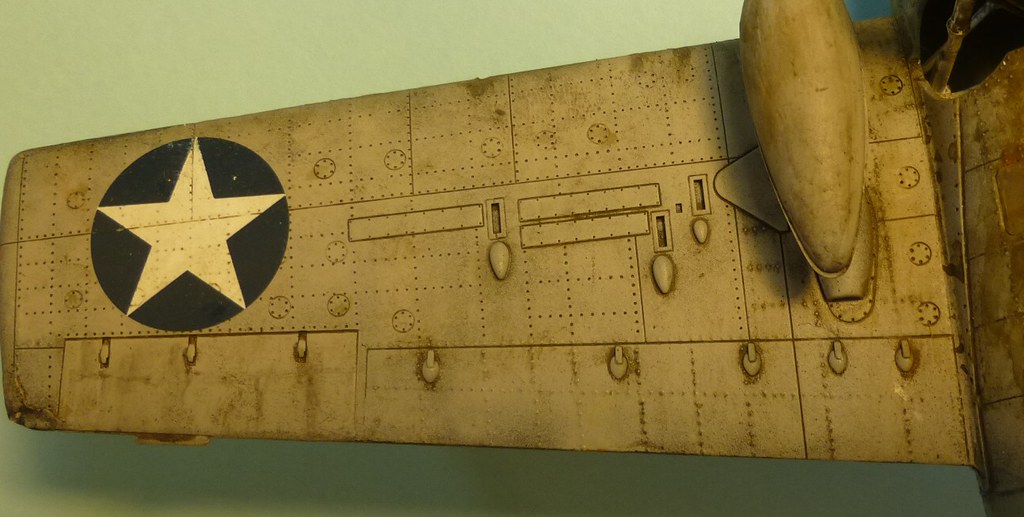
Iwata Medea Com.Art paints are hard to describe unless you've used them. They are a major brand in the world of professional airbrush artists for use on textiles, canvas and figures. They have a hydro-carbon binding agent that is very unlike the polymer found in Vallejo/Golden or the solvent brew found in Tamiya/Gunze. There are two weathering sets out there for railroaders, and that's where I ran into them. The texture is a little grainy and I think it would be much too fragile for base color on styrene. But each color has an opaque and transparent version - this allows a good artist to employ an equivalent of glazing. And it makes a great weathering paint. The grainy texture gives a kind of grime on the transparent versions. I use transparent black or transparent blue-gray smoke. You don't cover a whole area like you do with Flory washes. Instead paint the panel lines with it, let it dry, and wipe most of it off. I also find it ideal for creating a blotching surface - especially if trying to emulate exhaust or fuel/oil stains. Do note that - as advised by Doog - there is a lot of blotching and staining near the front. Radial engines burned a lot of oil especially when kicking out 1200 horsepower and receiving imperfect maintenance. Should also mention that Com.Art can be "revived" with water after it's dried, making it possible to tinker with the effects. (Adam Wilder is putting out a line of acrylic washes that can be "revived" - I think I know what they'll be like.)
I like Com.Art for panel lines a lot - they're less distinct than enamel or oil washes which is fine by me. I've been looking at airplanes via modelers' eyes for the past couple of years and I think panel lines are easy to over do. In some cases they're very evident. The bulkheads on the Grumman planes were heavy things and left very notable lines. But in many cases lines are indistinct but not invisible. So if I like a paint because you can't see it very well, there's method if not madness. I do supplement washes with Verithin color pencils which I can get very fine with an electric sharpener. Everyone will get different mileage but I like the combination of black basing (some lines you leave alone - they'll stand out) Com.Art washes and pencils better than pre/post shading and enamel panel line paints. Black basing etc is more irregular than more standard techniques. I'm not saying that it looks neater, but I do think that it better evokes weathered aircraft where "distress" was irregular - nearly random. Anyway, after the Com.Art was done, I sealed the model with the really good Windsor Newton Matte Varnish thinned with Mr. Levelling Thinner. (Vallejo's varnishes are good, but not that good, so I made that concession to water based modeling.) After I added a little more blotching done with oil color mixed with gloss for the odd fuel stain. Here are a couple of details:
 rt-w-dt by Eric Bergerud, on Flickr
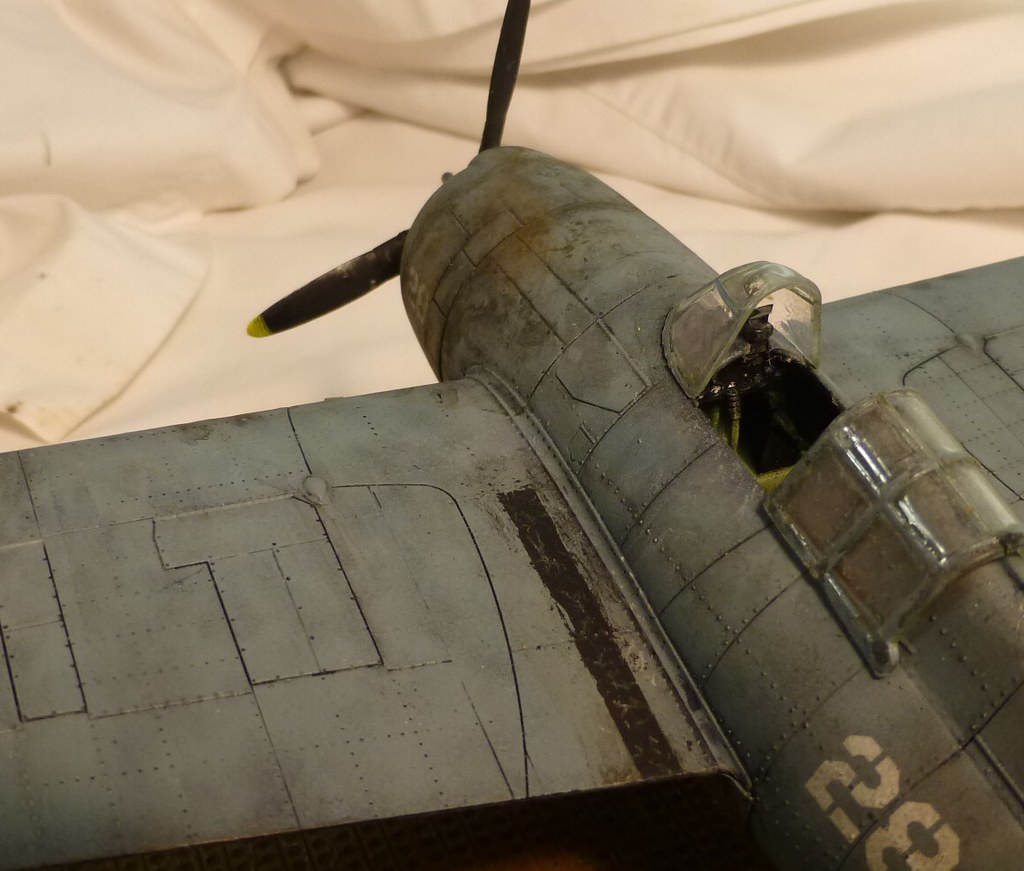 ft-ftdet by Eric Bergerud, on Flickr
Not quite done unfortunately. You know how a good contemporary kit has two canopies - one for closed, one for open? Tamiya only had one. I did a quick dry fit early on and it looked okay. But when it came to putting things on, the rear didn't set quite right. Judging from the decals this kit may be several years old. In any case, as I was trying to wedge the rear portion into shape it cracked in two. Fortunately I had Formula 500 Canopy Glue (made by the Zap people) and the cockpit went back together pretty well with only a slight crack. And after that it fit in the open position. I did add a little extra Com.Art "old oil" mixed with gloss varnish for some last stains.
I put it on a Eduard plastic base that is emulates Marston Mat - or "pierced steel planking" for nerds, a clever technique developed by the US early in the war that allowed for the creation of quickie air bases all over the world. I painted it bronze, gave it a wash and pigments. Space is an issue at my place, so this will serve as a photo base for several planes. You can get one in resin for $30 - I wouldn't. Here's a detail:
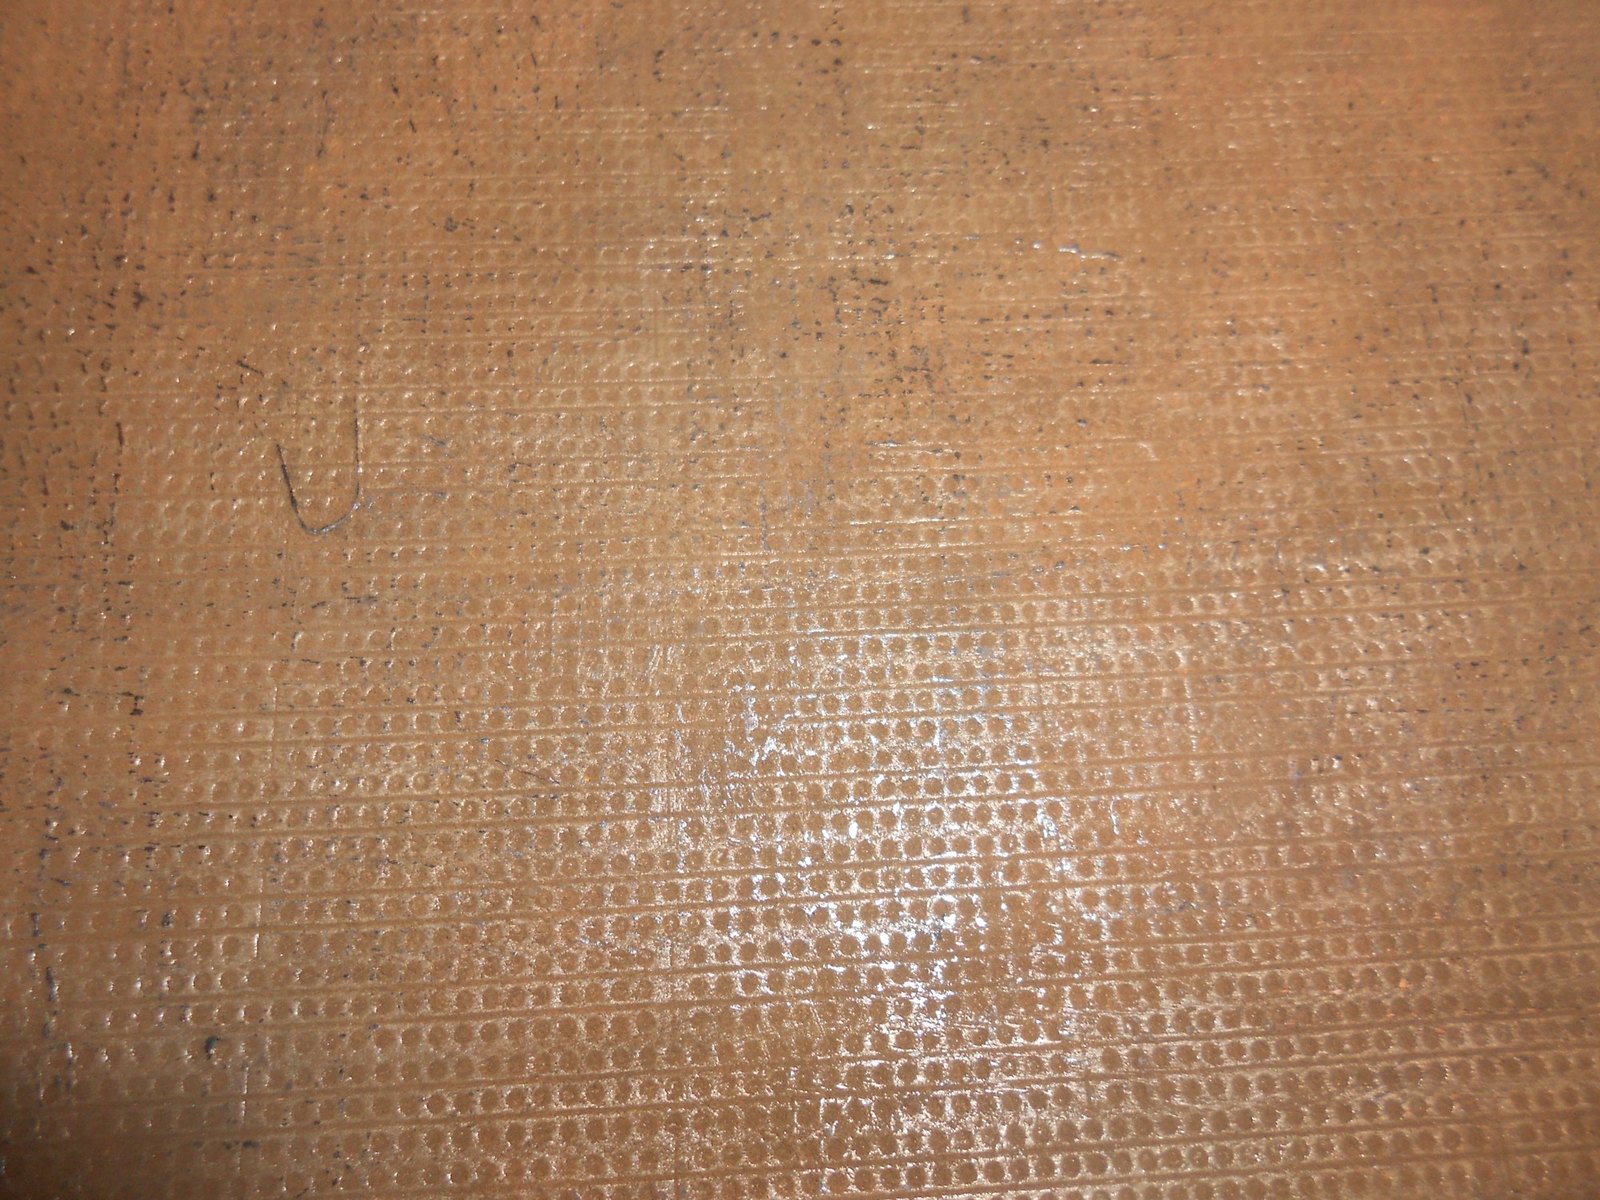 basedet by Eric Bergerud, on Flickr
Here are some pics of a Tamiya Wildcat dressed for festivities at Guadalcanal:
Eric
 left by Eric Bergerud, on Flickr
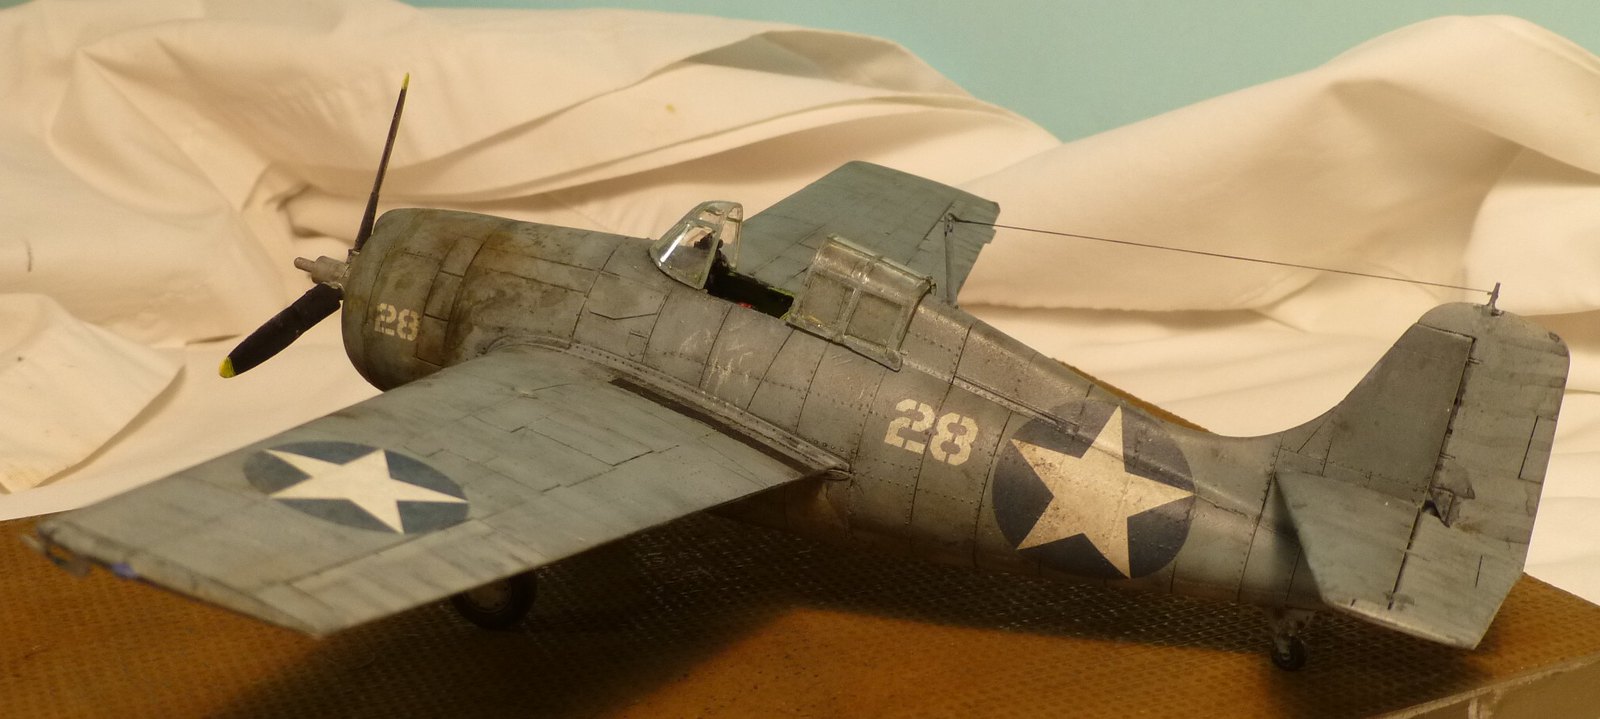 left-r by Eric Bergerud, on Flickr
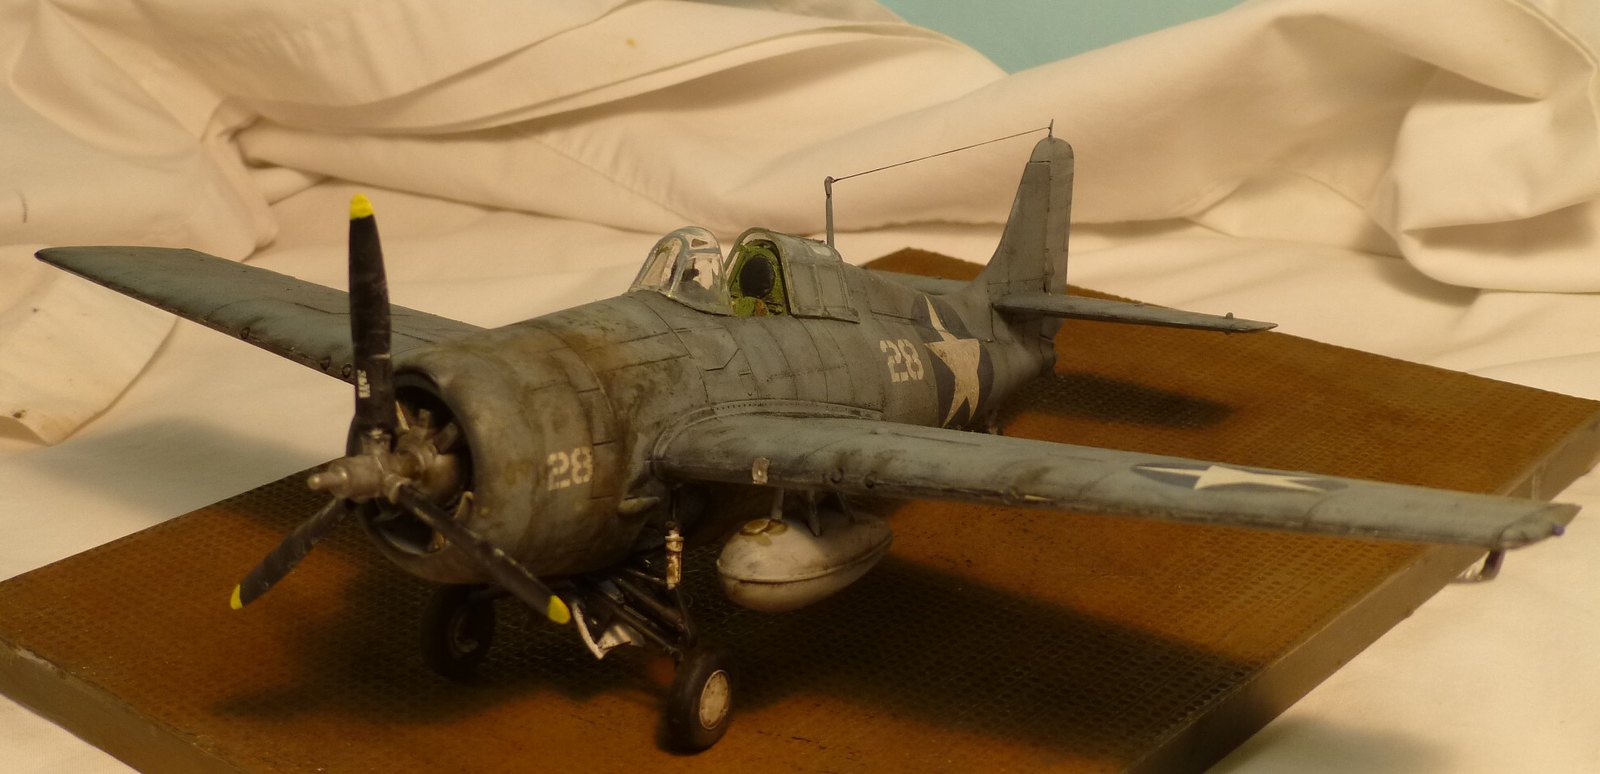 lft-ft by Eric Bergerud, on Flickr
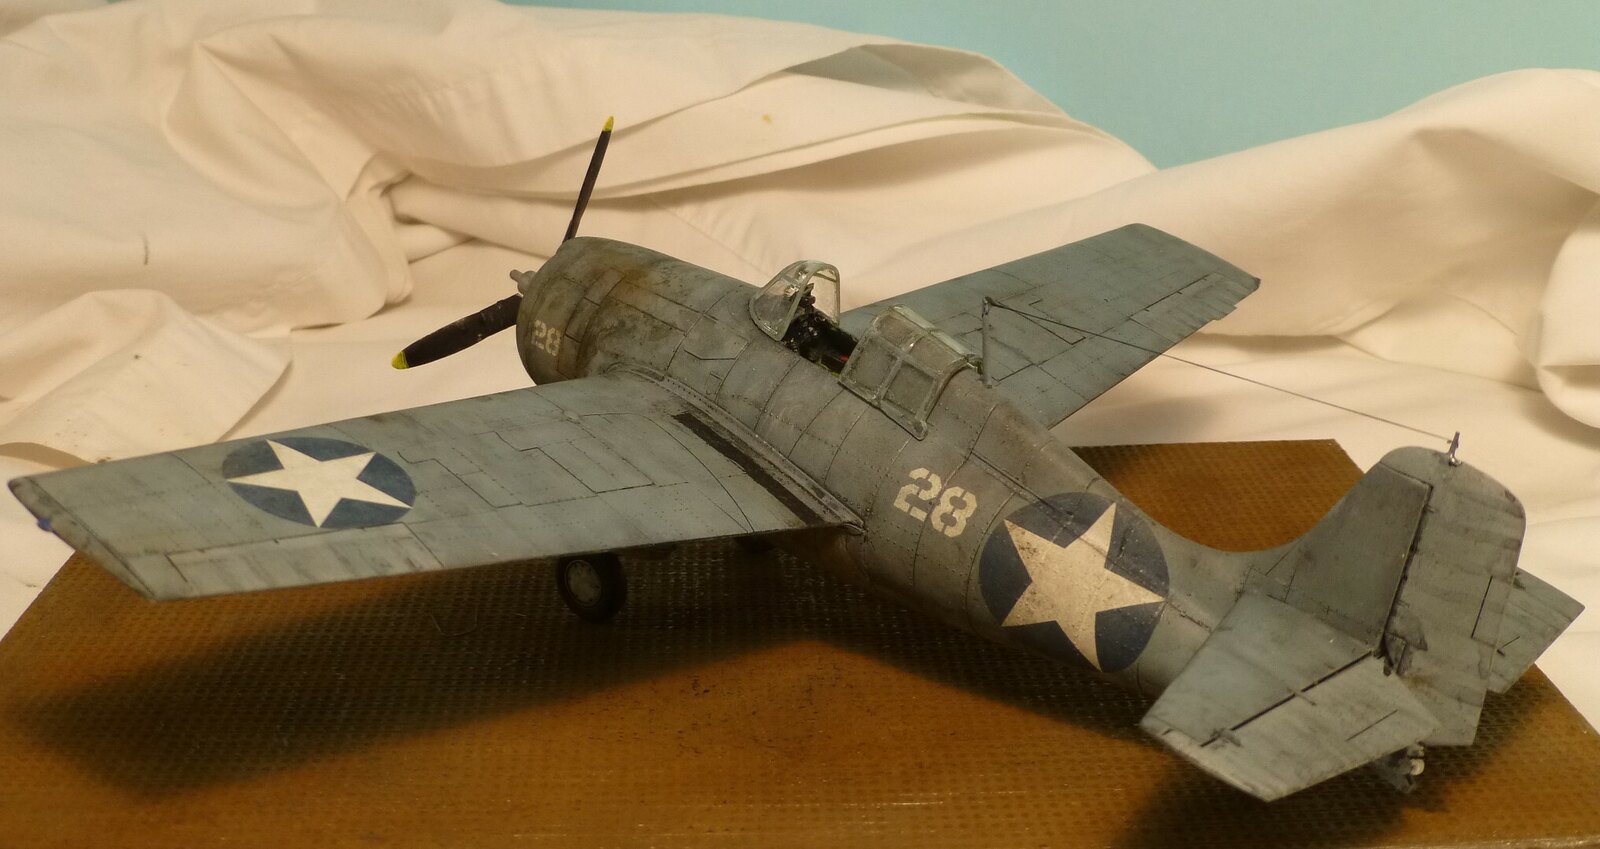 lft-r2 by Eric Bergerud, on Flickr
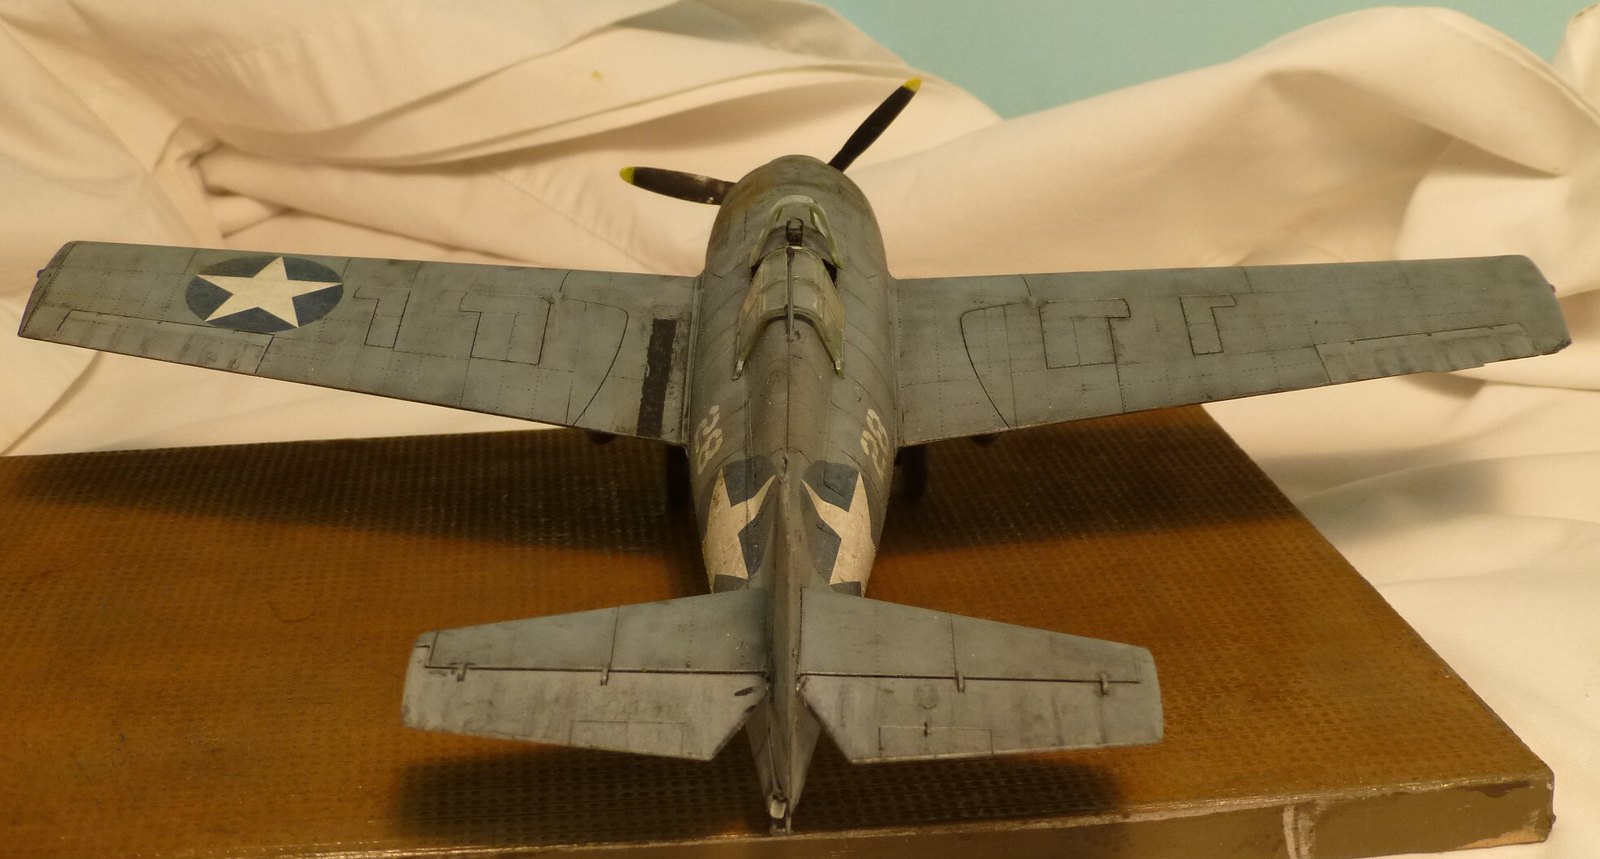 rear by Eric Bergerud, on Flickr
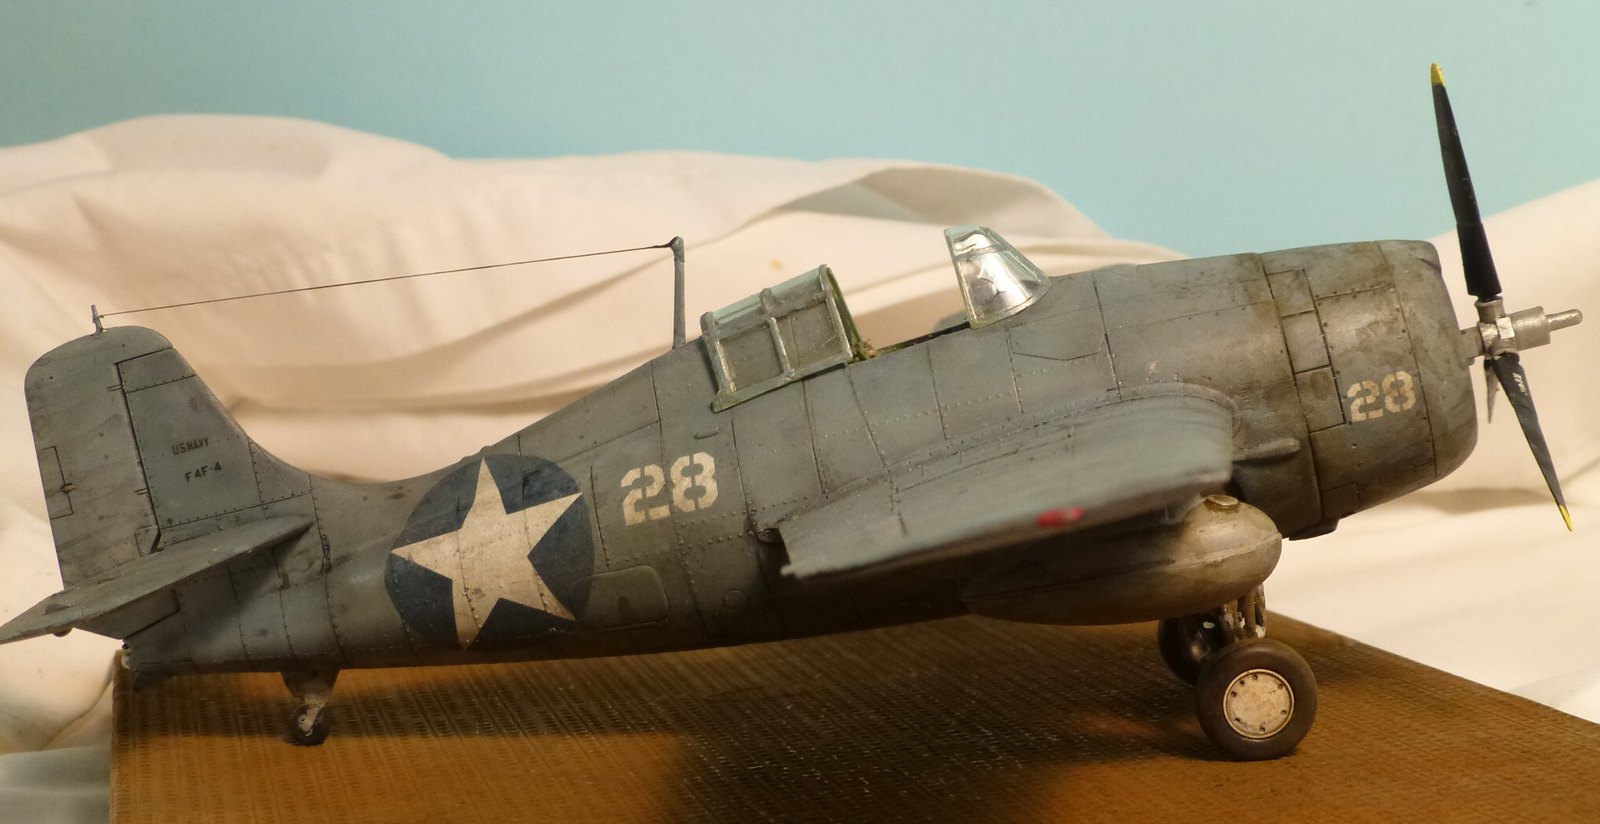 right2! by Eric Bergerud, on Flickr
 tilt by Eric Bergerud, on Flickr
 right-r by Eric Bergerud, on Flickrrt-ft by Eric Bergerud, on Flickr


