Rotary Wing
Discuss helicopters and other rotary wing aircraft from any era.
Hosted by Gino P. Quintiliani
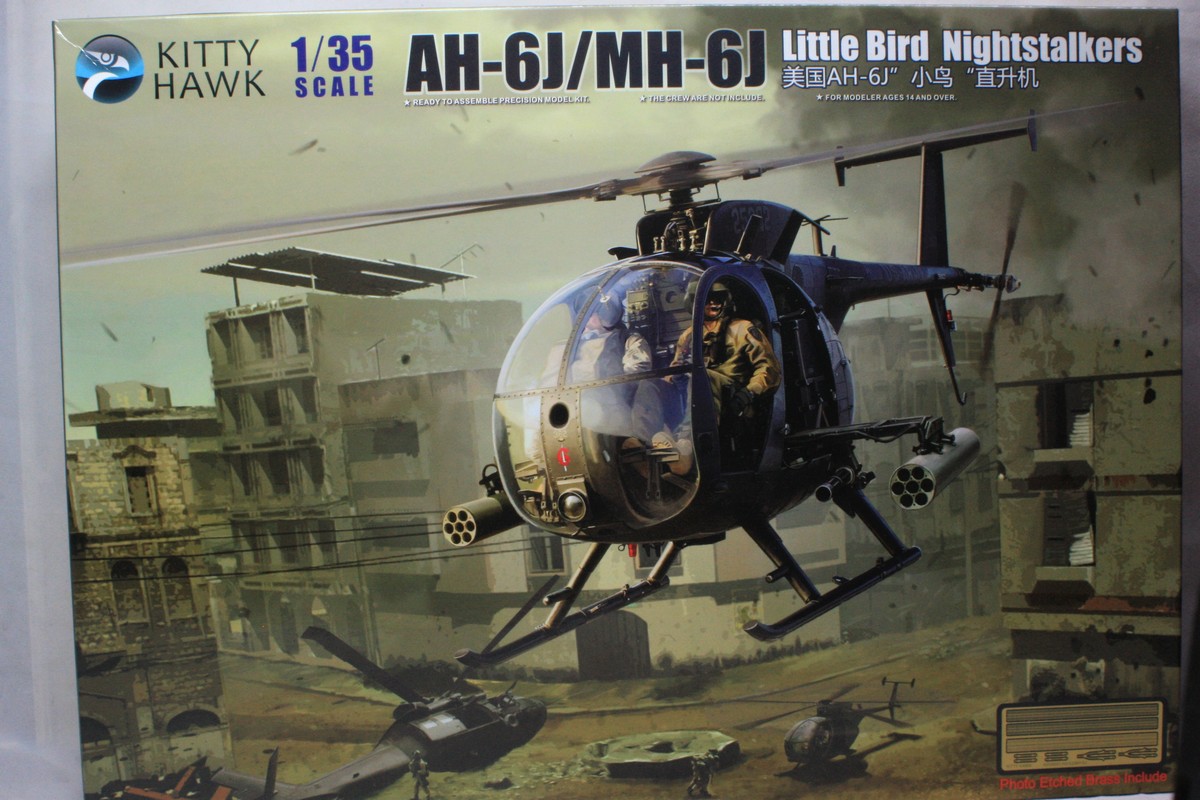
Review
Kitty Hawk: AH-6J/MH-6JIn_War_and_Peace
Associate Editor
England - South West, United Kingdom
Joined: September 26, 2015
KitMaker: 116 posts
AeroScale: 71 posts
Joined: September 26, 2015
KitMaker: 116 posts
AeroScale: 71 posts
Posted: Thursday, December 14, 2017 - 09:02 PM UTC
Adie Roberts opens the box on the Kitty Hawk AH-6J/MH-6J to see what you actually get and look at a possible build feature with a Black Hawk down.
Read the Review
If you have comments or questions please post them here.
Thanks!
Posted: Thursday, December 14, 2017 - 11:17 PM UTC
Adie
Nice review, would love to see this built. I am really thinking about this one.
Kevin
Nice review, would love to see this built. I am really thinking about this one.
Kevin
mother
New York, United States
Joined: January 29, 2004
KitMaker: 3,836 posts
AeroScale: 1,036 posts
Joined: January 29, 2004
KitMaker: 3,836 posts
AeroScale: 1,036 posts
Posted: Thursday, December 14, 2017 - 11:19 PM UTC
I just finished mine a few week ago, it's a great kit and with some detail work it looks great. However it has some small fiddle fails...The kit has many short shot of plastic within the sprue frames.
Step 3: the kit is missing the FLIR ball, so parts C21&20 are not used. But it you can get one or make one then go ahead and add them.
C57 should be B57, Also C55 is missing the connection point to part B20.
There is no hole for part B32. Also missing are the holes for A9, you will need to drill or sand the legs down as I did.
When installing the seats, don't build them, add to cockpit floor and wall starting with part A18,19 then A27,28 followed by A63,64.
Adding the PE seat harness, be sure to bend the tail of harness over parts A38,39..not like shown in the instructions.
Rudder pedals have some problems, full short shot on part B49 and most of the parts are missing the connection holes.
Cockpit floor is missing the hole for fire extinguisher, no big problem...just drill one.
If you plan on building the Littlebird with weapons, don't add parts A1,2,3,and 4, they are used for the fast rope bar.
In step 10 check your references for which bird you plan to do. There are many photos on the net. Step 10 is installing the lights and antennae's. Part A35 is not listed on the instruction sheet, however it's shown in place in step 10.
Step 11...mini guns..well they are a pain. My suggestion is to buy aftermarket or used some found in other helicopter kit in plastic. To much to go into...
Adding the skids, make sure you line up the supports and skids so the bird is sitting level.
In step 14, adding the last of the antenna blades, part A57 is to be above after the rear door (both sides)...look at reference photos.
A33 will not fit with part A30, the hit together, after looking over reference I found it's placement.
The PE ammo chutes will bend, but was a real treat to get them installed.
On the tail boom there are four connection point to install tail rudder...well to 2 or the 4 are missing...
In step 17 is a bit of a mess, it can be done with some time and patience. Most of the parts are missing their connection points and have weak detail.
In no way does this discourage me from building more Littlebird kits, I have two more in the works. Just be patience and you'll be satisfied with it.
Happy Modeling,
Joe
In_War_and_Peace
Associate Editor
England - South West, United Kingdom
Joined: September 26, 2015
KitMaker: 116 posts
AeroScale: 71 posts
Joined: September 26, 2015
KitMaker: 116 posts
AeroScale: 71 posts
Posted: Friday, December 15, 2017 - 02:03 AM UTC
Thank you, Kevin, it is a nice looking kit I have to say and thank you, Joe, for bringing this to our attention.
AJLaFleche
Massachusetts, United States
Joined: May 05, 2002
KitMaker: 8,074 posts
AeroScale: 328 posts
Joined: May 05, 2002
KitMaker: 8,074 posts
AeroScale: 328 posts
Posted: Friday, December 15, 2017 - 09:14 PM UTC
Looks intriguing! I couldn't see in the sprue shots...does it have the rotor for the six bladed version?
mother
New York, United States
Joined: January 29, 2004
KitMaker: 3,836 posts
AeroScale: 1,036 posts
Joined: January 29, 2004
KitMaker: 3,836 posts
AeroScale: 1,036 posts
Posted: Friday, December 15, 2017 - 09:45 PM UTC
It does not have the set of the six blade bird, however the kit does come with the sixth blade, maybe in a future release.
Joe
Joe
AJLaFleche
Massachusetts, United States
Joined: May 05, 2002
KitMaker: 8,074 posts
AeroScale: 328 posts
Joined: May 05, 2002
KitMaker: 8,074 posts
AeroScale: 328 posts
Posted: Friday, December 15, 2017 - 10:59 PM UTC
Thanks, Joe. That saved me some money! And no small amount of frustration.
HeavyArty
Florida, United States
Joined: May 16, 2002
KitMaker: 17,694 posts
AeroScale: 1,728 posts
Joined: May 16, 2002
KitMaker: 17,694 posts
AeroScale: 1,728 posts
Posted: Tuesday, December 19, 2017 - 10:31 PM UTC
A good review and a good rundown of potential issues by Mother. I too plan to get and build this kit.
A couple points though, Joe says:
"Step 3: the kit is missing the FLIR ball, so parts C21&20 are not used. But it you can get one or make one then go ahead and add them."
It is actually common for AH-6Js to not install the FLIR ball, but have the mount still in place. The ball is removable when not used, but the mount is permanent. All the AH-6Js in OP Gothic Serpent (Somalia '93) had the mounts, but the FLIR balls not mounted.
Also:
"If you plan on building the Littlebird with weapons, don't add parts A1,2,3,and 4, they are used for the fast rope bar."
This is not necessarily true. The aircraft can be reconfigured as either an AH or MH by adding or removing mission equipment (i.e.: weapons plank vs seat plank, FLIR or not, etc., etc...). They can be reconfigured in many ways. As such, most aircraft have the connection points for the fast rope rigs on them. So it is not incorrect to have them on an AH-6J gunship.
Kitty Hawk has shown a future set of figures for the Littlebird. They are suposed to be from 3D renderings and look awesome. Hopefully we will see them soon.
A couple points though, Joe says:
"Step 3: the kit is missing the FLIR ball, so parts C21&20 are not used. But it you can get one or make one then go ahead and add them."
It is actually common for AH-6Js to not install the FLIR ball, but have the mount still in place. The ball is removable when not used, but the mount is permanent. All the AH-6Js in OP Gothic Serpent (Somalia '93) had the mounts, but the FLIR balls not mounted.
Also:
"If you plan on building the Littlebird with weapons, don't add parts A1,2,3,and 4, they are used for the fast rope bar."
This is not necessarily true. The aircraft can be reconfigured as either an AH or MH by adding or removing mission equipment (i.e.: weapons plank vs seat plank, FLIR or not, etc., etc...). They can be reconfigured in many ways. As such, most aircraft have the connection points for the fast rope rigs on them. So it is not incorrect to have them on an AH-6J gunship.
Quoted Text
...first I will do some research and see if anyone has any 1/35 scale crew, more importantly, some 1/35th special forces in a sitting position that could sit on the out riding planks for interdiction / extraction work.
Kitty Hawk has shown a future set of figures for the Littlebird. They are suposed to be from 3D renderings and look awesome. Hopefully we will see them soon.
Removed by original poster on 01/21/18 - 15:38:07 (GMT).
Removed by original poster on 01/21/18 - 15:37:50 (GMT).
ubisuck
Quebec, Canada
Joined: December 20, 2012
KitMaker: 461 posts
AeroScale: 85 posts
Joined: December 20, 2012
KitMaker: 461 posts
AeroScale: 85 posts
Posted: Saturday, January 20, 2018 - 08:37 PM UTC
So how did you guys manage to glue B1 to B16/B15 and last B17 ??
FloydWerner
Maryland, United States
Joined: February 19, 2006
KitMaker: 144 posts
AeroScale: 141 posts
Joined: February 19, 2006
KitMaker: 144 posts
AeroScale: 141 posts
Posted: Thursday, January 25, 2018 - 07:28 AM UTC
ubisuck I enlarged the holes in B1 so that B15/16 fit into it and then B-17 just fits down the side.
FloydWerner
Maryland, United States
Joined: February 19, 2006
KitMaker: 144 posts
AeroScale: 141 posts
Joined: February 19, 2006
KitMaker: 144 posts
AeroScale: 141 posts
Posted: Thursday, January 25, 2018 - 07:29 AM UTC
Check out my build here: http://www.arcair.com/Gal15/14601-14700/gal14653-MH-6-Werner/00.shtm
ubisuck
Quebec, Canada
Joined: December 20, 2012
KitMaker: 461 posts
AeroScale: 85 posts
Joined: December 20, 2012
KitMaker: 461 posts
AeroScale: 85 posts
Posted: Thursday, January 25, 2018 - 04:48 PM UTC
Quoted Text
ubisuck I enlarged the holes in B1 so that B15/16 fit into it and then B-17 just fits down the side.
Thank you Floyd