Hi again
Work's prevented me from getting in much building, but heer's a quick update to show I haven't been entirely idle.
I've taken a break from the engine and cockpit to check the overall fit of the main airframe parts. To be honest, it's something I usually do before starting a build properly, particularly with any kit that's produced without the benefits of full mainstream production resources.
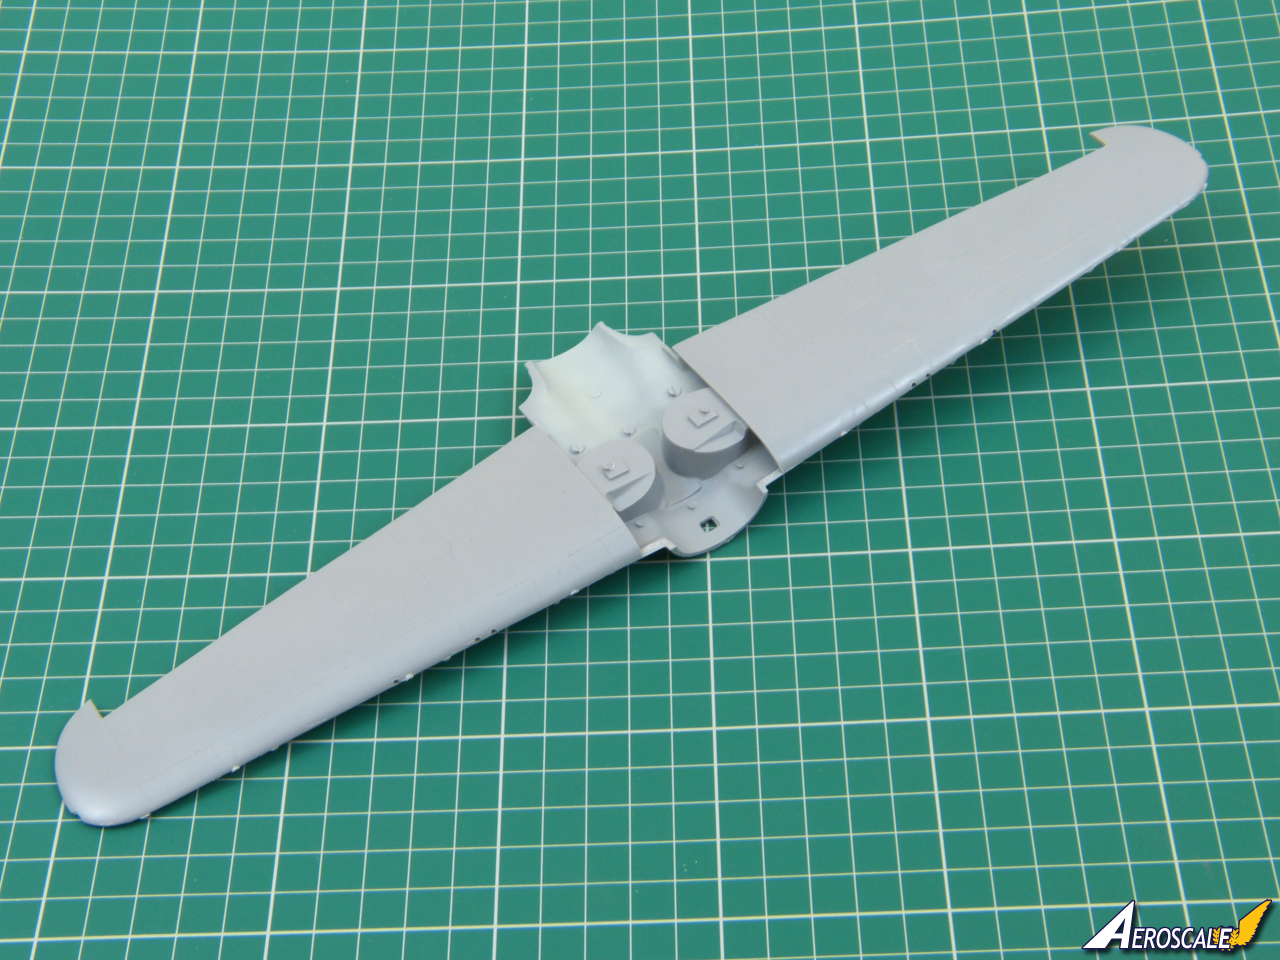
I've only taped the fuselage together, because I'm obviously still working on the interior, but I glued the wings the other day and they went together without any hassle:
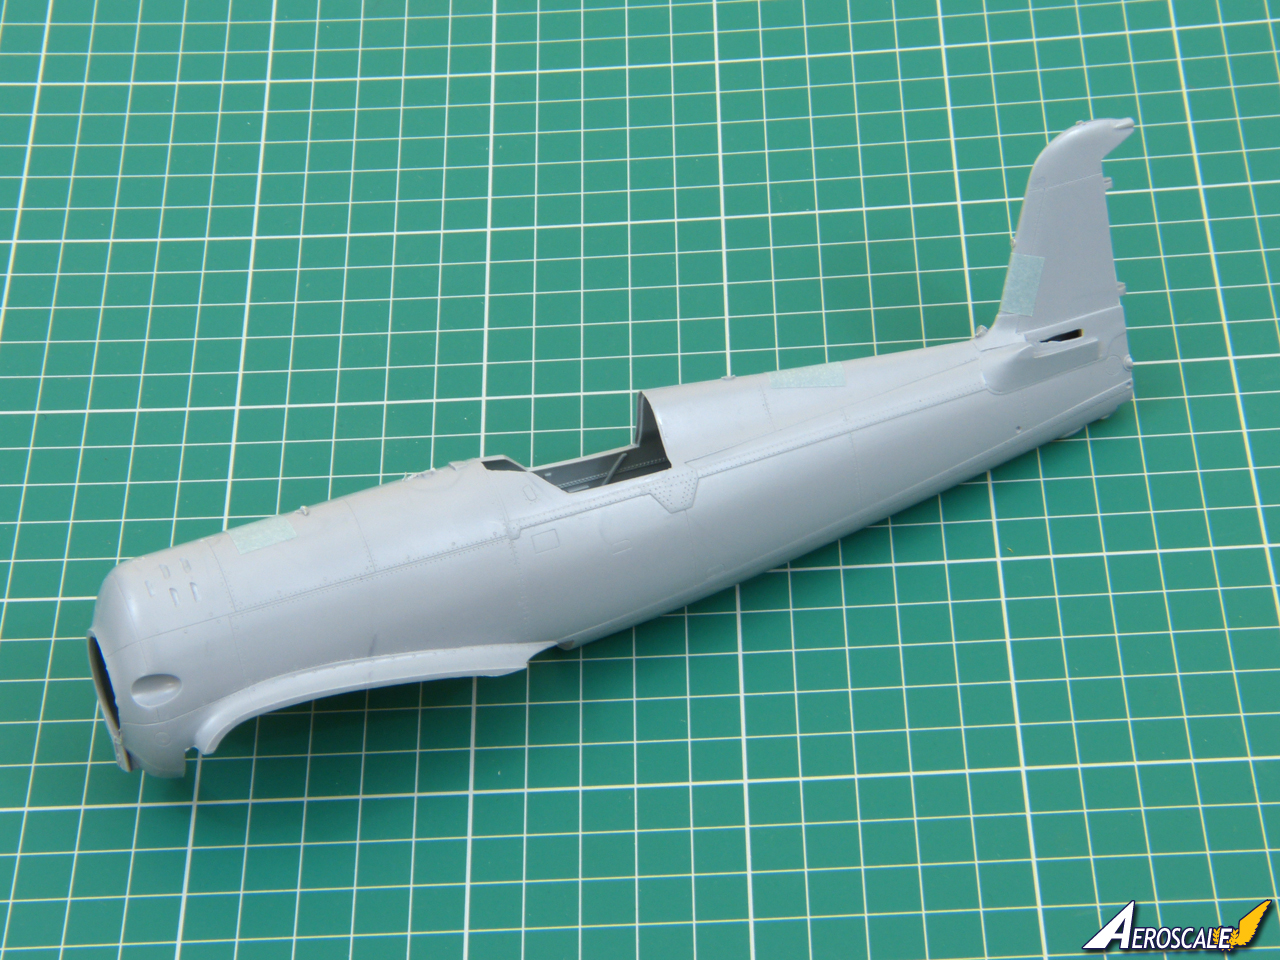
The first attempt at joining evreything together showed a nasty gap:
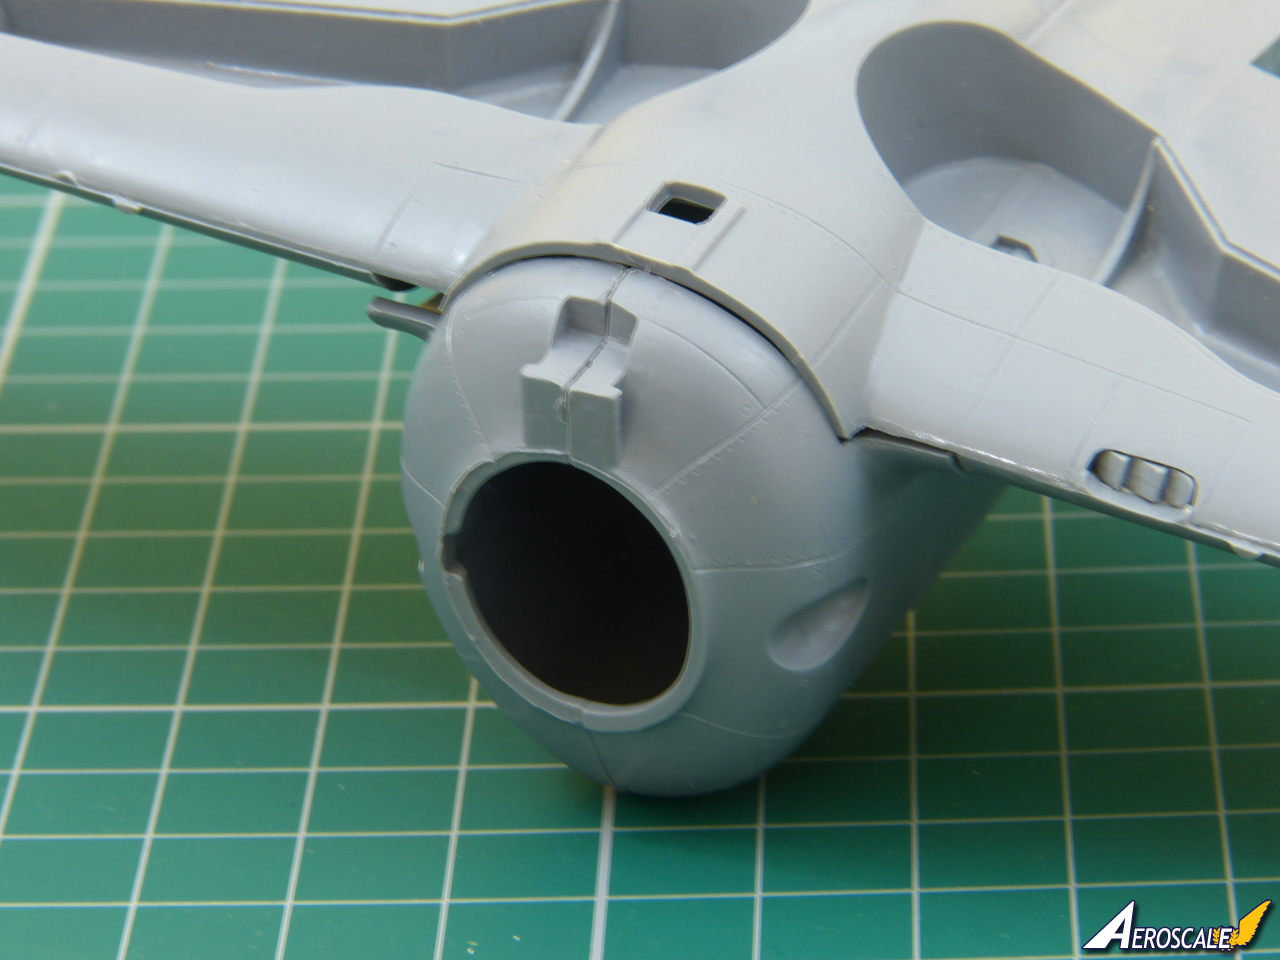
Looking inside revealed the culprits: a couple of ejection pin marks that need to be removed:
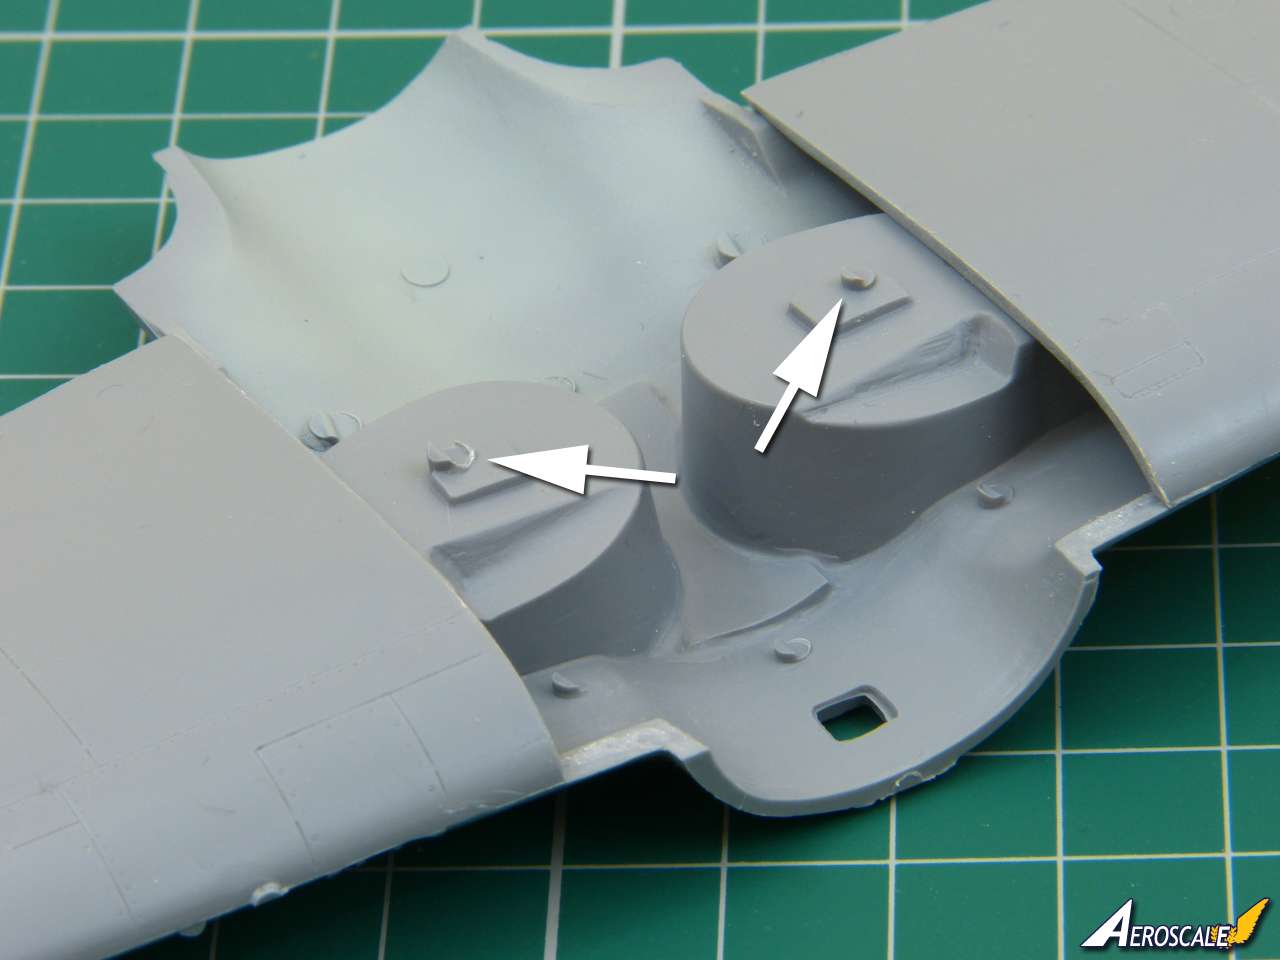
With those out of the way, everything went together quite neatly, but you may find you need to add small spacers to ensure the airfoil of the roots and wings match:
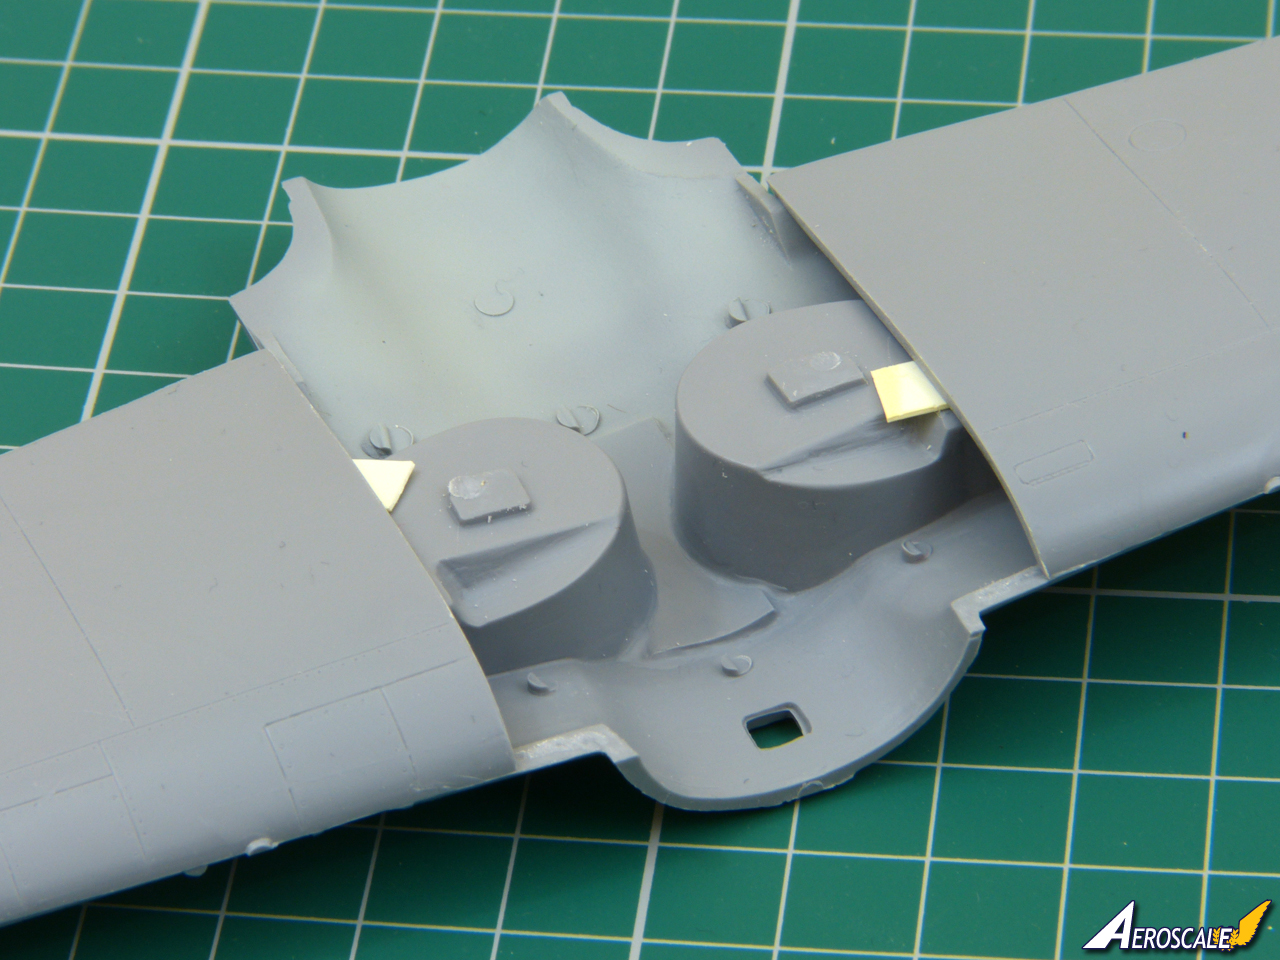
I've only positioned spacers very roughly here to demonstrate the principle, but it's enough to show the final fit will be fine:
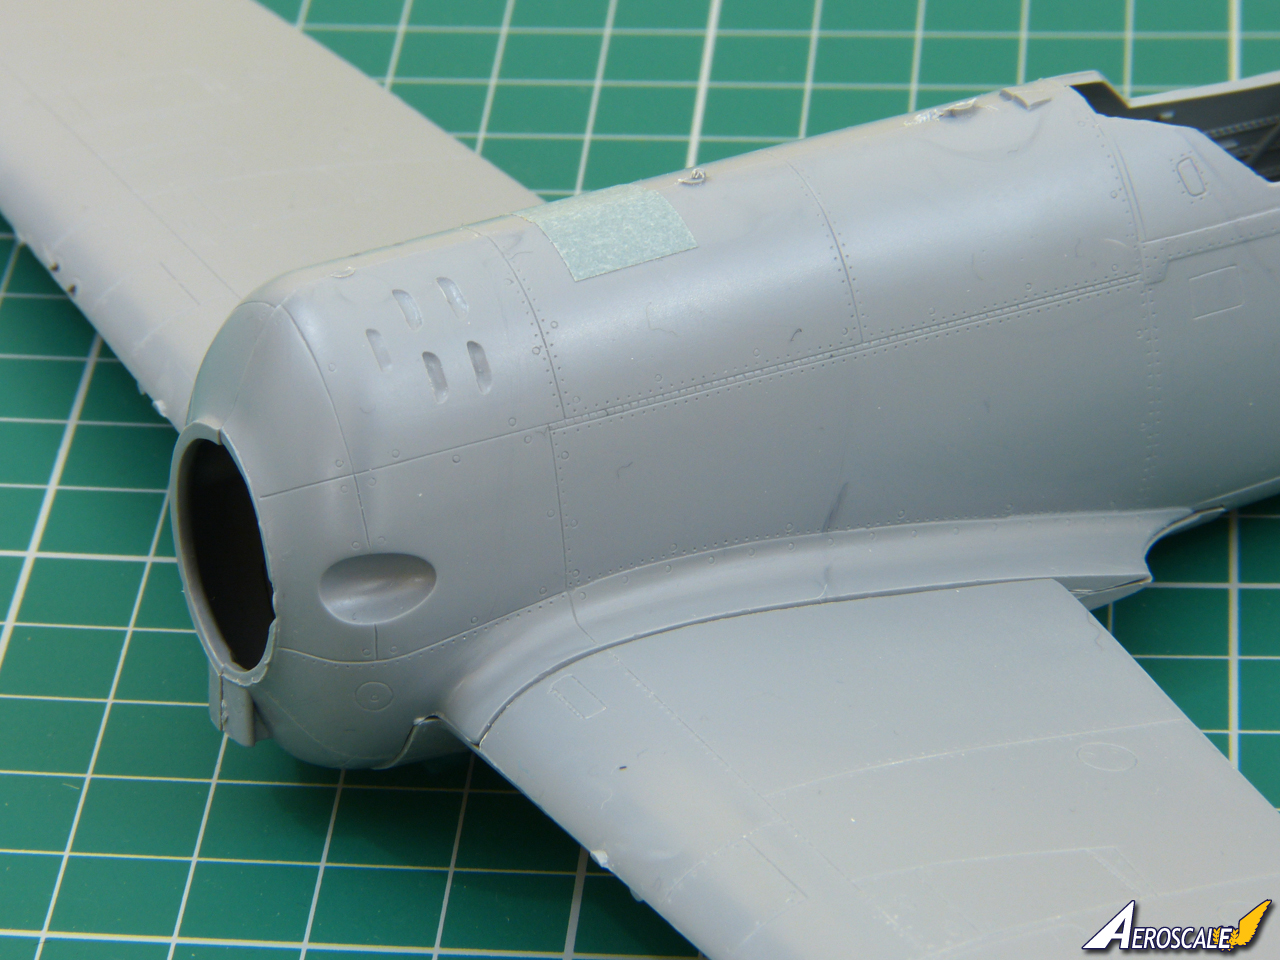
Now I can be confident the wings and fuselage will fit together, I'll get back to the interior and engine.
All the best
Rowan
World War II
Discuss WWII and the era directly before and after the war from 1935-1949.
Hosted by Rowan Baylis
FRROM 1:32 I.A.R.-80A
Posted: Thursday, January 11, 2018 - 02:47 AM UTC
Posted: Thursday, January 11, 2018 - 12:13 PM UTC
All is good then
Szmann
Netherlands Antilles
Joined: September 02, 2014
KitMaker: 1,977 posts
AeroScale: 295 posts
Joined: September 02, 2014
KitMaker: 1,977 posts
AeroScale: 295 posts
Posted: Thursday, January 11, 2018 - 09:36 PM UTC
Hi, Rowan!
I just catch up with this build. Very nice so far. I'm finishing this days the HB 1/48 IAR80.
Following with interest.
Cheers!
Gabriel
I just catch up with this build. Very nice so far. I'm finishing this days the HB 1/48 IAR80.
Following with interest.
Cheers!
Gabriel
Joel_W
Associate Editor
New York, United States
Joined: December 04, 2010
KitMaker: 11,666 posts
AeroScale: 7,410 posts
Joined: December 04, 2010
KitMaker: 11,666 posts
AeroScale: 7,410 posts
Posted: Friday, January 12, 2018 - 01:43 AM UTC
Rowan,
Nicely done with those spacers. Placed just right I can see that you'll get the fit just about perfect.
Joel
Nicely done with those spacers. Placed just right I can see that you'll get the fit just about perfect.
Joel
greif8
Bayern, Germany
Joined: January 17, 2006
KitMaker: 673 posts
AeroScale: 492 posts
Joined: January 17, 2006
KitMaker: 673 posts
AeroScale: 492 posts
Posted: Friday, January 12, 2018 - 03:18 PM UTC
Rowan, good sleuthing to find the fit issue and an elegant solution to getting the wing joints to line up.
Ernest
Ernest
Posted: Saturday, January 13, 2018 - 03:04 AM UTC
Cheers everyone
I aim to get back on the case tomorrow. The Klear-coat on the interior and engine has been curing for a couple of days while I've been tied up at Oxfam, so I'm keen start some weathering to bring out the details - nothing too extreme, because Radu Brinzan describes the IARs being pretty well looked after in their service careers.
@ Gabriel - post some pics of your HobbyBoss build on Aeroscale. Actually, I'll go one better - send us in a Review: we are always looking for new reviewers and it's a kit we've never covered.
All the best
Rowan
Posted: Saturday, January 13, 2018 - 11:37 PM UTC
Hi again
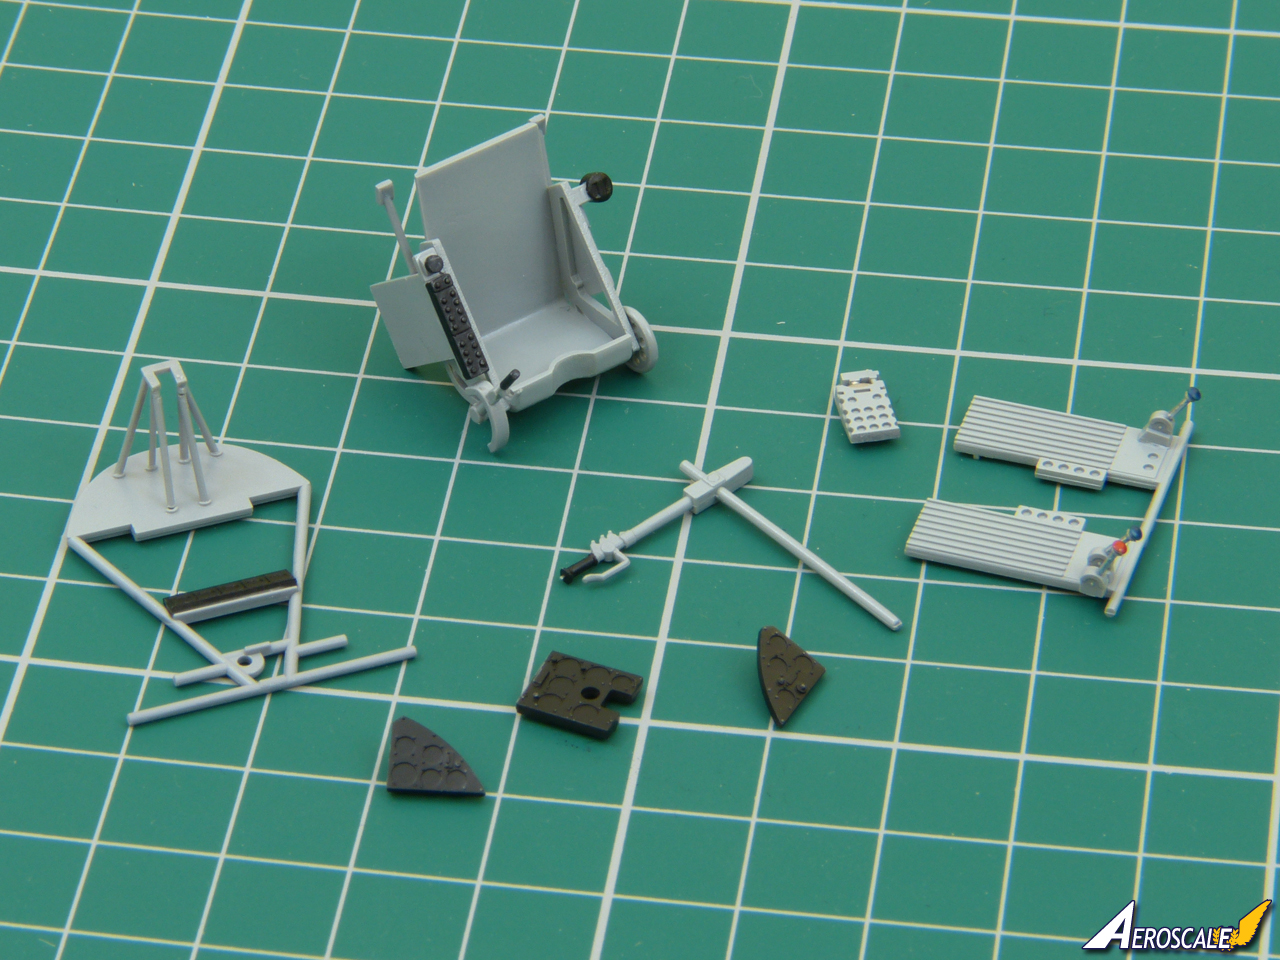
As promised, I had a tinker today. It ended up being a case of working on smaller details in the cockpit ahead of starting to weather things to bring it life, and starting to sort out the wiring for the engine. There really should be more at the back of the engine, but I won't bother because it won't be visible.
More soon.
All the best
Rowan
Szmann
Netherlands Antilles
Joined: September 02, 2014
KitMaker: 1,977 posts
AeroScale: 295 posts
Joined: September 02, 2014
KitMaker: 1,977 posts
AeroScale: 295 posts
Posted: Sunday, January 14, 2018 - 09:43 PM UTC
Hi, Rowan!
The wires in front won't be to visible either, because tje engine is set rather deep inside the cowling. But at 1/32 scale woths the effort, of course!
I was thinking to do a review on my 1/48 IAR80 but now I'm certain I will, given a few days to get it written. I have some 80 support photos, I reckon.
Cheers!
Gabriel
Joel_W
Associate Editor
New York, United States
Joined: December 04, 2010
KitMaker: 11,666 posts
AeroScale: 7,410 posts
Joined: December 04, 2010
KitMaker: 11,666 posts
AeroScale: 7,410 posts
Posted: Monday, January 15, 2018 - 12:23 AM UTC
Rowan,
I'm really impressed with the detailing you're doing on the K14-IV C32 engine. the one thing that struck me as being rather odd is that there is only one plug wire per cylinder, so I went looking for a picture of the real deal.
and indeed that's the case. Also the offsetting valve pushrods aren't something I'm use to seeing either.
Joel
Posted: Monday, January 15, 2018 - 02:21 AM UTC
Cheers Gabriel and Joel
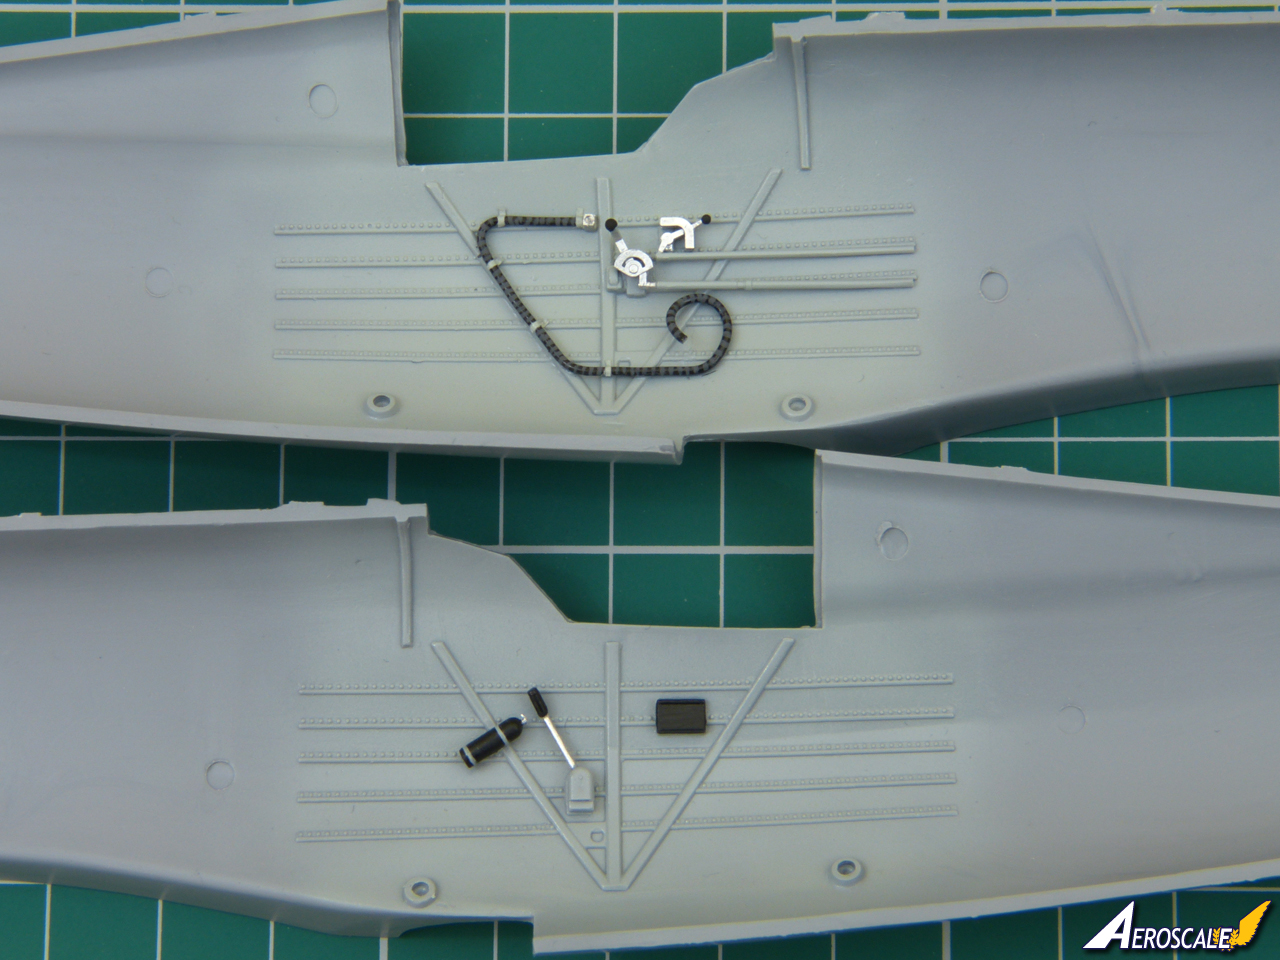
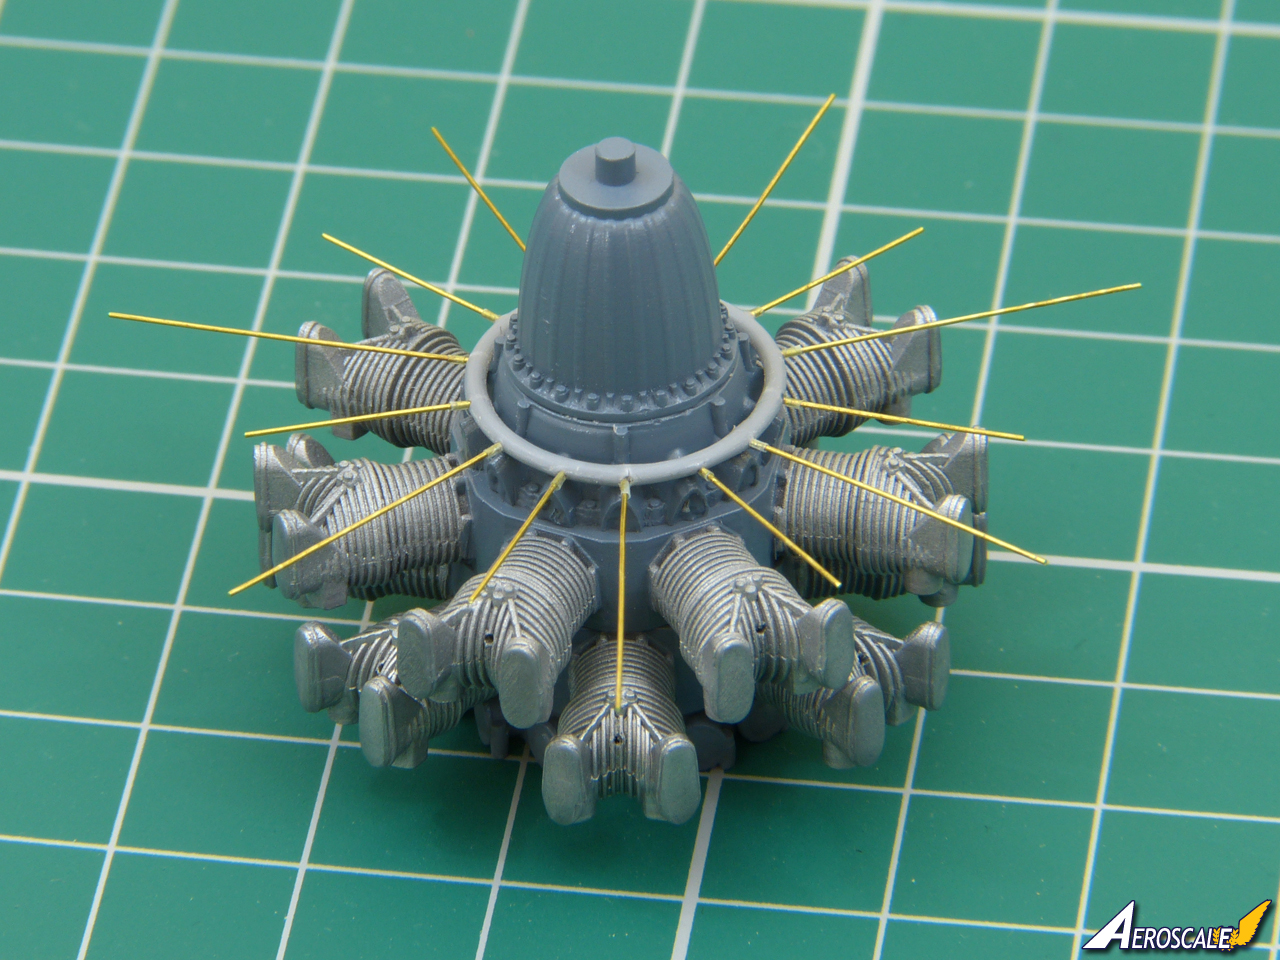
No - there's won't be much visible once the cowling's on. Maybe enough to know "something's in there"... but we'll see. I've done it partly for the love of extending the techniques I have up my sleeve, stretching a cotton-bud stalk over a flame to produce fine tubes for the connectors. It'll be fun to see how it looks when finished.
@ Gabriel - Nice one on preparing the review for us! It'll be great to have the HobbyBoss kit in the database.
@ Joel - You were right to do a double-take. On this family of engines the other wires come from a second ignition harness at the back of the engine and attach on the rear face of each cylinder. I'm not going to bother with those.
Some of my references show that the front harness probably shouldn't be a full ring, but I've left it as supplied in the kit because this is aiming to be pretty much OOB and I don't want to risk getting stalled and not being able to decide what to do.
All the best
Rowan
Joel_W
Associate Editor
New York, United States
Joined: December 04, 2010
KitMaker: 11,666 posts
AeroScale: 7,410 posts
Joined: December 04, 2010
KitMaker: 11,666 posts
AeroScale: 7,410 posts
Posted: Monday, January 15, 2018 - 03:08 AM UTC
Quoted Text
Cheers Gabriel and Joel
....
@ Joel - You were right to do a double-take. On this family of engines the other wires come from a second ignition harness at the back of the engine and attach on the rear face of each cylinder. I'm not going to bother with those.
Some of my references show that the front harness probably shouldn't be a full ring, but I've left it as supplied in the kit because this is aiming to be pretty much OOB and I don't want to risk getting stalled and not being able to decide what to do.
All the best
Rowan
Rowan,
Now that makes even more sense. So the duel ignition is from the back. I've heard of that before but I've never seen it up close and personal.
Joel
Posted: Monday, January 15, 2018 - 03:35 AM UTC
Hi Joel
The colour of the crankcase has also been fun tracking down... On Italian versions, it seems to be the warm grey in your picture, but the only shots I've found of an un-restored Romanian engine, it actually looks unpainted.
Eventually, I took the view that Radu Brinzan collaborated closely with Gilles at FFROM in preparing the kit, and I certainly wouldn't argue with him, so I went with the Blue-Grey as suggested in the instructions and I've used White Ensign's Gris Bleu Clair enamel to hopefully get me in the ballpark.
The way the ignition wires attach also differs in almost every shot I've found - so it's been very much a case of Aaaaghhh! - just make a call and do something and move on.
All the best
Rowan
thegirl
Alberta, Canada
Joined: January 19, 2008
KitMaker: 6,743 posts
AeroScale: 6,151 posts
Joined: January 19, 2008
KitMaker: 6,743 posts
AeroScale: 6,151 posts
Posted: Monday, January 15, 2018 - 05:19 AM UTC
I'm enjoying the direction this build is going ..better and better
Terri
Terri
Posted: Monday, January 15, 2018 - 12:38 PM UTC
That all looks very good and the photo of the engine does indeed show some unusual difference to what I would expect, so very nice to see the reference here, so thanks for that Joel
Posted: Tuesday, January 23, 2018 - 01:37 AM UTC
Hi again
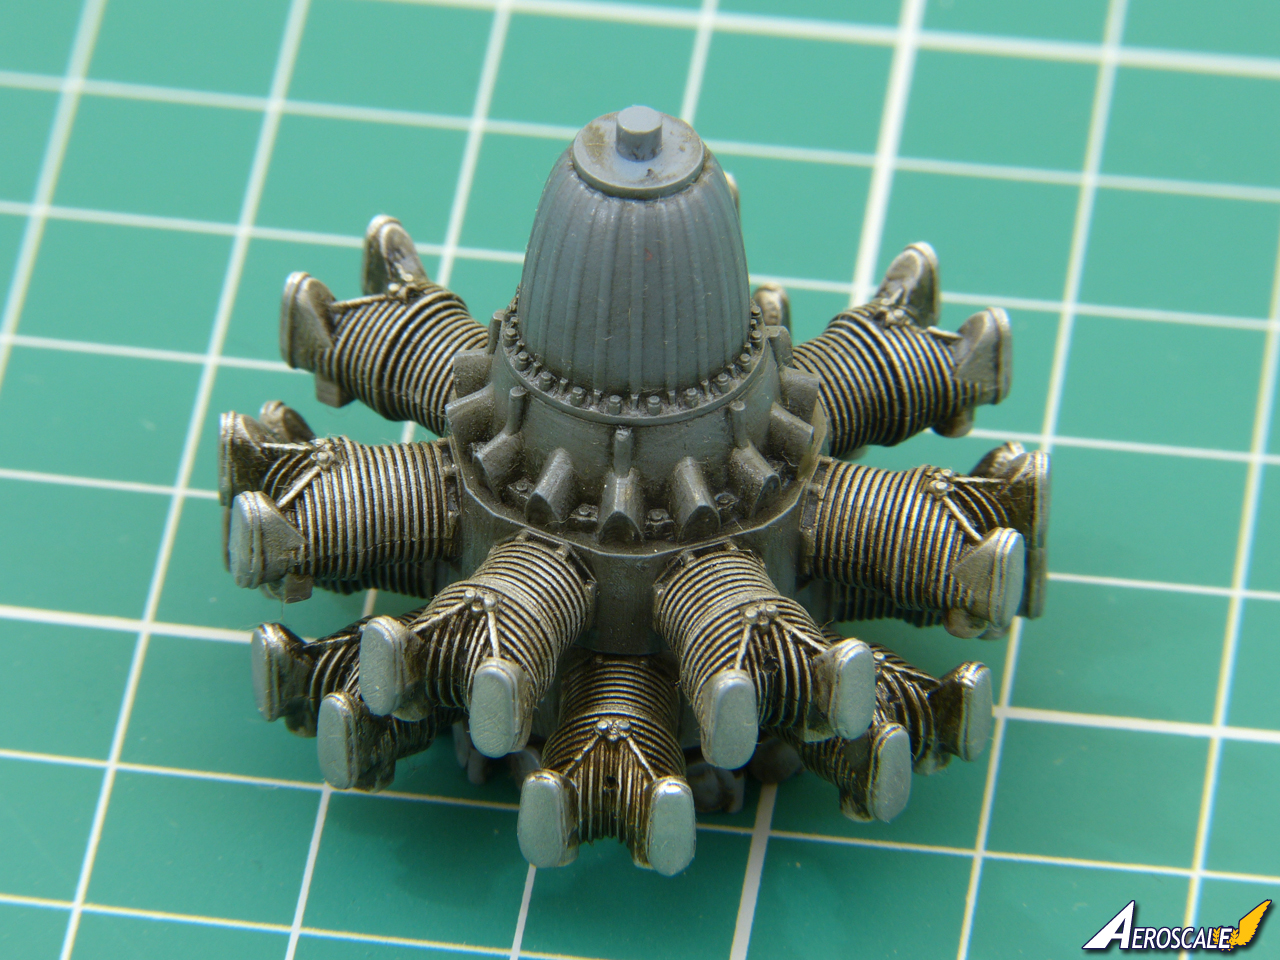
Just a very quick update to show I'm still pottering along slowly despite not having had much time at the workbench. I've got the first stage of weathering underway - neat oil-paint "dirt" applied and partially removed.
In this cold weather there's plenty of working time, so I'll knock it back and blend it a bit further and add some highlights before attaching the push-rods and wiring.
All the best
Rowan
Posted: Tuesday, January 23, 2018 - 12:36 PM UTC
That is looking good Rowan
I don't have a problem with work getting in the way of modelling but I'm still slacking! I need to crack on with some of my projects, especially my WWI stuff
Posted: Wednesday, August 01, 2018 - 12:01 AM UTC
Hi again
It's time to get back to my poor neglected IAR! I've been working solidly on commission projects but, even so, I can't believe it's been quite so long since I posted an update!
Anyway, I've finally got a window of opportunity to make some progress, so I'd best grab it!
Gilles at FROMM gave me a heads-up about assembling the cowling, so that's the obvious place to start again before I finish the engine. I think it's great when a manufacturer highlights an issue instead of trying to hide it.
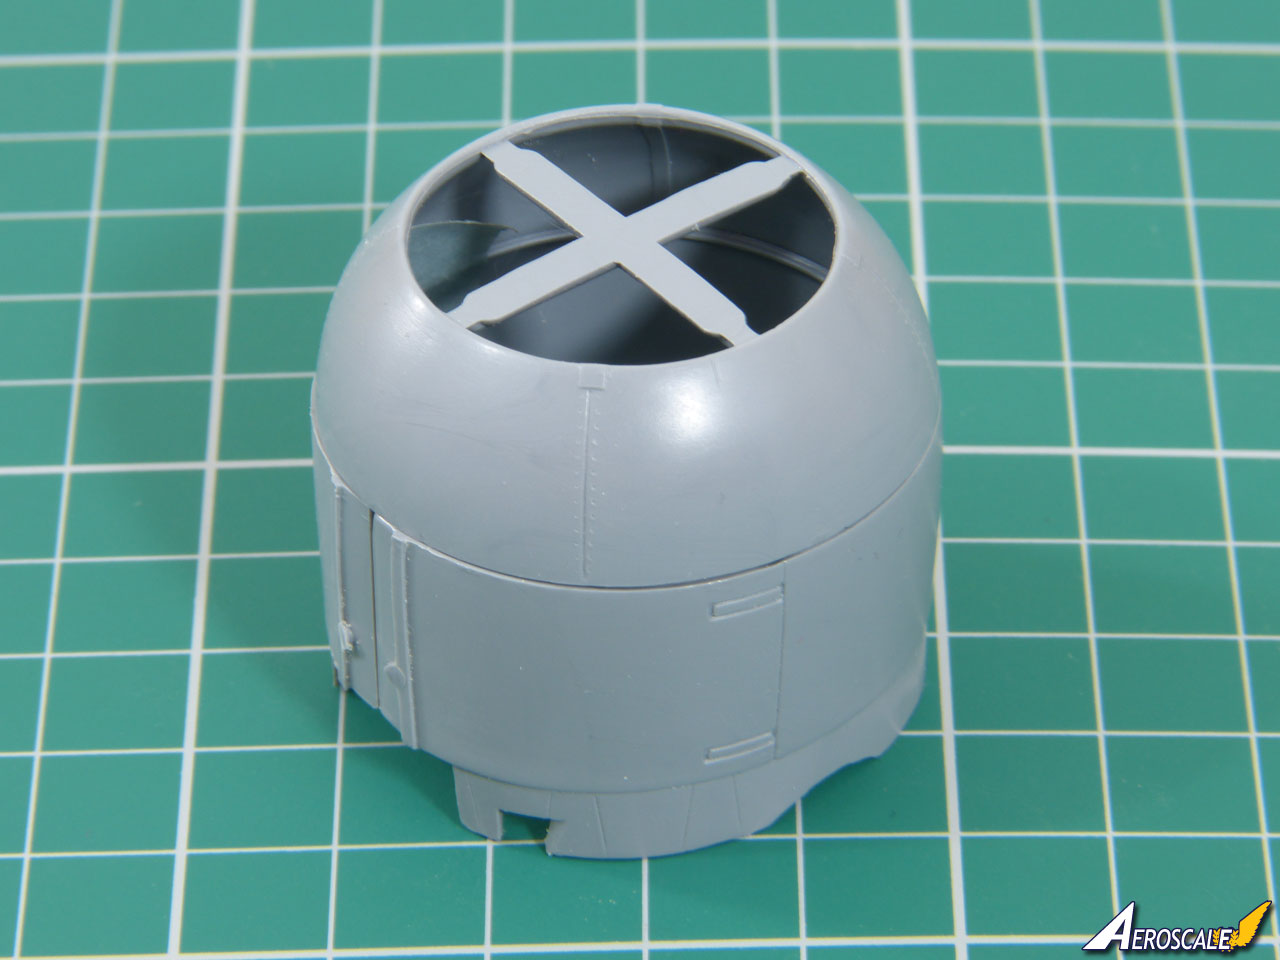
The main cowling parts actually fit together neatly enough (I've kept the cross-brace in place at this stage to ensure the front ring isn't at all distorted):
The fun starts when you add the engine into the equation - and this is what Gilles warned me about:
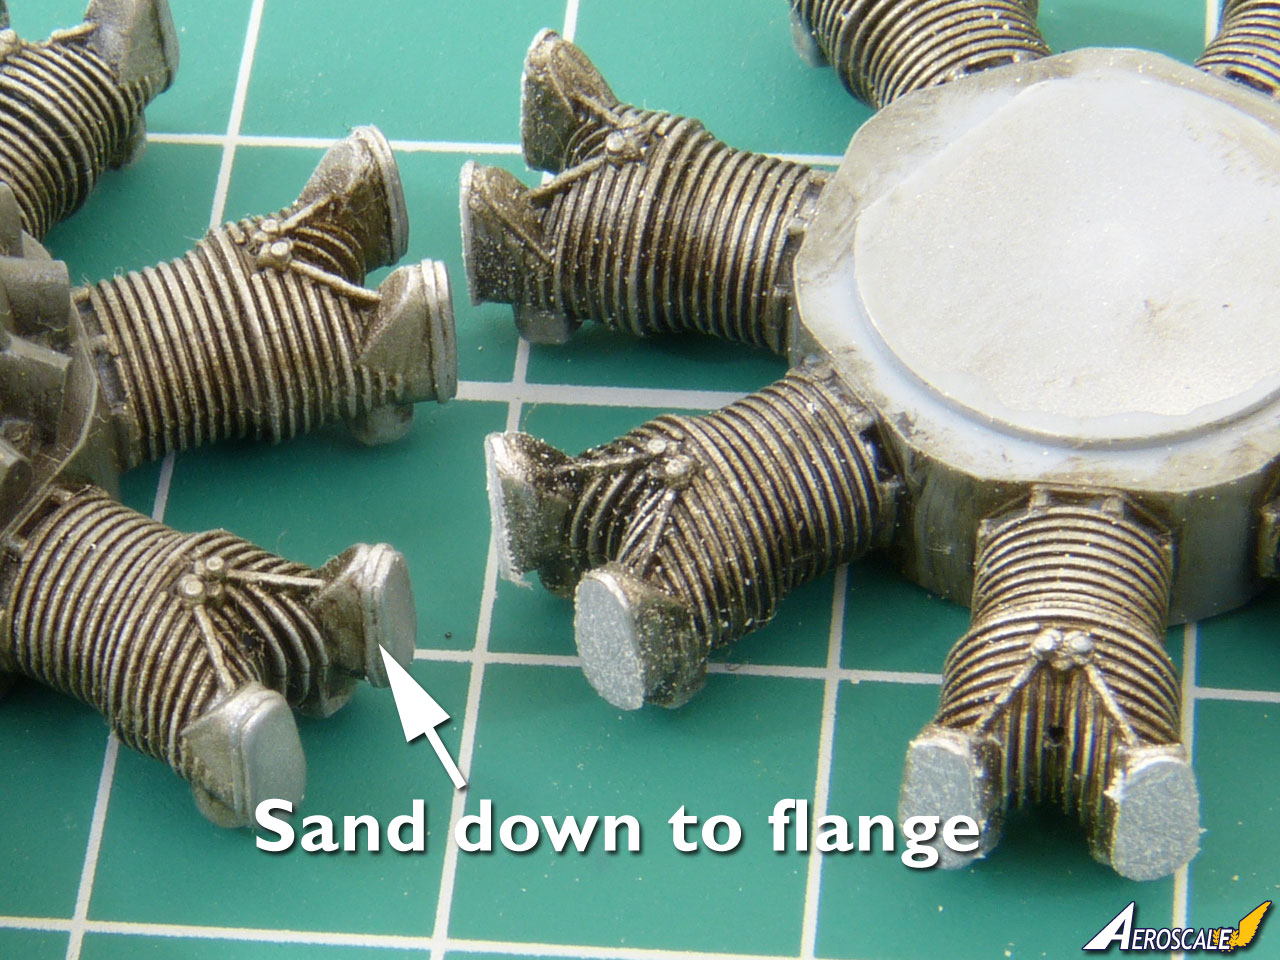
The reason is simple enough - the engine and cowling are both moulded true-to-scale, without taking the thickness of the cowl walls into account. So, the inside dimension of the cowl ends up too tight. That sounds like a mistake, but I'd far rather have a correctly sized engine. I don't intend to display the engine with the cowl panels off - but, if I did, I'd want the engine accurately to scale - not shrunk to fit inside the cowling.
I guess you could maybe thin down the cowls, but it would be risky and might not totally fix the issue. A much easier solution will be to trim the end of each cylinder until the cowl halves close around the engine. As we've noted before, not much will be visible inside the cowling, so the "cheat" won't show.
More before too long.
All the best
Rowan
Joel_W
Associate Editor
New York, United States
Joined: December 04, 2010
KitMaker: 11,666 posts
AeroScale: 7,410 posts
Joined: December 04, 2010
KitMaker: 11,666 posts
AeroScale: 7,410 posts
Posted: Wednesday, August 01, 2018 - 01:53 AM UTC
Rowan,
Wow, that's some break between updates. Good thing I really like you
That's some space between the cowling halves. Grinding down the tops of the valve rocker arm covers seem the most logical way to go. Especially, if the halves once joined mates with the fuselage correctly.
Joel
Wow, that's some break between updates. Good thing I really like you
That's some space between the cowling halves. Grinding down the tops of the valve rocker arm covers seem the most logical way to go. Especially, if the halves once joined mates with the fuselage correctly.
Joel
Posted: Wednesday, August 01, 2018 - 02:23 AM UTC
Cheers Joel
It's good to have the IAR back on the bench.
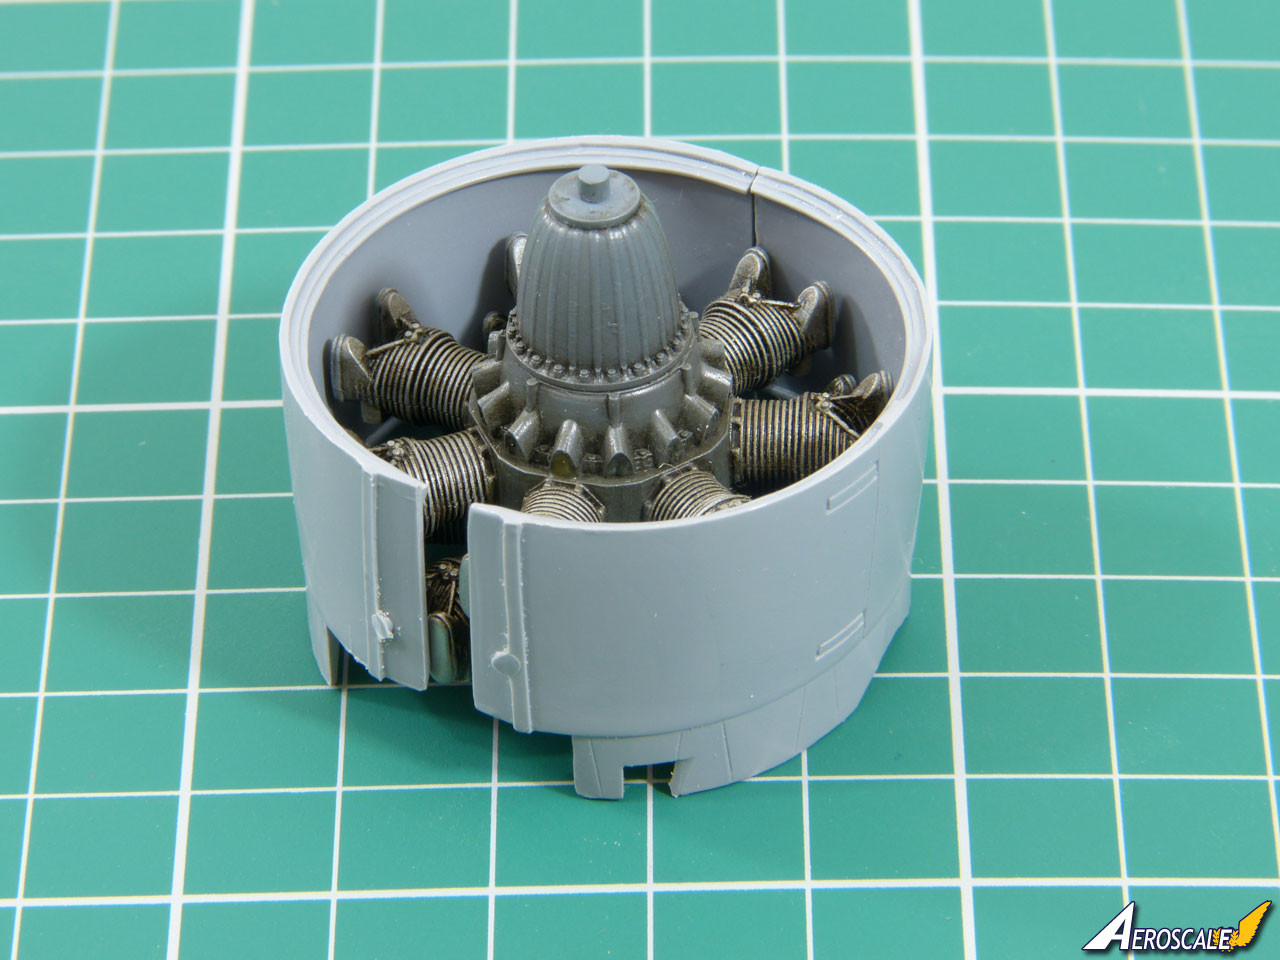
In case butchering the rocker covers sounds drastic, the actual amount of plastic you need to remove isn't much. A little sanding goes a long way, because the effect is doubled by being on opposite sides of the engine.
There's a flange which makes a handy reference point which I used my coarsest sanding stick to file down to:
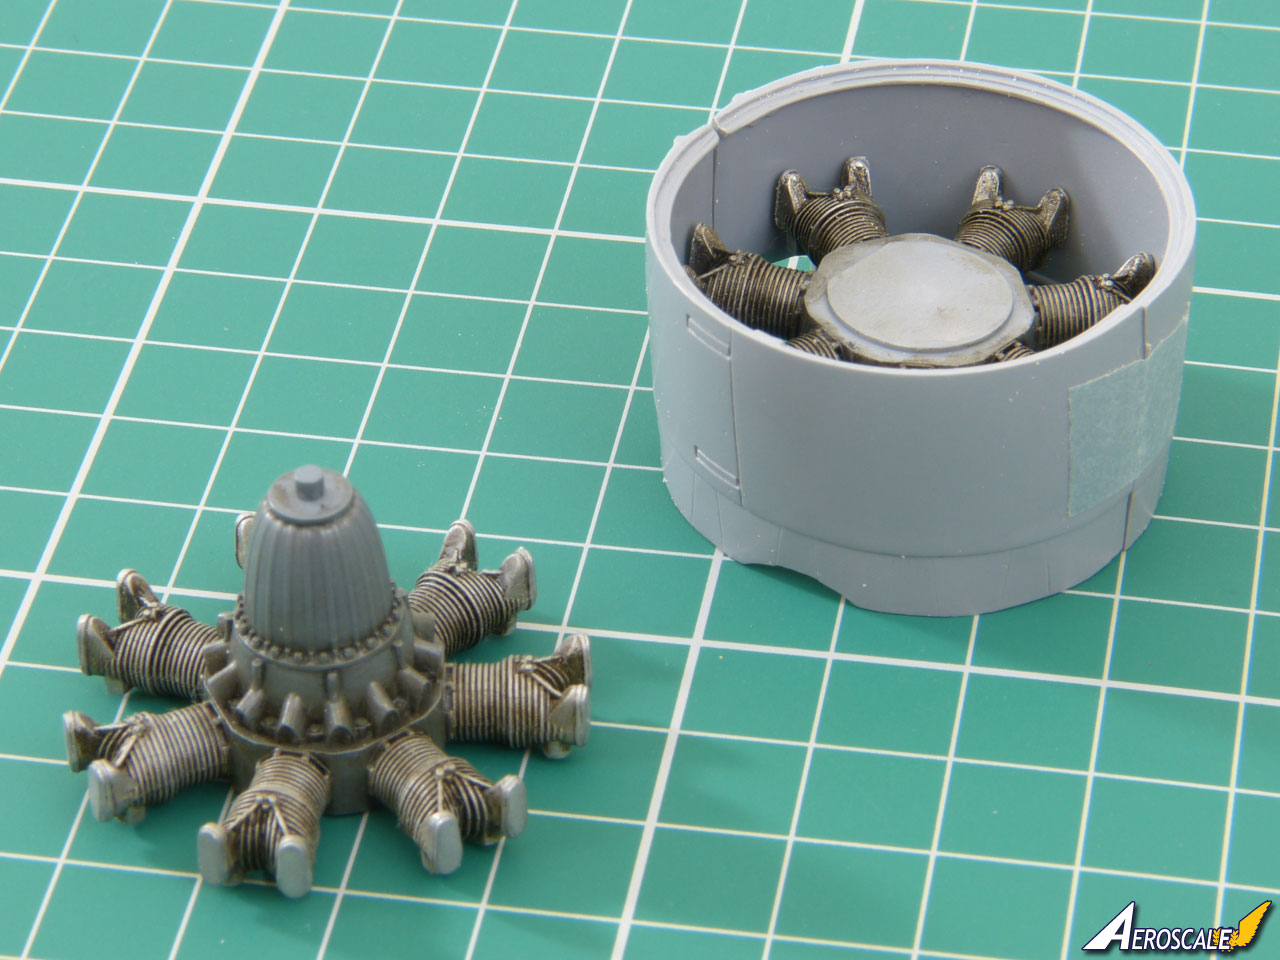
That's really enough - the cowl closes now:
So, I'll do the same on the front row of cylinders and clean things up with a fine sander and that should be job done...
All the best
Rowan
Joel_W
Associate Editor
New York, United States
Joined: December 04, 2010
KitMaker: 11,666 posts
AeroScale: 7,410 posts
Joined: December 04, 2010
KitMaker: 11,666 posts
AeroScale: 7,410 posts
Posted: Wednesday, August 01, 2018 - 05:15 AM UTC
Rowan,
Excellent decision for sure. The cowl closed up looks perfect as does the valve rocker arm covers. Have you dry fitted the full cowl to the fuselage yet just to make sure everything aligns correctly?
Joel
Excellent decision for sure. The cowl closed up looks perfect as does the valve rocker arm covers. Have you dry fitted the full cowl to the fuselage yet just to make sure everything aligns correctly?
Joel
Szmann
Netherlands Antilles
Joined: September 02, 2014
KitMaker: 1,977 posts
AeroScale: 295 posts
Joined: September 02, 2014
KitMaker: 1,977 posts
AeroScale: 295 posts
Posted: Wednesday, August 01, 2018 - 08:37 AM UTC
Hi, Rowan!
Glad to see you bouncing back with this build.
The solution you found for the cowling fitting issue it's perhaps the wisest one - it has no visible effect on the completed model yet allows perfect alignment with the body. Well done!
Gabriel
Glad to see you bouncing back with this build.
The solution you found for the cowling fitting issue it's perhaps the wisest one - it has no visible effect on the completed model yet allows perfect alignment with the body. Well done!
Gabriel
Planenuts
Ohio, United States
Joined: December 16, 2005
KitMaker: 45 posts
AeroScale: 45 posts
Joined: December 16, 2005
KitMaker: 45 posts
AeroScale: 45 posts
Posted: Wednesday, August 01, 2018 - 11:45 PM UTC
Sadly I run into the same issue every time I use one Vectors lovely engines and many times have ended up grinding off way more than you did. Great work so far, makes me want to start on my 81.
Posted: Thursday, August 02, 2018 - 07:51 AM UTC
Quoted Text
Sadly I run into the same issue every time I use one Vectors lovely engines and many times have ended up grinding off way more than you did. Great work so far, makes me want to start on my 81.
Hi Gary - Ouch! Sergey's resin parts and kits are just gorgeous, so it's extra painful to have to hack them down to fit! But that is the price of having things correctly scaled, and I think it's worth paying.
@ Joel - The way the kit's designed, the cowl fits around the engine and doesn't actually touch the fuselage. A dry fit shows the engine sits nice and square so, touch wood, all should be good.
I hope to get a bit more done tomorrow, but I'm going to do my usual trick of darting around in a build and, now I'm happy the engine will fit in the cowling, I'll resume work on the cockpit.
Don't worry - I don't think anybody's ever accused me of being logical in how I build kits!
All the best
Rowan
Posted: Friday, August 03, 2018 - 07:36 AM UTC
Hi again
I had a tinker, but there's no progress to show - today was more about a refresher course on how the cockpit goes together and getting re-acquainted with where I'd got to.
Sometimes you go back to a build after a break and instantly spot things you'd have done differently and start undoing stuff, but (touch wood...) it all looks in reasonable shape to crack on with. My target for Sunday is to get the cockpit pretty much done, so that I can join the fuselage halves.
All the best
Rowan
Posted: Tuesday, August 07, 2018 - 08:41 AM UTC
Hi again
Well - I pretty much met my target... except for the fact that I couldn't find my stash of lead wire to add some cabling in the "office".
I've ordered some more, which is due to arrive on Friday, so I've lost almost a week through having a messy workshop!
Will I learn the lesson from this?... If I'm honest, probably not. I've always been hopelessly untidy.
All the best
Rowan
Well - I pretty much met my target... except for the fact that I couldn't find my stash of lead wire to add some cabling in the "office".
I've ordered some more, which is due to arrive on Friday, so I've lost almost a week through having a messy workshop!
Will I learn the lesson from this?... If I'm honest, probably not. I've always been hopelessly untidy.
All the best
Rowan