_GOTOBOTTOM
World War II
Discuss WWII and the era directly before and after the war from 1935-1949.
Hosted by Rowan Baylis
Early FineMolds 1/48 Claudes
rdt1953
_VISITCOMMUNITY
New Jersey, United States
Joined: February 06, 2015
KitMaker: 1,098 posts
AeroScale: 900 posts
Posted: Sunday, February 18, 2018 - 03:15 AM UTC
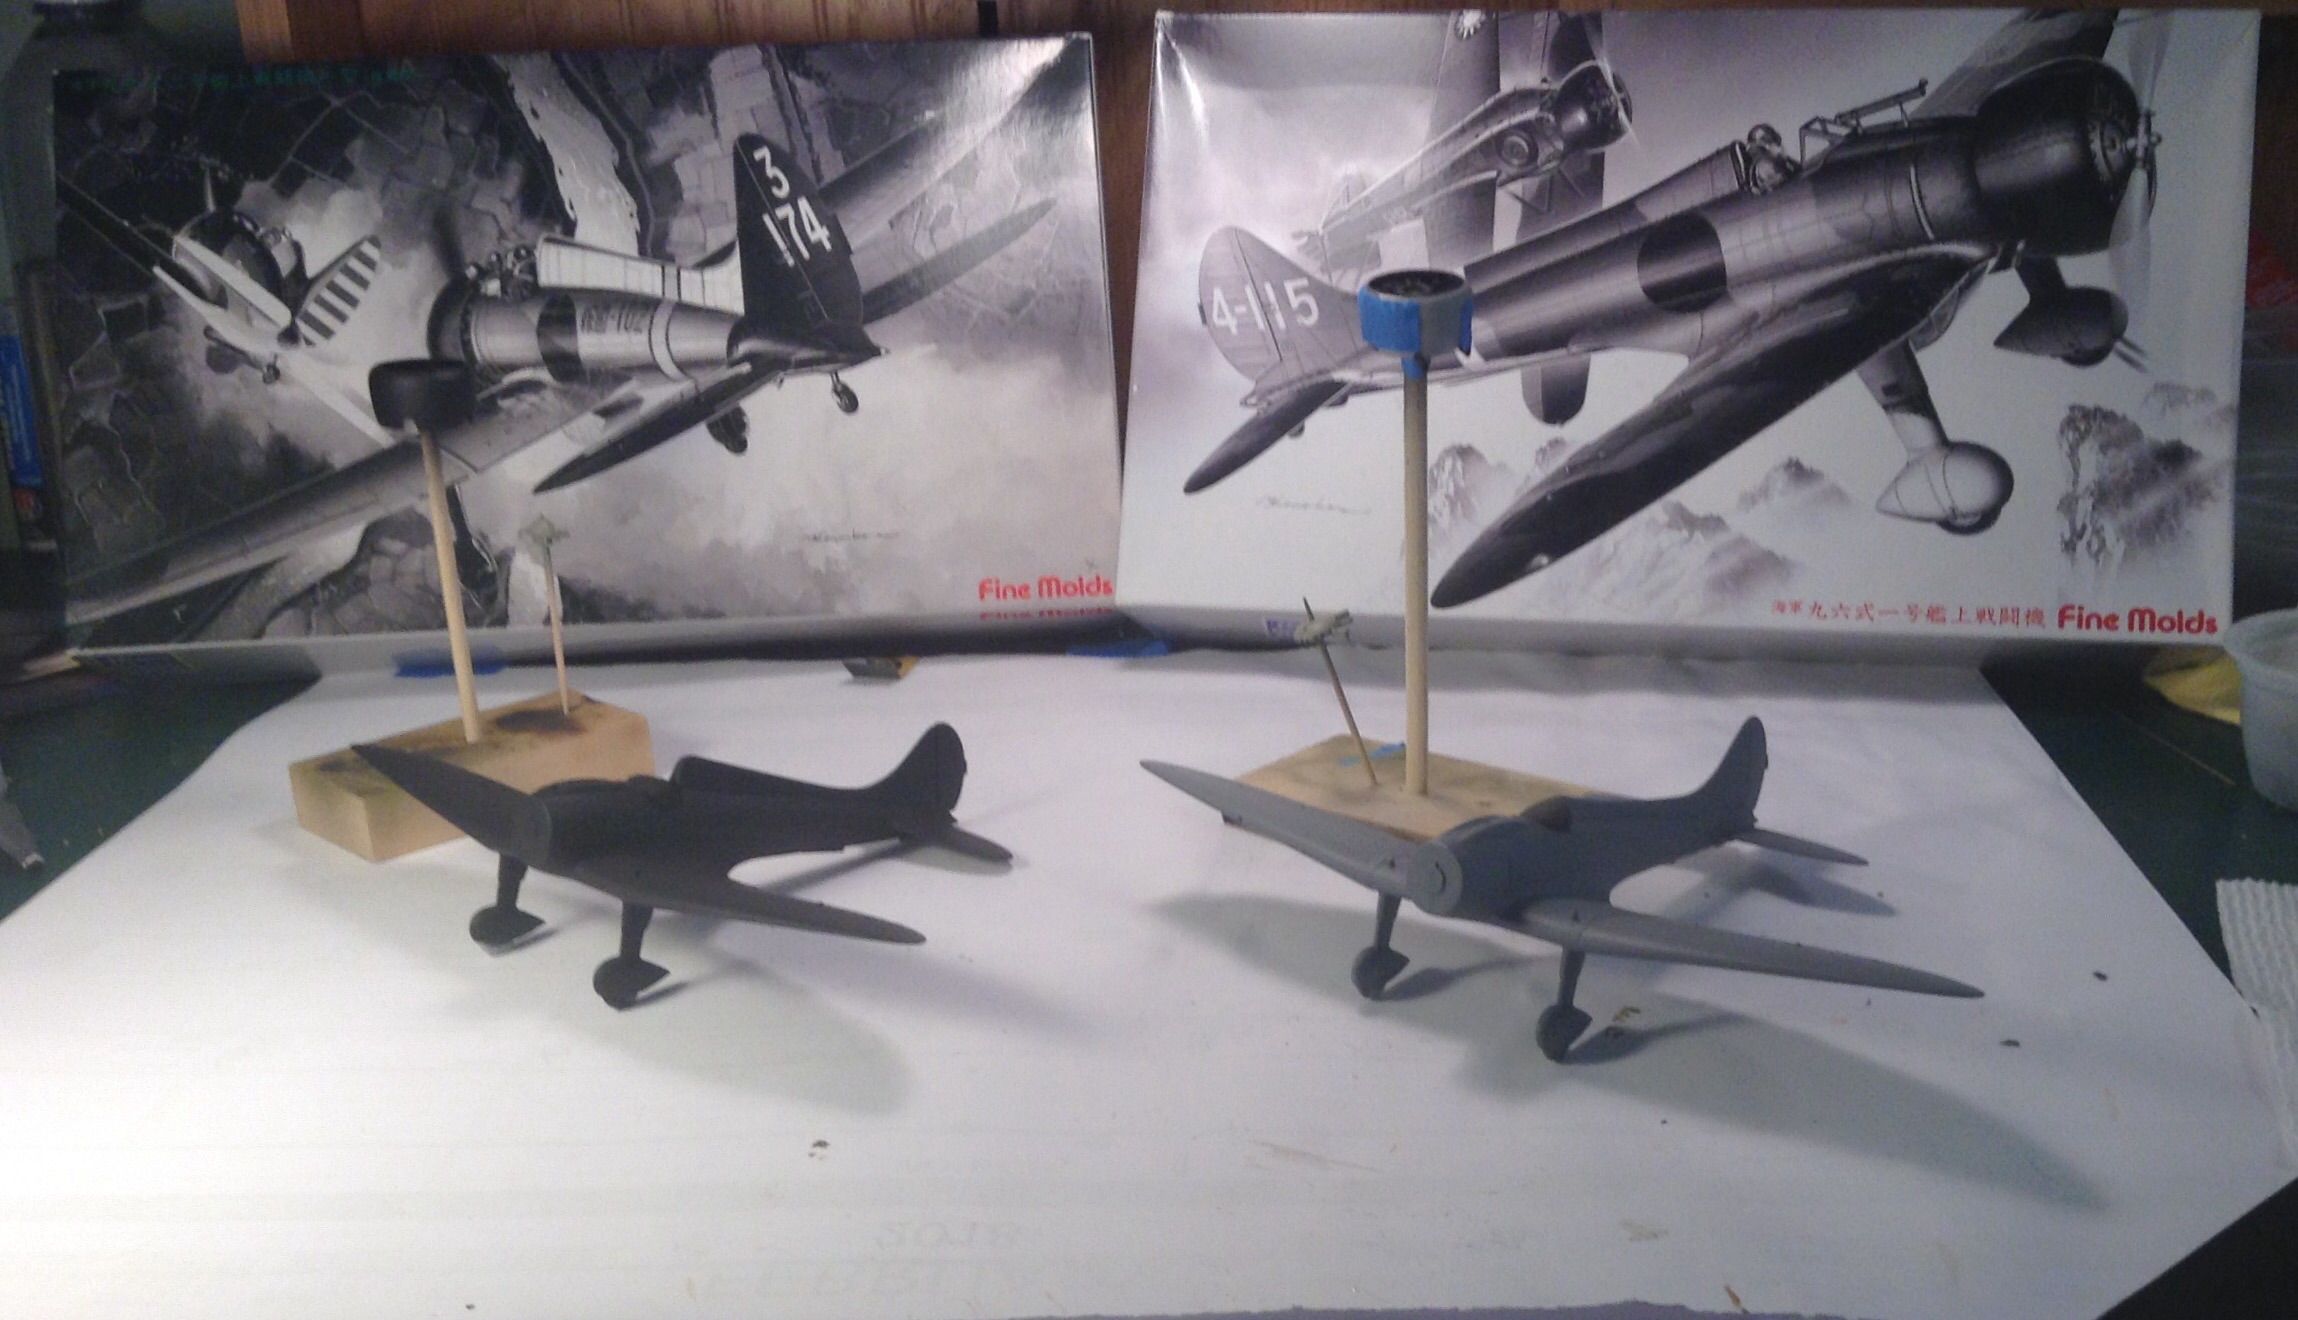
I had been working on these on and off during the Hayabusa build so I will post a few pics now and then as I wrap them up. Battling some air brush issues at the moment so progress will be spotty till that gets sorted out.


I built one of the Classic Airframes Claudes a while back and these first generation FineMolds kits have the same feel- no shake the box and dump out a finished kit but fun none the less. They include in a somewhat gimmicky fashion white metal parts - engine , exhausts , seat and a few other detail items . I don't know if they did this for snob appeal or if it decreased their tooling costs - I guess you have to embrace this as part of this genre but frankly styrene would be just as good IMHO and easier. FineMolds must agree as their later kits are all plastic.

More to come - Richard
Joel_W
Staff MemberAssociate Editor
AUTOMODELER
_VISITCOMMUNITY
New York, United States
Joined: December 04, 2010
KitMaker: 11,666 posts
AeroScale: 7,410 posts
Posted: Sunday, February 18, 2018 - 09:06 PM UTC
Richard,
glad to see that you have a few other kits in the works. Looking forward to following both along to completion.

What's the issue with your AB? Maybe we can help you over that hump?
Joel
rdt1953
_VISITCOMMUNITY
New Jersey, United States
Joined: February 06, 2015
KitMaker: 1,098 posts
AeroScale: 900 posts
Posted: Sunday, February 18, 2018 - 10:12 PM UTC

Quoted Text

Richard,
glad to see that you have a few other kits in the works. Looking forward to following both along to completion.

What's the issue with your AB? Maybe we can help you over that hump?
Joel


Joel - you can read my thread in network forums - Modeling in General - Badger Airbrush won't feed - sorry I can't provide you with a link but the http code isn't displaying. It's going off to Badger tomorrow. I have other brushes to use but they are siphon feed and I like to spray at the lower pressure of the gravity feed brush - plus cleanup is a pain and you need more paint in the cup .

Baffled- Richard
rdt1953
_VISITCOMMUNITY
New Jersey, United States
Joined: February 06, 2015
KitMaker: 1,098 posts
AeroScale: 900 posts
Posted: Sunday, March 04, 2018 - 03:39 AM UTC
A little progress to post-

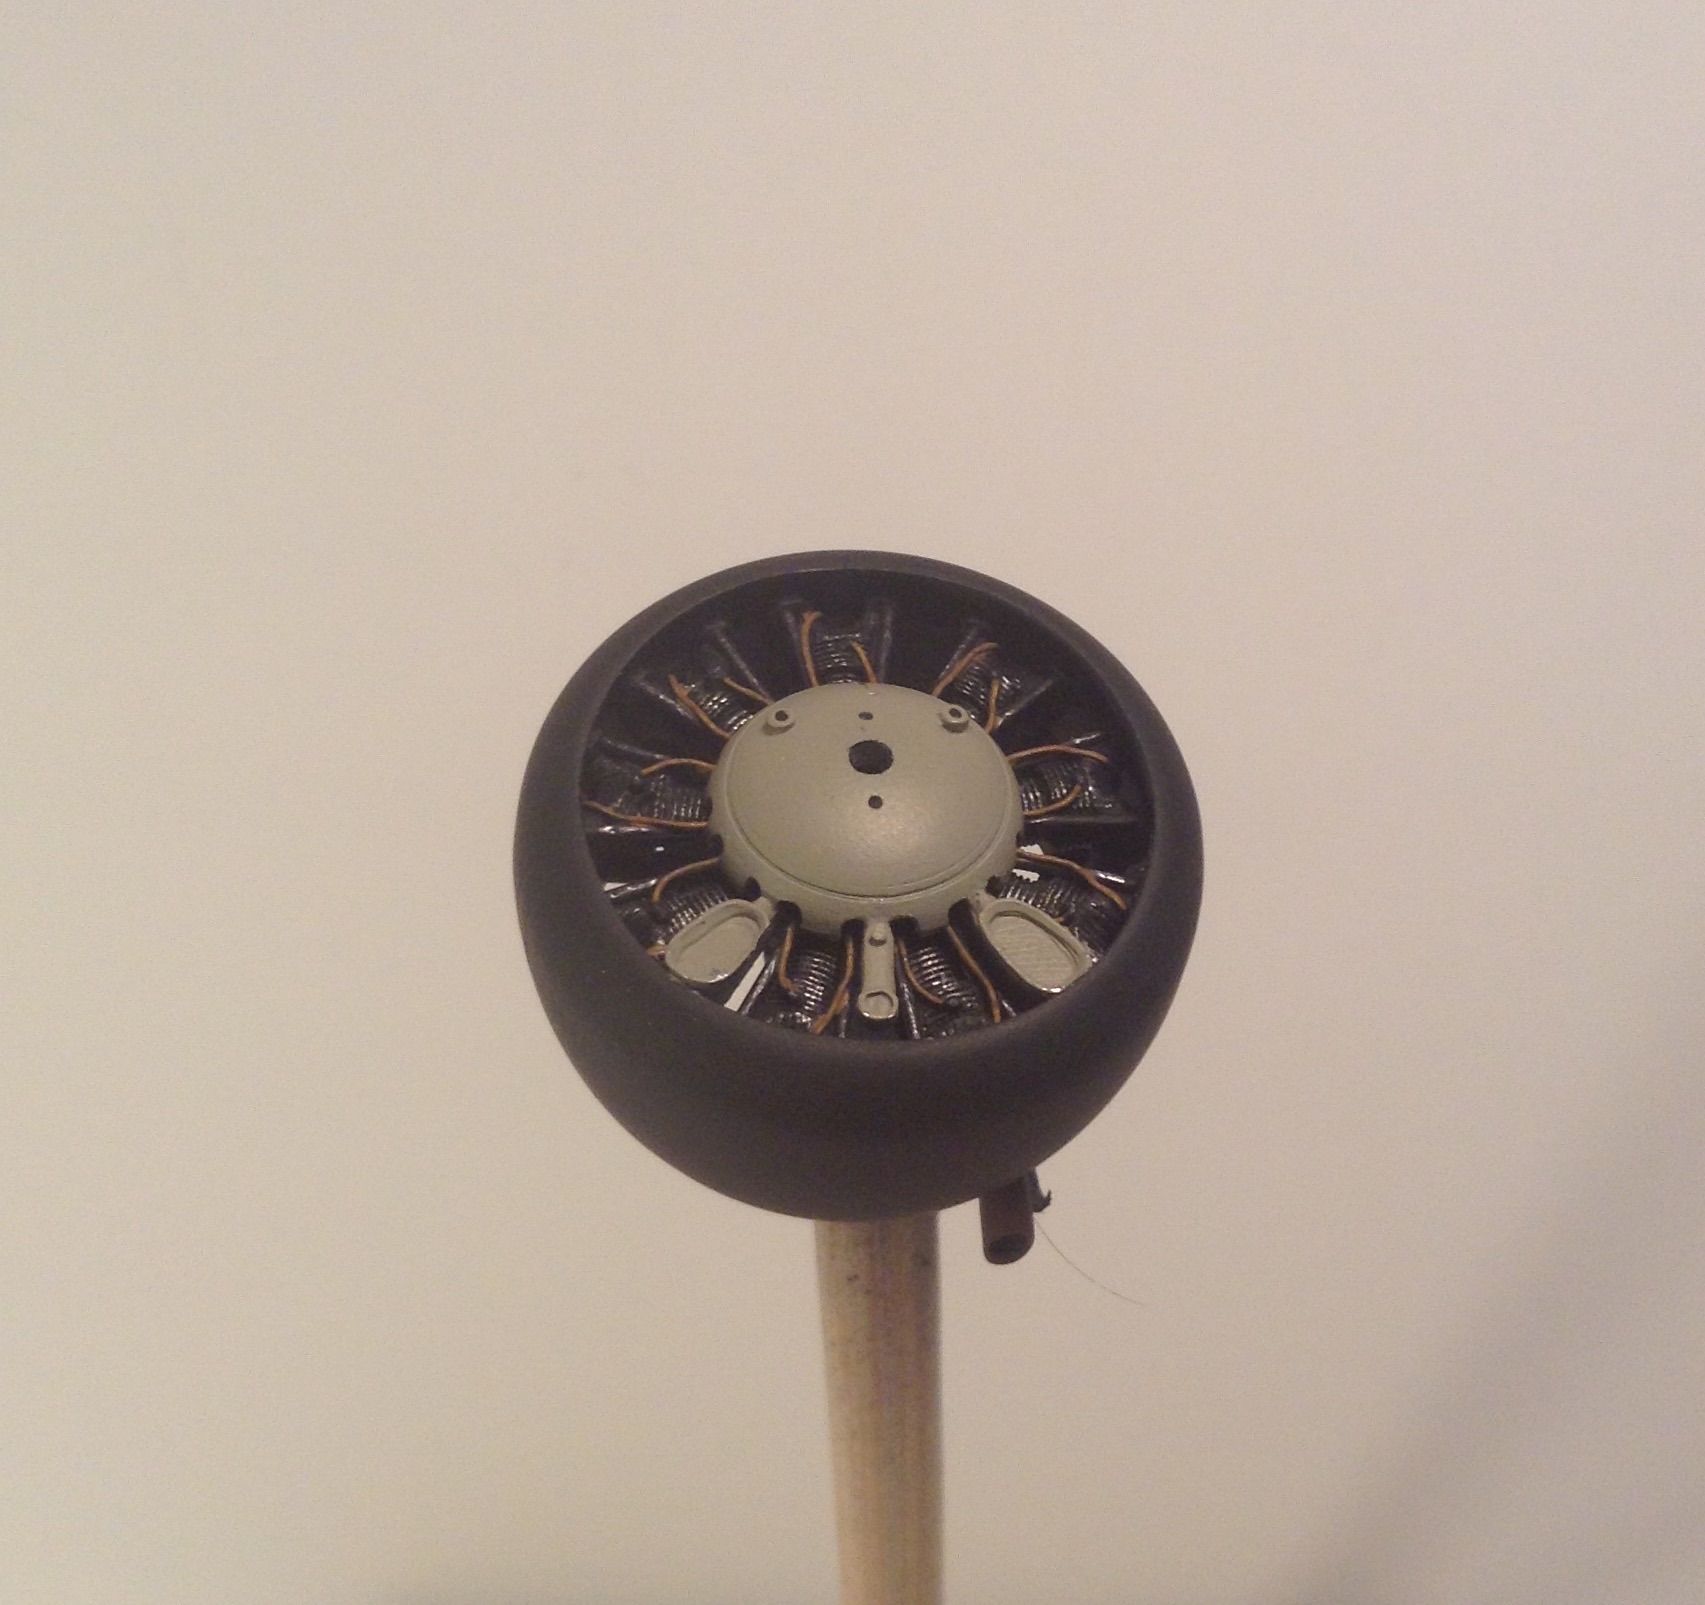
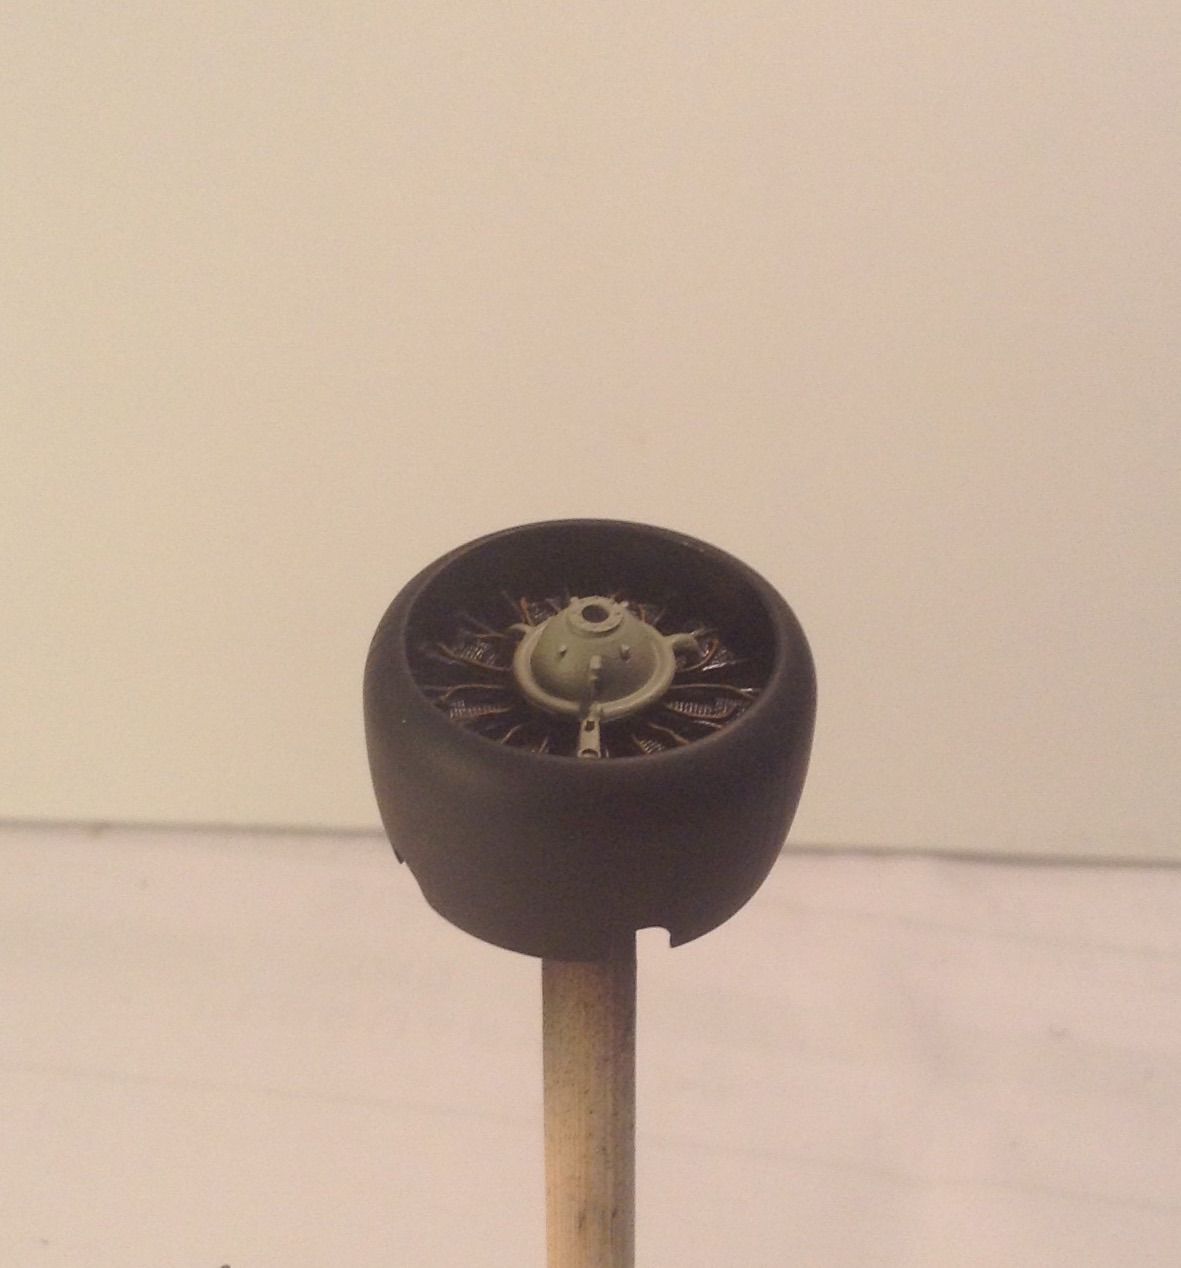
The cowlings are together entrapping the white metal engines - not the best of fits nor the most positive location/registration of the engines compounded by the difficulties of bonding the dissimilar materials but it got done. A little CA here , epoxy there seems to have done it. Paint is Stynylrez black primer - cylinder finning/pushrod tubes rubbed with lead pencil - ignition leads picked out in brown. Crankcase bells done in Vallejo IJN Ash Grey .Waiting for my airbrush to return from Badger to finish paint cowl rings.

Here is A5M1 unit -


And A5M2A unit -


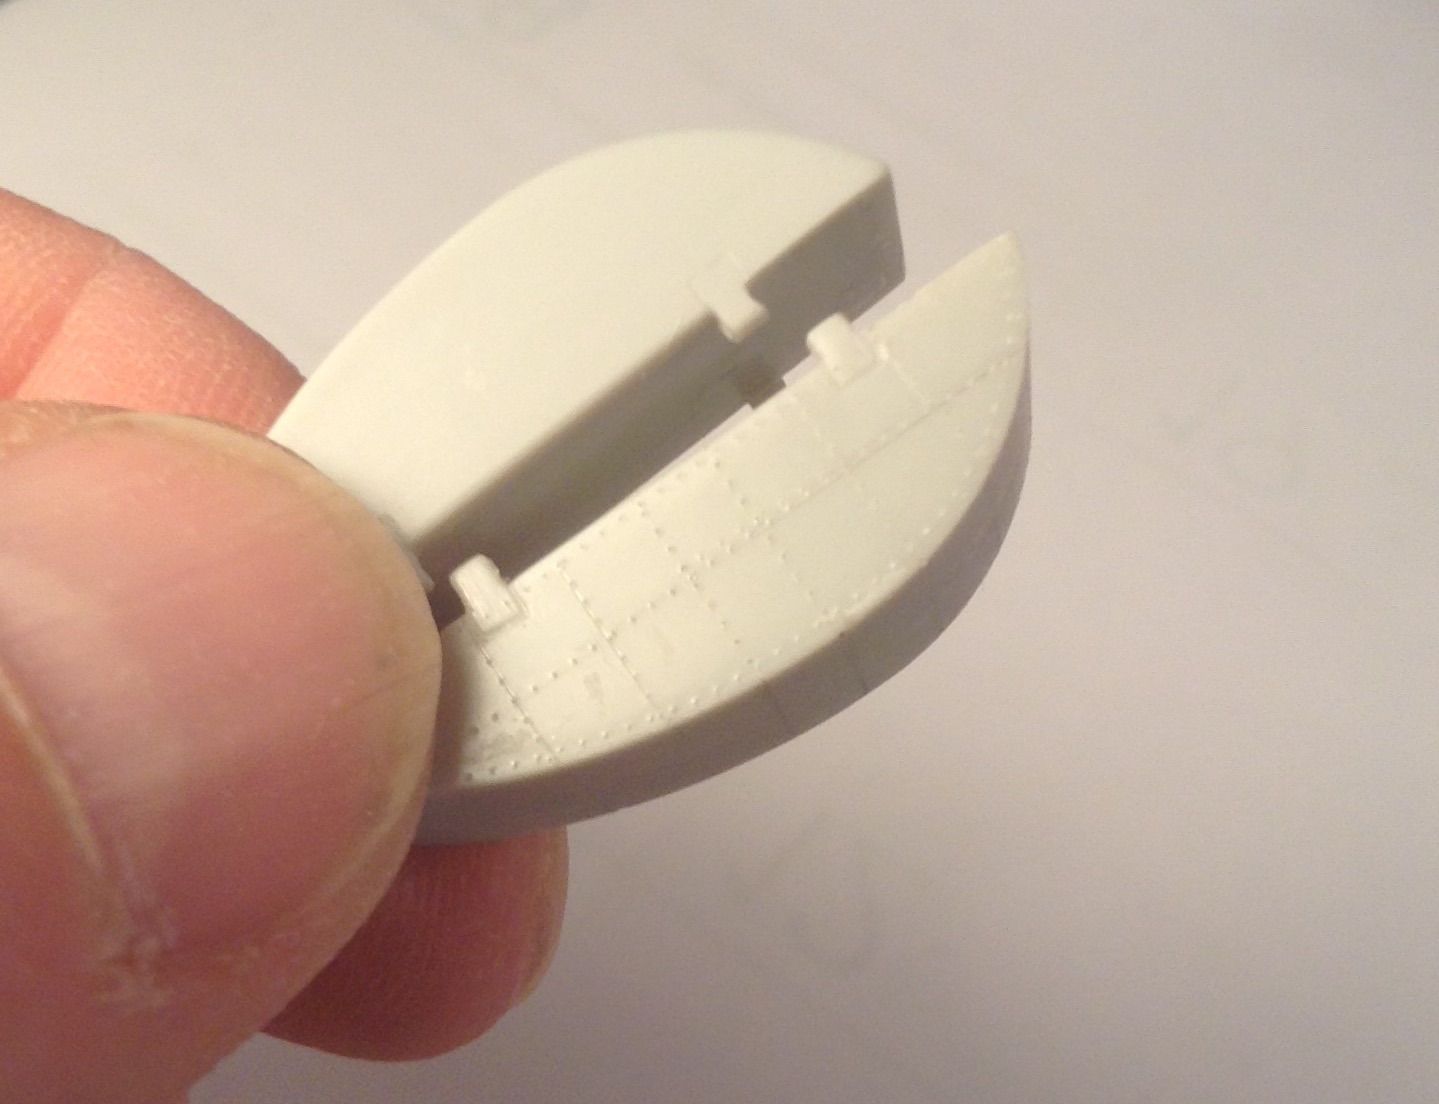
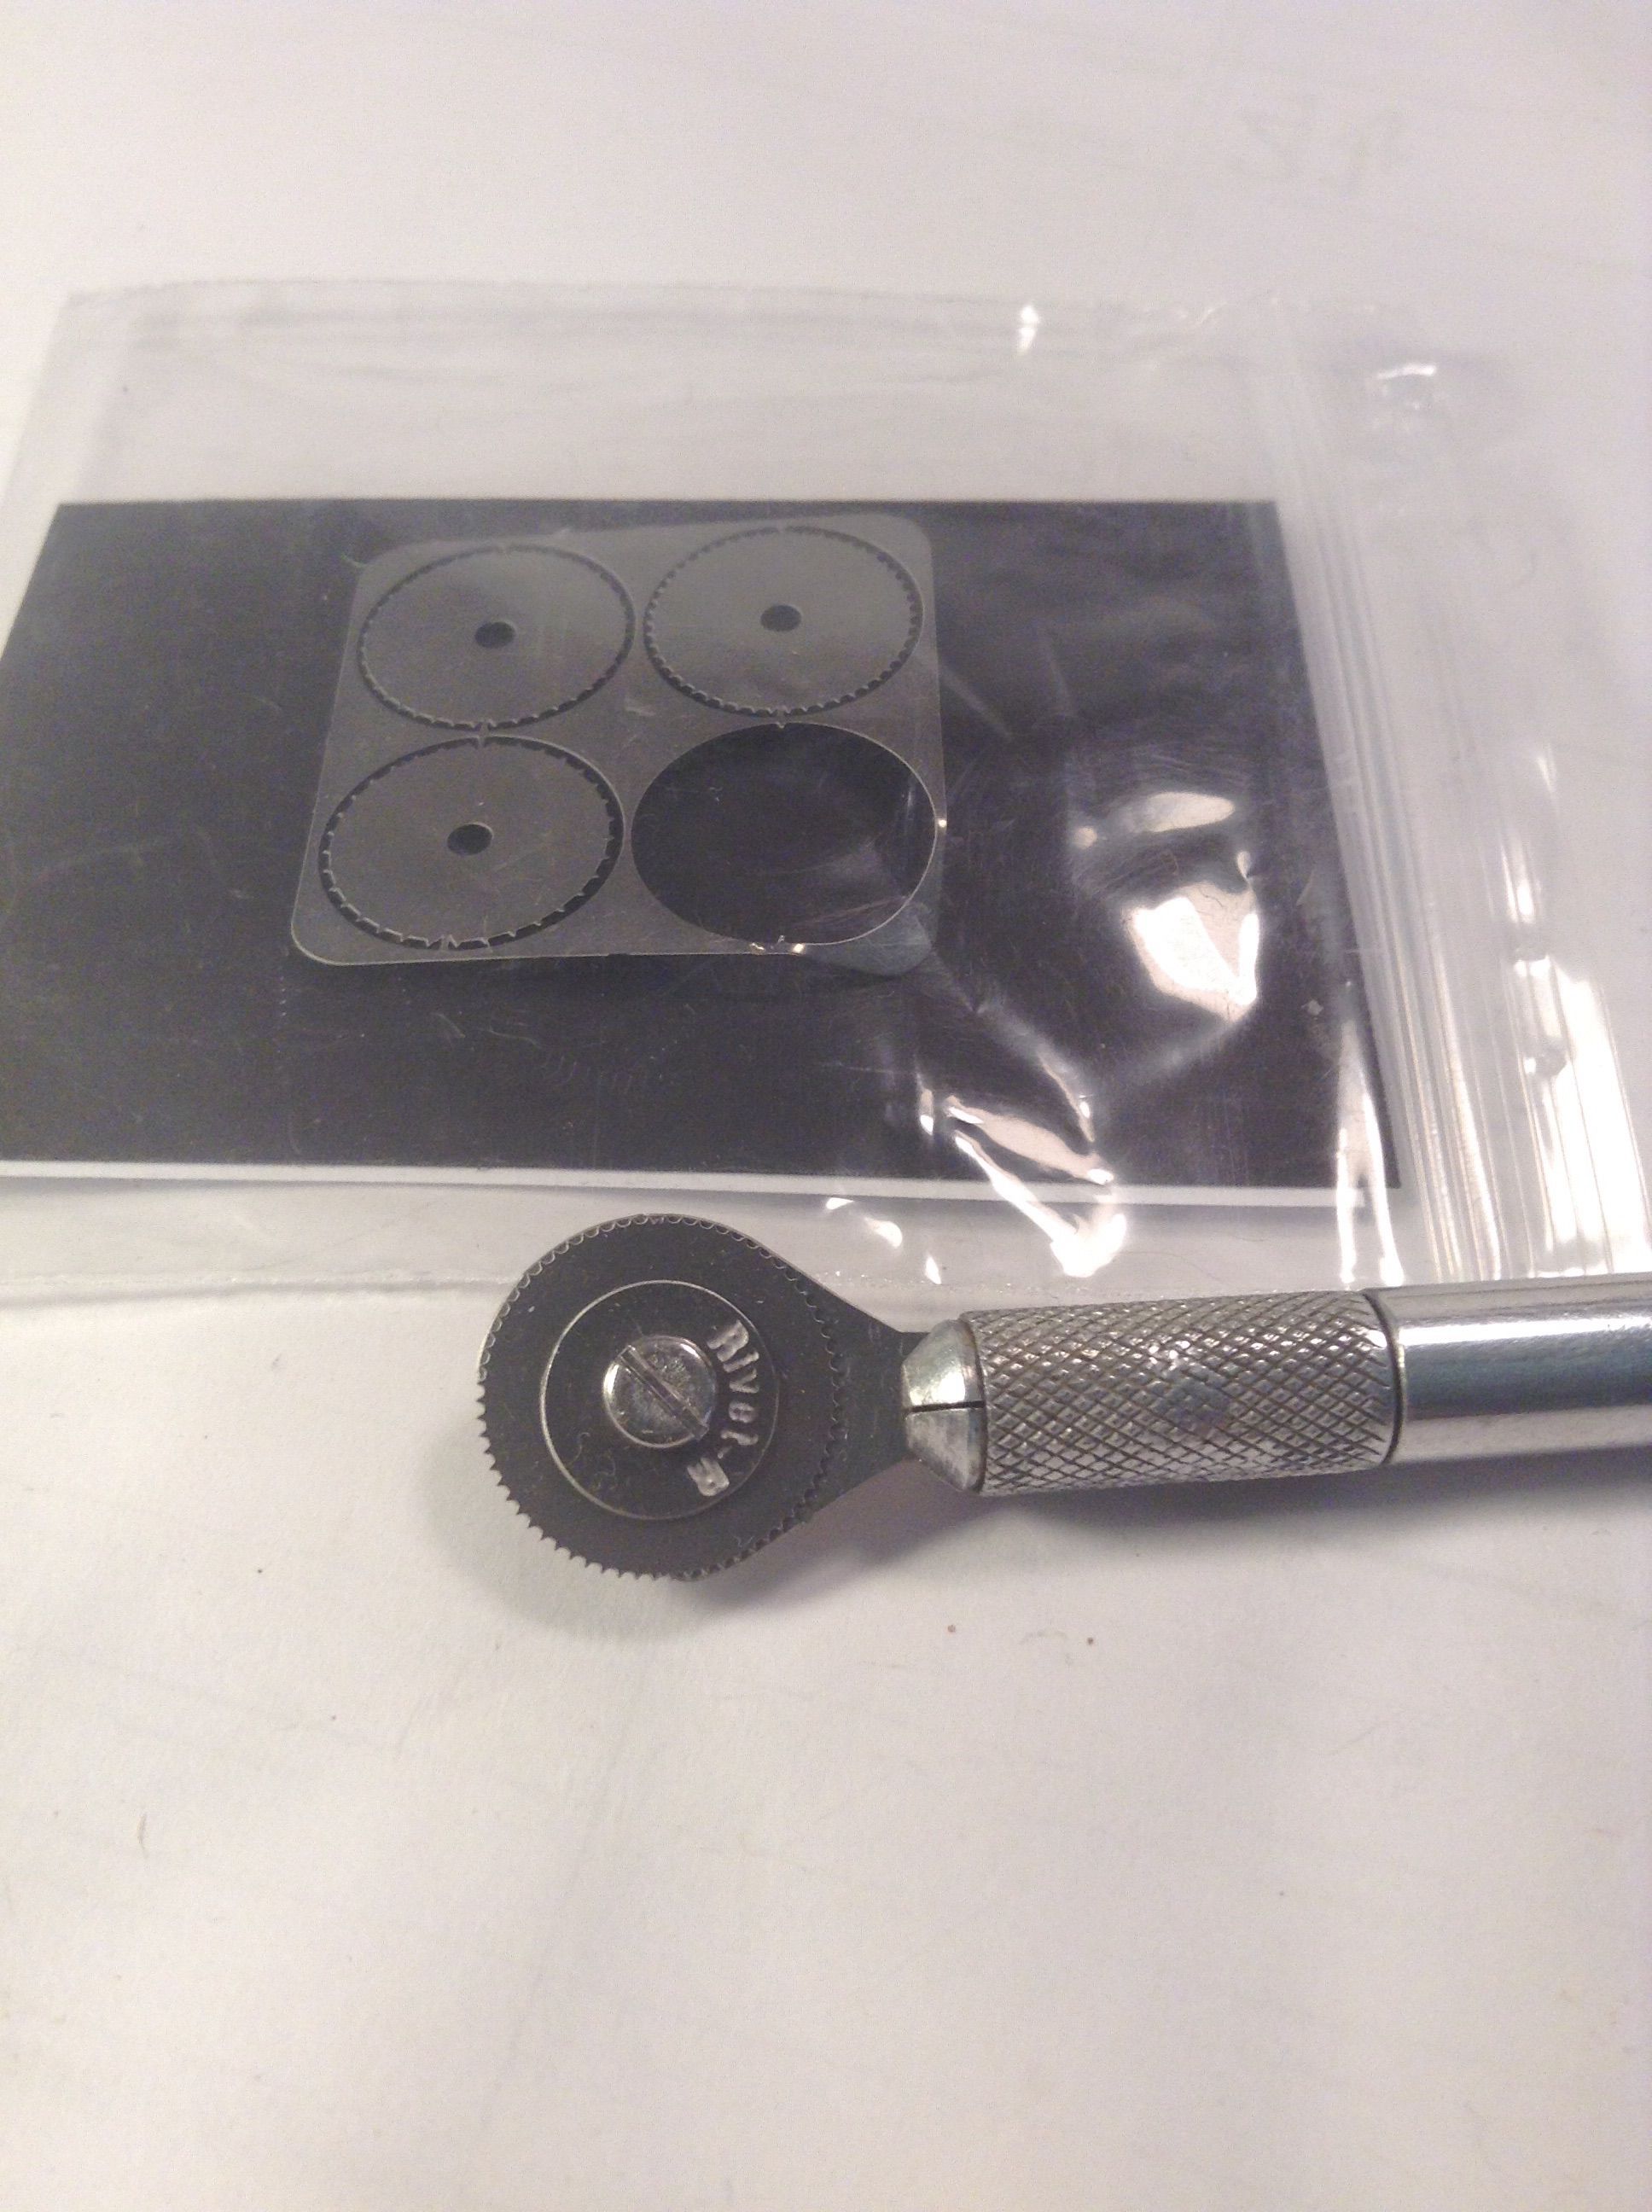
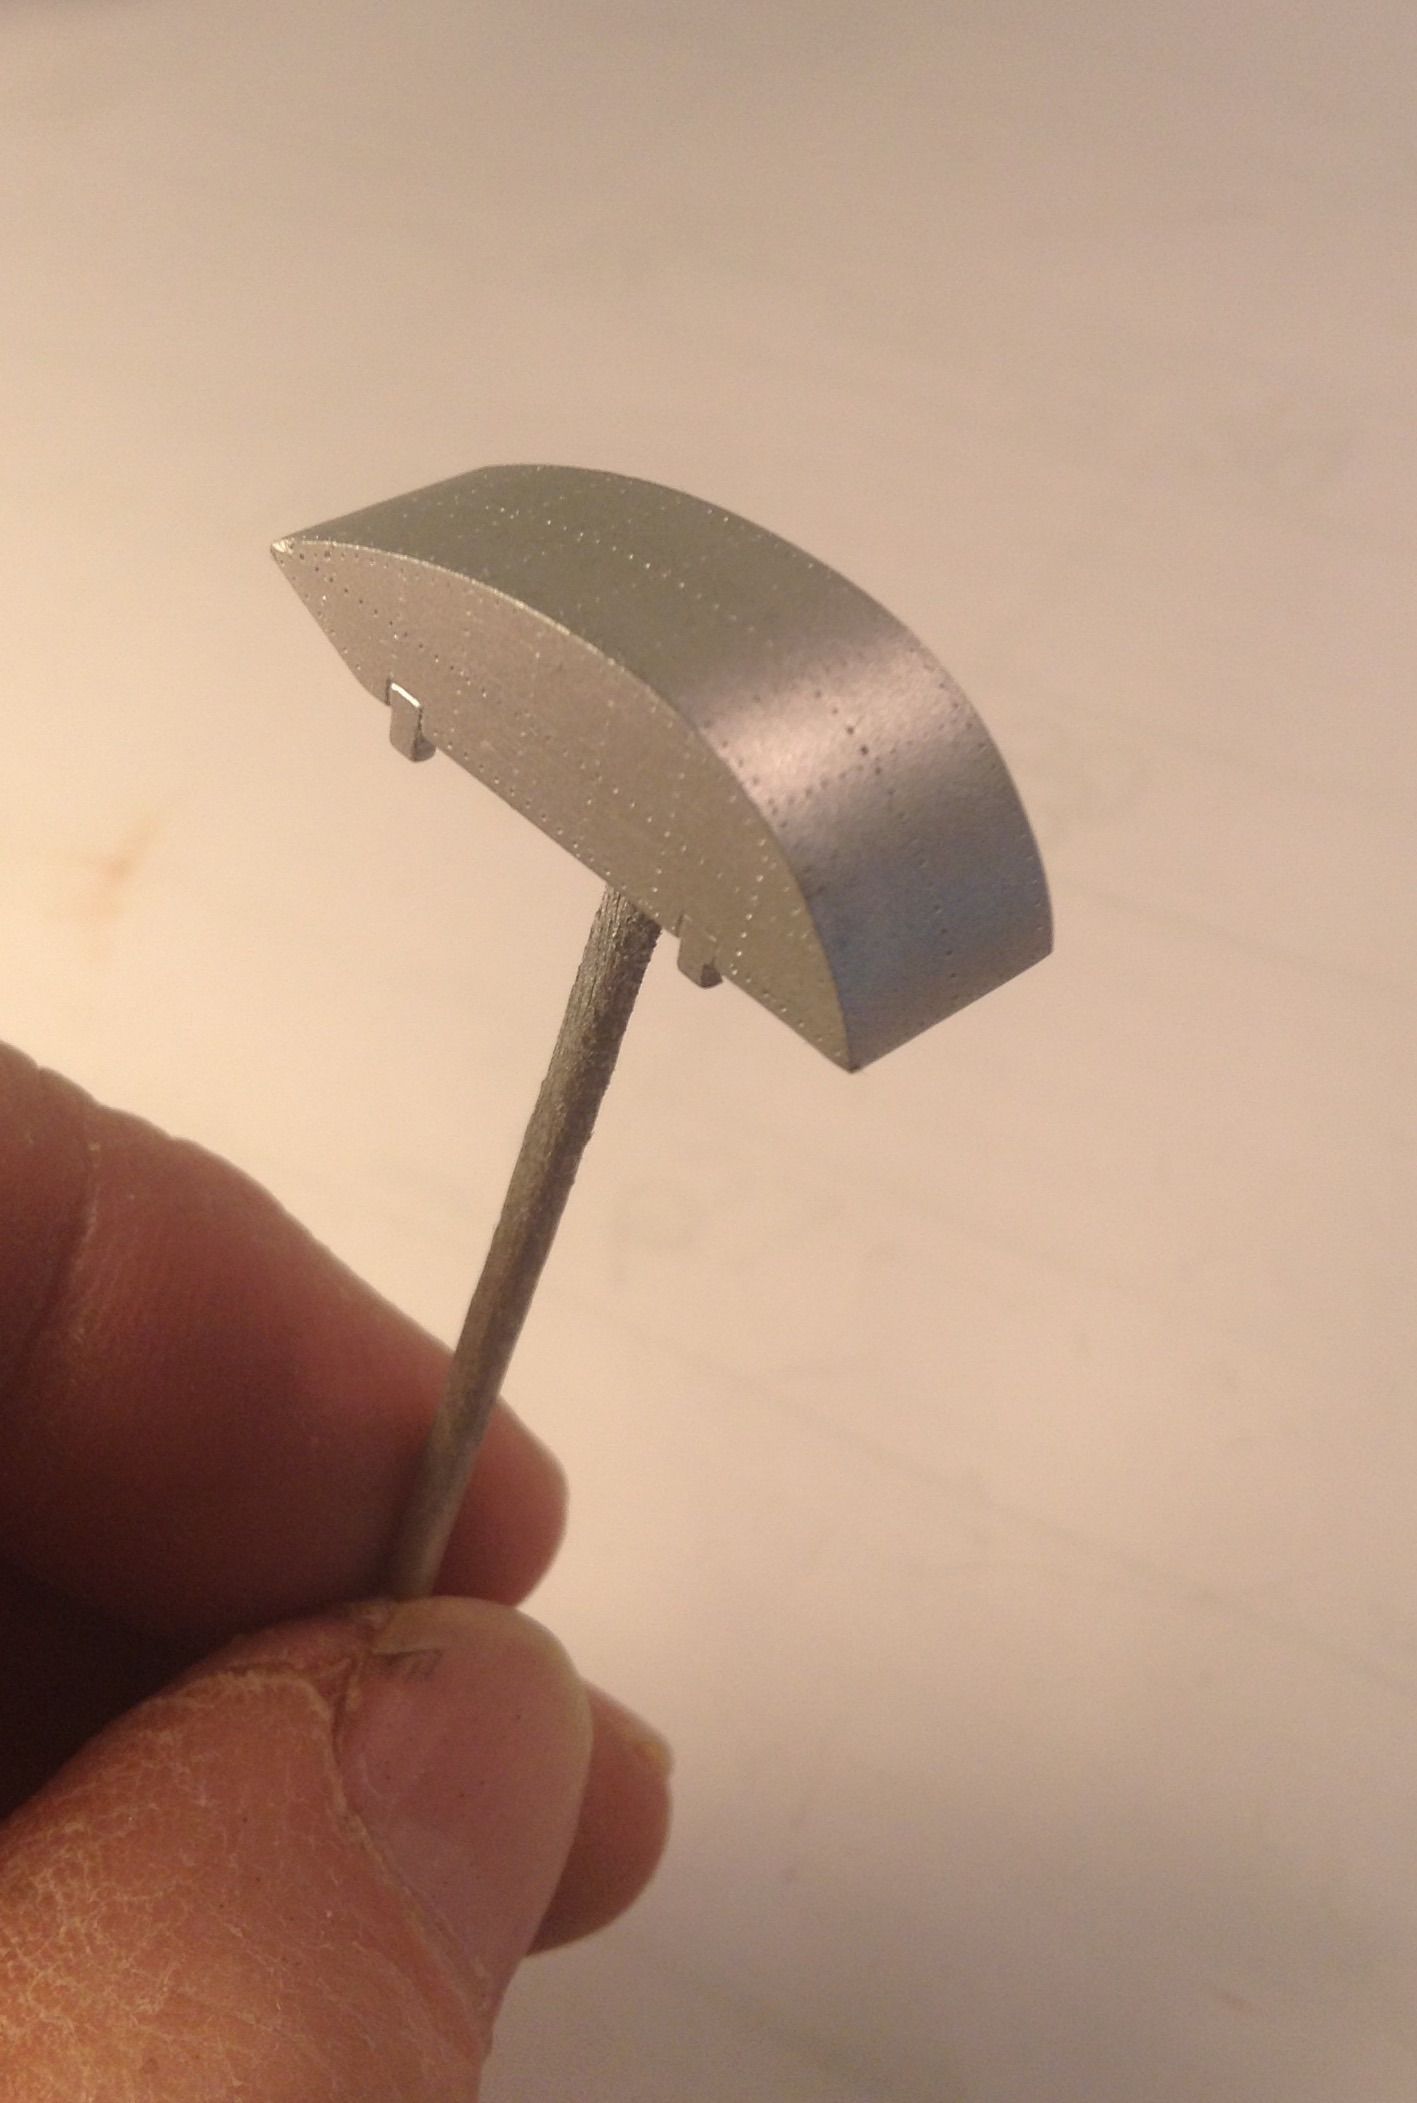
The slipper tanks are molded devoid of any detail - I added rivet detail with RB Productions rivet tool - I am anxious to see how they look after priming.


Sharp eyes may spot a row where I wandered off course - I think I can correct this with surfacer.

Thanks for looking in ! Richard
Joel_W
Staff MemberAssociate Editor
AUTOMODELER
_VISITCOMMUNITY
New York, United States
Joined: December 04, 2010
KitMaker: 11,666 posts
AeroScale: 7,410 posts
Posted: Sunday, March 04, 2018 - 11:01 PM UTC
Richard,
Both engines really do look quite good incased in their respective cowlings.

Nice riveting job on that tank. I must confess that I've got a riveter and a few different size wheels, but always find an excuse not to use it.

Joel
rochaped
_VISITCOMMUNITY
Lisboa, Portugal
Joined: August 27, 2010
KitMaker: 679 posts
AeroScale: 669 posts
Posted: Monday, March 05, 2018 - 01:47 AM UTC
Richard,

I must say I agree with Joel, those engines are looking very good.
The Claude is a fine example of elegance in high boots, quite sure they will look awesome when completed.
By the way, that’s an excellent steady hand using the riveter. I have one from Trumpeters, not a bad tool, but somehow the technique eludes me because the effects are either too deep or barely visible, let alone getting straight lines like you’ve achieved.

Cheers
Pedro
rdt1953
_VISITCOMMUNITY
New Jersey, United States
Joined: February 06, 2015
KitMaker: 1,098 posts
AeroScale: 900 posts
Posted: Monday, March 05, 2018 - 04:21 AM UTC
Joel & Pedro -

Thanks Gents for the kind words . I have found that it is much easier to get straight lines with the rivet tool by pulling it with the handle as close to being parallel to the work surface as possible. I laid out lines and thought I would need a straightedge but it is actually easier to freehand it. Watch the line and draw the tool slowly watching each tooth as it falls on the work. Better to start with light pressure. You can go over it again to make deeper impressions if need be - just be certain to get the starting tooth in a previously made impression. Like anything else there is a learning curve.
Cheers - Richard
thegirl
_VISITCOMMUNITY
Alberta, Canada
Joined: January 19, 2008
KitMaker: 6,743 posts
AeroScale: 6,151 posts
Posted: Monday, March 05, 2018 - 06:42 AM UTC
Super job on the engines Richard . You don't have a spare airbrush ?


Terri
rdt1953
_VISITCOMMUNITY
New Jersey, United States
Joined: February 06, 2015
KitMaker: 1,098 posts
AeroScale: 900 posts
Posted: Monday, March 05, 2018 - 07:15 AM UTC

Quoted Text

Super job on the engines Richard . You don't have a spare airbrush ?


Terri


Thanks Terri !

I have a Tamiya ( made by Iwata ) HG Superfine that I do detail work with and 3 other Badgers but the Badgers are all syphon feed and I like to spray at the lower pressure of the gravity feed . I also think the larger cups of the syphon waste more paint and clean up is a chore . I hope to have my 200 G back soon ( hmm - maybe I need an Iwata Revolution with a . 5 needle for heavy work ?) tempting-

Richard
Joel_W
Staff MemberAssociate Editor
AUTOMODELER
_VISITCOMMUNITY
New York, United States
Joined: December 04, 2010
KitMaker: 11,666 posts
AeroScale: 7,410 posts
Posted: Monday, March 05, 2018 - 08:41 AM UTC
Richard,
I've got two Revolution AB, but they're single action, internal mix, gravity fed. A M-1, & M-2. Had them since they 1st came out. Both need new trigger O rings, but other then that, they've been perfect for every job I've asked of them.

Joel
thegirl
_VISITCOMMUNITY
Alberta, Canada
Joined: January 19, 2008
KitMaker: 6,743 posts
AeroScale: 6,151 posts
Posted: Wednesday, March 07, 2018 - 07:16 AM UTC
I have a few spares as well . Still have my Passche H . Itwa neo , but I don't like this airbrush at all . Air brush city GD 150 garvity feed and a sophin one . Also have spare hoses as well .
My main brush is Passache TG Eagle Talon .


Terri
Joel_W
Staff MemberAssociate Editor
AUTOMODELER
_VISITCOMMUNITY
New York, United States
Joined: December 04, 2010
KitMaker: 11,666 posts
AeroScale: 7,410 posts
Posted: Wednesday, March 07, 2018 - 09:01 AM UTC

Quoted Text

I have a few spares as well . Still have my Passche H . Itwa neo , but I don't like this airbrush at all . Air brush city GD 150 garvity feed and a sophin one . Also have spare hoses as well .
My main brush is Passache TG Eagle Talon .

Terri


Terri
I always liked the looks of the Talon, and the reviews are always pretty good. I really want to upgrade to at least one Double action AB, so that just may be it. Still I've been a Iwata guy forever. tough choice to make.

Joel
thegirl
_VISITCOMMUNITY
Alberta, Canada
Joined: January 19, 2008
KitMaker: 6,743 posts
AeroScale: 6,151 posts
Posted: Friday, March 09, 2018 - 06:27 AM UTC

Quoted Text


Quoted Text

I have a few spares as well . Still have my Passche H . Itwa neo , but I don't like this airbrush at all . Air brush city GD 150 garvity feed and a sophin one . Also have spare hoses as well .
My main brush is Passache TG Eagle Talon .

Terri


Terri
I always liked the looks of the Talon, and the reviews are always pretty good. I really want to upgrade to at least one Double action AB, so that just may be it. Still I've been a Iwata guy forever. tough choice to make.

Joel


Joel , the Talon is a awesome airbrush . I think you would be pleased with results . Alot of make -up artist and model makers in Hollywood use this airbrush . There is a difference on a single action too a double action . I use the double action . Better paint and airflow control and you can do amazing effects with one .


Terri
rdt1953
_VISITCOMMUNITY
New Jersey, United States
Joined: February 06, 2015
KitMaker: 1,098 posts
AeroScale: 900 posts
Posted: Friday, March 09, 2018 - 05:51 PM UTC
I broke down and ordered an Iwata Revolution CR - gravity feed dual action . Also bought .5 mm needle & nozzle for spraying the heavy stuff . Pretty good deal online at Dick Blick.
It will probably show up on my doorstep the same day the Badger returns from repair .

Richard
Joel_W
Staff MemberAssociate Editor
AUTOMODELER
_VISITCOMMUNITY
New York, United States
Joined: December 04, 2010
KitMaker: 11,666 posts
AeroScale: 7,410 posts
Posted: Friday, March 09, 2018 - 08:47 PM UTC

Quoted Text


Quoted Text


Quoted Text

I have a few spares as well . Still have my Passche H . Itwa neo , but I don't like this airbrush at all . Air brush city GD 150 garvity feed and a sophin one . Also have spare hoses as well .
My main brush is Passache TG Eagle Talon .

Terri


Terri
I always liked the looks of the Talon, and the reviews are always pretty good. I really want to upgrade to at least one Double action AB, so that just may be it. Still I've been a Iwata guy forever. tough choice to make.

Joel


Joel , the Talon is a awesome airbrush . I think you would be pleased with results . Alot of make -up artist and model makers in Hollywood use this airbrush . There is a difference on a single action too a double action . I use the double action . Better paint and airflow control and you can do amazing effects with one .

Terri


Terri,
I'm really thinking about it.

Joel
Joel_W
Staff MemberAssociate Editor
AUTOMODELER
_VISITCOMMUNITY
New York, United States
Joined: December 04, 2010
KitMaker: 11,666 posts
AeroScale: 7,410 posts
Posted: Friday, March 09, 2018 - 08:51 PM UTC

Quoted Text

I broke down and ordered an Iwata Revolution CR - gravity feed dual action . Also bought .5 mm needle & nozzle for spraying the heavy stuff . Pretty good deal online at Dick Blick.
It will probably show up on my doorstep the same day the Badger returns from repair .

Richard


Richard,
Congratulations on the new AB. Of course it will arrive the same day as your Badger repaired AB.

It's the same set of universal principles that govern packages I receive that are left by the front door. They seem to only come in major storms. Decals and PE sheets are always jammed into the mailbox by the street as our post man seems to think that do not bend or fold, means the exact opposite.

Joel
rdt1953
_VISITCOMMUNITY
New Jersey, United States
Joined: February 06, 2015
KitMaker: 1,098 posts
AeroScale: 900 posts
Posted: Wednesday, March 14, 2018 - 07:10 AM UTC
The new Iwata airbrush arrived today. I ordered a .5mm needle and nozzle in addition to the airbrush. Anyone care to guess what size needle came in the airbrush ?


Guess I should have asked - Richard
thegirl
_VISITCOMMUNITY
Alberta, Canada
Joined: January 19, 2008
KitMaker: 6,743 posts
AeroScale: 6,151 posts
Posted: Wednesday, March 14, 2018 - 07:45 AM UTC
On the plus side you have a spare needle and tip


I have done this before , not with an airbrush though . But with PE sets forcing me to buy another kit to go with said set .


Terri
Joel_W
Staff MemberAssociate Editor
AUTOMODELER
_VISITCOMMUNITY
New York, United States
Joined: December 04, 2010
KitMaker: 11,666 posts
AeroScale: 7,410 posts
Posted: Wednesday, March 14, 2018 - 07:13 PM UTC
Richard,
Congrats on getting your Iwata Revolution AB. Of course it came with a .5mm needle, as that's Murphy's law working perfectly once again.

Most Iwata ABs can be ordered with different needle sizes as you've already found out. Call customer service and see if you can exchange the replacement needle for a .3mm. It's worth a try as the odds of needing a 2nd .5mm needle is slim to none especially since you're such a meticulous builder.

Joel
rdt1953
_VISITCOMMUNITY
New Jersey, United States
Joined: February 06, 2015
KitMaker: 1,098 posts
AeroScale: 900 posts
Posted: Sunday, March 18, 2018 - 02:03 AM UTC
With a new airbrush at hand ( Loving it !) I'm able to move forward a bit.

As these kits have been around a while I have decided to use Montex Masks for the markings as I found the kit decals to be nearly useless when doing the instrument panels. This is my first experience with aftermarket masks of any sort so a new skill to acquire .
The A5M1 will have natural metal undersides and camo uppers of IJA Dark Green over IJA Dark Beige - what the allies referred to as " sand and spinach ".
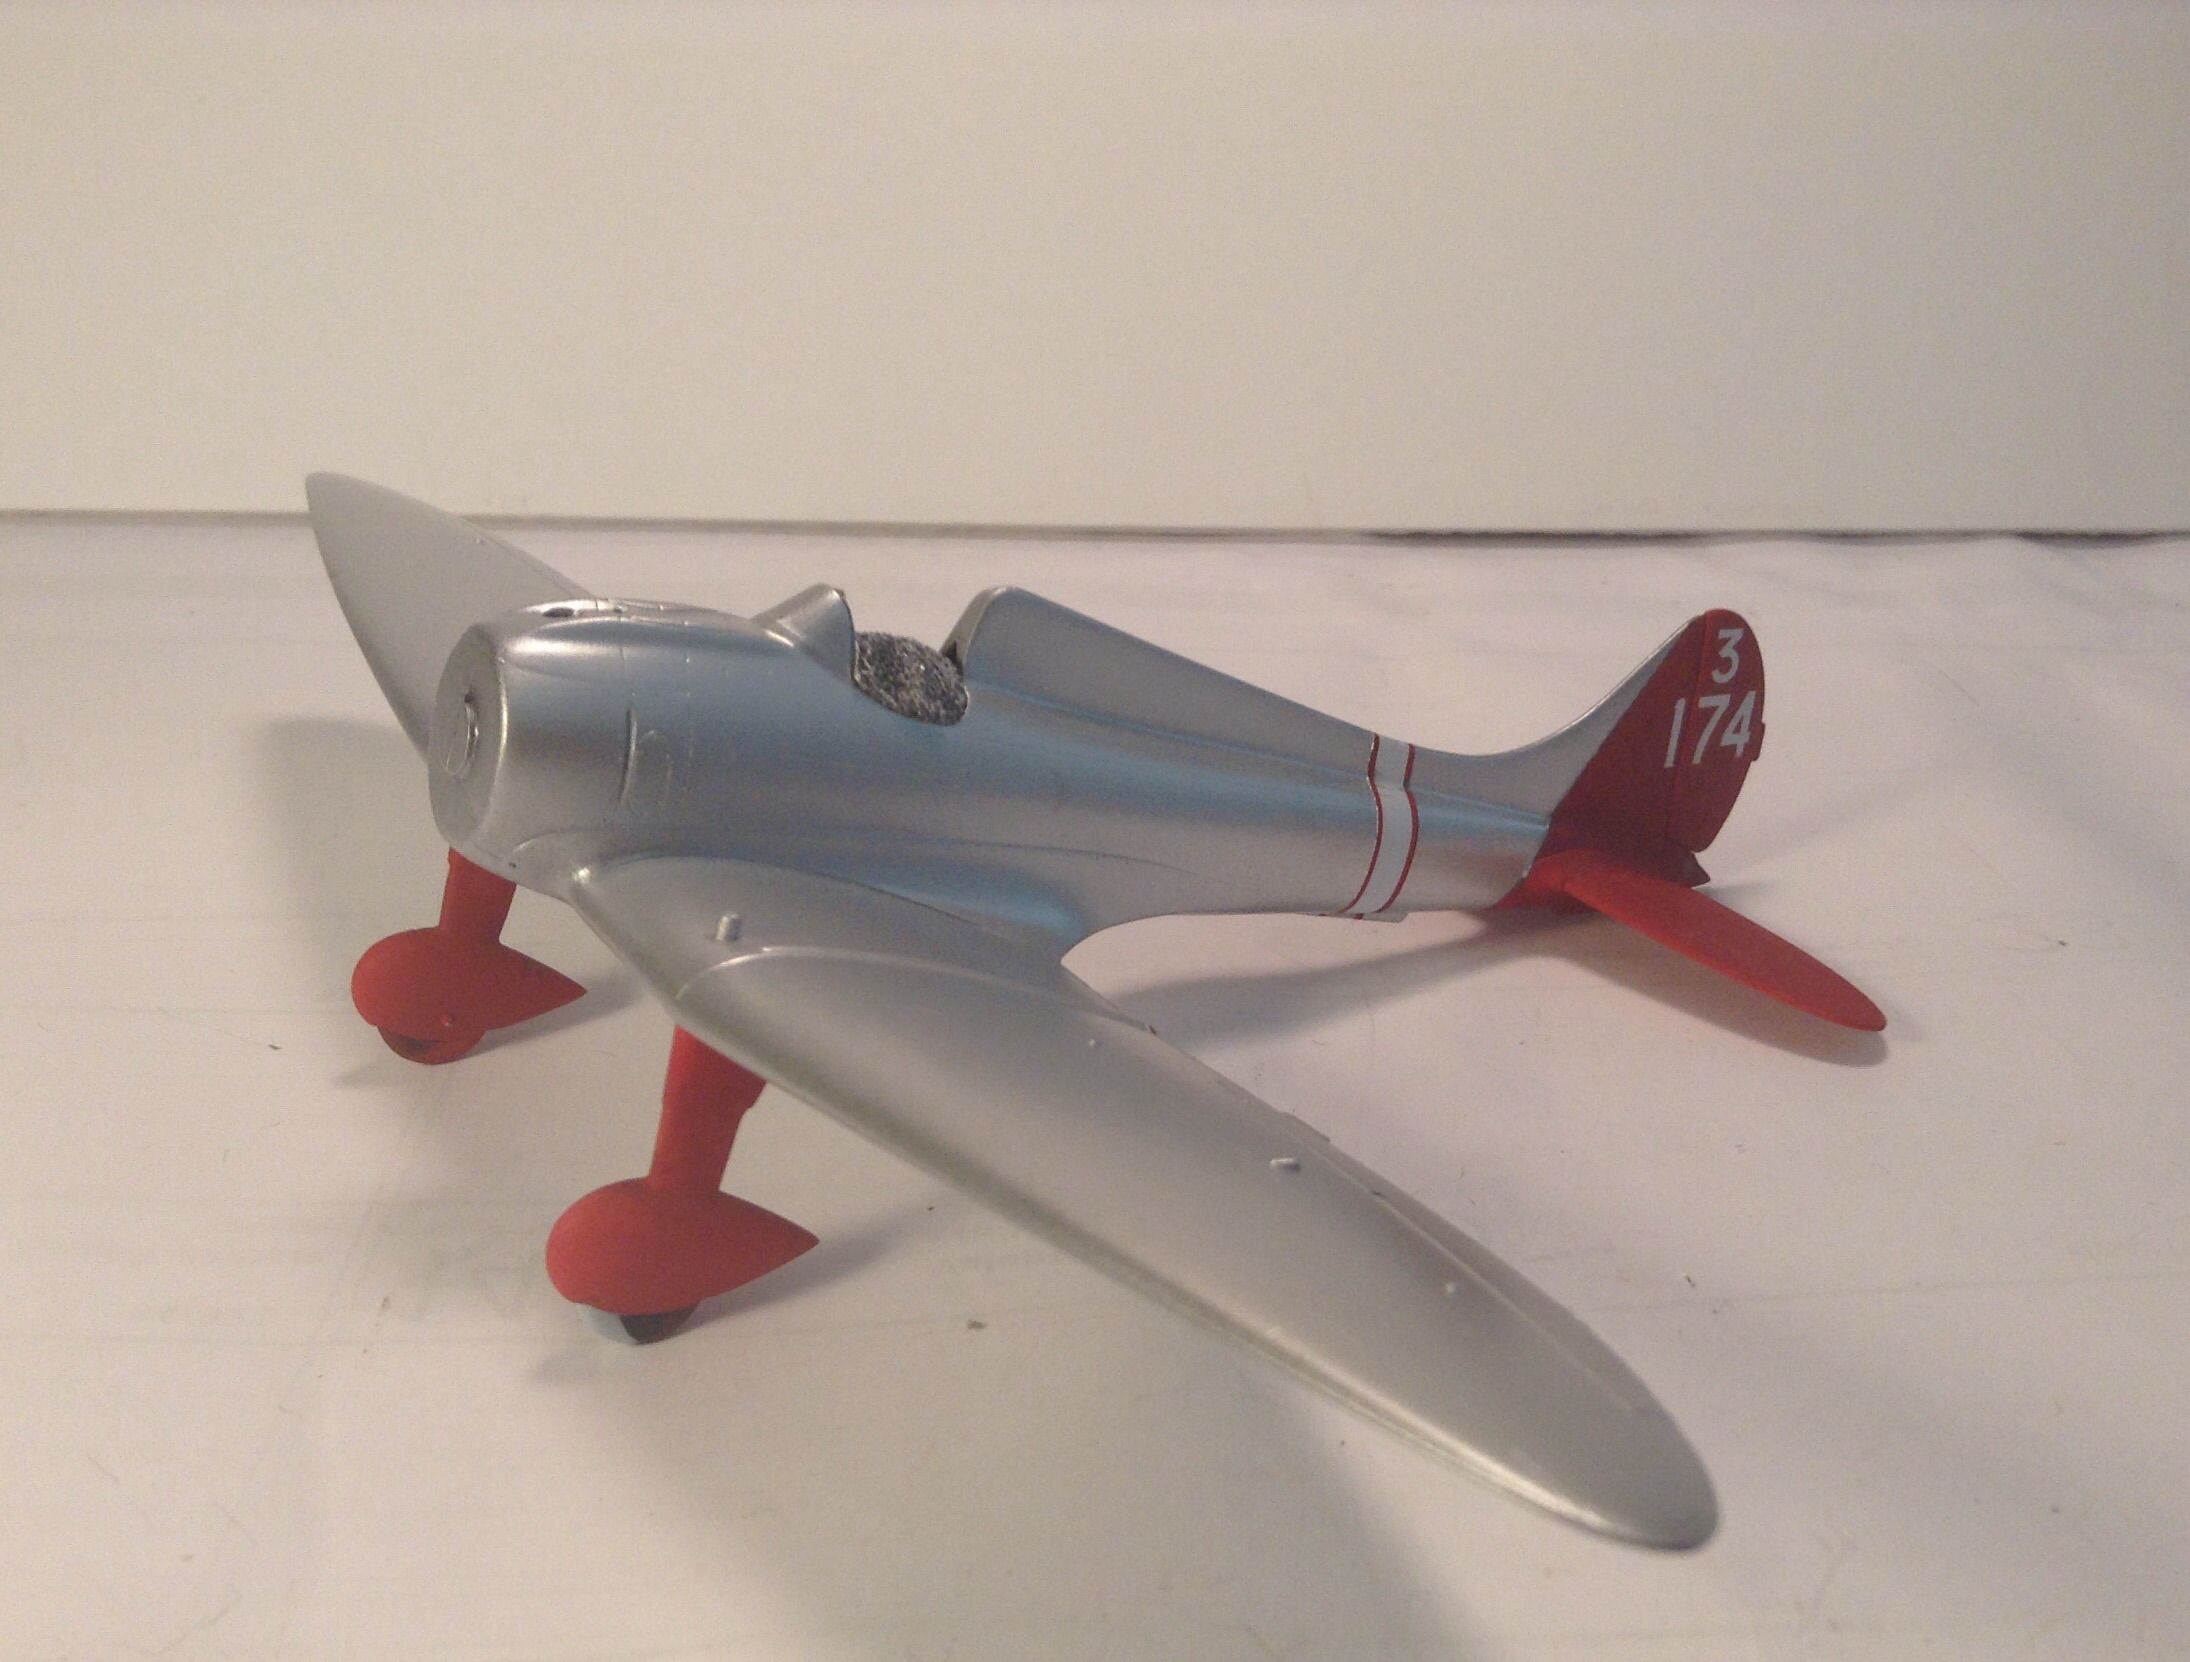
The A5M2a will be natural metal with red legs and tail surfaces.


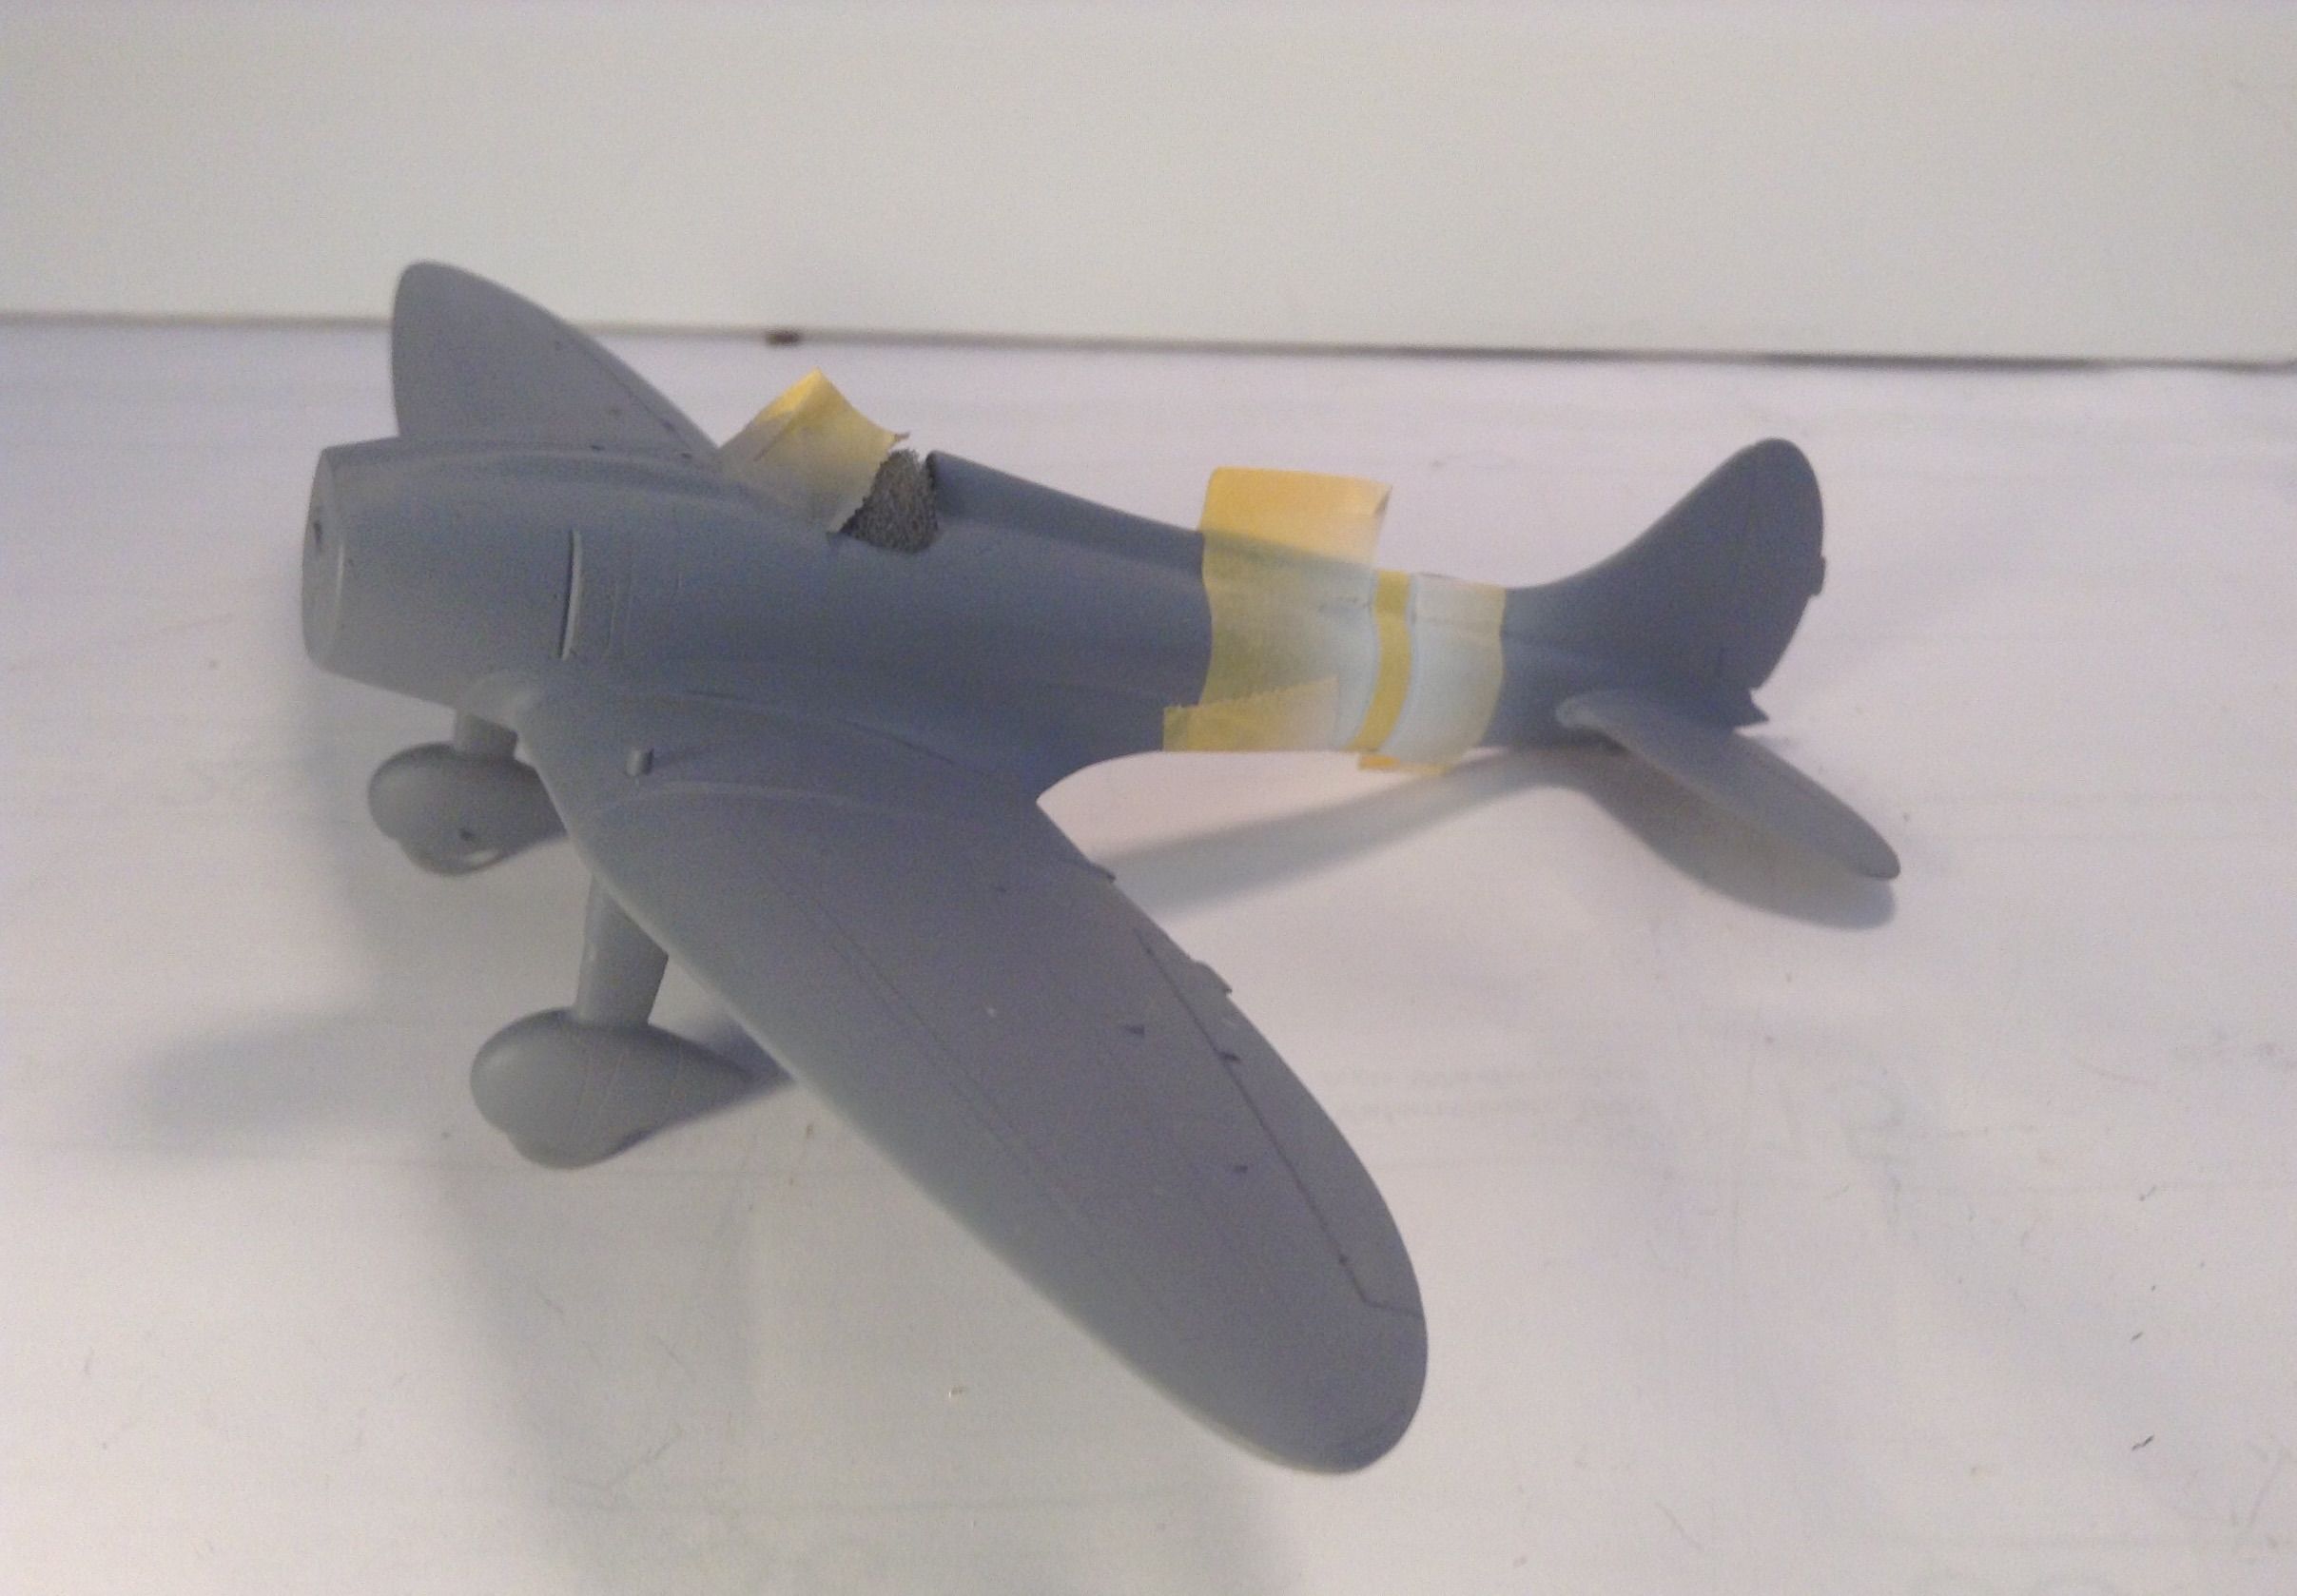
Here is the A5M1 withe fuselage band sprayed white and masked for the red borders-


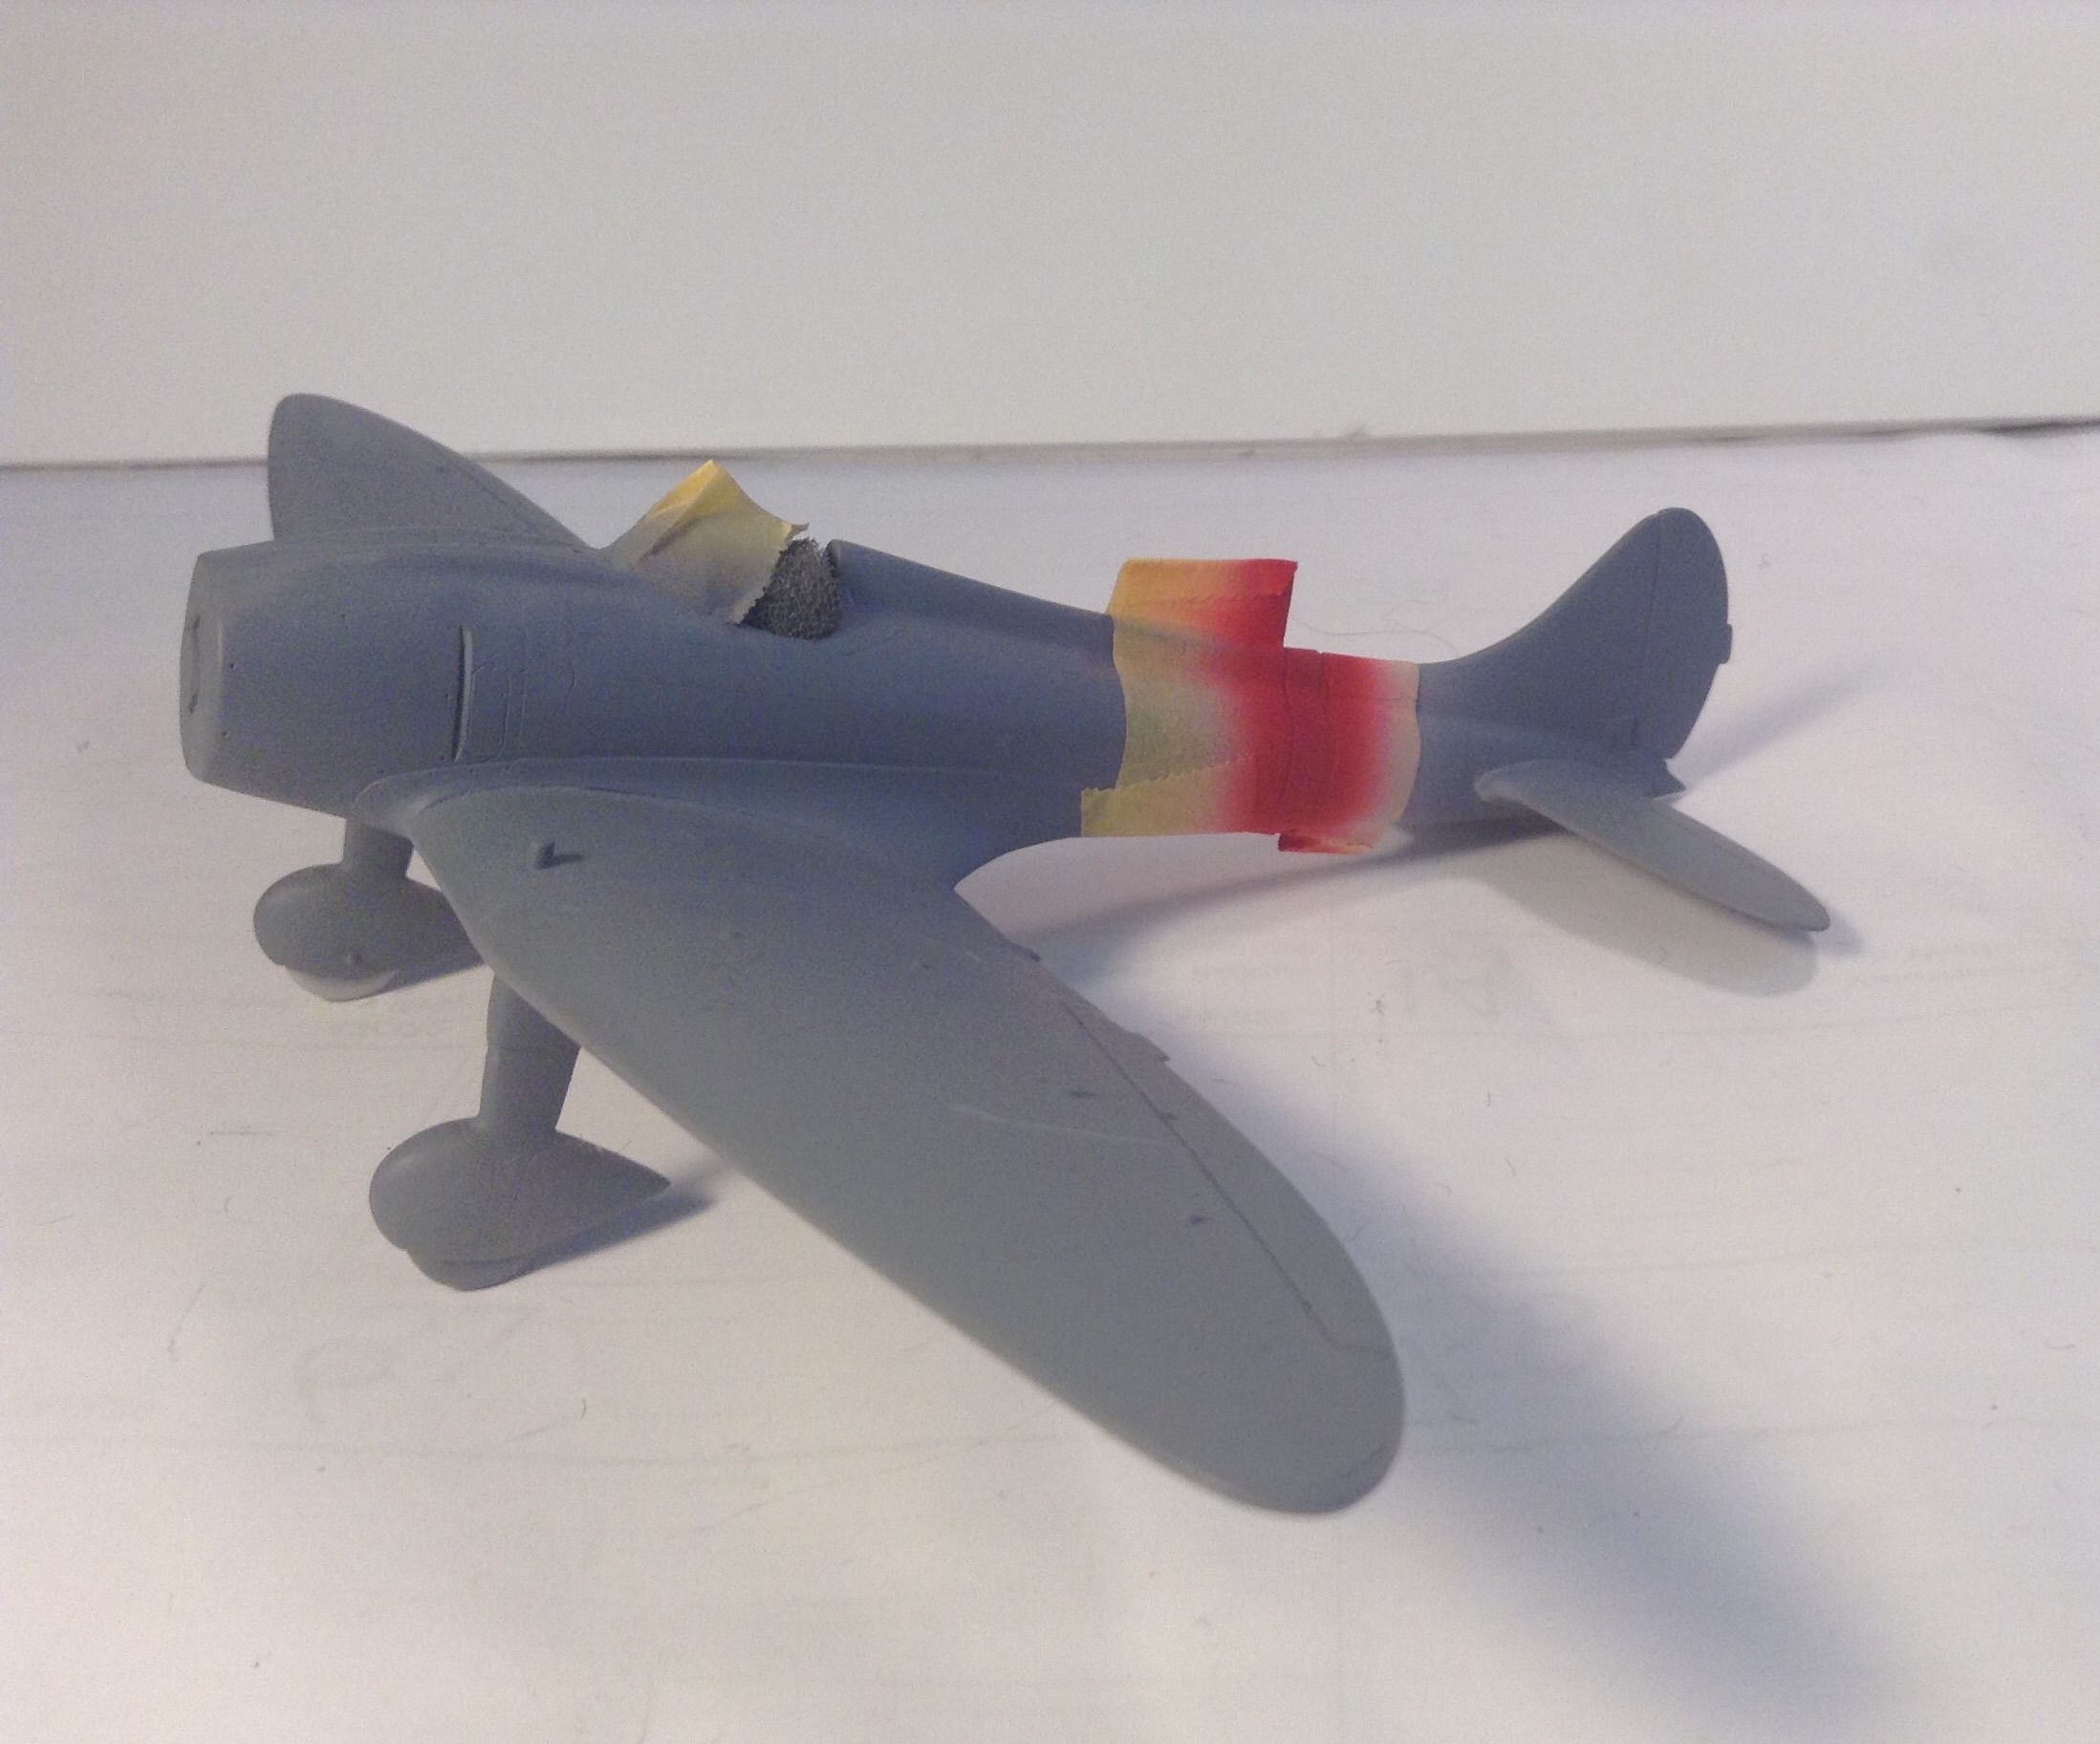
The borders shot in red- a mix of Tamiya Flat Red cut with a bit of Red Brown to take the edge off a bit -


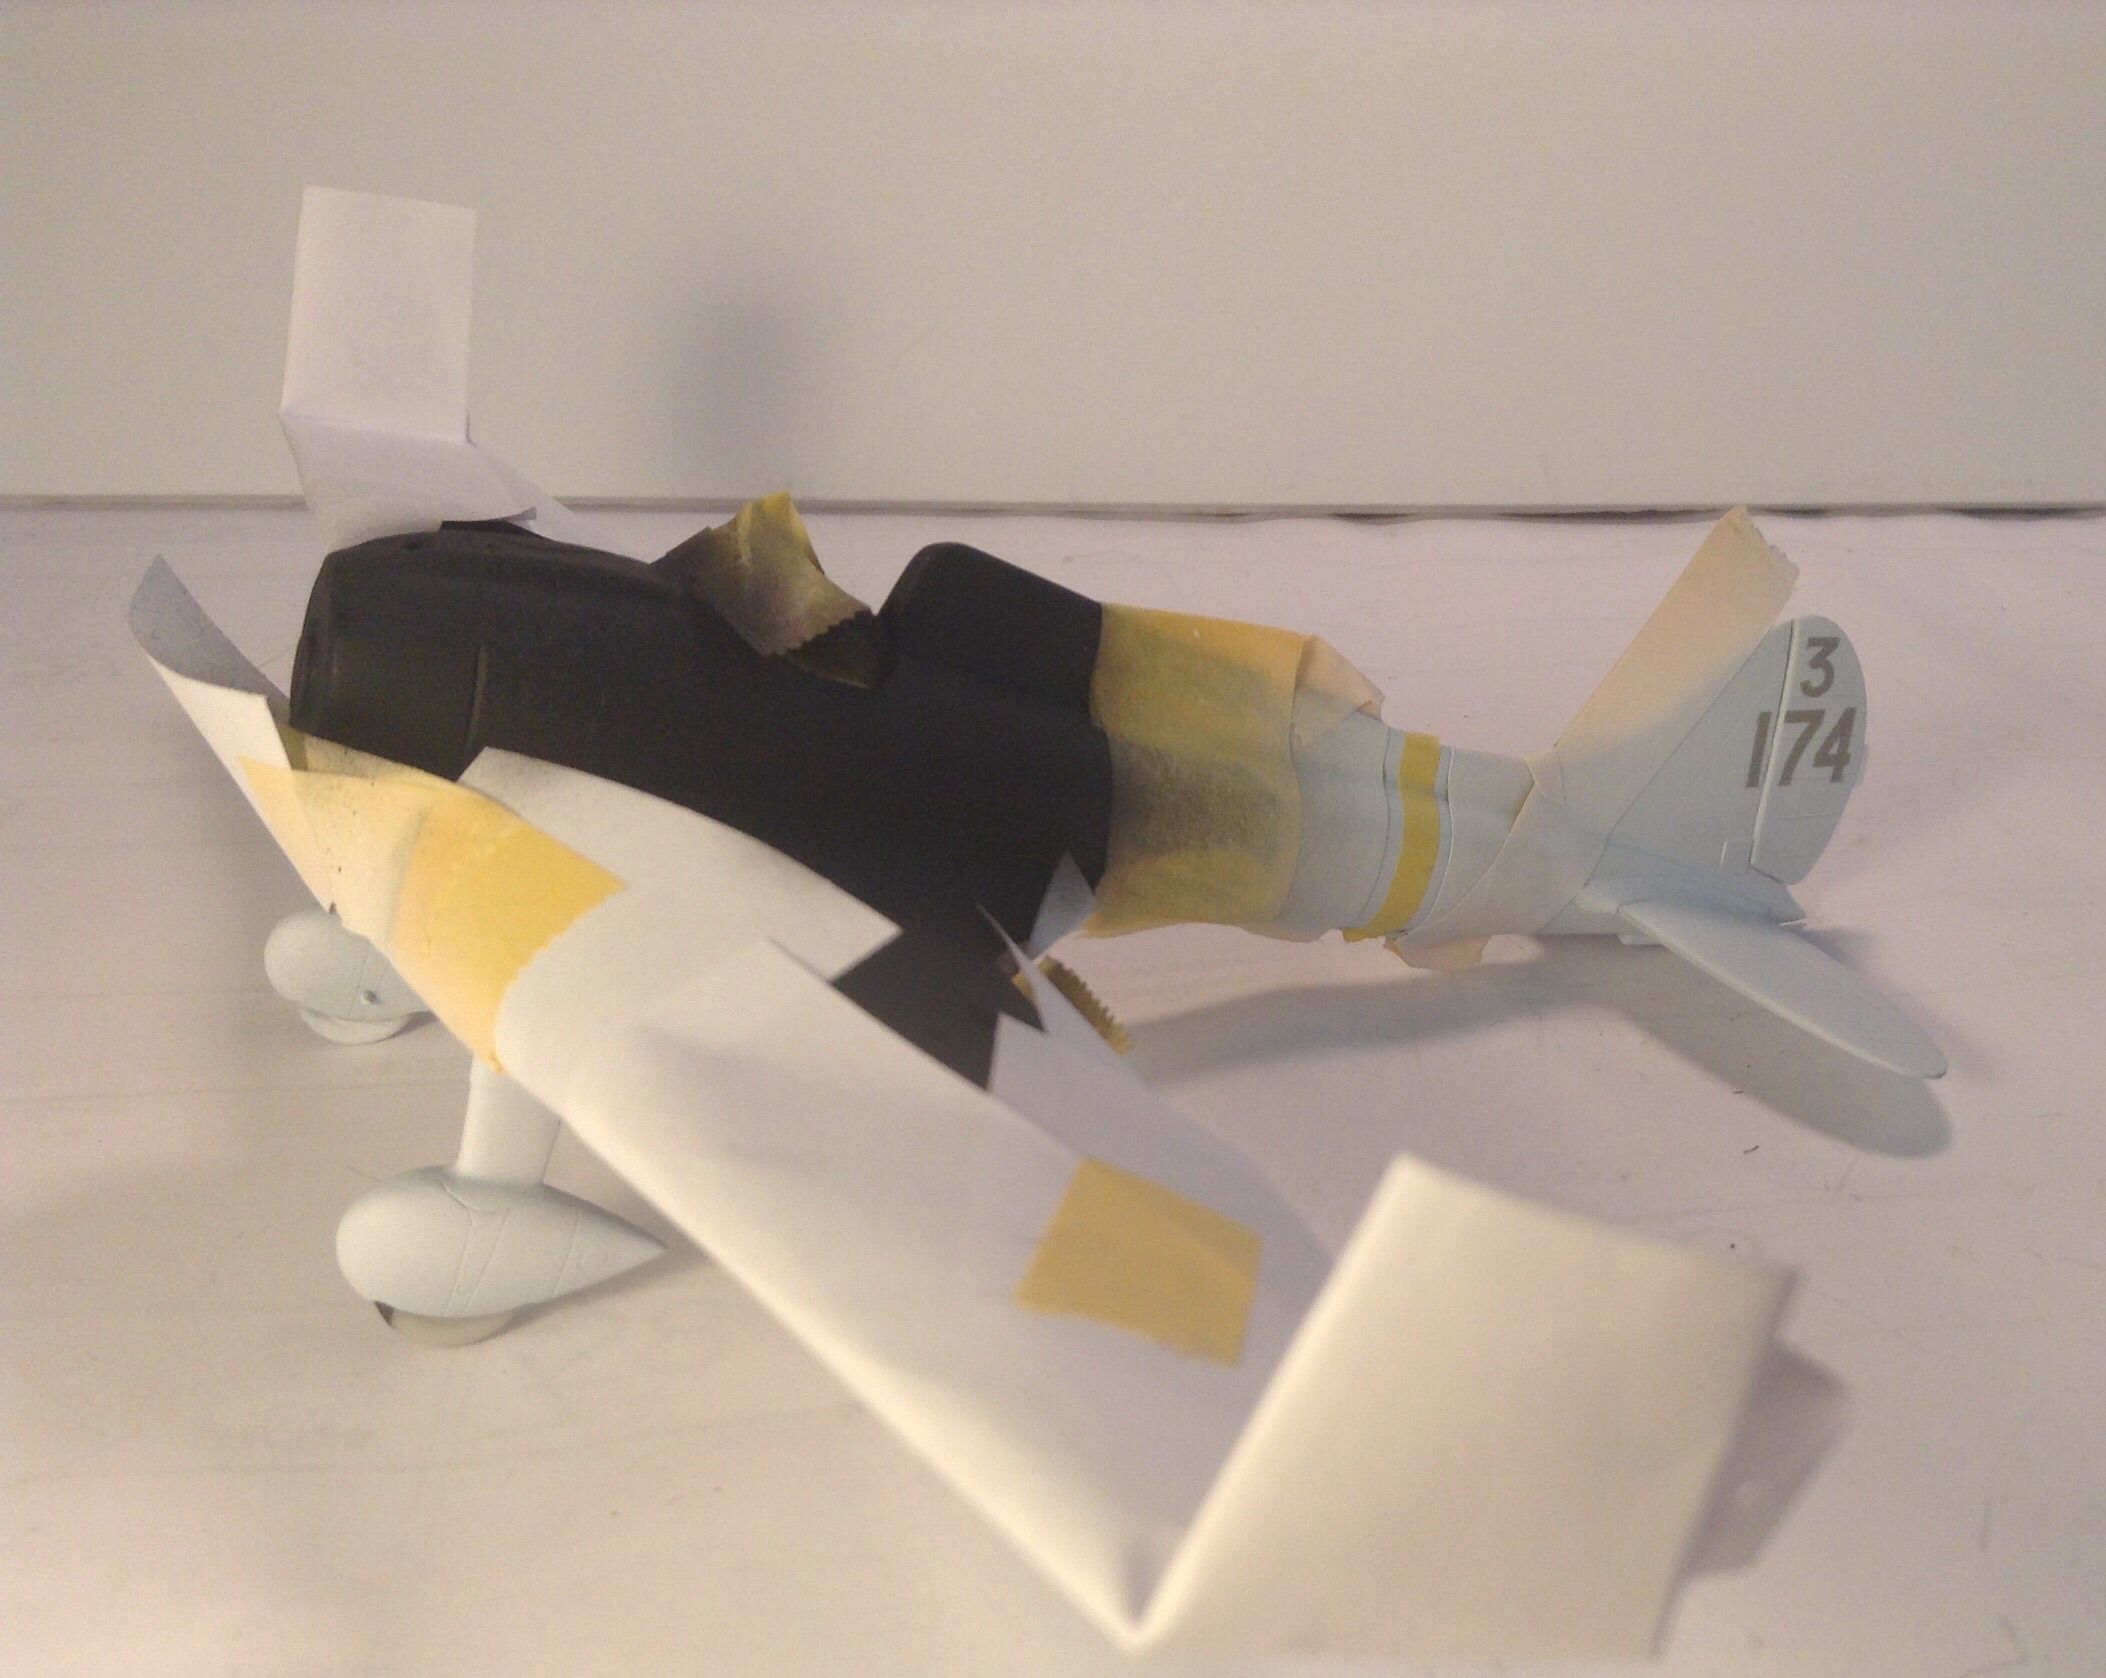
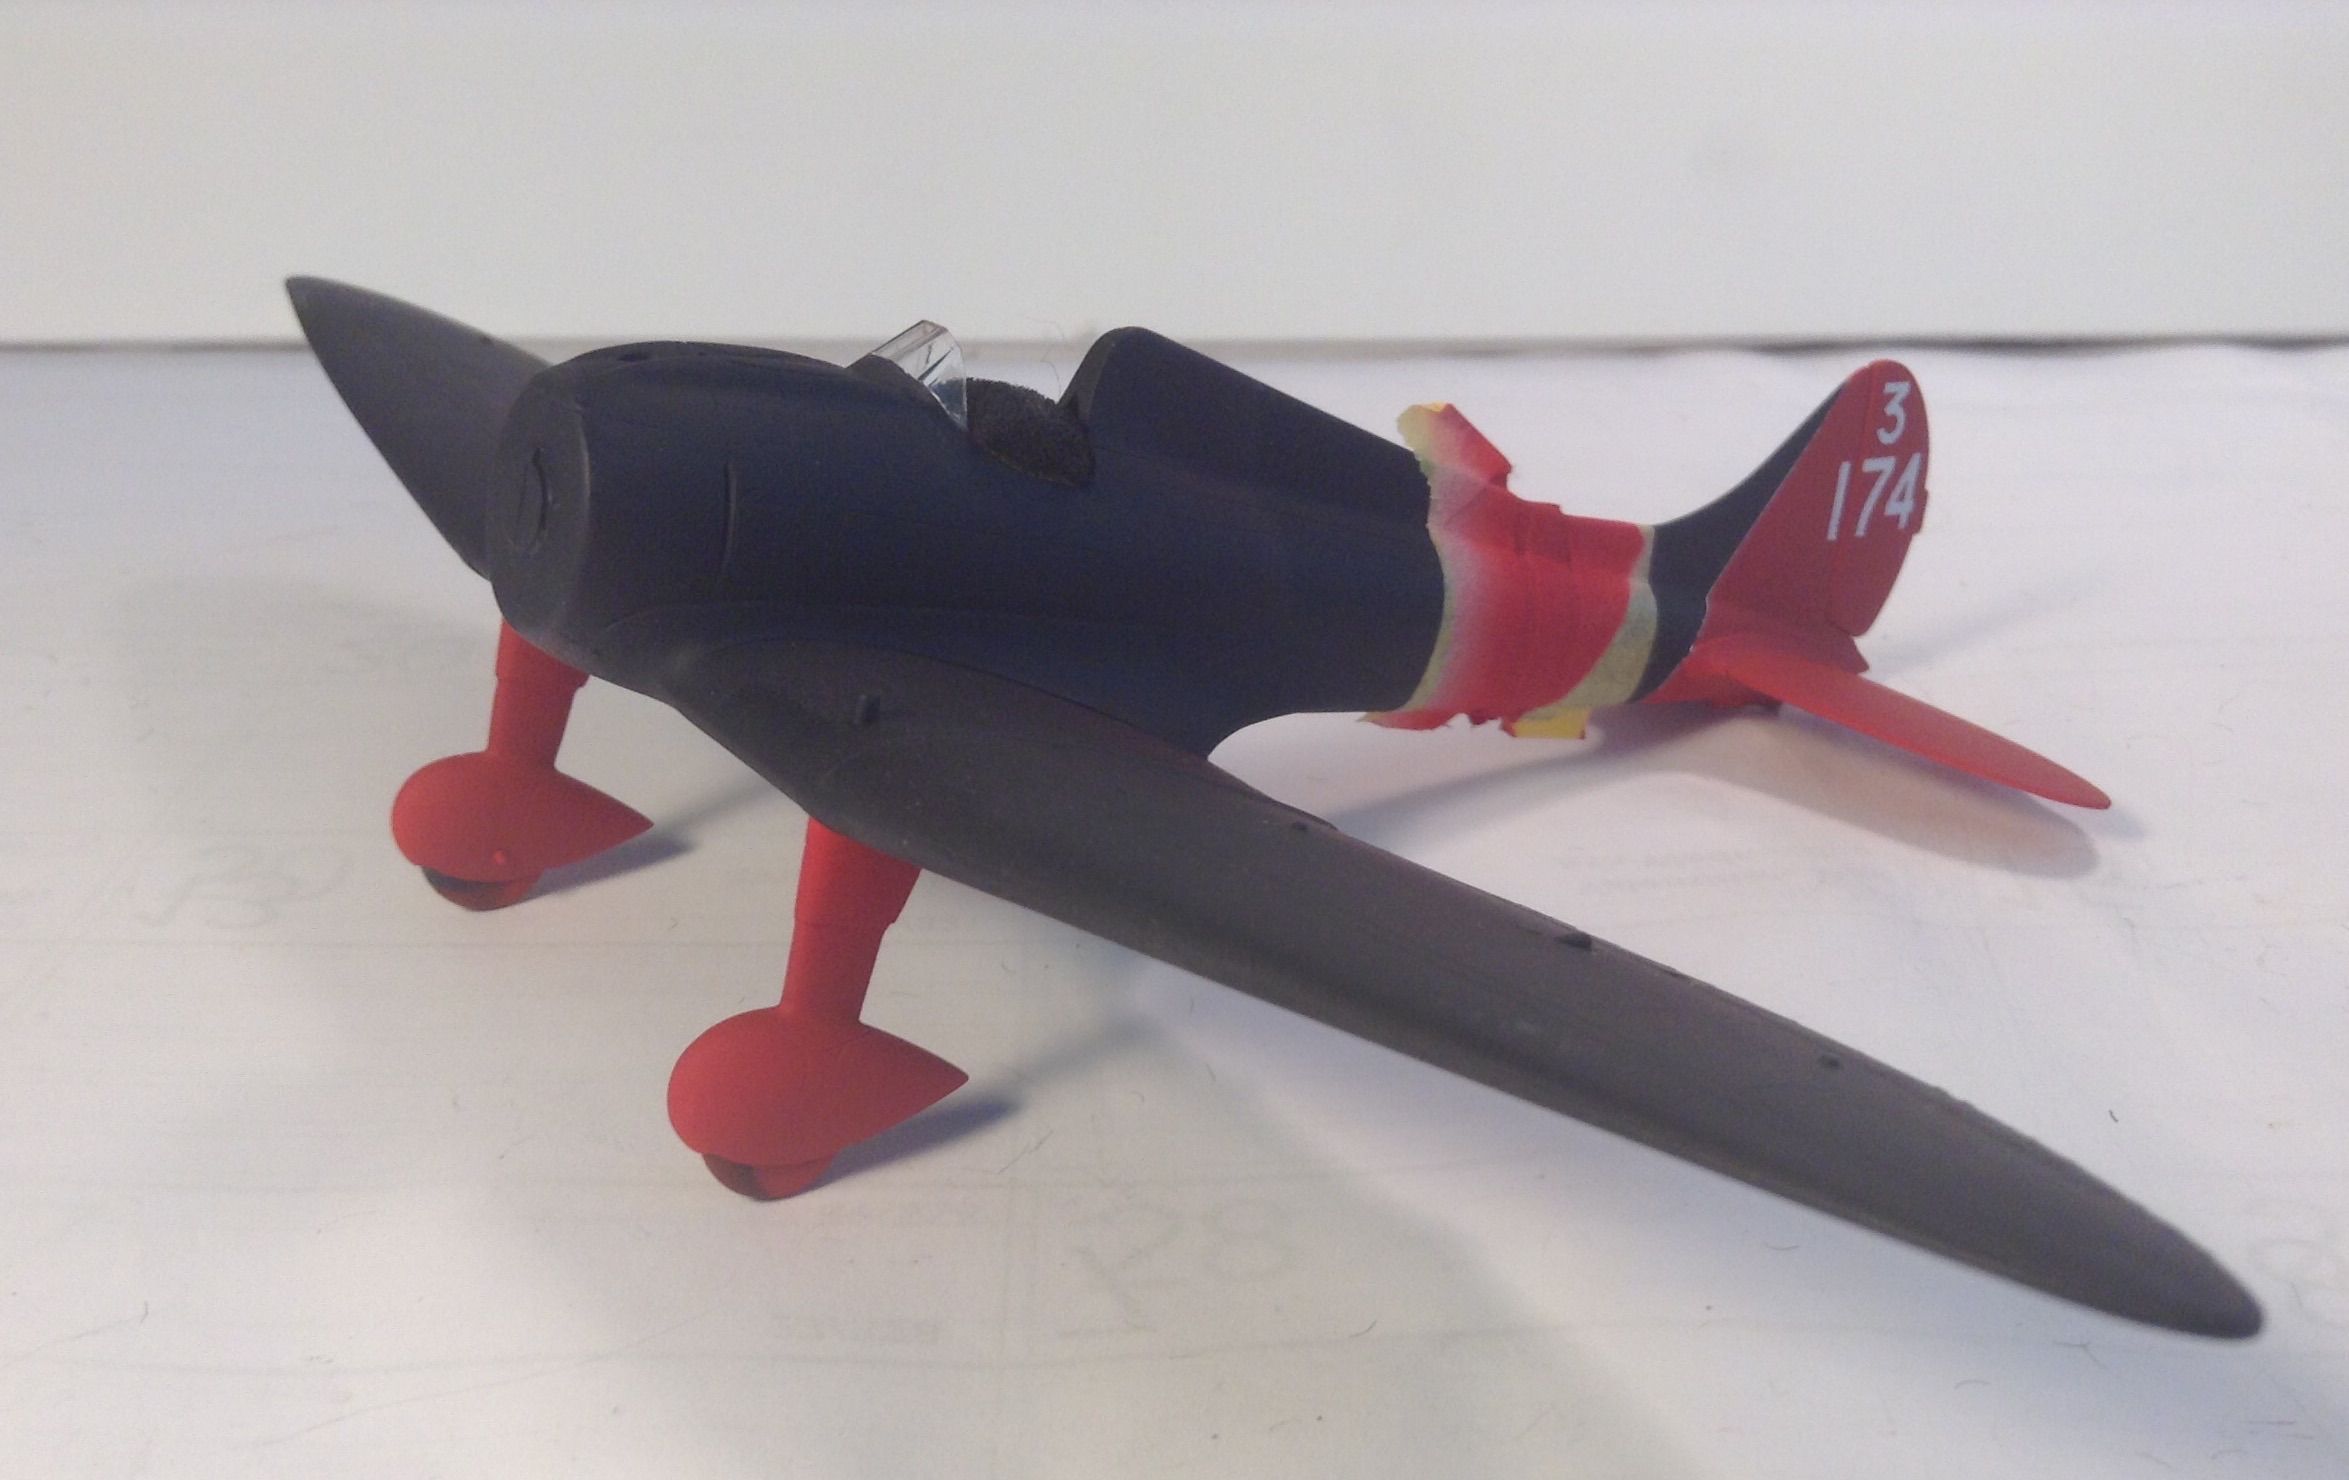
Here is the A5M2a with legs , fuselage band and tail shot in white as a base for the red. I've used the numerals from the Montex set in negative fashion .


Red legs and tail with numeral masks removed - the other side had a little spray get under the mask edges but I hope I can correct it by using the positive mask and touch up the white. I'm learning, I hope !


Thanks for looking in ! Richard
Joel_W
Staff MemberAssociate Editor
AUTOMODELER
_VISITCOMMUNITY
New York, United States
Joined: December 04, 2010
KitMaker: 11,666 posts
AeroScale: 7,410 posts
Posted: Sunday, March 18, 2018 - 08:45 PM UTC
Richard,
Your duel painting efforts are both coming out looking simply outstanding. True, the Iwata makes these processes that much easier, but it's the guy at the trigger that actually controls the entire process to reach the level that these builds are currently at.

Looking forward to your next colorful update.

Joel
rdt1953
_VISITCOMMUNITY
New Jersey, United States
Joined: February 06, 2015
KitMaker: 1,098 posts
AeroScale: 900 posts
Posted: Monday, March 19, 2018 - 01:59 AM UTC
Joel - Thanks !

I received the repaired Badger AB today - Invoice says they replaced a cracked tip and needle bearing and regulator . All at no charge except for shipping and quick turn around so hats off to Badger.

Richard
Joel_W
Staff MemberAssociate Editor
AUTOMODELER
_VISITCOMMUNITY
New York, United States
Joined: December 04, 2010
KitMaker: 11,666 posts
AeroScale: 7,410 posts
Posted: Monday, March 19, 2018 - 02:27 AM UTC

Quoted Text

Joel - Thanks !

I received the repaired Badger AB today - Invoice says they replaced a cracked tip and needle bearing and regulator . All at no charge except for shipping and quick turn around so hats off to Badger.

Richard


Richard,
Now that's impressive service for sure. You'll also get that kind of service from Iwata.

Joel
thegirl
_VISITCOMMUNITY
Alberta, Canada
Joined: January 19, 2008
KitMaker: 6,743 posts
AeroScale: 6,151 posts
Posted: Monday, March 19, 2018 - 11:39 PM UTC
Those are starting look might pretty Richard , love the red tail scheme


Terri
rdt1953
_VISITCOMMUNITY
New Jersey, United States
Joined: February 06, 2015
KitMaker: 1,098 posts
AeroScale: 900 posts
Posted: Saturday, March 24, 2018 - 03:09 AM UTC
A little progress on the A5M2a - shot with Tamiya Gloss Black and blocked out with micro mesh pads. ( I meant to take a photo but forgot ! )

Natural metal color is Vallejo MetalColor White Aluminum.


The kit windscreen had the glazed areas much too small - I had to sand all facets and polish out. The Montex masks were of course made to fit the kit so I made frames of thin slices of masking tape , applied bare metal foil over all for mask , cut along tape frames with model knife and removed the tape frames.

In the interests of full disclosure I discovered a large J shaped sink mark under one of the wings - I only caught it after it was revealed by the gloss black - disappointing but at least it's on the underside.

I don't know how happy I am with the painted on markings yet - no decal film but I now have paint edges to deal with. I'll hopefully rub them out after paint cures a bit.

Thanks for looking- Richard
 _GOTOTOP