Hi all,
This is my next build. I'm hoping for a quick turnaround, so I’ll be trying to resist any major modifications. I’ve already started so the post and photos are a bit of a catch up.
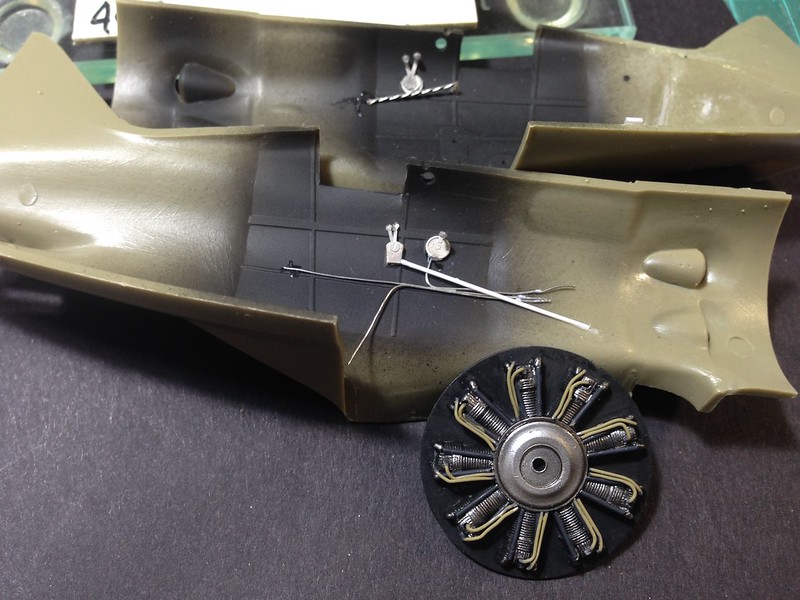
Priming started using Mig One shot black primer.
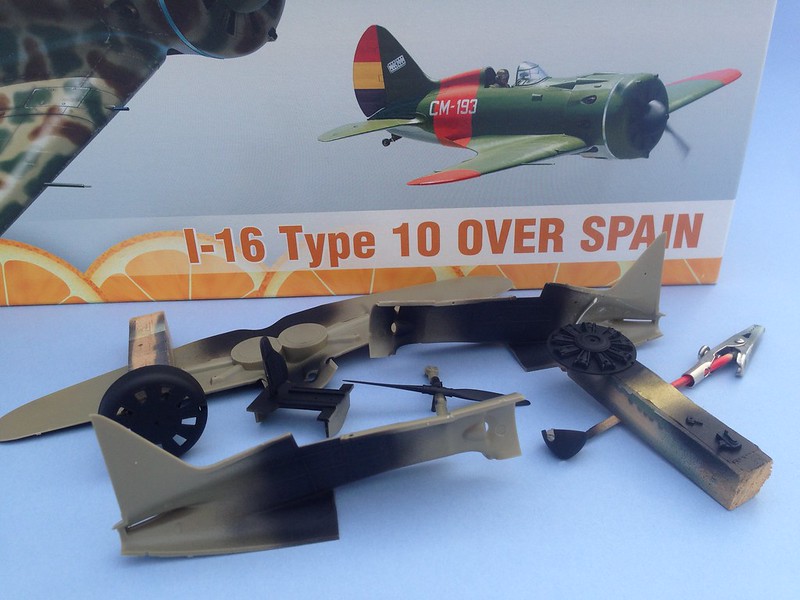
IMG_1945 by Spud Moulder, on Flickr
Some minor mods to the engine, rods and wiring added.
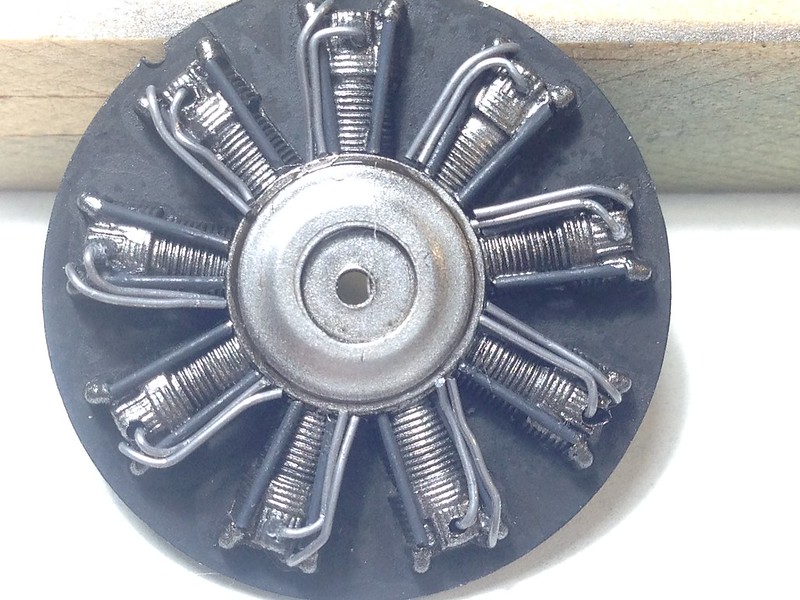
IMG_1978 by Spud Moulder, on Flickr
Not that you can see much of it. Still.
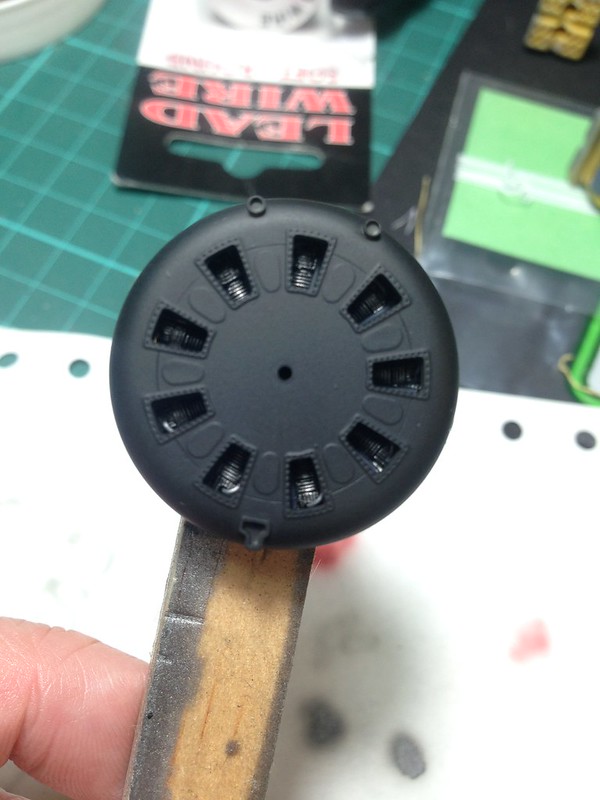
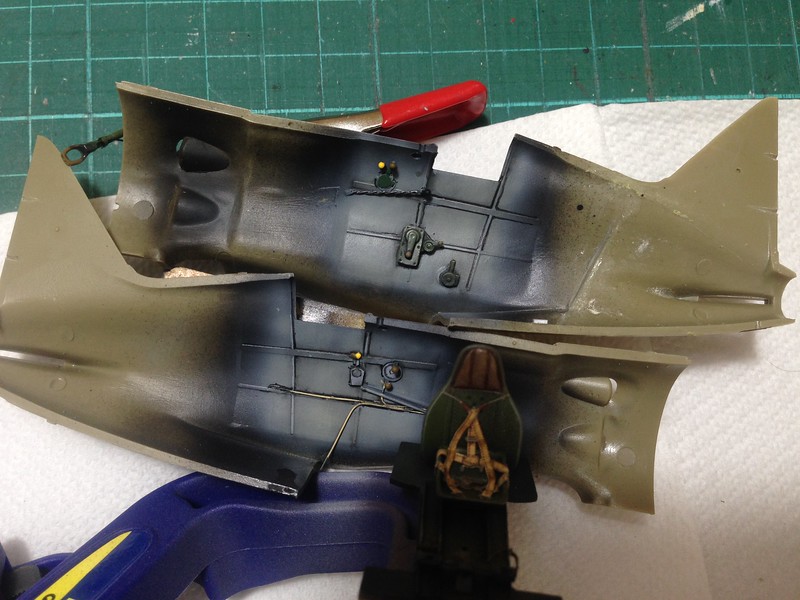
IMG_1973 by Spud Moulder, on Flickr
Engine ready, and some fuse wire cables added to the sidewalls, but from experience from the last one I built, it’s going to be near invisible once it’s closed up.
IMG_1989 by Spud Moulder, on Flickr
Any and all comments or constructive critique are welcome, so don't feel you have to hold back if you're itching too give your 2c.
In fact any advice on the main colours would be appreciated. At the moment I'm looking at Gunze H303 for the green and Gunze 323 for the underside blue. I'm not looking to get too hung up on the final colours but certainly interest in opinions.
cheers.
Hosted by Rowan Baylis
I-16 Type 10 over Spain
Willard79
Wellington, New Zealand
Joined: June 01, 2014
KitMaker: 189 posts
AeroScale: 179 posts
Joined: June 01, 2014
KitMaker: 189 posts
AeroScale: 179 posts
Posted: Saturday, March 17, 2018 - 09:28 AM UTC
Posted: Saturday, March 17, 2018 - 11:18 PM UTC
Your Rata is coming along well. I look forward to how you paint it.
Nice work on the small cockpit details.
Yes, that Polikarpov's face really hide the engine. At least you know of all the work you did to that Shvetsov
Nice work on the small cockpit details.
Yes, that Polikarpov's face really hide the engine. At least you know of all the work you did to that Shvetsov
Willard79
Wellington, New Zealand
Joined: June 01, 2014
KitMaker: 189 posts
AeroScale: 179 posts
Joined: June 01, 2014
KitMaker: 189 posts
AeroScale: 179 posts
Posted: Sunday, March 18, 2018 - 05:57 AM UTC
Thanks Frederick,
Yes, Rata or Mosca, depending on your affiliation at the time.
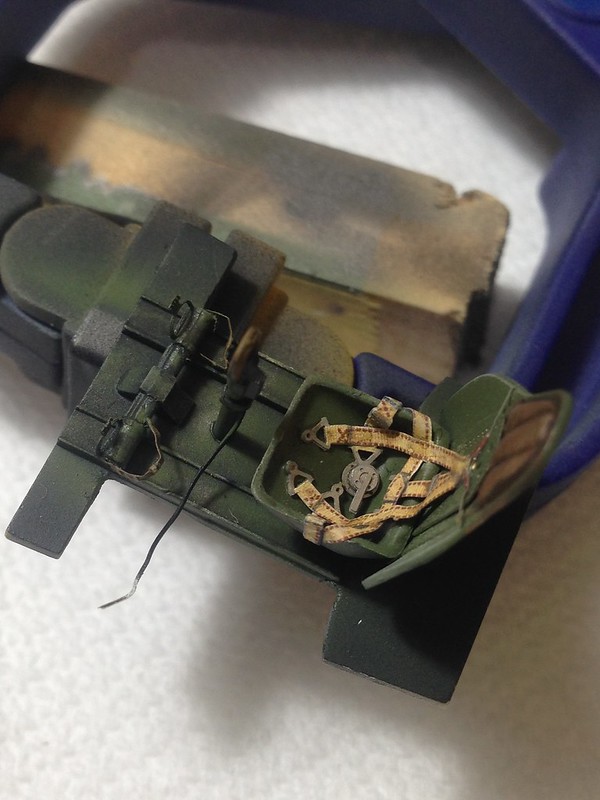
The cockpit is done and it's ready to be closed up.
Minor mods to note would be the cockpit floor cut back to the foot rails and the instrument panel illumination ports drilled out on the top of the fuselage halves (I thing that's what they were for.)
IMG_2007 by Spud Moulder, on Flickr
IMG_2012 by Spud Moulder, on Flickr
regards.
Willard79
Wellington, New Zealand
Joined: June 01, 2014
KitMaker: 189 posts
AeroScale: 179 posts
Joined: June 01, 2014
KitMaker: 189 posts
AeroScale: 179 posts
Posted: Thursday, March 22, 2018 - 12:57 AM UTC
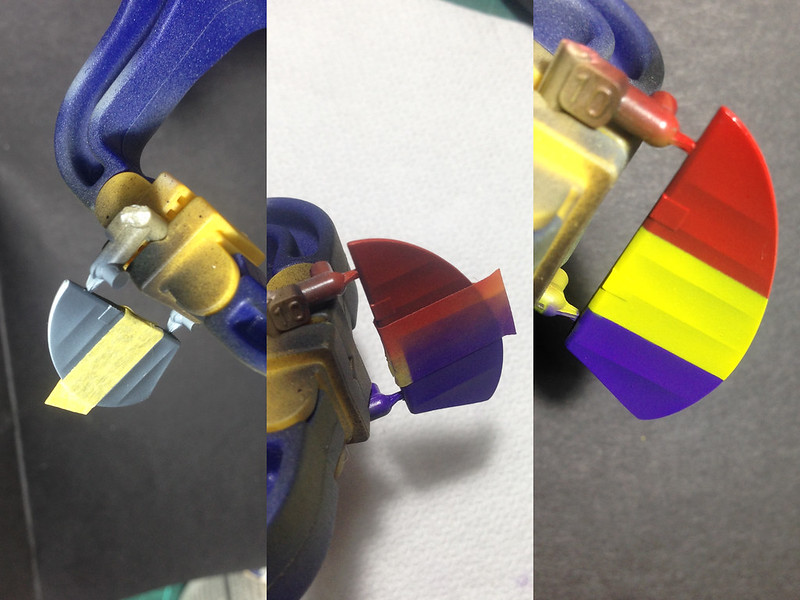
Not a whole lot of progress going on, but I've painted the prop and spinner hub to keep it ticking along. Rudder also painted in Republican colors while starting with some modulated pre-shade.
I-16 rudder painting by Spud Moulder, on Flickr
cheers.
I-16 rudder painting by Spud Moulder, on Flickr
cheers.
rochaped
Lisboa, Portugal
Joined: August 27, 2010
KitMaker: 679 posts
AeroScale: 669 posts
Joined: August 27, 2010
KitMaker: 679 posts
AeroScale: 669 posts
Posted: Thursday, March 22, 2018 - 01:02 AM UTC
Spud,
This a great subject (no pun intended) to build.
The mosca is a tiny but groundbreaking aircraft that deserves more kits on these pages.
What camouflage will you choose?
Good work so far, I like that cockpit shading a lot
Cheers
Pedro
This a great subject (no pun intended) to build.
The mosca is a tiny but groundbreaking aircraft that deserves more kits on these pages.
What camouflage will you choose?
Good work so far, I like that cockpit shading a lot
Cheers
Pedro
Willard79
Wellington, New Zealand
Joined: June 01, 2014
KitMaker: 189 posts
AeroScale: 179 posts
Joined: June 01, 2014
KitMaker: 189 posts
AeroScale: 179 posts
Posted: Thursday, March 22, 2018 - 01:37 AM UTC
Thanks Pedro, yes it is a nifty little bird for it's time.
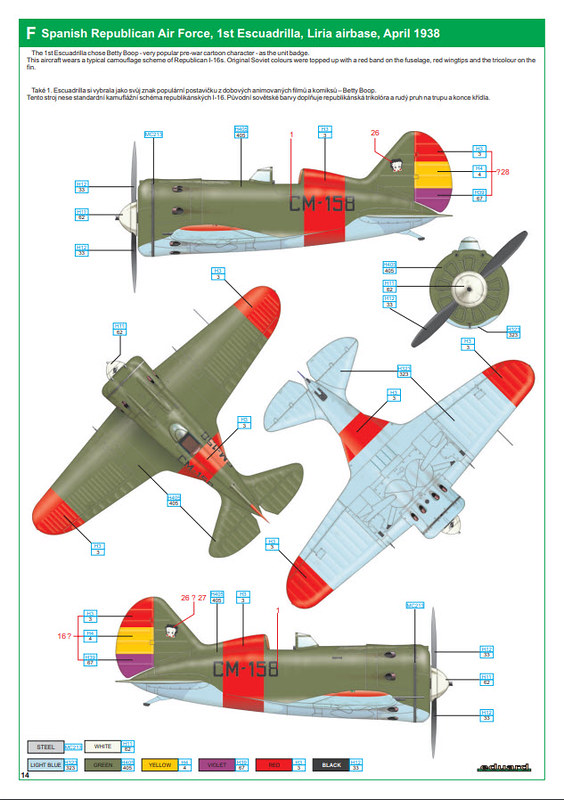
I'm going for classic Republican this time round.
scheme F by Spud Moulder, on Flickr
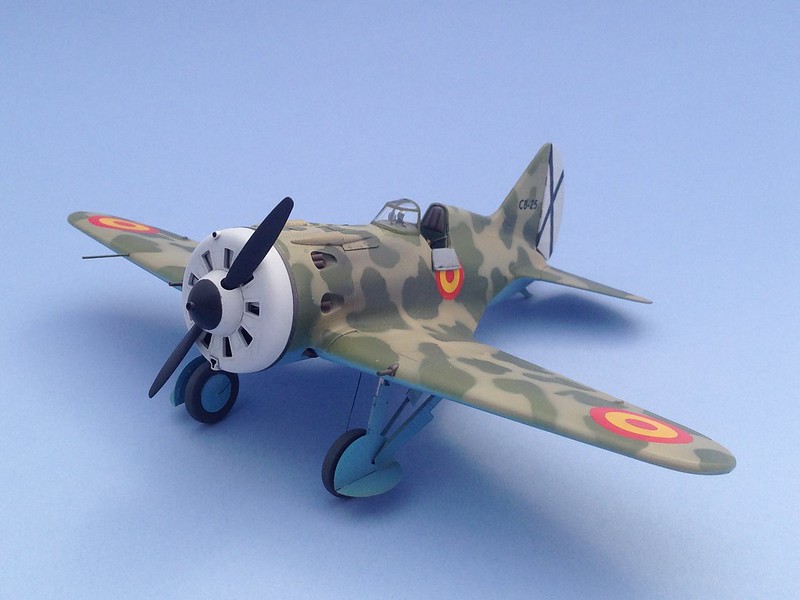
This was my last effort, a re purposed Nationalist Rata. Eduard are onto something with their dual kits, they always tempt me to open my wallet.
IMG_1946 by Spud Moulder, on Flickr
Thanks for stopping by.
I'm going for classic Republican this time round.
scheme F by Spud Moulder, on Flickr
This was my last effort, a re purposed Nationalist Rata. Eduard are onto something with their dual kits, they always tempt me to open my wallet.
IMG_1946 by Spud Moulder, on Flickr
Thanks for stopping by.
Joel_W
Associate Editor
New York, United States
Joined: December 04, 2010
KitMaker: 11,666 posts
AeroScale: 7,410 posts
Joined: December 04, 2010
KitMaker: 11,666 posts
AeroScale: 7,410 posts
Posted: Thursday, March 22, 2018 - 02:50 AM UTC
Spud,
A rather unusual aircraft that as you said, hasn't seen that many builds here.
Really a excellent job on the cockpit. The seat and those belts really stand out, and will be the most visible part of the cockpit when someone leans in for a look.
You've done more then enough on the engine as it's almost completely encapsulated, but what shows has your extra detail easily visible.
Sorry that I can't even offer a suggestion on colors to help you out, but I have no experience with that era aircraft.
I'm pulling up my chair, and I'll be along for the ride.
BTW, your earlier build looks fantastic.
Joel
Willard79
Wellington, New Zealand
Joined: June 01, 2014
KitMaker: 189 posts
AeroScale: 179 posts
Joined: June 01, 2014
KitMaker: 189 posts
AeroScale: 179 posts
Posted: Thursday, March 22, 2018 - 04:27 AM UTC
Hey, thanks Joel.
The belts can be a bit of a pain to get sitting right and needed a bit of a wash to tone them down, but I think I'm happy with them now. (I know, first world modelling problems)
I'd like to get a lot better at making my own belts, luckily there are quite a few people out there to learn off.
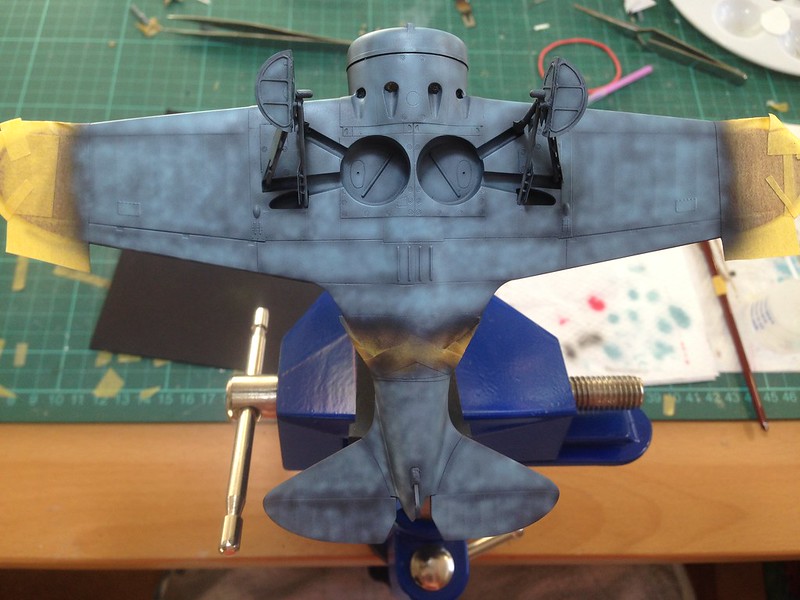
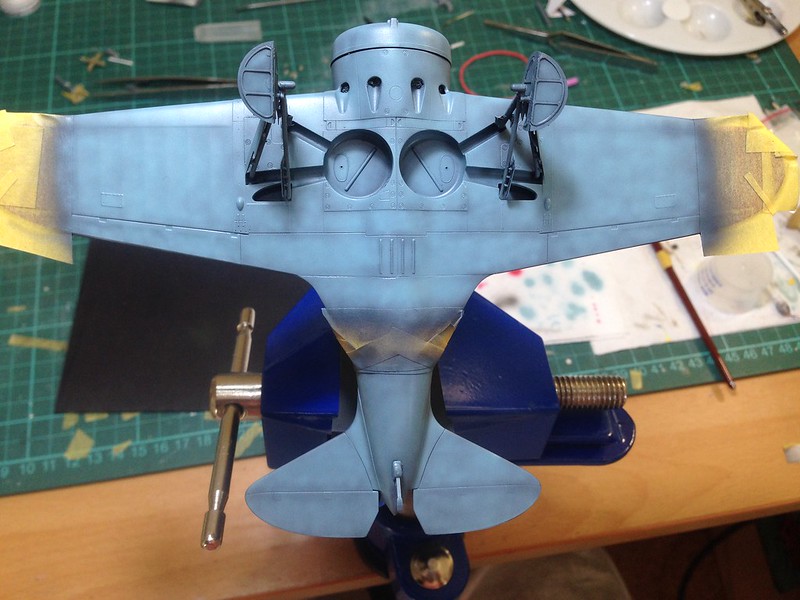
Regarding the base colors, I'm going to paint some samples and see what takes my fancy.
Nice to know your lookin' on, feel free to let me know if you see something amiss.
cheers.
Willard79
Wellington, New Zealand
Joined: June 01, 2014
KitMaker: 189 posts
AeroScale: 179 posts
Joined: June 01, 2014
KitMaker: 189 posts
AeroScale: 179 posts
Posted: Saturday, April 07, 2018 - 10:17 AM UTC
Taking my time and doing my bit to push the build time average back up (I'm looking at you Terri).
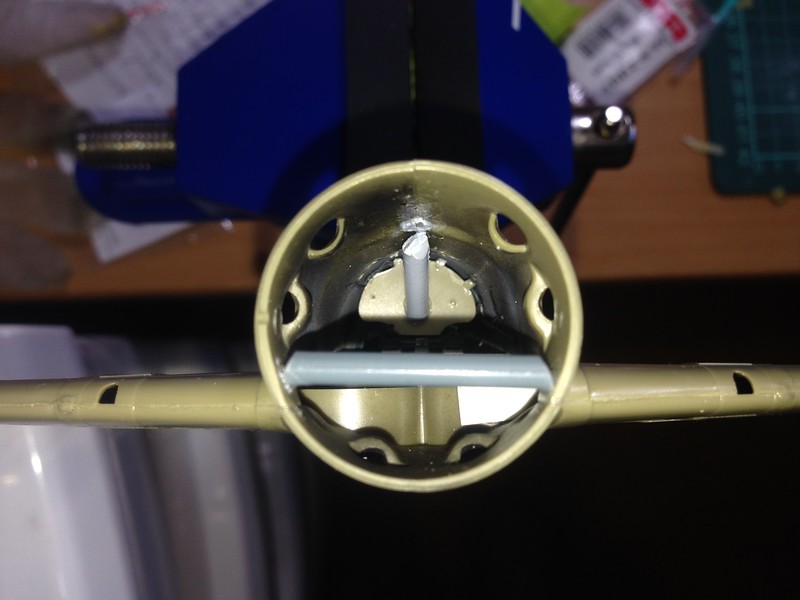
The Mosca is closed up with some of the braces, spreaders and shim shown to try and level everything out.
IMG_2031 by Spud Moulder, on Flickr
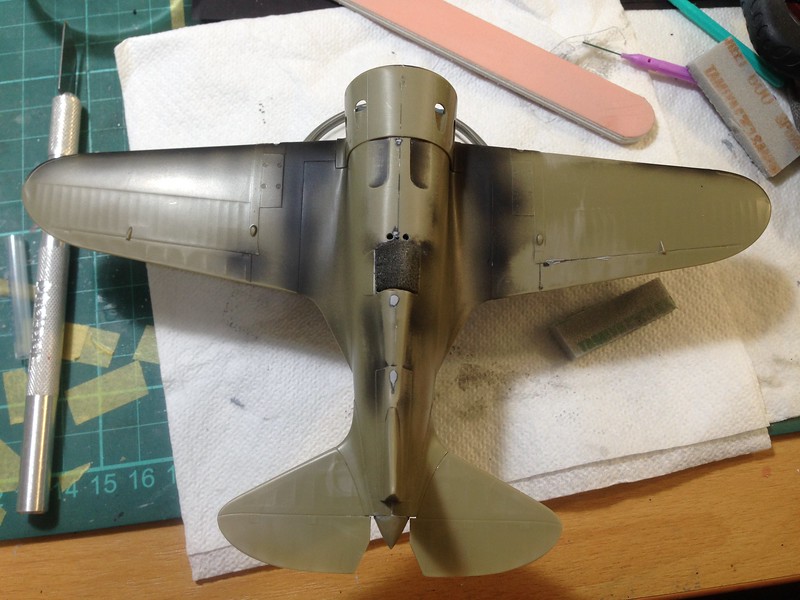
The build is currently going throgh a cycle of fill, sand, prime [repeat].
IMG_2036 by Spud Moulder, on Flickr
In the meantime, punishing myself with the PE landing gear covers.
IMG_2038 by Spud Moulder, on Flickr
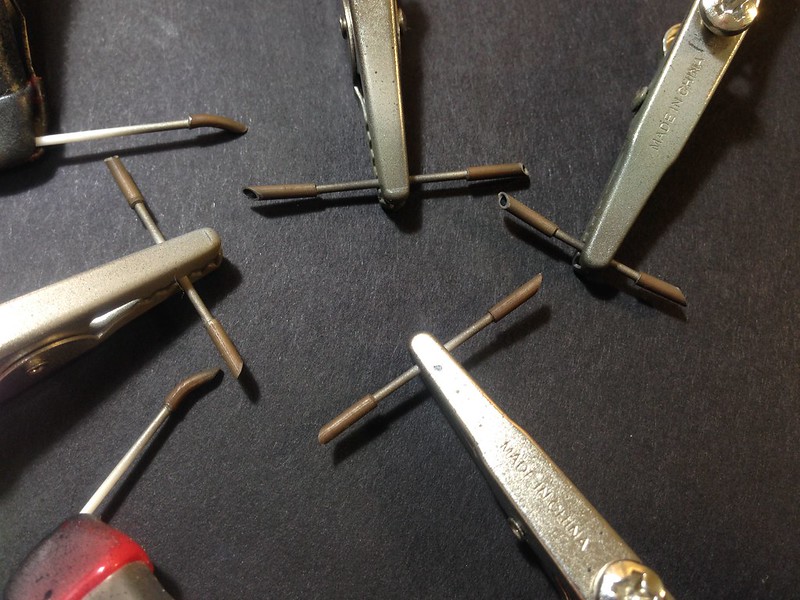
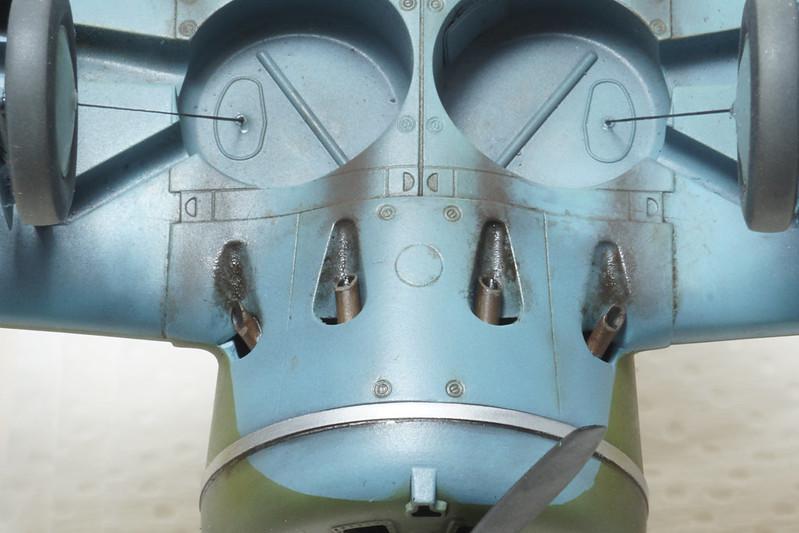
and finally I've replaced the kit exhausts with brass tubing and applied exhaust painting method No. 86 to them. I think they might need another dark filter.
IMG_2039 by Spud Moulder, on Flickr
Gracias.
The Mosca is closed up with some of the braces, spreaders and shim shown to try and level everything out.
IMG_2031 by Spud Moulder, on Flickr
The build is currently going throgh a cycle of fill, sand, prime [repeat].
IMG_2036 by Spud Moulder, on Flickr
In the meantime, punishing myself with the PE landing gear covers.
IMG_2038 by Spud Moulder, on Flickr
and finally I've replaced the kit exhausts with brass tubing and applied exhaust painting method No. 86 to them. I think they might need another dark filter.
IMG_2039 by Spud Moulder, on Flickr
Gracias.
thegirl
Alberta, Canada
Joined: January 19, 2008
KitMaker: 6,743 posts
AeroScale: 6,151 posts
Joined: January 19, 2008
KitMaker: 6,743 posts
AeroScale: 6,151 posts
Posted: Sunday, April 08, 2018 - 01:54 AM UTC
Your build is coming along very nice for far . Looking forward on the next up-date .
Terri
Terri
Willard79
Wellington, New Zealand
Joined: June 01, 2014
KitMaker: 189 posts
AeroScale: 179 posts
Joined: June 01, 2014
KitMaker: 189 posts
AeroScale: 179 posts
Posted: Sunday, April 08, 2018 - 02:01 AM UTC
Cheers Terri, we must've been writing on each other posts at the same time. Freaky.
Willard79
Wellington, New Zealand
Joined: June 01, 2014
KitMaker: 189 posts
AeroScale: 179 posts
Joined: June 01, 2014
KitMaker: 189 posts
AeroScale: 179 posts
Posted: Friday, April 20, 2018 - 04:08 AM UTC
Bit of an update now it’s in the painting phase.
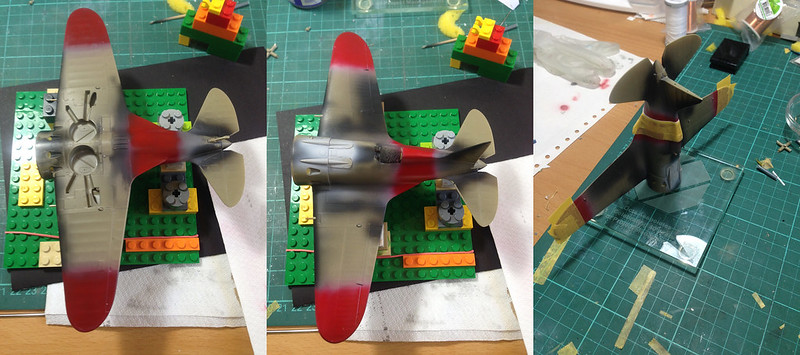
Red over grey primer
red paint by Spud Moulder, on Flickr
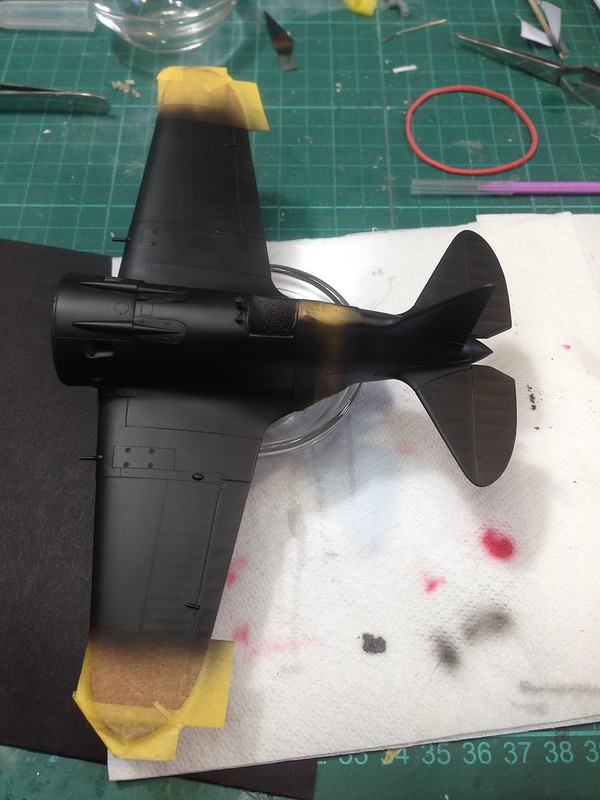
Black primer followed by black basing with a mix of XF-23 and H323
IMG_2049 by Spud Moulder, on Flickr
IMG_2050 by Spud Moulder, on Flickr
At about this point I’ve done a blend coat which I’ll leave and comeback to If I think it needs more.
IMG_2051 by Spud Moulder, on Flickr
cheer.
Willard79
Wellington, New Zealand
Joined: June 01, 2014
KitMaker: 189 posts
AeroScale: 179 posts
Joined: June 01, 2014
KitMaker: 189 posts
AeroScale: 179 posts
Posted: Saturday, April 21, 2018 - 10:01 AM UTC
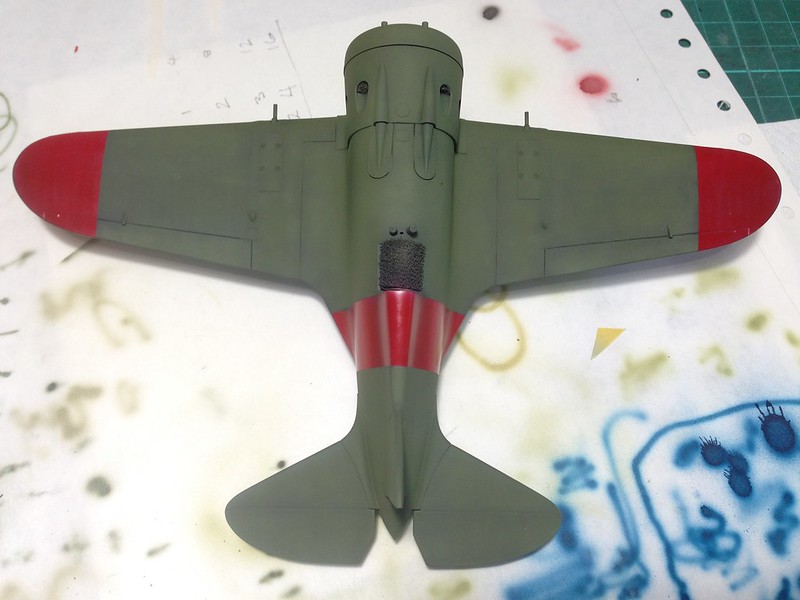
And with that the top side coat goes on.
Black basing with Mr Hobby H303, which differs from the instructions as I was after a lighter shade.
Here it is with the first blend coat.
IMG_2052 by Spud Moulder, on Flickr
Then after a blend coat with a bit of white for the highlights and a bit more blending, also the masking for the red coat have been removed.
IMG_2054 by Spud Moulder, on Flickr
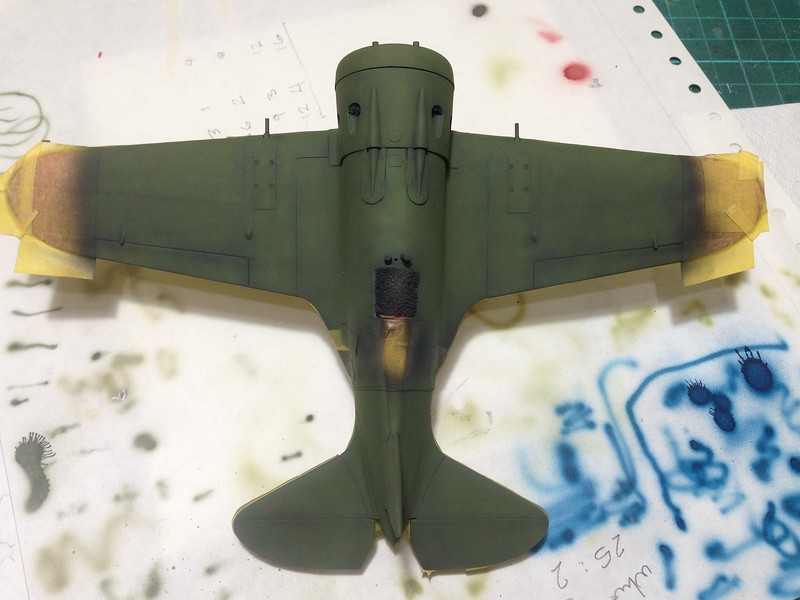
And finally the underside.
IMG_2056 by Spud Moulder, on Flickr
Decals and weathering next.
Regards.
Willard79
Wellington, New Zealand
Joined: June 01, 2014
KitMaker: 189 posts
AeroScale: 179 posts
Joined: June 01, 2014
KitMaker: 189 posts
AeroScale: 179 posts
Posted: Wednesday, May 16, 2018 - 02:31 PM UTC
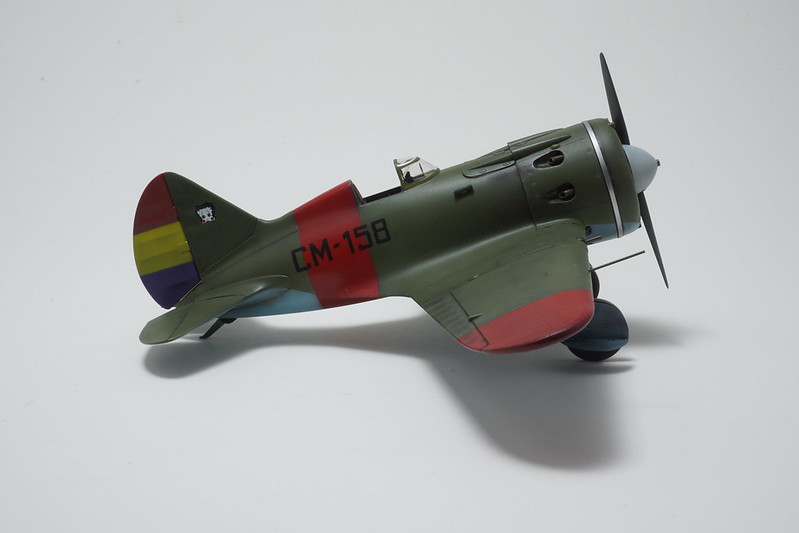
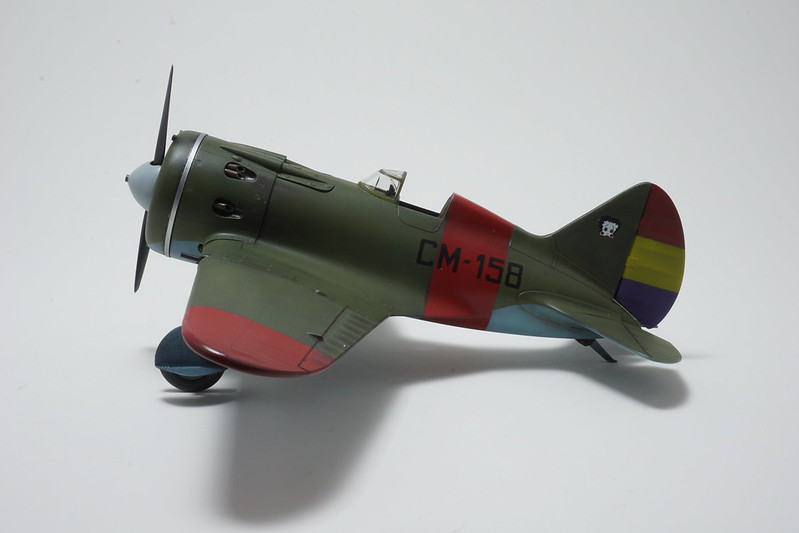
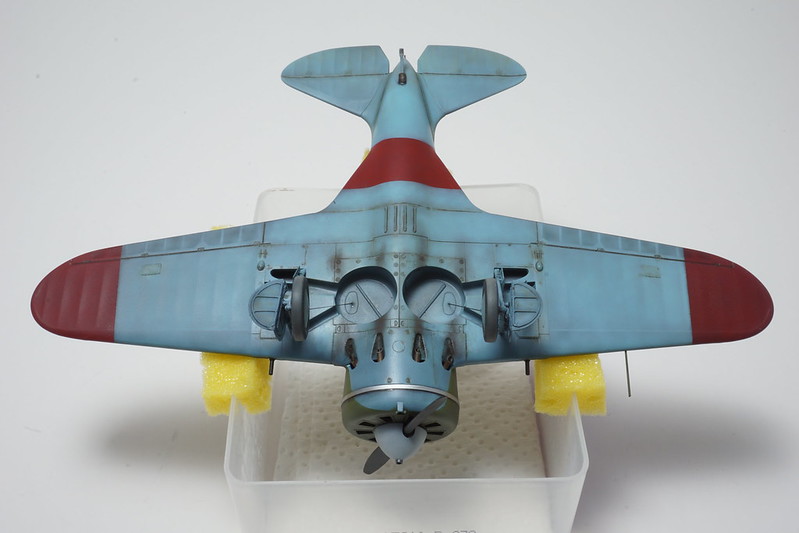
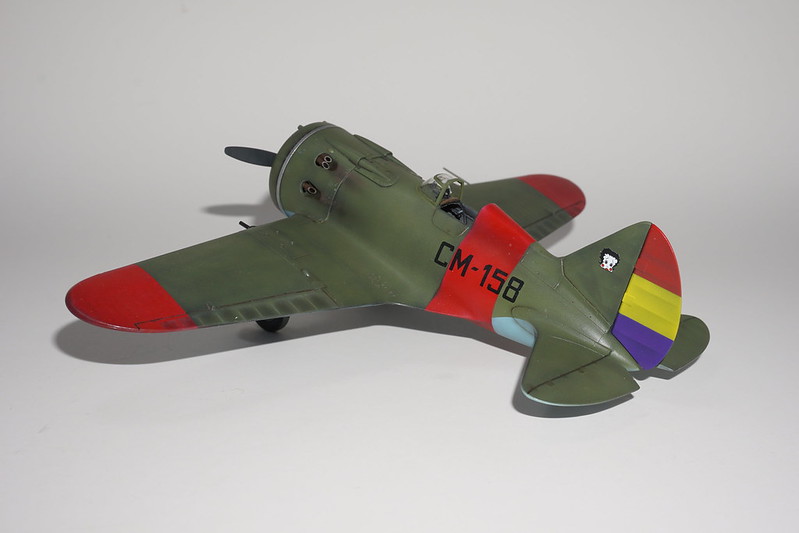
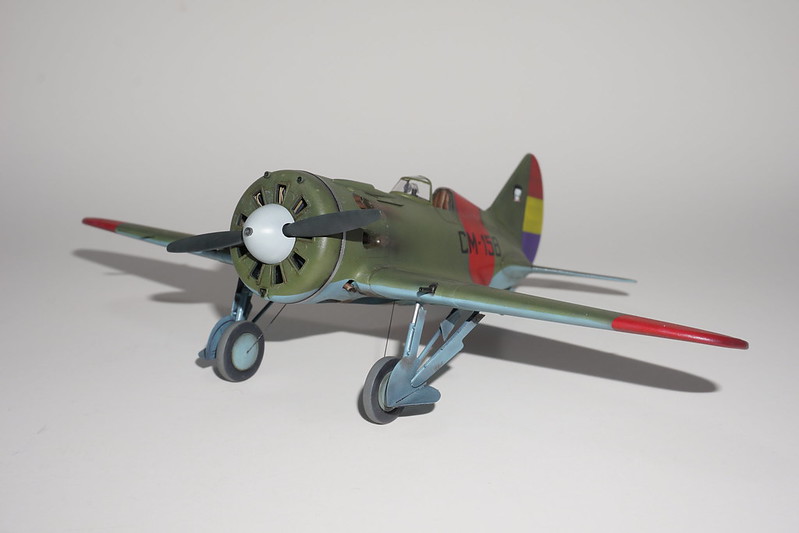
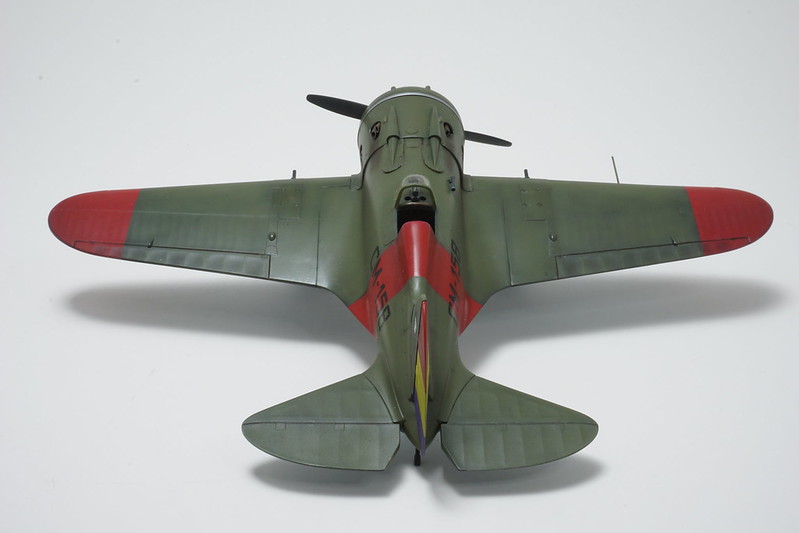
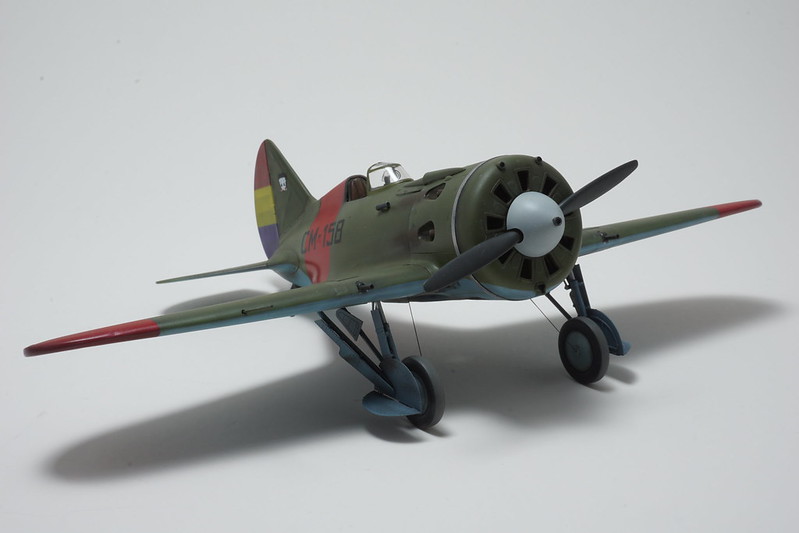
Well, I’m calling this done and sticking it on the shelf next to its buddy.
The weathering process started as a bit ad hoc while I tried a couple of new products, but I eventually settled down and enhanced some fabric areas like the flaperons and faded some areas. I ended up appling a selective oil wash and various dusty tones to the underside/rear.
On the metal airframe areas, I applied a satin varnish and then contrasted this with a matt coat to the fabric areas (wings and tail plane).
Finally, I added the exhaust stains with a thin filter and pigments, but also added some oil staining with model masters ‘Oil and Grease’ near the stacks for contrast and visual interest.
I’ve recently purchased a new camera, so I’ve been a bit snap happy while I figure it out, hence the prolific photo dump below.
As always, feel free to comment/critique (or don’t), but thanks if you’ve been following along.
Regards.
DSC00110 by Spud Moulder, on Flickr
DSC00111 by Spud Moulder, on Flickr
DSC00112 by Spud Moulder, on Flickr
DSC00118 by Spud Moulder, on Flickr
DSC00122 by Spud Moulder, on Flickr
DSC00123 by Spud Moulder, on Flickr
DSC00125 by Spud Moulder, on Flickr
DSC00127 by Spud Moulder, on Flickr
DSC00129CROP by Spud Moulder, on Flickr
DSC00133 by Spud Moulder, on Flickr
thegirl
Alberta, Canada
Joined: January 19, 2008
KitMaker: 6,743 posts
AeroScale: 6,151 posts
Joined: January 19, 2008
KitMaker: 6,743 posts
AeroScale: 6,151 posts
Posted: Thursday, May 17, 2018 - 05:06 AM UTC
Beautiful job on your build Spud , well done
Terri
Terri
Bigrip74
Texas, United States
Joined: February 22, 2008
KitMaker: 5,026 posts
AeroScale: 2,811 posts
Joined: February 22, 2008
KitMaker: 5,026 posts
AeroScale: 2,811 posts
Posted: Thursday, May 17, 2018 - 05:32 AM UTC
Spud, yes indeed a really nice job on your I16. I learned something watching your progress, thanks.
Bob
Bob
Willard79
Wellington, New Zealand
Joined: June 01, 2014
KitMaker: 189 posts
AeroScale: 179 posts
Joined: June 01, 2014
KitMaker: 189 posts
AeroScale: 179 posts
Posted: Thursday, May 17, 2018 - 09:40 AM UTC
Thanks Terri and Bob, I was trying to finish before Terri posted yet another finished build (the Hurri?), which would've been 3 in the time I took to do one. (might even be 4 to my 1).
All the best.
All the best.
Joel_W
Associate Editor
New York, United States
Joined: December 04, 2010
KitMaker: 11,666 posts
AeroScale: 7,410 posts
Joined: December 04, 2010
KitMaker: 11,666 posts
AeroScale: 7,410 posts
Posted: Friday, May 18, 2018 - 07:15 PM UTC
Spud,
A most impressive build for sure. Your Black Basing choice of colors proved to be perfect to bring out the various tones in both the top and bottom base colors. The weathering on the top side is just enough to a well maintained operational aircraft, while the bottom side shows more staining, and really looks the part.
Very well done my friend.
I don't think it's humanely possible to build at Terri's rate, and maintain the quality of each build like she does.
Joel
Willard79
Wellington, New Zealand
Joined: June 01, 2014
KitMaker: 189 posts
AeroScale: 179 posts
Joined: June 01, 2014
KitMaker: 189 posts
AeroScale: 179 posts
Posted: Saturday, May 19, 2018 - 01:41 AM UTC
Thank you Joel, I was trying to go for a dustier look than I got, but I settled for the final product as I was entering irreversible stuff up territory. I've got another couple of builds planned that will give me a chance to work on that dusty sun bleached look.
regards.
regards.
Joel_W
Associate Editor
New York, United States
Joined: December 04, 2010
KitMaker: 11,666 posts
AeroScale: 7,410 posts
Joined: December 04, 2010
KitMaker: 11,666 posts
AeroScale: 7,410 posts
Posted: Saturday, May 19, 2018 - 06:51 PM UTC
Quoted Text
Thank you Joel, I was trying to go for a dustier look than I got, but I settled for the final product as I was entering irreversible stuff up territory. I've got another couple of builds planned that will give me a chance to work on that dusty sun bleached look.
regards.
Spud,
for a dusty look especially on the topside, I've always used a airbrushed wash of a light Earth Tone Tamiya paint really thinned out like 1 part paint to 6+ parts thinner, and just gave the model an overall series of light dust coatings. Every 3 passes, I'd give it a rest of 10 min or so both for the paint to really tact up and for my eyes to adjust to the effect. If I can do it, anyone can.
Joel