Hosted by Rowan Baylis
Hasegawa zero 1/32 scale
russamotto

Joined: December 14, 2007
KitMaker: 3,389 posts
AeroScale: 375 posts

Posted: Monday, September 10, 2018 - 01:25 AM UTC
Detail looks awesome. Hope it is visible when everything is closed up. It really adds a lot to the kit.
Joel_W

Joined: December 04, 2010
KitMaker: 11,666 posts
AeroScale: 7,410 posts

Posted: Monday, September 10, 2018 - 01:56 AM UTC
Terri,
The Pit really is starting to look quite good. I envy that you can get the Tamiya Lacquer Paints. They're just not available here in the states.
Joel
The Pit really is starting to look quite good. I envy that you can get the Tamiya Lacquer Paints. They're just not available here in the states.
Joel
thegirl

Joined: January 19, 2008
KitMaker: 6,743 posts
AeroScale: 6,151 posts

Posted: Monday, September 10, 2018 - 01:05 PM UTC
Quoted Text
Cute cat. They do tend to let you know where you stand. My daily routine starts at 6AM with feeding the cats, change the water bowl, and clean the litter box. Then, and only then, I can make coffee for Maria and myself...
Same routine for me as well , and lord help me if the food dish isn't filled fast enough !
Terri
thegirl

Joined: January 19, 2008
KitMaker: 6,743 posts
AeroScale: 6,151 posts

Posted: Monday, September 10, 2018 - 01:10 PM UTC
Quoted Text
Great work so far Terri, I must admit to liking the new Hasegawa offering better than I like their first. Which I have built with little problem it was just adding in some of the missing details that took the time. I look forward to seeing it go together but from what I've seen so far it's time to add a couple to the ever growing stash.
Hi Chris
 I haven't built their older version of this kit . But I must say this new tooled one is awesome so far , good level of detail and the fit so far is super . One could go nuts with the wiring in the pit . Something I didn't feel like doing this time around .
 Terri
thegirl

Joined: January 19, 2008
KitMaker: 6,743 posts
AeroScale: 6,151 posts

Posted: Monday, September 10, 2018 - 01:15 PM UTC
Quoted Text
Detail looks awesome. Hope it is visible when everything is closed up. It really adds a lot to the kit.
I as well Russ , be a shame not to see the detail after added it all .
Terri
thegirl

Joined: January 19, 2008
KitMaker: 6,743 posts
AeroScale: 6,151 posts

Posted: Monday, September 10, 2018 - 01:21 PM UTC
Quoted Text
Terri,
The Pit really is starting to look quite good. I envy that you can get the Tamiya Lacquer Paints. They're just not available here in the states.
Joel
Really ! you don't have them there yet ? To be honest I was surprised that they even had them in stock . I will be getting more of the range . Won't be restocking any of my Vallejo model air paints once used up .
Hope to have more soon , these belts will take a bit of time to construct .
Terri
thegirl

Joined: January 19, 2008
KitMaker: 6,743 posts
AeroScale: 6,151 posts

Posted: Sunday, September 16, 2018 - 01:43 AM UTC
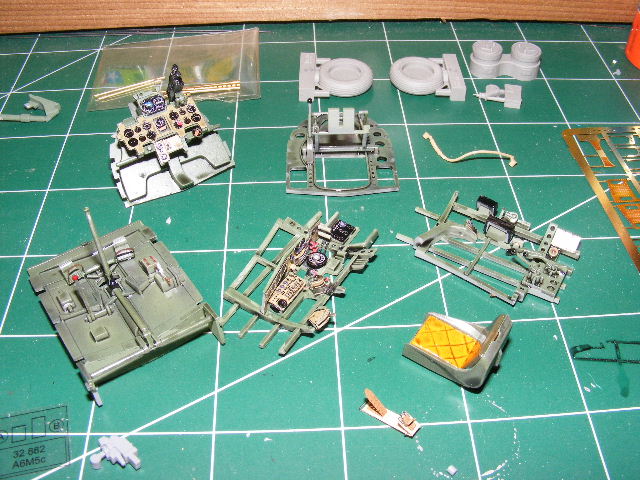
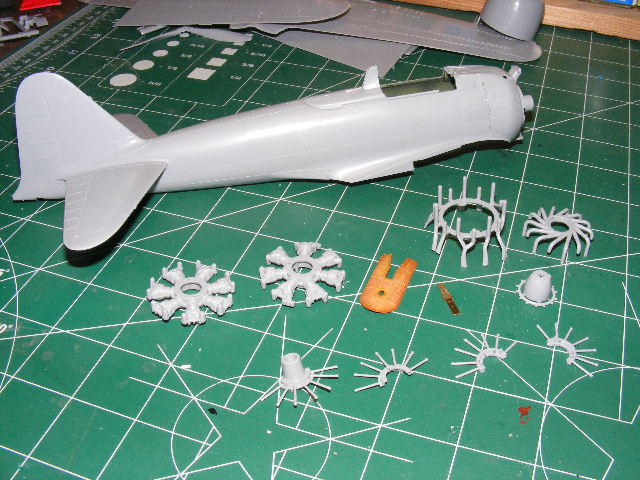
Not much bench time this past week but I was able to make some progress moving forward .
The pit has it wash and while I was waiting for the parts to dry I started cleaning up the engine parts , got the tail planes glued up ( not yet glued in place ) and the fuselage halves are glued up with just a little sanding here and there . Still working on the seatbelts , very hard on the eyes so these will take me a bit of time still . Almost have two done , two more to go !
Terri
The pit has it wash and while I was waiting for the parts to dry I started cleaning up the engine parts , got the tail planes glued up ( not yet glued in place ) and the fuselage halves are glued up with just a little sanding here and there . Still working on the seatbelts , very hard on the eyes so these will take me a bit of time still . Almost have two done , two more to go !
Terri
Posted: Saturday, September 22, 2018 - 07:59 AM UTC
Hi Terri
Great job so far! Sorry, I've slipped out of touch on this build - and despite your excellent work on the cockpit, the clear the star of the show is Seiben! Wow! What a little darling!
All the best
Rowan
Great job so far!
 Sorry, I've slipped out of touch on this build - and despite your excellent work on the cockpit, the clear the star of the show is Seiben! Wow! What a little darling!
All the best
Rowan

thegirl

Joined: January 19, 2008
KitMaker: 6,743 posts
AeroScale: 6,151 posts

Posted: Monday, September 24, 2018 - 01:13 PM UTC
Thank you Rowan . Yes he is a little darling and very affectionate .
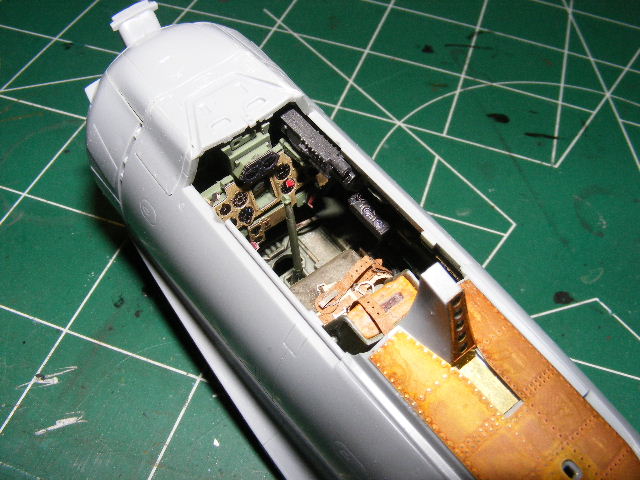
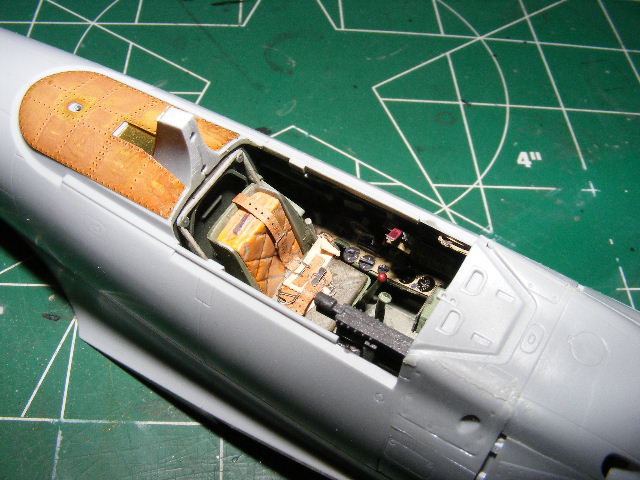
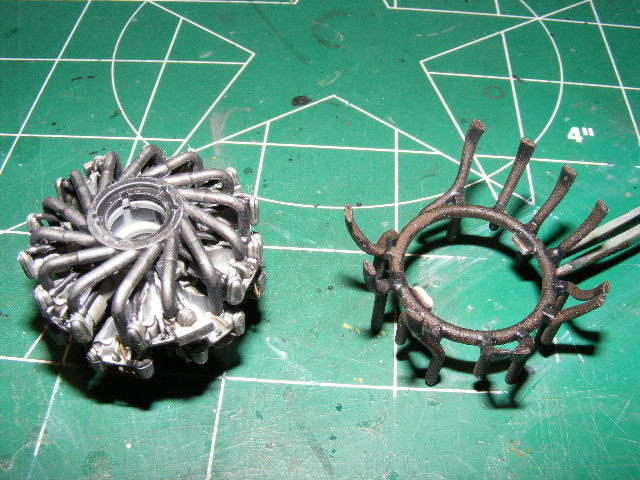
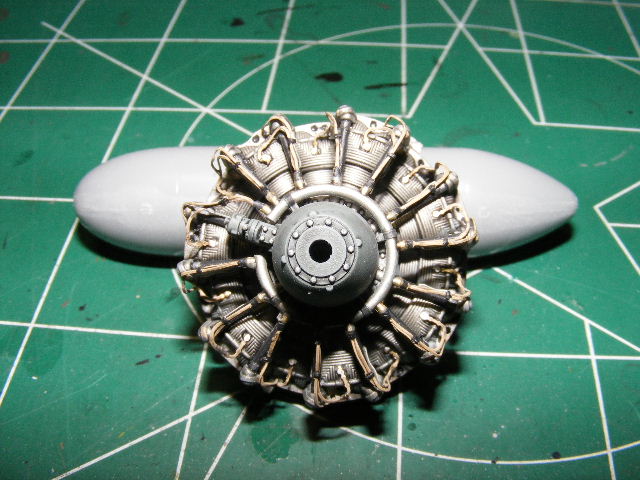
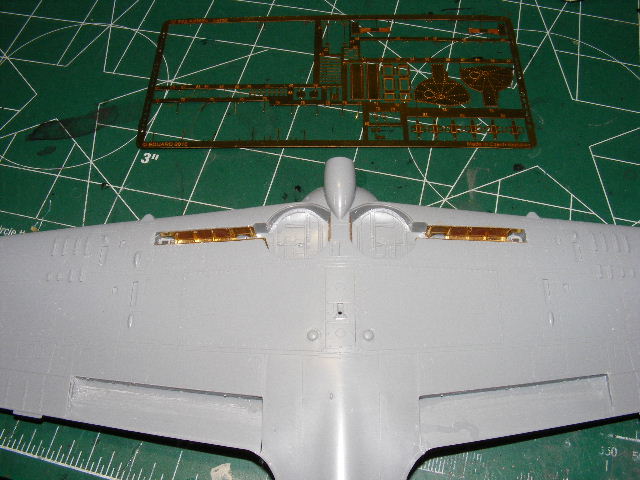
Made a fare bit of progress over the weekend . Cockpit is finished and installed . Sorry I forget to snap a photo before I glued the assemble in place . Power plant is painted weathered and read to be installed . A bit more work to do on the exhaust . Main wings a glued together with the landing flaps cut out ready for the PE ones . Wheel wells still have a few more details to added and this was no fun getting every thing to fit right .
Terri
Made a fare bit of progress over the weekend . Cockpit is finished and installed . Sorry I forget to snap a photo before I glued the assemble in place . Power plant is painted weathered and read to be installed . A bit more work to do on the exhaust . Main wings a glued together with the landing flaps cut out ready for the PE ones . Wheel wells still have a few more details to added and this was no fun getting every thing to fit right .
Terri
russamotto

Joined: December 14, 2007
KitMaker: 3,389 posts
AeroScale: 375 posts

Posted: Tuesday, September 25, 2018 - 01:21 AM UTC
Looks really nice. You can see just how tight the cockpit was on the Zero but the details really stand out. Looking forward to more.
Joel_W

Joined: December 04, 2010
KitMaker: 11,666 posts
AeroScale: 7,410 posts

Posted: Tuesday, September 25, 2018 - 01:50 AM UTC
Terri
I'm really impressed on how the Pit came out, and all that added PE certainly makes a huge difference. the wheel wells with the added PE is a perfect example.
Joel
I'm really impressed on how the Pit came out, and all that added PE certainly makes a huge difference. the wheel wells with the added PE is a perfect example.
Joel
thegirl

Joined: January 19, 2008
KitMaker: 6,743 posts
AeroScale: 6,151 posts

Posted: Wednesday, September 26, 2018 - 01:30 PM UTC
Quoted Text
Looks really nice. You can see just how tight the cockpit was on the Zero but the details really stand out. Looking forward to more.
Thanks Russ , I'm glad I didn't do the wiring of panels and other plumbing , not much would have been visible .
Terri
thegirl

Joined: January 19, 2008
KitMaker: 6,743 posts
AeroScale: 6,151 posts

Posted: Wednesday, September 26, 2018 - 01:38 PM UTC
Quoted Text
Terri
I'm really impressed on how the Pit came out, and all that added PE certainly makes a huge difference. the wheel wells with the added PE is a perfect example.
Joel
Hi Joel , PE is the devils details . There is a fare bit of it for the pit but it sure does make the difference .
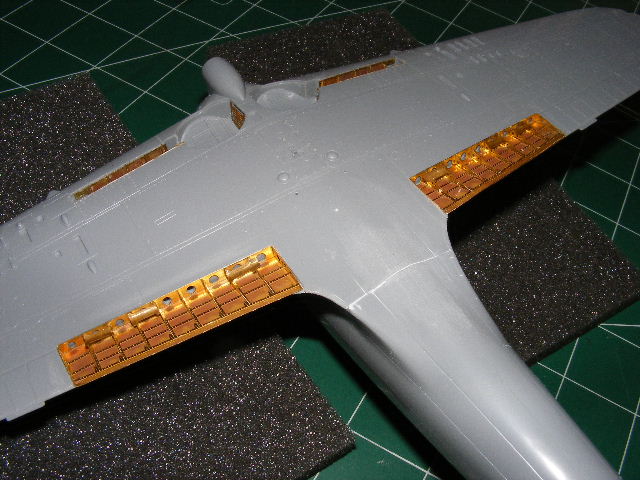
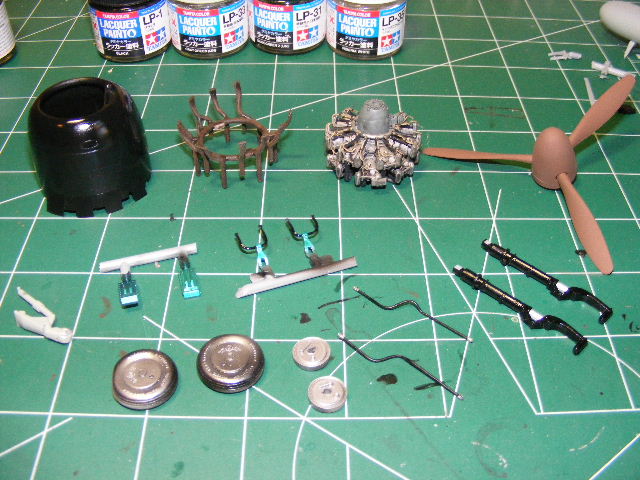
Still working on the wells and starting the landing gear covers and legs . The covers are PE and there is a fare bit of bending and rolling and painting these items as I go . Once assmbled it will be difficult to paint .
Terri

Scrodes

Joined: July 22, 2012
KitMaker: 771 posts
AeroScale: 763 posts

Posted: Thursday, September 27, 2018 - 11:51 AM UTC
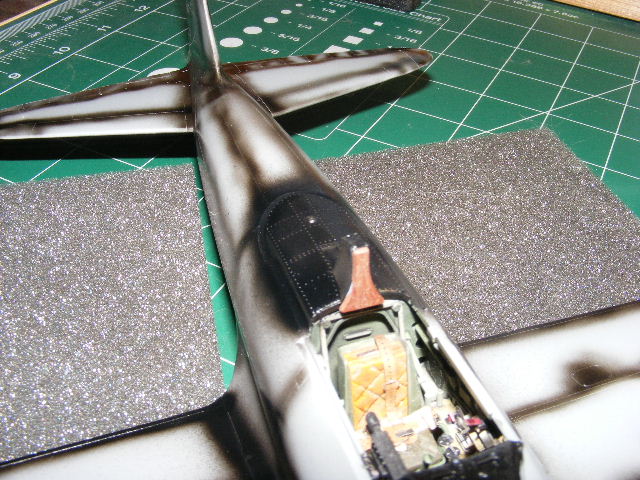
Just jumping in before it's too late - don't forget the turtle deck (the area under the canopy) is black.
Think of it as the A6M equivalent of the seam on the spine of the ME-109.
Think of it as the A6M equivalent of the seam on the spine of the ME-109.

rdt1953

Joined: February 06, 2015
KitMaker: 1,098 posts
AeroScale: 900 posts

Posted: Thursday, September 27, 2018 - 12:55 PM UTC
Hi Terri !
Loving it - especially the seat / seat belts !
Cheers - Richard
Loving it - especially the seat / seat belts !
Cheers - Richard
thegirl

Joined: January 19, 2008
KitMaker: 6,743 posts
AeroScale: 6,151 posts

Posted: Saturday, September 29, 2018 - 12:07 AM UTC
Quoted Text
Just jumping in before it's too late - don't forget the turtle deck (the area under the canopy) is black.
Think of it as the A6M equivalent of the seam on the spine of the ME-109.
I won't forget Matt , haven't made it that far yet . Thanks for the reminder though . It's good to have them every once in a while .
Terri
thegirl

Joined: January 19, 2008
KitMaker: 6,743 posts
AeroScale: 6,151 posts

Posted: Saturday, September 29, 2018 - 12:08 AM UTC
Quoted Text
Hi Terri !
Loving it - especially the seat / seat belts !
Cheers - Richard
Thank you Mr.Redcircle

Terri
thegirl

Joined: January 19, 2008
KitMaker: 6,743 posts
AeroScale: 6,151 posts

Posted: Monday, October 01, 2018 - 11:31 AM UTC
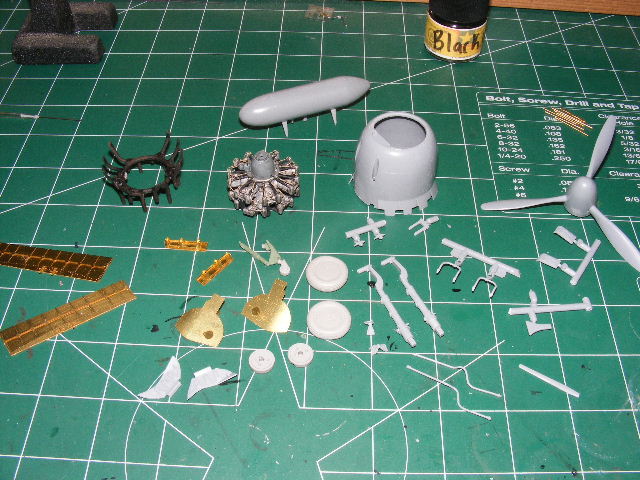
Was a busy weekend in front of the bench . Got a fair bit done , more then what I was expecting to accomplish .
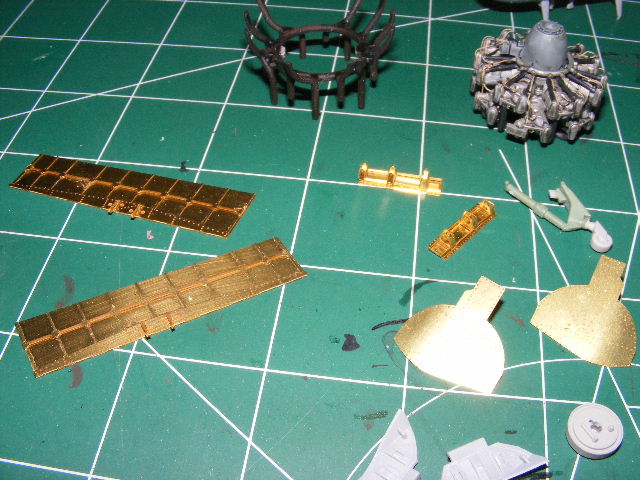
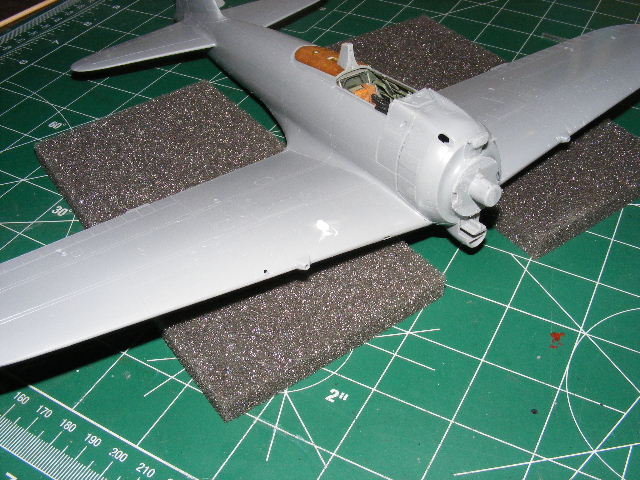
I got going on roll with the photo etch and got all the parts folded and glued up . It didn't stop there either , out came the airbrush for a painting maraton .
So here is where I'm at right now with the build .
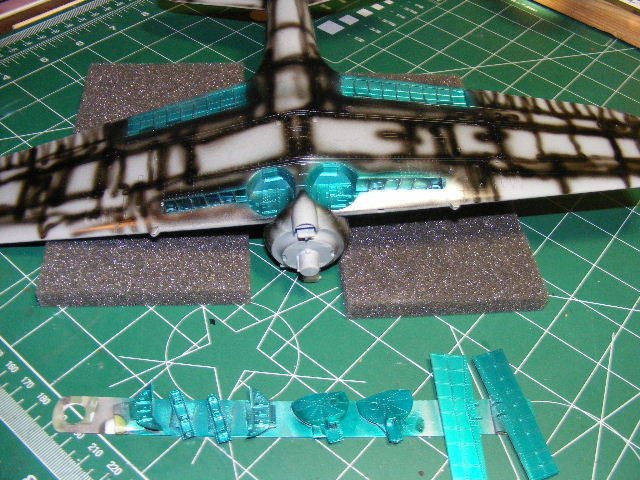
And this one is for Matt
Terri
I got going on roll with the photo etch and got all the parts folded and glued up . It didn't stop there either , out came the airbrush for a painting maraton .
So here is where I'm at right now with the build .
And this one is for Matt

Terri
thegirl

Joined: January 19, 2008
KitMaker: 6,743 posts
AeroScale: 6,151 posts

Posted: Friday, October 05, 2018 - 02:28 PM UTC
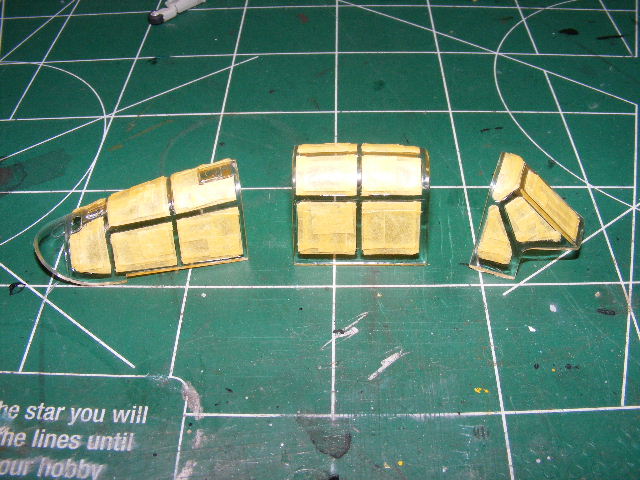
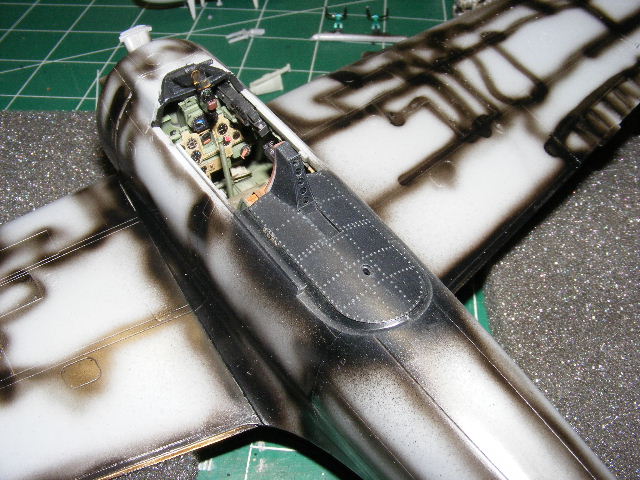
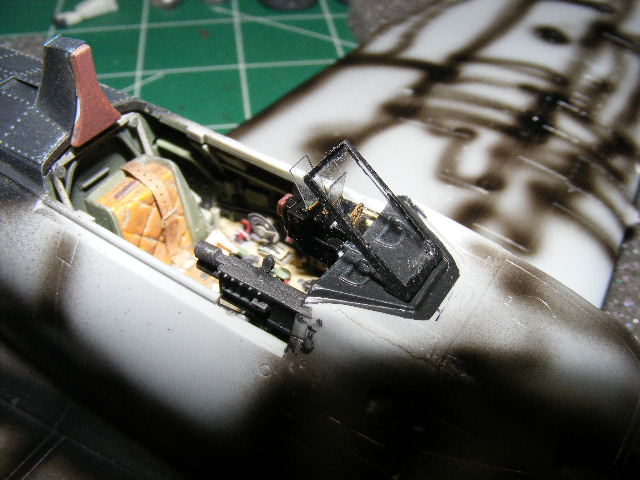
A few days of masking and the canopy is ready to be installed .
Gun sight and armoured glass are also button up resting in their final position . Should have spray the armoured glass frame . My hands aren't as steady as they used to be .
Terri
Gun sight and armoured glass are also button up resting in their final position . Should have spray the armoured glass frame . My hands aren't as steady as they used to be .
Terri
Joel_W

Joined: December 04, 2010
KitMaker: 11,666 posts
AeroScale: 7,410 posts

Posted: Saturday, October 06, 2018 - 02:46 AM UTC
Terri,
Nice job on the canopy masking. These days I use Eduard's masks to not only save time, but get it right the 1st time.
Joel
Nice job on the canopy masking. These days I use Eduard's masks to not only save time, but get it right the 1st time.
Joel
russamotto

Joined: December 14, 2007
KitMaker: 3,389 posts
AeroScale: 375 posts

Posted: Saturday, October 06, 2018 - 03:07 AM UTC
Looks really nice. Can't wait for the next installment.
thegirl

Joined: January 19, 2008
KitMaker: 6,743 posts
AeroScale: 6,151 posts

Posted: Sunday, October 07, 2018 - 01:56 AM UTC
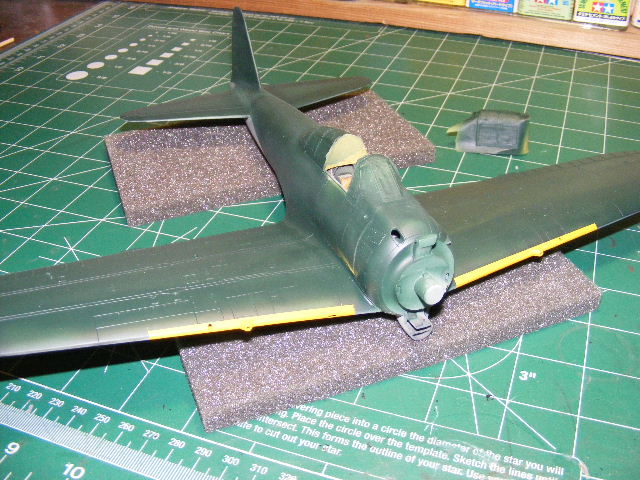
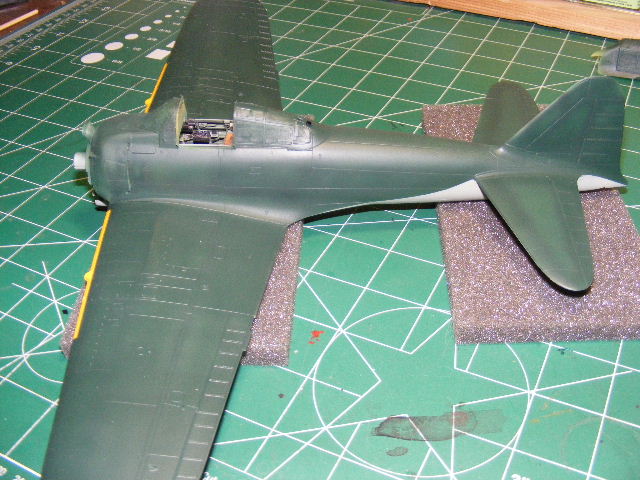
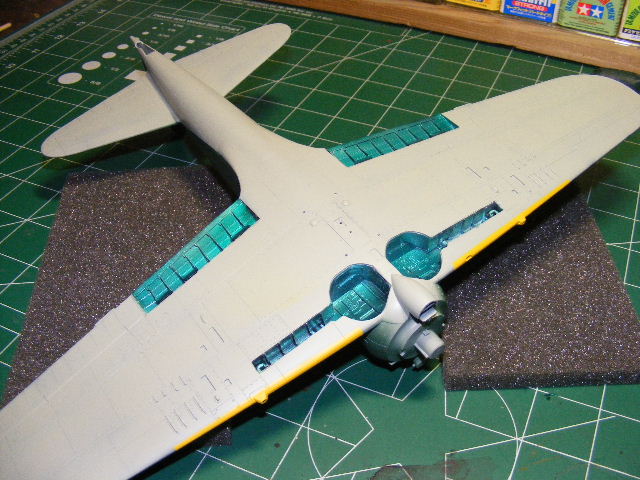
Spend the day doing the final painting of all the parts and even got the camo colours on . I used Tamiya's new lacquer line on paints for the colour scheme . You do have to thin them for airbrushing and they are very thin and many coats were needed which work out perfect . Was able to have better control on the layers being applied .Up next will be clear coating and decaling .
Thanks Joel and russ for following along
Terri
Thanks Joel and russ for following along

Terri
thegirl

Joined: January 19, 2008
KitMaker: 6,743 posts
AeroScale: 6,151 posts

Posted: Sunday, October 07, 2018 - 01:37 PM UTC
Decals are on along with a wash and smaller bits added for the next round of weathering . I should be able to have this finished up tomorrow with the final weathering and sealant coats .
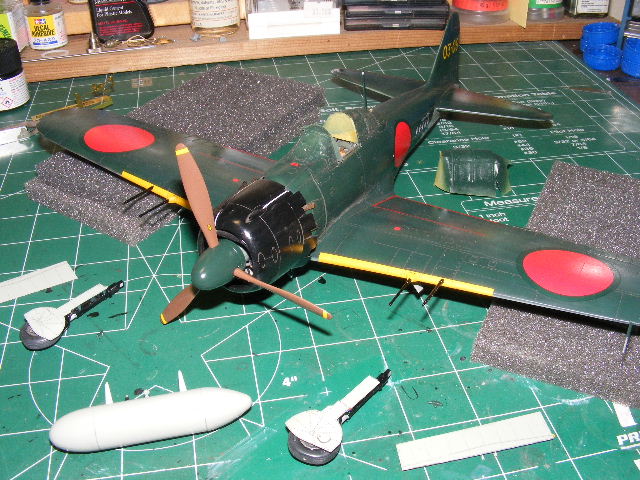
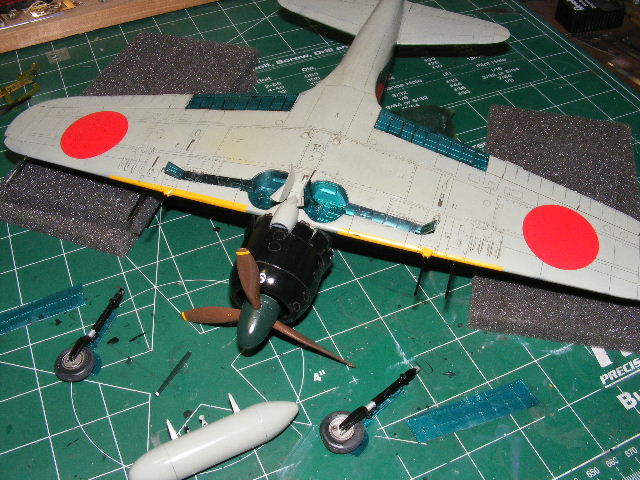
Terri
Terri
thegirl

Joined: January 19, 2008
KitMaker: 6,743 posts
AeroScale: 6,151 posts

Posted: Monday, October 08, 2018 - 09:59 AM UTC
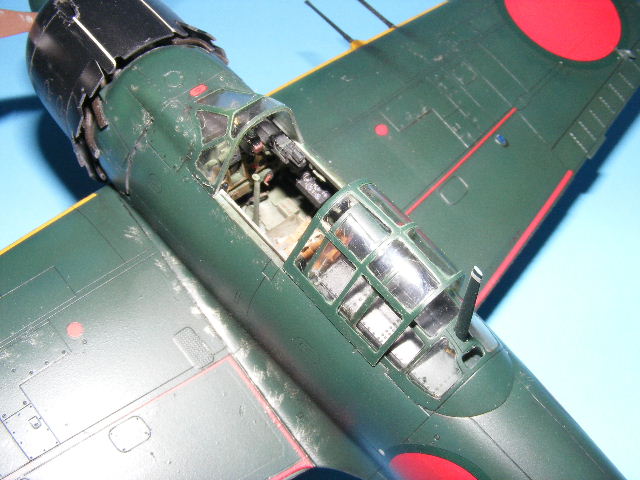
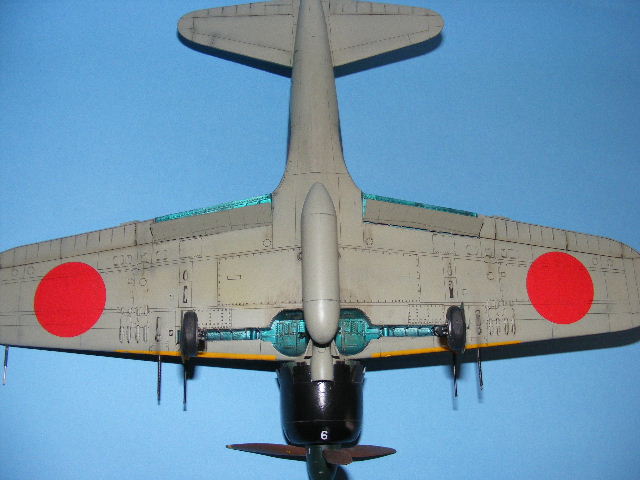
Stick a fork in it , it's done . Okay maybe not a fork that would just get me upset . Over all this was a real joy to build , really didn't have to use putty with the expection of the wing root . Even with the amount of PE added it went faster then what I was figuring on .
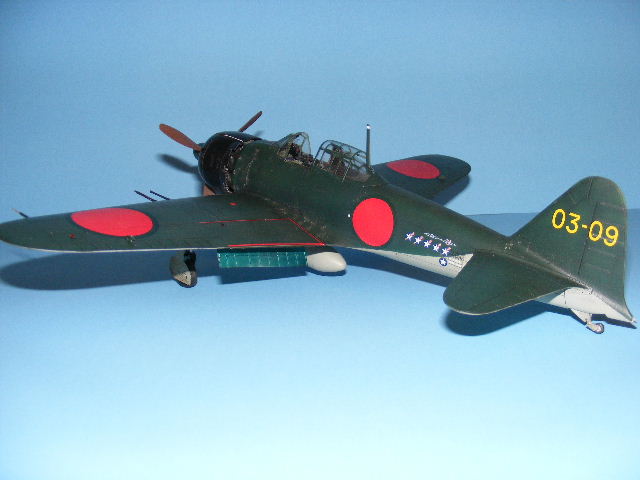
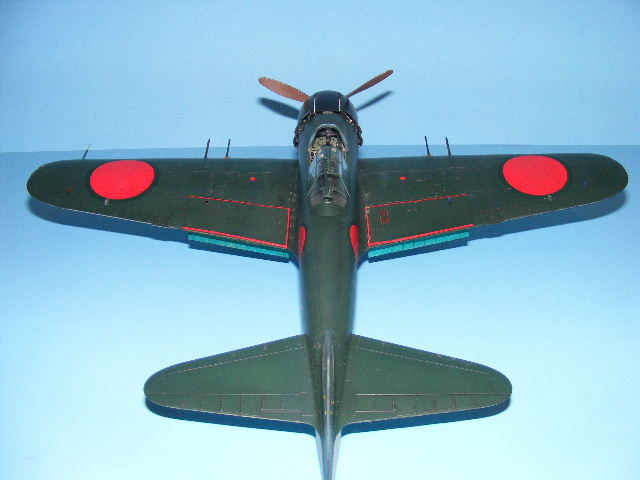
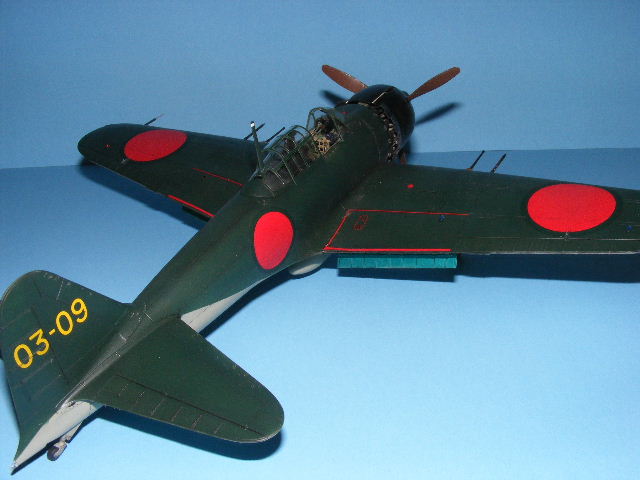
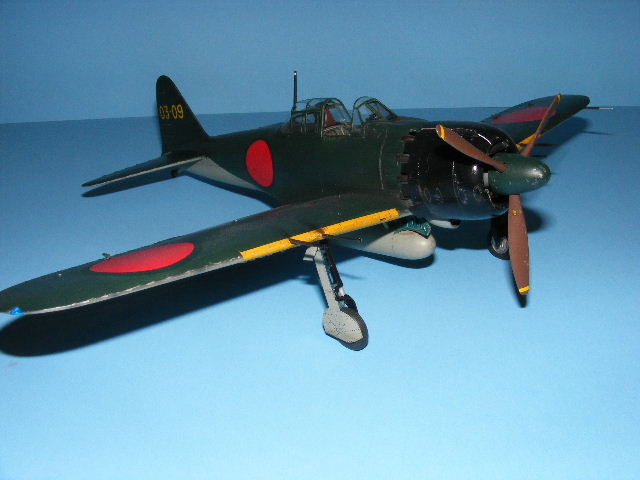
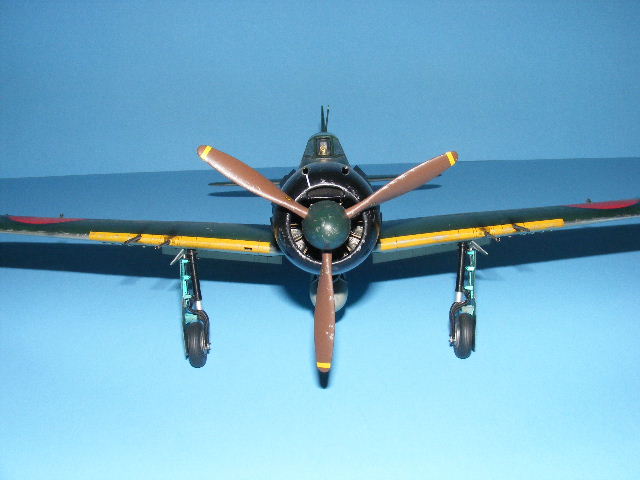
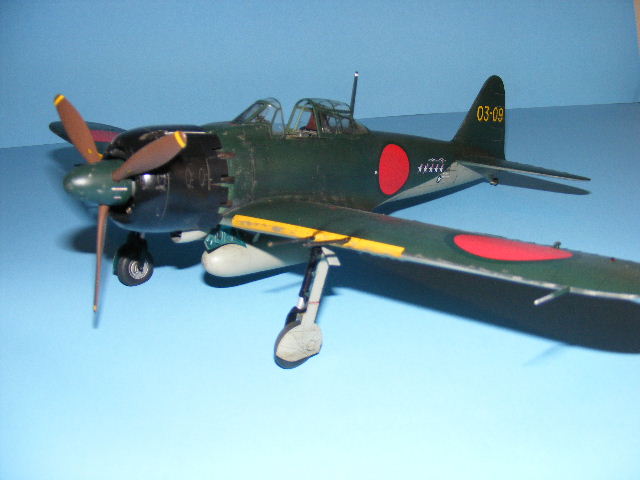
Terri
Terri
Posted: Monday, October 08, 2018 - 12:30 PM UTC
Fantastic result Terri! I love the weathering and the overall look you've achieved gives me ideas for my own.
I've got two ..... three of the old Hasegawa kits??? It now looks like I'll have to get a couple of the new Hasegawa's as well as the new Tamiya kit! I think I'm going to see if I can create a new interior for the old using the new as a template should be a lot od fun!
I've got two ..... three of the old Hasegawa kits??? It now looks like I'll have to get a couple of the new Hasegawa's as well as the new Tamiya kit! I think I'm going to see if I can create a new interior for the old using the new as a template should be a lot od fun!
 |


