_GOTOBOTTOM
Early Aviation
Discuss World War I and the early years of aviation thru 1934.
Daimler-Merceds D.III
gastec
_VISITCOMMUNITY
Auckland, New Zealand
Joined: February 03, 2014
KitMaker: 1,042 posts
AeroScale: 136 posts
Posted: Friday, October 26, 2018 - 04:35 PM UTC
Managed to throw this little powerplant together in a day. Wingnut Wings 1/32 (From a Roland D.VIa) with spark plugs and valve springs from Taurus models. Additional detals adde using fuse and speaker wire. Painted with acrylics and laquers and weathered with oils, washes and pigments...


Gary
ColinEdm
Staff MemberAssociate Editor
ARMORAMA
_VISITCOMMUNITY
Alberta, Canada
Joined: October 15, 2013
KitMaker: 1,355 posts
AeroScale: 107 posts
Posted: Saturday, October 27, 2018 - 12:02 AM UTC
Wow! Beautiful job Gary, looks like you could fire it right up! I amd wanting to do a WWI kit with the exposed engine more and more seeing work like this.
Vicious
_VISITCOMMUNITY
Queensland, Australia
Joined: September 04, 2015
KitMaker: 1,517 posts
AeroScale: 75 posts
Posted: Saturday, October 27, 2018 - 09:57 AM UTC
Very Nice!....i am doing the same motor just waiting for same parts from Taurus
Scrodes
_VISITCOMMUNITY
Ontario, Canada
Joined: July 22, 2012
KitMaker: 771 posts
AeroScale: 763 posts
Posted: Saturday, October 27, 2018 - 11:22 AM UTC
Bravo - very nice.
MerlinV
_VISITCOMMUNITY
Victoria, Australia
Joined: November 26, 2006
KitMaker: 608 posts
AeroScale: 602 posts
Posted: Sunday, October 28, 2018 - 06:48 PM UTC
Wow!
Love the metallic effects... The copper and the rust on the exhaust!

Great job!

Cheers,

Hugh
Szmann
_VISITCOMMUNITY
Netherlands Antilles
Joined: September 02, 2014
KitMaker: 1,977 posts
AeroScale: 295 posts
Posted: Sunday, October 28, 2018 - 09:04 PM UTC
Gary, that level of detail is plainly insane! Loved it!

Cheers!
Gabriel
Louis
_VISITCOMMUNITY
Bas-Rhin, France
Joined: May 21, 2006
KitMaker: 472 posts
AeroScale: 471 posts
Posted: Monday, October 29, 2018 - 03:47 AM UTC
Beautiful !!!

Tell us a little about the steps to paint the exhaust ?

I would like mine to be like that

Regards
JackFlash
_VISITCOMMUNITY
Colorado, United States
Joined: January 25, 2004
KitMaker: 11,669 posts
AeroScale: 11,011 posts
Posted: Wednesday, November 14, 2018 - 11:52 PM UTC
Beautiful
Merlin
Staff MemberSenior Editor
AEROSCALE
#017
_VISITCOMMUNITY
United Kingdom
Joined: June 11, 2003
KitMaker: 17,582 posts
AeroScale: 12,795 posts
Posted: Friday, November 16, 2018 - 08:46 AM UTC
Hi Gary

Simply magnificent! That must rate among the best - if not the best - model engines I've ever seen! If you said it was 1:4 or 1:8 scale I'd have believed you.

As has been noted, the effects on the exhaust are amazing. Could you write a "How To" article for Aeroscale on the basics of how you tackle a finish like that?

All the best

Rowan
gastec
_VISITCOMMUNITY
Auckland, New Zealand
Joined: February 03, 2014
KitMaker: 1,042 posts
AeroScale: 136 posts
Posted: Sunday, November 18, 2018 - 09:06 AM UTC
Thanks guys

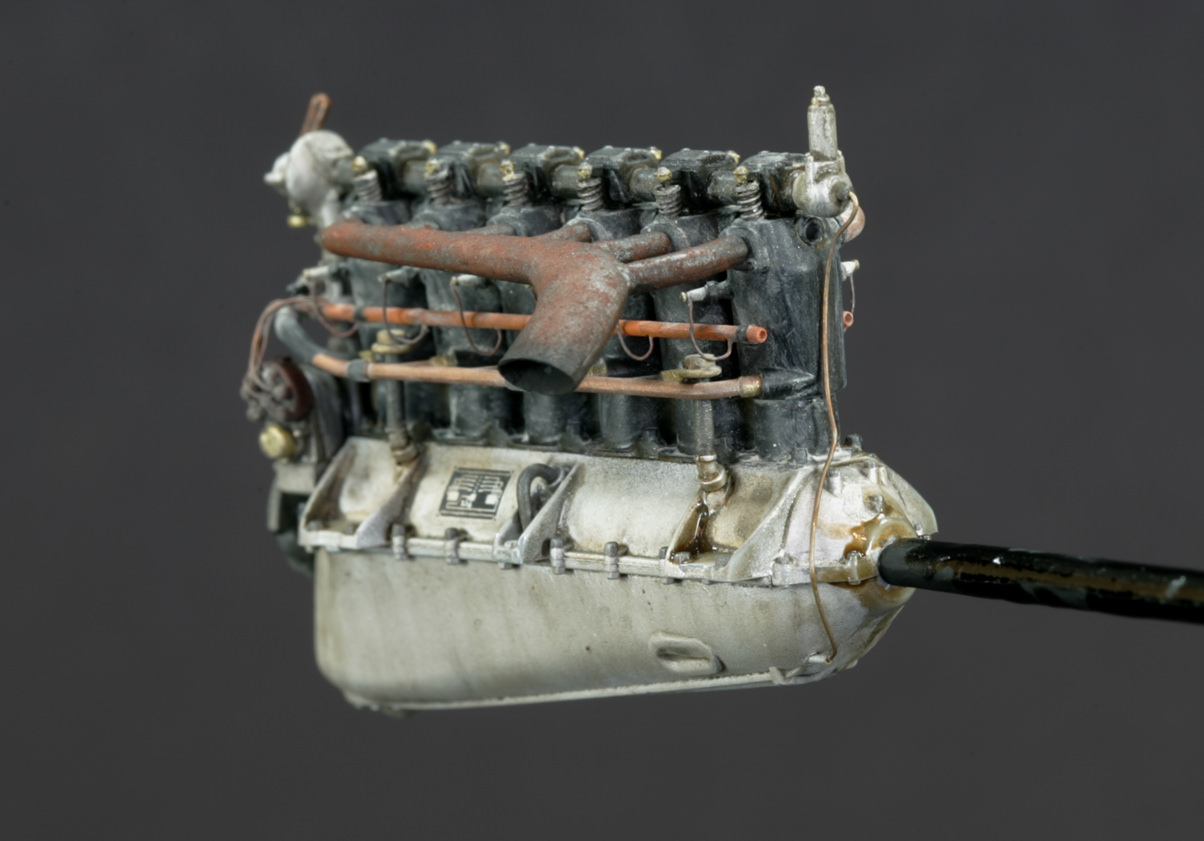
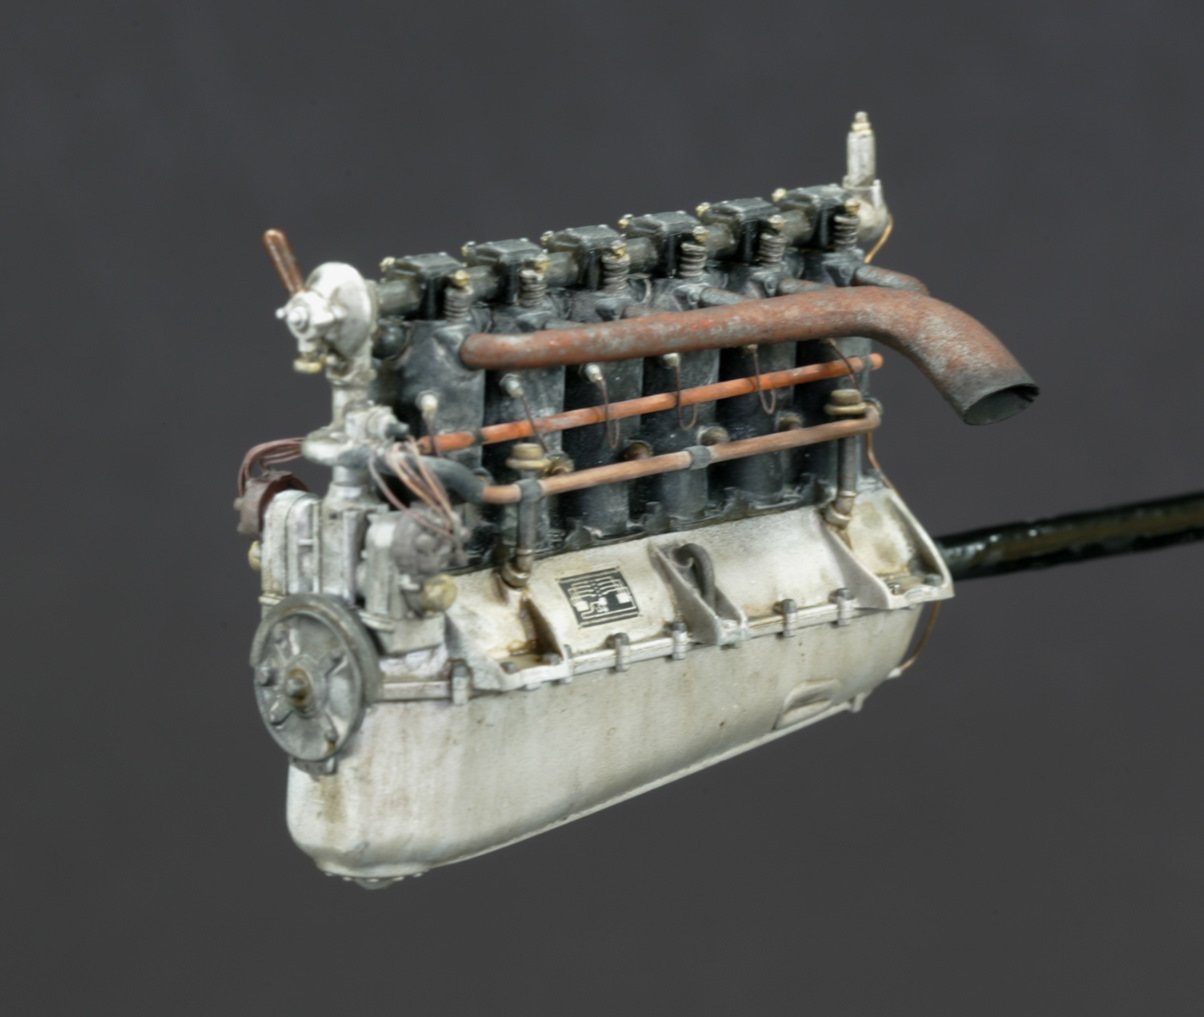
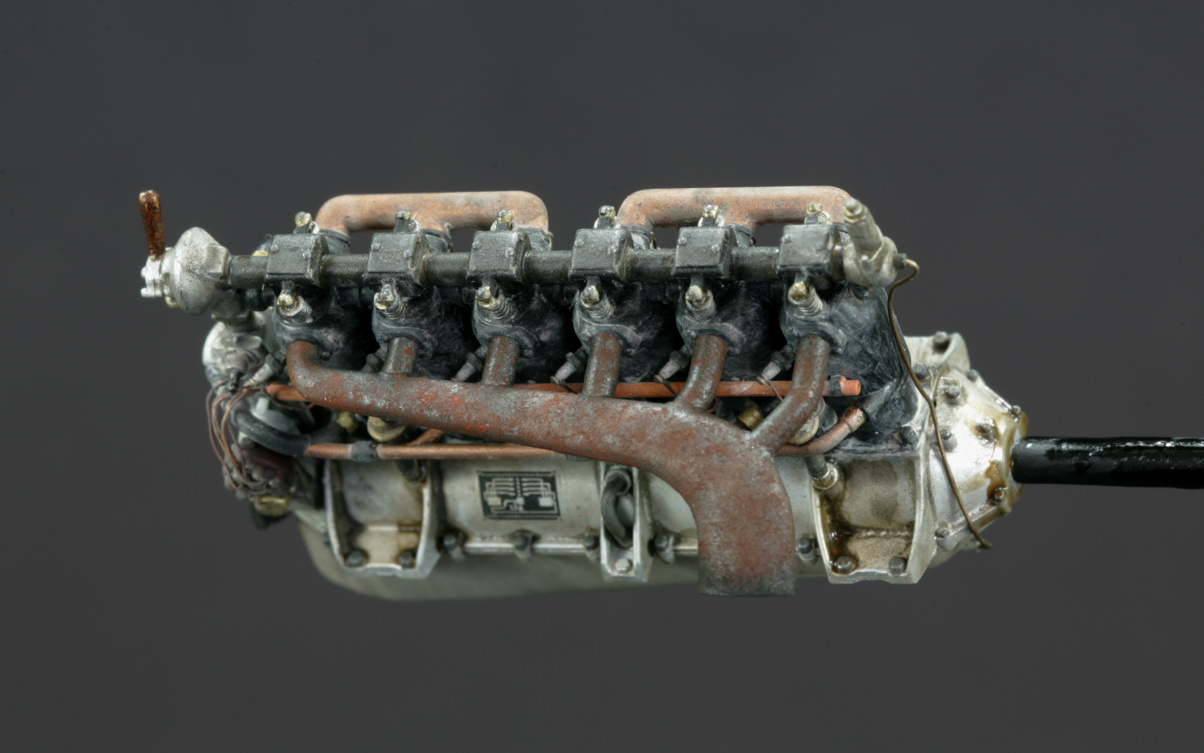
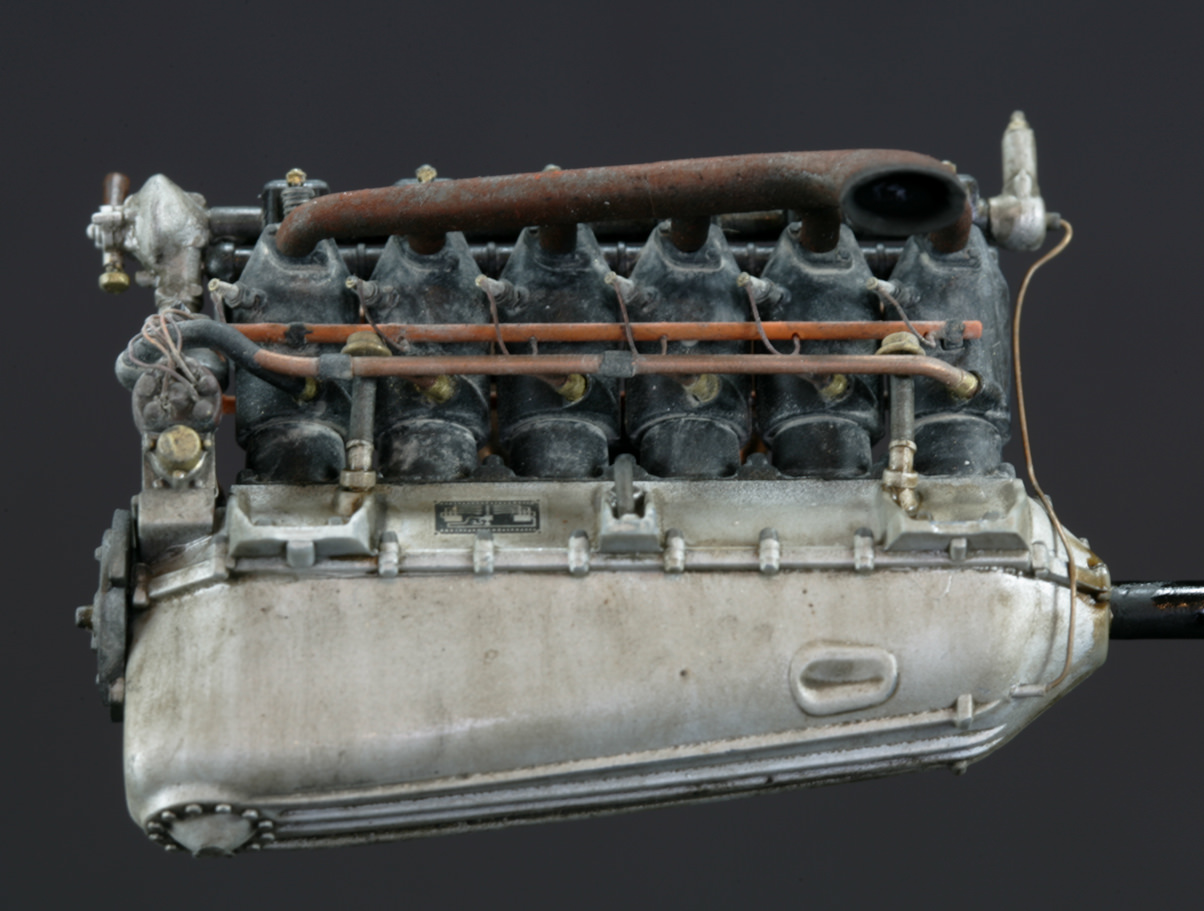
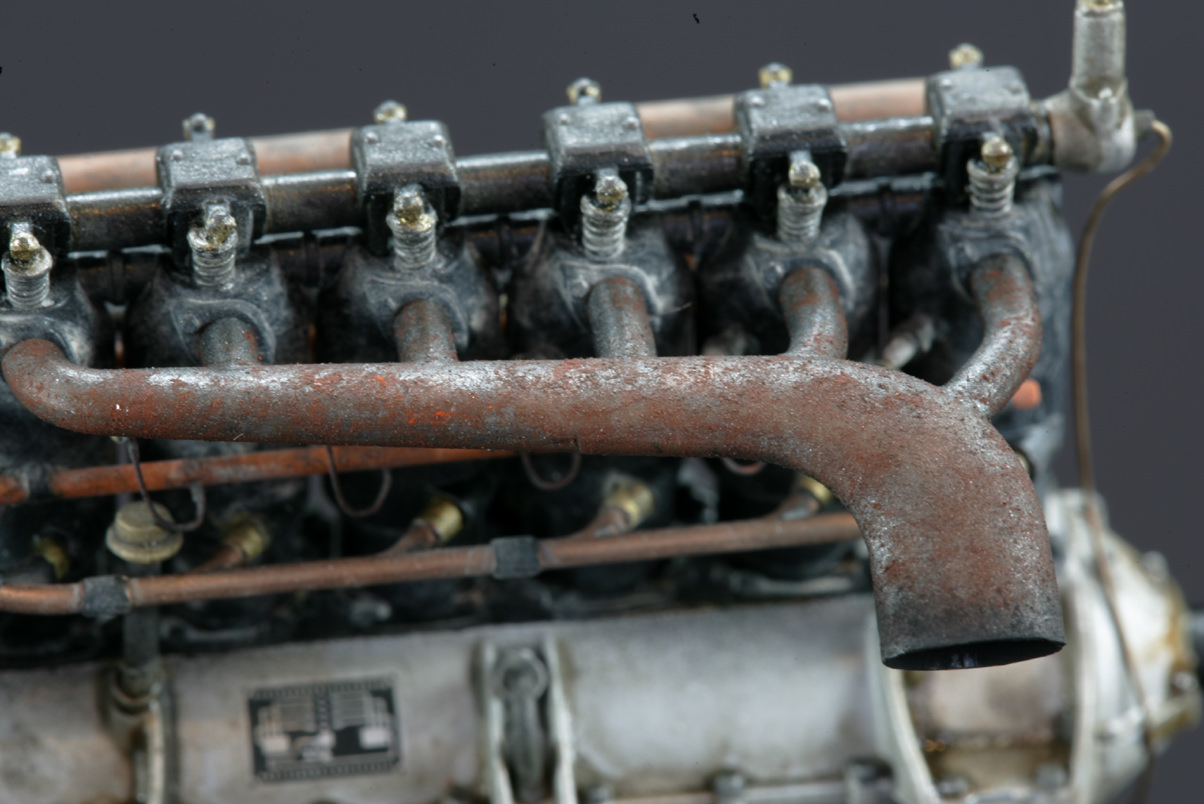
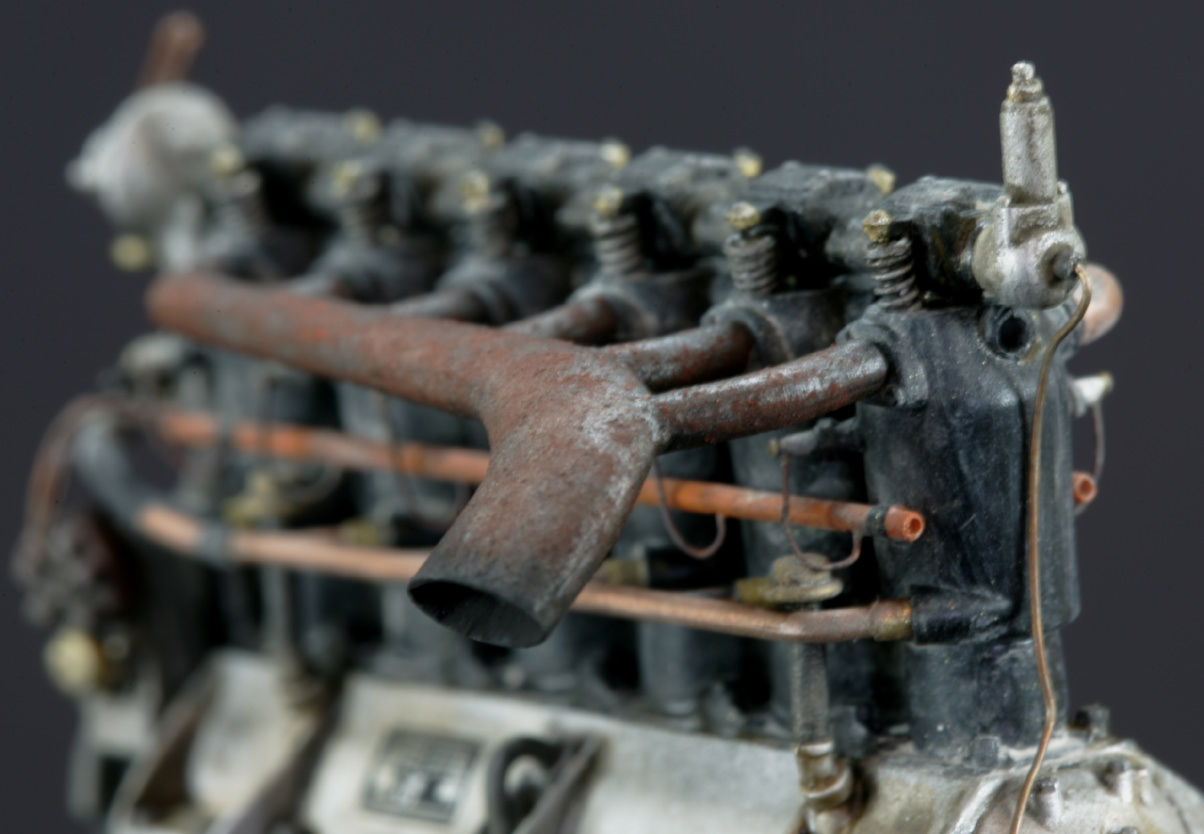
Process is very straightforward. After hollowing out the outlet to make the 'walls' more to scale, I sprayed a basecoat of Modelmaster Lacquer exhaust. Once dry, this was buffed to a sheen so it represented real steel. I then misted over a light and very diluted coat of Mig medium rust wash. Before this starts to dry, i then apply pigment. Using an old brush, i pick up some rust pigment and stipple it onto the exhaust. The wash will absorb the pigment, but by careful application, you can acheive the effect as above. Soot pigment is applied to the outlet. Plenty here as fuel quality was really poor in those days. A final coat of pigment sealer fixes everything in place.
Pretty simple process.
Gary
c4willy
#305
_VISITCOMMUNITY
Christchurch, New Zealand
Joined: February 01, 2006
KitMaker: 1,673 posts
AeroScale: 1,517 posts
Posted: Sunday, November 18, 2018 - 11:03 AM UTC
How the hell did you manage to get the plastic so uniformly thin? It must have been fairly hard to get it to that point without it collapsing in when you were working on it? I originally thought it was a galvanically grown replacement set from moskit or some such just makes the result even more astounding. It looks so life like awesome work there Gary!
krow113
_VISITCOMMUNITY
British Columbia, Canada
Joined: March 16, 2010
KitMaker: 473 posts
AeroScale: 101 posts
Posted: Sunday, November 18, 2018 - 12:50 PM UTC
Nicely done!
Pretty sure you have the exhaust on backwards.
gastec
_VISITCOMMUNITY
Auckland, New Zealand
Joined: February 03, 2014
KitMaker: 1,042 posts
AeroScale: 136 posts
Posted: Sunday, November 18, 2018 - 01:18 PM UTC
Thanks Chris. A lot of patience and a very sharp blade.

Steve. Will only fit one way.

Gary
Vicious
_VISITCOMMUNITY
Queensland, Australia
Joined: September 04, 2015
KitMaker: 1,517 posts
AeroScale: 75 posts
Posted: Sunday, November 18, 2018 - 01:34 PM UTC

Quoted Text

Nicely done!
Pretty sure you have the exhaust on backwards.


No,the Roland have the exhaust like that,the Albatros have the same motor and exhaust but on the other direction

I love the exhaust i have to copy your technique on my Albatros,you use only the spring from Taurus or also the timing e lifters?
gastec
_VISITCOMMUNITY
Auckland, New Zealand
Joined: February 03, 2014
KitMaker: 1,042 posts
AeroScale: 136 posts
Posted: Monday, November 19, 2018 - 08:31 PM UTC
Just the springs.
 _GOTOTOP