_GOTOBOTTOM
Early Aviation
Discuss World War I and the early years of aviation thru 1934.
Mark Builds a Biplane
md72
#439
_VISITCOMMUNITY
Washington, United States
Joined: November 05, 2005
KitMaker: 4,950 posts
AeroScale: 3,192 posts
Posted: Monday, May 13, 2019 - 05:39 PM UTC
Next to Natural Metal Finishes, there are fewer modelling challenges more scary than your first rigged biplane. So as part of the Learning to Fly campaign, I decided to face my fears and dive in on the Revell of Germany 1/72 Boeing Stearman Kaydet.

It's only 29 pieces, with only one marking option, so there's not too many chances to screw it up. Fortunately for a complete neophyte like me, Revell added (as an afterthought?) a guide to rigging the plane.
I started by fixing some of the most obvious issues. Lucky for me the ejector pins in the top wing were on the bottom. No so lucky for me the ejector pins are on the top of the bottom wing . I was able to punch some disks out of some 0.005" sheet I had on the bench.

And Revell couldn't avoid putting their mark on the kit.

I was able to chisel the marking off and sand it all back smooth.
Scrodes
_VISITCOMMUNITY
Ontario, Canada
Joined: July 22, 2012
KitMaker: 771 posts
AeroScale: 763 posts
Posted: Tuesday, May 14, 2019 - 04:27 AM UTC
Every day when I worked at the LHS


"Oh look dear - the plastic is color, so we don't need paint."

That poor little boy, I cannot save him without sounding like I'm just trying to sell something.


Or the look of skepticism when I'm asked "Do I need paint?" and I said yes
JPTRR
Staff MemberManaging Editor
RAILROAD MODELING
#051
_VISITCOMMUNITY
Tennessee, United States
Joined: December 21, 2002
KitMaker: 7,772 posts
AeroScale: 3,175 posts
Posted: Tuesday, May 14, 2019 - 05:44 AM UTC
Hi Mark,

I've wanted to see one of these built. I will be watching.

Man, no wonder I never liked Revell for anything other than ships and 1/32 air: to think that as late as 1992 they would put ejector marks on visible surfaces, let alone their logo! Pathetic.

But so long as the detail and fit is good...
md72
#439
_VISITCOMMUNITY
Washington, United States
Joined: November 05, 2005
KitMaker: 4,950 posts
AeroScale: 3,192 posts
Posted: Tuesday, May 14, 2019 - 07:37 AM UTC
@Matt, I think the best answer starts with "It all depends on what you want to do." It's awfully easy to spend 3-4 times the original kit price on paint, PE, putty, glue, new decals, placard decals whatever. I don't think I applied paint to plastic for my first 3-4 years of modeling. This kit is clearly going to need paint, possibly several coats, including primer. And no telling what damage I will do trying to rig it.
@Fredrick, There's a good chance I'll finish this kit sooner or later. But if you want to see one finished nicely, check out B-17 Peter's (Peter Mollenhaur?) entry in Learning to Fly. The only way I could beat that is by having decent rigging.
md72
#439
_VISITCOMMUNITY
Washington, United States
Joined: November 05, 2005
KitMaker: 4,950 posts
AeroScale: 3,192 posts
Posted: Thursday, May 16, 2019 - 05:22 PM UTC
OK a bit of progress.
I did a bit of prep work. Cleaned off the flash and did a little painting on the inside to hint at doped linen and aluminum on the interior.

I usually cut the pilots off of the sprue and heat up a pin to stick it into their butts for a handle while I'm painting them. In the spirit of this build, I'm trying something new. I super glued the crew to pieces of scrap shapes and I'm =using that for handles.

Revell's instructions call for the pilot's coveralls to be olive brown, not having access to Revell's paints in this corner of the world, I had to do a mad cross reference all over the web, finally decided on Model Master Israeli Armor SandGray. That didn't sound right, but from the looks of it, thispaint is a lot closer to sage green.

I'll probably need a second coat before it looks right.
md72
#439
_VISITCOMMUNITY
Washington, United States
Joined: November 05, 2005
KitMaker: 4,950 posts
AeroScale: 3,192 posts
Posted: Saturday, May 18, 2019 - 04:22 PM UTC
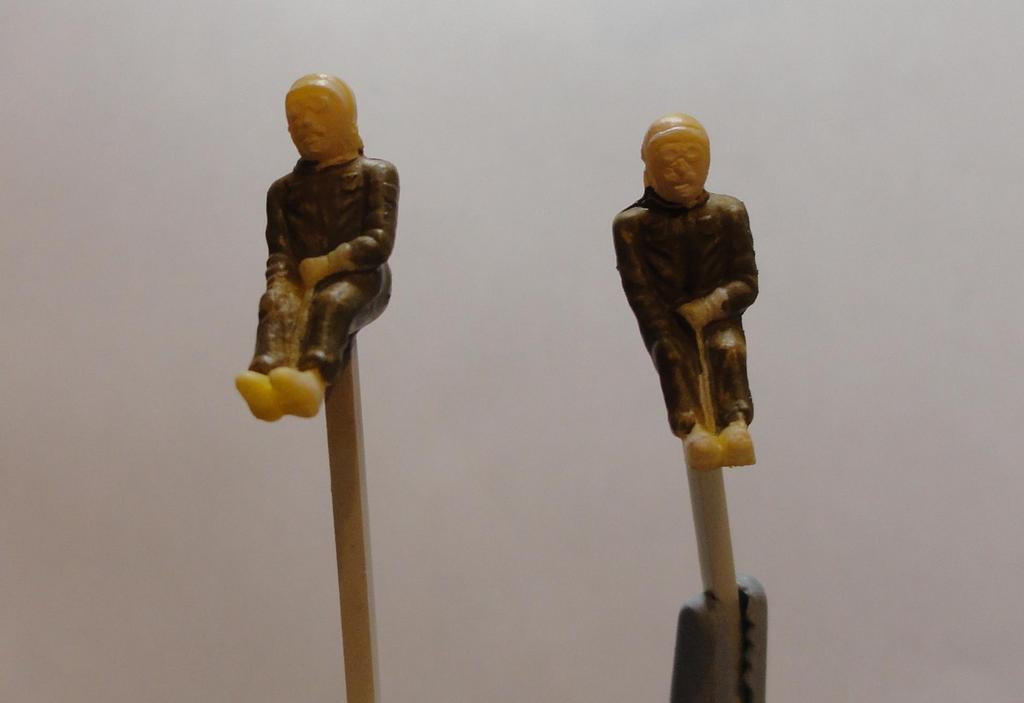
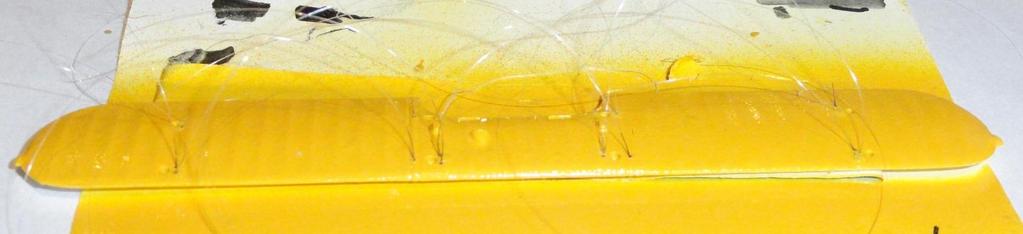
SO to be upfront, I've never rigged a biplane before.
Not having any idea how to do it, I looked to that undeniable expert on everything, the Internet.

One guy suggested drilling deep holes in the top wing, shallow holes in the bottom wing. Then you carefully measure the distance between the holes and cut stretched sprue or a stiff wire just slightly longer than the measurement. You slip one end of the sprue into the deeper hole and let it fall into the shallower hold. Apply super glue and let cure. If it sags a bit, apply heat with a cigarette butt or a stick of incense to tighten it up. Seems like a lot of work, all the sprue stretching and measuring, then the heat seems a bit dodgy.

Someone else suggested drilling holes through both wings, then feeding fishing line thru the holes tying knots to hold the line in place. Finally supergluing the hole shut and sanding to match. Refinish the paint as needed. Seems like a dangerous proposition.

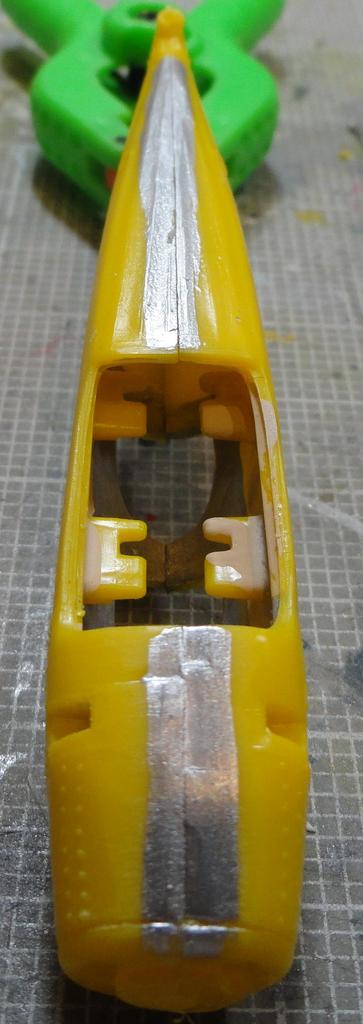
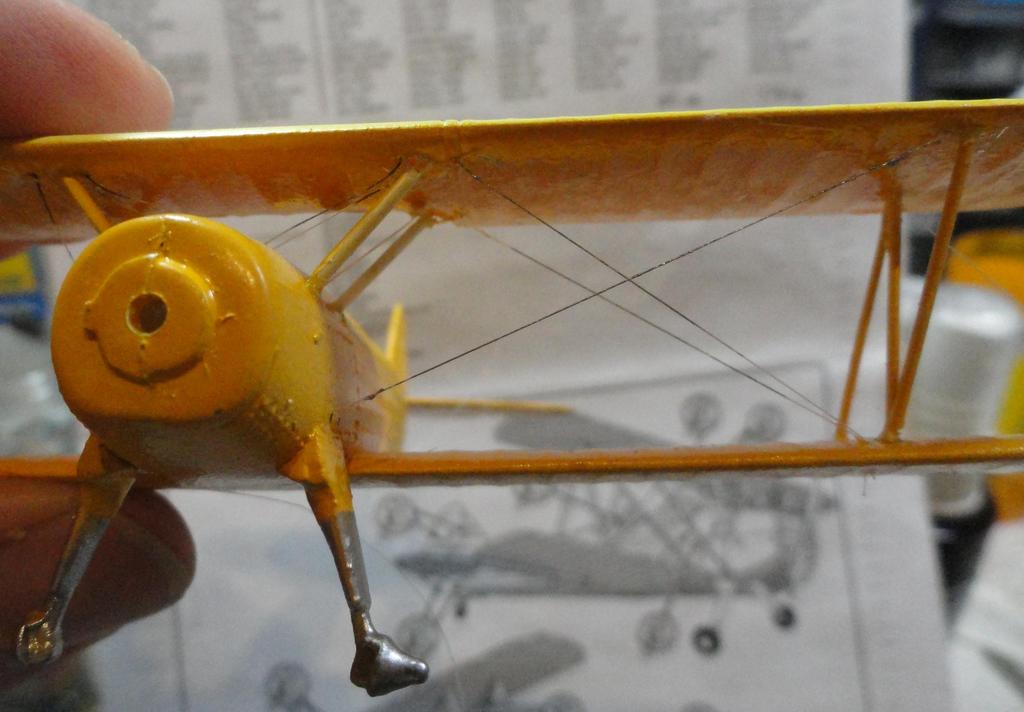
Finally found one that might work for me. Drill blind hole in the bottom of the top wing, drill thru holes in the bottom wing. Before mounting the top wings, superglue long strands of line into the top holes. Then mount the top wing. After it cures, thread the line through the bottom wings, pull tight, and add a weight to hold it taunt while you apply super glue and let it cure. Seems doable for the wings, lines to the fuselage might be a bit tricker. I'm thinking of leaving the interior (what little there is) out until after the lines are installed. Then I could use a hemostat to pull the lines out and hold them tight till the glue cures.

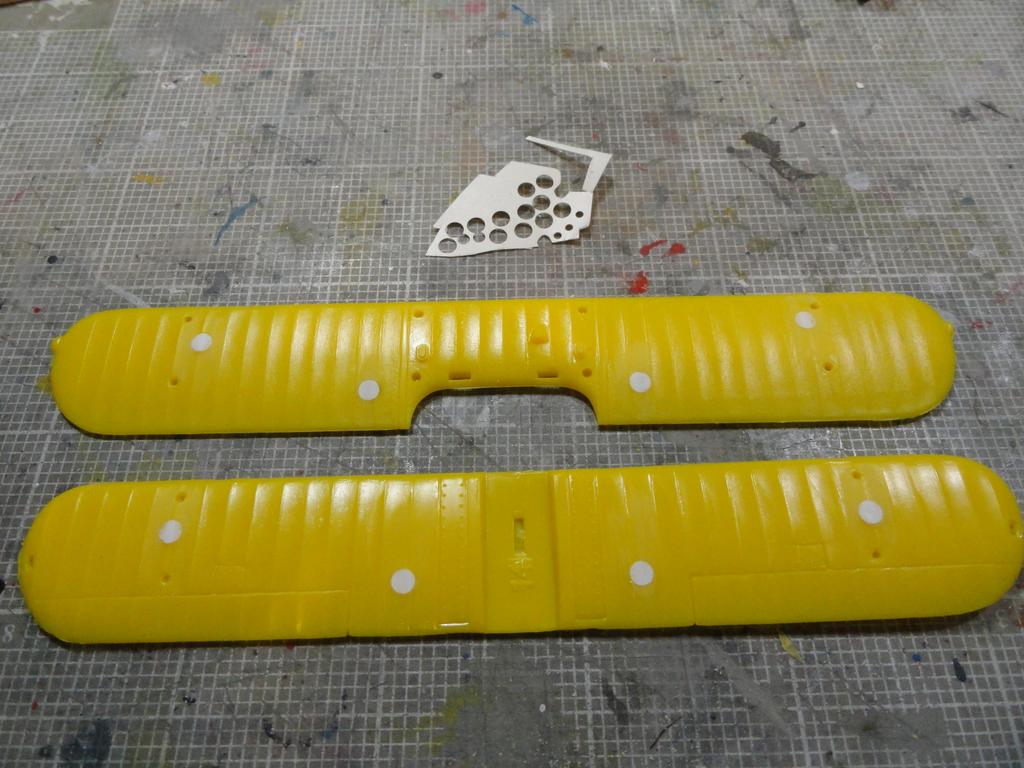
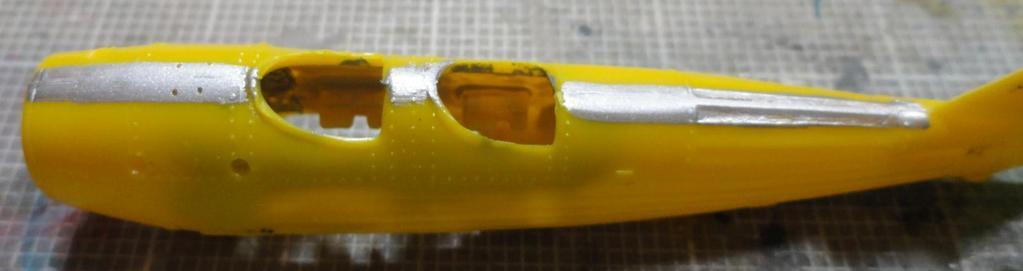
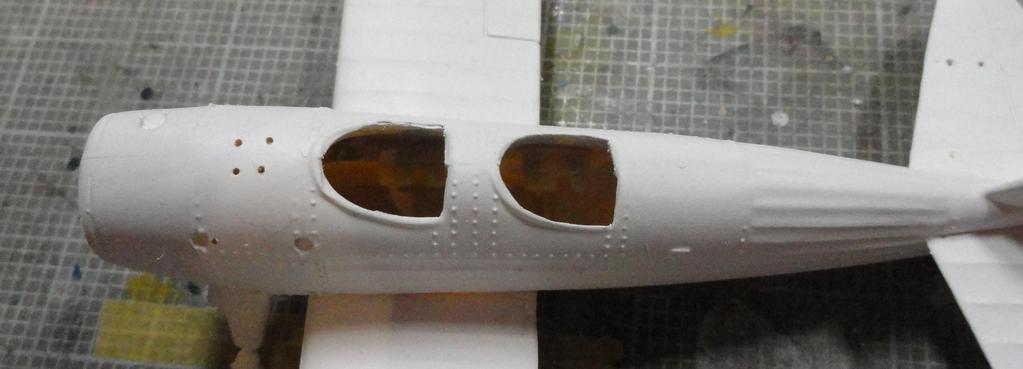
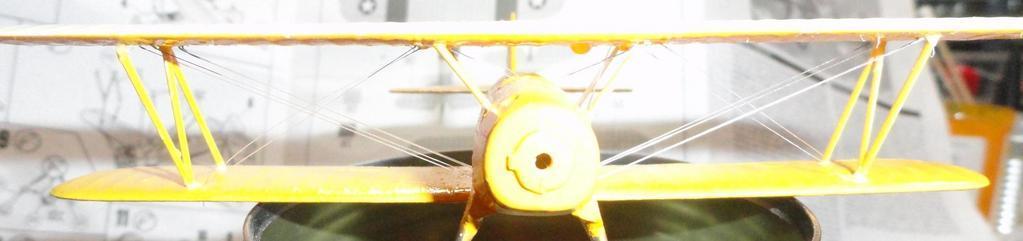
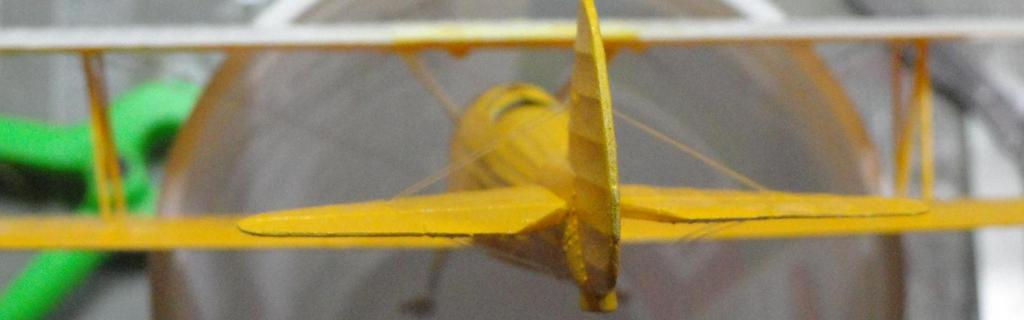
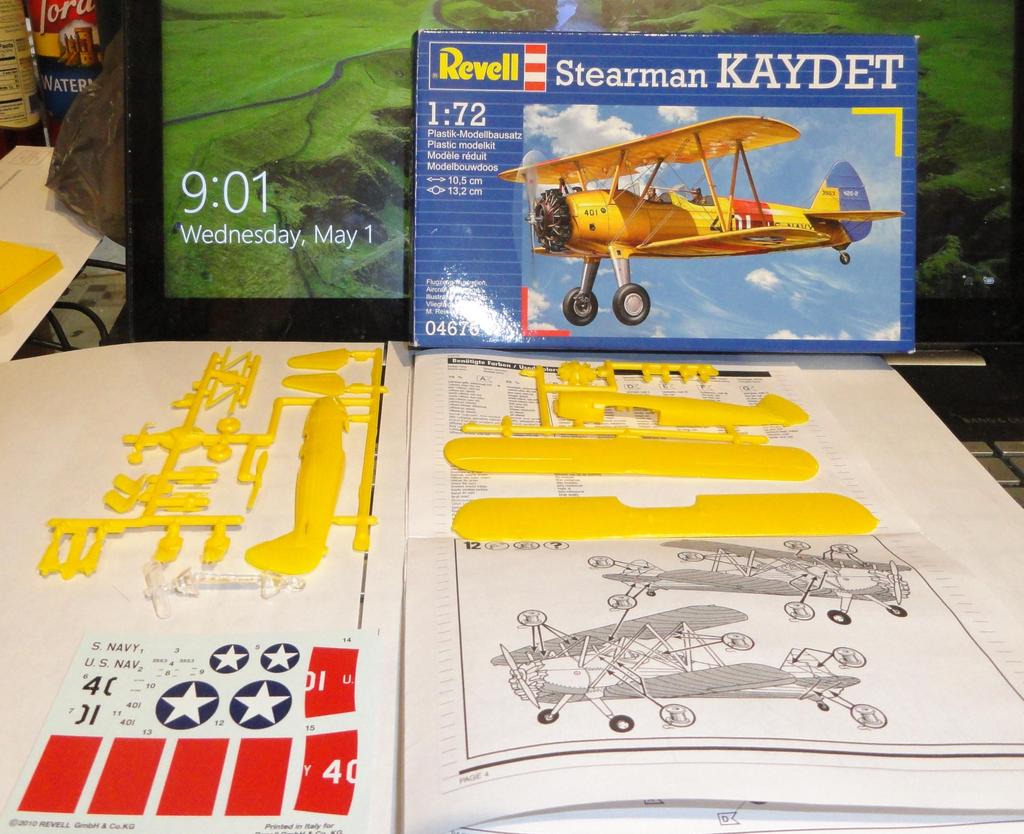
So using the wiring plan on the instructions, I've drilled out all of the holes with a 0.0135 (#80) bit. Since I'm using EZ Line, about 0.001" dia, I should be able to feed the line tru after painting.

Everything all drilled out:

Jessie_C
_VISITCOMMUNITY
British Columbia, Canada
Joined: September 03, 2009
KitMaker: 6,965 posts
AeroScale: 6,247 posts
Posted: Monday, May 20, 2019 - 08:00 AM UTC

Quoted Text

Hi Mark,

I've wanted to see one of these built. I will be watching.

Man, no wonder I never liked Revell for anything other than ships and 1/32 air: to think that as late as 1992 they would put ejector marks on visible surfaces, let alone their logo! Pathetic.

But so long as the detail and fit is good...


I think that 1992 was only the last time they refurbished the moulds. The kit itself has been around since at least 1966 and likely before that.
md72
#439
_VISITCOMMUNITY
Washington, United States
Joined: November 05, 2005
KitMaker: 4,950 posts
AeroScale: 3,192 posts
Posted: Monday, May 20, 2019 - 08:32 AM UTC
Scalemates agrees that the tooling was new in 1965. I can't tell if the mod mark is 1982 or 1992. I glued the fuselage together over the weekend, fit wasn't too bad, I should have done a little more to correct the fwd fuselage mating before I glued it up. The top side cleaned up nicely, the bottom had some molded in offsets and didn't fit too well. The aft fuselage looked good till I highlighted it and there's a rough edge all along the seam. Hope to get some photos up 2 nite.
AussieReg
Staff MemberAssociate Editor
AUTOMODELER
#007
_VISITCOMMUNITY
Victoria, Australia
Joined: June 09, 2009
KitMaker: 8,156 posts
AeroScale: 3,756 posts
Posted: Monday, May 20, 2019 - 04:37 PM UTC
Adventures in rigging, another modelling skill I need to work on before I tackle my Sopwith Camel!

Following along with much interest Mark, and I agree with the course you are taking based on my interweb Googling!

Cheers, D
md72
#439
_VISITCOMMUNITY
Washington, United States
Joined: November 05, 2005
KitMaker: 4,950 posts
AeroScale: 3,192 posts
Posted: Monday, May 20, 2019 - 06:44 PM UTC
Got the fuselage together and started cleaning up the joint.

Front Cowling is OK, aft needs work
Bottom cowling is terrible, the rest is manageable.

magnusf
_VISITCOMMUNITY
Stockholm, Sweden
Joined: May 02, 2006
KitMaker: 1,953 posts
AeroScale: 1,902 posts
Posted: Saturday, May 25, 2019 - 09:36 AM UTC
Mark! I have heard rumours that there are better and more up to date biplane kits out there! In case you want to make life a bit easier !


Magnus
JPTRR
Staff MemberManaging Editor
RAILROAD MODELING
#051
_VISITCOMMUNITY
Tennessee, United States
Joined: December 21, 2002
KitMaker: 7,772 posts
AeroScale: 3,175 posts
Posted: Saturday, May 25, 2019 - 12:16 PM UTC
Old Model Kits has one dated 1966.

Man, I just noticed this is 1/72! I thought it was 1/48.
md72
#439
_VISITCOMMUNITY
Washington, United States
Joined: November 05, 2005
KitMaker: 4,950 posts
AeroScale: 3,192 posts
Posted: Saturday, May 25, 2019 - 12:45 PM UTC
Thanks Mangus and Frederick, I have no doubt there are better examples of the biplane kit. Wingnut Wings and Eduard come to mind immediately, but reasons. I started this for the Learning to Fly campaign. I had it in the stash and of all the bipes in the stash it was the only one with rigging details.
md72
#439
_VISITCOMMUNITY
Washington, United States
Joined: November 05, 2005
KitMaker: 4,950 posts
AeroScale: 3,192 posts
Posted: Tuesday, June 04, 2019 - 04:55 PM UTC
Well, this isn't fun. I've filled this seam twice, I can't feel it with my finger, but the primer shows it everytime.

Anyone got any good hints?
Jessie_C
_VISITCOMMUNITY
British Columbia, Canada
Joined: September 03, 2009
KitMaker: 6,965 posts
AeroScale: 6,247 posts
Posted: Wednesday, June 05, 2019 - 12:06 PM UTC

Quoted Text

Well, this isn't fun. I've filled this seam twice, I can't feel it with my finger, but the primer shows it everytime.

Anyone got any good hints?


Using a scriber, dig it out a bit, stretch some sprue and glue it in using some 'hot' liquid glue. Goop on some sprue dissolved in liquid glue and wait for it to harden. Afterwards, sand to shape.
md72
#439
_VISITCOMMUNITY
Washington, United States
Joined: November 05, 2005
KitMaker: 4,950 posts
AeroScale: 3,192 posts
Posted: Monday, June 10, 2019 - 04:31 PM UTC
Thanks Jessie, I tried half of your suggestion. I scribed down on the seam, wiped a bit of Tamiya Extra Thin over the joint let it set a bit then squeezed the halves together until a little melted plastic oozed up and clamped it closed overnight.

Looks good enough under a new coat of primer.
md72
#439
_VISITCOMMUNITY
Washington, United States
Joined: November 05, 2005
KitMaker: 4,950 posts
AeroScale: 3,192 posts
Posted: Sunday, June 23, 2019 - 07:21 PM UTC
It's been a while, but I have made some progress. Got the fuselage built up and the seams addressed. Got some Chrome Yellow paint on it. Not the world's best finish, but it is YELLOW!.


But for the real point of this build, rigging!

I went back over the holes that I had previously drilled and opened them up. Then I tried to superglue EZ Line into one of the holes. It was too flexible for me and hard to get into the hole. Then I tried some 4lb test fishing line (0.008in), it was easier to get into the holes. But it was very stiff, and relatively large, you might even pick it out in the photo. I finally tried some invisible thread, it's about 0.004in. It was small enough to fit easily into the hole. I was still having trouble grabbing the end of the thread, half the time I couldn't see it. I ended up using a black Sharpie, or a Testor's paint pen to highlight the ends of the thread. You can see the paint along the front edge of the wings, I hope to cover most of it up with silver paint after I get everything glued in place.
I used a clamping set of tweezers to hold the thread while pushing it into the hole, it worked better than straight tweezers or just using my fingers. I tried both dipping the thread into a puddle of superglue then pushing it into the hole and applying a drop of superglue to the hole and then pressing the end of the thread into the glue. Both methods worked reasonably well. On most of the lines, I used a toothpick to drip some kicker onto the sg. most notably along the leading edge of the wing, where most of the threads are standing upright.

Next up, trying to get the top wing in place.
md72
#439
_VISITCOMMUNITY
Washington, United States
Joined: November 05, 2005
KitMaker: 4,950 posts
AeroScale: 3,192 posts
Posted: Wednesday, July 03, 2019 - 06:52 PM UTC
Well, the top wing is on. So far getting the wing lined up and glued into place has been the most difficult part of the build.

I think that each part was glued on at least 3 times and I had to replace one of the struts with a section of airfoil strut that was long enough to reach.
I managed to follow part of my plan on the rigging. I was able to snag the ends of the threads I glued in at the front struts the pulled through the holes OK, I was able to use a flashlight and tweezers into the fuselage and pull the lines out. I wasn't able to get them as tight as I wanted, but the whole process of feeding the line through the hole did produce an amazingly zen feeling as long as it fed in.
The 0.004" thread mostly worked well. Unfortunately several pieces broke free from their mounts on the top wing. I'm having to replace them one by one. The E-Z Line worked well and tightened up nicely. The 0.008" fishing line was stiff and hard to thread and it broke free when I tried to tighten it.

So I've got most of the lines on the Port wing placed when one of the lines failed. So I've got to replace it one everything else cures. I ran a silver paint marker over the lines to highlight them for the photo.
tread_geek
_VISITCOMMUNITY
Ontario, Canada
Joined: March 23, 2008
KitMaker: 2,847 posts
AeroScale: 144 posts
Posted: Friday, July 05, 2019 - 03:27 AM UTC
Mark,

That's quite an adventure that you undertook with this build. And I thought I had issues with the Airfix Vampire T-11 that I built for the same campaign? The rigging looks quite good but I wonder if the men in the white coats and padded truck are waiting around the corner?

Good luck and cheers,
--Jan
Jessie_C
_VISITCOMMUNITY
British Columbia, Canada
Joined: September 03, 2009
KitMaker: 6,965 posts
AeroScale: 6,247 posts
Posted: Friday, July 05, 2019 - 04:05 AM UTC
Rigging is actually quite easy when you use the right methods. As with all things, practise is your friend.
md72
#439
_VISITCOMMUNITY
Washington, United States
Joined: November 05, 2005
KitMaker: 4,950 posts
AeroScale: 3,192 posts
Posted: Friday, July 05, 2019 - 07:27 AM UTC
Of course I see this after I'm nearly 1/2 done. I had looked at someone else's version, but passed on building all of the tiny tie downs because I was afraid I couldn't make them small enough. Maybe next time.
Like I said so far the hardest part was getting the cabine struts in place. One of them is a replacement from Contrail, another one ended up slightly above its intended location. Keeping the anchored threads in place has been a bit of fun. Several have pulled out, they're a lot harder to replace with the top wing installed.
md72
#439
_VISITCOMMUNITY
Washington, United States
Joined: November 05, 2005
KitMaker: 4,950 posts
AeroScale: 3,192 posts
Posted: Friday, July 19, 2019 - 04:51 PM UTC
Well, it's been a while. And if you consider 2 steps back and 1 step forward, then I've made progress. I got the port side done for the last update and then I started on the starboard side. I wasn't paying full attention and one of the clips fell off, allowing the line to go slack as the CA cured. Another anchor point broke free and when I glued it back it too was slack. Not a problem I thought, I'll just use a little bit of heat to make the line shrink till it looks taut. Major Fail. Got too much heat and all 6 lines melted away. Well that solves a bit of a problem. Now I just had to reach between the wings and drill out some holes. Had to use some dental picks to actually open up the blind holes in the top wing. With a bit more line and and quite a bit of luck, I managed to get all of the lines in place and reasonably taut:

Now on to the empennage!
tread_geek
_VISITCOMMUNITY
Ontario, Canada
Joined: March 23, 2008
KitMaker: 2,847 posts
AeroScale: 144 posts
Posted: Saturday, July 20, 2019 - 02:52 AM UTC
Mark,

Looks like your having about as much fun with those rigging lines as I've had with "oh so thin and delicate" Vampire decals. Just to give an example, if the decals didn't break while submerged in water they'd curl up onto themselves and meld into a blob. Sometimes the simplest additions to an otherwise simple kit can become a monster. Good luck on taming that beast.

Cheers,
--Jan
md72
#439
_VISITCOMMUNITY
Washington, United States
Joined: November 05, 2005
KitMaker: 4,950 posts
AeroScale: 3,192 posts
Posted: Saturday, July 20, 2019 - 04:22 AM UTC
Thanks Jan. I volunteered for this fun. I've always been afraid of doing rigging, decided that I'd use the excuse of the Learning to Fly campaign to actually do one. Actually there are moments of true Zen while pulling the threads. But it my be a while before I do another string bag.

I gave up on the decals for my Airfix Havoc. 40 years old, yellowed and cracked. I tried making new decals, even after I put the fixer on the ink ran when I put them in the water. Finally broke down; raided the decal stash, scrounged around on Ebay and resorted to painting on the rudder stripes. Good luck with the Vampire.
md72
#439
_VISITCOMMUNITY
Washington, United States
Joined: November 05, 2005
KitMaker: 4,950 posts
AeroScale: 3,192 posts
Posted: Sunday, July 21, 2019 - 03:01 PM UTC
The rigging is done! The tail feathers were the easiest of all.


Now to fill the holes,touch up the yellow paint and get some silver color on the lines.
 _GOTOTOP