_GOTOBOTTOM
Pre-Flight Check
Constructive critique of your finished or in-progress photos.
Mistel S2
Holdfast
Staff MemberPresident
IPMS-UK KITMAKER BRANCH
#056
_VISITCOMMUNITY
England - South West, United Kingdom
Joined: September 30, 2002
KitMaker: 8,581 posts
AeroScale: 4,913 posts
Posted: Thursday, April 01, 2004 - 09:03 AM UTC
Well not to be left out of this wonderful new forum here are some pics of my Dragon Mistel S2. This is not a kit that I would have bought but I got it as part exchange for some of my built up armour :-) A great deal as far as I'm concerned, although it was difficult parting with my Merkava. Anyway, I started this kit years ago but got stuck when it came to applying the camo pattern. Now that I think I'm capable of painting it I decided to reserect this project. When I looked over the Ju 88 I realised I had been a bit "slap dash" with a few of the joints, so I rectified that. I'm pleased because I had a think about what the Mistel project was all about and as old, wornout Ju 88 were used, I decided that a little artistic licence would be appropriate, so I am going to show a few replaced parts, plus evedence of equipment removed.
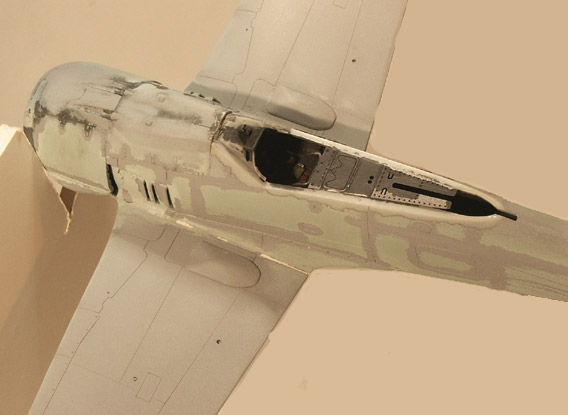
The FW 190 has actually been waiting for it's decals all this time, because I completed it first. Allthough most models of the Mistel depict the FW 190 with it's wheels down I recon that It would actually have it's wheels up. I have seen pics of both configurations. Anyway, the wheels up choice has been made and was not difficult to achieve. The wheels were cut, so that the portion showing, was all that was left. This was to allow the gear doors to close, they had to be modified as they were not the best fit. The tail wheel was shortened. When I took a look at the FW 190 I just couldn't live with the standard of the mottle camo. After discusing it with Merlin, I started to strip it, using "Mr Muscle" oven cleaner. The Xtracolor enamel paints went, with no broblem, but the Aeromaster acrylic RLM 76 is hanging on. The white glue, holding on the canopy, gave way and the oven cleaner has taken off a little of the interior paint. All looks promising though for a complete strip and re-paint :-)
Sorry for the state of the pics, but I took them tonight, using just a couple of daylight bulbs.
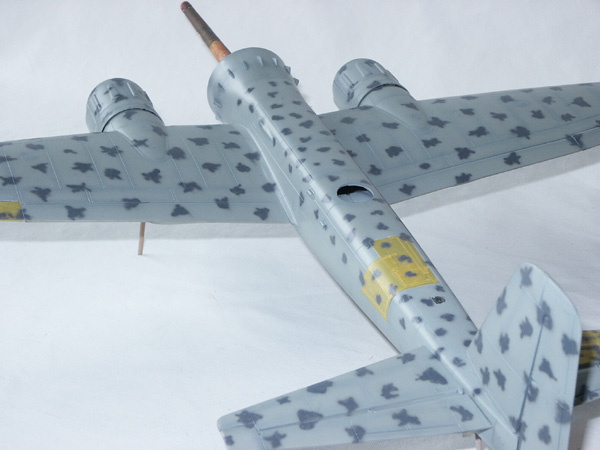
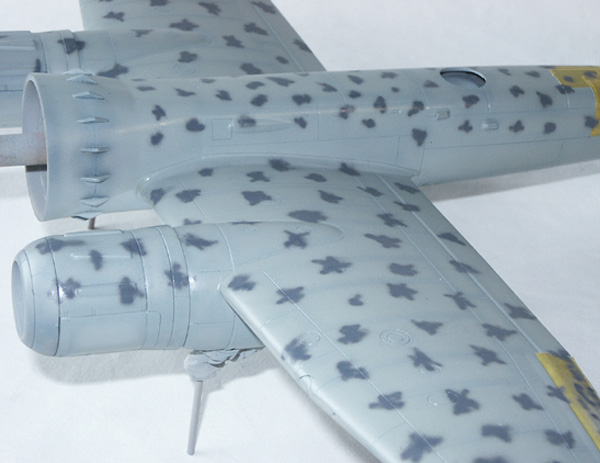
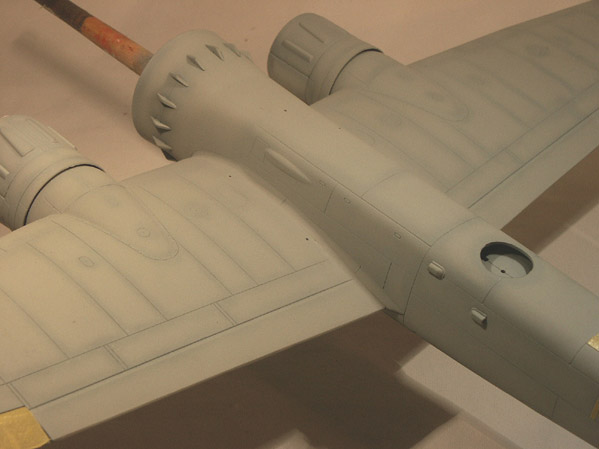
Comments welcome, particularly about the camo scheme for the 190 and conformation about the kit scheme for the Ju 88, as all attempts at researching these has failed.

FW 190, showing the stubborn RLM 76


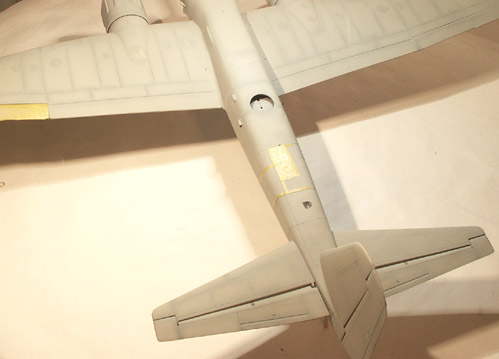
Ju 88, I've started masking off a couple of areas.


Mal
Merlin
Staff MemberSenior Editor
AEROSCALE
#017
_VISITCOMMUNITY
United Kingdom
Joined: June 11, 2003
KitMaker: 17,582 posts
AeroScale: 12,795 posts
Posted: Thursday, April 01, 2004 - 06:14 PM UTC
Hi Mal

This one should look amazing - a real work-out for your new airbrush! It's great to see Dragon's Ju88 appearing in posts in various guises. Over the years I've read many comments about the poor fit in places - did you hit similar problems?

It's interesting how the different paint brands reacted to oven-stripper. I'd have bet the gloss Xtracolour enamel would be toughest... Despite it's age, some Isopropyl Alchohol might deal with the Aeromaster acrylic - alternatively, you could try a swipe with nail-varnish remover - that's what I use to remove acrylic putty without harming the plastic.

All the best

Rowan
Holdfast
Staff MemberPresident
IPMS-UK KITMAKER BRANCH
#056
_VISITCOMMUNITY
England - South West, United Kingdom
Joined: September 30, 2002
KitMaker: 8,581 posts
AeroScale: 4,913 posts
Posted: Saturday, April 03, 2004 - 07:06 AM UTC
Hi Rowan
Yep I had those reported problems, they do lessen the pleasure of the build a little, but once they are sorted they are forgotten about with a fine looking Ju 88.

You can see how clean the wings are, I have done nothing more to them. I will try Isopropynol on the aeromaster 76, my concern is not damaging any more of the cockpit.

Mal
Holdfast
Staff MemberPresident
IPMS-UK KITMAKER BRANCH
#056
_VISITCOMMUNITY
England - South West, United Kingdom
Joined: September 30, 2002
KitMaker: 8,581 posts
AeroScale: 4,913 posts
Posted: Sunday, April 11, 2004 - 08:14 AM UTC
Added the RLM 75 camo to the Ju 88. I brush painted a couple of coats of Kleer (Future) before airbrushing, just in case I blew it. No worries though, my new airbrush performed excellantly.


Rowan, I have tried Isopropynol, on the 190, and it's working. Just taking my time.

Mal
Merlin
Staff MemberSenior Editor
AEROSCALE
#017
_VISITCOMMUNITY
United Kingdom
Joined: June 11, 2003
KitMaker: 17,582 posts
AeroScale: 12,795 posts
Posted: Wednesday, April 14, 2004 - 10:00 AM UTC
Hi Mal

That's some of the sharpest airbrushing I've ever seen! To say the new airbrush performed excellently is the understatement of the century... it's awesome!

All the best

Rowan
woltersk
_VISITCOMMUNITY
Utah, United States
Joined: May 27, 2003
KitMaker: 1,026 posts
AeroScale: 215 posts
Posted: Wednesday, April 14, 2004 - 10:11 AM UTC
Holdfast,
It looks great. Not to get off topic, but what brand, make, model of airbush is this new one?
I am in the market and considering an Iwata or another Badger (360-9?). Currently I have a Badger 150.
RotorHead67
_VISITCOMMUNITY
Virginia, United States
Joined: May 07, 2003
KitMaker: 1,174 posts
AeroScale: 226 posts
Posted: Wednesday, April 14, 2004 - 11:18 AM UTC
Well, KOODO"S
I dont care what airbrush manufacture you use, German mottle camo
is still the hardest and time consuming camo scheme to paint... It looks GREAT and the
suttle squiggles and stippling look MARVELOUS. Keep up the GREAT work!!!! She will
deffinately look the part when done.
Major_Goose
_VISITCOMMUNITY
Kikladhes, Greece / Ελλάδα
Joined: September 30, 2003
KitMaker: 6,871 posts
AeroScale: 0 posts
Posted: Wednesday, April 14, 2004 - 06:53 PM UTC
really have to admit that this camo went along very well. and its not the airbrush that performed so good but the hand that used it !!!! I bet that the finished one will be a winner !!!
Holdfast
Staff MemberPresident
IPMS-UK KITMAKER BRANCH
#056
_VISITCOMMUNITY
England - South West, United Kingdom
Joined: September 30, 2002
KitMaker: 8,581 posts
AeroScale: 4,913 posts
Posted: Friday, April 16, 2004 - 08:47 AM UTC
Thanks guys

Quoted Text

It looks great. Not to get off topic, but what brand, make, model of airbush is this new one?
I am in the market and considering an Iwata or another Badger (360-9?). Currently I have a Badger 150. woltersk


My new airbrush is a Simair Evolution. It's a double action gravity fed brush and is really well made. Unlike my Badger 200, you don't need a spanner to take it apart and cleaning is simple and straight forward. I chose the Evolution because it comes with both 0.2 and 0.4mm needles and both 2 and 5ml gravity feed cups. Having used a single action syphon fed Badger 200 for many years I have been amazed by this airbrush. I looked at many others, including the Badger 360, before making my choice. I would recomend this airbrush to anyone.
Mal
woltersk
_VISITCOMMUNITY
Utah, United States
Joined: May 27, 2003
KitMaker: 1,026 posts
AeroScale: 215 posts
Posted: Friday, April 16, 2004 - 08:50 AM UTC
THANK YOU for the airbrush info. And now back on-topic: again, wonderful job on the kit. Looking forward to seeing it progress.

 _GOTOTOP