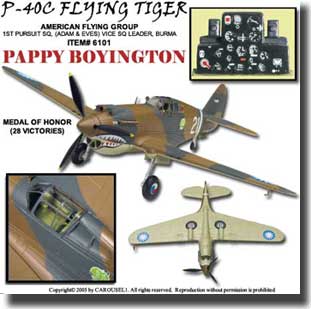
_GOTOBOTTOM
World War II
Discuss WWII and the era directly before and after the war from 1935-1949.
Hosted by Rowan Baylis
Mystery Model! Boyington's AVG Curtiss Hawk
Redhand
#522
_VISITCOMMUNITY
New Jersey, United States
Joined: January 20, 2013
KitMaker: 1,460 posts
AeroScale: 1,443 posts
Posted: Wednesday, June 10, 2020 - 03:20 PM UTC
MYSTERY MODEL! BOYINGTON's AVG CURTISS HAWK

I know that photographic quality is not great here -- these were taken late at night with a flash, but I wanted to get something up to show that I actually "build" stuff too.

Here are two shots of a just-completed AVG Curtiss H81-A2 Hawk in 1/48 Scale flown by Greg "Pappy Boyington" during his brief (and unhappy) service with the "Flying Tigers."

The aircraft is #21 of the 1st Pursuit Squadron. Before I start to describe what I did to create what you see, riddle me this, my friends, bad lighting and all.


Who manufactured the model? Is it:

1. Monogram's original "P-40B" kit from back in the 60s?

2. Hobby Craft/Academy's "P-40C" offering?

3. Trumpeter's somewhat controversial kit?

4. Airfix's latest "state of the art" model?

5. Something else?

I'll let this question linger for a day or so and then come back to provide you with the answer.
rdt1953
_VISITCOMMUNITY
New Jersey, United States
Joined: February 06, 2015
KitMaker: 1,098 posts
AeroScale: 900 posts
Posted: Wednesday, June 10, 2020 - 10:24 PM UTC
What a great idea Brian ! I am not familiar with any of the above mentioned kits . I have the Airfix version in the stash but have never opened the box .
I’m going to take a wild guess and go with # 5 - Otaki ?
BlackWidow
_VISITCOMMUNITY
European Union
Joined: August 09, 2009
KitMaker: 1,732 posts
AeroScale: 1,336 posts
Posted: Wednesday, June 10, 2020 - 11:55 PM UTC
Brian, I believe it's quarterscale, right? If so, here's my guess: Academy ....
Redhand
#522
_VISITCOMMUNITY
New Jersey, United States
Joined: January 20, 2013
KitMaker: 1,460 posts
AeroScale: 1,443 posts
Posted: Thursday, June 11, 2020 - 01:29 AM UTC

Quoted Text

Brian, I believe it's quarterscale, right? If so, here's my guess: Academy ....


Yes, 1/48 but Academy - No. I'll fix the main post to state the scale. "Thanks for playing" seems to fit as a polite response.
Redhand
#522
_VISITCOMMUNITY
New Jersey, United States
Joined: January 20, 2013
KitMaker: 1,460 posts
AeroScale: 1,443 posts
Posted: Thursday, June 11, 2020 - 01:34 AM UTC

Quoted Text

What a great idea Brian ! I am not familiar with any of the above mentioned kits . I have the Airfix version in the stash but have never opened the box .
I’m going to take a wild guess and go with # 5 - Otaki ?


Thanks, Richard, but no. Otaki only made a P-40E. "Thanks for playing."
Jessie_C
_VISITCOMMUNITY
British Columbia, Canada
Joined: September 03, 2009
KitMaker: 6,965 posts
AeroScale: 6,247 posts
Posted: Thursday, June 11, 2020 - 02:06 AM UTC
Going from the panel lies, I'll say Airfix.
MichaelSatin
Staff MemberCampaigns Administrator
AEROSCALE
_VISITCOMMUNITY
Colorado, United States
Joined: January 19, 2008
KitMaker: 3,909 posts
AeroScale: 2,904 posts
Posted: Thursday, June 11, 2020 - 05:03 AM UTC
I agree with Jessi. I think if it was the Monogram kit and you'd rescribed it, the panel lines would be sharper. Airfix.

Michael
bomber14
_VISITCOMMUNITY
New Jersey, United States
Joined: February 02, 2015
KitMaker: 330 posts
AeroScale: 286 posts
Posted: Thursday, June 11, 2020 - 06:48 AM UTC
i also was going by the panel lines to say airfix.
phantom_phanatic309
#372
_VISITCOMMUNITY
United Kingdom
Joined: March 10, 2010
KitMaker: 2,568 posts
AeroScale: 1,619 posts
Posted: Thursday, June 11, 2020 - 09:51 AM UTC
Nice work Brian.

I'm also going to go with Airfix.
Redhand
#522
_VISITCOMMUNITY
New Jersey, United States
Joined: January 20, 2013
KitMaker: 1,460 posts
AeroScale: 1,443 posts
Posted: Thursday, June 11, 2020 - 11:04 AM UTC
HISTORICAL REFERENCE MATERIALS - FOR EDUCATIONAL PURPOSES ONLY!

Before I do "The Big Reveal" tonight -- it's not Airfix and in the best/worst clickbait parlance I'll say "The answer will surprise you," let me give you some historical materials on this particular aircraft. My primary source is


It's out of print but reasonably available on E-Bay and elsewhere. I highly recommend it, especially if you want to do A/C #75 with RAF Roundels on the top wings in addition to the Chinese roundels.

Eagle Editions also issued decals of the A/C in the book -- three sets, one for each squadron -- at the same time the book came out, which is where I got these markings. (More on those decals later).

So, here's a picture of A/C #21 from the book with commentary.


And here's a profile of the A/C.


Tune back in later tonight (Eastern Standard Time).
rdt1953
_VISITCOMMUNITY
New Jersey, United States
Joined: February 06, 2015
KitMaker: 1,098 posts
AeroScale: 900 posts
Posted: Thursday, June 11, 2020 - 03:15 PM UTC
One more guess if I may ?
# 5 again - one of your die cast repaints ?
Redhand
#522
_VISITCOMMUNITY
New Jersey, United States
Joined: January 20, 2013
KitMaker: 1,460 posts
AeroScale: 1,443 posts
Posted: Thursday, June 11, 2020 - 04:06 PM UTC
AND THE WINNER IS!


Quoted Text

One more guess if I may ?
# 5 again - one of your die cast repaints ?


RICHARD TOOL!

Yes, it started out as a diecast.


Here is a "before" shot depicting the model in "out of the box" condition.


And here is my "after" shot taken just a few minutes ago, in better lighting with the chaos of my work table as a backdrop.


With the following photo I will point out the "finishing touches" I made since last night's photos.


In this photo you can see that I

(1) painted steel tips to the gun barrels to reflect the muzzles, which are quite evident on the real thing.

(2) straightened one of the guns on the right wing

(3) touched up the paint on the tail, where the wire extends out from the vertical stab to meet the three strands

(3) replaced the pitot tube, which was, hands down, the most maddening thing about this entire task, and

(4) detailed the post sight, which is brown at the base, black in the middle, and has a steel bead on top. It now matches the ring in back and is consistent with photos of the real thing.

By the time I finished this, I felt that it would have been just as quick to build the Airfix kit from scratch. But I had taken a liking to Boyington's aircraft (though not necessarily to him for reasons to be discussed) and I felt that this diecast was good enough in dimensions that it really "looked like a P-40" IYKWIMAITYD, so was worth salvaging -- even after I realized just how many things were wrong with the original.

While I'm at it, if you look closely at the windscreen, you will see not only a mirror that I added but also the bulletproof glass with a sight glass rectangle at the top, which is almost invisible from other angles.

In the next posts, I'll discuss the many additional changes that were necessary to transform this thing from an adult toy-"collector's item" into a reasonably accurate representation of the real thing. The next posts will also offer some opinions about the pilot.

I recognize that this is a bizarre offshoot from "real modeling," but now that I've been outed as Eliza Doolittle rather than Hungarian royalty, I hope you'll forgive me. I have enlisted in the Korean campaign, and will soon be starting a couple of Special Hobby Grumman Guardians.

MichaelSatin
Staff MemberCampaigns Administrator
AEROSCALE
_VISITCOMMUNITY
Colorado, United States
Joined: January 19, 2008
KitMaker: 3,909 posts
AeroScale: 2,904 posts
Posted: Friday, June 12, 2020 - 02:44 AM UTC
I confess myself surprised! Well done!

Michael
rdt1953
_VISITCOMMUNITY
New Jersey, United States
Joined: February 06, 2015
KitMaker: 1,098 posts
AeroScale: 900 posts
Posted: Friday, June 12, 2020 - 05:54 AM UTC
So I guess my prize is the Luscious Lady when complete?
Redhand
#522
_VISITCOMMUNITY
New Jersey, United States
Joined: January 20, 2013
KitMaker: 1,460 posts
AeroScale: 1,443 posts
Posted: Friday, June 12, 2020 - 06:21 AM UTC

Quoted Text

So I guess my prize is the Luscious Lady when complete?


In your dreams, but I will buy you a large cup of coffee when we meet.
Redhand
#522
_VISITCOMMUNITY
New Jersey, United States
Joined: January 20, 2013
KitMaker: 1,460 posts
AeroScale: 1,443 posts
Posted: Friday, June 12, 2020 - 06:26 AM UTC

Quoted Text

I confess myself surprised! Well done!

Michael


Thank you, Michael. It's at least a respectable shelf model. It was a challenge in its own way, as subsequent posts will show.

I'm looking forward to doing the Guardians.
rdt1953
_VISITCOMMUNITY
New Jersey, United States
Joined: February 06, 2015
KitMaker: 1,098 posts
AeroScale: 900 posts
Posted: Friday, June 12, 2020 - 12:57 PM UTC

Quoted Text


Quoted Text

So I guess my prize is the Luscious Lady when complete?


In your dreams, but I will buy you a large cup of coffee when we meet.


Don’t screw it up by putting too much half & half in it - coffee should be the color of new Carhartt overalls ...
Redhand
#522
_VISITCOMMUNITY
New Jersey, United States
Joined: January 20, 2013
KitMaker: 1,460 posts
AeroScale: 1,443 posts
Posted: Saturday, June 13, 2020 - 02:00 PM UTC
SIZING UP THE JOB

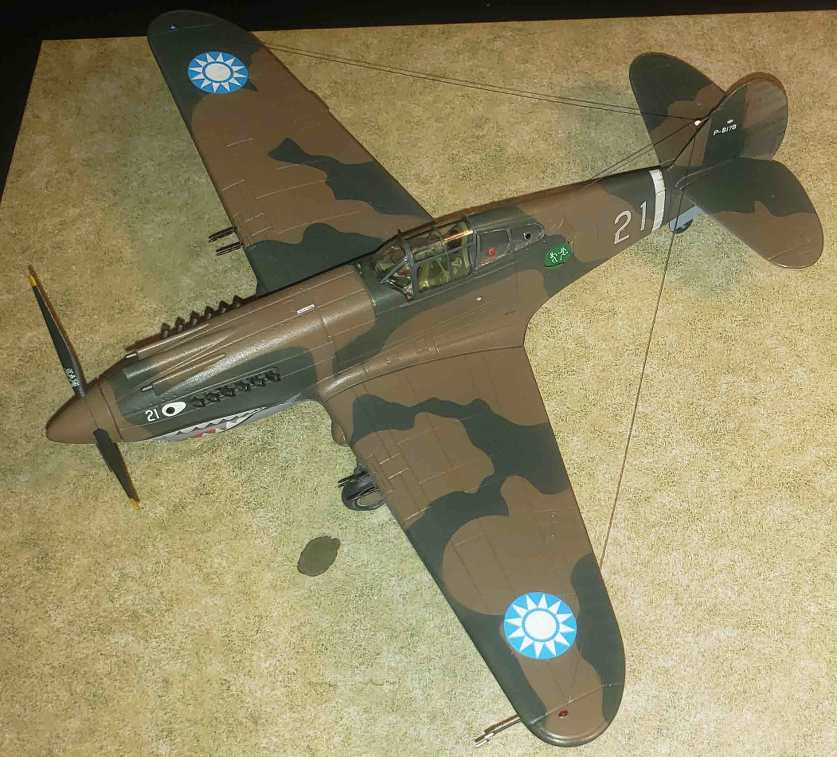
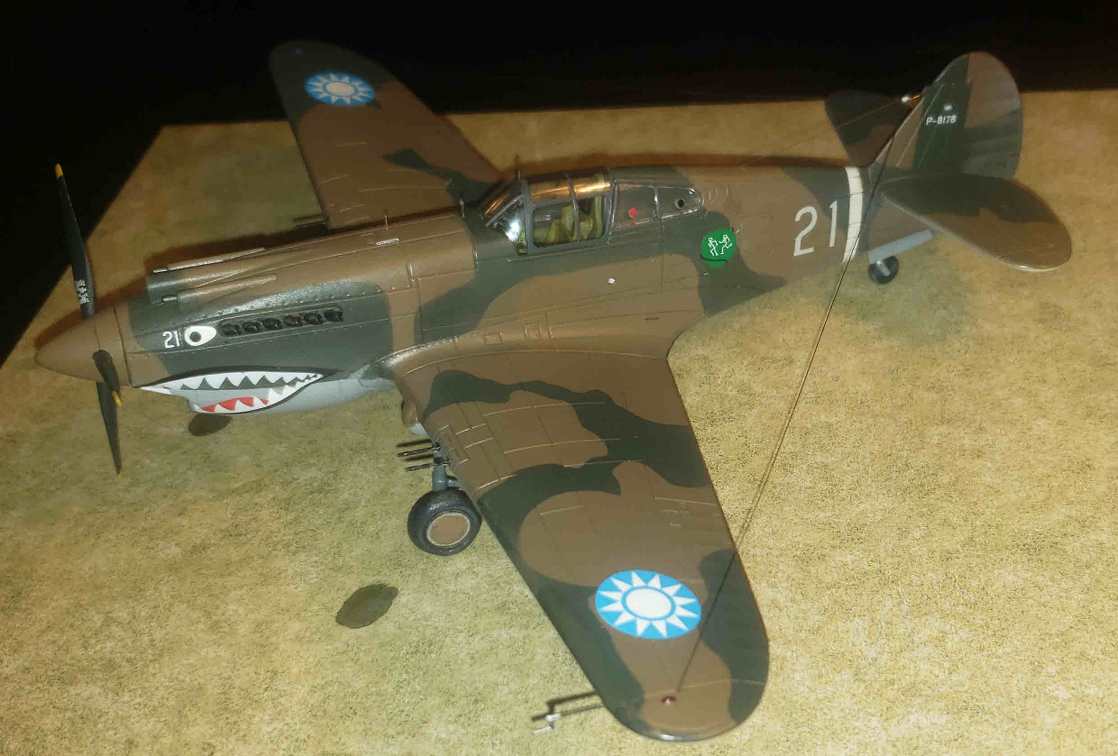
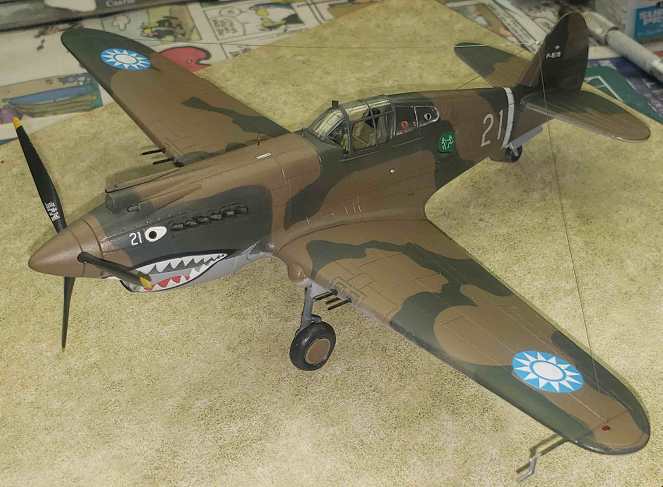
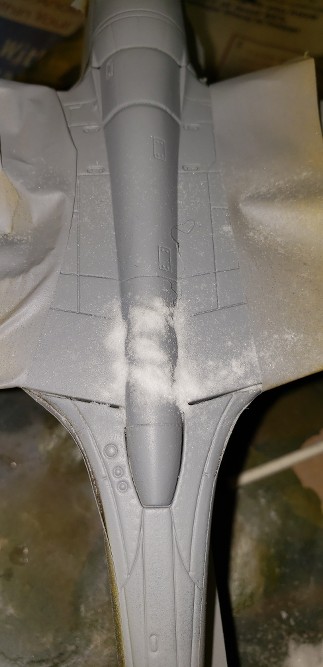
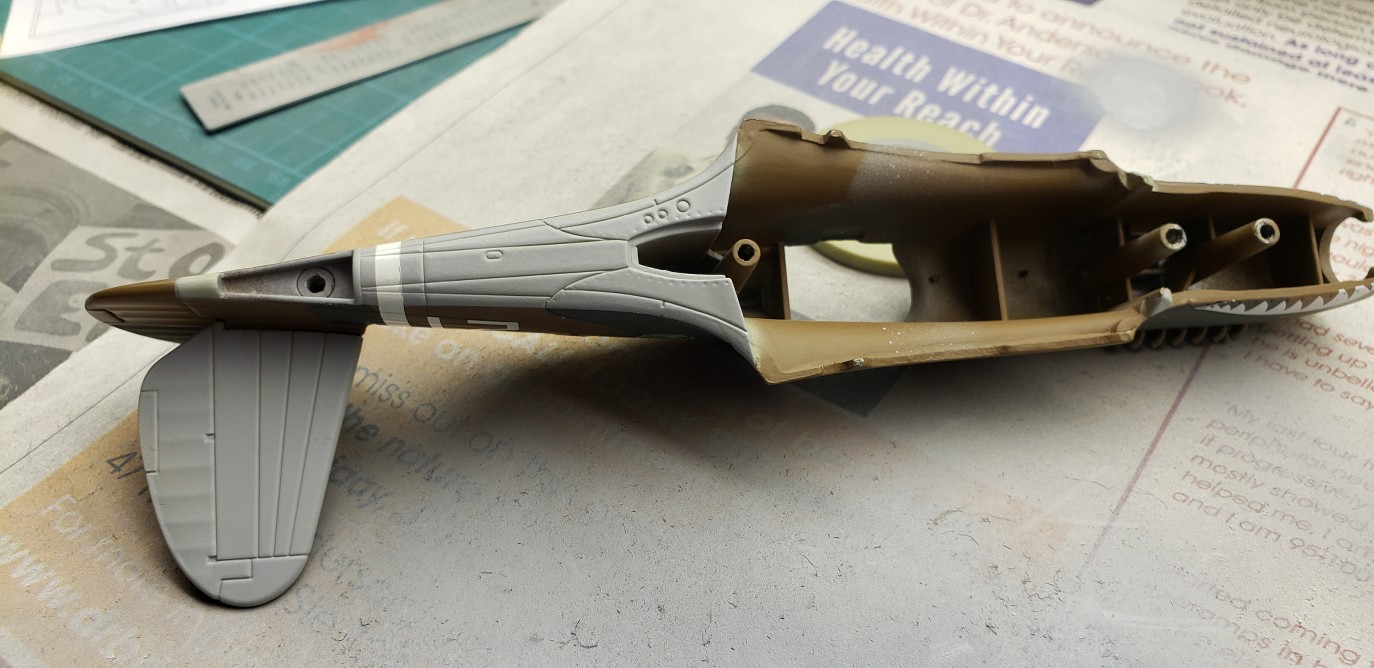
When I first got this model, the only thing I saw "wrong" about it in terms of general appearance was that the bottom of the aircraft was painted in "Sky Type S" rather than the light gray that we now know was painted on at the Curtiss factory in Buffalo, NY. So, if I was going to make this more realistic and presentable, my initial thought was that all I had to do was repaint the bottom. I scratched my head a little bit about the shark teeth and how to do that, but figured I would deal with it later on. (Little did I know that the shark mouth was going to be the make-or-break part of this project.)

Upon much closer examination over a long period of time, and before I took the plunge, I realized that there was much more wrong with the external appearance. Below are some pictures in which I will discuss this.


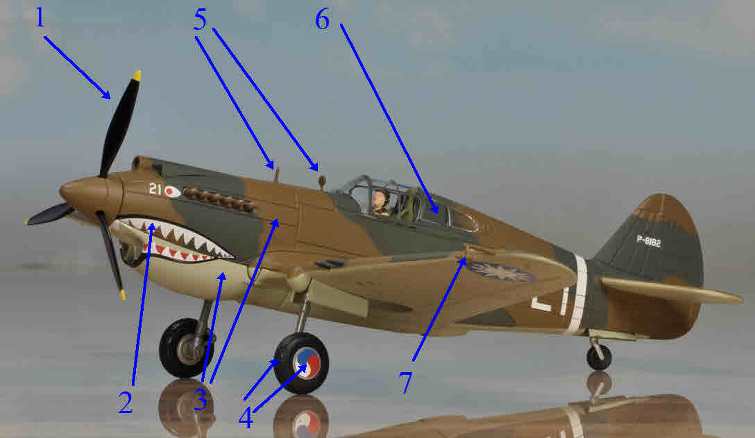
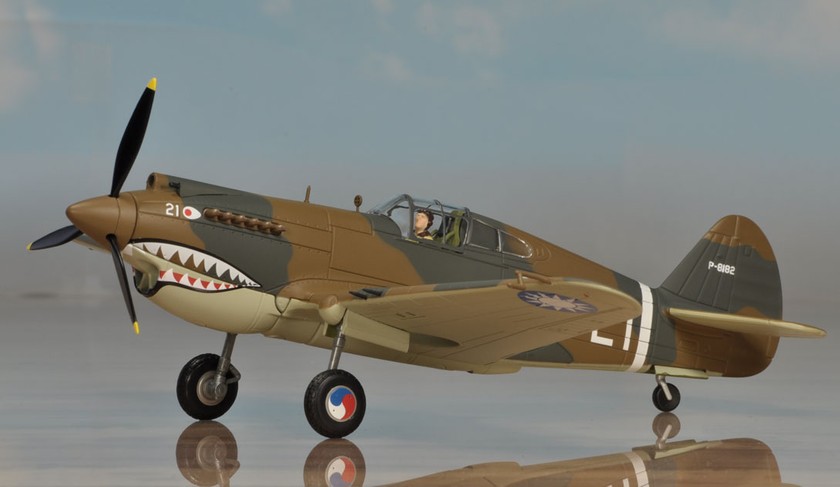
The first photo is numbered 1-7 and let's get into it.

1. The propeller is inaccurate. I will show you more pictures of that later and why it was essential to replace it.

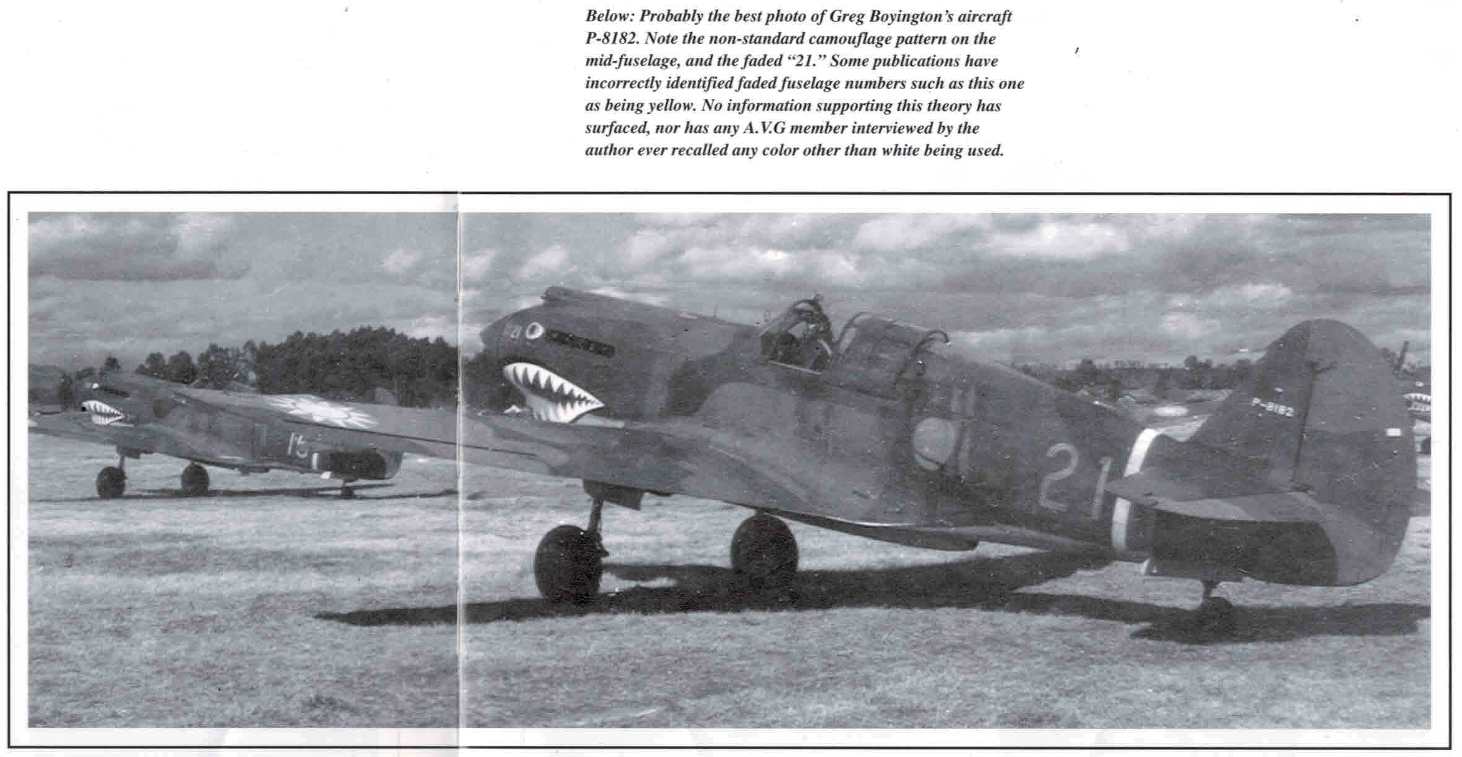
2. When I started researching shark mouths on AVG Hawks, I learned that each aircraft was different. Further research showed that the shark mouth on the model was nowhere near what the one on Boyington's aircraft looked like.

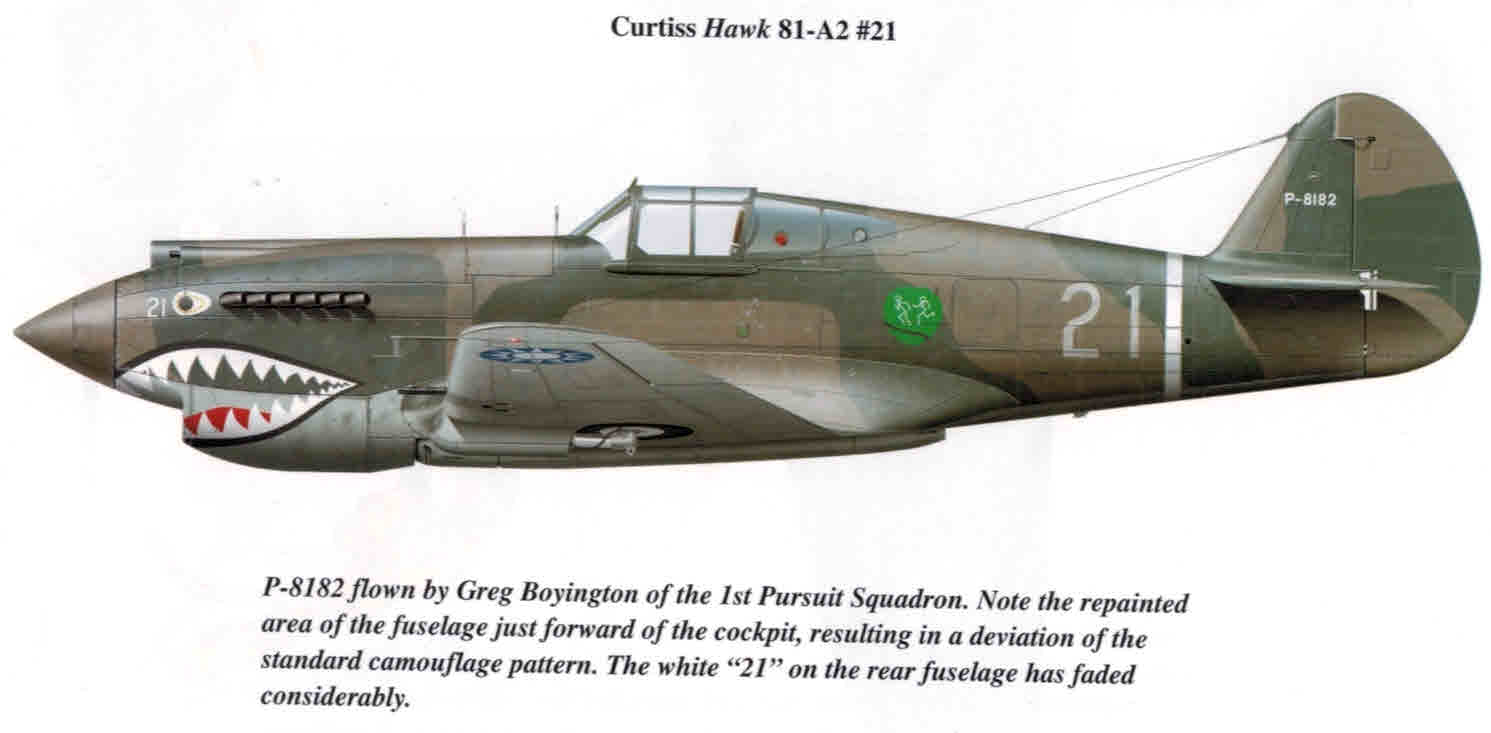
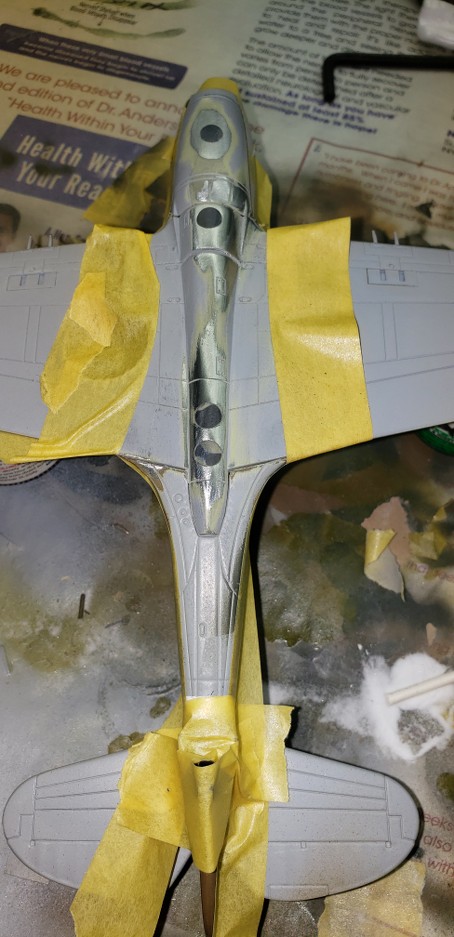
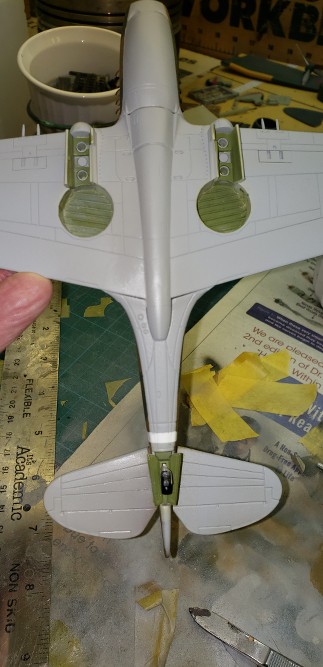
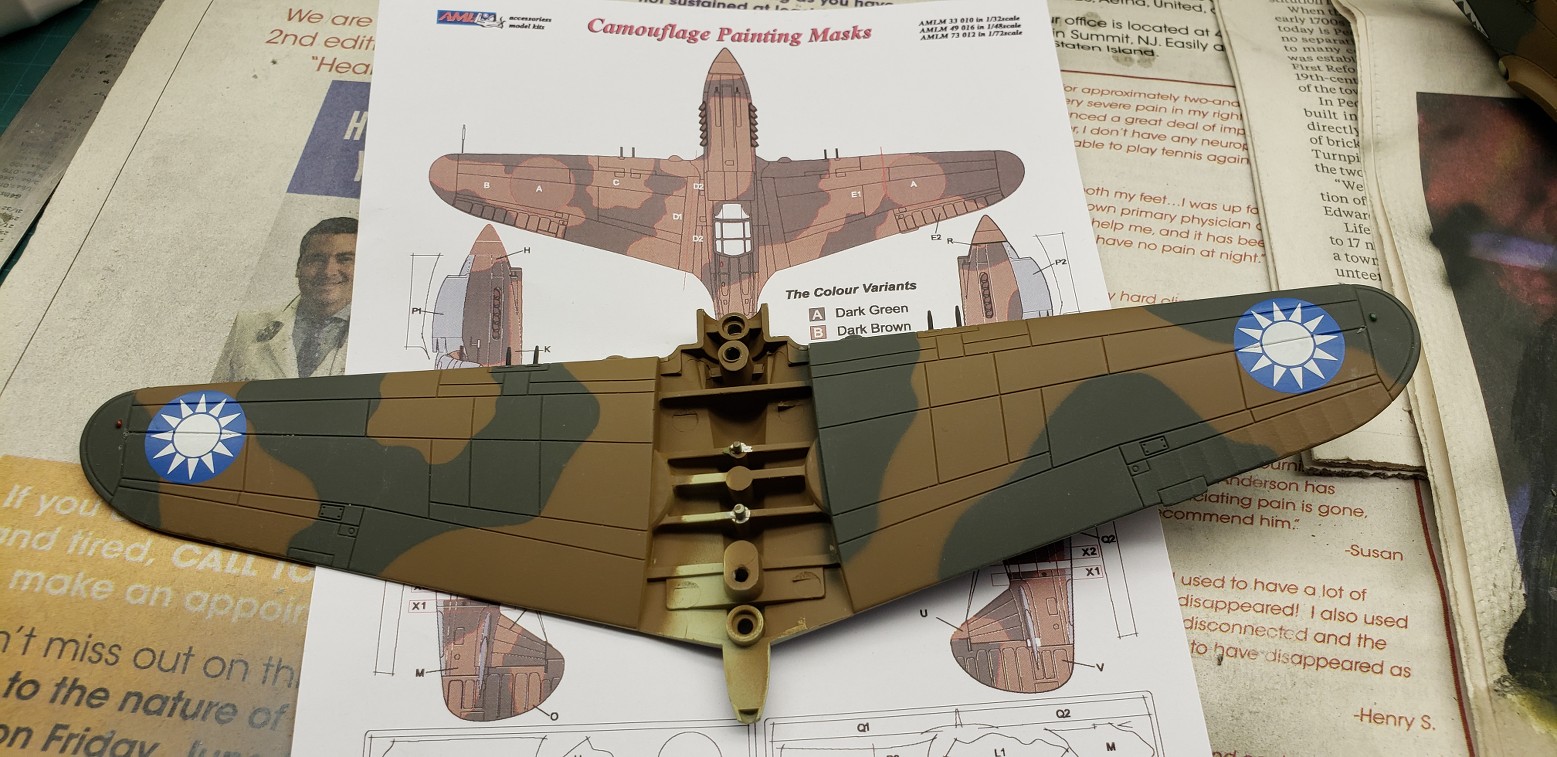
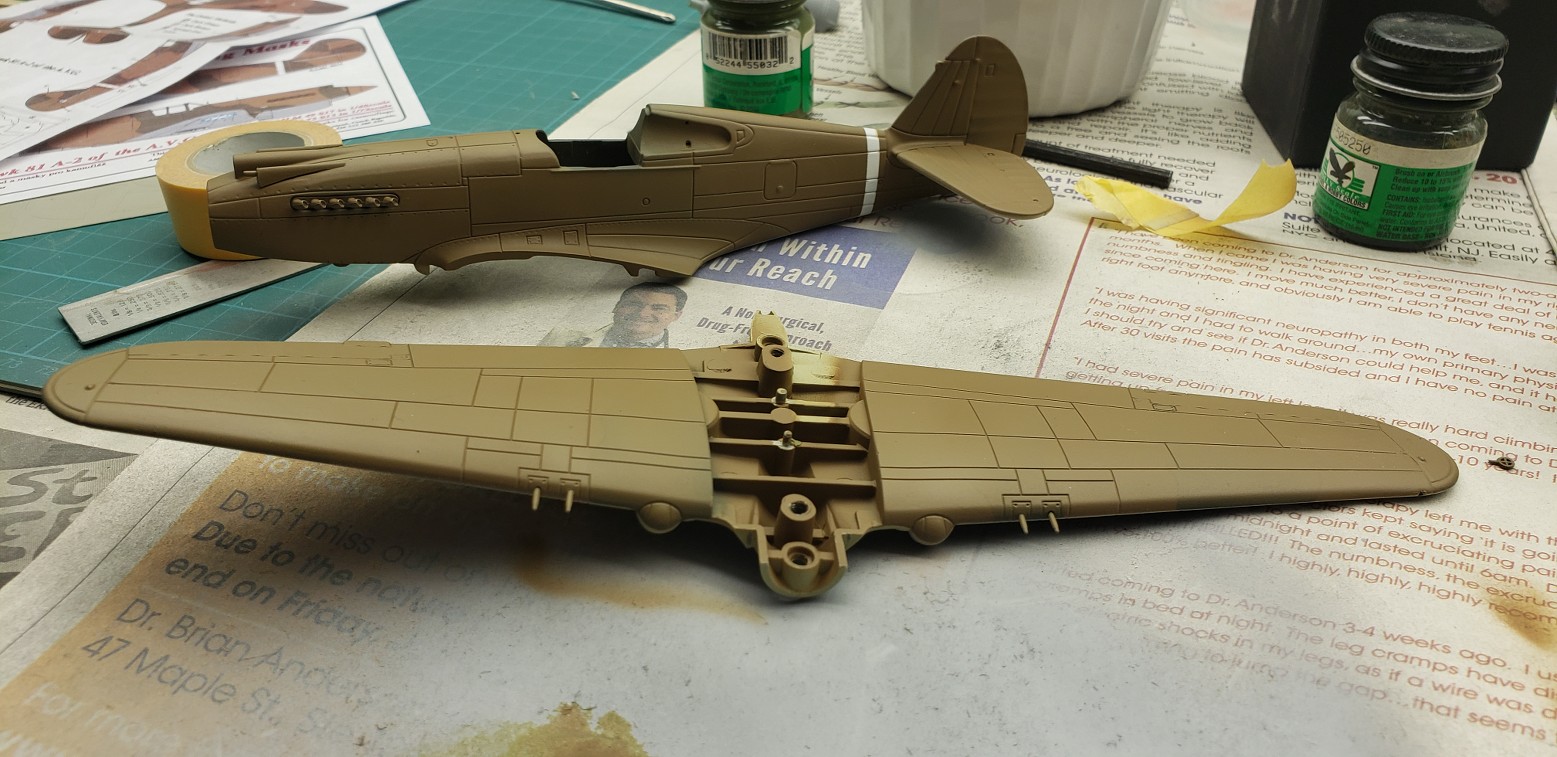
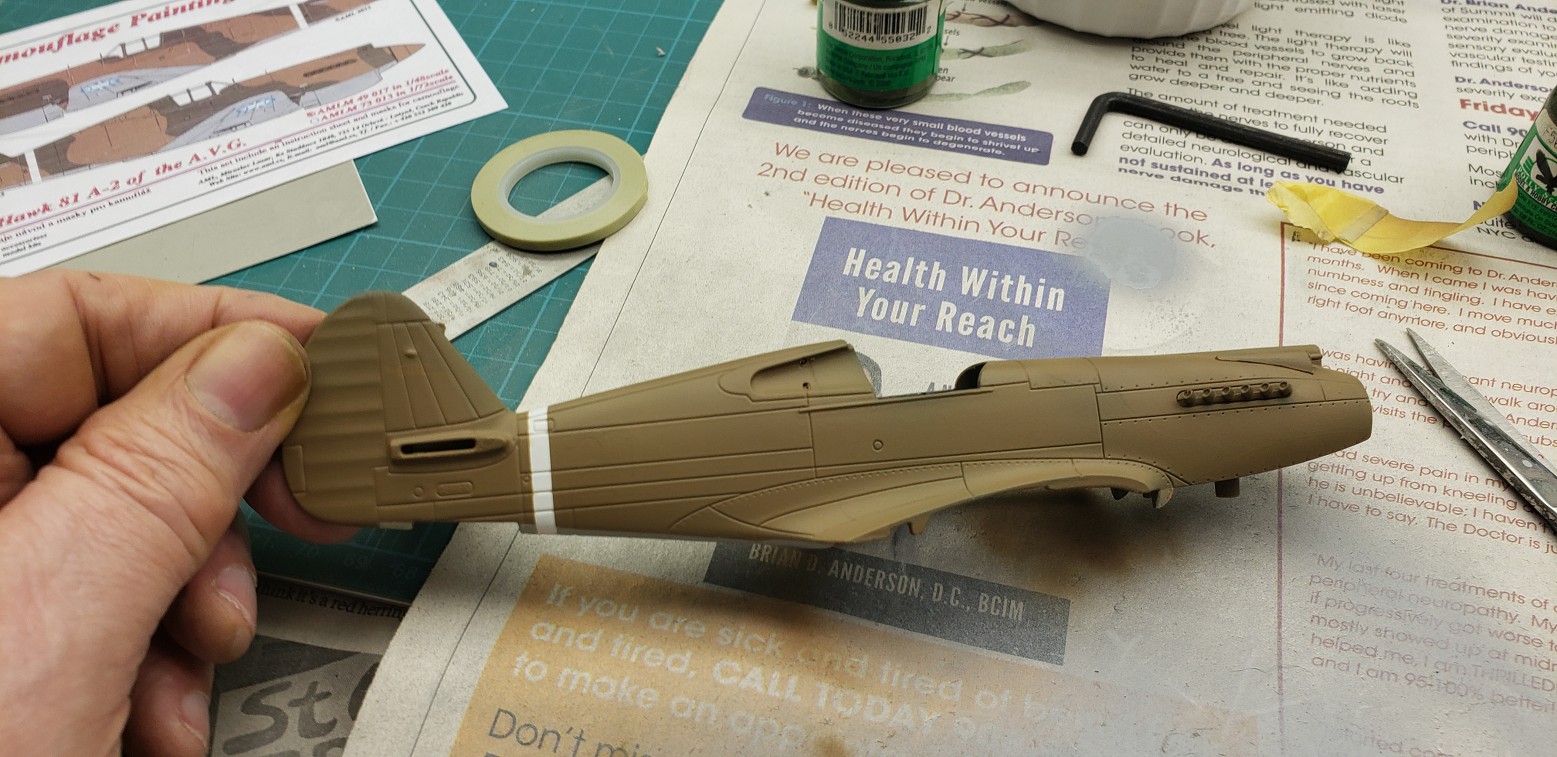
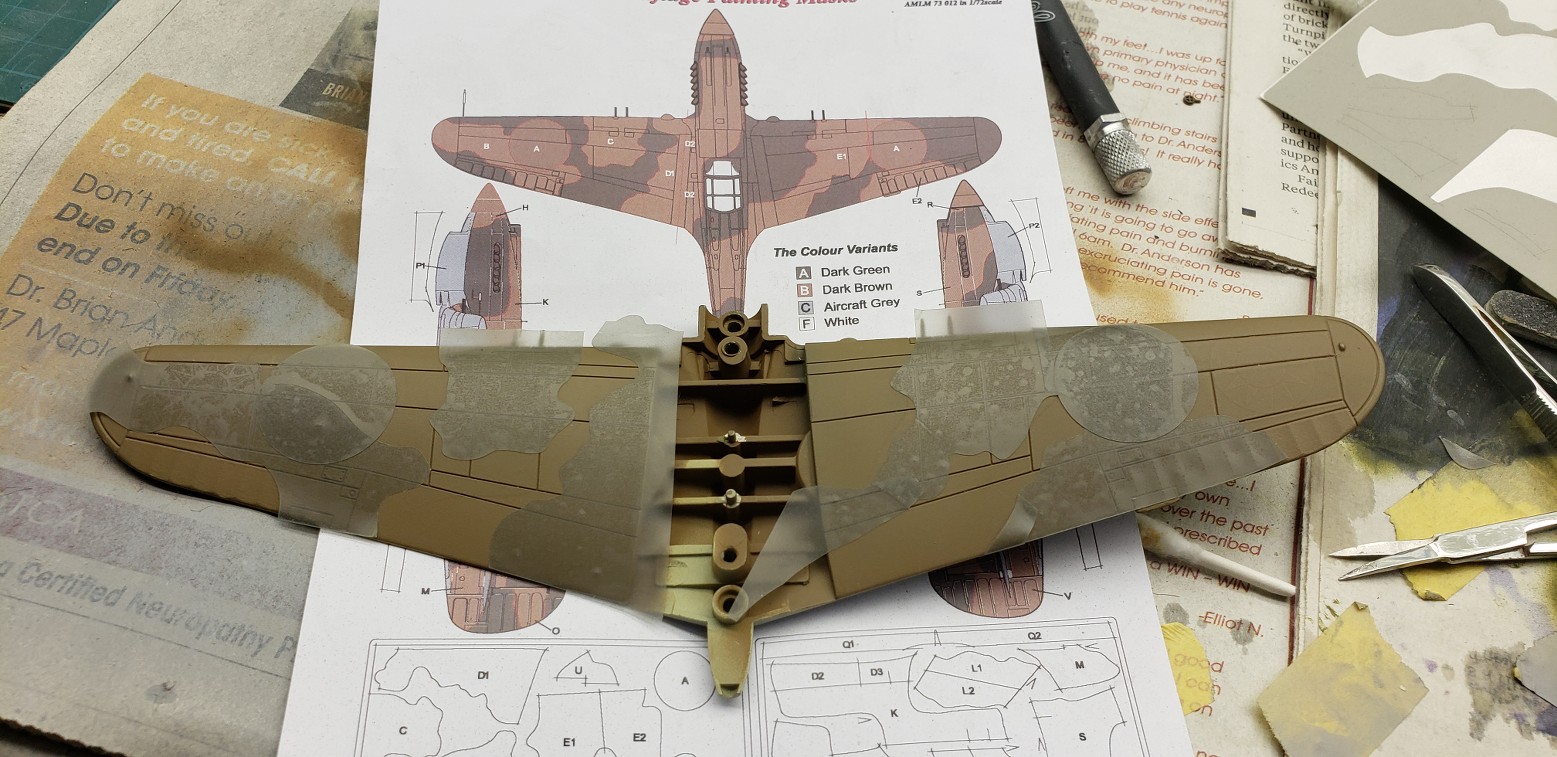
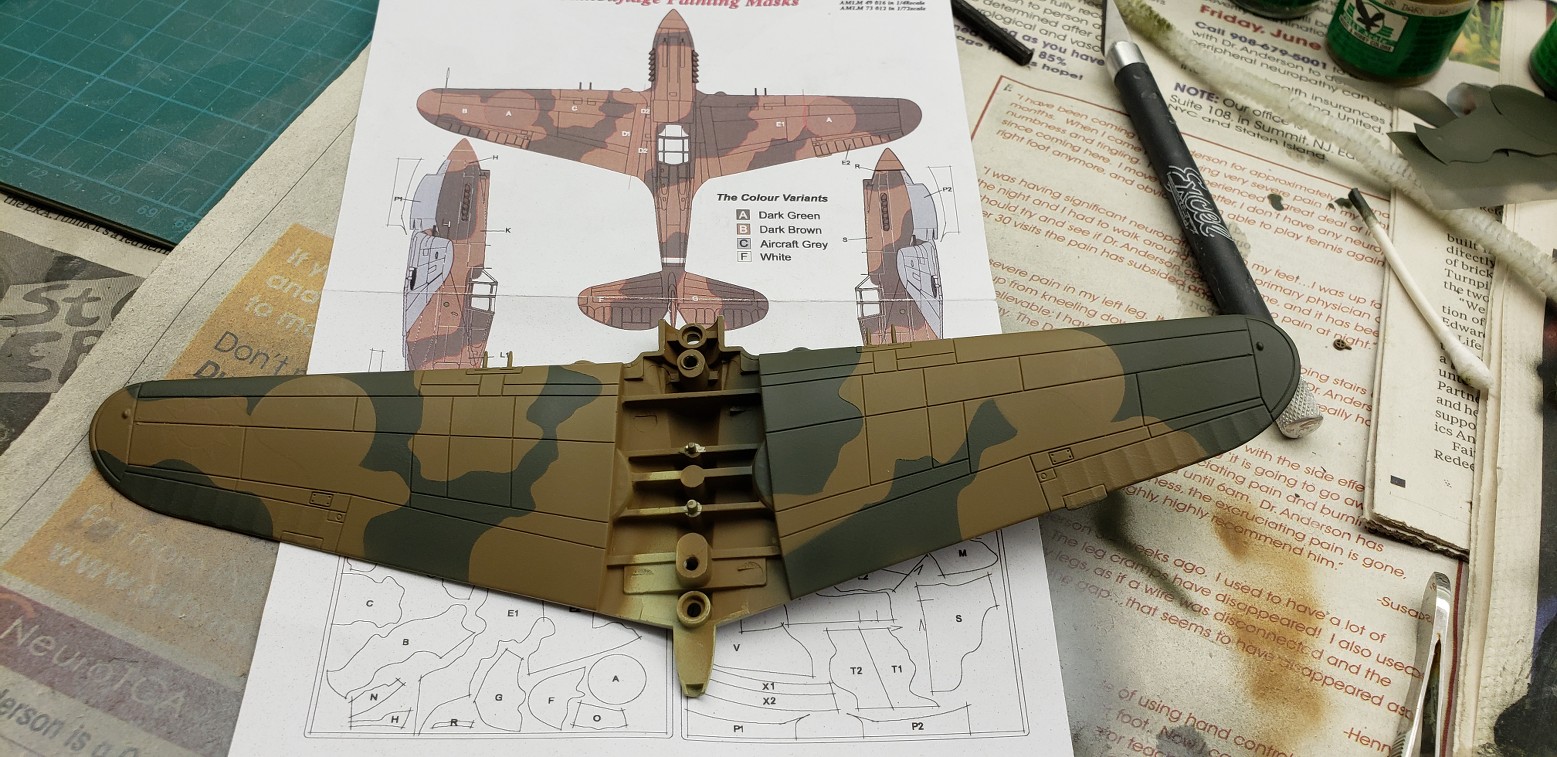
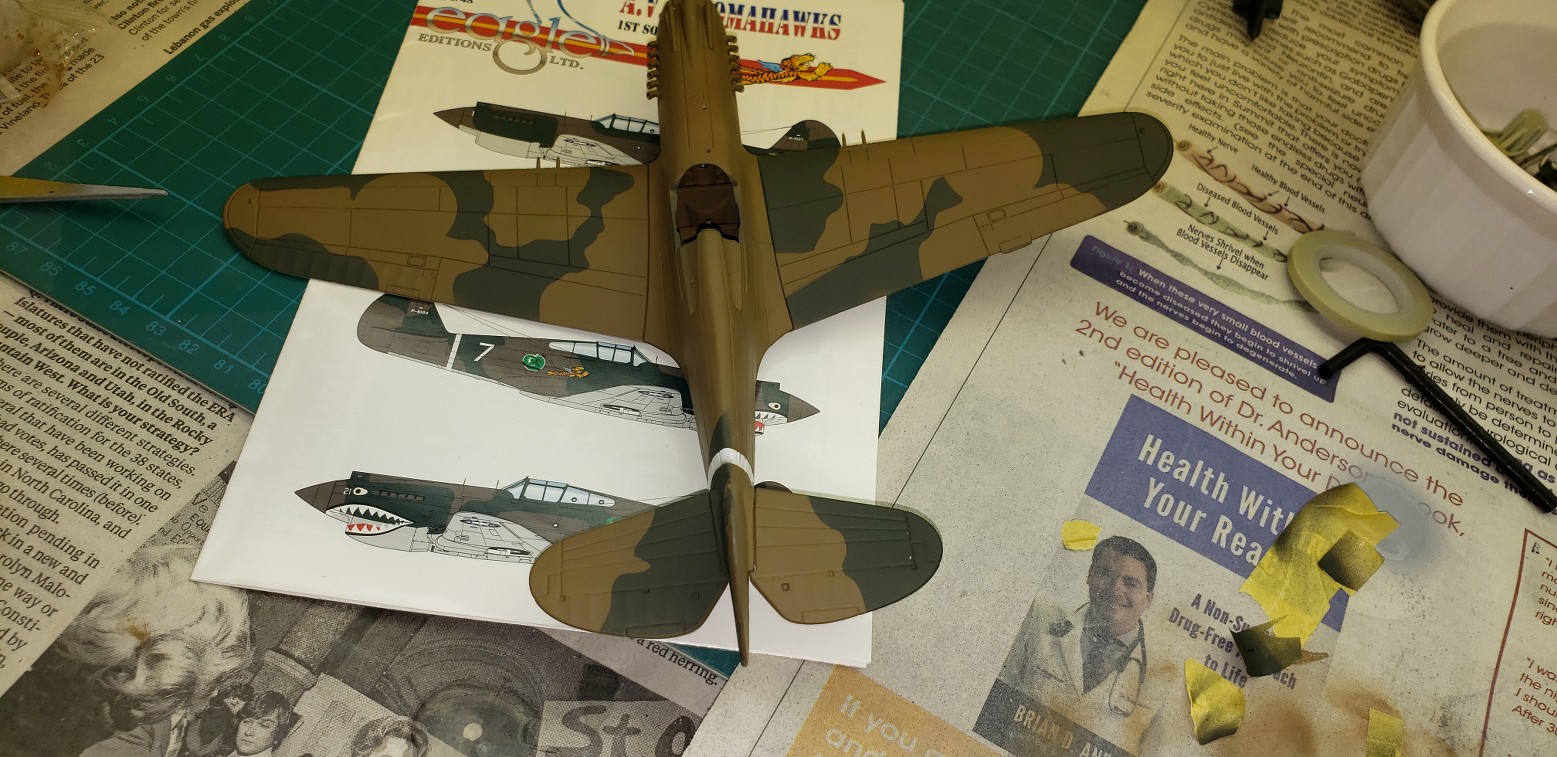
3. Not only was the bottom color wrong but the layout of the green and brown camouflage topside was a product of the designer's imagination rather than an examination of the photos available of real AVG aircraft. Carousel 1 decided to freestyle the pattern rather than adhere to the sharp camo patterns delineated by the rubber mats laid over the aircraft at the Curtiss factory to spray the camouflage paint on. Another problem where this was obvious was that the top wings did not have separate circles for the RAF insignia. That I will show later.

4. The main wheels were wrong. They had a delicate tread pattern whereas the AVG aircrafts' main wheels were smooth. Also, I learned later that the fancy three-color "pinwheel" painting of the wheel hub covers was not present on Boyington's aircraft. It was painted the same "dark earth" present on the upper surfaces of the aircraft.

5. The post and the ring sight was hopelessly out of scale and needed to be replaced.

6. There were no holes for the fuel cap and vent in the port rear window.

7. The pitot tube was unsatisfactory. It was rubber and bent. The same was true of the wing guns, which were also too short.

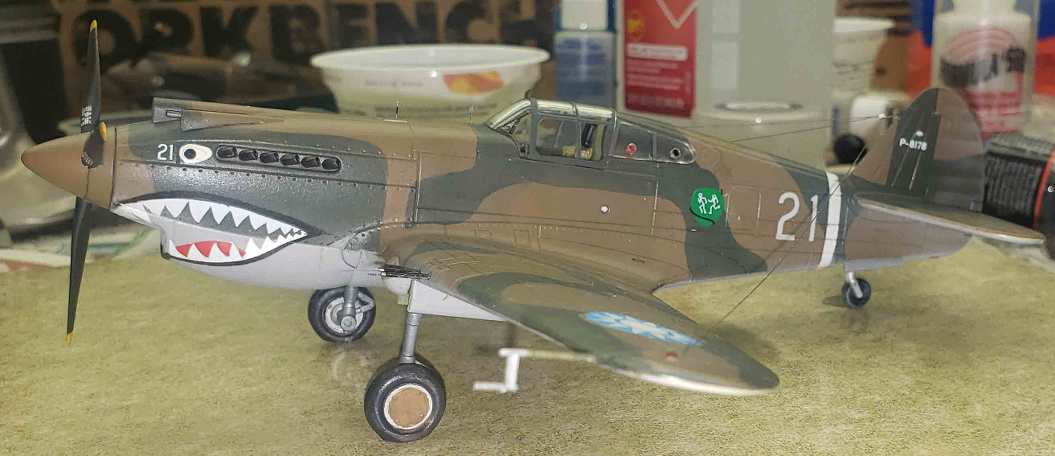
Let's move on to the next picture.


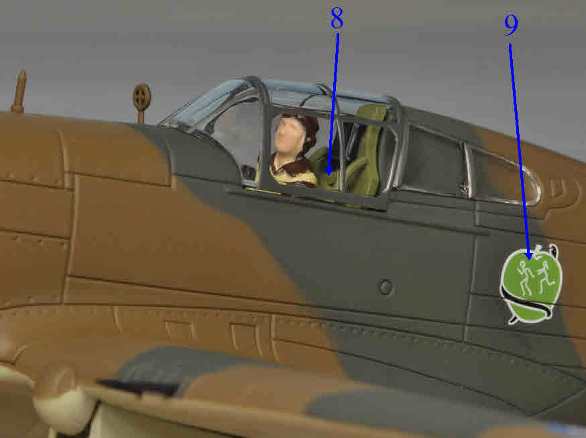
8. Further research disclosed that the pilot seat in this aircraft was wrong. It was basically good for a US Air Corps P-40B, but was not the export seat that AVG Hawks had.

9. The designer got the squadron symbol right, but not the details. Just as with the shark mouths, squadron insignia on AVG aircraft varied greatly in appearance. The green apple with the woman chasing the man (wait, isn't that usually the other way around?) was far fancier than on Boyington's aircraft.

Okay here's the last photo of this post.


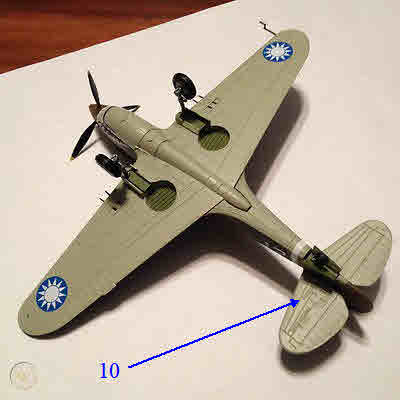
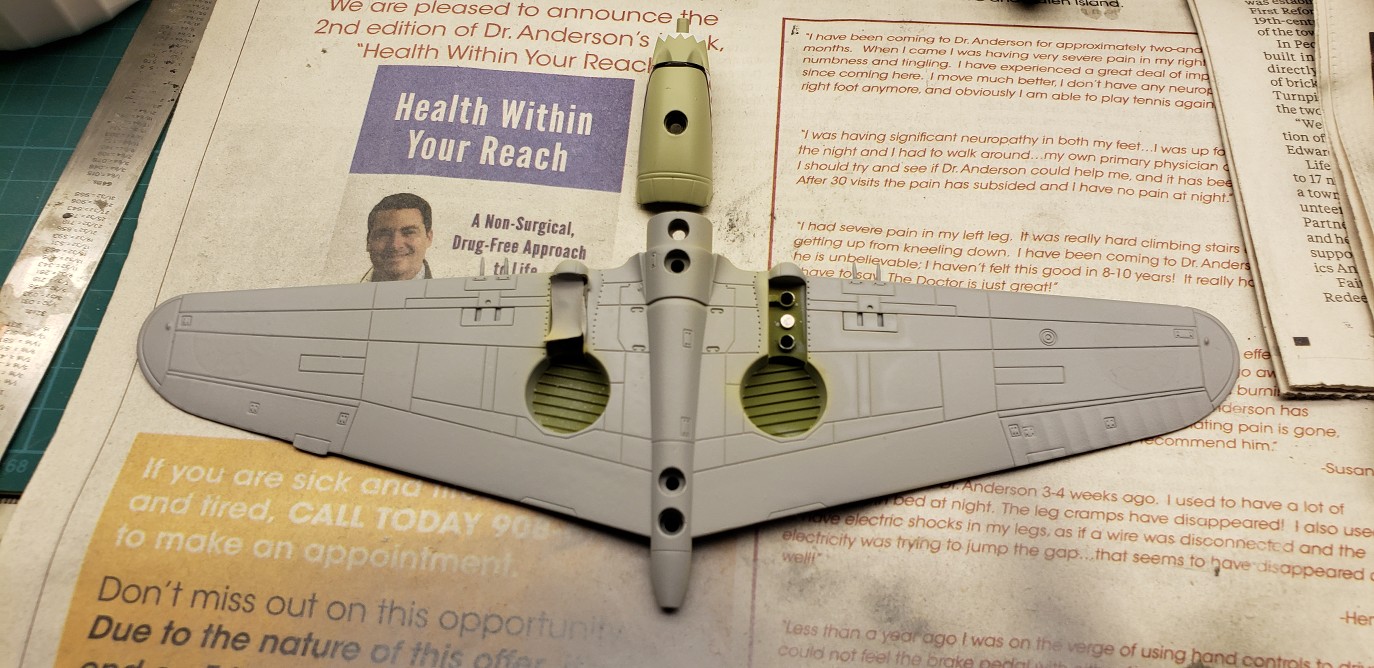
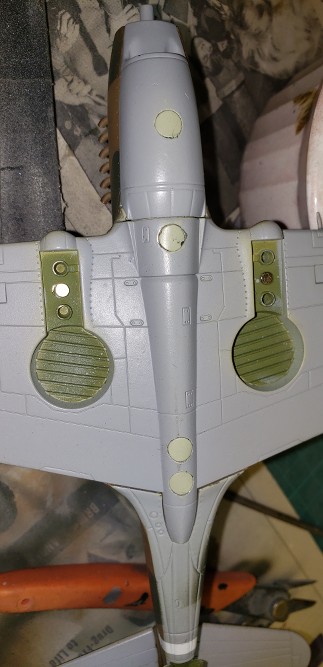
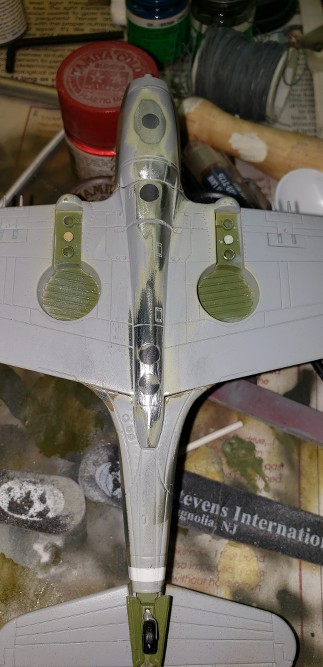
10. There are other Carousel 1 models far more accurate than this one, but all of them have a horrible raised logo on the bottom of the right horizontal stabilizer. I knew it was there and wondered if I would try to fix it or not. I mean, it's raised metal!
You'll see what happens later.
Redhand
#522
_VISITCOMMUNITY
New Jersey, United States
Joined: January 20, 2013
KitMaker: 1,460 posts
AeroScale: 1,443 posts
Posted: Saturday, June 13, 2020 - 02:11 PM UTC

Quoted Text


Richard Tool

Don’t screw it up by putting too much half & half in it - coffee should be the color of new Carhartt overalls ...


I looked up the brown color on the internet. Stylish, Man!
Redhand
#522
_VISITCOMMUNITY
New Jersey, United States
Joined: January 20, 2013
KitMaker: 1,460 posts
AeroScale: 1,443 posts
Posted: Thursday, June 25, 2020 - 03:37 PM UTC
BASIC PREPARATIONS AND PAINTING

The first thing to do to rebuild this was to take it apart. The model was held together by a number of screws on the bottom of the fuselage, which were covered by rather ugly rubber plugs. I had to remove the plugs and then unscrew the major components.


Then I had to decide how to fill the holes in. I opted to reinsert the plugs and feather them into the middle fuselage bottom.


This was tedious.


But ultimately it yielded a good result.


At this point I was using Tamiya primer in the can, 1200 I think, and the color was pretty close to what I wanted. (The final color I used was a Tamiya light sky gray.)

Since I had gotten this far I decided to tackle the ugly logo on the starboard bottom horizontal stabilizer which I pointed out earlier.

I did this by pulling the stabilizer off of the model, which was a bit of a task but ultimately accomplished.


Here you can see how the stabilizer looks after I sanded it down and then re-scribed the metal. I used a variety of sanding sticks and a lot of elbow grease, but as you can see it looks acceptable.


After that it was time to move to the fuselage top and to the wings. I'll cover that in the next post.
Redhand
#522
_VISITCOMMUNITY
New Jersey, United States
Joined: January 20, 2013
KitMaker: 1,460 posts
AeroScale: 1,443 posts
Posted: Friday, June 26, 2020 - 11:20 AM UTC
TOPSIDE

That a complete re-painting of the aircraft topside was necessary can be seen by this comparison of the model's wing with an AML template from a mask set for AVG Hawks that I bought.


The only way to start was to jump in, which I did with some old Polyscale (I think, subject to correction) that I used to paint the lighter of the two camouflage coats. I know that there were "Dupont Paints" whose colors were "equivalent" to RAF Dark Earth and Dark Green used at the Curtiss factory in Buffalo, but I opted for the RAF colors because the differences would be all but undetectable, especially after some service use.

Here are some views of the upper wing and fuselage.


You will note on the fuselage that I already pulled out the oversized post and ring sights forward of the cockpit.

And here's the Stbd. fuselage, all mud brown.


Next will be painting using the AML masks.
rdt1953
_VISITCOMMUNITY
New Jersey, United States
Joined: February 06, 2015
KitMaker: 1,098 posts
AeroScale: 900 posts
Posted: Friday, June 26, 2020 - 08:34 PM UTC
Hi Brian - This is pretty neat to follow - something different !
Redhand
#522
_VISITCOMMUNITY
New Jersey, United States
Joined: January 20, 2013
KitMaker: 1,460 posts
AeroScale: 1,443 posts
Posted: Saturday, June 27, 2020 - 04:47 AM UTC

Quoted Text

Hi Brian - This is pretty neat to follow - something different !


Thank you, Richard! I was wondering if this would have any appeal.
Redhand
#522
_VISITCOMMUNITY
New Jersey, United States
Joined: January 20, 2013
KitMaker: 1,460 posts
AeroScale: 1,443 posts
Posted: Saturday, June 27, 2020 - 12:31 PM UTC
TOPSIDE WING AND TAIL CAMOUFLAGE

To set the mood I did some online searching for "P-40's" under construction at the Curtiss Airplane Division Buffalo plant. When I was a Curtiss-Wright employee many moons ago I occasionally flew to Buffalo to visit a steel extrusion plant that was the only remnant of the Airplane Division's massive facilities in nearby Cheektowaga.


In the 80s and 90s, much of the plant was still standing and in use even though Curtiss-Wright had closed the facility in 1946. Some of it may still be because there were many Curtiss buildings nearby. But not, I think, the assembly building that is shown above and the rest of the factory taken over by Westinghouse in 1946. The demolition of the former Curtiss-Wright factory brings mixed emotions.

EDIT AND UPDATE: Curtiss-Wright Plant 2/Westinghouse Electric Plant (Site)

Today, no evidence of the Curtiss-Wright #2 plant exists aside from some of the original employee parking lot on the Northeast portion of the former property. Through a memorial plaque for workers lost in a September 11th, 1942 crash was unveiled in September of 2000, a larger planned monument to the factory and its workers on airport grounds fell to the wayside in the face of post-9/11 security concerns, leaving the majority of tangible evidence of the plant’s existence and contribution to the Second World War and subsequent generations available at the Cheektowaga Historical Association and Museum.


There is that museum. See Cheektowagah Historical Museum.

Anyway, I hoped my online search would show some pictures of the RAF Curtiss Tomahawks and AVG aircraft being painted with hard demarcation lines using the rubber mats that were cut out in the camouflage patterns. No luck. See below, which was as close as I got.


So let's go to the model and see what the pattern looks like from the AML set of masks.


I have read accounts that the painting jobs on these aircraft were to the same pattern, but not identical because of the difficulty of placing the rubber mats properly. Let's just say that after using the AML masks, which I consider really good by the way, I have some feel for what it was like for the plant painters. There's a lot of difficulty with placing the patterns to get things "right."

I definitely had to give it more than one try before achieving this result.


And even after it was done there was a lot of fiddling to do to make the wing patterns match up with the fuselage patterns etc. However, if you compare this photo to the photo of the wing before disassembly, you can see what an improvement this is.


Let's move on to the horizontal stabilizer camo patterns. They were also fictional on the model and I needed the masks to set things right.


And yes, at this point I began to have a nice feeling that I was actually "building a model again."


More fun to come.
SpeedyJ
_VISITCOMMUNITY
Bangkok, Thailand / ไทย
Joined: September 17, 2013
KitMaker: 1,617 posts
AeroScale: 212 posts
Posted: Saturday, June 27, 2020 - 02:43 PM UTC
Very interesting. Like it a lot. 3D printed modeling has the same style of modeling complete installments.
 _GOTOTOP