hi fellows, i'm new here and not real familiar with how to use the galleries as of now, so if you have any reccemendations, please let me know.
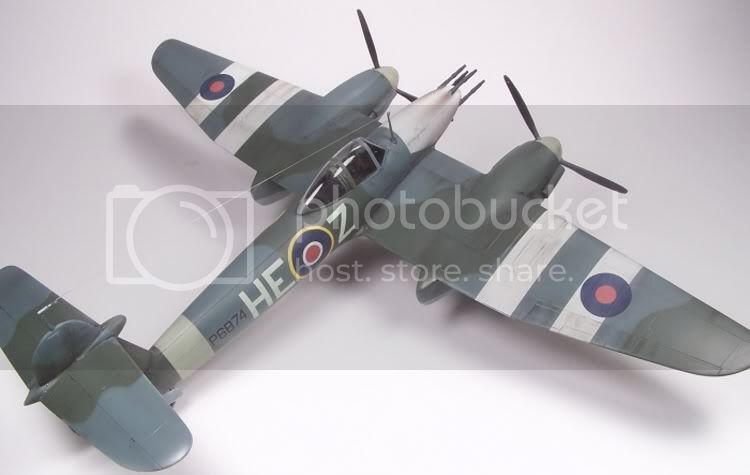
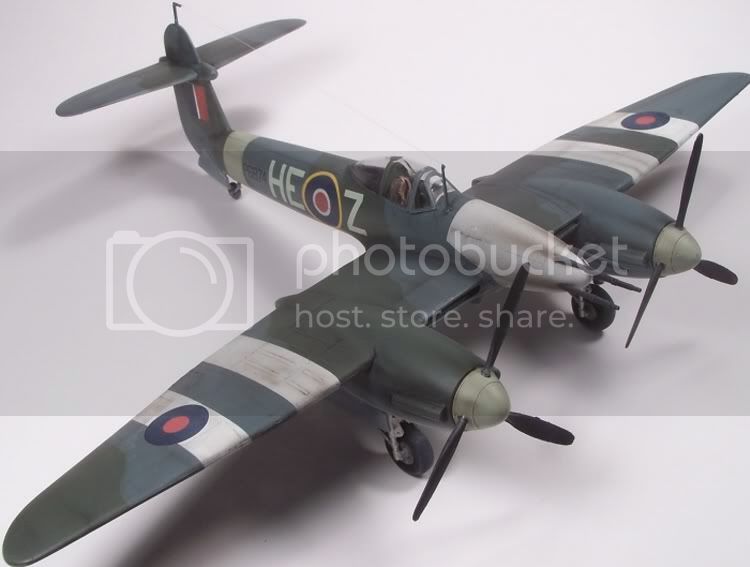
this is my latest build. it is Classic Airframes 1/48 Westland Whirlwind. a real tough kit for me, but i finally got it finished.
i invite you to view the rest of the pics, if you care to, here:
http://img16.photobucket.com/albums/v47/saltydog322000/Westland%20Whirlwind/ " TARGET="_blank"> http://img16.photobucket.com/albums/v47/saltydog322000/Westland%20Whirlwind/
Hosted by Rowan Baylis
1/48 Westland Whirlwind Finished
saltydog
Alabama, United States
Joined: August 12, 2004
KitMaker: 44 posts
AeroScale: 0 posts
Joined: August 12, 2004
KitMaker: 44 posts
AeroScale: 0 posts
Posted: Thursday, August 12, 2004 - 09:04 AM UTC
OllieC-FWOL
Quebec, Canada
Joined: March 31, 2004
KitMaker: 446 posts
AeroScale: 0 posts
Joined: March 31, 2004
KitMaker: 446 posts
AeroScale: 0 posts
Posted: Thursday, August 12, 2004 - 09:34 AM UTC
Very nice!
Did you used an injection canopy?
saltydog
Alabama, United States
Joined: August 12, 2004
KitMaker: 44 posts
AeroScale: 0 posts
Joined: August 12, 2004
KitMaker: 44 posts
AeroScale: 0 posts
Posted: Thursday, August 12, 2004 - 09:50 AM UTC
OllieC, i used the kit supplied canopy, it was too thick to be a vacuform, so i'm assuming it was injected. nothing fit on this kit........and i mean nothing!! bad kit!!later.
Tony_Frey
Missouri, United States
Joined: May 03, 2003
KitMaker: 272 posts
AeroScale: 41 posts
Joined: May 03, 2003
KitMaker: 272 posts
AeroScale: 41 posts
Posted: Thursday, August 12, 2004 - 10:53 AM UTC
Tough build or not, I think it looks fantastic, especially your weathering. Perseverance pays off.
saltydog
Alabama, United States
Joined: August 12, 2004
KitMaker: 44 posts
AeroScale: 0 posts
Joined: August 12, 2004
KitMaker: 44 posts
AeroScale: 0 posts
Posted: Thursday, August 12, 2004 - 11:20 AM UTC
thanks for your kind words Tony. later.
Posted: Thursday, August 12, 2004 - 02:32 PM UTC
Hi saltydog
Lovely job! Very nice build and finshing.
Just a couple of points, which may simply not show in the photos... did you represent the landing and navigation lamps on the wingtips and tail-fin, and are the propeller tips yellow?
I built the kit when it was first released a few years ago and I also found some fit problems. The early release featured a vacuform canopy, which has been replaced with a injection-moulded item for the new release.
All the best
Rowan
MrRoo
Queensland, Australia
Joined: October 07, 2002
KitMaker: 3,856 posts
AeroScale: 0 posts
Joined: October 07, 2002
KitMaker: 3,856 posts
AeroScale: 0 posts
Posted: Thursday, August 12, 2004 - 02:43 PM UTC
while I am not an aircraft builder I must admit I am impressed with this one.
You have done a fantastic job on it. Thanks for sharing
OllieC-FWOL
Quebec, Canada
Joined: March 31, 2004
KitMaker: 446 posts
AeroScale: 0 posts
Joined: March 31, 2004
KitMaker: 446 posts
AeroScale: 0 posts
Posted: Thursday, August 12, 2004 - 08:34 PM UTC
Excellent, so you had the newer boxing with the injected canopy.
Your propeller blades seem to be offset. Are they at 120 degrees?
saltydog
Alabama, United States
Joined: August 12, 2004
KitMaker: 44 posts
AeroScale: 0 posts
Joined: August 12, 2004
KitMaker: 44 posts
AeroScale: 0 posts
Posted: Thursday, August 12, 2004 - 09:12 PM UTC
LOL, you guys are sharp!! yes, the props are off, its a styrene to resin butt joint that my patience just couldn't overcome!! to answer the question about the yellow prop tips, yes, they were supposed to be yellow, an item i overlooked during assembly, and once i discovered they were supposed to be yellow, i had struggled to get the prop blades attach semi ok, so i was scared to touch them with anything for fear of breaking them off. that isa very delicate prop assembly on this kit!! and you got me again, i didn't do the nav lights, as i was just glad to get this thing off my bench and out of the few hairs that i have left. thanks for you kind and constructive feedback. later.
OllieC-FWOL
Quebec, Canada
Joined: March 31, 2004
KitMaker: 446 posts
AeroScale: 0 posts
Joined: March 31, 2004
KitMaker: 446 posts
AeroScale: 0 posts
Posted: Thursday, August 12, 2004 - 09:25 PM UTC
If I recall correctly, there is a tool to make perfect props over at Modeling Madness.
I'll have a look and pos the link here.
Posted: Thursday, August 12, 2004 - 10:18 PM UTC
LOL! I don't comment on the angle of the blades, because I thought it was camera-lens distortion.
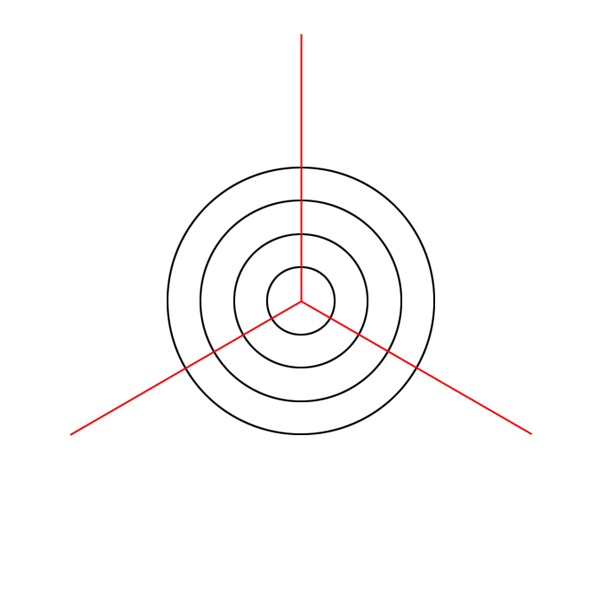
It's actually really simple to draw a template to ensure you get the angles right, using a compass and protractor - (or draw it in a graphics programme ).
All the best
Rowan
It's actually really simple to draw a template to ensure you get the angles right, using a compass and protractor - (or draw it in a graphics programme ).
All the best
Rowan
OllieC-FWOL
Quebec, Canada
Joined: March 31, 2004
KitMaker: 446 posts
AeroScale: 0 posts
Joined: March 31, 2004
KitMaker: 446 posts
AeroScale: 0 posts
Posted: Thursday, August 12, 2004 - 10:53 PM UTC
Ok, here's the word :
buy a Mercedes and use the star on the hood as the template!!
:-) :-)
buy a Mercedes and use the star on the hood as the template!!
:-) :-)
Posted: Thursday, August 12, 2004 - 11:22 PM UTC
Yes, buying a Merc is definitely the most fun way of doing it!
Otherwise, try something like these for 3, 4 and 5 bladed props. Just centre the spinner in the cicles and line-up the blades with the guides.
All the best
Rowan
Otherwise, try something like these for 3, 4 and 5 bladed props. Just centre the spinner in the cicles and line-up the blades with the guides.
All the best
Rowan
saltydog
Alabama, United States
Joined: August 12, 2004
KitMaker: 44 posts
AeroScale: 0 posts
Joined: August 12, 2004
KitMaker: 44 posts
AeroScale: 0 posts
Posted: Friday, August 13, 2004 - 01:58 AM UTC
thanks for the wonderful tid bit fellows!! i'll definetly keep this in mind the next go around. i want to return to this subject oneday and do it right. i did it the dumb way this time, and attached the prop blades after i had attached the nose piece to the engine!! again, thanks, later.
Posted: Friday, August 13, 2004 - 06:10 AM UTC
Nice Whirlwind, even with the one or two, minor, slips. The paint job and weathering look well done, as do the decals. The canopy is particularly impressive, really nice and clear, what's your secret?
I am about to start this kit, the early version. I was thinking about doing it as an on-line build, what do you think? I'm also undecided on whether to do the dark earth and green, or ocean grey and green, any thoughts on that?
Mal
I am about to start this kit, the early version. I was thinking about doing it as an on-line build, what do you think? I'm also undecided on whether to do the dark earth and green, or ocean grey and green, any thoughts on that?
Mal
Posted: Friday, August 13, 2004 - 06:17 AM UTC
Hi Mal
I'd vote for the early colour scheme - apparently Whilwinds had vivid sky-blue undersides (not Sky) - that'd be great to pin down...
Rowan
I'd vote for the early colour scheme - apparently Whilwinds had vivid sky-blue undersides (not Sky) - that'd be great to pin down...
Rowan
OllieC-FWOL
Quebec, Canada
Joined: March 31, 2004
KitMaker: 446 posts
AeroScale: 0 posts
Joined: March 31, 2004
KitMaker: 446 posts
AeroScale: 0 posts
Posted: Friday, August 13, 2004 - 06:24 AM UTC
For good advice on British camo, try getting a hold of Graham Boak on Hyperscale.
He has always answered to my questions with very good and interesting information.
saltydog
Alabama, United States
Joined: August 12, 2004
KitMaker: 44 posts
AeroScale: 0 posts
Joined: August 12, 2004
KitMaker: 44 posts
AeroScale: 0 posts
Posted: Friday, August 13, 2004 - 06:37 AM UTC
thanks for your kind words Mal. as for the canopy, i always dip them in future after a good soak and cleaning. when i dip it, i place it on a papertowel so the excess will wick away from it, i also place a cup over it upside down to divert any dust or debri from settling in the fresh coat of future. after about 24 hours, or when i get the fuselage halves placed, whether i'm gonna close the canopy or leave it open, i tack it in place and mask it off. this kills 2 birds with one stone IMO. you have to mask the cockpit and the canopy frame, so this does both in one, quick step. when i'm done with the sealer coat on the kit, i peel the masking tape off (i use tamiya masking tape for canopies) and she's as clear as the day i tacked her on.
as for the camo job, i personally like the grey and green over the dark earth an green, but its totally personal. if you need any help, feel free to drop me an email, i'll help if i can. later.
Posted: Saturday, August 14, 2004 - 01:04 AM UTC
Quoted Text
I'd vote for the early colour scheme - apparently Whilwinds had vivid sky-blue undersides (not Sky) - that'd be great to pin down...
Thanks Rowan, that makes the task of settling on a colour scheme much easier ......not....... :-)
I know some Spitfires and Hurricanes had sky blue undersurfaces, but I've never seen any reference to Whirlwinds with them. Both the dark earth/green and grey/green schemes appeal to me, so I think I'll do my first one in earth/green (with sky undersurfaces) and, assuming all goes well, I'll do a second in ocean grey/green :-)
You treat your canopies much the same as me, saltydog, yours do look very well done Thanks for the offer of help, I may give you a call.
Mal
Posted: Saturday, August 14, 2004 - 03:57 AM UTC
Quoted Text
Thanks Rowan, that makes the task of settling on a colour scheme much easier ......not.......
Hi Mal, glad to help!
Michael Bowyer has commented in many publications about the "rich blue" undersides on Whirlwinds. As far as I can gather, it seems to have been a Westland "home brew", used before stocks of Sky were available. Apparently, Sky spinners and fuselage-bands stood out like sore thumbs against the blue...
All the best
Rowan