_GOTOBOTTOM
World War II: USA
Aircraft of the United States in WWII.
Hosted by Rowan Baylis
Inside Out: 1:48 Mustang
archerwin
_VISITCOMMUNITY
Luzon, Philippines
Joined: January 05, 2004
KitMaker: 106 posts
AeroScale: 0 posts
Posted: Monday, June 27, 2005 - 05:04 PM UTC
hello! just want to share to you my current in-progress build... it's nearing it's completion... some of the mods that I did:
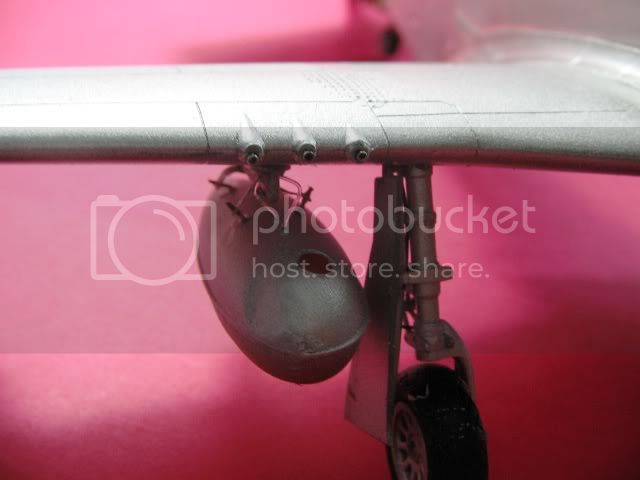
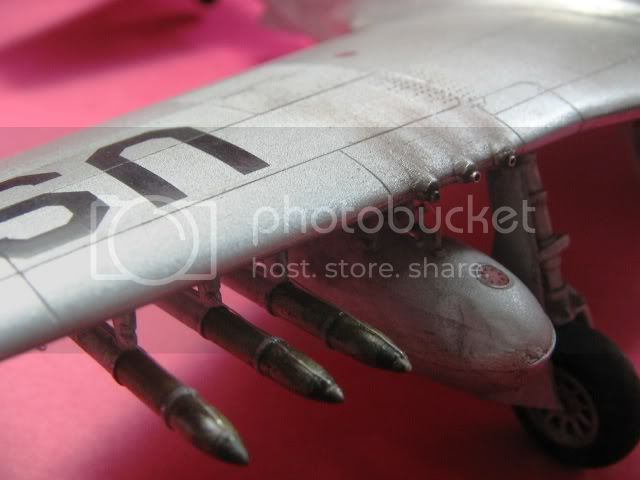
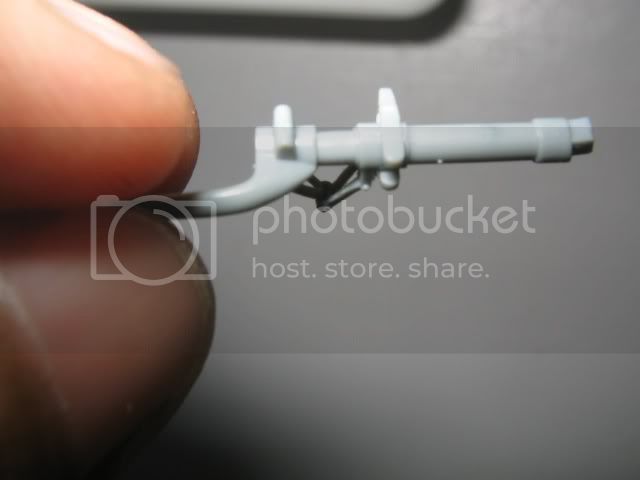
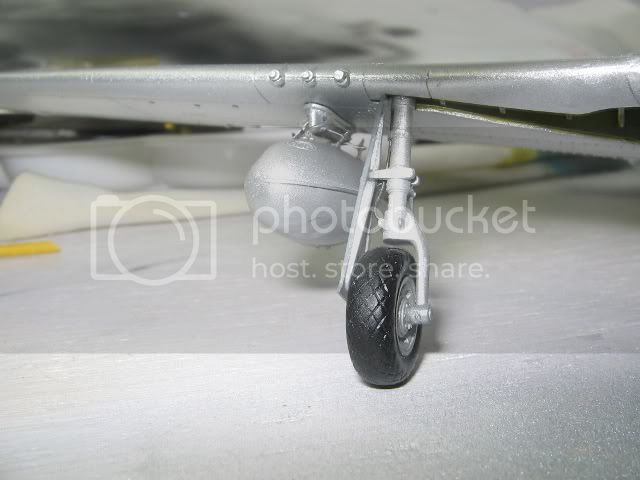
1. modified the mounting brakets for the drop tanks, added fuel lines
2. improved the landing gear by opening the molded details and adding brake lines
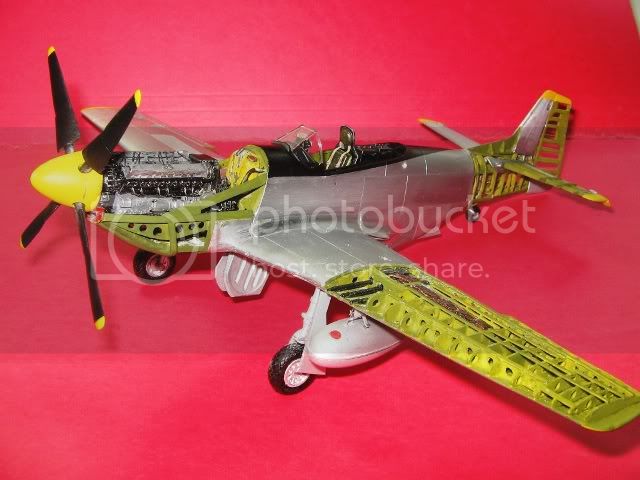
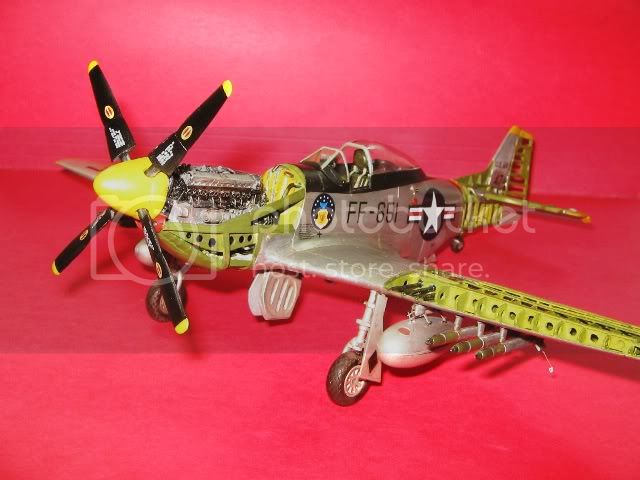
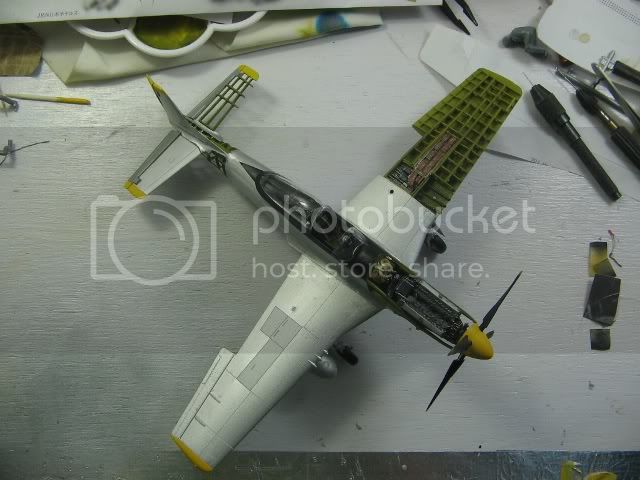
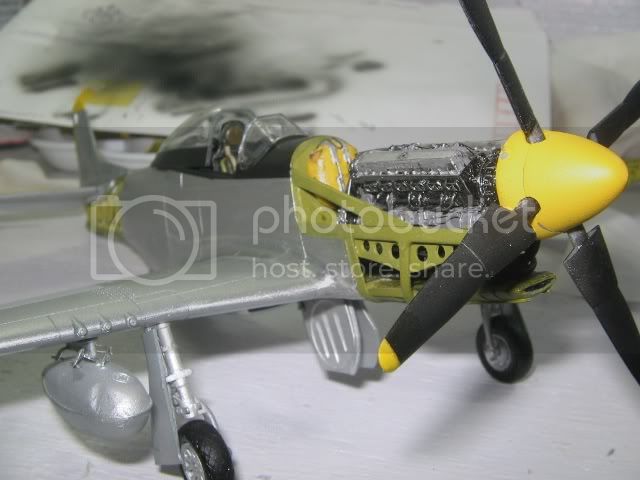
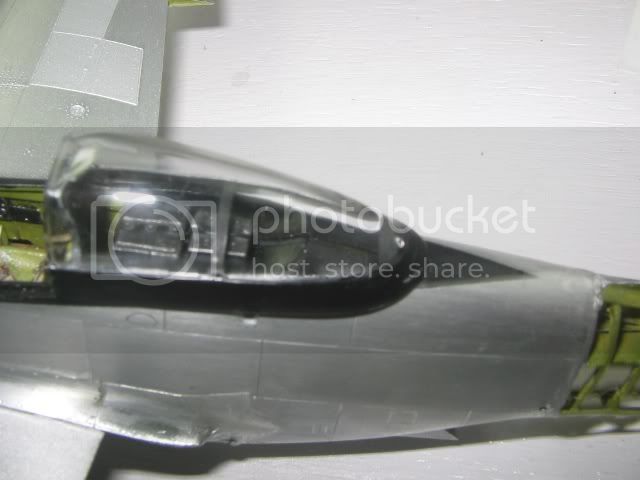
3. cockpit: OOB except Eduard PE seatbelts
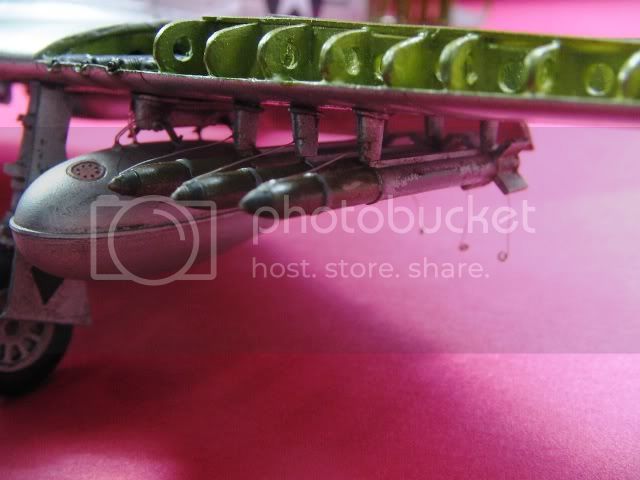
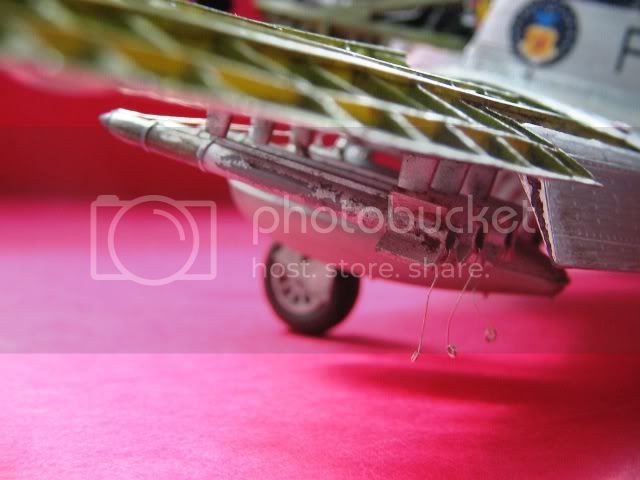
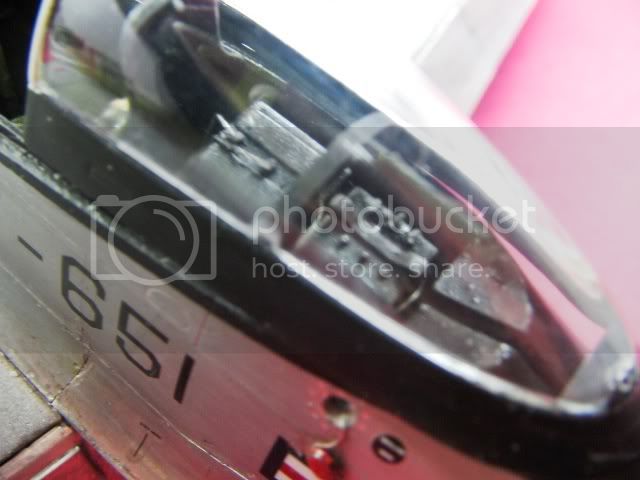
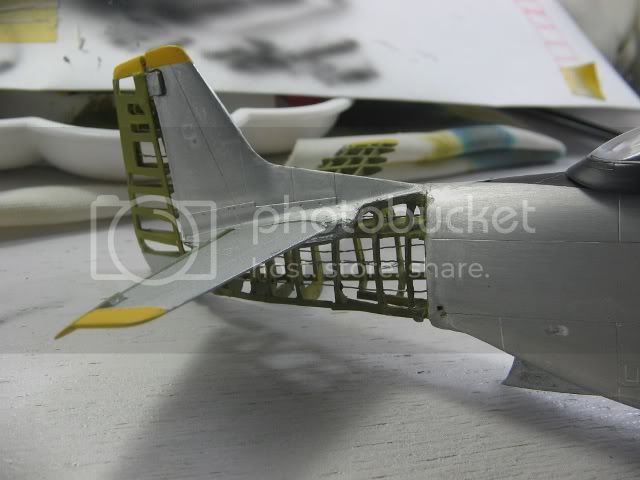
4. showed inside ribbing for wing and tail section
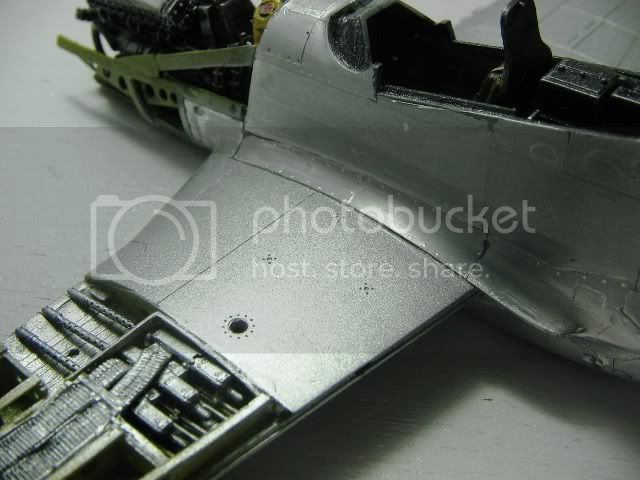
5. Aires gun bay, engine
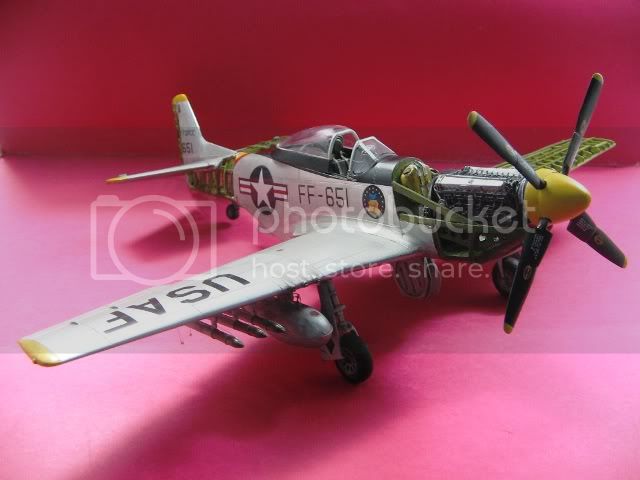
6. Foil on the fuselage

comments are mose welcomed!


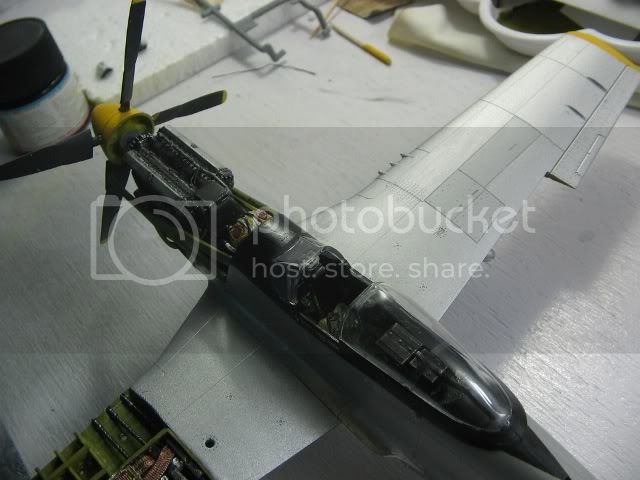
btw, the intake duct going to the scoop was already corrected.

thanks for browsing!
Holdfast
Staff MemberPresident
IPMS-UK KITMAKER BRANCH
#056
_VISITCOMMUNITY
England - South West, United Kingdom
Joined: September 30, 2002
KitMaker: 8,581 posts
AeroScale: 4,913 posts
Posted: Thursday, June 30, 2005 - 08:15 AM UTC
You have put a lot of effort it this, some nice work. Just one thing, I think it would look even better if the gun barrels on the Starboard wing were drilled out.
I'm intrigued as to why you would want to do this, seems like an awful lot of work? Nice though
Mal
TedMamere
_VISITCOMMUNITY
Moselle, France
Joined: May 15, 2005
KitMaker: 5,653 posts
AeroScale: 4,347 posts
Posted: Thursday, June 30, 2005 - 08:38 AM UTC
Hello archerwin!

Hello Mal! Im with you on your comment! Stripping such a kit to the bone is an incredible work! I saw some pics of stripped kits in FSM not long ago! Amazing job! Someone talked about masochism in the "Two Wings" campaign thread and this is something alike! :-)
I just couldn't put that much effort in a kit! But I admire those people building only one or two kits a year and taking the hell out of them...
Again, superdetailling is nothing for me but I'm fascinated by the job of the guys who do this!
So archewin, go on and detail every rivet of this beast if this is what you're after and show us the final result!

Bravo et bon courage!

Jean-Luc
archerwin
_VISITCOMMUNITY
Luzon, Philippines
Joined: January 05, 2004
KitMaker: 106 posts
AeroScale: 0 posts
Posted: Thursday, June 30, 2005 - 01:59 PM UTC
tail wheel finally finished!!!
added the triangular mounting bracket and actuators.


gun barrels were also replaced by hypodermic needles.


my almost finished mustang....


Other items to do:
1. covers for fuel fuselage and wing tanks
2. improve bullet colors
3. paint clear parts
4. attach decals
5. weathering

thanks for viewing... comments are most welcomed!
Henk
_VISITCOMMUNITY
England - South West, United Kingdom
Joined: August 07, 2004
KitMaker: 6,391 posts
AeroScale: 69 posts
Posted: Thursday, June 30, 2005 - 02:46 PM UTC
And for his next trick, he'll get in, fire up that engine and take off.....
Incredible, my hat of to you, I have neither the skill nor wish to scratch such an epic result. And to top it off, in 1:48.. . Bravo.

Cheers
Henk
Holdfast
Staff MemberPresident
IPMS-UK KITMAKER BRANCH
#056
_VISITCOMMUNITY
England - South West, United Kingdom
Joined: September 30, 2002
KitMaker: 8,581 posts
AeroScale: 4,913 posts
Posted: Friday, July 01, 2005 - 07:58 PM UTC

Quoted Text

gun barrels were also replaced by hypodermic needles.


Why am I not surprised, nice one archerwin
Mal
archerwin
_VISITCOMMUNITY
Luzon, Philippines
Joined: January 05, 2004
KitMaker: 106 posts
AeroScale: 0 posts
Posted: Sunday, July 03, 2005 - 02:36 PM UTC
finally done...
1. decals already attached
2. rockets detailed and attached
3. fuel caps intalled
4. radio wiring
5. radiator actuator (?)
6. weathering done using pastels

[glow=red,2,300]HELP NEEDED: I LOST THE DECAL FOR THE WING FUEL TANK... IT GOT CRUMPLED WHILE I TRIED TO MOVE IT TO PLACE... CAN SOMEBODY SPARE 1 DECAL FOR ME? THAT'S THE ONLY MISSING THING HERE. THANKS IN ADVANCE.[/glow]

anyways...
rockets... rockets... rockets...


fuel caps:


radio wiring:


radiator actuator:


other pics:


Warhawk-Nick
_VISITCOMMUNITY
California, United States
Joined: July 22, 2005
KitMaker: 9 posts
AeroScale: 0 posts
Posted: Sunday, July 24, 2005 - 05:15 PM UTC
That looks awesome man,great job!

-Nick
JPTRR
Staff MemberManaging Editor
RAILROAD MODELING
#051
_VISITCOMMUNITY
Tennessee, United States
Joined: December 21, 2002
KitMaker: 7,772 posts
AeroScale: 3,175 posts
Posted: Sunday, July 24, 2005 - 11:24 PM UTC
Archerwin,

This is great! I have been contemplating building my Monogram "Phantom Mustang" soon, debating whether OOB or with internal extras. You certainly inspire me to go beyond OOB.
archerwin
_VISITCOMMUNITY
Luzon, Philippines
Joined: January 05, 2004
KitMaker: 106 posts
AeroScale: 0 posts
Posted: Tuesday, July 26, 2005 - 11:18 AM UTC
JPTRR,
looking at your finished models... building the mustang "beyond OOB" will be a breeze to you... go the extra mile and really do a cut-away i chickened out in doing the cut-away of the main fuselage bec of lack of experience hehehehe....

- archerwin


Quoted Text

Archerwin,

This is great! I have been contemplating building my Monogram "Phantom Mustang" soon, debating whether OOB or with internal extras. You certainly inspire me to go beyond OOB.

USArmy2534
_VISITCOMMUNITY
Indiana, United States
Joined: January 28, 2004
KitMaker: 2,716 posts
AeroScale: 246 posts
Posted: Thursday, July 28, 2005 - 01:10 AM UTC
I am throughly impressed. Where did the engine come from. Were any aftermarket parts used? I read that the cockpit had PE but anything else?

Again, simply amazing and that is a show stopper. Seriously, enter that into a contest and watch the ribbons pile up!

Jeff
archerwin
_VISITCOMMUNITY
Luzon, Philippines
Joined: January 05, 2004
KitMaker: 106 posts
AeroScale: 0 posts
Posted: Sunday, July 31, 2005 - 01:06 PM UTC

Quoted Text

I am throughly impressed. Where did the engine come from. Were any aftermarket parts used? I read that the cockpit had PE but anything else?

Again, simply amazing and that is a show stopper. Seriously, enter that into a contest and watch the ribbons pile up!

Jeff


The engine is from Aires. it's pretty good. the only problem is that it does not have the engine supports and peripherals... buy the new aires set so you will not scratchbuild the brackets anymore... mine is a little off-scale in thickness.

the only PE in the cockpit is the seatbelts from eduard.

no other Aftermarket parts, just the engine, gunbay and the seat belts.
archerwin
_VISITCOMMUNITY
Luzon, Philippines
Joined: January 05, 2004
KitMaker: 106 posts
AeroScale: 0 posts
Posted: Sunday, July 31, 2005 - 01:09 PM UTC

Quoted Text

Hey Archer,

Honestly if this were full-sized, as I believe you are seeking to depict, it looks just like the museum display type of aircraft, and I would not weather it at all, since they tend to keep things very clean in such environments.

Really, I wouldn't smudge it a bit, unless you decide to indicate the skeletal framing was due to battle-damage, i.e., the skin being blown off by unfriendly cannon fire.


Thanks! i can't resist putting exhaust fumes and stains... those are the only weathering i put here...
 _GOTOTOP