


 . Nope, by pure coinsidence, I happened to start at about the same time as him, so here is where I am. By the way this is Italeri's 1/48 SH-60B Seahawk without any aftermarket sets.
As I have mentioned, glee at much interior details turned to
 . The interior details, especially the sonobouy launcher provide for a good start to build upon, but don't do much on their own.
The seat supports don't quite fit, thought I think this is just as much a result of bad instructions as bad fit. I also find the decal panels appaling for a 1/48 kit built two years ago!
But to me, the biggest concern is the Sensor Operator's panel. Decal console, and NO BACK. I can look straight through the cockpit and see completely through the hollow station! That there is no bulkhead between the cockpit and the rear does not bother me as much as this. So I set it upon myself to suck it up and refine my horrible scratchbuilding skills. The result is shown below and given my level of skills, I am very happy with the results. I went for asthetics with loose accuracy.
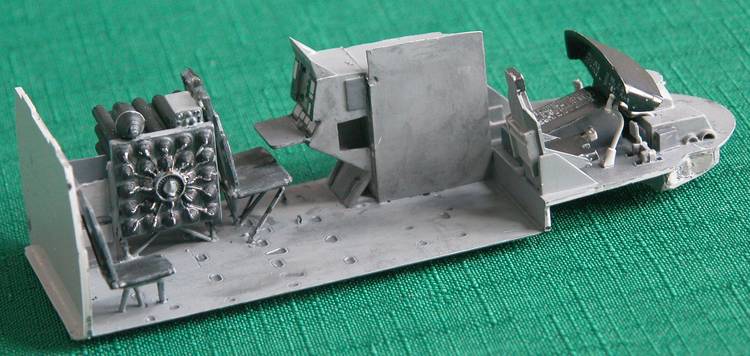
And now that I got some armor guys looking at a wingie post, in the picture above if you look closely behind the instrument panel you will see what are two of three added parts. Name what, when put together, they form for bonus points...oh wait this isn't one of the trivia pages
 well name it anyway I just used scratchbuilt parts to fill in the empty front. It is very dark with little light going in, so accuracy in any form is not a big concern. I just want to be able to look in one lower window and not see through the other side.
The front is mainly reinforcement and added texture.

In addition to the front wall, I also added a panel with some texture between the sonobouy launcher and the rear bulkhead.

Since the left seat door is planned to be open, I decided to add some detail. Curves are not my thing, so this still needs more touching up and sanding, but this is also much more accurate than the scratchbuilt wall. Not perfect -and not painted! - just more accurate.
I am trying to make the deadline for Air over the Sea, and thus far I might actually make it.
Comments welcome.
Jeff


