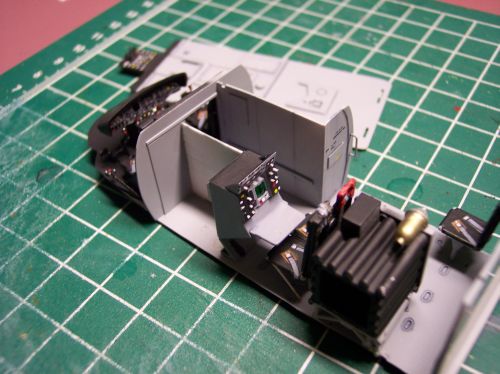
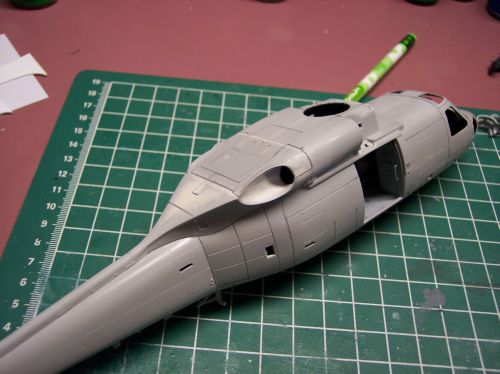
Here are some update pics, interior is done and installed in the fuselage. Scribed in some of the panel lines (pic with the pencil lines) that were missing.
Jeff, see the rolled up sandpaper, thats what you want to do the next time. I did'nt use a rod in it, without it it makes it fit inside and follow better.
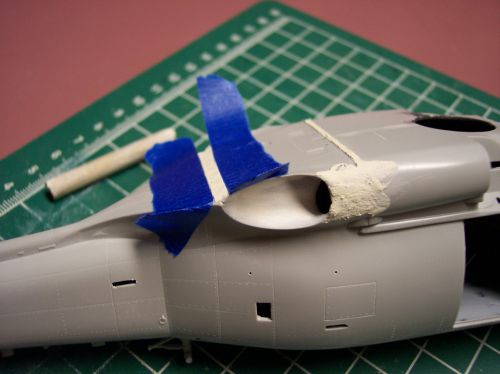
Here it cut the tail and stabilator off the fuselage so I can make it in it's folded postion.
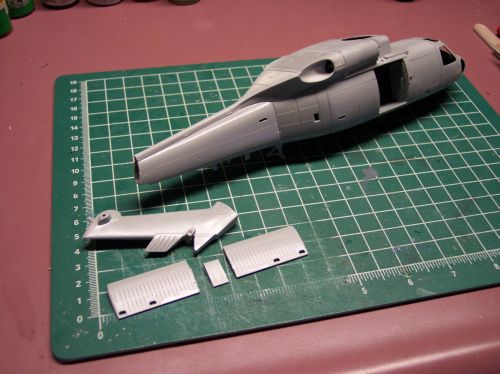
Most of the interior is missing on this kit, so had to do some scratchbuilding to fill in the cabin area. This is the RAST (recover assist, Secure, and Traverse) probe.
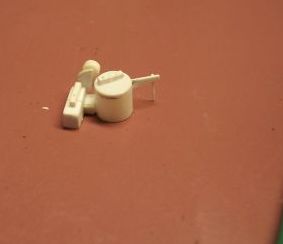
More to follow
Rotary Wing
Discuss helicopters and other rotary wing aircraft from any era.
Hosted by Gino P. Quintiliani
Mothers 2nd SH-60B update
mother
New York, United States
Joined: January 29, 2004
KitMaker: 3,836 posts
AeroScale: 1,036 posts
Joined: January 29, 2004
KitMaker: 3,836 posts
AeroScale: 1,036 posts
Posted: Sunday, August 07, 2005 - 12:38 PM UTC
Posted: Sunday, August 07, 2005 - 01:21 PM UTC
Nice looking interior Joe. I bet its tough painting all the dials and knobs but it really looks nice will be waiting for more progress.
Mech-Maniac
Virginia, United States
Joined: April 16, 2004
KitMaker: 2,240 posts
AeroScale: 53 posts
Joined: April 16, 2004
KitMaker: 2,240 posts
AeroScale: 53 posts
Posted: Sunday, August 07, 2005 - 01:52 PM UTC
Good progress, those cockpit details look great
Where do you find out the info on all the panel lines, is there a website, because I noticed you did an excellent job with them on your 46s and now your SH-60
USArmy2534
Indiana, United States
Joined: January 28, 2004
KitMaker: 2,716 posts
AeroScale: 246 posts
Joined: January 28, 2004
KitMaker: 2,716 posts
AeroScale: 246 posts
Posted: Sunday, August 07, 2005 - 02:28 PM UTC
Ah, I see what you did! Thanks.
And now I see how the right side electronics storage bulkhead goes. Very well done. 'Tis a shame most of the interior will be dark Oh, well thats what the camera is for! Is that a brass cylinder on top of the sonobouy housing or is that just painted as brass?
Your cockpit is very well detailed. I love the breaker panels on the rear, very well done. Dare I ask how you were able to fashion it? And do you intend to make the ceiling instrument panel (with PCLs, and other "buttons")?
Do you plan to add detail to the left door?
Your RAST mount is very well done!
Keep going. Doesn't look like all the fixing and adjustments are slowing you down too much.
Jeff
mother
New York, United States
Joined: January 29, 2004
KitMaker: 3,836 posts
AeroScale: 1,036 posts
Joined: January 29, 2004
KitMaker: 3,836 posts
AeroScale: 1,036 posts
Posted: Sunday, August 07, 2005 - 03:29 PM UTC
Thanks guys
Shain most of the references (panel lines) come from walk arounds, either off the net or books such as Squadron/signal publications.
Jeff, yes it’s a shame that all the interior will not be seen and that it’s dark. The cylinder is painted brass, the breaker panels are made from different pieces of plastics, then drilled out and small round rods are glued in place. Painting them are easy, just using a tooth sharpened and dipped in to the paint and then just poked on I will do the same for the ceiling instrument panel, and all the doors will have some level of detail.
Quoted Text
Where do you find out the info on all the panel lines, is there a website, because I noticed you did an excellent job with them on your 46s and now your SH-60
Shain most of the references (panel lines) come from walk arounds, either off the net or books such as Squadron/signal publications.
Jeff, yes it’s a shame that all the interior will not be seen and that it’s dark. The cylinder is painted brass, the breaker panels are made from different pieces of plastics, then drilled out and small round rods are glued in place. Painting them are easy, just using a tooth sharpened and dipped in to the paint and then just poked on I will do the same for the ceiling instrument panel, and all the doors will have some level of detail.
USArmy2534
Indiana, United States
Joined: January 28, 2004
KitMaker: 2,716 posts
AeroScale: 246 posts
Joined: January 28, 2004
KitMaker: 2,716 posts
AeroScale: 246 posts
Posted: Monday, August 08, 2005 - 01:18 AM UTC
Quoted Text
Painting them are easy, just using a tooth sharpened and dipped in to the paint
Tooth? As in a real tooth? Or are we talking about a toothpick? If the former, I am really curious as to how you got the inspiration for using a real tooth. Very creative
Jeff
mother
New York, United States
Joined: January 29, 2004
KitMaker: 3,836 posts
AeroScale: 1,036 posts
Joined: January 29, 2004
KitMaker: 3,836 posts
AeroScale: 1,036 posts
Posted: Monday, August 08, 2005 - 04:41 AM UTC
Yes just like this :-) :-) :-) :-) :-) :-) :-) :-) :-) :-) :-) :-)
Duh......I forgot to add the word *pick* as on toothpick.
USArmy2534
Indiana, United States
Joined: January 28, 2004
KitMaker: 2,716 posts
AeroScale: 246 posts
Joined: January 28, 2004
KitMaker: 2,716 posts
AeroScale: 246 posts
Posted: Monday, August 08, 2005 - 05:16 AM UTC
Nice. You put new meaning to "enamel"!
Jeff
Jeff
Posted: Monday, August 08, 2005 - 08:04 AM UTC
Joe, I'm begining to get the impression that you like Helicopters This is going to be another wonder, looking forward to seeing it progress
Mal
Mal