I have placed all the entries for August in a folder in the aircraft gallery so it is easier to compare them.
Folder MOM August
I have dispenced with thumbnails as I think the single full size pics are a better idea.
Please vote as per these instructions to make the counting easier
1. You may vote for 3 entries
2. Your first vote is for your favourite, the second for your second favourite and the third for your third favourite
3. Do not add any comments (they go in the thread for the MOM)
4. Only put your votes in your reply, nothing else. Do not post again with comments on other votes
5. Votes will be counted: 3 points for first choice, 2 points for second choice and 1 point for third choice
The above is to try and keep the voting simple to count I don't want to have to trawl through loads of posts to get the tally. If these simple rules are not adhered to I may have to ignore the ones that do not comply. Voting will close at midnight GMT on the last day of the month. Any votes cast after this will be ignored
Mal
JPTRR
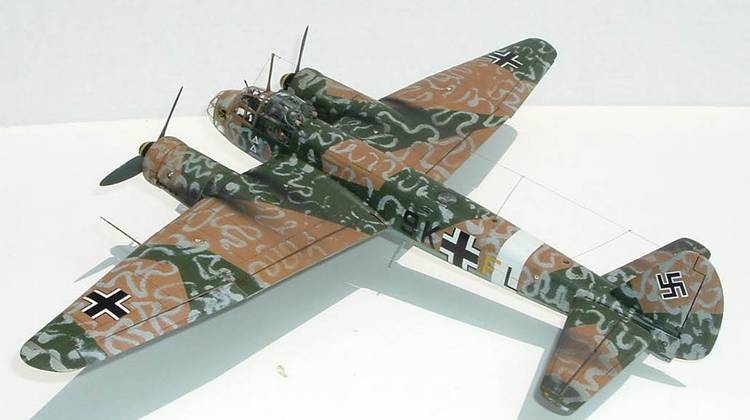
Pro-Modeler 1/48 JU-88 A-4. Primed with Floquil silver, painted with Polly Scale RLM 78, 79 & 80, etc. Amazing how hard Polly Scale dries and resists tape. Built OoB, except for brake piping, copper wire antenne, and seat belts made of cloth tape and chain link.
I decided to build the machine lightly weathered. Seems the attrition of the bomber Geschwaders was so high I figured not many planes would live to get banged up and chipped. First I painted it in the three color camo. Then I decaled it. What I've read indicates the over-water squiggly Wassermuster camo was field-applied, so I allowed it to obscure some markings; despite "lightly weathered", I fine-sanded off much to simulate field-applied paint wearing/washing off a non-factory prepped airframe.
The JU-88's exhaust pattern is very interesting. At first I thought it was shadow, but photos without shadow show the heavy soot blasted out of the pipes and was carried up the nacelle and over the leading edge, as well as under the wing.
The kit decals were troublesome, translucent, taking three sheets to complete the bird. The gear, too. Multi-part, one strut broke and had to be grafted to the bulkhead inside the wheel well AFTER the wing was assembled. Finally, the canopy, after much sanding and tweaking, still doesn't fit well. As I've posted before, looking at many JU-88 photos shows the real canopy didn't fit like a filled-N-sanded model, either, so I decided "good enough" is the motto, and it was time to finish the beast.
Brandydog
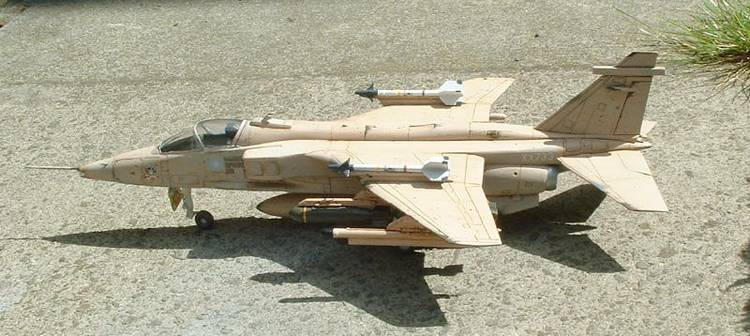
Airfix 1/48 Sepecat Jaguar GR1/3. Built OOB, painted with Xracrylix, decals from Xtradecal, weathered with burnt umber oil and dry brushed with Humbrol enamels to show original grey/green camo.
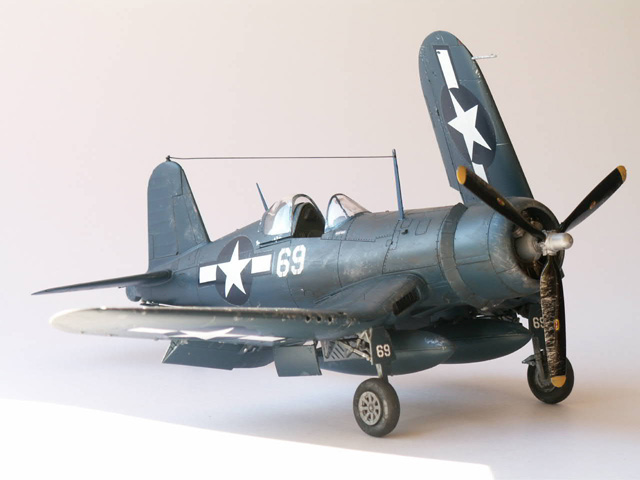
TedMamere
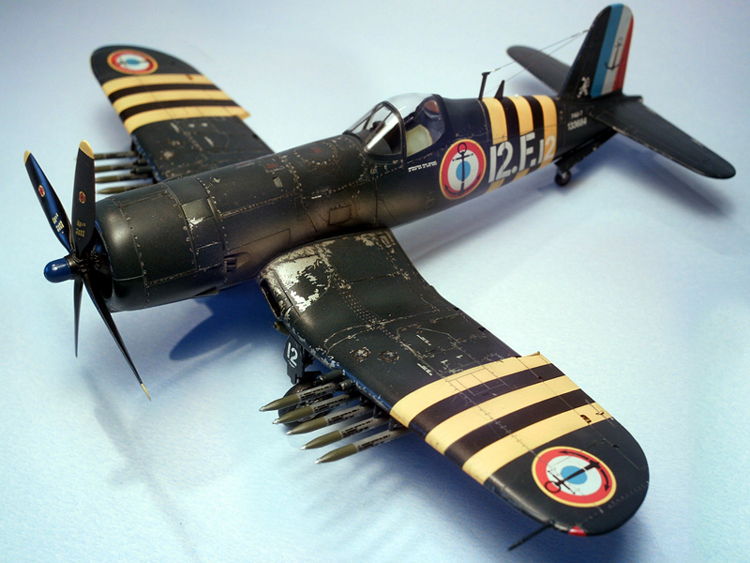
Here is my Revell (Hasegawa mold) 1/48 Vought F4U-7 Corsair in typical Suez Campaign markings. The model was made for the "Air over the Sea" Campaign wich will end this month!
The kit was build out of the box except for the two navigation lights on the fuselage. Overall, I encountered no real problems, the fit was good , so it was a fast build (one week).
However, for those wanting to build the kit I noticed the following flaws:
- The wheel bay is not deep enough. So, when glueing the wings together, there will be a noticable gap here!
- Hasegawa designed the mold to make both the F4U-5 and F4U-7 versions. Thus you will notice a nice seam running around the front fuselage!
- The exhausts for the F4U-7 don't fit to a part designed for the F4U-5 and you will have to sand the cowlings to get them in place!
- And finaly the best one! There is a seam running in the middle of the Canopy! I removed it by scratching it with my X-acto knife, then I used Tamiya's 1000 (gold) sanding paper and the same brand's polishing compound! It worked fine!
newtothegame
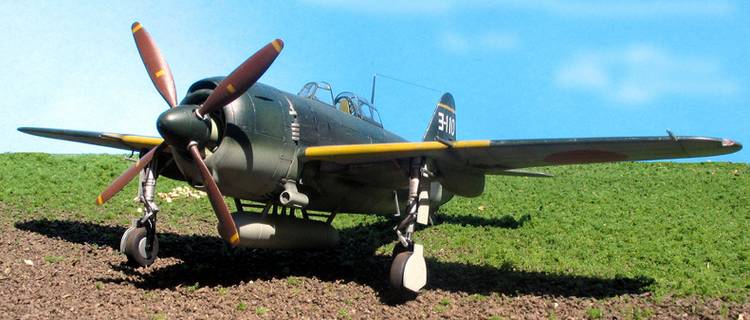
Well I finally finished one. It is the Tamiya 1/48 N1K1. It should have been really easy. The kit is great; goes together great and will undoubtedly make even a builder like me look at least decent , but I learned a lot about my airbrush throughout this build. In other words, I made many airbrush mistakes; oh well in the end I like the results.
I used parts of the Eduard Zoom PE set (seat, instrument panel and seatbelts). The markings are painted on except the E-110 and small Japanese characters on the wings which are aeromaster as I don't really trust Tamiya's decals anymore. Other small adjustments are wiring on engine and landing gears, antennae from monofilament, tires flattened with an iron, wing lights replaced with clear sprue, and exhaust / guns hollowed out.
Pixilater
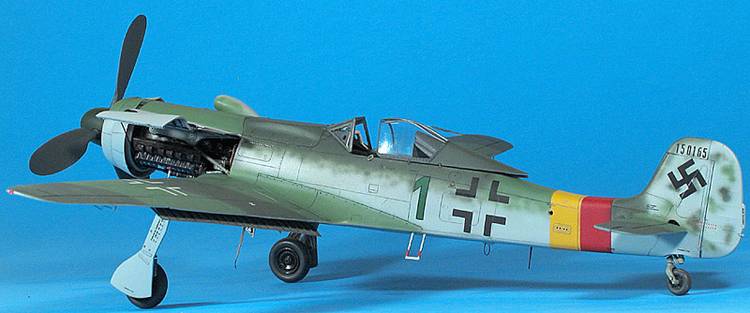
The kit was built using Eduard's photoetched detail set. The engine, cockpit, and wheel wells/landing gear are plumbed and wired with micro solder and various gauges of fine wire. The framework on the inside of the cowl hatches is scratchbuilt. The kit flaps were removed and replaced with photoetch. Cannons barrels were drilled.
The fuselage RV band was masked and painted, and the camouflage was sprayed freehand. The kit decals were used, along with the aircraft and W. Nr. from a Trimaster sheet and swastikas from an Eagle Strike sheet.
archerwin
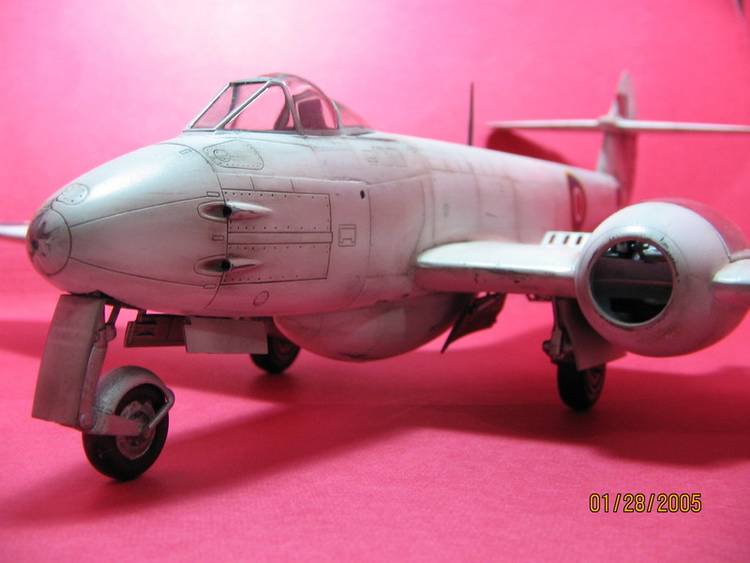
This is my tamiya 1/48 Gloster Meteor F.3. I build this straight OOB for the Internal Tamiya-con for my local club the IPMS-BAC. I chose the white meteor scheme. I painted the camo first before i applied the white wash...
modelguy2
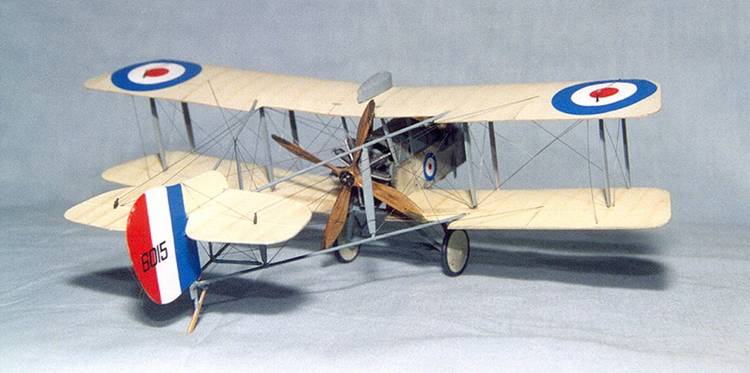
Here's Eduards 1/48 DH 2 built OOB with Boron fiber rigging . Pastels were used for weathering.
lordQ
The tamiya vought Corsair D version. It's build OOB. Painted with tamiya acrylics and weathering
with oils.
matrixone
This is the 1/72 scale Academy A6M5c built OOB except for the decals.
I wanted to do a ''what-if'' Zero in German markings and camouflage.
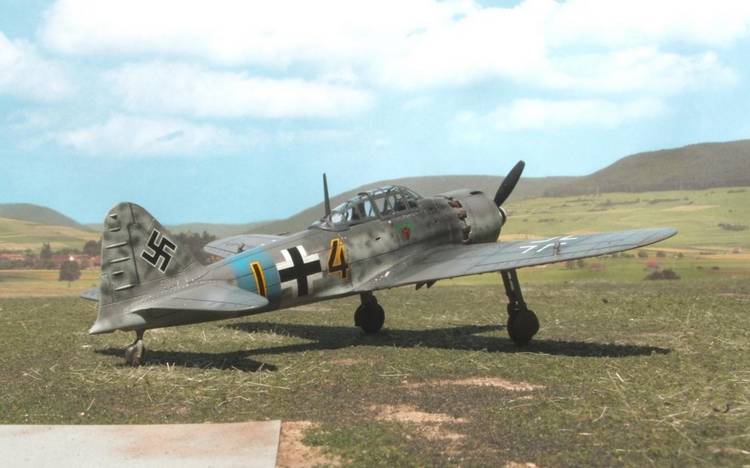
CPTKelley
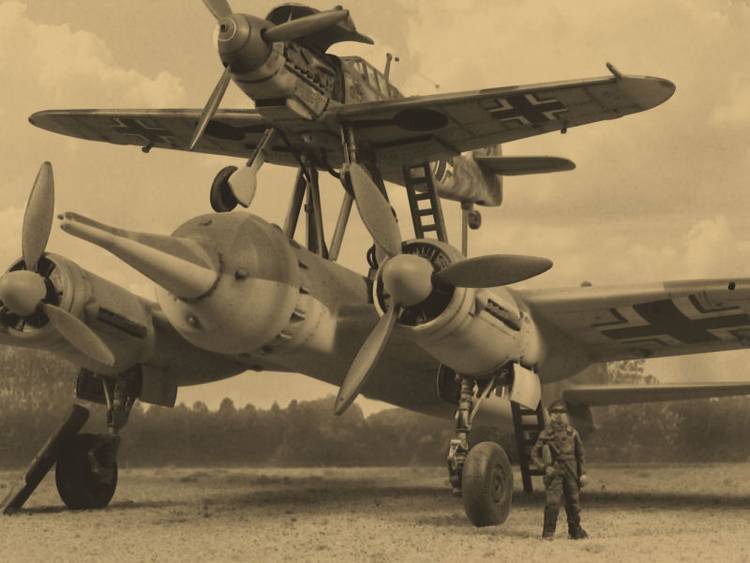
1:72 scale Italeri / AMT / Fine Molds kits. Warhead from Italeri kit grafted onto AMT airframe (from leading edge forward). Many panel lines scribed, rivet detail added where appropriate. Landing gear shortened 3mm to scale. Oleo struts opened up. Rear support mast replaced with brass mast machined from hollow tubing. Added sheet brass plate w/rivet detail. Fuel and release mechanism conduits added from brass tubing and model car ignition wires. Bf 109F-4 has True Details cockpit added, along with fine solder in engine compartment to replicate hoses. Camoflauge scheme airbrushed freehand.
Holdfast

This is my Tamiya 1/48 Dewoitine D520.
1. It is built OOB the only addition being PE seat belts.
2. It is painted with Aeromaster paints.
3. Decals are from Aeromaster.
4. Wash is done with white spirit and artist oils.
5. Paint chipping is achieved with a silver pencil
mother
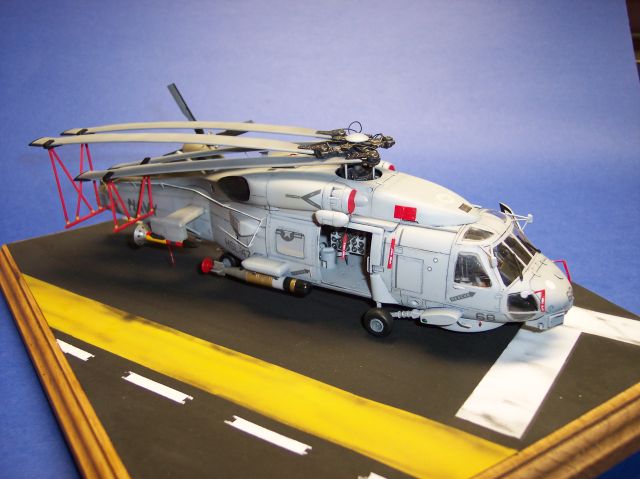
This months entry is Italeri's 1/48th SH-60B. The cockpit and cargo bay was pretty much empty and simple, so out came the Evergreen plastics. Most of the photos I saw showed the 60B with the tail boom section folded and I decided to cut and scratch build that also. Model Masters paints were used through out and the base was painted with Light Ghost Gray. A gray oil was used to detail the panel lines. I used the kit's decals along with a few of Verlinden's dry transfers. The (HF) high frequency antenna was added on and had to modify the main rotor blades to fold further back. The exhaust was sprayed on using a 4% of Tamiyas smoke, 1% of NATO brown and 90% thinner. You can see some of the construction photos in my gallery under "Helicopter"
PolarBear
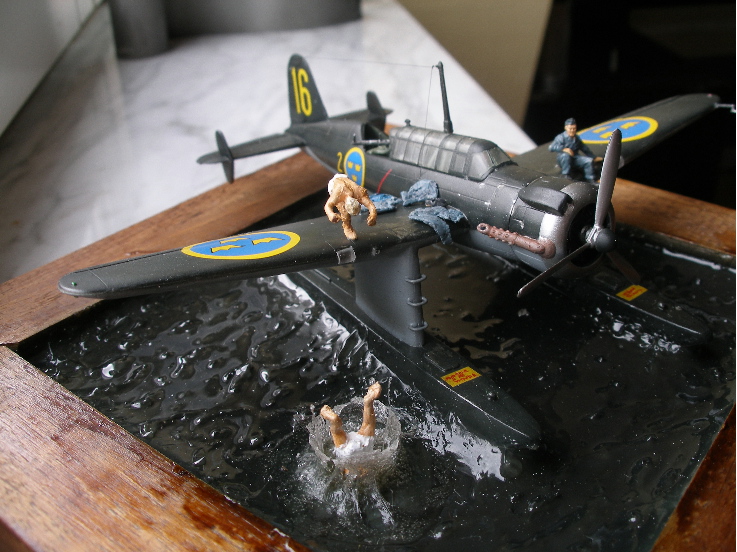
My entry is Marivox' 1/72 Saab S 17BS reconnaissance aircraft. The kit was built more or less OOB. I've replaced the steps and certain details with copper thread. I've used mainly Tamiya acrylics; a home made blend to accomplish the colour of the submarine paint - a very blackish green - used on Swedish marine aircraft at the period. Weathering mainly preshading on the lower surfaces, and a little "bleaching" on the upper ones + some chipping with a pen. The water was accomplished mainly with the use of Woodland Scenics' "Realistic Water", and the splash was made of Humbrol ClearFix. The bathing mechanics are based on Italeri's Zulu (sic!) warriors!
The markings depict an aircraft during the summer of 1945, somewhere near a wartime base in the Stockholm archipelago. The enlisted mechanics decide to go for a break...
This is my 7th model, my first diorama and my first entry in any contest!