_GOTOBOTTOM
Pre-Flight Check
Constructive critique of your finished or in-progress photos.
Airfix 1/24 Stuka progress
MegaJim1000
_VISITCOMMUNITY
New Jersey, United States
Joined: September 06, 2005
KitMaker: 18 posts
AeroScale: 0 posts
Posted: Thursday, September 15, 2005 - 01:11 PM UTC
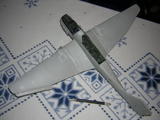
This is the project I've been working on for the past year on and off. It has been a nightmare full of mis-fitting parts. In the begging of the summer I cracked the engine and mounts off the completed fuselage and decided that I needed a break from this project, and modeling in general. I started again with a fresh head and a new determination about 2 weeks ago. It has been a tough go but I'm finally seeing some light at the end of the tunnel. The cowling around the engine has been the real nightmare. I will explain how I overcame parts that misaligned by sometimes over 1/8 of an inch in a very complex sub assembly to maybe save somebody from going crazy as this project has brought me to the brink of more than a few times, or to help somebody save the $70 that this kit cost me. Anyway, here goes........

Click on the thumbnails.
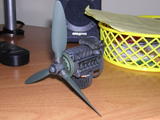
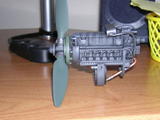
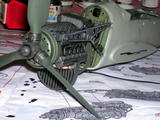
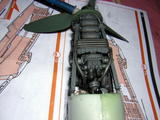
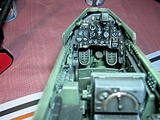
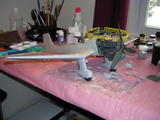

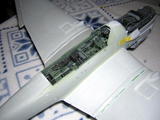
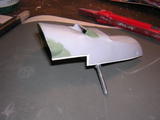
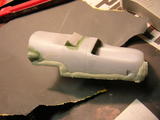
The engine cowling was assembled in it's entirety (minus the top cover) with many large gaps throughout, plus the side panels were too short by about 1/16" from the prop bulk head. This I remedied with some strip styrne to give me the length and covered with milliput which I shaped after hardening to conform to the panel and mesh smoothly with the prop bulk head. The rest of the gaps where filled with strip steryne and squadron green putty. ALL panel line where also filled with the green putty because they looked horrible. After much sanding and re-shaping I spot primed with Gunze Mr Surfacer 500 and wet sanded with 1500 grit automotive grade paper. When I was pleased I rescribed all the panel lines and added the rivets back with a pounce wheel and compass point. Then I airbrushed a coat a Mr Surfacer 1000 and wet sanded again so the assebly all has the same surface texture. I hit some spots I wasn't pleased about with Mr Surf 500 with a brush again and tomorrow I will wet sand those spots smooth.

The top panel is still in progress. With some test fitting on the model I sanded down strip styrne that I glued to one side because the panel does not reach to the rest of the cowling assembly. Once I got that fitted proberly I added a bead of milliput which I'mgoing to shape out tomorrow. The corner of the top also was mis-shaped out of the mold and didn't sit right on the prop bulk head so that got some milliput also. I'll post more pics of the top after shaping and scribing and priming.


TedMamere
_VISITCOMMUNITY
Moselle, France
Joined: May 15, 2005
KitMaker: 5,653 posts
AeroScale: 4,347 posts
Posted: Thursday, September 15, 2005 - 11:17 PM UTC
Hi Jim!

I already PM'd you to say how I was impressed with your model so far... so I won't add to much WOWs! This is not the place for that.

I won't be critical about the model but about the pictures! You should post some detail pics as well. It's frustrating to have such an outstanding job in stamp format! Smaller pictures are great to show the progress, but one or two bigger pics would be fantastic! I'm sure you would have more feedback!

Jean-Luc
MegaJim1000
_VISITCOMMUNITY
New Jersey, United States
Joined: September 06, 2005
KitMaker: 18 posts
AeroScale: 0 posts
Posted: Friday, September 16, 2005 - 12:15 AM UTC
Jean-Luc,

Click on the little pics! :-)
Jim
lordQ
_VISITCOMMUNITY
Oost-Vlaanderen, Belgium
Joined: June 21, 2004
KitMaker: 530 posts
AeroScale: 0 posts
Posted: Friday, September 16, 2005 - 01:50 AM UTC
I love the cockpit, looks very convincing.
Built the thing a get some pics on the AC forum

cheerz Q
TedMamere
_VISITCOMMUNITY
Moselle, France
Joined: May 15, 2005
KitMaker: 5,653 posts
AeroScale: 4,347 posts
Posted: Friday, September 16, 2005 - 03:32 AM UTC
thanks Jim

Now I've seen the details WOW! :-)

The cockpit work is impressive! Can you tell us how you did the painting! Only with airbrushing or by using some dry brushing as well? What is your secret potion!

Jean-Luc
MegaJim1000
_VISITCOMMUNITY
New Jersey, United States
Joined: September 06, 2005
KitMaker: 18 posts
AeroScale: 0 posts
Posted: Sunday, September 18, 2005 - 05:07 AM UTC
Jean-Luc, thanks for the comments. I plan on writting and submitting an article soon when I get to another painting stage on the model. It's all brush work and very simple. I think it would be very helpful to alot of fellow modelers.
Jim
TedMamere
_VISITCOMMUNITY
Moselle, France
Joined: May 15, 2005
KitMaker: 5,653 posts
AeroScale: 4,347 posts
Posted: Sunday, September 18, 2005 - 05:22 AM UTC
Hi Jim!

That's great! I'm really looking forward to it... just can't figure out how you did Only brush work? Very impressive...

Jean-Luc
 _GOTOTOP