Hi Dave,
How's life up in Collingwood, snowed in yet? :-) :-)
You've got the technique down right, just in the wrong order.....
Pre-shading is never necessary, it does however break up the monotony of a paint job. I've found that this technique works quite well, and limits what a certain local modeller I know calls the 'contrived' look of most pre-shading techniques....
1. Step 1 - Since you are going to apply very thinned out coats of paint, you need a primer coat, any dark colour in my opinion will do, I use a flat black (acrylic Tamiya or Polly Scale). Apply this coat over the whole model, thinned out about 30 to 50% with thinner.
2. Step 2 - Pick the final colour you want to paint, and then choose one lighter shade and one darker shade, (don't bother looking at colour charts or bother with authinticity here.... use what looks right). So now you should have three similar colours at hand.
3. Step 3 - Spray the lightest of the three colours over the model, thinned out 30 to 50% with thinner.
4. Step 4 - Spray the recessed panel lines and raised detail with the darkest of the three colours and thin this coat out by 50 to 60% thinner. Use your fine tip and reduce the pressure on your airbrush to say 10 to 15 PSI.
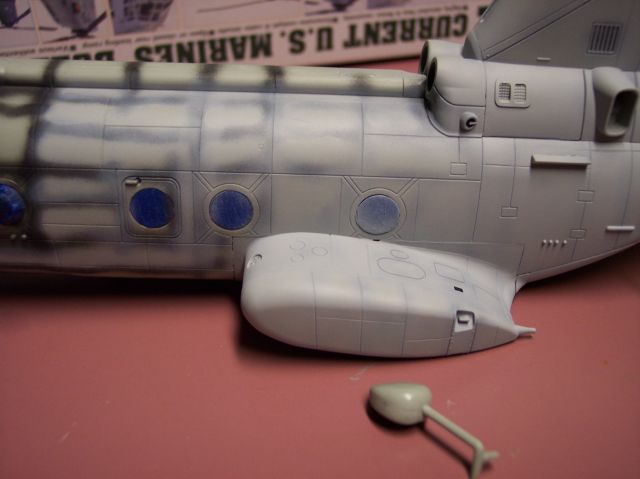
5. Final Step - Thin out the middle colour by a whopping 70 to 80% and blend in the previous two coats of paint. Set the airbrush to 25 to 30PSI and continue to use the fine tip and needle. The trick here is to not allow the paint to build up too much. If you have a duel action airbrush, use it half for spraying paint and half to dry out the paint. What you're doing here is spraying a translucent coat that will blend in with the two underlying coats of paint.
The photo below will show these steps from right to left, if it doesn't come up, just hit the 'my photos' icon below.....
Hope this helps.....
Frank


 ... Not snowed in yet though...


