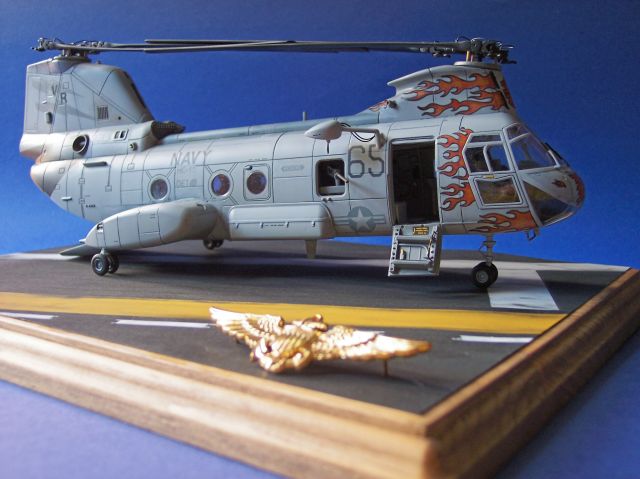
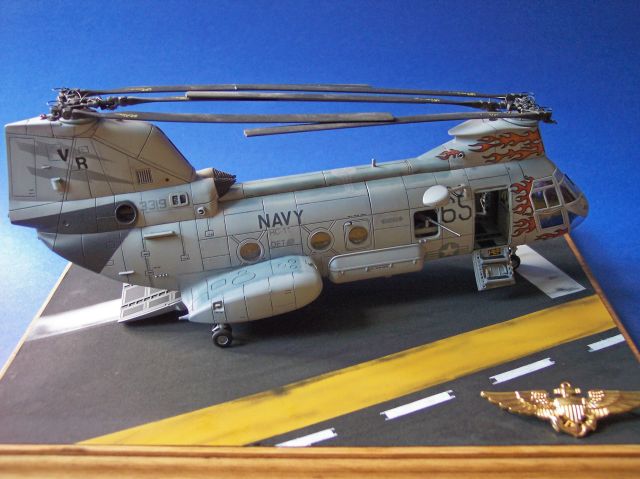
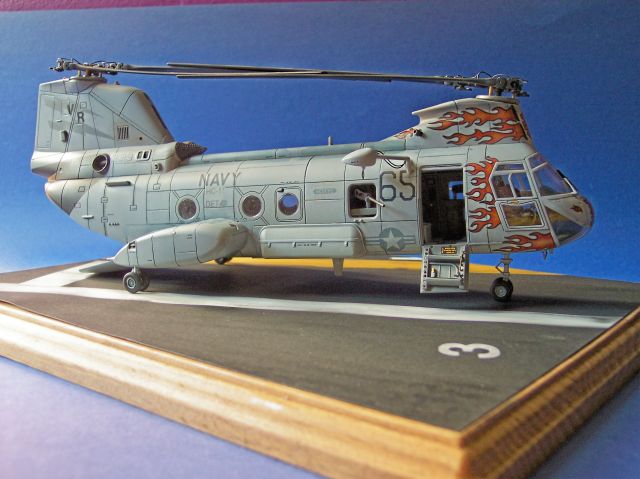
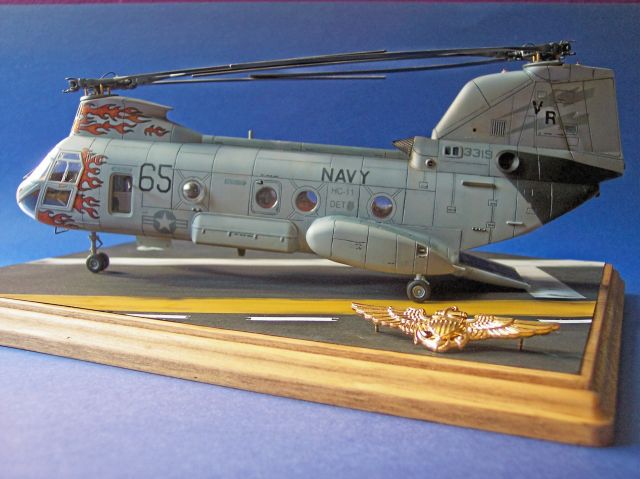
Here is the latest addition to my collection. Academy's 1/48th CH-46. The art work was taken from a internet photo of a CH-46 Sea Knight assigned to the “Gunbearers” of Helicopter Combat Support Squadron Eleven Detachment Five (HC-11 Det. 5) in 2003. The decal were made for me by NEO, the link below will have some build and interior photos along with a photo of the real 46'er. Hope you enjoy as much as I did building it.
https://armorama.kitmaker.net/forums/62799&page=1
Rotary Wing
Discuss helicopters and other rotary wing aircraft from any era.
Hosted by Gino P. Quintiliani
One Hot Phrog
mother
New York, United States
Joined: January 29, 2004
KitMaker: 3,836 posts
AeroScale: 1,036 posts
Joined: January 29, 2004
KitMaker: 3,836 posts
AeroScale: 1,036 posts
Posted: Saturday, November 12, 2005 - 07:09 AM UTC
Neo
North Carolina, United States
Joined: January 20, 2005
KitMaker: 916 posts
AeroScale: 22 posts
Joined: January 20, 2005
KitMaker: 916 posts
AeroScale: 22 posts
Posted: Saturday, November 12, 2005 - 11:25 AM UTC
Joe,
Looks great. Nice decals - LOL.
Shoot a head on / up close photos if you get a chance.
N E O
Looks great. Nice decals - LOL.
Shoot a head on / up close photos if you get a chance.
N E O
mother
New York, United States
Joined: January 29, 2004
KitMaker: 3,836 posts
AeroScale: 1,036 posts
Joined: January 29, 2004
KitMaker: 3,836 posts
AeroScale: 1,036 posts
Posted: Saturday, November 12, 2005 - 11:28 AM UTC
Thanks Neo, have look in my galley and you'll see more.
rv1963
New York, United States
Joined: December 07, 2004
KitMaker: 1,888 posts
AeroScale: 39 posts
Joined: December 07, 2004
KitMaker: 1,888 posts
AeroScale: 39 posts
Posted: Saturday, November 12, 2005 - 11:37 AM UTC
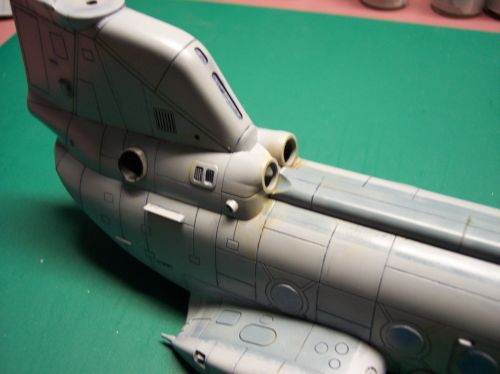
Nice work Joe i like the panel line details and the stairs, very clean build. One of these days i should try a helicopter.
HeavyArty
Florida, United States
Joined: May 16, 2002
KitMaker: 17,694 posts
AeroScale: 1,728 posts
Joined: May 16, 2002
KitMaker: 17,694 posts
AeroScale: 1,728 posts
Posted: Saturday, November 12, 2005 - 11:38 AM UTC
Looks awesome as usual, Joe. Great job. You are becoming quite the helo expert.
jazza
Singapore / 新加坡
Joined: August 03, 2005
KitMaker: 2,709 posts
AeroScale: 0 posts
Joined: August 03, 2005
KitMaker: 2,709 posts
AeroScale: 0 posts
Posted: Saturday, November 12, 2005 - 11:56 AM UTC
Great job finishing this one. Remembered seeing your progress photos and was already blown away by it then.
I cant recall however if you used the pre-shading technique or pin wash to highlight those panel lines. Would be great if you could share how you did not panel lines again.
Cheers!
I cant recall however if you used the pre-shading technique or pin wash to highlight those panel lines. Would be great if you could share how you did not panel lines again.
Cheers!
Posted: Saturday, November 12, 2005 - 11:57 AM UTC
Hi Joe
That is a real beauty! it really should be an On Display model - can I swipe the pics?
All the best
Rowan
That is a real beauty! it really should be an On Display model - can I swipe the pics?
All the best
Rowan
mother
New York, United States
Joined: January 29, 2004
KitMaker: 3,836 posts
AeroScale: 1,036 posts
Joined: January 29, 2004
KitMaker: 3,836 posts
AeroScale: 1,036 posts
Posted: Saturday, November 12, 2005 - 12:54 PM UTC
Thanks RV, Gino, Jermy and Merlin,
Merlin let me take some better shots and I'll email the to you.
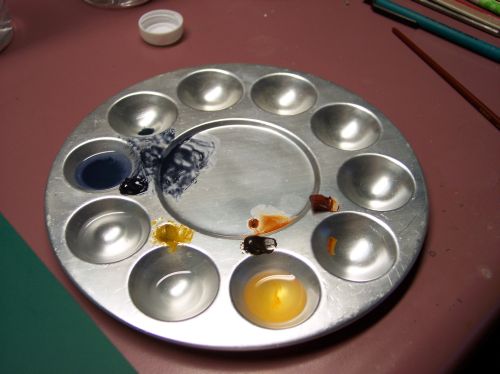
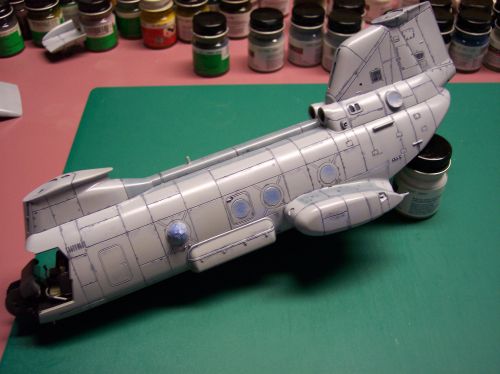
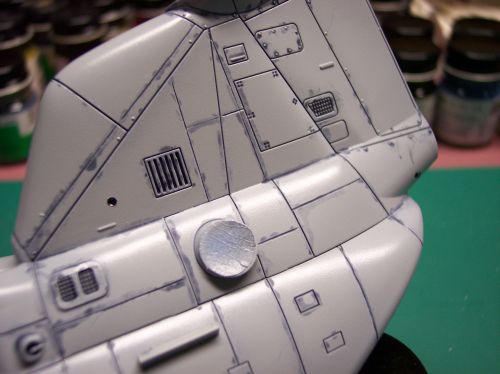
Jeremy, I did both the pre-shade/pinwash technique. What I did for pre-shading was airbrush Model Masters flat black along the panel lines, then slowly built up my base coat, then sprayed on a few coats of Furture floor wax to help the oils flow better. Once it was dry I used Winton oils for the wash. For the panel lines Paynes gray was used. To give it that rust look in spots I used Yellow Ochre and Burnt Sienna, both mixed in different shades. I let the oil wash set for 3 hours then using Q-tips to blend the wash in. I will be doing a feature and this technique soon.
Grumpyoldman
_ADVISOR
Florida, United States
Joined: October 17, 2003
KitMaker: 15,338 posts
AeroScale: 836 posts
Joined: October 17, 2003
KitMaker: 15,338 posts
AeroScale: 836 posts
Posted: Saturday, November 12, 2005 - 01:39 PM UTC
Looks really great Joe.......
submit it for an on display, or write a feature.
PvtParts
New Jersey, United States
Joined: June 18, 2003
KitMaker: 1,876 posts
AeroScale: 0 posts
Joined: June 18, 2003
KitMaker: 1,876 posts
AeroScale: 0 posts
Posted: Saturday, November 12, 2005 - 02:01 PM UTC
Joe, Very nice work!
Kencelot
Florida, United States
Joined: December 27, 2001
KitMaker: 4,268 posts
AeroScale: 0 posts
Joined: December 27, 2001
KitMaker: 4,268 posts
AeroScale: 0 posts
Posted: Saturday, November 12, 2005 - 02:03 PM UTC
Joe, terrific job on the whirlie! You gotta just love those decals! Nice base for her too.
Keep em coming.
Keep em coming.
Posted: Saturday, November 12, 2005 - 07:15 PM UTC
Hi Joe!
Great model again! It's always incredible how you manage to make those grey paintschemes look cool! As Dave said, a feature would be an excellent idea!
Jean-Luc
Great model again! It's always incredible how you manage to make those grey paintschemes look cool! As Dave said, a feature would be an excellent idea!
Jean-Luc
Posted: Saturday, November 12, 2005 - 09:21 PM UTC
Joe, great stuff I just love it.
Mal
Mal
DPD1
California, United States
Joined: July 08, 2004
KitMaker: 18 posts
AeroScale: 0 posts
Joined: July 08, 2004
KitMaker: 18 posts
AeroScale: 0 posts
Posted: Monday, November 14, 2005 - 08:49 PM UTC
Very nice work. Now that the new unit (HSC-21) has started, and the transition to the 60S is complete... I wonder if they'll do a new ship up in this scheme.
Dave
-DPD Productions - Featuring the NEW 'Military Aircraft' Photo CD -
http://eje.railfan.net/dpdp/
Dave
-DPD Productions - Featuring the NEW 'Military Aircraft' Photo CD -
http://eje.railfan.net/dpdp/
lestweforget
Victoria, Australia
Joined: November 08, 2002
KitMaker: 2,832 posts
AeroScale: 224 posts
Joined: November 08, 2002
KitMaker: 2,832 posts
AeroScale: 224 posts
Posted: Monday, November 14, 2005 - 09:33 PM UTC
Well mate, youve done it again.
That chook looks fantastic, as i told you the other day those decals look really mean.
Great job bro.
Cheers
That chook looks fantastic, as i told you the other day those decals look really mean.
Great job bro.
Cheers
Braystaff
England - North, United Kingdom
Joined: August 24, 2005
KitMaker: 154 posts
AeroScale: 5 posts
Joined: August 24, 2005
KitMaker: 154 posts
AeroScale: 5 posts
Posted: Monday, November 14, 2005 - 09:41 PM UTC
That's fantastic
Did you do the pre-shadding etc onto the bare plastic? Or did you you but a basecoat down first
mother
New York, United States
Joined: January 29, 2004
KitMaker: 3,836 posts
AeroScale: 1,036 posts
Joined: January 29, 2004
KitMaker: 3,836 posts
AeroScale: 1,036 posts
Posted: Tuesday, November 15, 2005 - 05:27 AM UTC
Thanks all ,
Sim I most often pre-shade over on bare plastic (lazy) but before I do, I'll wipe done the kit with rubbing alcohol to clean it from dust and oils left behind from my finger prints.