_GOTOBOTTOM
General Aircraft: Tips & Techniques
Discussions on specific A/C building techniques.
Rigging made easy
PolarBear
_VISITCOMMUNITY
Västra Götaland, Sweden
Joined: February 23, 2005
KitMaker: 820 posts
AeroScale: 629 posts
Posted: Sunday, November 13, 2005 - 10:00 AM UTC
Hi all,

I recently tried rigging a bi-plane for the first time. Since the method I used was quite fun and fast - and since it obviously could be applied by a newbie like me - I thought I'd share the basics.

The model I used was Airfix Bristol Bulldog Mk IIa in 1/72. It's a very cheap model (about € 6), and - in my humble opinion - well worth the money.


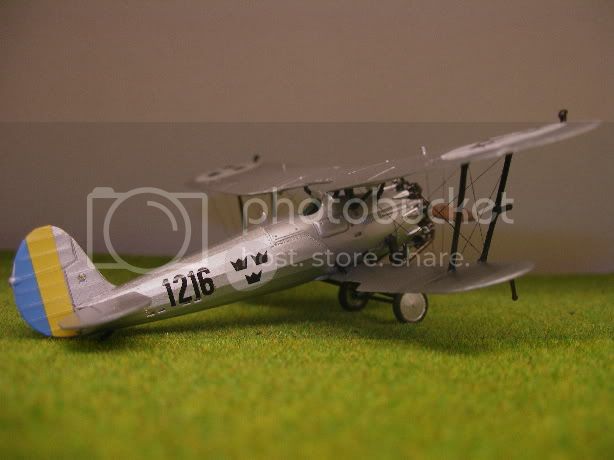
- Since Airfix didn't provide any drawings, I checked some photos of the actual aircraft. I tried to locate all the rigging, and started to plan how to drill the holes and how to draw the line. Preparation seems to be key.

- I drilled some tiny holes with the smallest drill bit I could find (made for Dremel but available seperately - I had to drill the holes by hand for precision and accuracy anyhow). I tried to place as many holes as possible in the struts (this was partly due to my late entry in the Two wings and a prayer campaign - I only had 48 hours, and I didn't have time to "repair" the wings from the drilling holes!).

Placement of the holes


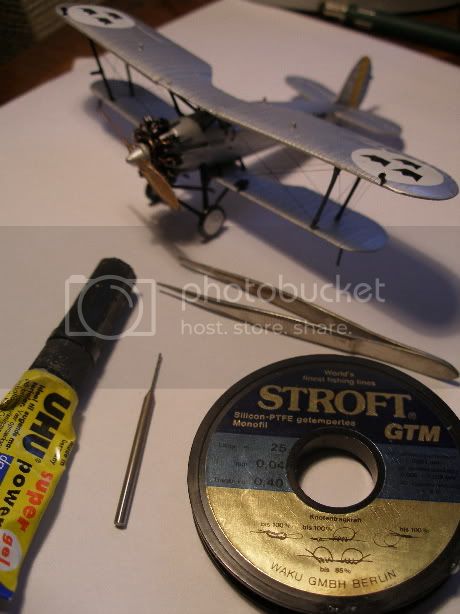
- I used fly-fishing line, which was stretchable (and can thus be tightened without any major risk of snapping). 0.04 mm became almost invisible. 0.08 mm would probably be recommendable for 1/72.

- I used CA glue to attach one end to the "first" hole, waited for a minute or so, tested if it had cured sufficiently, and then it was a sinch to draw the line through the holes.

The main tools


- Once I reached the last hole, I applied a little bit of CA and then stretched the line. The rigging becomes really tight! I used the excess fishing line and swirled it a couple of times around the wings so that I would not have to hold the line while the CA cured.

- Finally, I cut of the excess line and made some finishing touches. A word of warning - As I tried to darken the lines with acrylic paint, tiny dropplets formed on the wires. Unfortunate, albeit hardly noticable for the naked eye (The model looks pretty big on the pictures, but it is really tiny!)

The finished result:


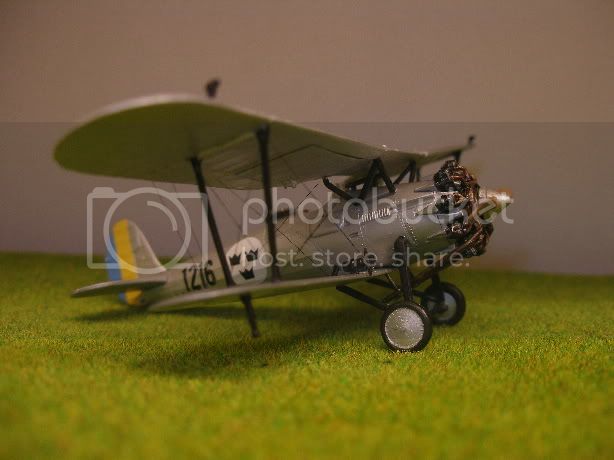
Believe me, rigging is well worth the try! Not that much work, and a rather impressive result!

Cheers!!
almonkey
_VISITCOMMUNITY
England - East Midlands, United Kingdom
Joined: March 23, 2003
KitMaker: 2,124 posts
AeroScale: 788 posts
Posted: Sunday, November 13, 2005 - 10:19 AM UTC
hi! you just described my favourite method of rigging! one thing i have found though, to counter the problem of painting the line what i did was to paint all the line on the reel with humbrol oily steel, thinned down. this means no fiddly painting through wings and struts, and the line looks nice and metallic
PolarBear
_VISITCOMMUNITY
Västra Götaland, Sweden
Joined: February 23, 2005
KitMaker: 820 posts
AeroScale: 629 posts
Posted: Monday, November 14, 2005 - 10:39 AM UTC
Thanks for the tip, Phil!

Painting the rigged wire was tough + resulted in some splattered paint. Your method will make it a lot easier!

Cheers!
Nitro
_VISITCOMMUNITY
West-Vlaaderen, Belgium
Joined: August 01, 2005
KitMaker: 34 posts
AeroScale: 23 posts
Posted: Monday, November 14, 2005 - 08:12 PM UTC
Hi,
about painting your rigging cables: I put a black permanent marker on my fishing line and pull it a couple of times from under it away. I have no problems with paint drops and my lines stay at the right thickness.

PS: sorry for my language, it's not that good.
LuckyBlunder
_VISITCOMMUNITY
Kansas, United States
Joined: February 02, 2006
KitMaker: 273 posts
AeroScale: 163 posts
Posted: Friday, February 03, 2006 - 03:49 PM UTC
PolarBear -

Just checked out your article. That seems the simplest method I've seen yet.

Question: You mention .08 as about right for 1/72. What would you recommend for 1/48? As I mentioned in my posts, I'm going to tackle a 1/48 Stanraer flying boat, and it has a whole lot of rigging. Even the wing floats have wires.

Question: Would you describe how you "clean up" the bottom of the bottom wing and the top of the top wing so get rid of the hole.?

By, the way - that airplane is terrific!!

Steve (LuckyBlunder)
VonCuda
_VISITCOMMUNITY
North Carolina, United States
Joined: November 28, 2005
KitMaker: 2,216 posts
AeroScale: 1,080 posts
Posted: Friday, February 03, 2006 - 08:19 PM UTC
Steve, I do the "clean up" like this.
After the CA glue has dried I snip the fishing line as close as possible to the hole. Then I use a modeling file (tiny with pointed tip) to even out the bubble of glue. If any indention is left I add a touch more glue. After that i sand with wet/dry paper and touch up the area with paint. This may not be the favoured technique but it's the easiest way I've found to touch up the holes when I run antenna wires to the wings and when I'm done you never notice that there is a hole at all. It looks like the wire is just growing straight out of the wing.

Hermon
PolarBear
_VISITCOMMUNITY
Västra Götaland, Sweden
Joined: February 23, 2005
KitMaker: 820 posts
AeroScale: 629 posts
Posted: Sunday, February 05, 2006 - 02:13 PM UTC
Steve,

CA glue should do the trick (see Hermons post). If you have made tiny holes, some micro filler and some sanding should suffice.

Please note that the fly fishing line I used was 0,04 mm (not 0,4), which is ok - but maybe a little thin - for 1/72. You have to look at pictures etc of the aircraft your building in order to estimate the thickness of the lines.

Cheers!
BugNerd
_VISITCOMMUNITY
Arkansas, United States
Joined: February 11, 2006
KitMaker: 36 posts
AeroScale: 0 posts
Posted: Wednesday, February 15, 2006 - 01:45 AM UTC
Wow, excellent job! Beautiful plane

How did you do the wood for prop? Looks real!
 _GOTOTOP