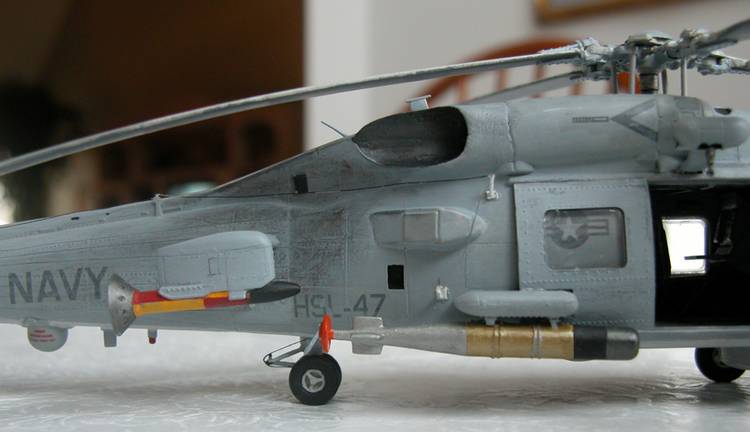
Here is my much delayed, and maligned SH-60B. This model presented new challenges to me including serious scratchbuilding and test fitting. A lot of fit issues and a lot of detail lacking, but interestingly a lot of detail included too...kind of a half-assed job.
I tried folding the rotors, but that outboard rotors would not fold under the inboard, then two of the rotors broke off and I hadn't glued together the rotor head so it would not spin, and then I said "Crap, I just want this done." So I just added the rotors and called it a day.
I scratchbuilt and added radio aerials, but forgot to paint the aerial supports, something to do
(note: for some wierd reason every model I have has either something missing and/or something not finished, sort of a scaled version of me, not really 100% finishing something)
The lines along the tail section did not exist so using the one or two panel lines given, I added them with a ruler (one a curved surface that was fun) and an Xacto knife.
Questions, comments, let me know.
Jeff
Rotary Wing
Discuss helicopters and other rotary wing aircraft from any era.
Hosted by Gino P. Quintiliani
SH-60B finally finished_pics
USArmy2534
Indiana, United States
Joined: January 28, 2004
KitMaker: 2,716 posts
AeroScale: 246 posts
Joined: January 28, 2004
KitMaker: 2,716 posts
AeroScale: 246 posts
Posted: Tuesday, November 29, 2005 - 08:50 AM UTC
mother
New York, United States
Joined: January 29, 2004
KitMaker: 3,836 posts
AeroScale: 1,036 posts
Joined: January 29, 2004
KitMaker: 3,836 posts
AeroScale: 1,036 posts
Posted: Tuesday, November 29, 2005 - 10:33 AM UTC
Wow Jeff that looks better than what you described. It really turned out great. Yeah I know what you mean about all the little fit problems. You can always go back and touch up the antenna supports. I too had the same problem folding the rotor blades, how to correct that, I ended up cutting the tops of the hinges so they would fold under the top blades. You can't even see where it cut them. Jeff do you airbrush...if so here's what you can use for the exhaust, Tamiya's smoke, a drop of Tamiya's NATO brown and thinned about 80% thinner. I just use rubbing alcohol. Use low pressure and build it up slowly. Over all your Seahawk looks super. I'd like to see it in next months aircraft MOM. Now let's see the F/A 18 finished
USArmy2534
Indiana, United States
Joined: January 28, 2004
KitMaker: 2,716 posts
AeroScale: 246 posts
Joined: January 28, 2004
KitMaker: 2,716 posts
AeroScale: 246 posts
Posted: Tuesday, November 29, 2005 - 11:25 AM UTC
I'm kind of a pansy, so I continue to hand paint mine, despite my dad's persistance that it isn't that hard. What I use is a carryover from my days of drawing. I use Graphite pencil shavings (I collect them in a graphite pencil sharpener) and I apply with a brush. The carryover is that I smear is with my finger in just the right areas to get the desired effect. Sometimes it works, sometimes it doesn't in which case, like paint, I paint over, and reapply. One of these days, I'll do use an airbrush which I have...I think its a badger.
As for MoM, I was/am planning to add it to December's.
Jeff
As for MoM, I was/am planning to add it to December's.
Jeff