

How do you pre-shade a multi-colour camouflage scheme so that you don't lose the effect when successive colours are added? Do you have to keep pre-shading before adding each colour?
General Aircraft
This forum is for general aircraft modelling discussions.
This forum is for general aircraft modelling discussions.
Hosted by Jim Starkweather
pre-shading camouflage

TB2

Joined: June 13, 2005
KitMaker: 361 posts
AeroScale: 0 posts

Posted: Thursday, January 05, 2006 - 11:01 PM UTC

Clanky44
Joined: September 15, 2005
KitMaker: 1,901 posts
AeroScale: 133 posts

Posted: Friday, January 06, 2006 - 01:00 AM UTC
There are different ways in achieving this technique. The way I pre-shade multiple colours is to mask off the individual colours, one at a time. I start off with the lightest colour, do my pre-shading and blending, and mask it with Tamiya tape. Then I choose the next lightest colour and repeat the process, mask again and do the final colour, then it's a matter of peeling off all the tape to reveal all three colours. Works great for hard-edged schemes.
Here is a current model I'm working on, showing the steps so far in achieving a three tone hard-edge scheme....
First colour is applied...

This shows the second colour applied over the initial masking of the yellow...
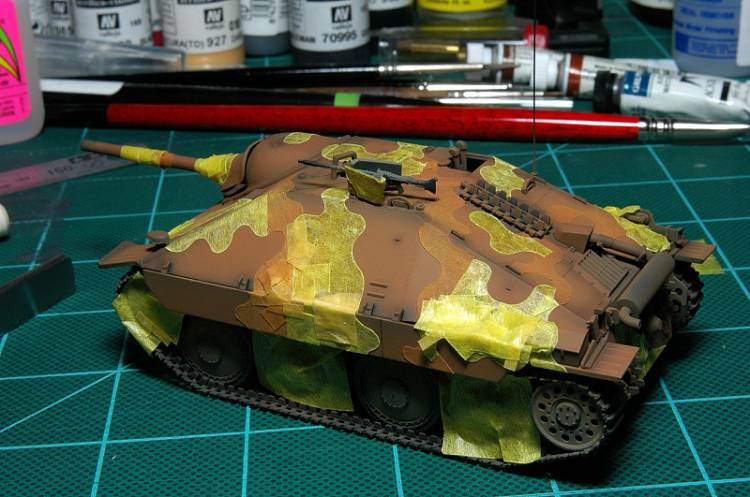
This is the model as it stands right now with all three colours, in need of paint chipping and washes and dry brushing.

Even though it's an armoured piece, the same principles apply to aircraft.
hope this helps,
Frank
Here is a current model I'm working on, showing the steps so far in achieving a three tone hard-edge scheme....
First colour is applied...
This shows the second colour applied over the initial masking of the yellow...
This is the model as it stands right now with all three colours, in need of paint chipping and washes and dry brushing.
Even though it's an armoured piece, the same principles apply to aircraft.
hope this helps,
Frank
Clanky44
Joined: September 15, 2005
KitMaker: 1,901 posts
AeroScale: 133 posts
Posted: Friday, January 06, 2006 - 01:37 AM UTC
To add to the above thread,...
For a soft-edge scheme, it's a bit different, you cannot use tape, but similar principles apply. The main thing is to start off with the lightest colour first, so when you add darker colours, it won't take too opaque a coat to accomplish the goal. Thin out your paints for the 2nd and 3rd coats much more, and apply the paint in layers. First coat, about 40% thinner (with acrylics) successive coats thinned out by 60 to 70% thinner. (sorry, can't tell you the thinning ratios for enamils)
a couple of photos of the steps involved in a soft-edge scheme....

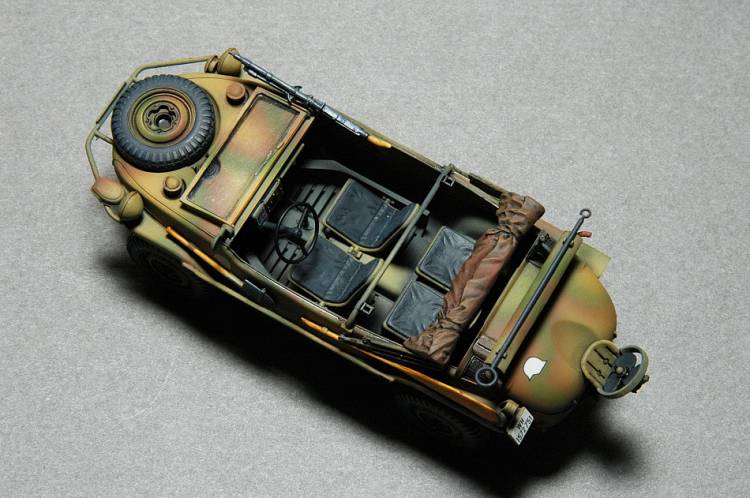
To add to the 'depth' you can also post-shading with a very thinned out (80% thinner) coat of very dark brownish-grey paint, with your finnest tip in your AB.
hope this helps,
Frank
For a soft-edge scheme, it's a bit different, you cannot use tape, but similar principles apply. The main thing is to start off with the lightest colour first, so when you add darker colours, it won't take too opaque a coat to accomplish the goal. Thin out your paints for the 2nd and 3rd coats much more, and apply the paint in layers. First coat, about 40% thinner (with acrylics) successive coats thinned out by 60 to 70% thinner. (sorry, can't tell you the thinning ratios for enamils)
a couple of photos of the steps involved in a soft-edge scheme....
To add to the 'depth' you can also post-shading with a very thinned out (80% thinner) coat of very dark brownish-grey paint, with your finnest tip in your AB.
hope this helps,
Frank

VonCuda

Joined: November 28, 2005
KitMaker: 2,216 posts
AeroScale: 1,080 posts
Posted: Friday, January 06, 2006 - 01:42 AM UTC
Clanky, is there a reason you start off with the lightest color first? I've not done any multi-color camo schemes yet but i'd like to try sometime soon.
Thanks,
Hermon
Thanks,
Hermon

VonCuda
Joined: November 28, 2005
KitMaker: 2,216 posts
AeroScale: 1,080 posts
Posted: Friday, January 06, 2006 - 01:43 AM UTC
Never mind Clanky. He he he he.....you answered my question while I was in the process of typing it. 
Holdfast

#056

Joined: September 30, 2002
KitMaker: 8,581 posts
AeroScale: 4,913 posts

Posted: Friday, January 06, 2006 - 01:49 AM UTC
Here's what I used to do:
1. Prime the model with white primer.
2. Pre-shade with black.
3. Paint the undersurface colour allowing the pre-shading to show. It is much easier to achieve this with the lighter, single colour undersurface. You need to thin your paint a bit more than for a straight colour coat and layer it on (thin layers, no need to wait for each one to dry). When complete and dry, mask off.
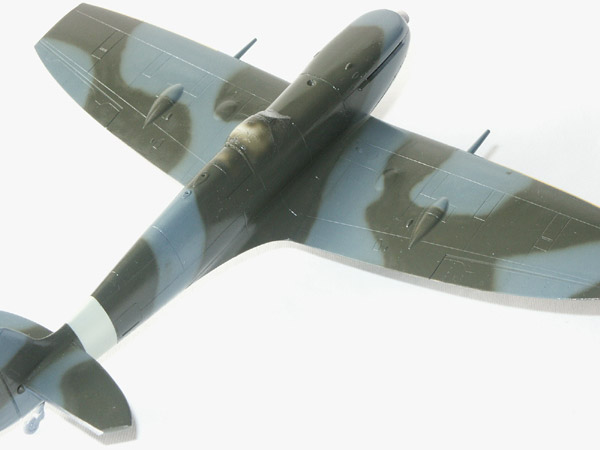
4. The convention is to paint the lighter of a 2 colour top coat first, then apply the second coat. If you do this you will not get any pre-shading effect at all on the second colour. If you go carefully it is possible to show pre-shading under the firat colour. If you prime with white and preshade with black you will have much more chance of achieving the pre-shaded look (It needs to be subtle). What I used to do is to paint the upper surface colours seperately and individually (see pics) and this works well. It is still difficult to show pre-shading through, darker, uppersurface colours, but it can be done.
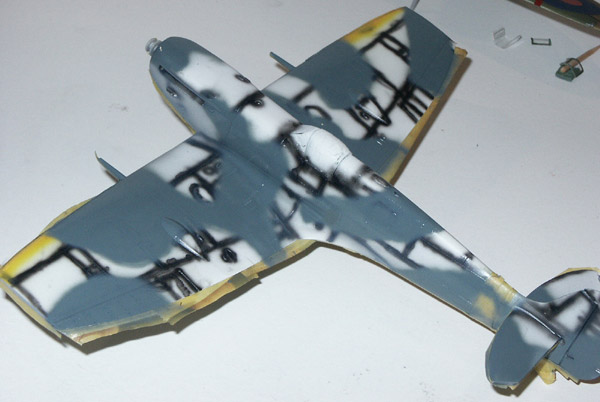
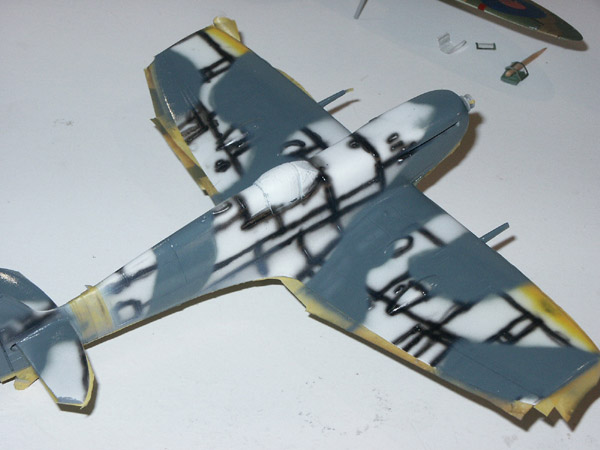
Im afraid the final pic is a little over exposed and the effect cannot be seen. It is very subtle but it is there.
I am experimenting with what I believe will be an even better way to achieve this aim and I'm in the process ov writing another article on the subject
Mal
1. Prime the model with white primer.
2. Pre-shade with black.
3. Paint the undersurface colour allowing the pre-shading to show. It is much easier to achieve this with the lighter, single colour undersurface. You need to thin your paint a bit more than for a straight colour coat and layer it on (thin layers, no need to wait for each one to dry). When complete and dry, mask off.
4. The convention is to paint the lighter of a 2 colour top coat first, then apply the second coat. If you do this you will not get any pre-shading effect at all on the second colour. If you go carefully it is possible to show pre-shading under the firat colour. If you prime with white and preshade with black you will have much more chance of achieving the pre-shaded look (It needs to be subtle). What I used to do is to paint the upper surface colours seperately and individually (see pics) and this works well. It is still difficult to show pre-shading through, darker, uppersurface colours, but it can be done.
Im afraid the final pic is a little over exposed and the effect cannot be seen. It is very subtle but it is there.
I am experimenting with what I believe will be an even better way to achieve this aim and I'm in the process ov writing another article on the subject
Mal

Clanky44
Joined: September 15, 2005
KitMaker: 1,901 posts
AeroScale: 133 posts
Posted: Friday, January 06, 2006 - 02:09 AM UTC
Hi Mal,
Do you use acrylics or enamils?
Another consideration to keep in mind is to be aware of the light source at your AB booth. It tends to be a lot brighter in the booth than in normal lighting, so take the occational break and take your model somewhere with ambient light. This will allow you to hit the 'subtle' sweet spot that Mal is hinting at. Measuring the level of depth in a pre-shading paint job under the bright lights of an AB booth will make your paint jobs look monotone once you get them to ambient light...
frank
Holdfast
#056
Joined: September 30, 2002
KitMaker: 8,581 posts
AeroScale: 4,913 posts
Posted: Saturday, January 07, 2006 - 09:07 PM UTC
Hi Frank, I use enamels mainly but sometimes use acrylics, if I have the colour in acrylic but not enamel, or sometimes for a different shade. I tried acrylics, several brands, but much prefer enamels
I think you have hit the nail on the head, as far as lighting is concerned. It is very easy to make just one pass to many and almost completely lose the effect. I'm just in the process of building a new spray booth and I'm hoping to be able to address this problem better. I have sort of decided that I should stop when I think that there isn't quite enough coverage, then come back to it the following day, before deciding to add more or not. My new method goes some way to helping with this problem, I think good lighting will "fill in the gaps" so to speak
Mal
 |

WEB HOSTING BY


Copyright ©2021 AeroScale and Kitmaker Network, a subsidiary of Silver Star Enterprises
All Rights Reserved. Please read our Conditions of Use and Privacy Policy.
All Rights Reserved. Please read our Conditions of Use and Privacy Policy.