_GOTOBOTTOM
General Aircraft
This forum is for general aircraft modelling discussions.
Trumpy Me-262 Fit Problems
JPTRR
Staff MemberManaging Editor
RAILROAD MODELING
#051
_VISITCOMMUNITY
Tennessee, United States
Joined: December 21, 2002
KitMaker: 7,772 posts
AeroScale: 3,175 posts
Posted: Friday, January 20, 2006 - 11:38 AM UTC
Hi Y'all,

Crybaby time. Up to now I have been pretty pleased with this kit.

Up to now the model has been fun to build. I have assembled the fuselage one segment at a time, a' la Pixilater. Align, liquid glue only an inch or two, let dry. Align, liquid glue only an inch or two...

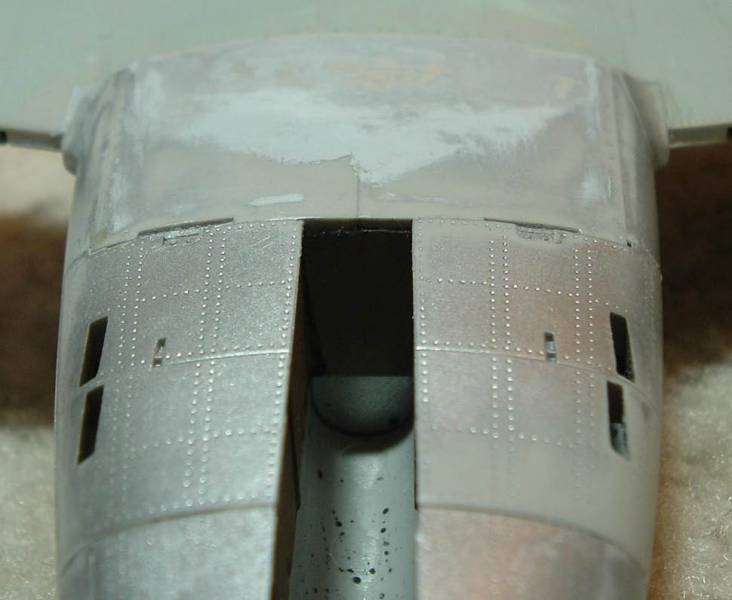
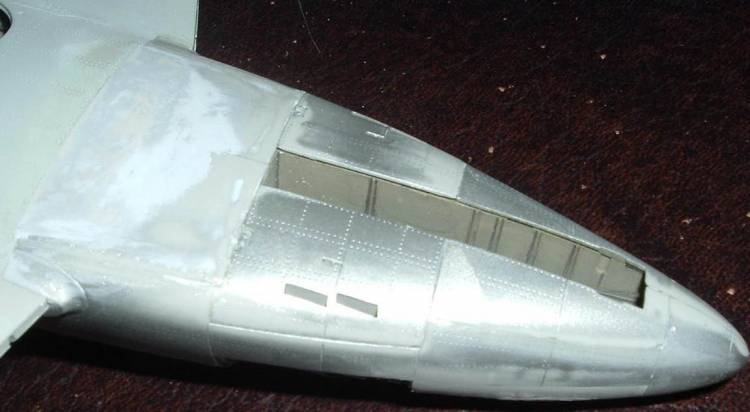
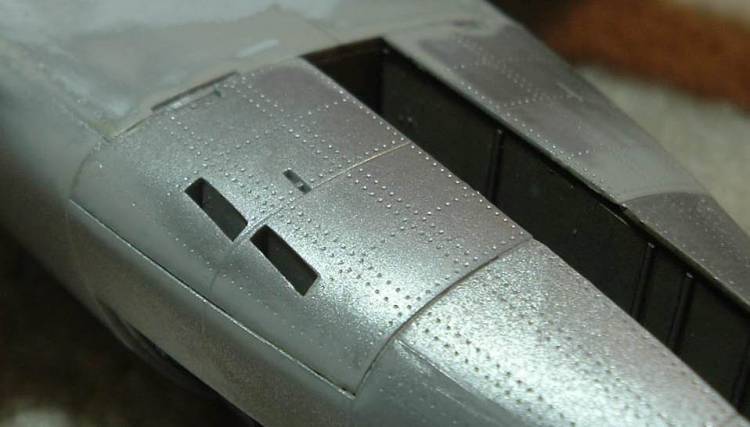
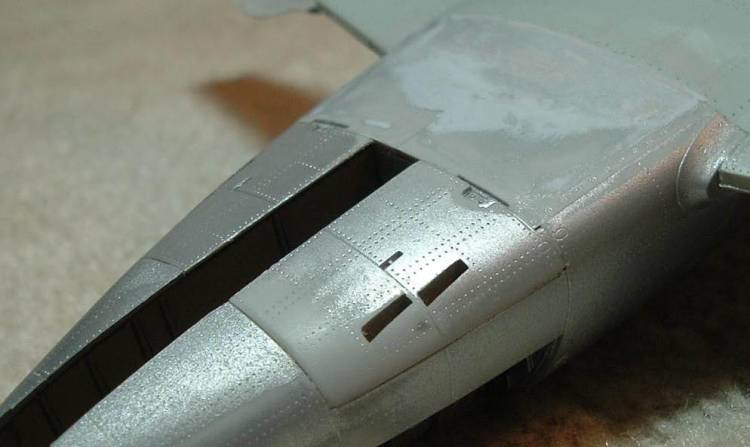
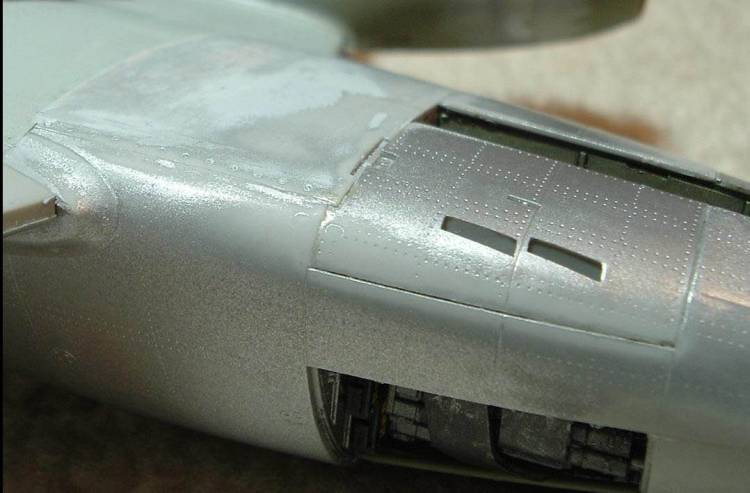
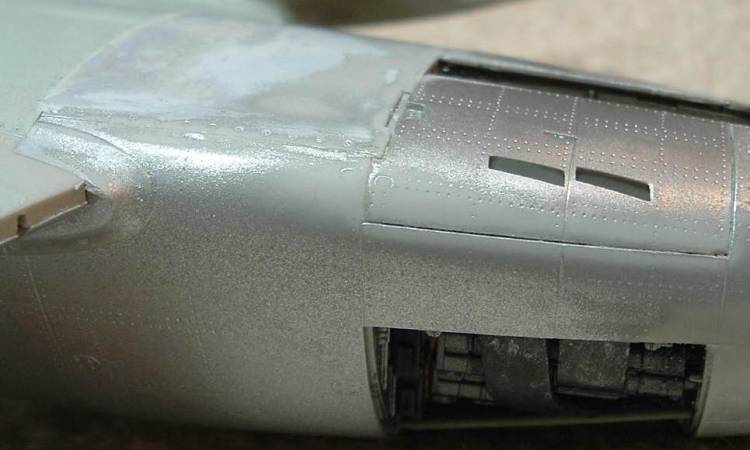
Now, with final assembly, I have mated the wings and started to put the weapon system's access panels on. I am sorry to report that these pieces fit poorly, as well as the front of the bottom wing-to fuselage joint:
Fuselage-wing misfit

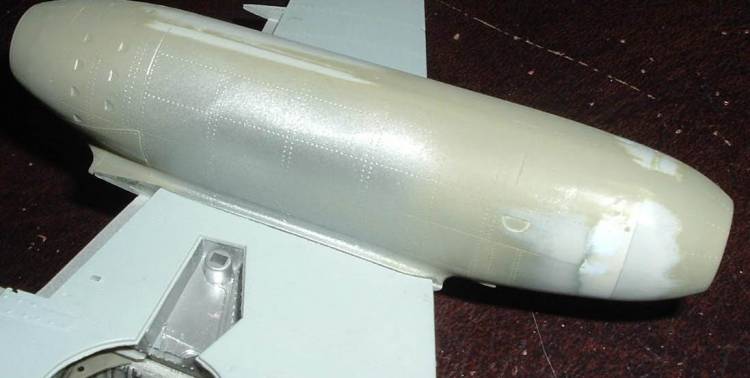
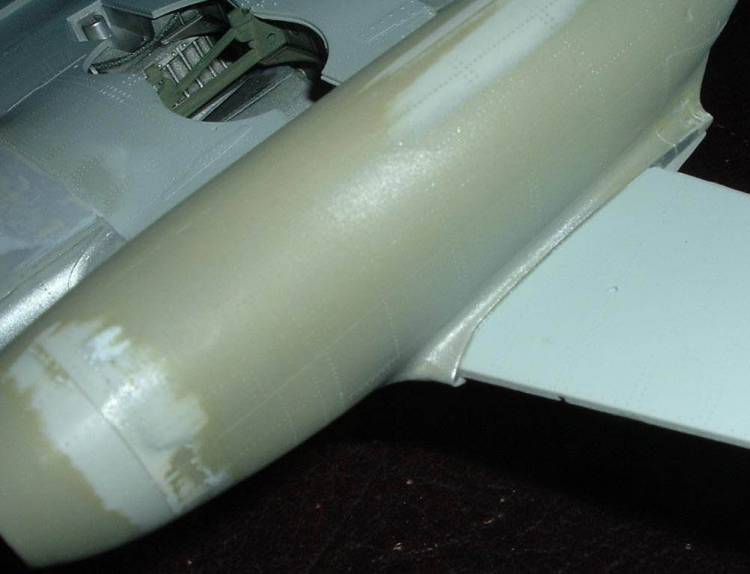
None of these pieces fit. The curvature of the gun covers do not match that of the fuselage. Expect a great deal of filing, filling and sanding, with resulting loss of the beautiful rivet and panel detail. If I was not on my fourth application of the wing-fuselage gap, I'd have the camouflage on by now.

I'll have photos ASAP. Stay tuned.
JPTRR
Staff MemberManaging Editor
RAILROAD MODELING
#051
_VISITCOMMUNITY
Tennessee, United States
Joined: December 21, 2002
KitMaker: 7,772 posts
AeroScale: 3,175 posts
Posted: Monday, January 23, 2006 - 08:22 PM UTC
These six pix show how the different pieces fit. As the entire model is primed with silver, the gray areas are the plastic, or just ahead of the wing/fuselage joint, the four layers of putty needed to blend the wing with the fuselage. Note how different sides of the shell ejection chute panels have to be sanded down to blend with the fuselage.


Nacelle to wing gaps.


Now consider that these access panels are compound curves made to fit over other compounds. As such, Trumpeter probabaly deserves praise for molding them aligned as well as they are. I do not intend this to be a Trumpeter-bash, rather to show you what to expect. The only other build-review is in Fine Scale Modeler, and the builder had problems I have not, and did not mention of that I have experienced.

OTHER ME-262 POSTS

Trumpeter ME-262 Painting Progress

Trumpeter ME-262 Painting

Bad Fittings

Trumpy Me-262 Progress--Nose & Fit

Trumpeter Me-262 Progress

Trumpeter Me-262 Stalled

Trumpeter Me-262 Warped Wing

Trumpeter ME-262 Guns, Cockpit, Engines

Trumpeter ME-262 Gun bay

Trumpeter ME-262 with In-box Review
matrixone
_VISITCOMMUNITY
Oregon, United States
Joined: February 07, 2004
KitMaker: 869 posts
AeroScale: 862 posts
Posted: Tuesday, January 24, 2006 - 07:14 AM UTC
Fred,

Thanks for posting those pics, now I know what I will be faced with when I build my kit.
For what that kit costs I had hoped it would fit together better than it does.

Matrixone
JPTRR
Staff MemberManaging Editor
RAILROAD MODELING
#051
_VISITCOMMUNITY
Tennessee, United States
Joined: December 21, 2002
KitMaker: 7,772 posts
AeroScale: 3,175 posts
Posted: Tuesday, January 24, 2006 - 10:59 AM UTC
Hi Les,

Caveat emptor!

I have wondered if it is my ineptitude that resulted in this. I don't think so. Note that wehere the wing leading edges mate with the wing root filet, they are flush. The bottom of the fuselage is snug against the fore cockpit bulkhead, so I don't think I deformed it. So, I think the curvature of the fuselage bottom is not the same as the curvature of the bottom wing.

The top gun trough panel does fit against the gun bay's fore and aft bulkheads, so maybe these are slightly misaligned. But the ejector chute panels fit against shelves molded into the fuselage, not against any bulkheads.

Those gaps along the nacelle/wing joints are noticeable, but seem pretty inconsequential to fill.

Any luck and I'll have paint on her Wed.
JPTRR
Staff MemberManaging Editor
RAILROAD MODELING
#051
_VISITCOMMUNITY
Tennessee, United States
Joined: December 21, 2002
KitMaker: 7,772 posts
AeroScale: 3,175 posts
Posted: Friday, January 27, 2006 - 12:38 PM UTC


Painting the bird. I liked the multiple colors
TedMamere
_VISITCOMMUNITY
Moselle, France
Joined: May 15, 2005
KitMaker: 5,653 posts
AeroScale: 4,347 posts
Posted: Friday, January 27, 2006 - 01:31 PM UTC
Hi Fred!

At last you reached the "fun" part of your Me 262 build: painting, decalling and weathering!
After all your fit problems, I wish you good luck for that. In France we say "merde"

Jean-Luc
JPTRR
Staff MemberManaging Editor
RAILROAD MODELING
#051
_VISITCOMMUNITY
Tennessee, United States
Joined: December 21, 2002
KitMaker: 7,772 posts
AeroScale: 3,175 posts
Posted: Friday, January 27, 2006 - 10:16 PM UTC
HI Jean-Luc,

Thanks! I'm wondering how much of the kit's problems weren't really my problems?

I decided to paint Rot 13 RLM 74/75/76. EagleCal and Merrick & Hitchcock's appended Luftwaffe guide state the colors are unknown but that Werk Numbers through Rot 13's are known to be these grays. Osprey states RLM 81/82. My other ME-262 is 81/82, as will my next.

Painting, decaling, I do like this part. With luck and patience and thinking one hour to build five minutes perhaps I can keep from turning it into a mouvement d'entrailles

Wish me luck!
JPTRR
Staff MemberManaging Editor
RAILROAD MODELING
#051
_VISITCOMMUNITY
Tennessee, United States
Joined: December 21, 2002
KitMaker: 7,772 posts
AeroScale: 3,175 posts
Posted: Friday, January 27, 2006 - 10:20 PM UTC
BTW, here's a beautiful build of this model, with an uncommon but well-known finish: Wanadoo ME-262
 _GOTOTOP