_GOTOBOTTOM
General Aircraft
This forum is for general aircraft modelling discussions.
Bare with me guys.....
VonCuda
_VISITCOMMUNITY
North Carolina, United States
Joined: November 28, 2005
KitMaker: 2,216 posts
AeroScale: 1,080 posts
Posted: Saturday, January 28, 2006 - 09:57 AM UTC
I took all the advise from you folks about the metallic paint and prep and so far my P-51 is really looking quite good. I've run into another small snag near the end of this build though.
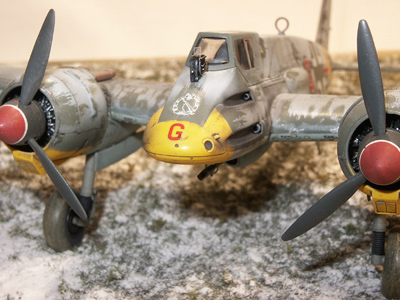
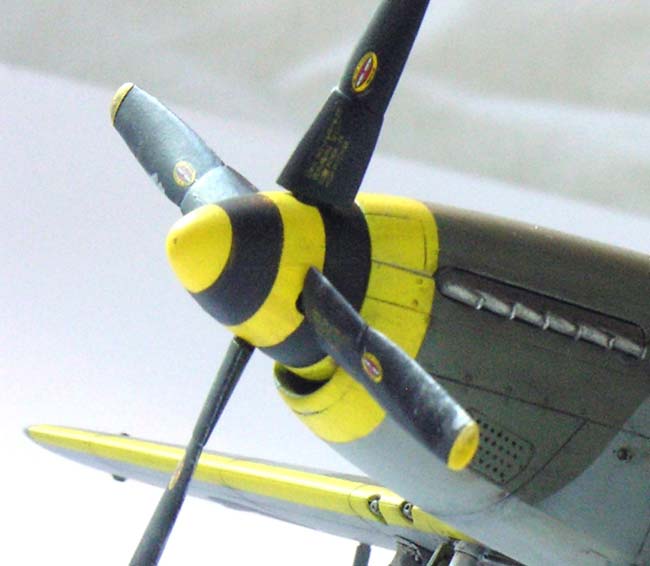
The nose cone shows 3 concentric rings should be painted on it in the directions as follows; red, yellow, red.
My solution was to paint the entire cone red and then paint the thin yellow ring in the middle last. Problem is that it's all but impossible to correctly mask this area for painting since it is conical shaped. Any suggestions on how to do this without making a mess?

Thanks,
Hermon
SKurj
_VISITCOMMUNITY
Ontario, Canada
Joined: November 28, 2005
KitMaker: 235 posts
AeroScale: 0 posts
Posted: Saturday, January 28, 2006 - 10:00 AM UTC
You could try liquid mask, it will take a steady hand to trim the mask once it is dry.

Another idea... try vinyl mask and heat the mask so it will form to the shape better.

Martyn
Merlin
Staff MemberSenior Editor
AEROSCALE
#017
_VISITCOMMUNITY
United Kingdom
Joined: June 11, 2003
KitMaker: 17,582 posts
AeroScale: 12,795 posts
Posted: Saturday, January 28, 2006 - 01:05 PM UTC
Hi Herman

Some of the ideas in the thread about painting stripes around bombs might help you out.

All the best

Rowan

Holdfast
Staff MemberPresident
IPMS-UK KITMAKER BRANCH
#056
_VISITCOMMUNITY
England - South West, United Kingdom
Joined: September 30, 2002
KitMaker: 8,581 posts
AeroScale: 4,913 posts
Posted: Saturday, January 28, 2006 - 02:25 PM UTC
I had a similar problem with my Henschel Hs 129.

My solution was to paint the spinner white, mask the band, paint the red, mask it and finally paint the green. The difficult part, as you say, is masking the thin ring because of the double compound curve. With masking the base colour, to be able to paint the ring you will present yourself with more problems, keeping seperate pices of masking tape parallel, cutting the tape thin enough to conform will leave it without sufficiant tack to stick, etc, etc. However cutting a piece of masking tape thin enough to mask the ring with the 2 edges parallel is almost impossible as well. The solution I came up with was to tape (or CA) 2 scalpel blades together. This works wonderfully well, the only problem is applying the tape straight, but this just needs care and a good eye. To cut wider tape, with parallel sides put a piece of plasticard between the blades. Razor blades are thinner then scalpel blades so they could be used for thinner stripes
Mal
gaborka
_VISITCOMMUNITY
Borsod-Abauj-Zemblen, Hungary
Joined: October 09, 2005
KitMaker: 626 posts
AeroScale: 264 posts
Posted: Saturday, January 28, 2006 - 05:30 PM UTC
Put a small rubber band on the cone. That will give you a perfectly round line, and after painting comes off easily.
RedSteve
_VISITCOMMUNITY
England - South East, United Kingdom
Joined: April 14, 2005
KitMaker: 31 posts
AeroScale: 0 posts
Posted: Saturday, January 28, 2006 - 05:49 PM UTC
Hermon,

I had similar problem with my Mustang III. Are your stripes wide like this?

What I did was I painted it all Yellow, then mounted the spinner onto a short piece of wooden rod with white glue. I put the rod into the chuck of my variable speed electric drill, and set it spinning. I then carefully applied a brush loaded with black to the rotating spinner, and got a perfect stripe.

I like Gábor's rubber band idea, but I'm not sure if it would work well for wide stripes like this. Good luck!
VonCuda
_VISITCOMMUNITY
North Carolina, United States
Joined: November 28, 2005
KitMaker: 2,216 posts
AeroScale: 1,080 posts
Posted: Saturday, January 28, 2006 - 09:19 PM UTC
Thanks for the advice guys

I'm not in a real hurry so I think I'll do some practice with all these different techniques and see what works best.
Steve, that is exactly the stripe pattern I'm doing. Only difference is the colors. Your idea about mounting the nose cone onto a slow drill is great. How did you overcome the "wobbeling" or were you able to mount it exactly center?

OK, time to practice.
Hermon
RedSteve
_VISITCOMMUNITY
England - South East, United Kingdom
Joined: April 14, 2005
KitMaker: 31 posts
AeroScale: 0 posts
Posted: Sunday, January 29, 2006 - 02:31 AM UTC
Hermon,
Getting a square cut on the bit of wooden dowel was critical, but easy- I used the factory cut end!
:-) Getting it centered was ok, the hole for mounting it on the model provided a good guide, but a bit of wobble [which I had] isn't a big problem.
The hard bit was keeping the drill [clamped in my workmate] running at a nice slow speed with one hand while painting with the other...
I think part of the trick was to do it in several applications to build up the density.
If I do it again, I will probably get someone to help out with squeezing the drill trigger - I reckon I was quite fortunate to get such a good line on this one single handed. I Look forward to seeing your P-51.


Steve
 _GOTOTOP