_GOTOBOTTOM
General Aircraft: What If?
For those who like to build hypothetical or alternate history versions of planes.
Profiles...progress report
flitzer
_VISITCOMMUNITY
England - North West, United Kingdom
Joined: November 13, 2003
KitMaker: 2,240 posts
AeroScale: 743 posts
Posted: Sunday, February 05, 2006 - 04:29 PM UTC
Hi
just to let you see a taste of the next Luft 46 colours feature chapter.
I'm trying to add as much detail as I can now where have I heard that before?

But each profile is taking a lot longer than previously.


And a little closer look


As always your comments are essential to guage what I'm doing

Cheers
Peter
:-)
TedMamere
_VISITCOMMUNITY
Moselle, France
Joined: May 15, 2005
KitMaker: 5,653 posts
AeroScale: 4,347 posts
Posted: Sunday, February 05, 2006 - 08:44 PM UTC
Hi Peter!

Since you asked for feedback... voilà!
I think you did a great job but would make two remarks:
1 - I would add more contrast to the outer lines and panel lines of the plane. Sometimes they are not noticable. I would use a darker grey. Do you use a vector program (Illustrator, Freehand, ?), if yes this could be changed in few clicks. I would keep the lighter greys for rivets or maintenance hatches though.
2 - I think the shadow is distracting. The profile is 2D and the shadow 3D. In my opinion it doesn't work together very well. Specially where the tyres meets the ground.

Other than that... it's a cool looking (desert?) paintscheme!

Jean-Luc
flitzer
_VISITCOMMUNITY
England - North West, United Kingdom
Joined: November 13, 2003
KitMaker: 2,240 posts
AeroScale: 743 posts
Posted: Sunday, February 05, 2006 - 09:33 PM UTC
Hi Jean Luc
Thanks for the comments....

I was thinking along similar lines...no pun ntended.

The shadow will be fixed.
And the panel lines/rivets etc are all on different layers so I am about to try swapping orders around.
I use Freehand for the key lines and Photoshop for the colour work.
In photoshop it looks deeper in colour but seems to look a little washed out here so I'll have a look at that too.

I have 3 more camo versions of this on the go.

Thanks again
Cheers
Peter

:-)
betheyn
Staff MemberSenior Editor
AEROSCALE
#019
_VISITCOMMUNITY
England - South East, United Kingdom
Joined: October 14, 2004
KitMaker: 4,560 posts
AeroScale: 2,225 posts
Posted: Sunday, February 05, 2006 - 09:43 PM UTC
Hi Peter,
Mal showed me a copy of your profile book at Milton Keynes model show on Sunday and i am impressed. The camo schemes are fantastic and could be used for all German aircraft as well as the Luft 46.
Are you getting this published. I think with a bit of text added it is a sure fire winner.
Andy (++)
P.S I want to buy a copy when you have finished, as it will be an excellent guide to painting
flitzer
_VISITCOMMUNITY
England - North West, United Kingdom
Joined: November 13, 2003
KitMaker: 2,240 posts
AeroScale: 743 posts
Posted: Sunday, February 05, 2006 - 10:50 PM UTC
Hi Andy...
thanks for the support.
When the profiles are finished they'll be going in to the next feature.
So if you want any, be my guest and download them.

I've already approached a couple of publishers but with no success...
But I enjoy doing them anyway.
Its a mess free way to do modelling...lol

Cheers
Peter
:-)
betheyn
Staff MemberSenior Editor
AEROSCALE
#019
_VISITCOMMUNITY
England - South East, United Kingdom
Joined: October 14, 2004
KitMaker: 4,560 posts
AeroScale: 2,225 posts
Posted: Sunday, February 05, 2006 - 11:09 PM UTC

Quoted Text

Hi Andy...
thanks for the support.
When the profiles are finished they'll be going in to the next feature.
So if you want any, be my guest and download them.

I've already approached a couple of publishers but with no success...
But I enjoy doing them anyway.
Its a mess free way to do modelling...lol

Cheers
Peter
:-)


Thanks Peter.
I can't believe know ones interested in publishing it, philistines the lot of them .
Andy (++)
flitzer
_VISITCOMMUNITY
England - North West, United Kingdom
Joined: November 13, 2003
KitMaker: 2,240 posts
AeroScale: 743 posts
Posted: Sunday, February 05, 2006 - 11:12 PM UTC
Hi
Jean Luc


I just swaped a few layers around. I think it looks a little sharper now.
And a new thin shadow will be added so the wheels have something to sit on.
I 'll also crank up the contrast a little.
When the markings and stencils go on it'll bite a bit more.
Amazing what a fresh set of eyes can do.

Cheers
Peter
:-)
matrixone
_VISITCOMMUNITY
Oregon, United States
Joined: February 07, 2004
KitMaker: 869 posts
AeroScale: 862 posts
Posted: Monday, February 06, 2006 - 08:11 AM UTC
Peter,

That looks great!

Looking forward to more of your work.

Matrixone
flitzer
_VISITCOMMUNITY
England - North West, United Kingdom
Joined: November 13, 2003
KitMaker: 2,240 posts
AeroScale: 743 posts
Posted: Monday, February 06, 2006 - 11:11 AM UTC
Hi

your wish is my command.
The tail. There's still a lot more work to do but its coming. I'm in the middle of putting in rivets on the top view....100's of 'em.


The beauty of doing profiles this way i.e. many layers, is that once one profile is complete its only a matter of changing the layers for flat camo colours and markings of course. All the detail and shading are on separate layers so can be copied intact to the next aircraft.

Cheers
Peter
:-)
Merlin
Staff MemberSenior Editor
AEROSCALE
#017
_VISITCOMMUNITY
United Kingdom
Joined: June 11, 2003
KitMaker: 17,582 posts
AeroScale: 12,795 posts
Posted: Monday, February 06, 2006 - 12:28 PM UTC
Hi Peter

Very impressive! It's been great to see the steady development in your technique over the course of the Luft '46 series. It seems odd giving pointers when I couldn't produce artwork of this quality myslef, but here goes:

I really like the "3-D" effect beginning to show on the second c/u of the cockpit area - the difference between flush and raised rivets. The glazing effect, with blurred detail inside, is great.

I think you need to make the rudder hinge-line more pronounced - give a little "shaping" to the front edge of the rudder itself. I can't make my mind up about the tyres; the shadow and highlights give a strong sense of contours - but maybe the "lip" is a bit too hard?

All the best

Rowan
flitzer
_VISITCOMMUNITY
England - North West, United Kingdom
Joined: November 13, 2003
KitMaker: 2,240 posts
AeroScale: 743 posts
Posted: Monday, February 06, 2006 - 02:50 PM UTC
Hi Rowan
yes things have progressed with technique... well they should as I've done that many...lol.

I intend doing a lot more on the whole profile including the rudder....its just like real 3D modelling, in that the more detail you add the more is needed.
Also the order of layers is similar to those of panel lines, washes, weathering etc, on an actual build.

As far as detail is concerned, I'm lucky with the 234 as there is loads of good refs around, even though this is the V-16 with crescent wings. I'll have to use my imagination for those...lol.

The wheels and tyres are my standard ones I use on all the profiles and when reduced to fit a profile page I hadn't noticed. But I'll take a closer look at the lip and try a bit of softening.

Thanks again.

Cheers
Peter
:-)
Littorio
_VISITCOMMUNITY
England - South East, United Kingdom
Joined: September 15, 2004
KitMaker: 4,728 posts
AeroScale: 1,351 posts
Posted: Tuesday, February 07, 2006 - 02:43 AM UTC
Hi Peter,

Just to say great work I love your profiles and look forward to your next set.

I would not know where to start doing what your doing, any time I've started to use a computer drawing program within 5minutes I'm completely bored. So I think I will stick to the 3D build it type and leave the drawing to you.

Ciao
Luciano
flitzer
_VISITCOMMUNITY
England - North West, United Kingdom
Joined: November 13, 2003
KitMaker: 2,240 posts
AeroScale: 743 posts
Posted: Tuesday, February 07, 2006 - 04:27 PM UTC
Hi
a bit more tail work along the lines mentioned by Merlin.


I've now more or less completed the rivets on the top view...phew...there's so many...I've got circular vision now.

Cheers
Peter
:-)
flitzer
_VISITCOMMUNITY
England - North West, United Kingdom
Joined: November 13, 2003
KitMaker: 2,240 posts
AeroScale: 743 posts
Posted: Tuesday, February 07, 2006 - 05:03 PM UTC
And a couple more views after more work...


I'll update this as things progress.

Cheers
Peter
:-)
vanize
_VISITCOMMUNITY
Texas, United States
Joined: January 30, 2006
KitMaker: 1,954 posts
AeroScale: 1,163 posts
Posted: Thursday, February 09, 2006 - 01:31 AM UTC
a couple more opinion comments:

1. I actually prefer the original lighter panel lines. I feel panel lines are generally over represented in our hobby in general . I am aware this is not a popular opinion, and I can appreciate the artistic value of over representing them - I just lean more to the realism side of it. And while the following goes a bit against what I just said, to bring out the panel lines more without going darker, using thin parallel dark and light lines (with the light line on the opposide side of the panel line from the light source) that only have maybe 60% or 70% opacity may be the way to go - that could make the lines stand out more without implying they are heavier/deeper like merely darkening the lines will do.

2. As pointed out, the original shadow you had looked odd. But i think this is because it was from a fairly sharp light source coming from almost straight overhead, while the lighting on the aircraft that gives its shading is coming from a diffuse source at perhaps 45 degrees. I think the shadow would look better if were diffuse and cast at a greater angle of incidence. Likewise, I can critique the wing and tailplane shadows, which are from a very sharp overhead source, but this is less obvious. But the original critique that you have a shadow casdt on a 3-d floor when you are seeing the aircraft from a purely 2-d side perspective is true, so perhaps best that this shadow remain deleted.

Having said all that, generally your rending and coloring are excellent! just think about shadow/shading consistancy more. I only offer the critique because you ask, as I have to admit you have done a better job than I would have.
flitzer
_VISITCOMMUNITY
England - North West, United Kingdom
Joined: November 13, 2003
KitMaker: 2,240 posts
AeroScale: 743 posts
Posted: Friday, February 10, 2006 - 11:59 AM UTC
Hi Vance
many thanks for your comments. All valid.
However there is a rub to this....

I principally do these profiles to conform to the restrictions of Armorama's image size of 600 x 450 pixels, so the in progress pics here are seen much larger than the finished piece will be.

This always causes a dilema for things such as panel lines etc. I try and put as much detail in as possible, but when things like the panel lines and rivets etc are done too subtle they tend to disappear when viewed at finished size. So its always a compromise to keep them as realistic as possible without them becoming invisible. And this sometimes requires making them a little darker than would normally be applied.
One day I will find the ideal :-)


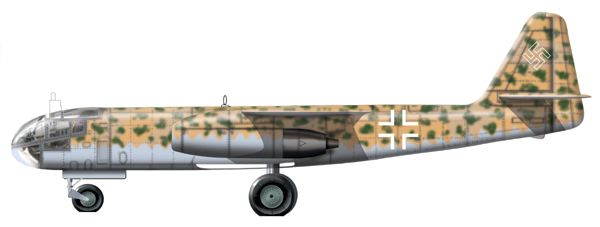
The upper one is at 600 pixels wide.
The small one is 50% smaller as a representative size as would be seen on the finished profile set.

I'm still toying with the shadow...this one is smaller but I'm still not sure weter to keep it or leave it out.

Many thanks again

Cheers
Peter
:-)
TedMamere
_VISITCOMMUNITY
Moselle, France
Joined: May 15, 2005
KitMaker: 5,653 posts
AeroScale: 4,347 posts
Posted: Friday, February 10, 2006 - 12:51 PM UTC
Hi Peter!

Looks good that way IMHO. I would keep the shadow but would put it a few pixels down so the main tyres would be almost in the middle of it. I would also blur the horizontal line of the tyres (where they meet the ground) to blend them more into the shadow.
At the beginning we talked about details, now we talk about MINOR details... I wonder about what we will talk next? :-)

Jean-Luc
flitzer
_VISITCOMMUNITY
England - North West, United Kingdom
Joined: November 13, 2003
KitMaker: 2,240 posts
AeroScale: 743 posts
Posted: Friday, February 10, 2006 - 01:24 PM UTC
Thanks Jean Luc

Further thinx....

Re: Shadow/undercarriage.

Doing profiles seems to throw up dilemas at regular intervals especially when the reason for doing them is added to the mix....i.e. camo guides.

One way to negate any question about the shadow and therefore the undercarriage is to do them in-flight mode with the undercarriage tucked away out of sight so no need for the shadow. But this asks another question...if I do it this way shouldn’t a pilot (or crew on bigger aircraft)be included?
And this creates its own little problems...lol.
Finding or doing pics or illustrations of them.
I could dress up in flying helmet, if I had one, and take digi pics to add.

The main reasons I do undercarriage down is to delete the need for pilots and to represent how most modellers build their models....?????

Its never easy dilemas, dilemas, dilemas

Cheers
Peter
:-)
 _GOTOTOP