Ontario, Canada
Joined: May 16, 2003
KitMaker: 250 posts
AeroScale: 207 posts
Posted: Sunday, February 19, 2006 - 08:43 PM UTC
Hi there everyone.
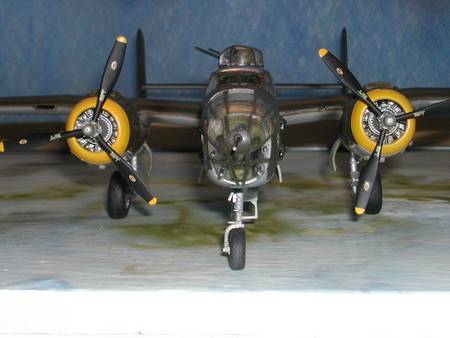
I started this for the "Bombs Away" Campain, spend the majority of this past weekend masking all the glass on this beast. Let me know what you think if the progress so far.


Comments welcomed, its the only way I can get better.
Thanks
Ted

California, United States
Joined: April 01, 2002
KitMaker: 4,287 posts
AeroScale: 1,164 posts
Posted: Monday, February 20, 2006 - 04:32 AM UTC
Looks like the Pro-Modeler kit. Nice start. You might want to add a little more paint to your seats it looks a little thin in spots. Other than that it looks good to me. Thanks for sharing. "Q"

"Don't fear the night, fear what hunts at night"
Ontario, Canada
Joined: May 16, 2003
KitMaker: 250 posts
AeroScale: 207 posts
Posted: Monday, February 20, 2006 - 08:28 PM UTC
Thanks for the feedback "Q". I agree with you about the seats, but I actually was looking for a bit of the 'worn,used' look when you look though the canopy. I don't think you will be able to see much else. So I decided to leave them. Do you think it might work?

Ontario, Canada
Joined: May 16, 2003
KitMaker: 250 posts
AeroScale: 207 posts
Posted: Monday, February 20, 2006 - 09:52 PM UTC
California, United States
Joined: April 01, 2002
KitMaker: 4,287 posts
AeroScale: 1,164 posts
Posted: Tuesday, February 21, 2006 - 10:33 AM UTC
I have two or three of this very kit on my shelves and understand about the gaps you are referring to. Only suggestion I can give is to take your time, sand, check, and then sand some more. Don't forget to sand off the Revell/Monogram logo on the bottom of the wing. Once all the sanding is done, its a good idea to polish the scratches out. This will also help in identifying scratches that were missed. For your seats, I suppose you could leave them the way they are. Its hard to see down thru to canopy glass and it will probably have the effect you are looking for. Again, thanks for sharing your progress/work. "Q"

"Don't fear the night, fear what hunts at night"
Ontario, Canada
Joined: May 16, 2003
KitMaker: 250 posts
AeroScale: 207 posts
Posted: Thursday, March 23, 2006 - 01:00 AM UTC
California, United States
Joined: July 08, 2003
KitMaker: 1,936 posts
AeroScale: 1,168 posts
Posted: Thursday, March 23, 2006 - 01:21 AM UTC
Ted - Looks like it's coming along nicely, I'd like to see that as at least an On-Display submission when complete.


Nevada, United States
Joined: March 27, 2005
KitMaker: 143 posts
AeroScale: 0 posts
Posted: Thursday, March 23, 2006 - 08:36 AM UTC
sexy.
I'd tap that.
:-) :-) :-)
Pig # 140
Minister of hidden base security,and jagermiester quality control.
They're in front of us, behind us, and on both flanks. Now they can't get away!
"All an artillaryman is is an Infantryman with a really really big gun!"
Ontario, Canada
Joined: May 16, 2003
KitMaker: 250 posts
AeroScale: 207 posts
Posted: Thursday, March 23, 2006 - 07:26 PM UTC
Quoted Text
Ted - Looks like it's coming along nicely, I'd like to see that as at least an On-Display submission when complete. 

I am not sure exactly what you mean by a "On-Display" submission.
Kindly fill me in.

California, United States
Joined: July 08, 2003
KitMaker: 1,936 posts
AeroScale: 1,168 posts
Posted: Thursday, March 23, 2006 - 11:09 PM UTC
Quoted Text
I am not sure exactly what you mean by a "On-Display" submission.
Kindly fill me in.
is a Models on Display Feature on the Aircraft (and others) Home Page - a Photo Featture if you will. Like to see several photos of your finished effort posted there if you would submit them for publication via the Feature submission page.


Ontario, Canada
Joined: May 16, 2003
KitMaker: 250 posts
AeroScale: 207 posts
Posted: Thursday, March 23, 2006 - 11:34 PM UTC
Quoted Text
Quoted Text
I am not sure exactly what you mean by a "On-Display" submission.
Kindly fill me in.
On-Display is a Models on Display Feature on the Aircraft (and others) Home Page - a Photo Featture if you will. Like to see several photos of your finished effort posted there if you would submit them for publication via the Feature submission page.


Thanks for the information. Hopefully this Mitchell comes out well enough for presentation. I am hoping to have this finished in a couple of weeks.
Thanks again

Nevada, United States
Joined: March 27, 2005
KitMaker: 143 posts
AeroScale: 0 posts
Posted: Friday, March 24, 2006 - 10:36 AM UTC
talk to Jean-Luc, and see if you slap some teeth on there if you can put it in his campaign also........
Pig # 140
Minister of hidden base security,and jagermiester quality control.
They're in front of us, behind us, and on both flanks. Now they can't get away!
"All an artillaryman is is an Infantryman with a really really big gun!"
Ontario, Canada
Joined: May 16, 2003
KitMaker: 250 posts
AeroScale: 207 posts
Posted: Sunday, March 26, 2006 - 08:33 PM UTC
First let me thanks you guys for the feedback.
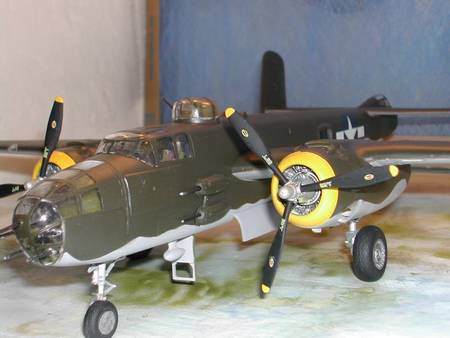
I got the decals on over the weekend, and sealed them with future, but that was all I was able to get done. Hopefully this week I can compete the weathering and exhaust stains and apply the dullcoat.
Roger,
Thanks for the suggestion of joining Jean-Luc's campain, actually this model is for the "Bombs Away" campain. I have already completed my build for Jean-Luc's campain. P-40 B/C.
I will post some completed pic's shortly.

Ontario, Canada
Joined: May 16, 2003
KitMaker: 250 posts
AeroScale: 207 posts
Posted: Tuesday, March 28, 2006 - 10:21 PM UTC
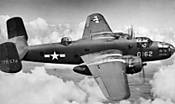
Good day gentlemen, I finally got around to taking some pictures after I applied the decals and sprayed another future coat to seal them. Can anyone tell me if the exhaust stains are on both upper and lower wing surfaces? I can't find any good photo's showing this.
Now comes the scary part, I am going to try a pastel wash on the lower surface of the wings (1st attempt), hopefully it comes out alright.


As always your comments good or bad are welcomed.
Cheers

Illinois, United States
Joined: February 23, 2006
KitMaker: 133 posts
AeroScale: 0 posts
Posted: Wednesday, March 29, 2006 - 05:20 AM UTC
Hey Ted,
Here a couple of photos showing B-25s with stained wings. I'm not sure what the staining is - perhaps someone else will know.


Ontario, Canada
Joined: May 16, 2003
KitMaker: 250 posts
AeroScale: 207 posts
Posted: Wednesday, March 29, 2006 - 07:14 PM UTC
Thanks Barry. I appreciate you finding those pictures for me.
Nevada, United States
Joined: March 27, 2005
KitMaker: 143 posts
AeroScale: 0 posts
Posted: Thursday, March 30, 2006 - 12:40 PM UTC
Hey man that one really looks great
Pig # 140
Minister of hidden base security,and jagermiester quality control.
They're in front of us, behind us, and on both flanks. Now they can't get away!
"All an artillaryman is is an Infantryman with a really really big gun!"
Moselle, France
Joined: May 15, 2005
KitMaker: 5,653 posts
AeroScale: 4,347 posts
Posted: Thursday, March 30, 2006 - 03:32 PM UTC
Hi Ted!
Looks very good so far!
Good luck with the pastel weathering. But you don't have to be too anxious about that. You can wash the pastels away if you are not happy with the result...
Jean-Luc
Better think one hour and build five minutes...
Than think five minutes and build an hour!
Ontario, Canada
Joined: May 16, 2003
KitMaker: 250 posts
AeroScale: 207 posts
Posted: Thursday, March 30, 2006 - 09:11 PM UTC
Thanks for the kind comments guys. Actually I have begun the painful process of trying to remove the misapplied decals that are on the rear of the airframe.

I can't believe I never noticed them prior to them setting. The one on the R/S is absolutely horendously bad, the one on the L/S while not quite as bad has to come off as well.
I tried pulling them with scotch tape, some of it came off but not all of them, now I am left with an aweful mess. I think I am just going to repaint over the area and reapply the decals from a spare set.

Moselle, France
Joined: May 15, 2005
KitMaker: 5,653 posts
AeroScale: 4,347 posts
Posted: Thursday, March 30, 2006 - 10:55 PM UTC
Hi Ted!
Now you mention the decals, I think the one on the wing is also upside down...


Jean-Luc

Better think one hour and build five minutes...
Than think five minutes and build an hour!
Ontario, Canada
Joined: May 16, 2003
KitMaker: 250 posts
AeroScale: 207 posts
Posted: Friday, March 31, 2006 - 12:44 AM UTC
Hello Jean-Luc,
You are absolutely correct in pointing that out. It is upside down.

I must have been sleeping or something when I installed all the decals.
By the way, I enjoyed being part of your "Show your Teeth" campain.
I only have 2 spare decals of this size, so now the decision, leave it or order a set and get it right?
I know..............not much of a decision. I guess I am ordering a set.
Do you think going over the one on the wing would work?
Cheers Ted
Moselle, France
Joined: May 15, 2005
KitMaker: 5,653 posts
AeroScale: 4,347 posts
Posted: Friday, March 31, 2006 - 10:56 AM UTC
Quoted Text
Do you think going over the one on the wing would work?
Hi Ted!
I think it would... but maybe the old one would show trough? It depends of the thickness of the new one I guess. I would try to strip the old decals off if I was you.
Thanks for the nice comments about the "Teeth" Campaign. Currently all seems quite there though... I guess it's the lull before the storm! :-)
Jean-Luc

Better think one hour and build five minutes...
Than think five minutes and build an hour!
Ontario, Canada
Joined: May 16, 2003
KitMaker: 250 posts
AeroScale: 207 posts
Posted: Monday, April 03, 2006 - 10:13 PM UTC
Ontario, Canada
Joined: May 16, 2003
KitMaker: 250 posts
AeroScale: 207 posts
Posted: Monday, April 10, 2006 - 10:32 PM UTC
California, United States
Joined: April 01, 2002
KitMaker: 4,287 posts
AeroScale: 1,164 posts
Posted: Wednesday, April 12, 2006 - 07:49 PM UTC
Ted,
Nice to see it finished. Sorry to see the decal trouble you had. Overall it looks good to me. I haven't seen many B-25's completed, so it is nice to see one here. Now that its done, sit back and have a nice tall, cold drink and relax a little. Once again, good job and thanks for sharing your work. "Q"

"Don't fear the night, fear what hunts at night"


 I can't believe I never noticed them prior to them setting. The one on the R/S is absolutely horendously bad, the one on the L/S while not quite as bad has to come off as well.


 I must have been sleeping or something when I installed all the decals.


 . Here are some completed pictures for you guys to comment on.


