Well guys the bird is practically finished.
Mal: I painted the wheel wells and interior part of the doors with silver but it isnŽt noticeable in the pics. When decaling I brooke one of the ruderŽs decals so I utilized (I trimed these) the ones of and old Airfix Typhoon kit and they worked well (Ibelieve they have more than 20 years). After applying all the decals I gave a coat of Future and tomorrow IŽll retouch the exhaust area, procede with the oil washes and then the mate coat and general weathering.
IŽm waiting a roll of Parafilm so the canopy will wait a couple of days. I think that next week it will be finished.
This Academy kit is great and I enjoy it very much. Highly recomendable.
Here are the pics:
Coments will be appreciated.
Hosted by Rowan Baylis
Hawker Typhoon 1/72 in progress
csch
Buenos Aires, Argentina
Joined: December 27, 2002
KitMaker: 1,941 posts
AeroScale: 1,040 posts
Joined: December 27, 2002
KitMaker: 1,941 posts
AeroScale: 1,040 posts
Posted: Saturday, April 15, 2006 - 06:38 AM UTC
Posted: Saturday, April 15, 2006 - 04:37 PM UTC
Not far to go now Carlos.
Those decals look great.I guess i was just unlucky with the 190.I see youve drilled the wings out.Have fun with the rockets my friend :-)
What colours did you use for the air intake?,,looks cool.
Nige
Those decals look great.I guess i was just unlucky with the 190.I see youve drilled the wings out.Have fun with the rockets my friend :-)
What colours did you use for the air intake?,,looks cool.
Nige
propboy44256
Ohio, United States
Joined: November 20, 2002
KitMaker: 1,038 posts
AeroScale: 285 posts
Joined: November 20, 2002
KitMaker: 1,038 posts
AeroScale: 285 posts
Posted: Saturday, April 15, 2006 - 04:51 PM UTC
Was this hand painted or airbrushed?
It looks good.
It looks good.
Posted: Saturday, April 15, 2006 - 04:53 PM UTC
So far so good Carlos.
Mal has written a good feature on painting rockets which might help with them.
Keep up the good work and keep posting the pics.
Andy (++)
Mal has written a good feature on painting rockets which might help with them.
Keep up the good work and keep posting the pics.
Andy (++)
Posted: Saturday, April 15, 2006 - 09:35 PM UTC
looking good Carlos, but oops, if I'd known that you were gonna paint the exhausts rust I would have warned against it I think that these were individually shrouded. The heat from the exhaust would still effect the paint on the shrouds but probably not to the extent of causing the whole length to rust. Drybrushing a little of the original colour might "bring 'em back a little", but don't woory about it. One tip for exhausts that cannot be drilled out is to paint the faces, where the orrifice would be, black. The real trick to making this look convincing is to try and leave a lip of colour (metal or rust)
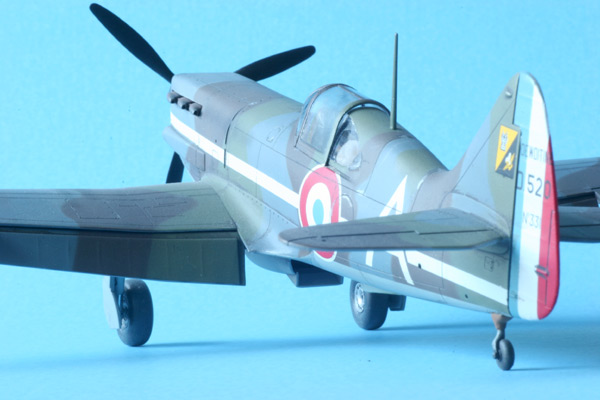
Although it isn't very clear the exhaust on my Dewoitine D.250 had this treatment.
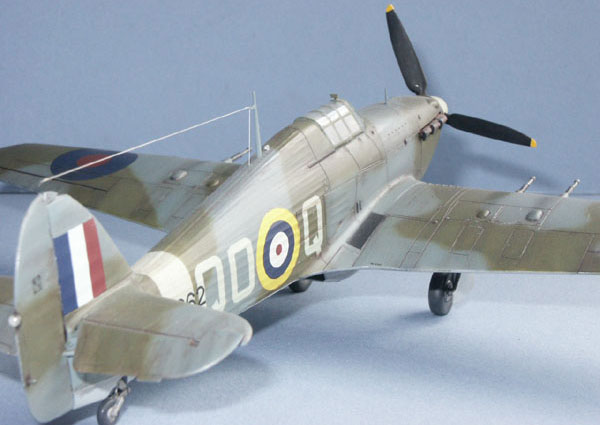
As did the exhaust on this Hurricane.
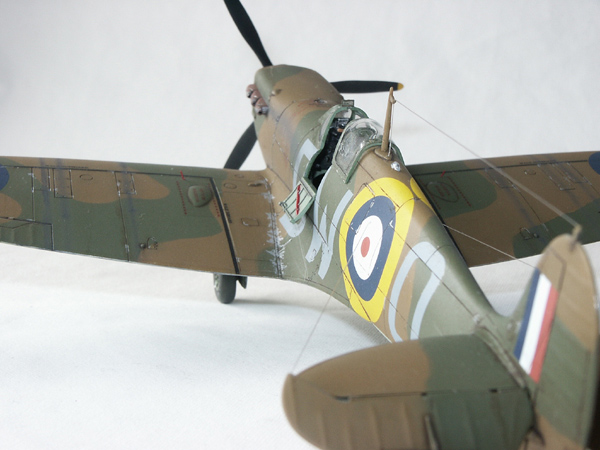
And this Spitfire.
Mal
Although it isn't very clear the exhaust on my Dewoitine D.250 had this treatment.
As did the exhaust on this Hurricane.
And this Spitfire.
Mal
csch
Buenos Aires, Argentina
Joined: December 27, 2002
KitMaker: 1,941 posts
AeroScale: 1,040 posts
Joined: December 27, 2002
KitMaker: 1,941 posts
AeroScale: 1,040 posts
Posted: Sunday, April 16, 2006 - 12:00 AM UTC
Quoted Text
Not far to go now Carlos.
Those decals look great.I guess i was just unlucky with the 190.I see youve drilled the wings out.Have fun with the rockets my friend :-)
What colours did you use for the air intake?,,looks cool.
Nige
Hi Nigel:
for the undersides I used Model Master Medium Sea Grey and for the oil cooler I first I painted it with Humbrol Flat Black and then dry brushed it with Humbrol Silver.
Regards.
Carlos
csch
Buenos Aires, Argentina
Joined: December 27, 2002
KitMaker: 1,941 posts
AeroScale: 1,040 posts
Joined: December 27, 2002
KitMaker: 1,941 posts
AeroScale: 1,040 posts
Posted: Sunday, April 16, 2006 - 12:01 AM UTC
Quoted Text
Hi Johnny:Was this hand painted or airbrushed?
It looks good.
Thanks, it was all airbrushed.
csch
Buenos Aires, Argentina
Joined: December 27, 2002
KitMaker: 1,941 posts
AeroScale: 1,040 posts
Joined: December 27, 2002
KitMaker: 1,941 posts
AeroScale: 1,040 posts
Posted: Sunday, April 16, 2006 - 12:05 AM UTC
Quoted Text
So far so good Carlos.
Mal has written a good feature on painting rockets which might help with them.
Keep up the good work and keep posting the pics.
Andy (++)
Hi Andy: Thank you.
IŽll read MalŽs article but I think IŽll paint the rockets with a brush, the pailons with diluted Model Master Medium Sea Grey enamel and the rockets with Vallejo Acrylic RLM 70. I did that in my Moosie and worked. well.
csch
Buenos Aires, Argentina
Joined: December 27, 2002
KitMaker: 1,941 posts
AeroScale: 1,040 posts
Joined: December 27, 2002
KitMaker: 1,941 posts
AeroScale: 1,040 posts
Posted: Sunday, April 16, 2006 - 12:12 AM UTC
Quoted Text
looking good Carlos, but oops, if I'd known that you were gonna paint the exhausts rust I would have warned against it I think that these were individually shrouded. The heat from the exhaust would still effect the paint on the shrouds but probably not to the extent of causing the whole length to rust. Drybrushing a little of the original colour might "bring 'em back a little", but don't woory about it. One tip for exhausts that cannot be drilled out is to paint the faces, where the orrifice would be, black. The real trick to making this look convincing is to try and leave a lip of colour (metal or rust)
Although it isn't very clear the exhaust on my Dewoitine D.250 had this treatment.
Mal
Hi Mal: thank you for the advice. IŽll try the tip. I have a bottle of Model Master Burnt Iron. I can try it in the exhausts and then drybrush some rust and after all aplly a point of black to simulate the holes. ThereŽs little room for that but iŽll try.
I donŽt like the way the exhaust are looking now.
Regards
Carlos
Posted: Sunday, April 16, 2006 - 02:06 AM UTC
Hi Carlos.
Ive tried a few different ideas on exhausts.
One thing I found to work quite well on this base color exhaust was to dry brush with a mixture of bronze and silver and while its still wet brush on a bit of brown pastel chalk.
Try it on a piece of sprue or scrap plastic and see what you think.
Nige
On the Typhoon in the RAF museum the exhausts are painted with the main camouflage colour,but Im not sure that this would be accurate at all.Ive got quite a few photos of this.If you (or anyone else) needs anything specific PM me.
csch
Buenos Aires, Argentina
Joined: December 27, 2002
KitMaker: 1,941 posts
AeroScale: 1,040 posts
Joined: December 27, 2002
KitMaker: 1,941 posts
AeroScale: 1,040 posts
Posted: Sunday, April 16, 2006 - 02:35 AM UTC
Tanks Nigel. IŽve sent a PM to you.