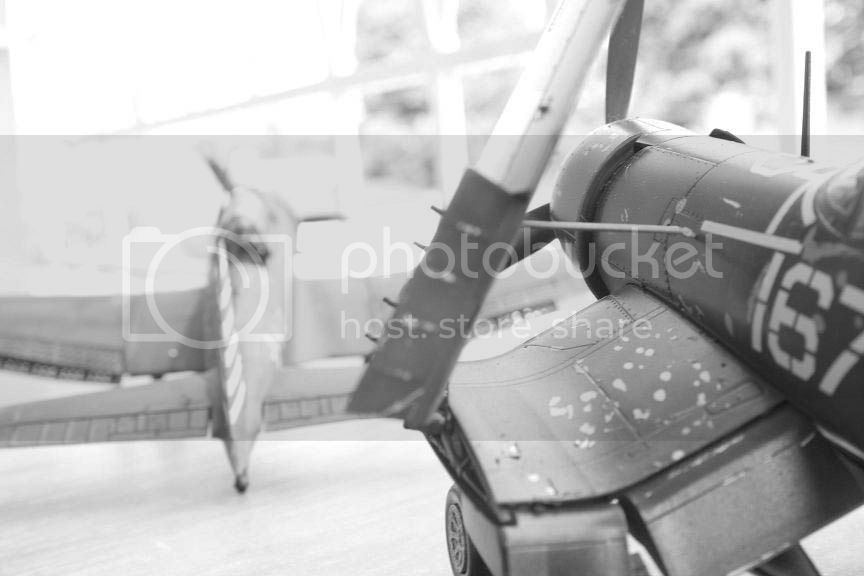
Teaser shot:
click here for more!!!
Comments and criticism welcome!
Pre-Flight Check
Constructive critique of your finished or in-progress photos.
Hosted by Jim Starkweather
F4U-1D Finished!
shonen_red
Metro Manila, Philippines
Joined: February 20, 2003
KitMaker: 5,762 posts
AeroScale: 543 posts
Joined: February 20, 2003
KitMaker: 5,762 posts
AeroScale: 543 posts
Posted: Sunday, June 11, 2006 - 12:19 PM UTC
WARLORD
Associate Editor
Warszawa, Poland
Joined: April 23, 2003
KitMaker: 1,923 posts
AeroScale: 100 posts
Joined: April 23, 2003
KitMaker: 1,923 posts
AeroScale: 100 posts
Posted: Monday, June 12, 2006 - 06:44 PM UTC
Nice work. I have the same kit waiting to be biult some day.
Maybe it's only me but I think paint chipping on wings looks unnatural and some pics of lower part of plane would be helpful.
What paint did use?
Maybe it's only me but I think paint chipping on wings looks unnatural and some pics of lower part of plane would be helpful.
What paint did use?
shonen_red
Metro Manila, Philippines
Joined: February 20, 2003
KitMaker: 5,762 posts
AeroScale: 543 posts
Joined: February 20, 2003
KitMaker: 5,762 posts
AeroScale: 543 posts
Posted: Tuesday, June 13, 2006 - 01:14 PM UTC
Quoted Text
Nice work. I have the same kit waiting to be biult some day.
Maybe it's only me but I think paint chipping on wings looks unnatural and some pics of lower part of plane would be helpful.
What paint did use?
Thanks mate! Actually, it's my first time to do paint chipping with rubber cement I used Tamiya enamels entirely on the kit, a mix of Royal Blue and Blue colors.
Posted: Wednesday, June 14, 2006 - 11:38 PM UTC
Hello Shonen-Red,
Overall a good looking model. I usually do not advocate "clouding" the paint for wear and tear but on this model, it works great!
I agree the chipping looks a little unnatural--perhaps better stated that it looks too uniform?
After a disagreement about chipping on mid and late-war US aircraft, I searched all of my WWII...In Color books. I found that USN carrier-based planes showed very little chipping. Was this due to attrition, or better maintainance--who knows? On the Corsair it seems most is in the form of scratches around the intercooler intakes at the leading edge, a little near the wingroots, and otherwise around high-scuff areas like cowl rivets. That said, the photos were not taken for modelers to study wear patterns, so a lot of the surfaces are not very viewable.
Overall, a good looking F4U.
AJLaFleche
Massachusetts, United States
Joined: May 05, 2002
KitMaker: 8,074 posts
AeroScale: 328 posts
Joined: May 05, 2002
KitMaker: 8,074 posts
AeroScale: 328 posts
Posted: Thursday, June 15, 2006 - 12:01 AM UTC
The build looks really good. I agree with the other guys on the chipping on the wings, something doesn't look right about it. If paint is going to wear, leading edges would loose a good deal as well. The plane looks like it's been in service and often parked in the hot sun on the deck of a carrier, but the fading you achieved doesn't carry to the stars and bars. In all, the decals don't look as weathered as the rest of the plane. The engine and prop look llike they were just delivered from Pratt & Whitney and Hamilton Standard. The leading edges of the blades should show wear even more than the rest of the paint. A black wash on the engine would give it a more broken in appearance.
GunTruck
California, United States
Joined: December 01, 2001
KitMaker: 5,885 posts
AeroScale: 103 posts
Joined: December 01, 2001
KitMaker: 5,885 posts
AeroScale: 103 posts
Posted: Thursday, June 15, 2006 - 12:27 AM UTC
Nice model and nice photos.
I agree with the other comments made above. The silver is much too bright for the scale, and too regular - but I liked the idea of implementing it.
The wheels are too shiny for my tastes, dulling them down would enhance the model's appearance.
Nice masking/painting around the canopy - this is often a weak spot in aircraft model finishes. I also like your attempt at sunbleaching the paint job. My only comment would be more subtlely - it's a stark contrast. I can live with the "freshness" of your Prop too - speaks more like a replacement to me - but this would be better told in a diorama setting. If displayed on it's own, a little wear on the leading edges would keep it in harmony with the rest of your model's finish.
Good Job!
Gunnie
jlmurc
England - East Anglia, United Kingdom
Joined: August 29, 2005
KitMaker: 1,267 posts
AeroScale: 49 posts
Joined: August 29, 2005
KitMaker: 1,267 posts
AeroScale: 49 posts
Posted: Thursday, June 15, 2006 - 01:34 AM UTC
Its a really great build but I really do agree that you need to try and make some adjustments to the paint chipping on the wings in particular, they are a little uniform and look like you have just dabbed a loaded paintbrush over the surface, it looks a little like acne.
If you can tone them down a little you would make a good looking kit great.
I hope that you see the critism as constructive as it is meant to be.
John
If you can tone them down a little you would make a good looking kit great.
I hope that you see the critism as constructive as it is meant to be.
John
shonen_red
Metro Manila, Philippines
Joined: February 20, 2003
KitMaker: 5,762 posts
AeroScale: 543 posts
Joined: February 20, 2003
KitMaker: 5,762 posts
AeroScale: 543 posts
Posted: Thursday, June 15, 2006 - 04:34 PM UTC
Wow! I can't imagine how much errors I had done with this kit. Thanks for all the comments guys. Surely on my next model, I'll try to study all my errors on this Corsair
Edit:
You said that the wings look pretty new. I don't have any clear photos on how they wear over time. I only know that they were not metal in the first place, so I avoid paint chipping them. Any ideas?
Also, you said that the decals weren't that weathered like the plane. Any ideas on how I would weather the decals?
AJLaFleche
Massachusetts, United States
Joined: May 05, 2002
KitMaker: 8,074 posts
AeroScale: 328 posts
Joined: May 05, 2002
KitMaker: 8,074 posts
AeroScale: 328 posts
Posted: Thursday, June 15, 2006 - 05:14 PM UTC
Quoted Text
Also, you said that the decals weren't that weathered like the plane. Any ideas on how I would weather the decals?
I'm not sure what I'd do with the white, perhaps a very light overspray of very light gray, just to bring the value down a notch, but for the stars & bars, I'd do what many figure guys do and place the plane under a single point desk lamp held directly above it to replicate the noonday sun. I'd make a mental note of where it trails off. I'd then very lightly add layers of lightened insignia blue to those areas, lighter to the top and less as the shadows terminator line approached. That's pretty much how I'd do the whole plane: Upper surfaces of the horizontal stabilizer and the spine would get most of the fading. I'd go more subtly on the blue on the wings, since they spend smoe time folded and some extended.
shonen_red
Metro Manila, Philippines
Joined: February 20, 2003
KitMaker: 5,762 posts
AeroScale: 543 posts
Joined: February 20, 2003
KitMaker: 5,762 posts
AeroScale: 543 posts
Posted: Thursday, June 15, 2006 - 08:15 PM UTC
Noted. Thanks for the tips!
Posted: Wednesday, June 28, 2006 - 11:13 PM UTC
Here's a good pix of a well-worn Hellcat:
http://www.ww2incolor.com/gallery/albums/us_navy/HELLCAT_45.jpg