Although I cannot continue with this for a while, as I don't have the Interior Green paint needed, there are still things that can be done in preperation. I know quite a few of you have bought this kit and are eager to get building, I also know that some, well at least one, hasn't used resin before. Before we start this I would just like to warn everyone that I am no expert when it comes to resin, I have add 2 resin cockpit sets to models in total. One in my last months MOM entry, the Me 163 and the other in this months entry, the Mosquito. However I can at least give you some pointers and help with painting etc
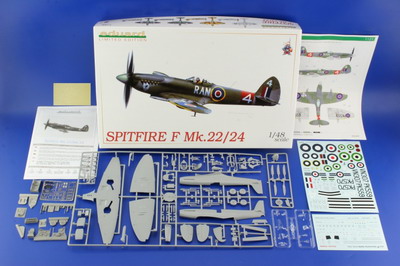
 What I'm sying hear is that what I will say is not "gospel" so if you feel that you have a better way of doing it then please do, but let us know Again, although I love the Spitfire, I am in now way an expert. I did, however learn quite a bit about the Spitfire F Mk 22/24 while researching my review of the kit Review If you have this kit (Eduards kit number 1121) feel free to join in, remember though that the idea is to help those that have not used mixed media stuff before. If there are any of you who have the original Airfix boxing then you may also join in as it will be an interesting comparison with the Eduard offering. The Eduard boxing of Airfix's kit is a real beauty so lets get on with it.
Remember when cutting and sanding resin to wear a mask, always
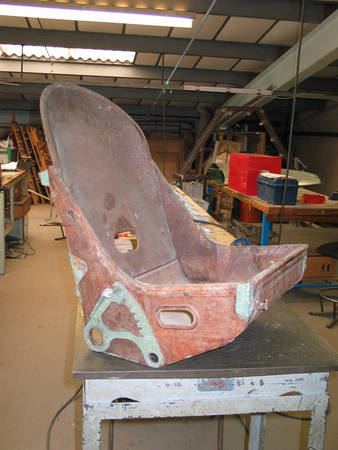
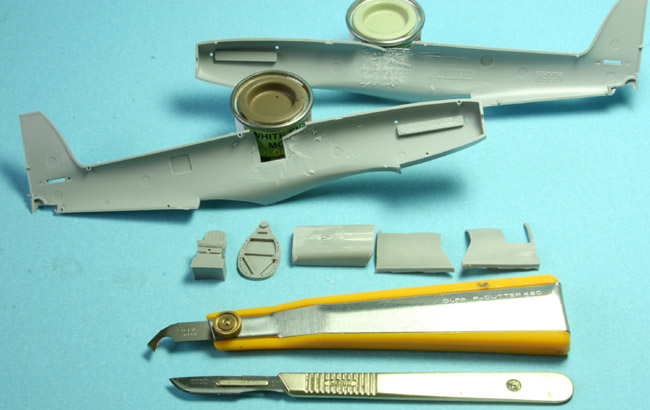
This is where I'm up to at the moment, I have removed casting over pours on parts, RP 9, 10, 11 and 17, started removing the one on RP 16 (the seat) and I have removed the detail from the fuselage halves.
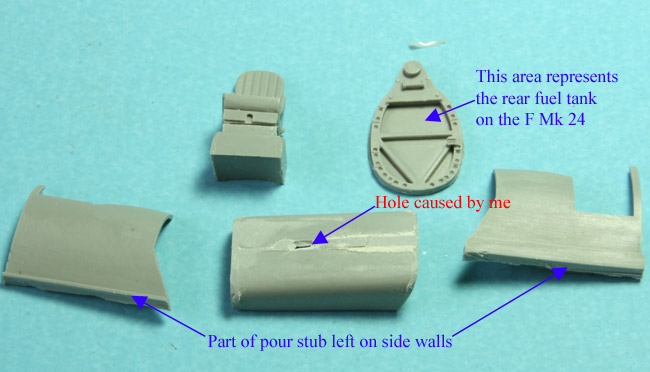
A closer look at the resin parts, you may notice that I have damaged part RP 17, the floor (more about this later. I can report that the resin appears relatively soft and is quite easy to work with.
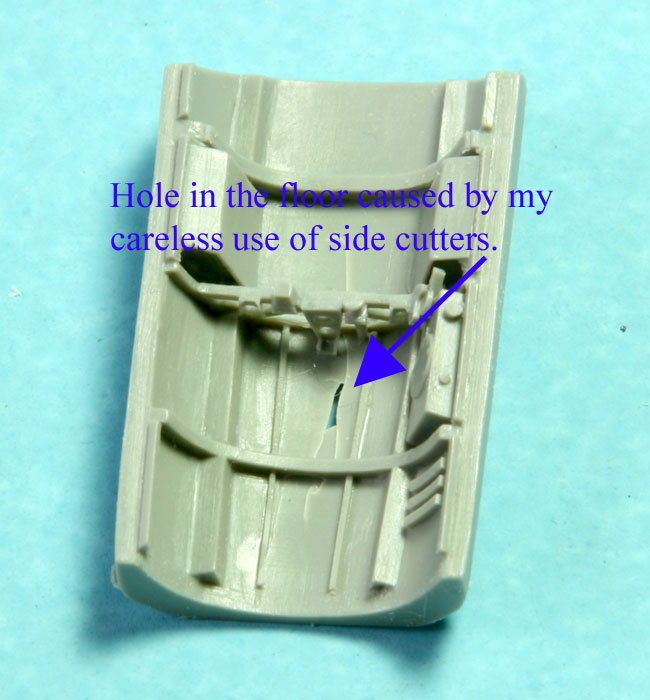
I used side cutters to remove the "H" shaped over pour on the floor, RP 17. I got a bit carried away and tried to take off too much at a time, Using side cutters should be fine if you take small "nibbles". Although I have cause a hole and cracking I will fill the hole and, after painting and instalation, you will never know, I hope. Be warned and simply take a little care.
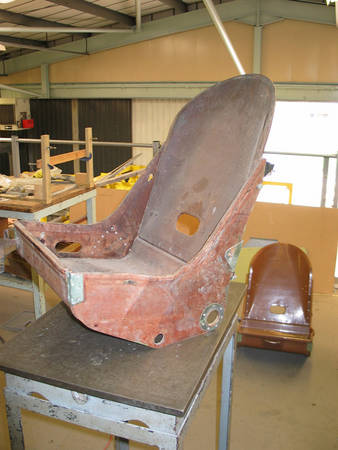
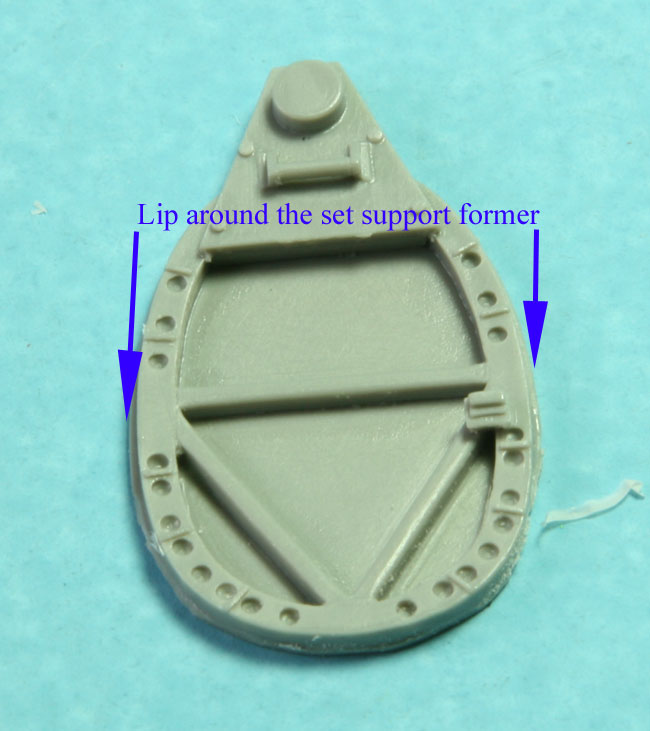
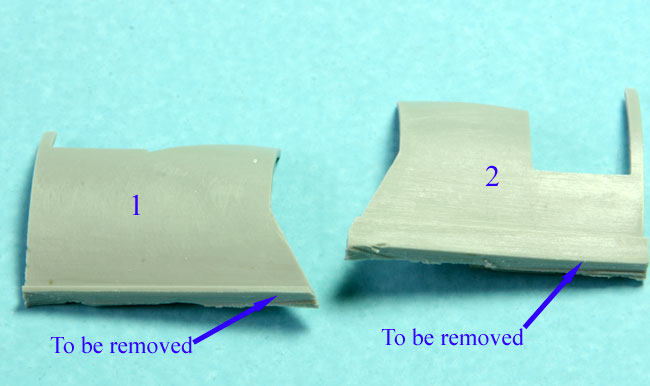
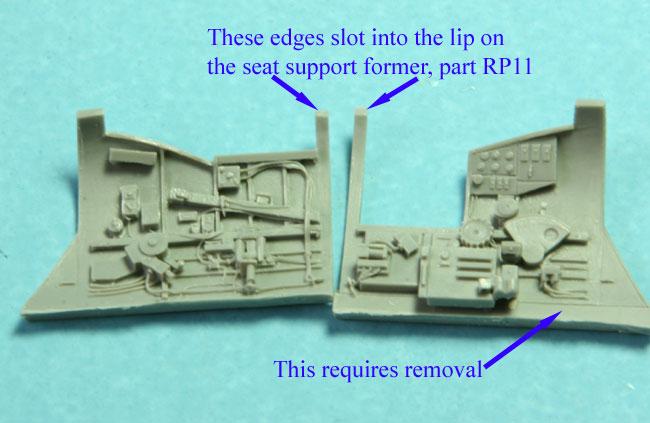
The word "Set" in this pic should read "seat". As it says, in the second pic, the filled in area represents the rear fuel tank in the F Mk 24 and it should be removed if you are building the F Mk22. You will see that there is a lip around the outside of this part, RP 11 which, after test fitting, accomodates the rear edges of the 2 cockpit side walls. For the time being I am using this lip as a gauge, to judge the depth of plastic to remove from each fuselage half. If you are building the F.22 you could do the same, then sand off the lip and the "fuel tank" before final fiting. It is not absolutely necessary to use this lip in this way (I guess) but the lip does position the side wall in correct relationship to part RP 11. It might also help in positioning, depending how much thickness of the side walls is removed.
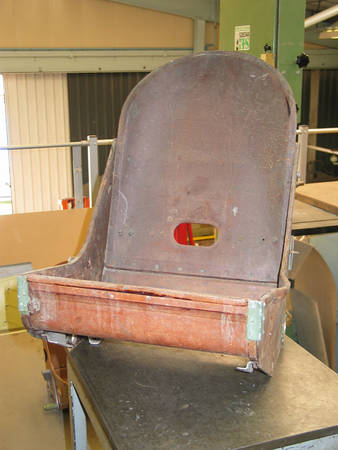
I removed the main part of the overpour, on the side walls by first cutting it in half, then scoring, with an "Olfa P cutter", from the back, then finally cutting through with a scalpel. This will still leave some to remove, in 1 it will simply be a case of repeating the scoring and cuuting from the front. But with 2, because of the protruding electrical box, see next pic, sandind is probably the way to go.
I think the captions say it all here.
Hope that you will join in
Mal