Hi there
The new forum is the perfect excuse to start a build-thread for the new 1/48 scale Butcher Bird!
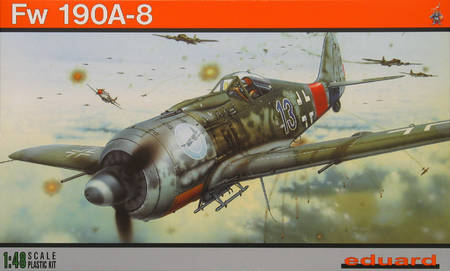
I should start with a quick word of explanation; Eduard very kindly sent Aeroscale one of only 20 pre-production test-shots. These are basically identical to the final kit, but you'll see a few minor differences through the course of the build:
1. There's a little extra flash on some of the sprues.
2. The painting masks are incomplete (and have no instructions).
3. The etched set has been pre-painted with the cockpit parts finished in RLM 02 instread of the correct RLM 66.
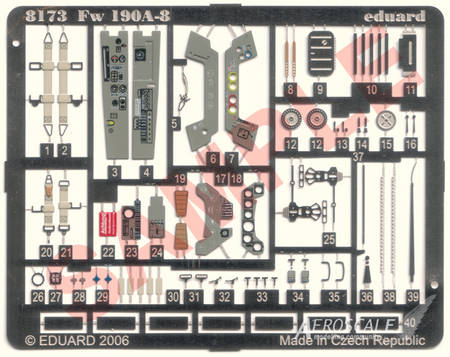
All these issues have addressed and corrected for the version on sale.
Check out Steffen's excellent build thread to see the finished model under construction.
Anyway, I've made a start with a basic test-fit of the major parts and, despite the kit's complexity, the fuselage and wings line up perfectly, with a very good fit at the wing roots:
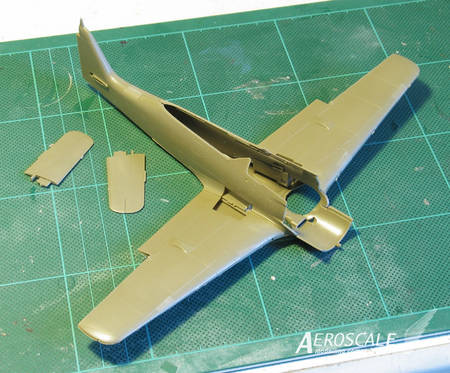
I've tinkered with a few sub-assemblies, but I'll be getting started properly this weekend, so more... much more... to follow.
All the best
Rowan
World War II
Discuss WWII and the era directly before and after the war from 1935-1949.
Hosted by Rowan Baylis
Online Build - Eduard's Focke-Wulf Fw 190A-8
Posted: Friday, October 06, 2006 - 02:14 PM UTC
Posted: Saturday, October 07, 2006 - 01:11 AM UTC
Hi Rowan!
I'l looking forward to see more!
Maybe the RLM 02 error isn't a bad thing. I would darken it with a wash of Future tinted with a very dark grey.
Do you plan to build this one "out of the box" or will you add some goodies like Steffen who plans to use aftermarket decals?
Jean-Luc
I'l looking forward to see more!
Maybe the RLM 02 error isn't a bad thing. I would darken it with a wash of Future tinted with a very dark grey.
Do you plan to build this one "out of the box" or will you add some goodies like Steffen who plans to use aftermarket decals?
Jean-Luc
Posted: Saturday, October 07, 2006 - 01:29 AM UTC
Hi Jean-Luc
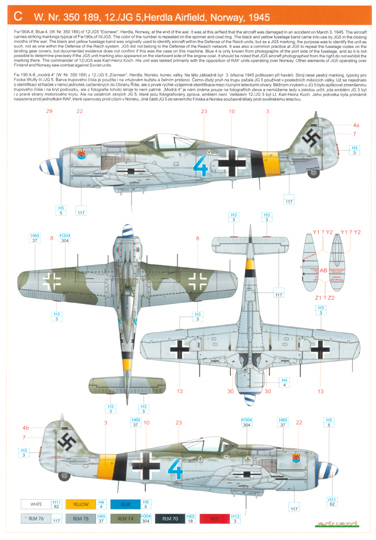
It'll be basically OOB - this is a Review-build. I'll certainly go with the kit decals - at the moment, I'm planning on this JG 5 scheme:
Eduard state that the badge may well have only been carried on one side of the cowl, but I don't have any reference photos for the a/c. It's shown as a profile in Squadron's Fw 190A/F Walkaround, but with upper-wing cannon-fairings. If anyone can help confirm the scheme and the fit-out, I'd very much appreciate it.
All the best
Rowan
Lucky13
Scotland, United Kingdom
Joined: June 01, 2006
KitMaker: 1,707 posts
AeroScale: 1,119 posts
Joined: June 01, 2006
KitMaker: 1,707 posts
AeroScale: 1,119 posts
Posted: Saturday, October 07, 2006 - 03:26 AM UTC
Posted: Saturday, October 07, 2006 - 03:59 AM UTC
Quoted Text
Is there a seat free for me Master Rowan?
Sure thing, Jan!
Just don't hog all the popcorn!
All the best
Rowan
Posted: Saturday, October 07, 2006 - 08:57 PM UTC
Hi again
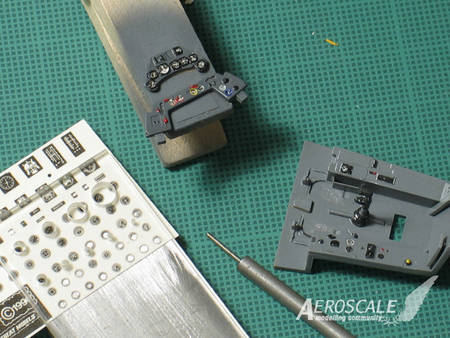
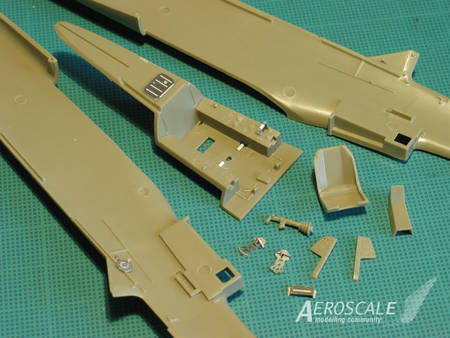
The forum-launch proved something of a distraction yesterday, so I've really only made a start this afternoon, cleaning up the cockpit parts and adding a few photo-etched details. I'll probably go with the injected side consoles, because they're very nicely detailed and will make for a good comparison with Steffen's use of the etched versions. I haven't decided what to do about the instrument panel, but the nice thing about the way the kit is designed is that I can put that off until later.
I'm straying away from my intention to build strictly OOB (don't all look so surprised! :-) and have added a throttle damper and control linkage (more to add there still) on the cockpit floor.
All the best
Rowan
FalkeEins
England - South East, United Kingdom
Joined: March 07, 2005
KitMaker: 868 posts
AeroScale: 690 posts
Joined: March 07, 2005
KitMaker: 868 posts
AeroScale: 690 posts
Posted: Saturday, October 07, 2006 - 11:15 PM UTC
Hi Rowan,
..I can only locate two rather indistinct photos - taken from from the port side - of a 'blue 4' belonging to 12./JG5 - these are on P.325 of the Focke Wulf 190 'bible', 'Jagdflugzeug 190' compiled by Peter Rodeike....while the props on these a/c have been removed the coloured cowl ring is easily identified..other photos of 12. Staffel machines show the emblem on the port cowl only ..and the upper wing covers are present..
BTW, this is not the same 'Blue 4' flown by 12./JG 5 ace Rudi Linz who was shot down and killed on 9 Feb 1945 - there are two partial views of Linz's 'Blue 4' in J-Y Lorant's 'Le FW 190' - one of which shows 55 rudder kill markings...
Lucky13
Scotland, United Kingdom
Joined: June 01, 2006
KitMaker: 1,707 posts
AeroScale: 1,119 posts
Joined: June 01, 2006
KitMaker: 1,707 posts
AeroScale: 1,119 posts
Posted: Saturday, October 07, 2006 - 11:22 PM UTC
Posted: Saturday, October 07, 2006 - 11:48 PM UTC
I have got to get myself one of these
Posted: Sunday, October 08, 2006 - 12:48 AM UTC
Quoted Text
Hi Rowan,
..I can only locate two rather indistinct photos - taken from from the port side - of a 'blue 4' belonging to 12./JG5 - these are on P.325 of the Focke Wulf 190 'bible', 'Jagdflugzeug 190' compiled by Peter Rodeike....while the props on these a/c have been removed the coloured cowl ring is easily identified..other photos of 12. Staffel machines show the emblem on the port cowl only ..and the upper wing covers are present..
BTW, this is not the same 'Blue 4' flown by 12./JG 5 ace Rudi Linz who was shot down and killed on 9 Feb 1945 - there are two partial views of Linz's 'Blue 4' in J-Y Lorant's 'Le FW 190' - one of which shows 55 rudder kill markings...
Many thanks Neil
That "bible" is, of course, the book I never bought! :-) Steffen's done a marvelous job sourcing it for me in Germany, because it doesn't seem to be available from Motorbooks or TAHS here.
Squadron's Walkaround has a profile of the 12./JG5 "Blue 4" and, just to confuse matters, colour photos of a restoration of Linz's a/c (now something of a hybrid, with A-3 components fitted).
Do the photos of the "Blue 4" in question show the wing covers. If not, I'll go with the configuration of the other a/c from the unit.
All the best
Rowan
Posted: Sunday, October 08, 2006 - 01:15 AM UTC
Hi Rowan
the machine on the pic is really small .. so there is not much to see ... sorry
cheers
Steffen
the machine on the pic is really small .. so there is not much to see ... sorry
cheers
Steffen
Posted: Sunday, October 08, 2006 - 01:29 AM UTC
Quoted Text
Hi Rowan
the machine on the pic is really small .. so there is not much to see ... sorry
cheers
Steffen
Hi Steffen
Oh no! Just what you don't want to read... What is it they say? - "The only thing worse than one reference is two - because they never agree!" :-)
Sooo - Eduard reckon on no wing covers, while Squadron show them. Meanwhile, some of the unit's other a/c definitely had them... what fun!
I suppose the next question is whether the underside any of the JG 5 a/c from this period is visible... You know what's coming... the dreaded "partially n/m" decision!
I've already made my mind up (not irrevocably!) to go with n/m wheelwells etc., in line with the late-war Focke-Wulf painting instructions, and I'll probably break things up a bit to indicate pre-painted sub-assemblies. It might not be (i.e. almost certainly isn't) 100% correct, but at some point you just have to go with an idea and live with the consequences. Modelling is all about learning - if only history at school was such fun...
All the best
Rowan
Posted: Sunday, October 08, 2006 - 01:39 AM UTC
Hi Rowan
I would not count on the squadron stuff especially not profiles ... you do not trust the osprey profiles, do you?(at least you should not for the Weal stuff !!) .... so why sqn
just my 2 ct
best wishes
Steffen
P.S. at least now you understand my dilemma
I would not count on the squadron stuff especially not profiles ... you do not trust the osprey profiles, do you?(at least you should not for the Weal stuff !!) .... so why sqn
just my 2 ct
best wishes
Steffen
P.S. at least now you understand my dilemma
Posted: Sunday, October 08, 2006 - 01:46 AM UTC
:-) :-) - after the I-16?...
Lucky13
Scotland, United Kingdom
Joined: June 01, 2006
KitMaker: 1,707 posts
AeroScale: 1,119 posts
Joined: June 01, 2006
KitMaker: 1,707 posts
AeroScale: 1,119 posts
Posted: Sunday, October 08, 2006 - 01:51 AM UTC
Thanks a lot fellows...... Now you've made me want to buy Fw 190's in all variants, when I should spend my money on tools and paints and stuff to get started....
I'm NOT a very happy bunny..... :-) :-) :-) :-)
Posted: Sunday, October 08, 2006 - 01:53 AM UTC
Quoted Text
:-) :-) - after the I-16?...
no ... to chose a good c&m for my Fw 190 that is well documented .. see the rather longish conversation with Neil in my build thread
cheers
Steffen
Posted: Sunday, October 08, 2006 - 02:02 AM UTC
Quoted Text
I have got to get myself one of these
Hi Nige - and Jan too
Yes, you have to! A totally shameless plug from someone lucky enough to get a freebie! How can I put it?... I'm going to go buy another one for my stash as soon as it's available in the UK! It's a great kit!
All the best
Rowan
Posted: Monday, October 09, 2006 - 04:24 AM UTC
Hi again
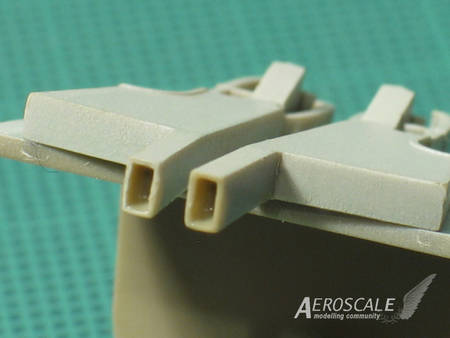
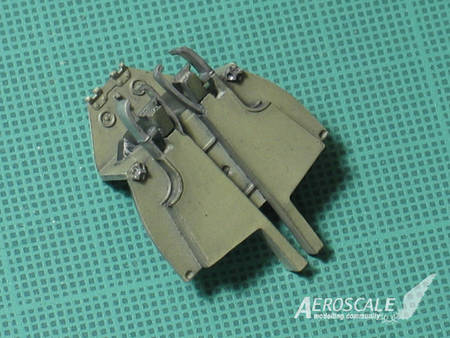
The tinkering continues. I've pretty much mirrored Steffen's build - looking at the fuselage guns set-up, I had to open up the ejector chutes (thanks for pointing that out Steffen - it's a "once you know it's there" job).
I'd better explain the "weird" colour! I sprayed everything with a lightened RLM 02 before I attached the ammunition boxes. The reason? The way I weather things, interiors have a habit of ending up too dark - so this is an experiment, and definitely not the finished look!
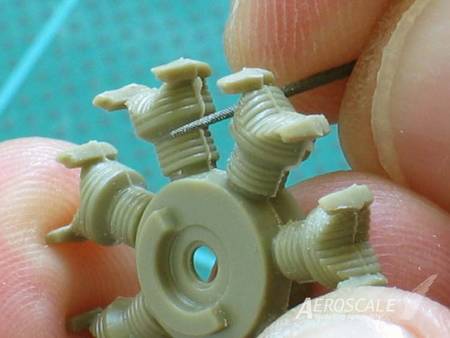
Looking elsewhere, I made a start on the engine. Probably because it's a test shot, there's a little flash to deal with:
Using my favourite Vallorbe fine needle file, I made a start - it's one of those pesky jobs we all face sometimes. The engine isn't really visible in a standard build of this kit, but I'll clean it up a bit anyway to show the fine basis Eduard have provided for superdetailers.
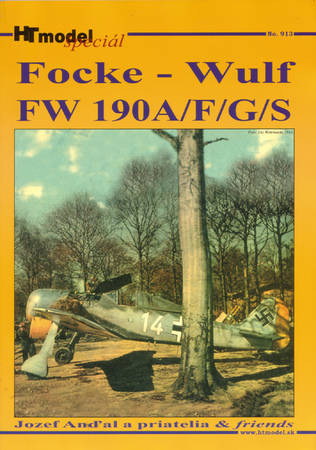
Meanwhile - dashing to Motor Books at lunchtime - I found a superb new Fw 190A reference that's only been available in the UK for a week or so:
It's an incredible book - 126 pages, with a combination of walkarounds and photos and illustrations from the original technical manuals. It's easily the most detailed book on the "guts" of the '190 I've found yet. UK price: £16.99
All the best
Rowan
Posted: Monday, October 09, 2006 - 01:14 PM UTC
Hi Rowan
nice progress! and I can confirm the flash you are removing on the engine is a fine line in my production kit .. thats why I left it as it was .... and you cant see anything of that once under the hood.
Addendum ... for some moments you mad me think I build in the ammo boxes too high .. i just checke and everything is well ... that would be hard to correct
Here is anothe hint for builders: HS Thread: wing root weapon bay I must say, that the restauration pic does not really convince me (yet) .. what kind of wing is the "original" ? FlugWerk? Which type? unfortunately I have not found a wartime pic yet.
cheers
Steffen
Posted: Monday, October 09, 2006 - 10:15 PM UTC
Quoted Text
Meanwhile - dashing to Motor Books at lunchtime - I found a superb new Fw 190A reference that's only been available in the UK for a week or so:
It's an incredible book - 126 pages, with a combination of walkarounds and photos and illustrations from the original technical manuals. It's easily the most detailed book on the "guts" of the '190 I've found yet. UK price: £16.99
All the best
Rowan
Seeing as Im in London for a few days I decided to check out this Motor Books that the wizard speaks of!
All I can say is what an incredible place!! I could have spent thousands!
Somehow,I managed to restrict myself to £35,,but theres still tomorrow to go yet!
The new FW190 book is a real find,and I just had to bag the last copy in the shop all for myself.All I need to do now is pick up the kit at Telford to go with it.
The whole area around the shop is right up Merlins strasse,,even the pub a couple of doors down from Motor Books is called the Round Table :-) :-)
Nige
Posted: Monday, November 06, 2006 - 02:40 AM UTC
Hi again
I finally managed to get back to the workbench yesterday afternoon - it was a bit of a struggle trying to remember where I'd got to...
With the test sample etched parts pre-painted incorrectly, I went back to the tried and tested method of Reheat generic instrument decals and a punch and die set... the results shouldn't look too bad and doing it the slow way, instrument by instrument, certainly is a reminder what a luxury etched panels (either pre-painted or with a film backing) are these days!
Everything's still looking very glossy and clean - plenty of brush-coated Klear/Future to seal the decals and as a bed ready for the next stage with some oil-paint weathering.
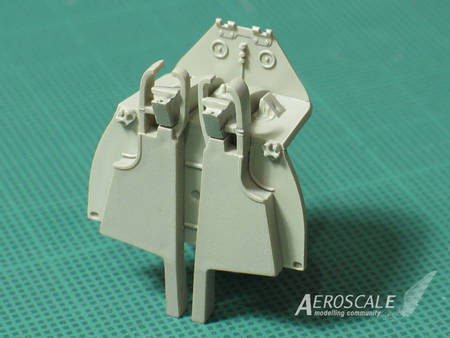
I don't normally do washes, preferring to use the oils "neat". I made a start on the firewall - it's darkened up somewhat since the earlier pic(!). There's more to do, with drybrushing, a matt coat and pastels, but you can see the direction things are going.
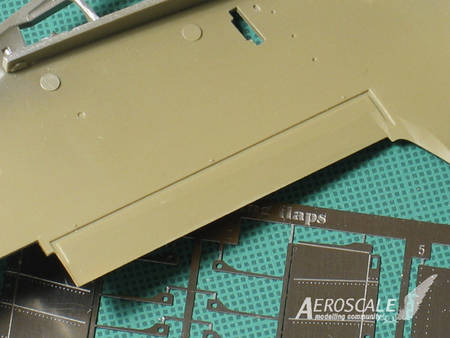
I was going to keep things pretty much OOB, but Eduard have kindly supplied a set of etched flaps designed for the kit. Now the reason for those engraved "cut lines" on the inner surface becomes clear.
It's the perfect excuse to give my Hold & Fold a proper outing, but I'll see how well I get on with the flaps before I risk slicing out the plastic items! Hopefully, now I'm back to modelling, it won't be quite so long before the next update...
All the best
Rowan
Posted: Monday, November 06, 2006 - 02:59 AM UTC
Hi owan
nice to see you back on track .... looking good so far!
I am building a Fw 190 too but not the A-8 (will post photos of your threat tomorrow in the appropriate thread) ..
I have seen the latest etched parts for the Fw 190 A-8 by Eduard and I am in fear ... better not start the flap thingie .. just have a look at the placard set or the tool box (talk about insanity) .. also the "normal" etched set includes a lot of interesting stuff ....
http://www.eduard.cz/info/photos/8173/#acc
That's why I decided to close the whole thing up and maybe (!) give my other kit the full dose of AM
i have found a proper c&m (I think) and should receive the decal sheet soon (fingers crossed) I intend to build Konrad Bauers red 3 "Kornjark" of JG 300 (EagleCals EC 89) ..
Now it is your turn ... hurry up so I can avoid your mistakes :-) :-) :-)
cheers
Steffen
Lucky13
Scotland, United Kingdom
Joined: June 01, 2006
KitMaker: 1,707 posts
AeroScale: 1,119 posts
Joined: June 01, 2006
KitMaker: 1,707 posts
AeroScale: 1,119 posts
Posted: Monday, November 06, 2006 - 03:00 AM UTC
Looking great O' Holder Of Steady Hand.....
DAMN! (sorry) I have to get the Eduard 190 I think.....
Posted: Monday, November 06, 2006 - 03:12 AM UTC
Quoted Text
I have seen the latest etched parts for the Fw 190 A-8 by Eduard and I am in fear
Hi Steffen
I was looking at the new engine set earlier... common sense tells me NOT to get it, or I'll never finish this build!
Looking forward to seeing your progress with the A-3.
All the best
Rowan