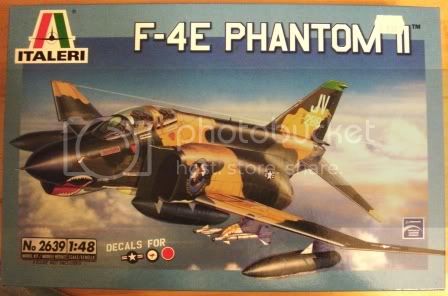
F-4E Phantom II for Vietnam campaign

#041
Kobenhavn, Denmark
Joined: July 20, 2006
KitMaker: 10,069 posts
AeroScale: 3,788 posts
Posted: Saturday, January 13, 2007 - 03:39 AM UTC
Hi everybody
Here is my tread on the building of my entry into the Vietnam campaign.
I am making the Italeri kit in 1/48 OOB. The only thing I will add is some bombs from Hasegawa's bomb set.
My main references are the old Squadron/Signal book on the subject and information from various other books and the internet.


Campaign'oholic - 252+ campaigns completed
#041
Kobenhavn, Denmark
Joined: July 20, 2006
KitMaker: 10,069 posts
AeroScale: 3,788 posts
Posted: Saturday, January 13, 2007 - 03:43 AM UTC
I have started on the cockpit and the missiles.
The seats have some pinmarks on the front of the headrest and sink holes in the seats. Not to difficult to remove.
The Sidewinders are moulded in one piece and look great once they are cleaned up.


Campaign'oholic - 252+ campaigns completed
betheyn
 Senior Editor
#019
England - South East, United Kingdom
Joined: October 14, 2004
KitMaker: 4,560 posts
AeroScale: 2,225 posts
Posted: Saturday, January 13, 2007 - 04:55 AM UTC
I shall be watching this with interest Jesper.
I will be keeping an eye out for any problems you have with the Italeri kit, as it is a lot cheaper then the Hasagawa F-4s.
I'll need to pick up the weapons set for my Sabre as well.
Andy

It's not the same, better, but not the same...
#041
Kobenhavn, Denmark
Joined: July 20, 2006
KitMaker: 10,069 posts
AeroScale: 3,788 posts
Posted: Saturday, January 13, 2007 - 02:37 PM UTC
Quoted Text
I'll need to pick up the weapons set for my Sabre as well.
Andy
The weapons set is great. I have used some of the bombs earlier on a F-16. Good details, easy to work with. Good information on the various ordnance anf good decals.
Campaign'oholic - 252+ campaigns completed
#041
Kobenhavn, Denmark
Joined: July 20, 2006
KitMaker: 10,069 posts
AeroScale: 3,788 posts
Posted: Saturday, January 13, 2007 - 05:51 PM UTC
Campaign'oholic - 252+ campaigns completed
#041
Kobenhavn, Denmark
Joined: July 20, 2006
KitMaker: 10,069 posts
AeroScale: 3,788 posts
Posted: Tuesday, January 16, 2007 - 01:03 PM UTC
Well, my build is moving along nicely except for the cockpit. This is only my fourth plane and my second jet fighter in years. There is a difference between painting tracks on tanks and modern cockpits :-) :-)
It is sort of okay, but I do not really know where to go from here. I could try some drybrushing to bring out the dials etc. Paint a few buttons etc. Anybody has some good suggestions?


Campaign'oholic - 252+ campaigns completed
England - South East, United Kingdom
Joined: June 27, 2006
KitMaker: 2,487 posts
AeroScale: 575 posts
Posted: Tuesday, January 16, 2007 - 03:07 PM UTC
Jesper
Try a bit of dry brushing - I'm building a Hasegawa Phantom - mine looks like this at the mo


Drybrushed the dials with white humbrol, switches etc with red and yellow.
It still needs the ejection seats finished and a wash to bring out details. I'll be posting further photos under the Aussie phantoms thread.
HTH
Andy
It's not the same, better, but not the same...
IPMS NO 10636
#041
Kobenhavn, Denmark
Joined: July 20, 2006
KitMaker: 10,069 posts
AeroScale: 3,788 posts
Posted: Tuesday, January 16, 2007 - 03:24 PM UTC
Hhmmm... The cockpits are actually quite different. Are you building an E version?
Anyway, I will try to bring out the detail with some drybrushing. Should my instrument faces be black? The instructions say light ghost grey.......If they are black it might be a little earsier to bring out the detail.
Campaign'oholic - 252+ campaigns completed
England - South East, United Kingdom
Joined: June 27, 2006
KitMaker: 2,487 posts
AeroScale: 575 posts
Posted: Tuesday, January 16, 2007 - 03:46 PM UTC
Jesper.
I've used this as a reference, so black it is

Yes it is an E version - I'm building it as an RAAF Phantom - the kit and RAAF decals were given to me by a mate in AUS, so thats how it's being built.
Hope this helps
Andy
It's not the same, better, but not the same...
IPMS NO 10636
#041
Kobenhavn, Denmark
Joined: July 20, 2006
KitMaker: 10,069 posts
AeroScale: 3,788 posts
Posted: Tuesday, January 16, 2007 - 06:28 PM UTC
Incredible that two companies that make the cockpits that different

Not only in the level of detail, but sinply the layout of the cockpit.
Thanks a lot for the reference picture. I will redo some of the parts of the cockpit.
Campaign'oholic - 252+ campaigns completed
England - South East, United Kingdom
Joined: June 27, 2006
KitMaker: 2,487 posts
AeroScale: 575 posts
Posted: Tuesday, January 16, 2007 - 06:39 PM UTC
Jesper
Have a look at
us cockpits - very useful photos
HTH
Andy
It's not the same, better, but not the same...
IPMS NO 10636
#041
Kobenhavn, Denmark
Joined: July 20, 2006
KitMaker: 10,069 posts
AeroScale: 3,788 posts
Posted: Wednesday, January 17, 2007 - 11:52 AM UTC
Quoted Text
Jesper
Have a look at us cockpits - very useful photos
HTH
Andy
Wow! Thanks for sharing. It is now added to favorites

Campaign'oholic - 252+ campaigns completed
#041
Kobenhavn, Denmark
Joined: July 20, 2006
KitMaker: 10,069 posts
AeroScale: 3,788 posts
Posted: Monday, January 22, 2007 - 12:27 AM UTC
I have made a little further progress on my build and it is now ready for a basecoat.
The landing gear and the underwing stores have had their first coat of white paint and a few details added. Next is the touching up were mould lines were missed the first time round and have been corrected. Finally some detail and weathering.
Thanks for looking


Campaign'oholic - 252+ campaigns completed
North Carolina, United States
Joined: November 28, 2005
KitMaker: 2,216 posts
AeroScale: 1,080 posts
Posted: Monday, January 22, 2007 - 08:34 AM UTC
Paint your dials black. When the paint is dry, add a tiny drop of Future...or Kleer on the dial with a toothpick. It actually looks like the glass face of a real dial when done properly. I picked up this little trick from a few other members here and have had great success.
hope this helps.

"Those who would give up Essential Liberty
to purchase a little Temporary Safety,
deserve neither Liberty nor Safety."
Benjamin Franklin
#041
Kobenhavn, Denmark
Joined: July 20, 2006
KitMaker: 10,069 posts
AeroScale: 3,788 posts
Posted: Monday, January 22, 2007 - 05:24 PM UTC
@VonCuda: Thanks for your advise. I will try that - when I have my bird painted up and after removing the masking
Campaign'oholic - 252+ campaigns completed
North Carolina, United States
Joined: December 17, 2006
KitMaker: 50 posts
AeroScale: 21 posts
Posted: Monday, January 22, 2007 - 06:18 PM UTC
I spent 4000 hours in the backseat of USAF F-4C/D/E and RF-4Cs. I don't recognize much in that kit "pit". I'm not sure what version your kit is using; maybe a G model, NWDS modified E model or Phoreign Phantoms? I didn't think the Foreign Military Sales aircraft were too different; heck, I even delivered a brand new F-4E to the Shah's IIAF back in 1975. it was identical to a USAF jet, even had the TISEO out on the left wing. The TIS was a long range visual id camera we had on late block models. It wasn't too popular for use and was just more drag on our Phlying barn doors.
The gauges were essentially black; the background panels were glossy medium gray when new, but the maintainers quickly took the shine off. The "kick" panels on the lower sides had black scuffs and the floors rapidly turned to bare metal.
Keep up the good work. I enjoy looking at well made models of my trusty,old "steed". Phantoms Phorever!
There are bold pilots, And there are old pilots,
There just aren't any old, bold pilots!
#041
Kobenhavn, Denmark
Joined: July 20, 2006
KitMaker: 10,069 posts
AeroScale: 3,788 posts
Posted: Wednesday, January 24, 2007 - 01:50 PM UTC
Very interesting to know. It is supposed to be a E version, but they cockpit does not really look like the Hasegawa cockpit or what I have seen in pictures of the cockpit.
Anyway, it is coming along nicely so far, but might take some time to finish as my airbrush needs a overhaul before it is functioning again.
Campaign'oholic - 252+ campaigns completed


