World War II
Discuss WWII and the era directly before and after the war from 1935-1949.
Hosted by Rowan Baylis
FEATURE
Finnish BuffaloPosted: Friday, January 19, 2007 - 09:03 PM UTC
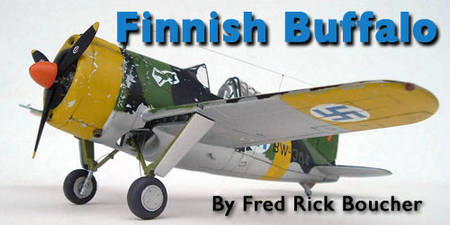
Fred Rick Boucher (JPTRR) is back with a complete build review of the Classic Airframes Brewster Typ 239 Buffalo kit. Fred applied some of his spectacular salt weathering techniques on this model.
Link to Item
If you have comments or questions please post them here.
Thanks!
Posted: Friday, January 19, 2007 - 09:32 PM UTC
Nice one Fred!
I'll definitely read your detailed construction notes when I tackle this little beast myself! It might have been your first short-run kit, but the result is a beauty!
Jean-Luc - Great job (as ever!) editing the photos.
All the best
Rowan
I'll definitely read your detailed construction notes when I tackle this little beast myself! It might have been your first short-run kit, but the result is a beauty!
Jean-Luc - Great job (as ever!) editing the photos.
All the best
Rowan
Lucky13
Scotland, United Kingdom
Joined: June 01, 2006
KitMaker: 1,707 posts
AeroScale: 1,119 posts
Joined: June 01, 2006
KitMaker: 1,707 posts
AeroScale: 1,119 posts
Posted: Friday, January 19, 2007 - 09:40 PM UTC
I second what the above gentleman said!
Posted: Saturday, January 20, 2007 - 03:29 AM UTC
Quoted Text
Jean-Luc - Great job (as ever!) editing the photos.
Indeed! I deluged him with a plethora of pictures and he melding them together wonderfully!
I invite all of you who have built this kit to add your comments concerning your builds, if you experienced the same troubles that I did. Together, we can advise future modelers of this kit as to whether my problems were due to the kit, or due to me!
BTW, some extra photos can be seen on this page of the FUMS-Build forum:
https://aeroscale.kitmaker.net/forums/80786&page=6
trahe
Virginia, United States
Joined: April 03, 2006
KitMaker: 1,158 posts
AeroScale: 73 posts
Joined: April 03, 2006
KitMaker: 1,158 posts
AeroScale: 73 posts
Posted: Saturday, January 20, 2007 - 04:02 AM UTC
Looks good. I like the salt weathering.
slodder
North Carolina, United States
Joined: February 22, 2002
KitMaker: 11,718 posts
AeroScale: 305 posts
Joined: February 22, 2002
KitMaker: 11,718 posts
AeroScale: 305 posts
Posted: Saturday, January 20, 2007 - 04:27 PM UTC
Another great addition to Aeroscale. This will come in handy when I break my kit off the shelf. Thanks
Posted: Saturday, January 20, 2007 - 04:37 PM UTC
Quoted Text
BTW, some extra photos can be seen on this page of the FUMS-Build forum
Hi Fred!
talking about FUMS, do you have a list of the completed entries for that Campaign? I would like to make a Portfolio dedicated to the Finnish War. Maybe you or Eetu could write a nice historical background to go with the pictures?
Jean-Luc
VonCuda
North Carolina, United States
Joined: November 28, 2005
KitMaker: 2,216 posts
AeroScale: 1,080 posts
Joined: November 28, 2005
KitMaker: 2,216 posts
AeroScale: 1,080 posts
Posted: Sunday, January 21, 2007 - 01:15 AM UTC
Having "attempted" to build this kit, it would have been a much easier process if I'd had Freds review before hand.
As for the review, everything is spot on in my opinion. I ended up building the Tamiya Buffalo because of time constraints on the FUMS campaign and supplementing parts of the CA kit such as engine cowling, rear fuselage tail assembly, etc. My two main complaints with the CA Buffalo kit are:
1. The plastic is beautiful but seems very "soft" or almost "rubbery". Experience building Tamiya, Academy, and Hasegawa kits has left me with a sense of just how much to cut, how hard to sand, and how much the plastic will "bend". The CA Buffalo kit is totally different to me. I found that when triming parts I often took off a bit too much because my hobby knife wanted to "dig" into the plastic more than usual. Is it just me or has anyone else ever experienced thie?
2. The directions leave the builder guessing at many stages. Drawings are often incomplete and it seems in a few steps the directions leave out crutial information on how to correctly install parts.
That said, I would not hesitate to build another CA Buffalo kit in the future. Now that I have a good review to guid me ( FRED ) I am not as intimidated by the process. Overall the kit is well done and given time and patience it will produce a beautiful result. As for CA kits in general, well I am ready to start another CA kit this week, the F5A Freedom Fighter in 1/48 scale.
Posted: Sunday, January 21, 2007 - 04:14 AM UTC
Hi gang
i still have not read Freds article ... he knows why. But as he asked me, here is my experience:
First let me state that this is one of the better CA kits ... one of the most overrated manufacturers IMO (if I see for what other manufacturers get bashed and smashed .... but I digress)
The kit is in the typical Special Hobby - CA Quality and looks good in the box (the kits done by Sword have a much harder and shinier plastic e.g. the F-5 or Bf 109 A). The wing(s) go together well and even the resin parts fit quite well. I added the Griffon ailerons but left out the landing flaps.
I built the cockpit-engine assembly into the right fuselage half (and arranged myself some tricky assembly for the rh side cockpit wall, which I should have mounted first). Then I glued the wing to the rh fuselage and made some adjustments to make it fit (the left fuselage side was also dryfit in this stage) Then I painted the interior and mountet the rest of the cockpit stuff.
Closing the fuselage was a bit tricky and I had to sand the engine bulkhead and the rear bulkhead several times to make all fit to a bearable degree. Still the whole assembly needed some pressure to minimize further filling and sanding. I matched all lines but kept a 1mm gap where the left wing meets the fuselage. I am sure this was because I was a bit sloppy when glueing the right fuselage. I used "Pattex Stabilit Express" a fast curing 2k Epoxi to glue everything together.
Now I removed the fin and replaced it with the Griffon parts. Then I added the tail end of the kit and the elevators from the Griffon set. Now some filling and sanding was required, but it was not very extensive as I did a good job aligning everything (though I had to reglue the u/c legs as they were off). I added some cockpit parts and attached the canopy (I was in a hurry as i wanted to get the thing done ... so I bet there are some smears and dust inside.
I masked the canopy with Bare Metal foil and the whole thing was primed with Citadel Black primer (first class product BTW). then I sprayed half a bottle Alclad alu on and sealed it with clear .... that is where I am now, but I do not expect many problems to come.
pix when it is done
best wishes
Steffen
Posted: Sunday, January 21, 2007 - 04:54 PM UTC
Addendum
cheers
Steffen
cheers
Steffen
Clanky44
Ontario, Canada
Joined: September 15, 2005
KitMaker: 1,901 posts
AeroScale: 133 posts
Joined: September 15, 2005
KitMaker: 1,901 posts
AeroScale: 133 posts
Posted: Wednesday, January 24, 2007 - 09:49 AM UTC
Great article Fred,
My experience building the CA Buffalo mirror yours, if there is one piece of advice which Classic Airframes gives over and over and over is to dry fit the assemblies prior to gluing... this is for obvious reasons. Overall, a good little kit.
Frank
My experience building the CA Buffalo mirror yours, if there is one piece of advice which Classic Airframes gives over and over and over is to dry fit the assemblies prior to gluing... this is for obvious reasons. Overall, a good little kit.
Frank