_GOTOBOTTOM
World War II: Germany
Aircraft of Germany in WWII.
Hosted by Rowan Baylis
Focke Wulf Fw-190 D9
Emeritus
_VISITCOMMUNITY
Uusimaa, Finland
Joined: March 30, 2004
KitMaker: 2,845 posts
AeroScale: 1,564 posts
Posted: Saturday, February 17, 2007 - 12:24 AM UTC
Here's my latest project, a late-war Fw-190 D9 in 1:48 scale, built from the trimaster kit. Since trimaster-originating Focke wulfs are ok for the Dragon mustang challenge, I'm having the intention of finishing this in time for the competion.
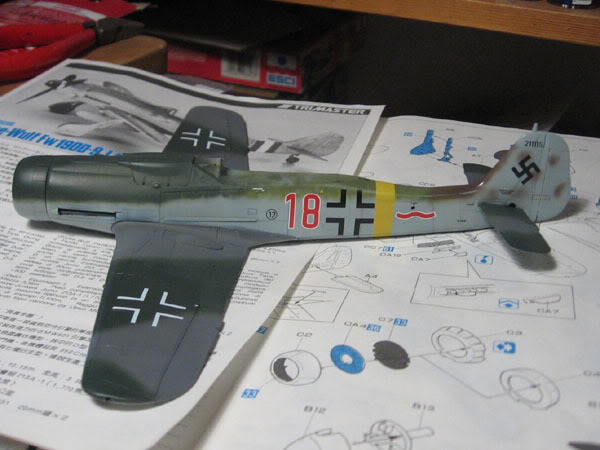
I started working on the kit on Saturday the 3rd. Here's some in-progress pics.


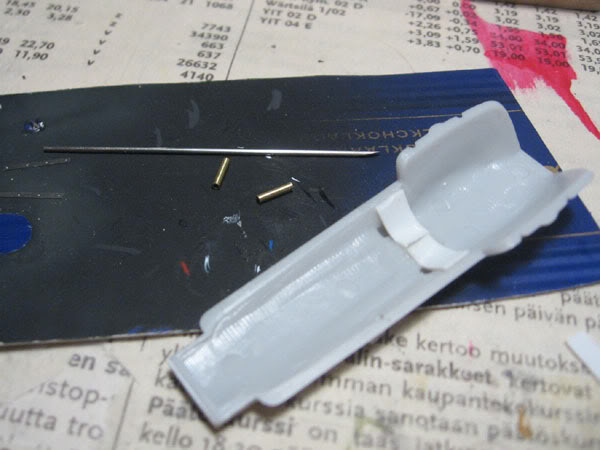
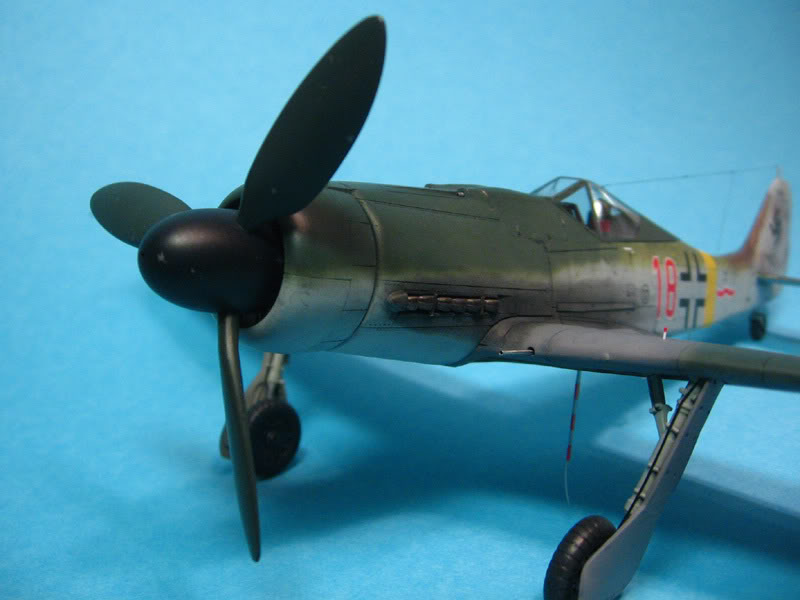
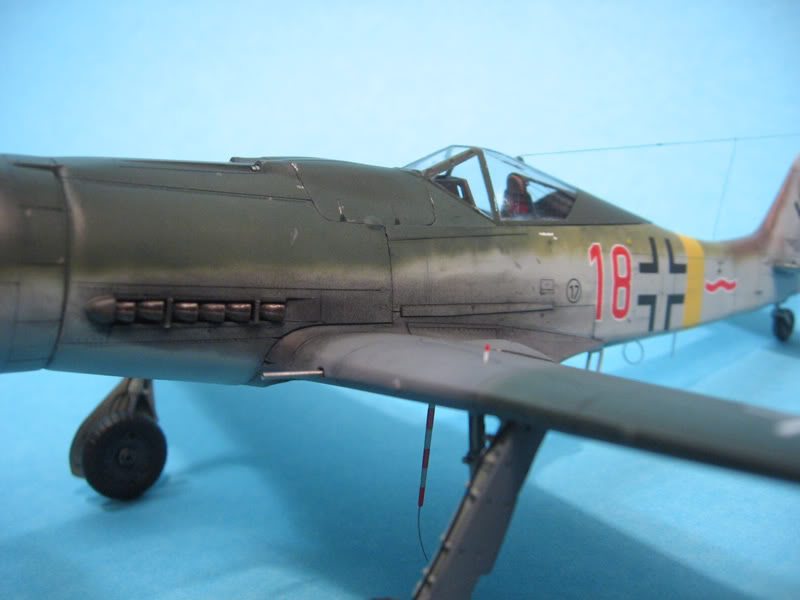
To make it possible to attach the cowl mg's after painting, I glued pieces of styrene sheet inside the upper cowling to form a shelf for the parts. The kit included copper tubing for mg's and cannon barrels but I'm replacing all of them with brass tubing and hypodermic needles. Brass tubing and needles make nicer mg's than just one piece of tubing and the needles I'm using are more in-scale than the thickish copper tubing supplied in the kit (they would look good for 30mm barrels, though). The harder material is also a bonus.


Here the fuselage halves have been glued together and the supercharger intake is held in place with a clothes peg. The only after-market parts I added were PE seatbelts from eduard. Only the lap belts have been glued in at this point, as the shoulder belts attach to the PE parts glued behind cockpit. (The later dragon-issued version has belts included in the PE fret, but no pilot figure like this kit). Visible in pic are the styrene shims I added to the wings and a spreader made from sprue glued inside the fuselage to get rid of the seams that would otherwise occur. I chose this method since the upper-wing to fuselage seam is not the most robust one in the world, the upper-wings are quite thin.


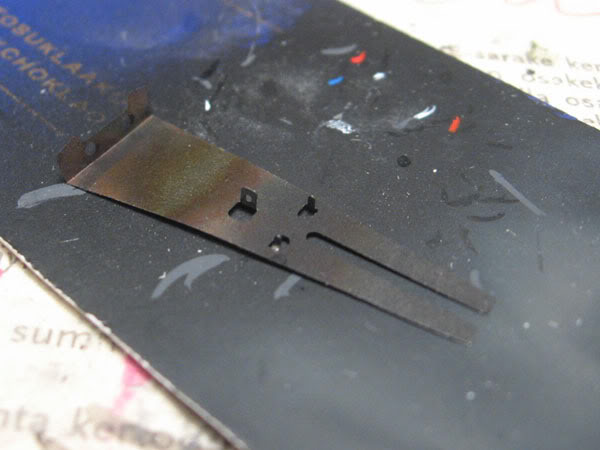
This is the PE "shelf" that goes behind the cockpit and where the antenna wire attaches. The part has been annealed with a lighter to make bending easier. I wished they made the parts from brass, as steel is not the most user-friendly material, especially with smaller parts. But robust it is, that's for sure. (The kit included two frets, one of "regular", and one thicker. The latter required side cutters and force to cut through the fret.)


The main landing gear legs, as well as anti-sway braces for the bomb rack and exhausts are white metal castings in this kits (re-produced in plastic by later issuers of the kit). The good thing about these is that you don't need to paint the oleo struts. I polished them by rubbing them with the side of a needle, then brushed on two coats of future to protect the shiny surface against possible oxidation.


The propeller blades were separate with no pins or other means to attach them to spinner at the same angle. Eduard's Fw-190 A8 has the same wider bladed props that go unused, and are a single piece, so I used them. The only modification needed was to cut away a pin in the middle of the trimaster spinner base plate. The new prop was a drop-fit to the spinner.


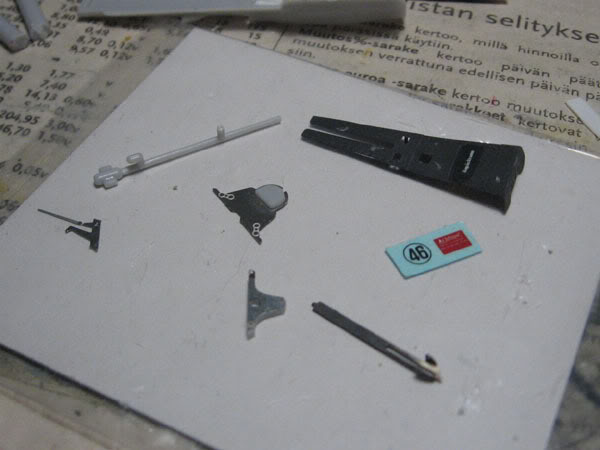
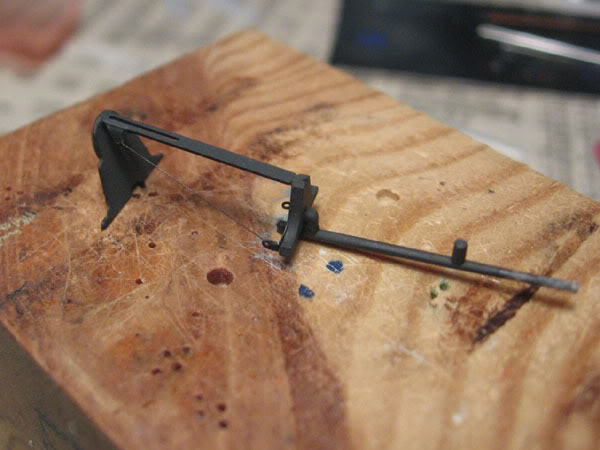
This part was the one I didn't like that much. The brace that goes inside the canopy. Not only does it have several parts that need to be glued to each other at an angle, they are photo-etched, requiring super glue. Taking measures from the canopy, attaching the partially completed brace to a piece of cardboard and marking the place of the front plate I was able to get the angle right. Dryfitting the completed assembly inside the canopy while the glue dried ensured the finished part would actually fit.
After struggling with bending a thick and narrow PE part made of steel, and getting this fixed to 2 other PE parts at a certain angle, painting, addind a warning text decal and attaching a support wire was a breeze.


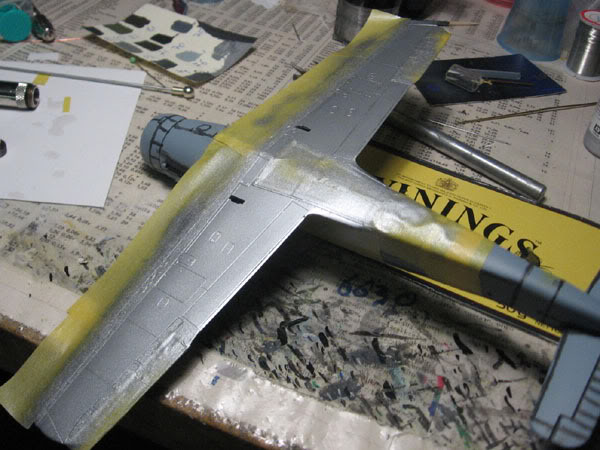
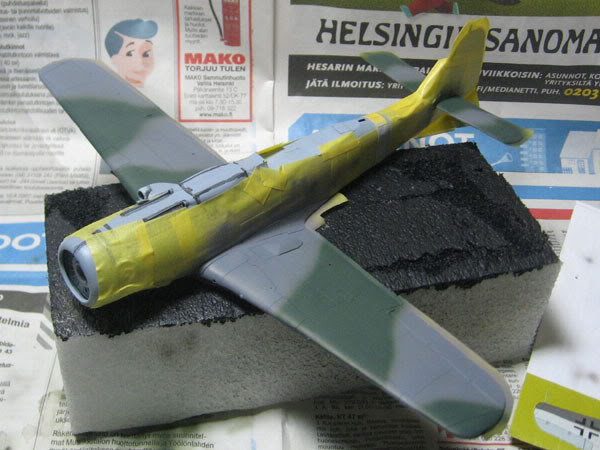
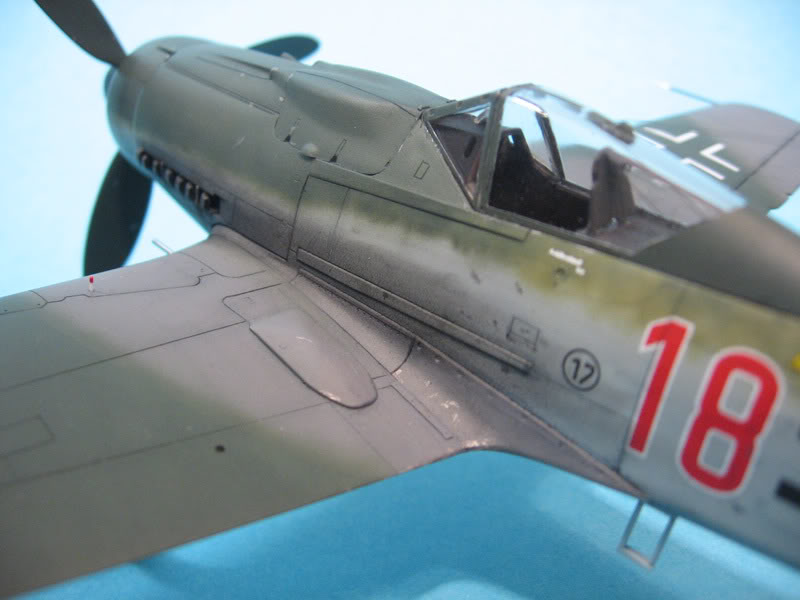
The airframe is here masked and ready for priming. Since the canopy is going to be overall RLM 83 and fits very well, I decided to paint it separately. It also made it easier to mask the cockpit opening.


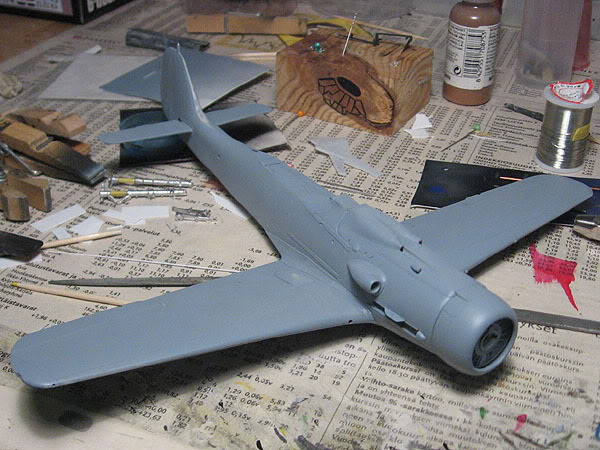
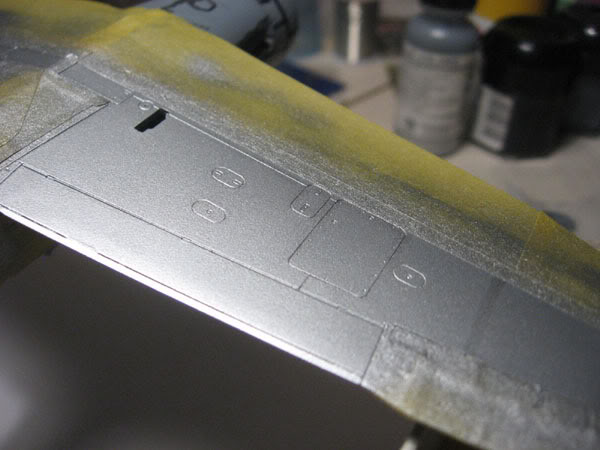
There, it's primed and ready for painting.
TedMamere
_VISITCOMMUNITY
Moselle, France
Joined: May 15, 2005
KitMaker: 5,653 posts
AeroScale: 4,347 posts
Posted: Saturday, February 17, 2007 - 12:09 PM UTC
Hi Eetu!

Looks fantastic so far! I hope you will make it before the end of the month! But I'm very confident

Remember though that you don't have to actually build a new model for the Mustang Challenge contest. You can also enter an already finished one. You can also enter up to three models for the competition.

Jean-Luc
csch
_VISITCOMMUNITY
Buenos Aires, Argentina
Joined: December 27, 2002
KitMaker: 1,941 posts
AeroScale: 1,040 posts
Posted: Sunday, February 18, 2007 - 06:27 PM UTC
Looking good so far Eetu. Keep on posting pics
Emeritus
_VISITCOMMUNITY
Uusimaa, Finland
Joined: March 30, 2004
KitMaker: 2,845 posts
AeroScale: 1,564 posts
Posted: Monday, February 19, 2007 - 12:46 AM UTC

Quoted Text

Keep on posting pics


Here comes. I just sprayed the wing undersides with aluminium from vallejo's model air paint range.


I think it came out pretty nice. What do you think?
Next I'll spray a coat or two of future over that to prevent masking tape from damaging the surface. Then it's time for RLM 76.
csch
_VISITCOMMUNITY
Buenos Aires, Argentina
Joined: December 27, 2002
KitMaker: 1,941 posts
AeroScale: 1,040 posts
Posted: Monday, February 19, 2007 - 03:07 AM UTC
Hi Eetu:

It´s coming out very nice. Does the D9 have aluminium colour in the undersurfaces ?
Emeritus
_VISITCOMMUNITY
Uusimaa, Finland
Joined: March 30, 2004
KitMaker: 2,845 posts
AeroScale: 1,564 posts
Posted: Monday, February 19, 2007 - 03:12 PM UTC

Quoted Text

Hi Eetu:

It´s coming out very nice. Does the D9 have aluminium colour in the undersurfaces ?


Thanks.
D9's were usually all painted, but this one I'm building is from the very end of the war, where many planes were rushed into service incompletely painted. This one has the wings' undersides (minus ailerons) natural metal, with the front third painted RLM 75.
SGTJKJ
#041
_VISITCOMMUNITY
Kobenhavn, Denmark
Joined: July 20, 2006
KitMaker: 10,069 posts
AeroScale: 3,788 posts
Posted: Monday, February 19, 2007 - 03:42 PM UTC
Looks great so far.

Very interesting colour scheme you have choosen for this bird. There was a lot of strange mix match colour schemes in the last months of the war.

However, I thought the FW 190s were always a cream-pinkish colour under the camouflage paint? I have seen some FW 190s with only the upper parts of the fuselage painted and the sides are this cream-pinkish colour. However, I do not know about the undersides of the wings. But maybe that colour is only on the fuselage and not on the wings?

Thanks for sharing your work
csch
_VISITCOMMUNITY
Buenos Aires, Argentina
Joined: December 27, 2002
KitMaker: 1,941 posts
AeroScale: 1,040 posts
Posted: Monday, February 19, 2007 - 07:12 PM UTC
Hi Eetu:

What did you use to preshade the panel lines ? Airbrush or marker ? They´re very thin.
Emeritus
_VISITCOMMUNITY
Uusimaa, Finland
Joined: March 30, 2004
KitMaker: 2,845 posts
AeroScale: 1,564 posts
Posted: Monday, February 19, 2007 - 07:47 PM UTC

Quoted Text

Hi Eetu:

What did you use to preshade the panel lines ? Airbrush or marker ? They´re very thin.


I used thinned acrylic paint and a regular paintbrush. I guess the effect would be better when airbrushed, but my skills are not yet at that level where I could spray just the panel lines.
Emeritus
_VISITCOMMUNITY
Uusimaa, Finland
Joined: March 30, 2004
KitMaker: 2,845 posts
AeroScale: 1,564 posts
Posted: Tuesday, February 20, 2007 - 06:08 PM UTC
Some more progress...


Note to self: grow an extra pair of arms, and get better lighting over my airbrushing desk.

The edges of the green areas didn't come out sharp enough, and are not accurate anymore, thanks to me not using masks.
You must know the phenomenon. You make a little mistake, and cover it up, going over the lines a little bit. Doing this, you make another little mistake, and cover that up too... Results can be seen in the pic above...
And because of my lack of hands (got only two! ), and without proper means of mounting the model securely for painting, my accuracy and stability isn't that great.
Now I have to mask the green patterns and re-spray the edges of the grey areas. Not a big deal, although I could be now painting the greens on the fuselage. I have to be careful not to ruin the preshading on the RLM 75.
Emeritus
_VISITCOMMUNITY
Uusimaa, Finland
Joined: March 30, 2004
KitMaker: 2,845 posts
AeroScale: 1,564 posts
Posted: Wednesday, February 21, 2007 - 08:54 PM UTC
I shouln't have tried to fix that camo in the first place...
So, I bit the bullet and masked the green areas and tried to make the grey areas more like the picture. They came out more accurate, but with hard edges, which looked quite odd. There I was, spraying green along the edges to get a feathered edge again. Back to square one...

Anyway, I got the camo painted. Next I'll brush on a coat or two of future to prepare the surface for the decals.

SGTJKJ
#041
_VISITCOMMUNITY
Kobenhavn, Denmark
Joined: July 20, 2006
KitMaker: 10,069 posts
AeroScale: 3,788 posts
Posted: Thursday, February 22, 2007 - 01:41 PM UTC
Know what you mean. Anyway, I think your Dora looks pretty good now. I would be satisfied if I were you.

Looking forward to see more.
Emeritus
_VISITCOMMUNITY
Uusimaa, Finland
Joined: March 30, 2004
KitMaker: 2,845 posts
AeroScale: 1,564 posts
Posted: Thursday, February 22, 2007 - 05:06 PM UTC

Quoted Text

Know what you mean. Anyway, I think your Dora looks pretty good now. I would be satisfied if I were you.


I am. I just feel kind of stupid wasting my time trying to correct the minor errors in the camo pattern only to end up re-spraying the edges resulting in pretty much where I started...


Quoted Text

Looking forward to see more.


Coming soon. I'm now applying decals. Left side of the fuselage almost done. These Aviprint decals are awesome! (the same stuff as with Eduard kits, or so I've heard) The only gripe I have is about the swastikas being in two pieces, and are meant to overlap a bit (probably to ensure they line up correctly without the need to touch up with black paint).
Well, I thought I could just grab a pair from the microscale swastika sheet. But no, it appears that just this size I'm needing is not there. Or is, but with white borders. Looks like the white-bordered 430mm swastikas match the aviprint ones, but the blacks lacking the white, making them a little smaller. On the other hand, there's these black swastikas on white circles (meant for the red-ruddered aircraft), which match in size, but I don't quite feel like cutting them from the white backgroud.
I guess I'll just have to make a choice between struggling with the two-piece markings, or use a little too big or small swastikas instead.
Emeritus
_VISITCOMMUNITY
Uusimaa, Finland
Joined: March 30, 2004
KitMaker: 2,845 posts
AeroScale: 1,564 posts
Posted: Friday, February 23, 2007 - 04:20 PM UTC
I chose to use microscale swastikas instead of trying to wrestle the two pieces together at the correct angle. Decaling done.
TedMamere
_VISITCOMMUNITY
Moselle, France
Joined: May 15, 2005
KitMaker: 5,653 posts
AeroScale: 4,347 posts
Posted: Friday, February 23, 2007 - 05:10 PM UTC
Hi Eetu!

Looks very good so far! I always like when the decals are applied to a model because it gets it's "personality" that way...

Only five days left for the Mustang Challenge...

Jean-Luc
Emeritus
_VISITCOMMUNITY
Uusimaa, Finland
Joined: March 30, 2004
KitMaker: 2,845 posts
AeroScale: 1,564 posts
Posted: Friday, February 23, 2007 - 05:39 PM UTC

Quoted Text


Only five days left for the Mustang Challenge...


I know...
But I'm pretty sure I can pull this off. What's left to do now is now some weathering (paint chips, some pastel dust and exhaust & gun powder stains), attaching small detail parts and final assembly.
Emeritus
_VISITCOMMUNITY
Uusimaa, Finland
Joined: March 30, 2004
KitMaker: 2,845 posts
AeroScale: 1,564 posts
Posted: Monday, February 26, 2007 - 08:27 PM UTC
My Focke Wulf's progressing nicely. I should get this done on time.

The polished oleo struts on the langing gear are now unmasked. They turned out really nice, IMO. The propeller & spinner assembly had to be varnished twice. When I was varnishing airframe and other components, the props didn't like the stuff. The clear coat developed a white fog on the spinner and at the roots of the props. I have no idead why. The paint on it had several days to dry (since there was no decals, no future was applied either). And none of the other components behaved this way. A coat of future got rid of the fog. I re-sprayed more carefully to avoid flooding with too much future. But still I got a little bit of fogging. Fortunately so little that I'll think about it later what to with it (if nothing at all).


The canopy is glued in place and held with rubber bands and a clothes peg under the fuselage to add tension to the bands.
The airframe is practically finished now. The only painting left to do is to blend in the two strips of styrene between the exhaust pipes (I replaced the PE frame with styrene strip, adding the "brigdes" after glueing in the exhausts). For the weathering, I painted chips with metallics and used ground pastels for accenting panel lines and making the exhaust stains. I prefer this pastel wash tecnique over regular thinned paint washes because the effect is much easier and forgiving to control. I first apply the dust with a dry brush to panel lines and other recessed details, then go over them with moistened cotton swabs to get remove excess dust and to also spread a thin dirty wash lightly over the whole airframe, subtly toning down colors. After this, I applied a flat varnish over the whole model, added the exhaust stains with dry pastel dust only, and sealed that with another light coat of varnish.

Next I'll tackle the landing gear, fix the antenna wire to the fin (note that the other end is already attached to the fuselage and goes through the canopy), and glue on other small parts like the pitot tube and landing gear indicators to the wings.
Lucky13
_VISITCOMMUNITY
Scotland, United Kingdom
Joined: June 01, 2006
KitMaker: 1,707 posts
AeroScale: 1,119 posts
Posted: Monday, February 26, 2007 - 09:48 PM UTC
Looking goooooood Eetu!
TedMamere
_VISITCOMMUNITY
Moselle, France
Joined: May 15, 2005
KitMaker: 5,653 posts
AeroScale: 4,347 posts
Posted: Tuesday, February 27, 2007 - 12:43 AM UTC
Hi Eetu!

definitely a contender for the Challenge!

Jean-Luc
Emeritus
_VISITCOMMUNITY
Uusimaa, Finland
Joined: March 30, 2004
KitMaker: 2,845 posts
AeroScale: 1,564 posts
Posted: Wednesday, February 28, 2007 - 01:10 AM UTC
Done!
I made it. I finished the kit in time.
I think the outcome is pretty neat. I especially like the pastels which I used to make the exhaust and gun powder stains.
The landing gear was the trickiest part of the kit, requiring both trimming and gluing with epoxy because the fit was quite loose. Of course the landing gear doors popped off when I positioned the legs, but glueing them back was a breeze. Fortunately aligning the gear was made a little easier by the drag links (which themshelves required filing and bending to connect to the u/c legs correctly and set the gear at the correct angle), which I glued to the wheel wells with CA, but left the hole-and-pin joint between the link and gear leg loose to allowe the legs to be aligned while the epoxy hardened. After the epoxy hardened, I applied CA to the aforementioned joint left loose.
The final touches were the antenna wire, landing gear indicators made from stretched white sprue with tips painted red, wing-root cannon barrels, pitot tube and three antennas to the underside.

Here it is. 25 days of work. I hope you like the results.


Comments, opinions and critique are extremely welcome as always.
Percheron
_VISITCOMMUNITY
Washington, United States
Joined: September 23, 2006
KitMaker: 432 posts
AeroScale: 360 posts
Posted: Wednesday, February 28, 2007 - 02:28 AM UTC
Absolutely stunning.
TedMamere
_VISITCOMMUNITY
Moselle, France
Joined: May 15, 2005
KitMaker: 5,653 posts
AeroScale: 4,347 posts
Posted: Wednesday, February 28, 2007 - 03:05 AM UTC
Hi Eetu!

Fantastic work! Congratulations!

Jean-Luc
VonCuda
_VISITCOMMUNITY
North Carolina, United States
Joined: November 28, 2005
KitMaker: 2,216 posts
AeroScale: 1,080 posts
Posted: Wednesday, February 28, 2007 - 05:54 AM UTC
I'm glad I didn't enter the Dragon Challenge. No way could I compete with this! Nice work on your Dora Eetu. She's a real beauty and your hard work and attention to details has really paid off. Congradulations!
lampie
#029
_VISITCOMMUNITY
England - East Midlands, United Kingdom
Joined: December 23, 2005
KitMaker: 6,249 posts
AeroScale: 3,270 posts
Posted: Wednesday, February 28, 2007 - 11:41 PM UTC
Hi Eetu
A real beauty! Great job.
Good luck with the Dragon Challenge!
Nige
SGTJKJ
#041
_VISITCOMMUNITY
Kobenhavn, Denmark
Joined: July 20, 2006
KitMaker: 10,069 posts
AeroScale: 3,788 posts
Posted: Thursday, March 01, 2007 - 12:56 PM UTC
Great model!! You did a really good job on that one. You can be proud of it.

I think I will try to copy the effect you got using pastels for engine and gun "blackening". It looks very nice.

Good luck in the Dragon Challenge.
 _GOTOTOP