Hi all,
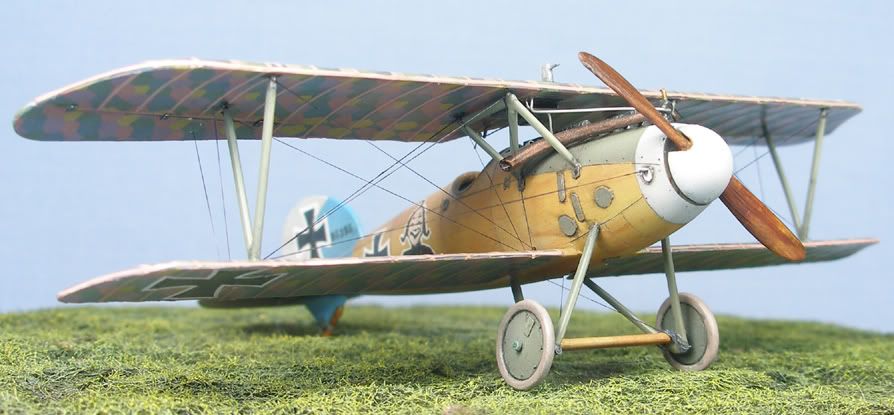
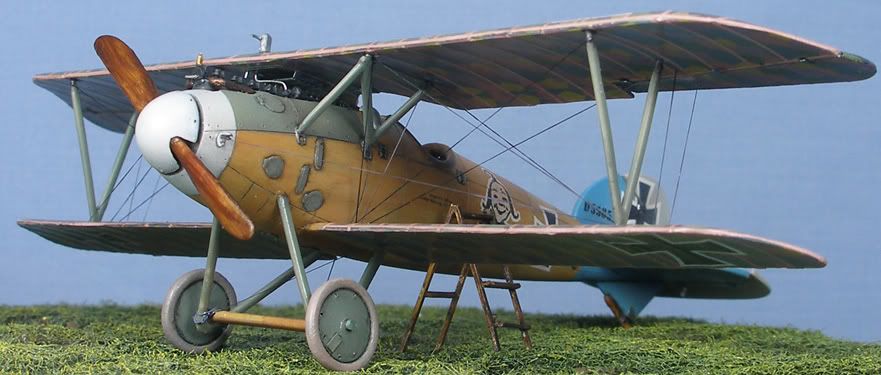
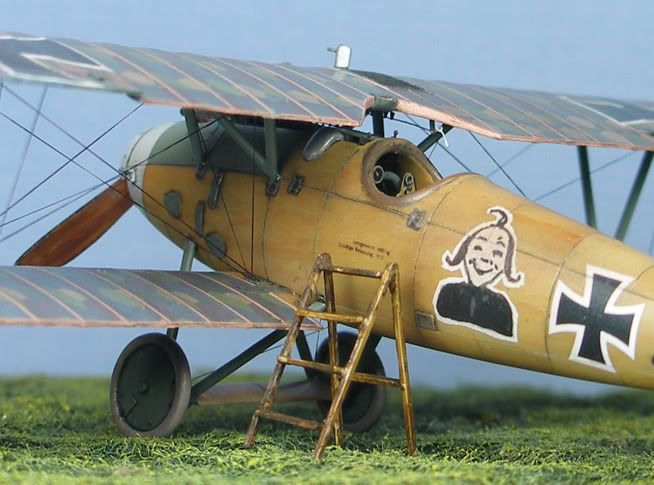
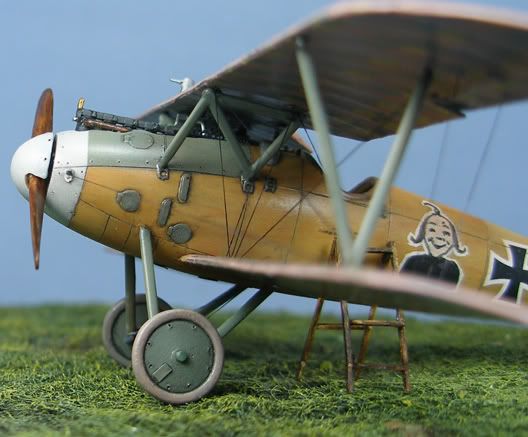
Here is my latest project off the bench, the 1/72 scale Eduard Albatros DVa Profipack. As I usually build in 1/48 scale, this one was a bit of a challenge on the eyes!
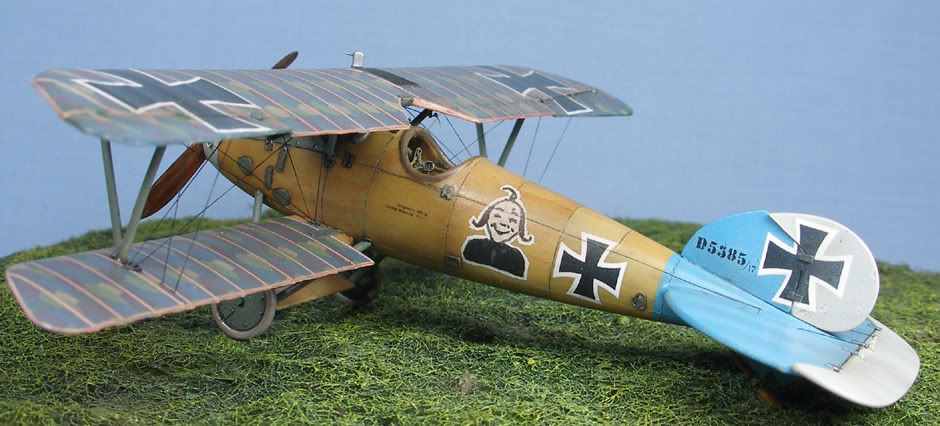
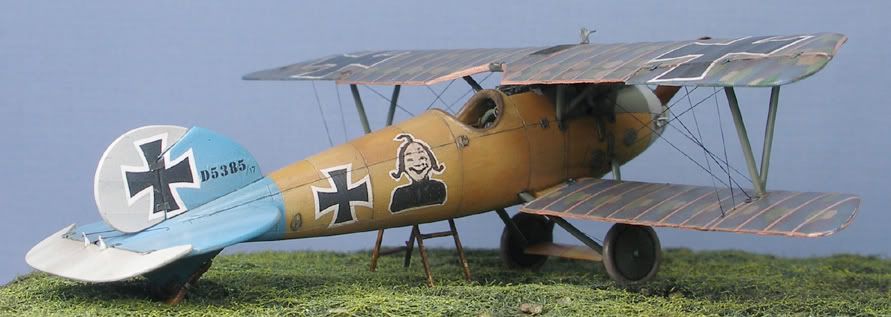
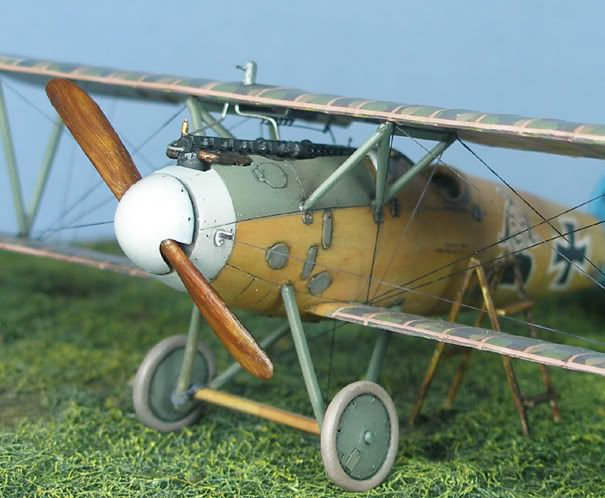
The kit is painted up to represent Albatros DVa D5385/17 of Jasta 77b. The aircraft sported a simplified version of “Moritz” – a popular cartoon character from the German “Max und Moritz” comic strip of the day. The “Moritz” figure was hand painted, the serial numbers came from the spares box and the kit lozenge decals were replaced with Eagle Strike lozenge. Rigging was done with elastic, and the wood areas were replicated with oil paints.
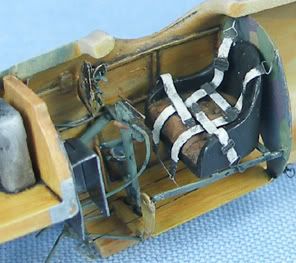
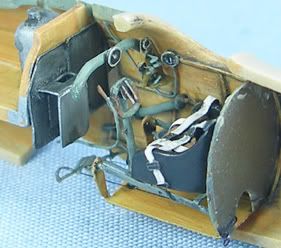
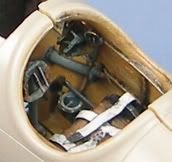
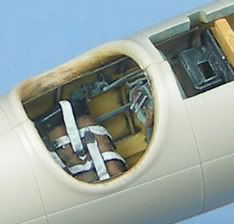
The kit builds great out of the box (in fact it is probably the best 1/72 Albatros DV on the market), but I added some extra details none the less, mainly in the cockpit, and some external details such as undercarriage bungee cords. The kit’s wheels were also too small so I replaced them with some modified Aeroclub white metal wheels.
Oh, and the ladder was scratchbuilt too for a bit of fun – not all WW1 pilots dashingly leapt into their aircraft before every flight!
All feedback welcome!
BC
Early Aviation
Discuss World War I and the early years of aviation thru 1934.
Hosted by Jim Starkweather
Latest Done - 1/72 Eduard Albatros DVa
BradCancian
Queensland, Australia
Joined: August 30, 2006
KitMaker: 285 posts
AeroScale: 281 posts
Joined: August 30, 2006
KitMaker: 285 posts
AeroScale: 281 posts
Posted: Friday, April 20, 2007 - 07:51 AM UTC
Posted: Friday, April 20, 2007 - 10:49 AM UTC
Hi Brad!
That's a fantastic model! Congratulations!
If I would build my 1/48 scale WW1 models as good as you build your 1/72 ones, I would be more than happy!
Can you tell me more about the elastic you used for the rigging? The result is very impressive especially in such a scale...
Jean-Luc
That's a fantastic model! Congratulations!
If I would build my 1/48 scale WW1 models as good as you build your 1/72 ones, I would be more than happy!
Can you tell me more about the elastic you used for the rigging? The result is very impressive especially in such a scale...
Jean-Luc
goldstandard
California, United States
Joined: March 29, 2007
KitMaker: 208 posts
AeroScale: 186 posts
Joined: March 29, 2007
KitMaker: 208 posts
AeroScale: 186 posts
Posted: Friday, April 20, 2007 - 10:51 AM UTC
Very nicely done! I plan on building an Eduard 1/72 Spad XIII after I get my current batch of kits done. I am curious about what technique you used to create the wood effects. I was working on an academy 1/72 Sopwith camel and tried to simulate wood grains by first laying down a base coat of testors wood color, followed by streaking on some burnt umber for the grain. The effect wasn't that great.
BTW, awesome job handpainting the cartoon on the fuselage. At 1/72 that must have been hard on the eyes. Did you use an optivisor?
JackFlash
Colorado, United States
Joined: January 25, 2004
KitMaker: 11,669 posts
AeroScale: 11,011 posts
Joined: January 25, 2004
KitMaker: 11,669 posts
AeroScale: 11,011 posts
Posted: Friday, April 20, 2007 - 11:48 AM UTC
Brad; Another fine build. Let me encourage you to try "STRUTZ " extruded brass from Aeroclub and available through RollModels. Great stuff for struts and great at load bearing. My biggest gripe about 1/72 was always that plastic kit struts were too thick. And if they are scale thick they break under the slightest pressure. The extruded brass gives the struts that airfoil cross section. Just a thought.
Posted: Friday, April 20, 2007 - 05:44 PM UTC
Quoted Text
If I would build my 1/48 scale WW1 models as good as you build your 1/72 ones, I would be more than happy!
Brad, Jean-Luc took the words right outta my pie hole!
Draken35akaScimitar
Namur, Belgium
Joined: April 12, 2007
KitMaker: 114 posts
AeroScale: 49 posts
Joined: April 12, 2007
KitMaker: 114 posts
AeroScale: 49 posts
Posted: Friday, April 20, 2007 - 08:52 PM UTC
Stunning work; well done; congratulations!!!
BradCancian
Queensland, Australia
Joined: August 30, 2006
KitMaker: 285 posts
AeroScale: 281 posts
Joined: August 30, 2006
KitMaker: 285 posts
AeroScale: 281 posts
Posted: Saturday, April 21, 2007 - 06:02 AM UTC
Hi guys - thanks for the kind words!
Jean-Luc - the rigging is made from the elstic core of a product called "knitting in elastic" - this product is basically an elastic core with thread wrapped around it - the elastic core is very very fine and perfect for scale rigging. Just remove the thread, go over the elastic core with a felt tip pen to colour it, and use superglue to attach - the good thing is that ham fisted people like myself won't break the rigging when handling the model.
Goldstandard - No I did not use an optivisor, as I tend to find them disorientationg (just a personal thing, but I am seriously thinking of switching to preserve the eye sight)... the wood effect is relatively simple, the key in my mind is keeping it subtle in this small scale. I start with a base coat of Tamyia “buff”. On top of this, using a wide chisel tipped brush, I streak a slightly thinned mixture of yellow ochre, white and burnt sienna oil paints (I use Windsor and Newton brand) mixed to varying ratios depending on the tone of wood I want to achieve. The aim is to try and replicate the tonal changes apparent in wood from a distance as opposed to trying to replicate individual grains - in 1/72, there will be no individual grains apparent, namely just subtle tonal changes, which is what I have aimed to achieve. Once this is dry (usually a couple of days), I then give the surface a couple of coats of thinned Tamyia “clear yellow” – his helps to tone down the contrast, tie it all together and impart a nice yellow hue to the wood. It's still something I have not perfected and continue to work on...
Stephen - thanks for the tip on the STRUTZ material - ya know, looking at the pics the struts do look chunky in these photos, I think I may look into getting hold of some. What do you use to cut the stuff?
Thanks again guys!
BC
JackFlash
Colorado, United States
Joined: January 25, 2004
KitMaker: 11,669 posts
AeroScale: 11,011 posts
Joined: January 25, 2004
KitMaker: 11,669 posts
AeroScale: 11,011 posts
Posted: Saturday, April 21, 2007 - 11:56 AM UTC
Quoted Text
"Hi guys - thanks for the kind words!. . .
Stephen - thanks for the tip on the STRUTZ material - ya know, looking at the pics the struts do look chunky in these photos, I think I may look into getting hold of some. What do you use to cut the stuff?. . . "
First the material is mostly extruded brass. Hobby nips or flush cutting dikes are good. I usually go over the tips with a cutting wheel chucked into my motortool at low speed. This tends to rough up the portion inserted into the wing and creates a barbed or rough surface for the adhesive to fill. This bites into the plastic or resin of a wing nicely as well.
WARNING!!! Never use white metal rod for struts or pinning in resin always use brass.