Post extra pictures and information about your model for the April MOM here. Don't forget to read the rules and post one picture in the gallery (for voting purposes). MOM May07
Best of luck to everyone
Mal
Rules for the new Model of the Month.
1. Entries must be of your own work.
2. The model must be of an aircraft.
3. The model can be in any scale and in any medium.
4. The model can be “out of the box”, scratch built, or anything in between.
5. The model must be finished within the month for which it is entered.
6. 1 picture is to be uploaded into the relevant gallery and titled with what the model is of, I.E. VS Spitfire Mk Vc. No composites. This picture must be of just the model, no base. (For a model posed in the "in Flight" configuration" a small stand is allowed which can be used to either support the model or as a counter weight. A beaching dolly can be used for a float plane.
7. A thread will be opened in the general aircraft forum in which you can add further pictures and details about the build. It is hoped that this thread will have members posting “in progress” pictures, as well as finished ones. The model can appear on a base or even in a diorama in this thread. Pictures must not be larger than 700 pixels wide, in either the gallery or the information thread.
8. Pictures of models can be placed in the gallery from the first of the month until the last day of the month (see “5” above).
9. Voting will take place over the first half of the next month, closing on the 16th.
10. At the moment there are no prizes but this is being looked into.
11. Staff members of the Kitmaker group of sites cannot enter.
12. The rules will be added to when and if it is deemed necessary.
13. Any none complience with these rules may result in disqualification.
Hosted by Jim Starkweather
May 07 MOM contest thread
Posted: Tuesday, May 01, 2007 - 01:39 AM UTC
Posted: Sunday, May 06, 2007 - 09:06 PM UTC
Heres my entry for this month it is Tamiya's 1/48 U.S Navy version Skyraider (I have started a seperate thread with info about the build aswell), it was a joy to build and i decided to do it oob and for some fun. It was painted using Halfords Gloss Appliance white and Tamiya Acrylics, it was weathered using oil paints and Mig pigments and i also added a scratch built seat harness.
Posted: Monday, May 07, 2007 - 02:02 PM UTC
Hi all
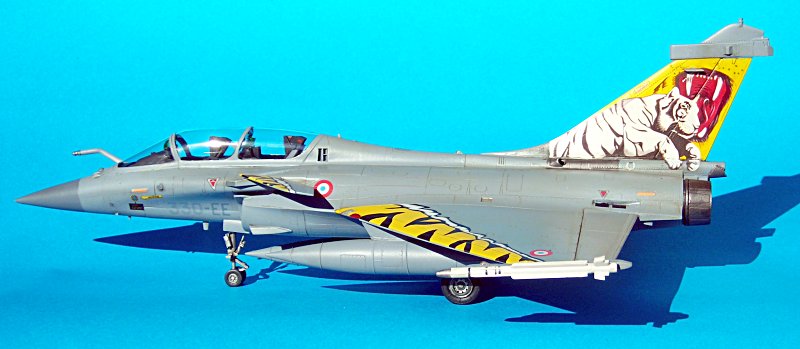
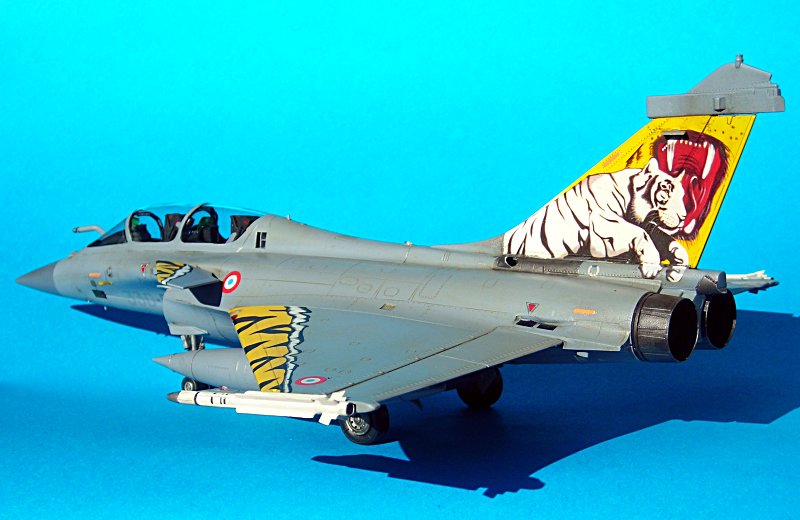
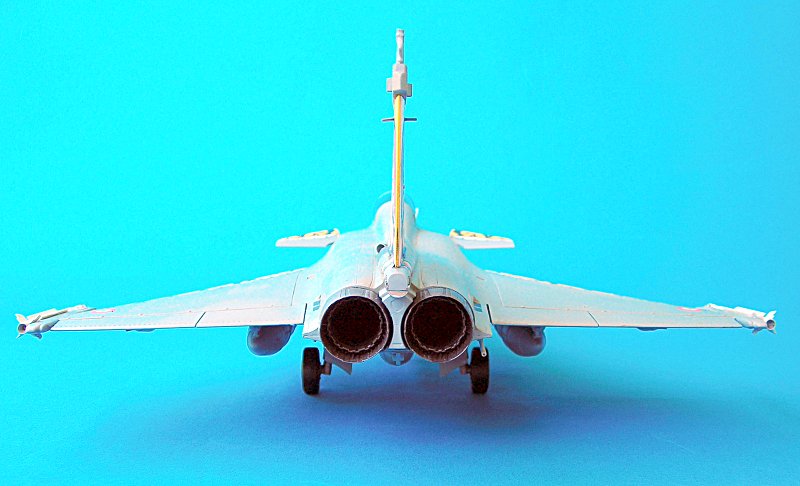
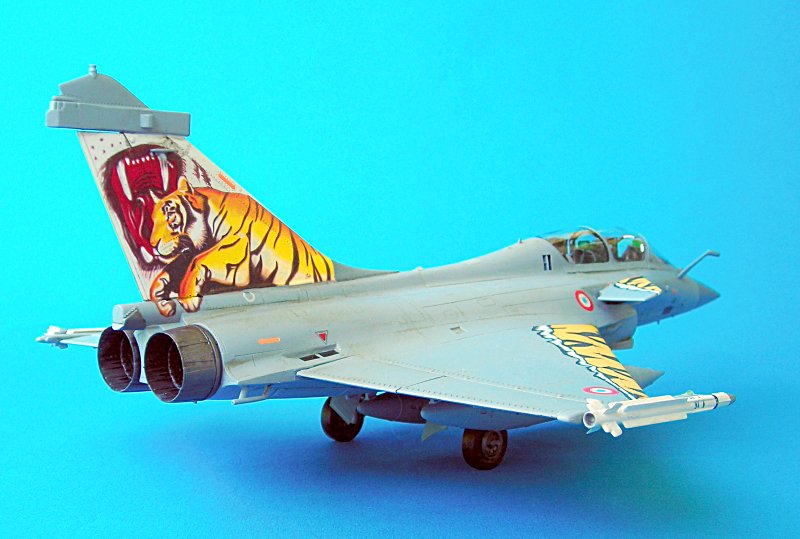
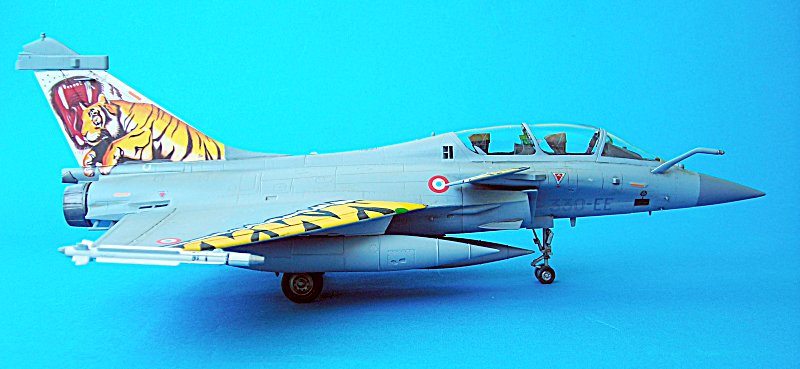
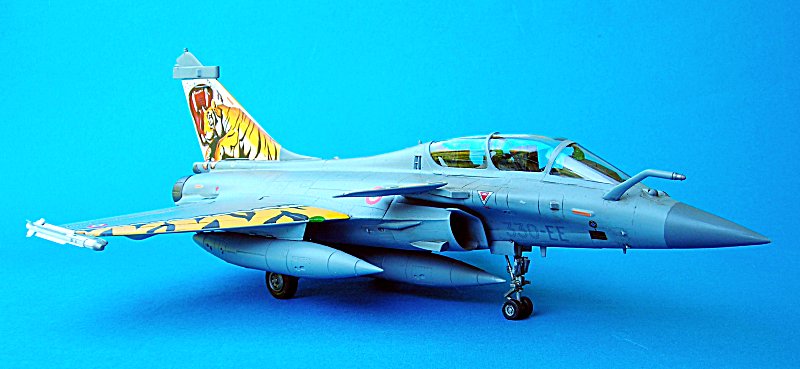
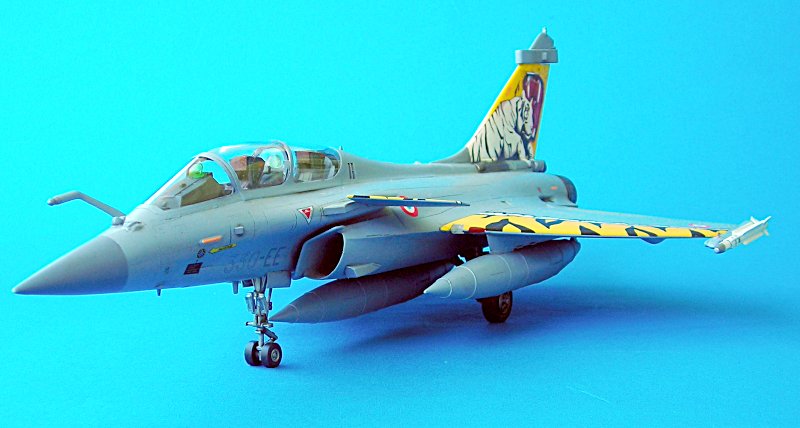
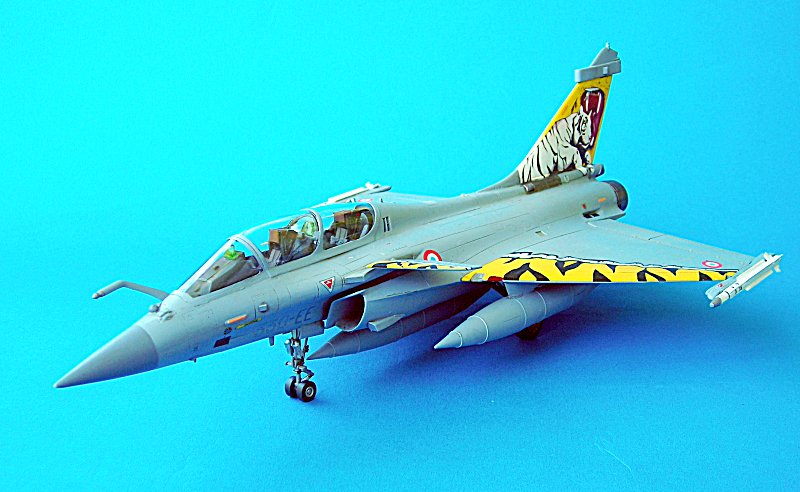
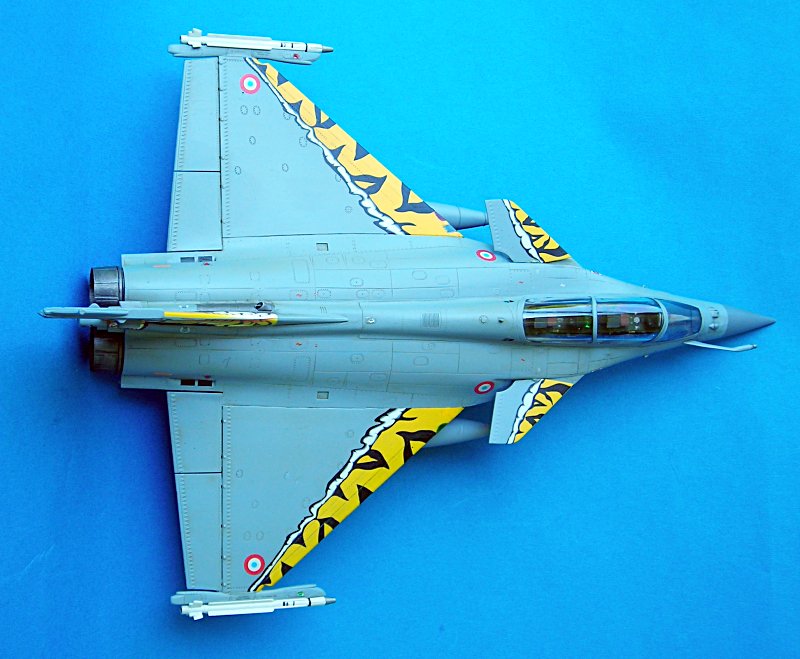
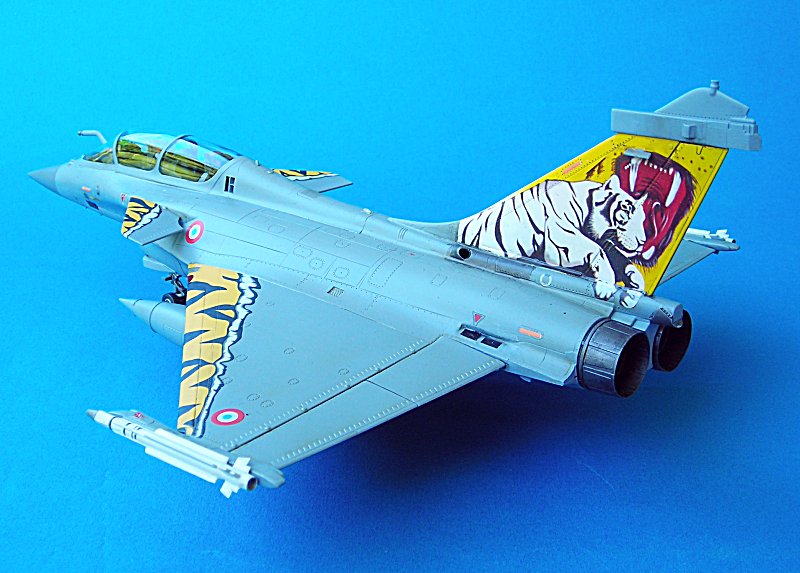
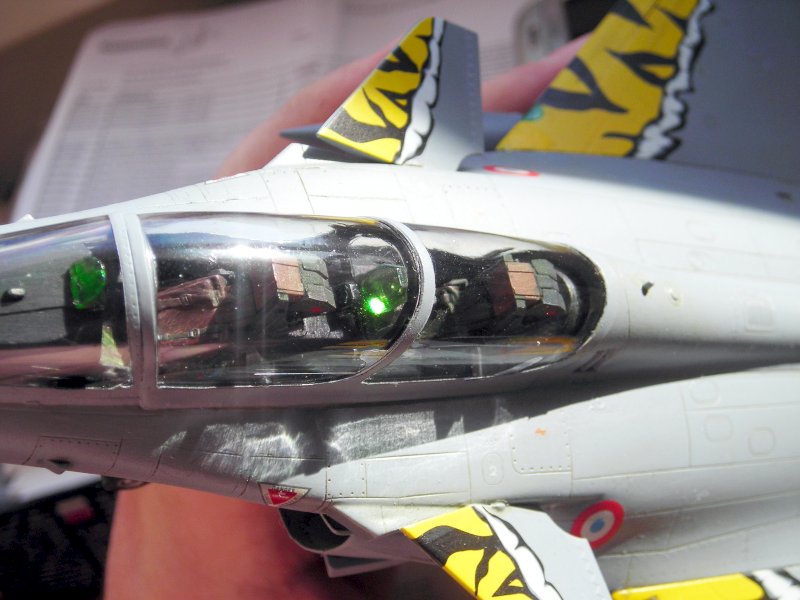
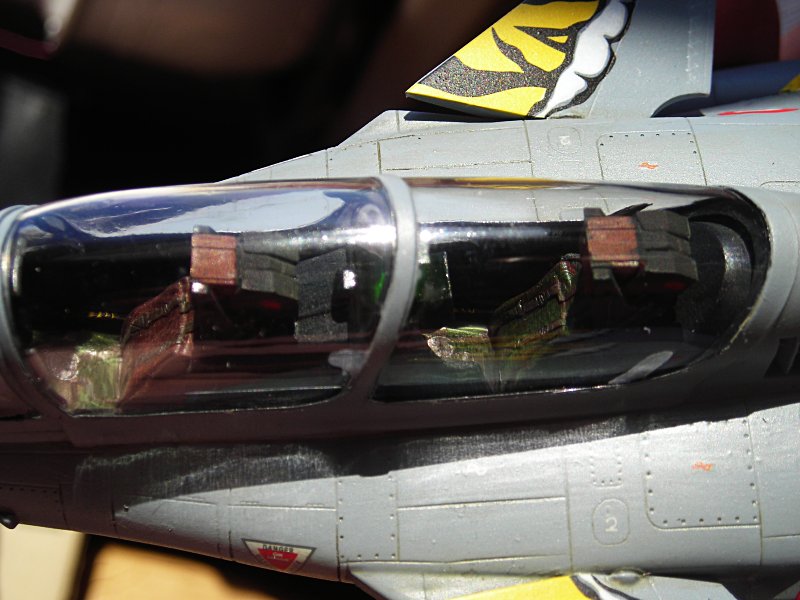
As I coul not finish this build for April it has to be my entry for May. I really wanted to do this model after I had seen the ModelAlliance decal sheet advertized. The Revell kit was still in my stash (bought it once cheap because of the Magic missiles which I need for my Mirage F.1 project) and so I only had to wait for the decals to appear. Pictures of the real thing can be found at airliners.net:
http://www.airliners.net/search/photo.search?front=yes&s=1&keywords=Rafale+Tiger
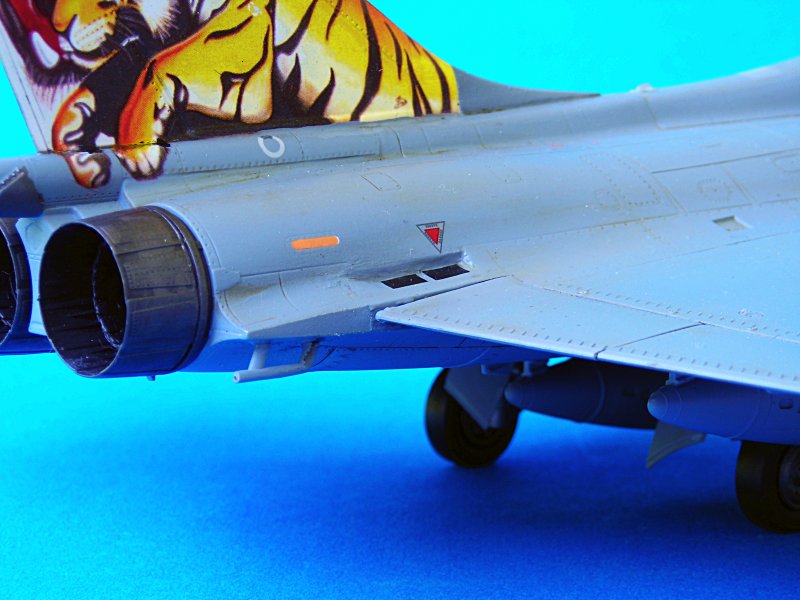
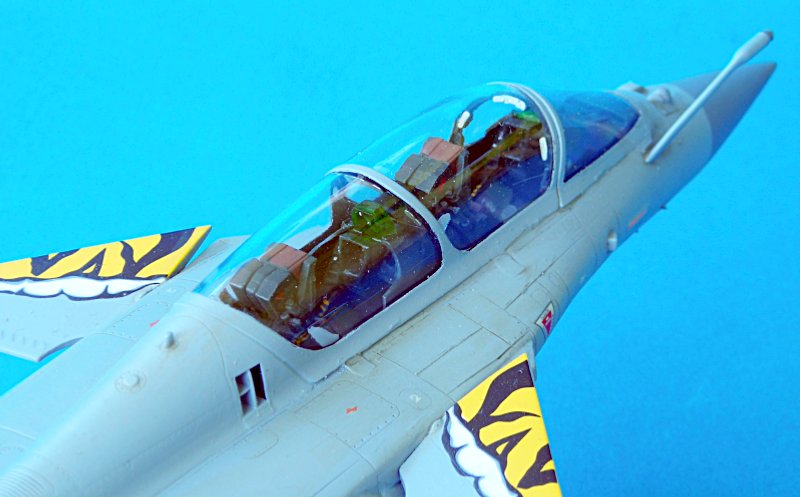
I used them to change some of the kit parts. The cockpit is as it comes from the box ---- you cannot see much of it. I added the chaff and flare indents at the tail (scratch), reshaped the MICA missiles to match the pictures of the real a/c. Also the nose sensor (folded back) and the tanks (welds) were altered. I did not change the wing tip missile pylon, which looks a little different on the pictures from airliners.net.
The Model Alliance decals do not really fit the model (tail motives) and the Revell stencil decals are more crisp, while some of the stencils have the wrong shape or size compared to the pictures (on both sheets). The model was painted with MM dark ghost grey --- for the different shade on the radome and some details I added a little black. the canopy was dipped in Klear.
I had also started a thread for comments: Revell Rafale 1/48
best wishes
Steffen
atoplu
Ontario, Canada
Joined: August 17, 2003
KitMaker: 753 posts
AeroScale: 174 posts
Joined: August 17, 2003
KitMaker: 753 posts
AeroScale: 174 posts
Posted: Monday, May 07, 2007 - 04:58 PM UTC
Here is my entry for May MOM. It is Revell's 1/72 F4F. It is converted to E model.
It was painted Gunze and Tamiya acrylics. It was weathered using oil paints and some airbrush tecnichs.
Enjoy
It was painted Gunze and Tamiya acrylics. It was weathered using oil paints and some airbrush tecnichs.
Enjoy
Posted: Tuesday, May 08, 2007 - 04:29 AM UTC
Finally Finished after months of sitting on the workbench and getting dusty (and even taking it to a few shows unfinished I now present my entry for this months MOM. It's the Tamiya 1/48 Vought F4U1-A Corsair built OOB with the only addition of etch seat belts and Cutting Edge Decals (Corsair nose art pt2) the kit was painted Xtracrylics paints and weathered with Paynes grey oil paint and MIG Pigments soot. The chipping was simulated with Tamiya aluminium and a very fine brush. This is my first attempt and paint chipping but you know what they say... "You only get better with practice"
Removed by original poster on 05/10/07 - 18:04:37 (GMT).
Ares
Joined: November 26, 2004
KitMaker: 23 posts
AeroScale: 7 posts
KitMaker: 23 posts
AeroScale: 7 posts
Posted: Sunday, May 13, 2007 - 12:19 PM UTC
I first started this Fujimi 1/72 F-14A Su-22 Killer kit at 1995, after 12 years I found it in my stash uncompleted with yellowed decals. Then one week ago I decided to rebuild it. Once the paint striped I rebuild the cockpit glued between two fuselage side. I used Hasegawa's K37 cockpit decals with microsol, then I used Humbroll putty for joints. As basic paint I airbrushed Gunze 315 with Badger 100G. I used Hasegawa's VF-124 decals prior the picture of this bird at Brown's fantastic Tomcat Alley "Photographic Roll Call of the Grumman F-14 Tomcat" book. After a thin layer of Tamiya X-22, I washed all the model with black oil paint. Then weathering; as smoke I used it from Tamiya brand, and over all I applied fresh Gunze paint with Aerograph S93. At leading edges of slats and air intakes I used Baremetal foil. Formation lights made using spare yellow decals. Finally I made some rust effects to landing gears using Tony Holmes' F-14 Tomcat book as referance. Kit build mostly OOB, only extra details added are drilling the missiles nozzles, a fine wire in front of the canopy (Hi-tech wind-o-meter) and an extra layer of canvas at wing beds. At nozzle I used Gunze Soot over Tamiya's enamel silver. It was a quickbuild as testbed of some navy weathering technics. From striping the old stuff to total finish took only 5 days, last whole day spent only for external stores. Pictures taken at sunlight with my trusty EOS20D at AV mode (I need to clean its CMOS censor, I know). Hope you like it.
And some pictures from rebuilding process...
http://www.modelsitesi.com/fotodepo/tc001.jpg
http://www.modelsitesi.com/fotodepo/tc002.jpg
http://www.modelsitesi.com/fotodepo/tc003.jpg
http://www.modelsitesi.com/fotodepo/tc004.jpg
http://www.modelsitesi.com/fotodepo/tc005.jpg
http://www.modelsitesi.com/fotodepo/tc006.jpg
http://www.modelsitesi.com/fotodepo/tc007.jpg
http://www.modelsitesi.com/fotodepo/tc008.jpg
http://www.modelsitesi.com/fotodepo/tc011.jpg
http://www.modelsitesi.com/fotodepo/tc012.jpg
Posted: Sunday, May 27, 2007 - 01:47 PM UTC
Hello again
strangely I managed to finish another model this month (start to finish).
It is Hasegawas Focke Wulf Fw 190 F-1 Tunisia edition. I built it in about 3 weeks. All info can be found in the build thread. As I already posted so many pix of my first model I will just post one here:

You find all photos and build information in this thread: Hasegawa Fw 190F-1 (Down Low)
best wishes
Steffen
strangely I managed to finish another model this month (start to finish).
It is Hasegawas Focke Wulf Fw 190 F-1 Tunisia edition. I built it in about 3 weeks. All info can be found in the build thread. As I already posted so many pix of my first model I will just post one here:
You find all photos and build information in this thread: Hasegawa Fw 190F-1 (Down Low)
best wishes
Steffen