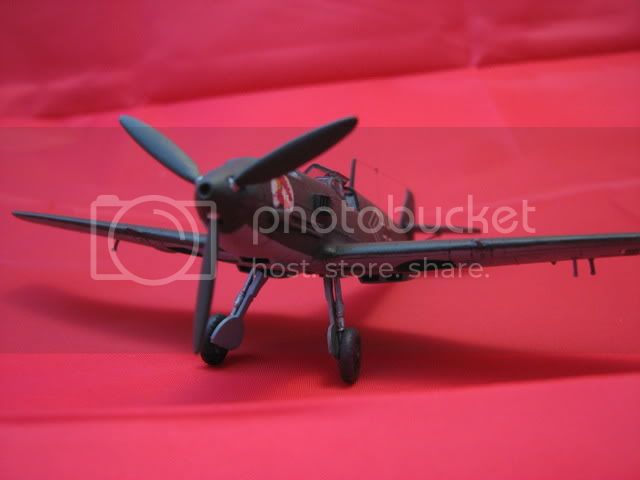
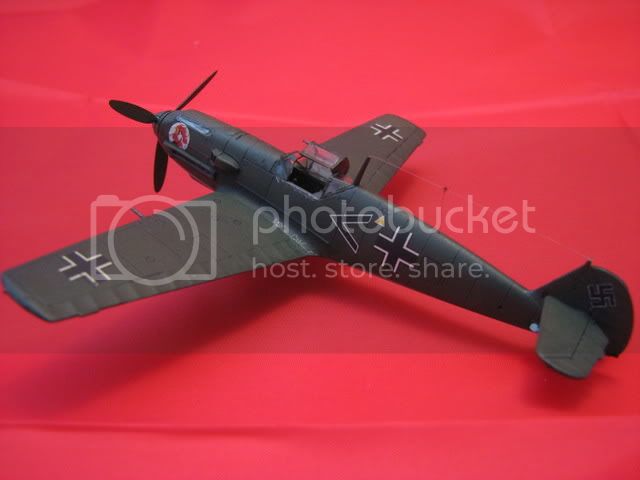
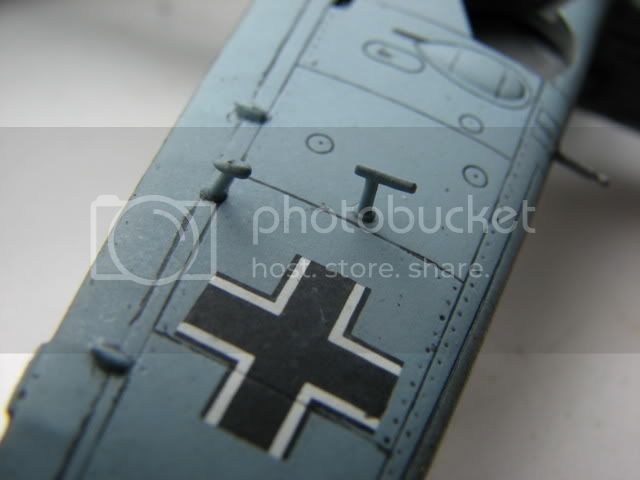
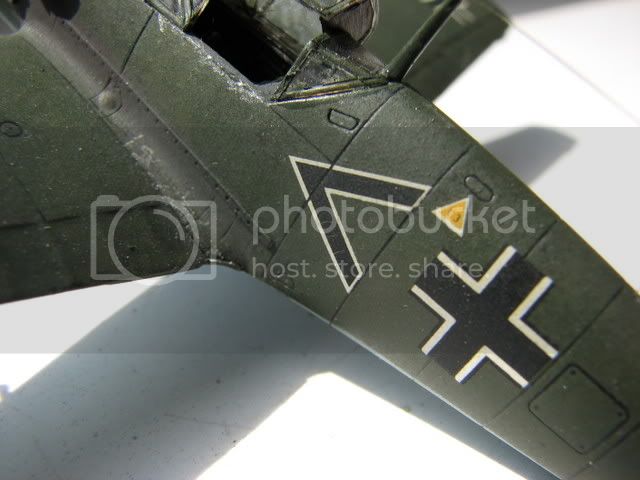
I had started another thread about this build in the World War II forum but I figured I would let that one die since I posted my pics a little large. Here is the finished product - my first model in quite some time. A little background: my first attempt at masking camo, masking the canopy, weathering, and using Future and Micro Set solutions. I am pleased to say I thought it came out pretty well all things considered. I used a chalk and water mixture for the wash - found it kinda hard to get it to work perfectly. Can anyone suggest an oil based paint wash mixture that they have used with success on light and dark grey aircraft colors?
Here are the pics, any and all comments/suggestions are certainly welcome!
Pre-Flight Check
Constructive critique of your finished or in-progress photos.
Hosted by Jim Starkweather
Finished! Academy 1/72 BF 109 E 3/4....
Vulcan1701
South Carolina, United States
Joined: April 25, 2007
KitMaker: 34 posts
AeroScale: 25 posts
Joined: April 25, 2007
KitMaker: 34 posts
AeroScale: 25 posts
Posted: Sunday, May 13, 2007 - 05:18 PM UTC
Posted: Sunday, May 13, 2007 - 05:45 PM UTC
Hi vulcan
it is a pretty nice model!
Two remarks.
1. (which you should consider changing on your model) the u/c legs are very, very ... awkward (hope I chose the right word for that) .. please look around the net (e.g. http://109lair.hobbyvista.com/ ... but there are others too) --- check how they should look and re-do yours. it will improve your model!
2. (for your next build(s) ) colours: I know this is a difficult and dangerous field. Yours look just wrong. Maybe it is your camera or lighting or post production, but the colours should be:
RLM 02 for the early war cockpit (less green, lighter .. it is almost a sandy colour with a green hue instead of red).
The camo should be RLM 70/71. The outdoor pix look a little better, so it might be quite o.k. on the model when you see it in person. RLM 71 is (roughly) equivalent to olive drab while RLM 70 is a very dark greenish (sometimes also leaning towards blue) gray.
As I said a hint for the future.
Hope you do not get me wrong. It is a nice model, but it can be improved. ... well, this is true for all my own models too
best wishes
Steffen
Posted: Sunday, May 13, 2007 - 06:31 PM UTC
Hi Vulcan.
Firstly,,congratulations of finishing your first build in a long time.Feels good doesnt it?
Its a bit daunting trying so many new things on the same kit,but every build just gets better and better and you become more comfortable with various techniques as time goes on. I still havent found a wash technique that works for me but Im slowly getting to the point where Im happy with it.I tried using oil based washes but they never seemed to work for me and Im currently experimenting with water based washes and they seem to be working much better.Thats just a personal thing and you will find which works best for you.
I echo what Stefan has said about the undercarriage legs being too "splayed".The Academy kit is quite a loose fit where the undercarriage is concerned and its a case of letting the wheels start to set and keeping an eye on them,adjusting the position slowly as the glue dries.There are plenty of photos available to help you figure out the correct angle.
The demarcation between the main colours looks a bit on the thick side.I would recommend thinning the paint a bit more and building it up slowly.Its a lot easier to add a bit more rather than try and take some away.
All in all though,your 109 looks great after so long away from building,and it will certainly give you something to compare your future builds against and you'll be able to see how your modelling develops. Thats all part of the fun of this hobby!
Well done with masking the canopy!,,its really tiny and a very fiddly job to do!
A picture says a thousand words,so Ive taken the liberty of posting a couple of pictures of the same kit which I built last year for the "Duel in The Sky" Campaign. I hope these will explain better what Ive tried to say in the text.
Happy Modelling!!
Nige
Vulcan1701
South Carolina, United States
Joined: April 25, 2007
KitMaker: 34 posts
AeroScale: 25 posts
Joined: April 25, 2007
KitMaker: 34 posts
AeroScale: 25 posts
Posted: Sunday, May 13, 2007 - 06:48 PM UTC
Quoted Text
Hi Vulcan.
Firstly,,congratulations of finishing your first build in a long time.Feels good doesnt it?
Its a bit daunting trying so many new things on the same kit,but every build just gets better and better and you become more comfortable with various techniques as time goes on. I still havent found a wash technique that works for me but Im slowly getting to the point where Im happy with it.I tried using oil based washes but they never seemed to work for me and Im currently experimenting with water based washes and they seem to be working much better.Thats just a personal thing and you will find which works best for you.
I echo what Stefan has said about the undercarriage legs being too "splayed".The Academy kit is quite a loose fit where the undercarriage is concerned and its a case of letting the wheels start to set and keeping an eye on them,adjusting the position slowly as the glue dries.There are plenty of photos available to help you figure out the correct angle.
The demarcation between the main colours looks a bit on the thick side.I would recommend thinning the paint a bit more and building it up slowly.Its a lot easier to add a bit more rather than try and take some away.
All in all though,your 109 looks great after so long away from building,and it will certainly give you something to compare your future builds against and you'll be able to see how your modelling develops. Thats all part of the fun of this hobby!
Well done with masking the canopy!,,its really tiny and a very fiddly job to do!
A picture says a thousand words,so Ive taken the liberty of posting a couple of pictures of the same kit which I built last year for the "Duel in The Sky" Campaign. I hope these will explain better what Ive tried to say in the text.
Happy Modelling!!
Nige
Nigel,
Thanks for the kind words and suggestions. Your version of the same model is excellent and very clean! Can you post pics of the underside and specifically the weathered panel lines and such? I'd love to see your application there. Also, can you provide the weathering wash recipe that you used? That would be awesome.
Also, I love your antennae rigging but I have no idea how to mimic that, can you provide some pointers on that as well...yours looks really good! I can't for the life of me find a material that attaches as tight/rigid as those like yours end up looking.
Also, in response to Steffen Arndt: I absolutely know the colors aren't right, but I was going more for technique than authenticity with this model. Not discounting your suggestions because they are very valid and correct. I need some time to get back into the practice of good modeling before I worry too much about the correct camo shade, etc. Please forgive - haha!
Thanks for all of the great critique!
Posted: Sunday, May 13, 2007 - 06:59 PM UTC
Quoted Text
I need some time to get back into the practice of good modeling before I worry too much about the correct camo shade, etc. Please forgive - haha!
Thanks for all of the great critique!
Hi Vulcan
I can live with that and it was only meant as an improvement for the further builds.
hope to see more of your stuff in the future
cheers
Steffen
Posted: Sunday, May 13, 2007 - 07:56 PM UTC
Hi Vulcan.
Heres a couple more pics. The "super macro" setting on my new camera really shows up the dust,even though the models are kept in a glass cabinet!
After decalling and applying 2 or 3 coats of Klear,I start to wash the panel lines with a thin mix of water and acrylc paint.In this instance I used black which is probably a bit dark for most peoples tastes. After about 10 minutes I wipe away the excess wash with a cotton bud (Q tip) dipped in water.It often takes 4 or 5 applications to get the desired effect. Notice how Ive washed over the decals as well.
For the antenna wire I use smoke coloured invisible thread.Attach one end to the mast with a small dab of ca glue.When its dry I pull the thread over the attachment point on the rudder with a set of self locking tweezers to hold the tension and then secure it with another tiny drop of ca glue. If the wire is still a bit droopy when its dry,heat up a paper clip til its red hot and then hold it close to the thread.This will tension it.Dont get too close or the thread will snap!
I hope this helps a little.
Dont hesitate to ask if you want to know more
Nige
Vulcan1701
South Carolina, United States
Joined: April 25, 2007
KitMaker: 34 posts
AeroScale: 25 posts
Joined: April 25, 2007
KitMaker: 34 posts
AeroScale: 25 posts
Posted: Sunday, May 13, 2007 - 08:53 PM UTC
Ah, excellent pics, Nigel!
I assume you have at least twice as much water as acrylic paint in the mixture...I've read on the forums where some go as far as 8 parts water to 1 part paint. Does this sound about right?
Here is a pic of my prelim weathering on the underside before I applied the dullcoat:
Nice suggestions on the rigging@:) ...I will try my hand at one of those soon.
Posted: Sunday, May 13, 2007 - 09:15 PM UTC
As for washes
I use either water colours (no acrylics, but the hard coloured circles, that you use with plenty of water) and I have started to try oils thinned with Humbol thinner (over acrylics/Klear that is) .
Both have the advantage, that they can be removed if necassary. Furthermore the oils can be blended in. Hope I remember to take photos for my Fw 190 build elsewhere.
cheers
Steffen
goldstandard
California, United States
Joined: March 29, 2007
KitMaker: 208 posts
AeroScale: 186 posts
Joined: March 29, 2007
KitMaker: 208 posts
AeroScale: 186 posts
Posted: Sunday, May 20, 2007 - 11:02 AM UTC
If you don't have anything constructive to add to this thread, don't bother.
Posted: Sunday, May 20, 2007 - 11:33 AM UTC
Hi harryb......
Agreed. This forum is for constructive criticism. You have to remember that the models are built by all ages and abilities - so you could equally find the latest project by a master-builder, or someone building their very first kit and looking for help and guidance for the future.
So I've edited your "helpful" comments and look forward to seeing you taking a more constructive part in proceedings and showing us your own work for appraisal.
All the best
Rowan
Jezmondo
Victoria, Australia
Joined: May 17, 2007
KitMaker: 18 posts
AeroScale: 8 posts
Joined: May 17, 2007
KitMaker: 18 posts
AeroScale: 8 posts
Posted: Sunday, May 20, 2007 - 11:48 AM UTC
Vulcan - for a first model, that's a DAMN good effort, mate - just wish that some of my efforts were of quality!!
If I wasn't so embarrased with my kits, then I'd post pictures of them here....
Vulcan1701
South Carolina, United States
Joined: April 25, 2007
KitMaker: 34 posts
AeroScale: 25 posts
Joined: April 25, 2007
KitMaker: 34 posts
AeroScale: 25 posts
Posted: Sunday, May 20, 2007 - 07:20 PM UTC
Quoted Text
Vulcan - for a first model, that's a DAMN good effort, mate - just wish that some of my efforts were of quality!!
If I wasn't so embarrased with my kits, then I'd post pictures of them here....
Thanks for the kinds words, Jezmondo. It's technically not my *FIRST* model ever, just the first in a long time that I've built. I'm sure your kits are just fine for posting here - I look forward to seeing some soon.
I'm working on something "special" right now for my next model. Hope to share it with you all soon.
Thanks for all of the comments!