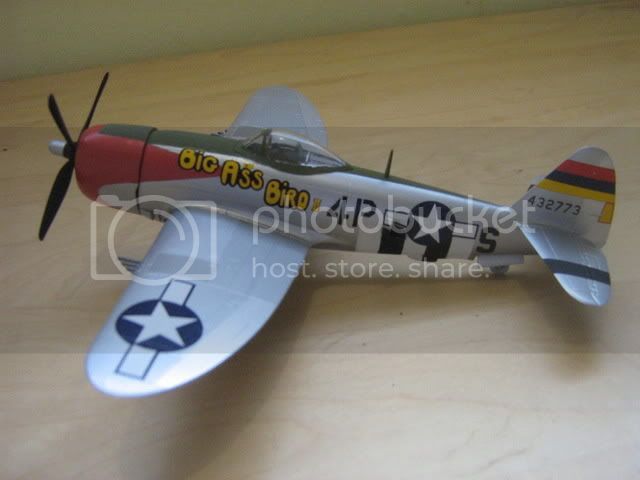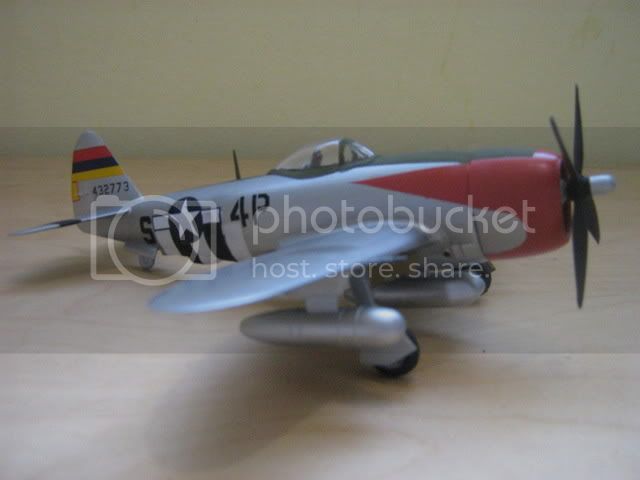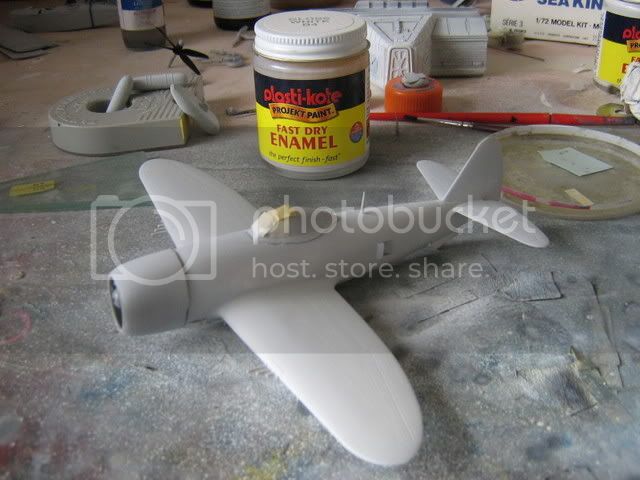
just a few pics of another hobbyboss build i'm working on, i wanted to throw something together, in order to have a practise with alclad paints. i took quite a few in-progress pics but managed to either blur them or shake the camera when i pushed the button! heres the best pics i got-
here it is primed with white matt,by the same maker as the jar in the background here, it was then coated with white gloss (from the jar seen here) because a couple of years ago i used alclad on a dinky restoration, that had been painted gloss white, and the alclad went on over this colour really well
masking for the invasion stripes has started-then my camera batteries run out!
and this is where i am with it at the minute, paintwork needs "fettling" then its on with the decals.
Hosted by Rowan Baylis
hobbyboss P-47D
Posted: Saturday, June 02, 2007 - 03:56 AM UTC
CRS
California, United States
Joined: July 08, 2003
KitMaker: 1,936 posts
AeroScale: 1,168 posts
Joined: July 08, 2003
KitMaker: 1,936 posts
AeroScale: 1,168 posts
Posted: Saturday, June 02, 2007 - 08:46 AM UTC
Recharge your batteries and get us some more pics Always like to see P-47's ,one of my favorites.
Thunderbolts seem to be the flavor of the month with all the P-47 and A-10 posts in the Forum. Sure glad I don't still live back in Ohio, there that could mean a storm is coming.
Keep up the good work and post some more photos as you progress.
Thunderbolts seem to be the flavor of the month with all the P-47 and A-10 posts in the Forum. Sure glad I don't still live back in Ohio, there that could mean a storm is coming.
Keep up the good work and post some more photos as you progress.
Posted: Saturday, June 02, 2007 - 09:27 AM UTC
your wish is my command! it certainly does seem like thunderbolt season just lately (and i do have an academy A-10 kit with a big p/e set in my stash hmmm....)
i started picking out various panels in differing shades of alclad,and it looks nice, just really need to trim the invasion stripes (the outer white ones seem slightly too wide) then its on with the decals
Posted: Saturday, June 02, 2007 - 09:30 AM UTC
Nice one Phil.
Did you have any trouble spraying the Alclad over enamels, every time I have sprayed over Revel enamels it has reacted by bubbling up (as though its trying to strip itself)?
You are beating Courtney at this point on your build .
Andy
Did you have any trouble spraying the Alclad over enamels, every time I have sprayed over Revel enamels it has reacted by bubbling up (as though its trying to strip itself)?
You are beating Courtney at this point on your build .
Andy
Posted: Saturday, June 02, 2007 - 09:43 AM UTC
not exactly sure how i got away with it andy! however the alclad is cellulose based,and i have noticed that when i used it in my old aztec, it did strip and clean out the humbrol paints in the threads of the nozzles. i think an acrylic barrier (possibly kleer?) coat between enamals and alclad would be the answer.
having seen your F-100 though i reckon you've got this nmf buisness well and truly sorted!
Posted: Saturday, June 02, 2007 - 09:57 AM UTC
Glad its just not me Alclad/enamels does that too then. I just make sure I use acrylics as a base.
Thanks for the compliment on my F-100, its my favorite NMF so far.
As for having NMF sorted, well not quite, I'm still experimenting with different base colours, post and pre shading effects and trying to use the new Airframe aluminium they have bought out. Every time I have used it so far it goes patchy .
Andy
Posted: Saturday, June 02, 2007 - 10:49 AM UTC
you can pre shade this stuff? thats food for thought! this build is basicly a test bed for when i build those reasonably priced war of the worlds kits, that you remember i got at telford last year! which is actually quite ironic, because most of those kits are white metal to start with!
Posted: Saturday, June 02, 2007 - 10:59 AM UTC
Looking good Phil!
Another P47,we ought to have a Thunderbolt section on the next Bulldogs stand.
Invasion stripes were often different widths,but they dont look right on a model I think.
How are you finding the kit? Ive got one in my stash courtesy of Father Christmas last year.
Nige
Another P47,we ought to have a Thunderbolt section on the next Bulldogs stand.
Invasion stripes were often different widths,but they dont look right on a model I think.
How are you finding the kit? Ive got one in my stash courtesy of Father Christmas last year.
Nige
Posted: Monday, June 04, 2007 - 06:39 AM UTC
Quoted Text
Looking good Phil!
Another P47,we ought to have a Thunderbolt section on the next Bulldogs stand.
Invasion stripes were often different widths,but they dont look right on a model I think.
How are you finding the kit? Ive got one in my stash courtesy of Father Christmas last year.
Nige
you can put this together in about three minutes! and thats without using glue, its painting that takes the time with this, the red nose marking has to be painted, as well as the stripes, but due to the fact it clips together, the nose cowl can easily be painted separatly
CRS
California, United States
Joined: July 08, 2003
KitMaker: 1,936 posts
AeroScale: 1,168 posts
Joined: July 08, 2003
KitMaker: 1,936 posts
AeroScale: 1,168 posts
Posted: Monday, June 04, 2007 - 06:55 AM UTC
Quoted Text
you can put this together in about three minutes!
I put one together as a paint test dummy a while back (shame on me for wasting a P-47). As I knew it's noble intended purpose in advance, for fun I timed my build. Sans landing gear it took 90 seconds and it looks it. You fellows are doing a really nice job building those 1/72 P-47's. Well done, keep up the good work.
Posted: Monday, June 04, 2007 - 09:37 AM UTC
90 Seconds Chuck!
Takes me more like 90 days to put a Tamiya one together.
Ive had a closer look at my Hobbyboss P47 and for the price and simplicity of the kit its actually IMHO a very good mould.
They make ideal builds for kids,,young and old,,LOL
Keep posting the pics Phil,,shes looking great!
Nige
Takes me more like 90 days to put a Tamiya one together.
Ive had a closer look at my Hobbyboss P47 and for the price and simplicity of the kit its actually IMHO a very good mould.
They make ideal builds for kids,,young and old,,LOL
Keep posting the pics Phil,,shes looking great!
Nige
Posted: Monday, June 18, 2007 - 08:38 AM UTC
almost finshed! got the decals on, so all thats left is a final touch up, have a go at the panel lines then a coat of matt
Posted: Monday, June 18, 2007 - 08:56 AM UTC
Thats a good looking kit Phil. As much as these hobby boss kits are aimed at the beginner, i think they are good fun, and a top choice for carrying out practice paint jobs etc.
Andy
Andy
Posted: Monday, June 18, 2007 - 10:08 AM UTC
now you know why i'm so interested in the finish on your mustang!
i've built two of these kits now, and to say i bought them just to try new painting techniques, they do turn out really nice models