_GOTOBOTTOM
Modern (1975-today): USA
Modern aircraft of the United States.
Hobby Boss F/A-18A Build
Merlin
Staff MemberSenior Editor
AEROSCALE
#017
_VISITCOMMUNITY
United Kingdom
Joined: June 11, 2003
KitMaker: 17,582 posts
AeroScale: 12,795 posts
Posted: Saturday, June 02, 2007 - 08:32 AM UTC
Hi all

So, it had to happen eventually... Merlin builds a Modern Jet! (Polite pause, while everyone picks themselves up off the floor... )

I'd better say in advance, I think the last time I built anything remotely like this was when Tamiya originally released their F-15 - probably 25+ years ago! So - let me apologise now if I make any terrible blunders that cause jet lovers to have fits! I'll refrain from "where's the propeller?" jokes, but you'll understand this really is, in effect, a novice's build when it comes to subject matter. Thanks also in advance to Joe for his patience and for pointing me to wonderful links that my notorious Google skills failed to find!

All help and advice will be gratefully received.

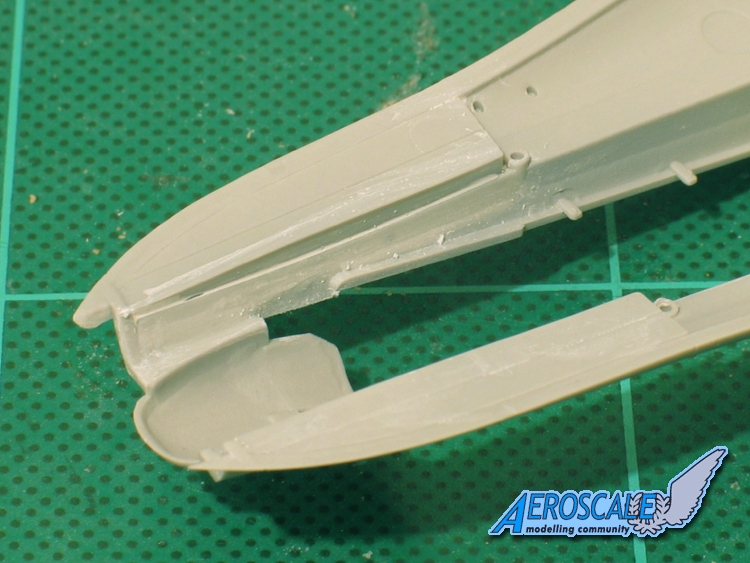
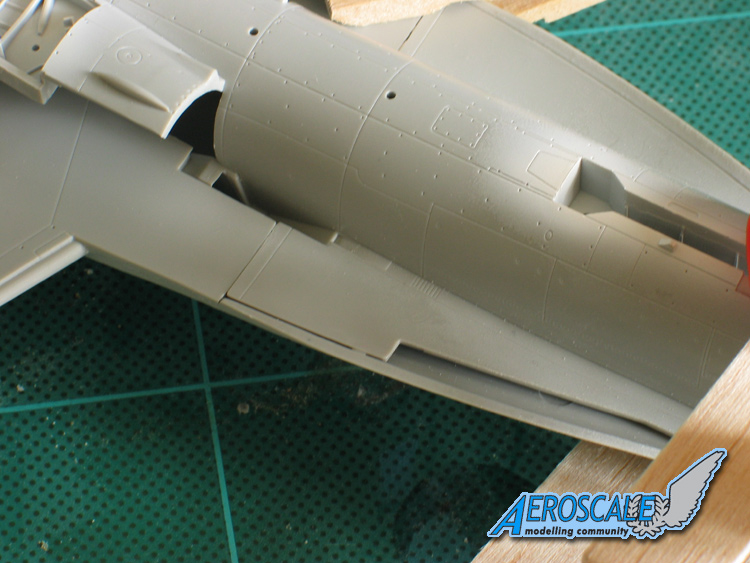
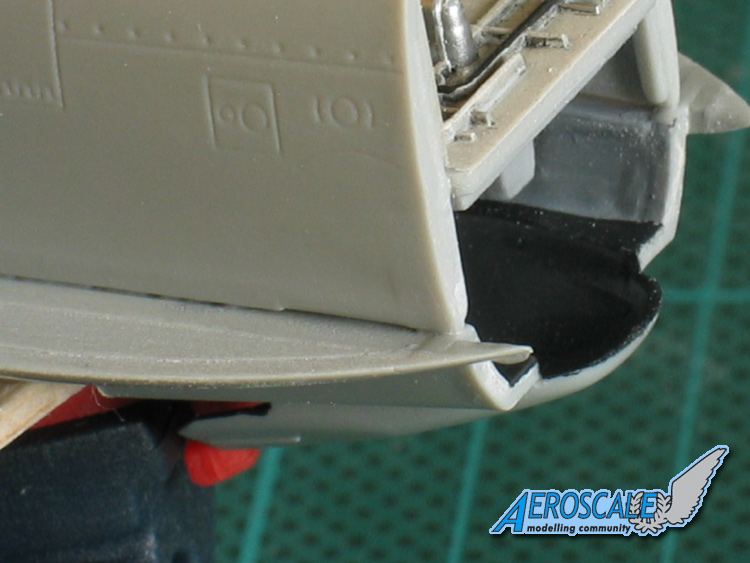
OK - to business. I've got to start somewhere, so it may as well be with something I didn't pick up on in the First-Look Review... mould lines:


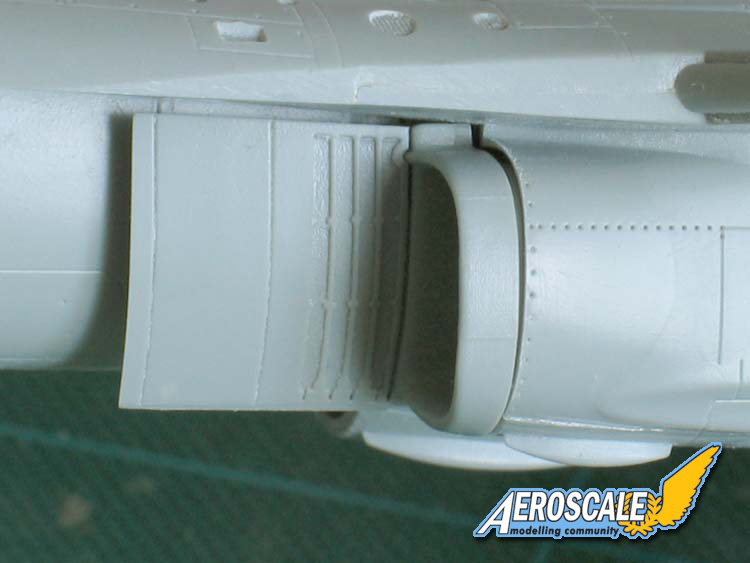
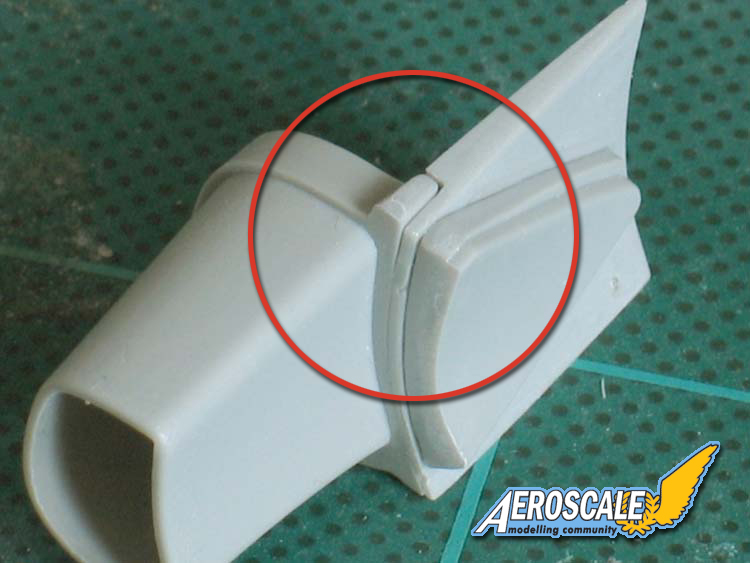
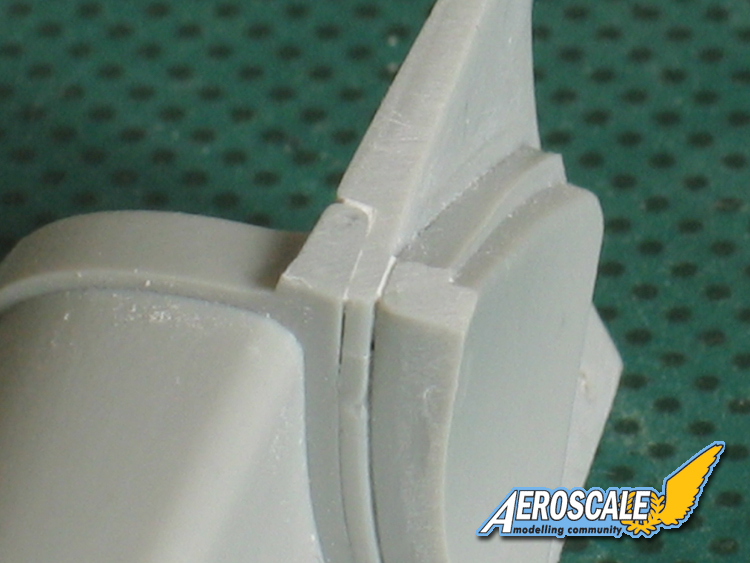
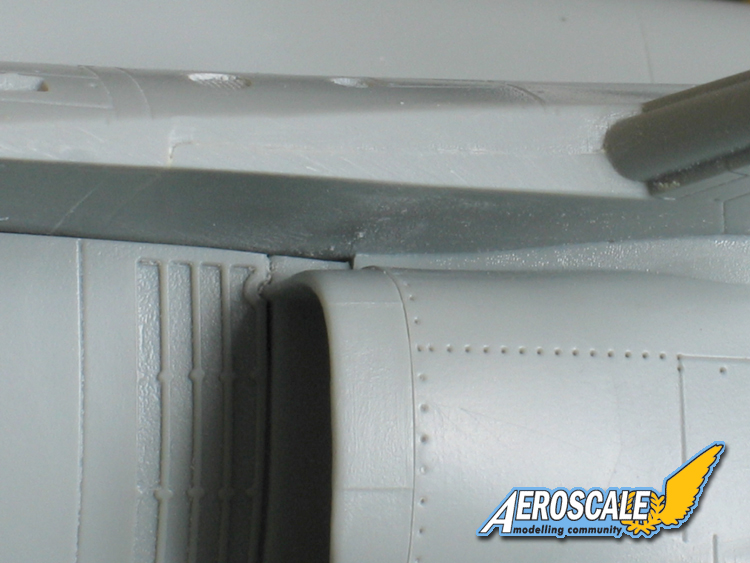
There are a few of these to take care of - nothing drastic, but a sign that multi-part moulds were needed to capture some of the complex curves.

Hobby Boss have striven to keep ejector-pin marks out of sight, which is great - the downside is that they've positioned some of them on the edges of parts. This is something that only becomes apparent as you begin assembly, so be prepared for a little extra clean-up on mating surfaces.

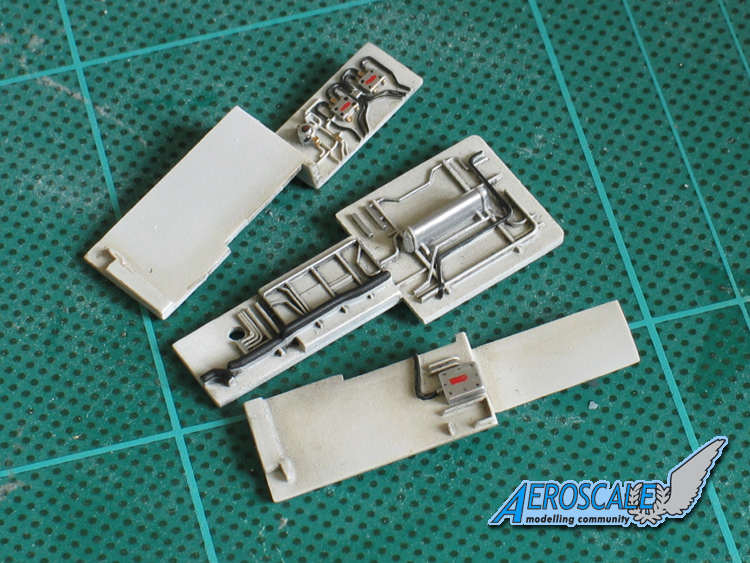
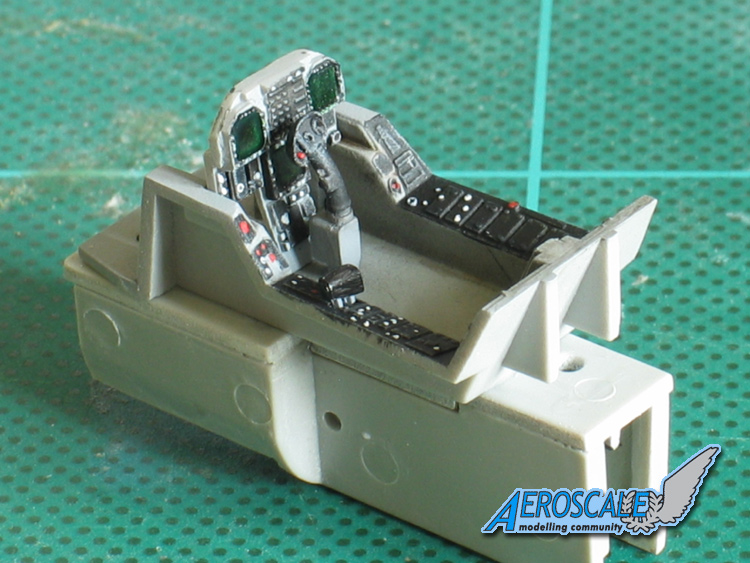
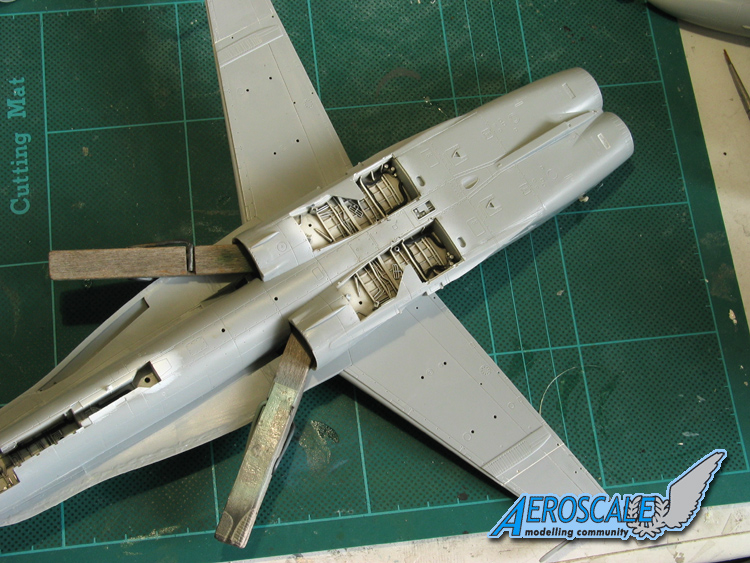
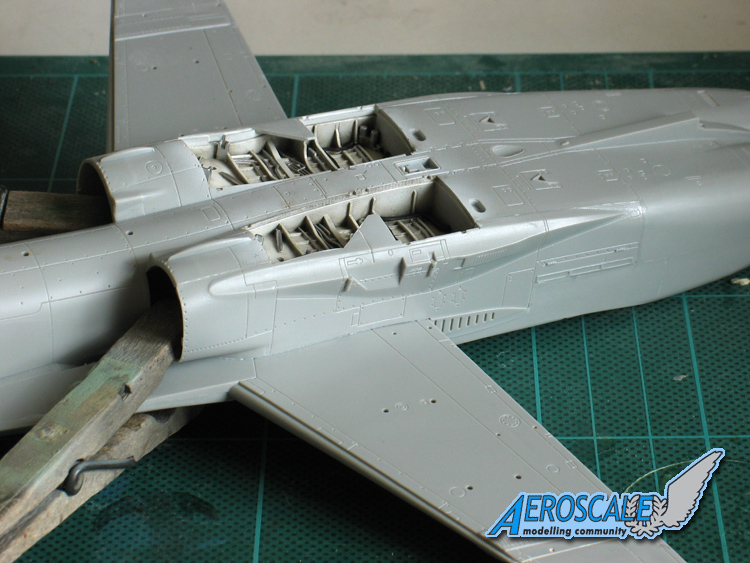
Starting work on the office, the ejection seat seems to match the SJU-5/A in it's basic details, although there's obviously a lot more detail you could add. I'll be building semi-OOB, but the seat's incomplete harness is an obvious candidate for replacement - here are shots before I sanded it off:


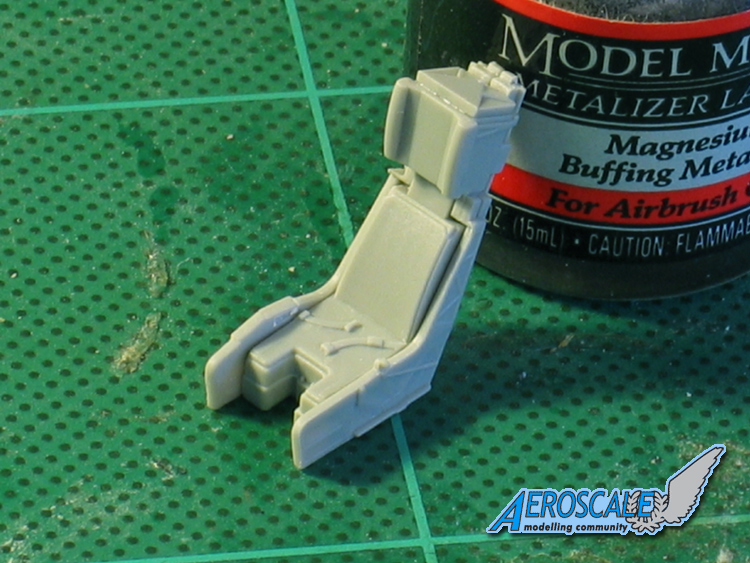
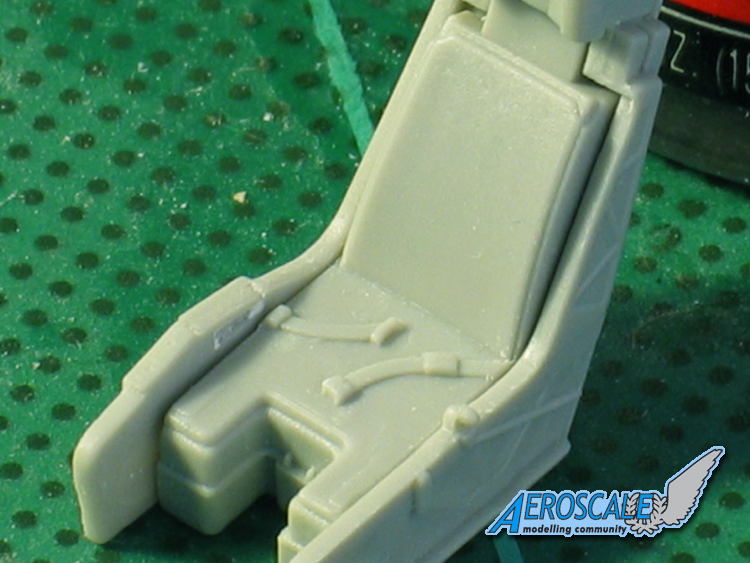
I've added a simple pillar up the back of the seat which helps hide the kit-parts' seam and will make up a harness using an ancient set of Reheat buckles.

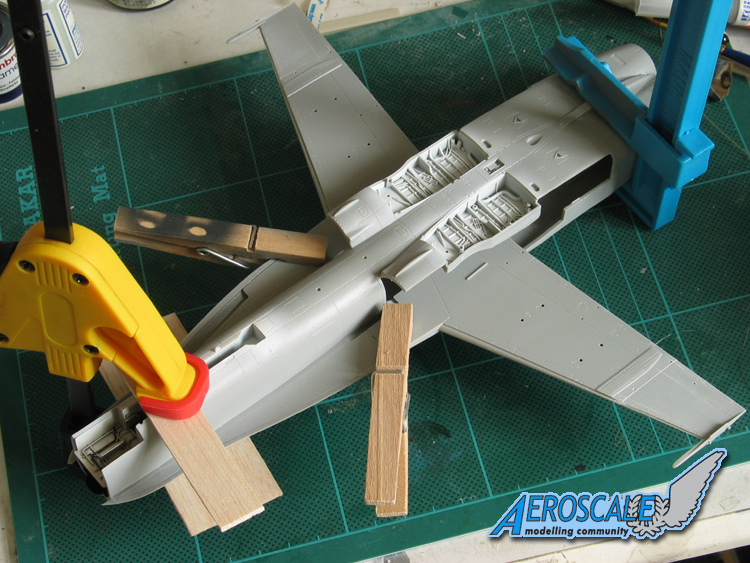
Hopefully some pics of something more resembling an airplane kit tomorrow...

All the best

Rowan
Merlin
Staff MemberSenior Editor
AEROSCALE
#017
_VISITCOMMUNITY
United Kingdom
Joined: June 11, 2003
KitMaker: 17,582 posts
AeroScale: 12,795 posts
Posted: Saturday, June 02, 2007 - 09:02 AM UTC
Hi again

Another point I noticed before putting the build to bed for the night is that the joins of the LEX inserts (parts #A12 and #23) will be clearly visible inside the cockpit, so you need to fill them - I didn't, so a repair and repaint is tomorrow's first task...


All the best

Rowan
Merlin
Staff MemberSenior Editor
AEROSCALE
#017
_VISITCOMMUNITY
United Kingdom
Joined: June 11, 2003
KitMaker: 17,582 posts
AeroScale: 12,795 posts
Posted: Saturday, June 02, 2007 - 11:01 PM UTC
Hi again

There's some nice detail in the nosewheel well:


It's a 3-part affair and forms the foundation for the cockpit tub. I make no claims for the accuracy of what I've done - I just painted a white basecoat and weathered it, with some details picked out in black and silver, with a few touches of gold for brass connectors and red for some warning stencils. It'll all be pretty much hidden on the finished model, so my aim was just to busy the area up before moving on.

All the best

Rowan
betheyn
Staff MemberSenior Editor
AEROSCALE
#019
_VISITCOMMUNITY
England - South East, United Kingdom
Joined: October 14, 2004
KitMaker: 4,560 posts
AeroScale: 2,225 posts
Posted: Saturday, June 02, 2007 - 11:11 PM UTC
Looking good Rowan.
We will convert you to jets .
Andy
Merlin
Staff MemberSenior Editor
AEROSCALE
#017
_VISITCOMMUNITY
United Kingdom
Joined: June 11, 2003
KitMaker: 17,582 posts
AeroScale: 12,795 posts
Posted: Saturday, June 02, 2007 - 11:15 PM UTC

Quoted Text

Looking good Rowan.
We will convert you to jets .
Andy


Cheers Andy

Well - I must admit I'm enjoying it. Call this a busman's holiday from my usual diet of WW2 stuff.

All the best

Rowan
Hisham
_VISITCOMMUNITY
Al Qahirah, Egypt / لعربية
Joined: July 23, 2004
KitMaker: 6,856 posts
AeroScale: 77 posts
Posted: Sunday, June 03, 2007 - 01:37 AM UTC
Just in time.. and just what i needed to see. Thanks for both your build and Andy's build of the A-10.

The title says Hobbycraft.. is that the same company as HobbyBoss?

Cheers
Merlin
Staff MemberSenior Editor
AEROSCALE
#017
_VISITCOMMUNITY
United Kingdom
Joined: June 11, 2003
KitMaker: 17,582 posts
AeroScale: 12,795 posts
Posted: Sunday, June 03, 2007 - 01:37 AM UTC
Hi again

The basic cockpit tub:


I've "glazed" the computer screens with Humbrol clear green over a black base. Hobby Boss suggest fitting the ejector seat at this stage, but I'll leave it off to allow some work on the harness - plus I'm sure it'll be a lot less likely to get bashed during assembly.

With the cockpit and nosewheel bay taken care of, I can get started on the airframe.

All the best

Rowan
Merlin
Staff MemberSenior Editor
AEROSCALE
#017
_VISITCOMMUNITY
United Kingdom
Joined: June 11, 2003
KitMaker: 17,582 posts
AeroScale: 12,795 posts
Posted: Sunday, June 03, 2007 - 01:39 AM UTC

Quoted Text

Just in time.. and just what i needed to see. Thanks for both your build and Andy's build of the A-10.

The title says Hobbycraft.. is that the same company as HobbyBoss?

Cheers


Hi Hisham

My blunder! I'll put that right. I was obviously so shocked to be building a jet, I simply forgot how to spell!

All the best

Rowan
betheyn
Staff MemberSenior Editor
AEROSCALE
#019
_VISITCOMMUNITY
England - South East, United Kingdom
Joined: October 14, 2004
KitMaker: 4,560 posts
AeroScale: 2,225 posts
Posted: Sunday, June 03, 2007 - 02:05 AM UTC

Quoted Text

Just in time.. and just what i needed to see. Thanks for both your build and Andy's build of the A-10.
Cheers


Thanks Hisham.
Us Staff are wonderful people really .
Andy
mother
_VISITCOMMUNITY
New York, United States
Joined: January 29, 2004
KitMaker: 3,836 posts
AeroScale: 1,036 posts
Posted: Sunday, June 03, 2007 - 04:52 AM UTC
Look out, afterburners lit Rowan rolling hot Great job with the wheel bay and cockpit. 25 years+...nah you still have it. Looking forward to the next up-date.

Joe
Merlin
Staff MemberSenior Editor
AEROSCALE
#017
_VISITCOMMUNITY
United Kingdom
Joined: June 11, 2003
KitMaker: 17,582 posts
AeroScale: 12,795 posts
Posted: Sunday, June 03, 2007 - 05:27 AM UTC
LOL! Cheers Joe

And I'm even on course for something starting to resemble an airplane by the end of the weekend:


The sight of clamps can make things seem worse than they are - and in this case they are largely a precaution.

There are some gaps to take care of though - principally around the LEXs:


The gap at the extreme nose is because there's an ejector pin mark on the mating surface. It'll fill well enough, but it's hard to see why Hobby Boss have included the front of the LEXs as separate parts at all - it just means an extra seam to deal with.


The wingtips are solid and there are slight gaps to the lower wing panels, but these will largely be hidden by fairings.

All the best

Rowan
betheyn
Staff MemberSenior Editor
AEROSCALE
#019
_VISITCOMMUNITY
England - South East, United Kingdom
Joined: October 14, 2004
KitMaker: 4,560 posts
AeroScale: 2,225 posts
Posted: Sunday, June 03, 2007 - 05:50 AM UTC
My jaw has hit the floor. This is a speed build for you .
Close up the seams look horrible, but in the pic with the clamps they don't look that bad.
Looking forward to the next instalment before bedtime .
Andy
lampie
#029
_VISITCOMMUNITY
England - East Midlands, United Kingdom
Joined: December 23, 2005
KitMaker: 6,249 posts
AeroScale: 3,270 posts
Posted: Sunday, June 03, 2007 - 06:47 AM UTC
Good grief Rowan!
Talk about "blink and you miss it"!!!
A speed build of Betheyn proportions indeed. Great work on the cockpit and its looking the part.
The way your going you'll probably have the decals on by the time Ive finished this post!
Nige
Merlin
Staff MemberSenior Editor
AEROSCALE
#017
_VISITCOMMUNITY
United Kingdom
Joined: June 11, 2003
KitMaker: 17,582 posts
AeroScale: 12,795 posts
Posted: Sunday, June 03, 2007 - 08:43 AM UTC
Hi Andy and Nige

Sorry to disappoint you, but no more tonight. But I've been tinkering with the fuselage sides and jet intakes and I think I'll have to dry fit the undercarriage soon to get an idea of how the model will balance.

All the best

Rowan
CRS
_VISITCOMMUNITY
California, United States
Joined: July 08, 2003
KitMaker: 1,936 posts
AeroScale: 1,168 posts
Posted: Sunday, June 03, 2007 - 08:53 AM UTC

Quoted Text

I think I'll have to dry fit the undercarriage soon to get an idea of how the model will balance.


I'll be very surprised if you use less than 40 grams of nose weight
Merlin
Staff MemberSenior Editor
AEROSCALE
#017
_VISITCOMMUNITY
United Kingdom
Joined: June 11, 2003
KitMaker: 17,582 posts
AeroScale: 12,795 posts
Posted: Tuesday, June 05, 2007 - 04:50 AM UTC
Hi again

I hope to get back to the build when I get home tonight. Things have been delayed by filling the LEX gap with epoxy putty - not something I use very often and maybe a mistake in this case, as it's taking forever to cure.

I guess it could have been too old to use (it's probably sat in the pack for 10 years!...)

All the best

Rowan
TedMamere
_VISITCOMMUNITY
Moselle, France
Joined: May 15, 2005
KitMaker: 5,653 posts
AeroScale: 4,347 posts
Posted: Tuesday, June 05, 2007 - 07:18 AM UTC

Quoted Text

Things have been delayed by filling the LEX gap with epoxy putty - not something I use very often and maybe a mistake in this case, as it's taking forever to cure.


Hi Rowan!

You could have used Tamiya's Light Curing putty instead...

Jean-Luc
Merlin
Staff MemberSenior Editor
AEROSCALE
#017
_VISITCOMMUNITY
United Kingdom
Joined: June 11, 2003
KitMaker: 17,582 posts
AeroScale: 12,795 posts
Posted: Tuesday, June 05, 2007 - 08:03 AM UTC

Quoted Text


Quoted Text

Things have been delayed by filling the LEX gap with epoxy putty - not something I use very often and maybe a mistake in this case, as it's taking forever to cure.


Hi Rowan!

You could have used Tamiya's Light Curing putty instead...

Jean-Luc


Hi Jean-Luc

Well, if you'd like to send me some... - none of the shops in London (Hannants included) are importing it.

All the best

Rowan
Merlin
Staff MemberSenior Editor
AEROSCALE
#017
_VISITCOMMUNITY
United Kingdom
Joined: June 11, 2003
KitMaker: 17,582 posts
AeroScale: 12,795 posts
Posted: Sunday, June 17, 2007 - 03:04 AM UTC
Hi again

Sadly, no opportunity to get near the workbench for the last couple of weeks, but I finally got back to the Hornet this afternoon (at least the blasted old epoxy putty had a chance to cure! LOL!).

Picking up where I'd left off, I went over the gaps under the LEX's with "supafilla" (cyano + talc), which dries quickly(!) and is beautifully easy to sand smooth. I'd already painted the main wheelwells white and given them a coat of Klear, so I quickly weathered them with oils and picked out some details in black and silver. This probably isn't the finished effect, but the side panels of the nacelles partly enclose the wells, so it's best to prepare a bit them before adding the panels.


The sides themselves are a fair fit - I've clamped the fronts and there are slight gaps to fill. I actually meant to sand the undersides of LEXs before adding the nacelle sides, but forgot! - so that'll have to wait until the cement's thoroughly dry. LOL!

All the best

Rowan
TedMamere
_VISITCOMMUNITY
Moselle, France
Joined: May 15, 2005
KitMaker: 5,653 posts
AeroScale: 4,347 posts
Posted: Sunday, June 17, 2007 - 05:03 PM UTC
Hi Rowan!

Nice progress... but don't forget the Avia! It's still hard for me to believe you are building a jet! Eeeerk!
Hopefully your build will get me to start the Rafale soon.

The wheel wells look very good on the F-18 kit from Hobby Boss.

Good luck on that one...

Jean-Luc
Merlin
Staff MemberSenior Editor
AEROSCALE
#017
_VISITCOMMUNITY
United Kingdom
Joined: June 11, 2003
KitMaker: 17,582 posts
AeroScale: 12,795 posts
Posted: Sunday, June 17, 2007 - 09:09 PM UTC

Quoted Text

Hi Rowan! Nice progress... but don't forget the Avia! It's still hard for me to believe you are building a jet! Eeeerk!
Hopefully your build will get me to start the Rafale soon...


Cheers Jean-Luc

Don't worry - the Avia may be feeling a little neglected, but it's not forgotten. I hope to get back to it this week.

I'm looking forward to seeing you start your Rafale - it's only fair that we both build a modern jet! Even with my head start, and knowing how quickly you build such great finished models, I'm afraid you'll still be waiting for me at the finishing line. Have a glass of nice French red ready for me.

All the best

Rowan
Merlin
Staff MemberSenior Editor
AEROSCALE
#017
_VISITCOMMUNITY
United Kingdom
Joined: June 11, 2003
KitMaker: 17,582 posts
AeroScale: 12,795 posts
Posted: Tuesday, June 19, 2007 - 07:03 PM UTC
Hi again

I've come across one area where the fit is pretty poor without a bit of tweaking... the intakes:


The culprit lies on the inner faces, where the parts are built-up as a sandwich:


Because they're hidden, it's easy to think they can be left pretty rough... don't! I sanded the area smooth and angled the joint slightly:


for an instant improvement:


The tubes inside the intakes are reasonably long, but it's still an area you don't want to inspect too closely or you'll clearly see the open innards of the fuselage. More soon.

All the best

Rowan
paxtonm
_VISITCOMMUNITY
Ohio, United States
Joined: February 06, 2007
KitMaker: 89 posts
AeroScale: 20 posts
Posted: Monday, August 20, 2007 - 05:31 PM UTC
Rowan,
Did you ever finish this build?
Michael
Merlin
Staff MemberSenior Editor
AEROSCALE
#017
_VISITCOMMUNITY
United Kingdom
Joined: June 11, 2003
KitMaker: 17,582 posts
AeroScale: 12,795 posts
Posted: Monday, August 20, 2007 - 07:23 PM UTC

Quoted Text

Rowan,
Did you ever finish this build?
Michael


Hi Michael

Sorry - I haven't had a chance to do any real modelling at all lately ('ve simply been up to my neck in Admin stuff). The poor old F/A-18 was glaring at me at the weekend, but I just didn't get a chance to get to the workbench.

All the best

Rowan put italicized text here
 _GOTOTOP