The history of the world's first operational jet fighter is well documented elsewhere, so I won't risk boring you by repeating it for this in-box review. As far as I know, the Messerschmitt Me 262 has been kitted twice before in 1/32 scale - by Revell and Hasegawa - and both previous kits are about 30 years old, so there was enormous excitement when Trumpeter announced their new model using C21st technology.
The kit
For a modeller like myself, who's used to working in 1/48 scale, just the sheer size of Trumpeter's impressive new Me 262 is exciting. The kit arrives in an enormous, very strong, conventional top-and-bottom box. Every sprue is separately bagged and an additional cardboard box containing smaller individual parts slots inside the main package.
The kit consists of:
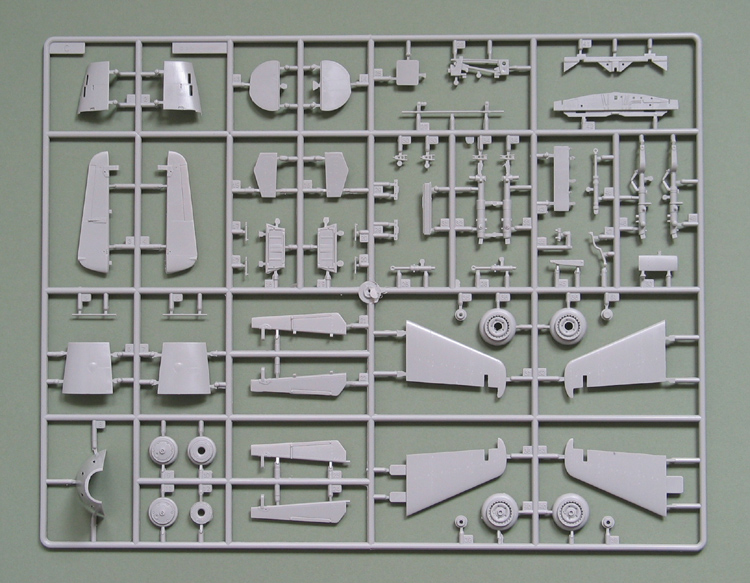
324 x pale grey styrene parts.
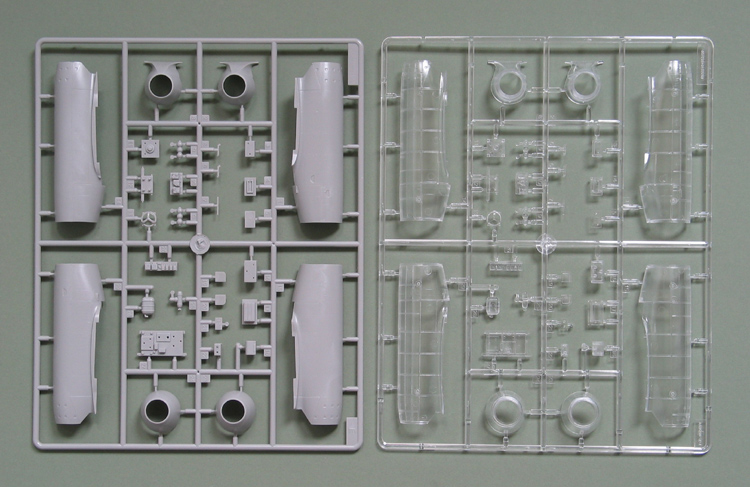
74 x clear parts
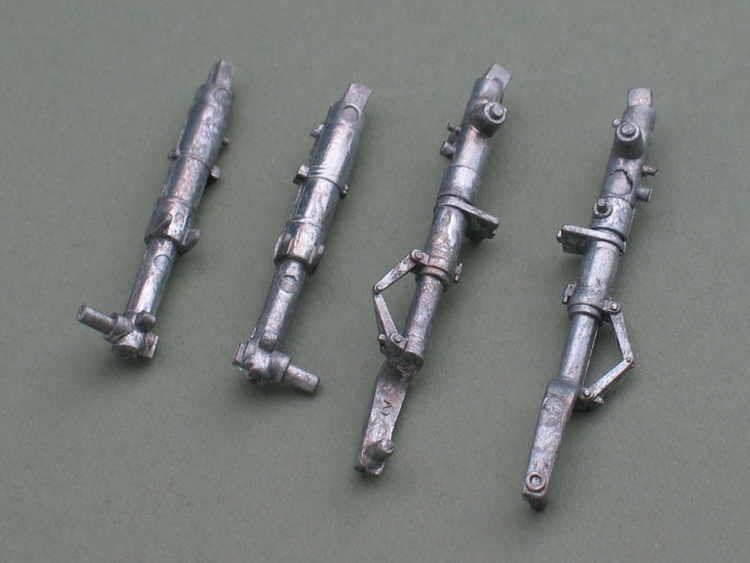
4 x white metal undercarriage legs
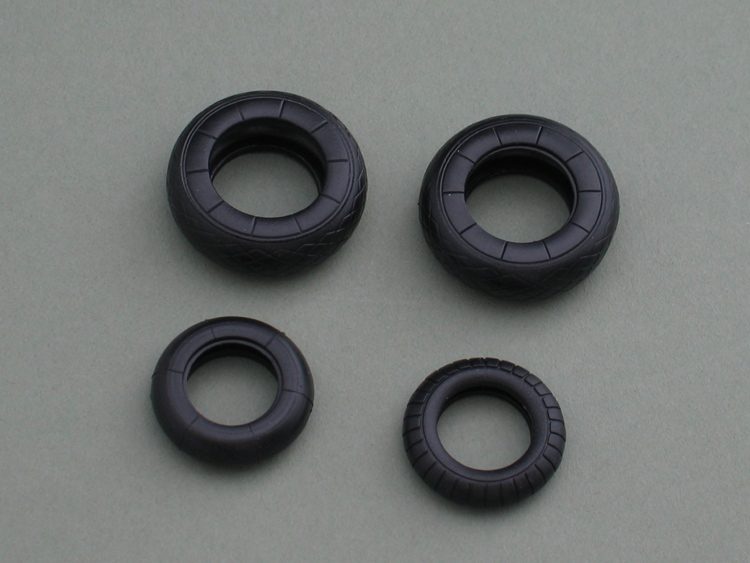
4 x vinyl tyres
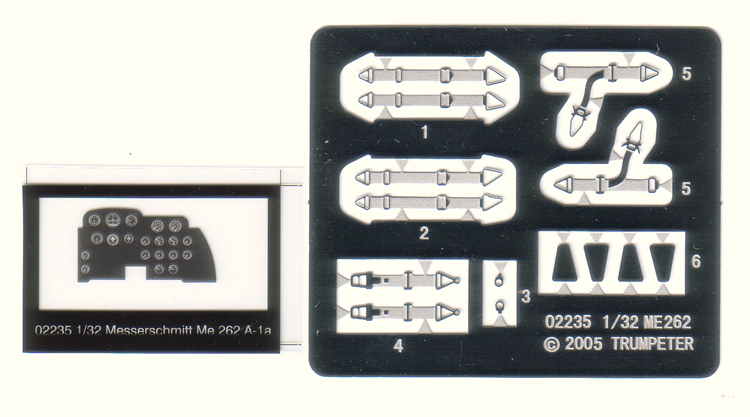
14 x photo-etched parts
1 x clear film for the cockpit instruments
Decals for 2 x colour schemes
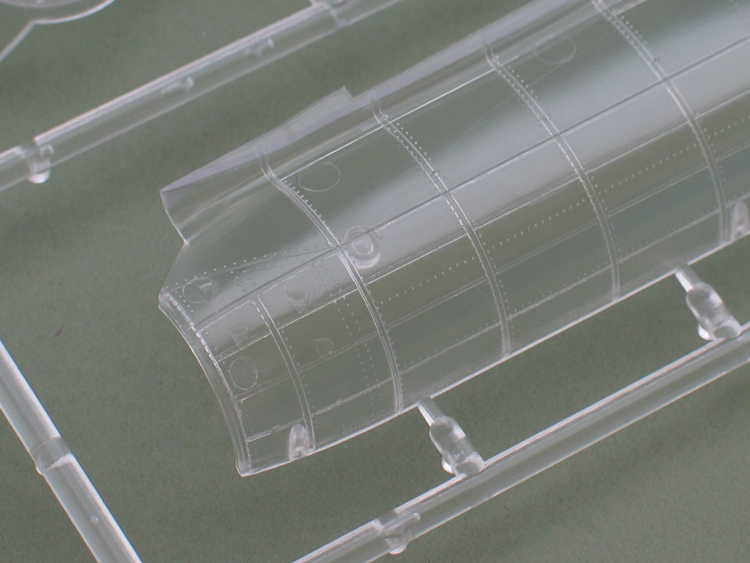
I guess the obvious question looking at the parts list is "Why so many clear parts?" - well, Trumpeter have duplicated one of the main sprues to provide clear engine nacelles to show off the well-detailed Jumo 004s. But more of that later, let's get back to the basics...
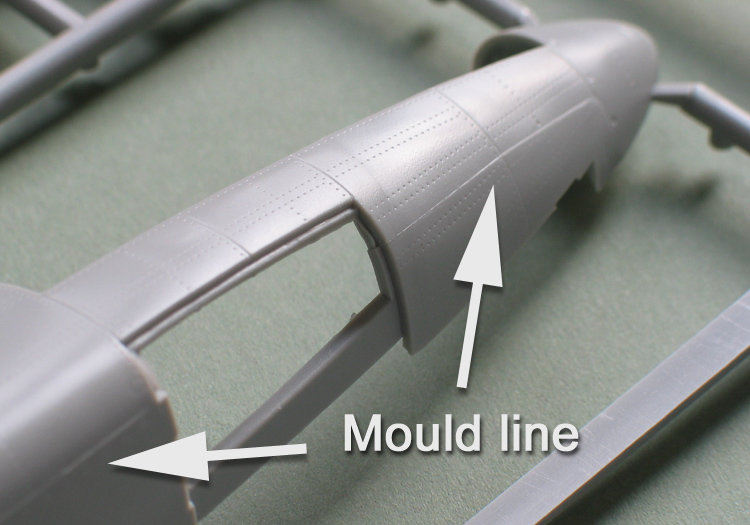
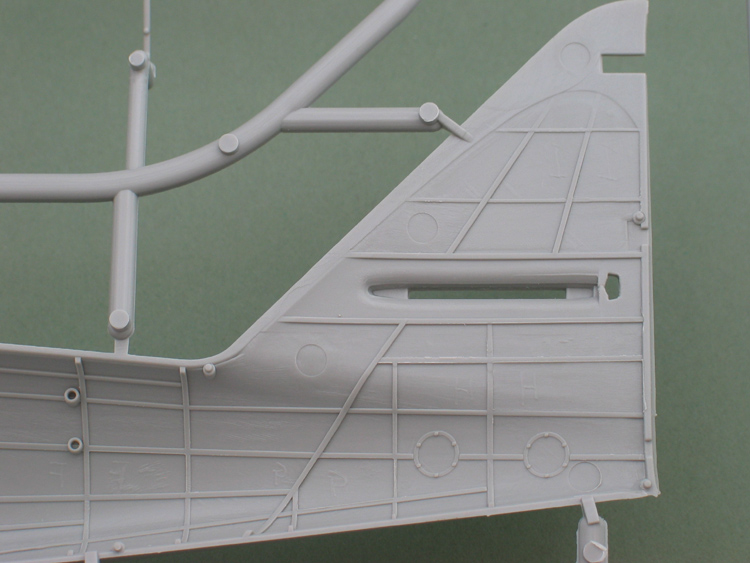
The main pale grey parts are very crisply moulded in quite soft plastic with little by way of flash, but there is a rather prominent seam along the bottom of the fuselage where a multi-part mould has been used to allow detailing on the underside. At one point it follows a panel line, but otherwise bit of careful sanding should soon take care of it. The surface detail is a huge improvement over other Trumpeter kits I've bought (such as the 1/48 scale P-40B and Fw 200); once again Trumpeter have embossed the rivets, but this time they are more "in scale", being much more delicately done and in more representative numbers. The panel lines are also very crisp - thankfully the rather ragged look of some of the earlier kits is gone.
Of course, Luftwaffe purists will rightly point out that on real Me 262s the rivets and panel lines were filled and sanded smooth, so depicting them this way is really artistic licence, but I think most modellers will be delighted with the surface finish of Trumpeter's kit.
A quick test fit of the major parts was very encouraging. The detail on the fuselage halves lined up very well. The wing / fuselage joint seemed a little loose, but this was without any of the internal fittings which might help maintain the dihedral etc. The wings are very thin for their size and, due to the softness of the plastic, they have a tendency to flex a lot. On my sample they were perfectly straight, but Fred Boucher (JPTRR) has informed me that the wings in his kit were badly warped and he has had to send for replacements. What I did find though, were shallow sink marks where the locations for the engine nacelles are moulded on the interior.
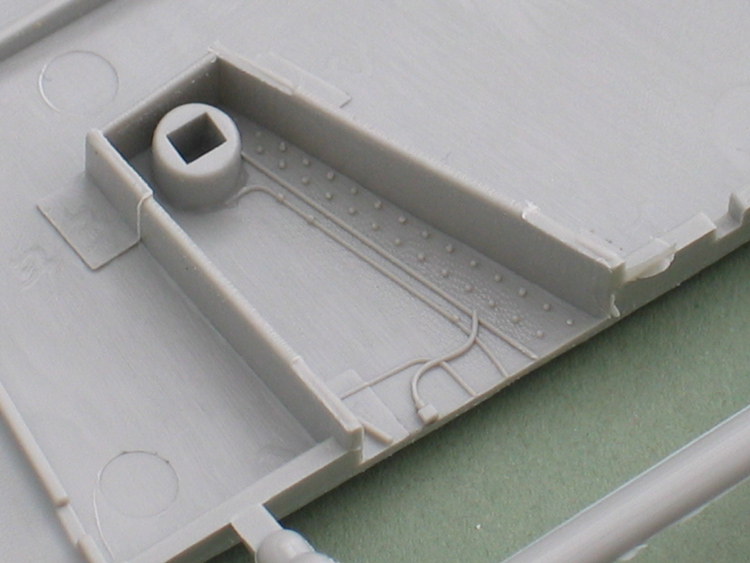
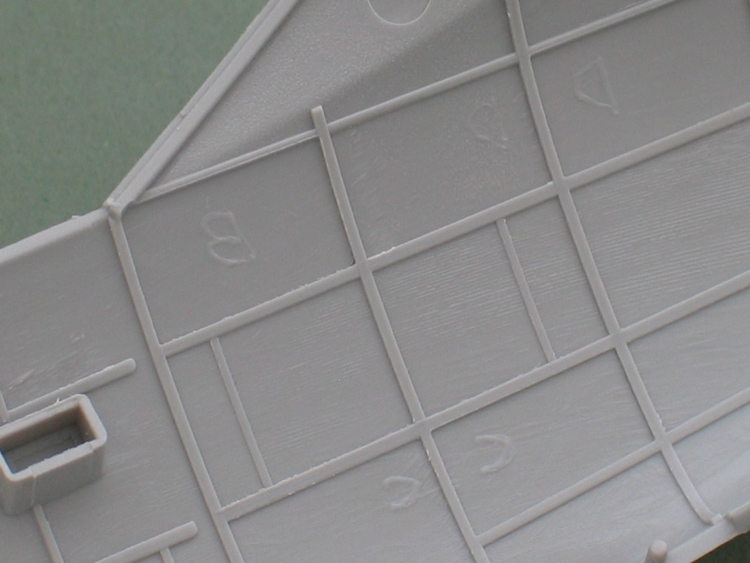
Trumpeter have done a pretty good job in keeping ejector pin marks to a minimum and mostly out of sight, but what is rather strange is that the interior of the fuselage sides is covered with small, raised "hand-written" numbers. Presumably these are a throw back to an early stage in the kit's production - I've never seen anything like them survive on a finished release before. Some of the interior parts show a rather coarse "milled" texture - usually a sign that things have been created with CAD. Thanks to the soft plastic it is easy to polish the numbers and texture off where necessary.
Instructions & Construction Breakdown
The instructions take the form of a clearly illustrated 20 page booklet, with the assembly broken down into 36 stages. There is almost no text - just minimal captions and colour notes in Chinese and English. The assembly is logical for the most part, but I expect most modellers will chose to complete the main airframe before adding smaller items and the undercarriage which are just asking to get damaged if you follow Trumpeter's suggested sequence.
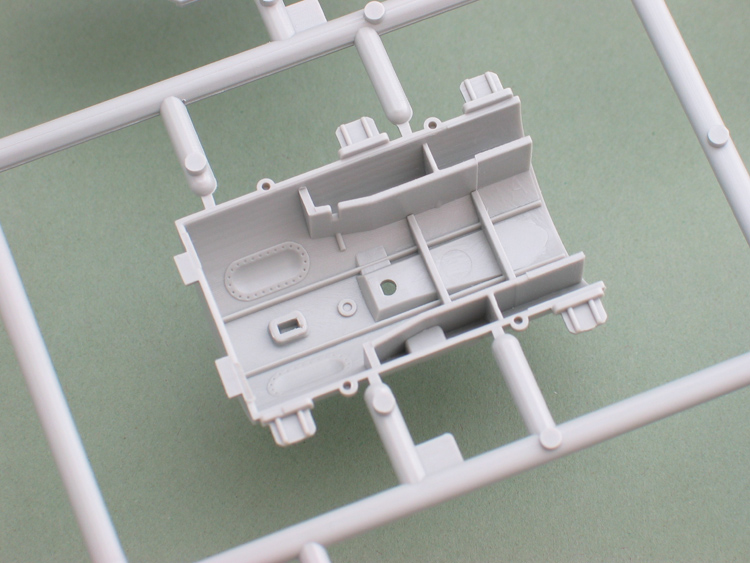
Stages 1-3 Things begin, logically enough, with the nicely detailed cockpit. The "pressure tub" of the original aircraft is split horizontally to allow the side consoles etc. to be added. The seat is fairly simple, but it comes with a photo-etched harness. The metal used is much thicker than any I've seen before, but it should bend easily enough once it's annealed. Seeing as Trumpeter have included an etched harness, it's surprising that they didn't also supply straps for the otherwise quite neat rudder pedals.
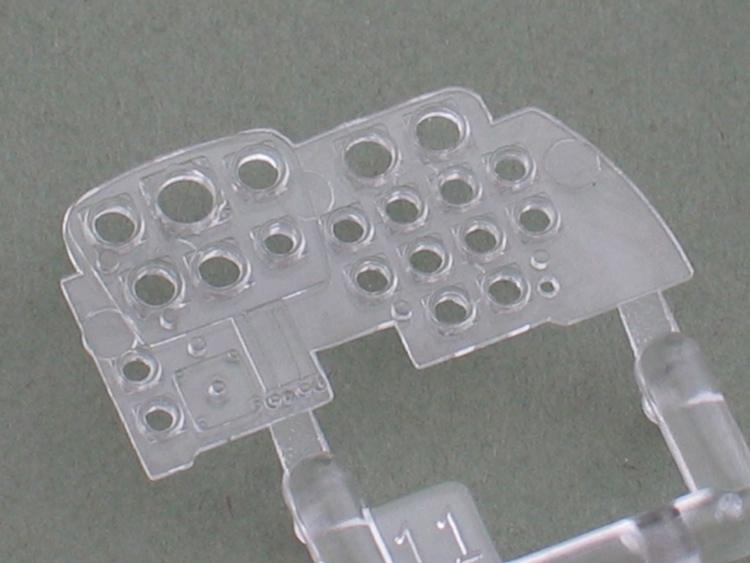
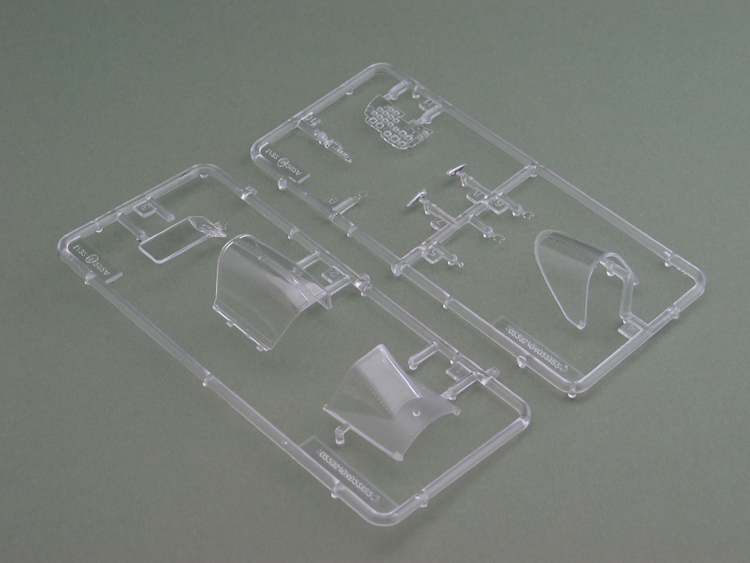
The instrument panel is a bit unusual. A clear film is sandwiched between front and rear plastic pieces and, oddly, the front panel is moulded clear with open bezels. The instruments printed on the clear film are OK, but close up they a printed as a half-tone (like a B&W newspaper photo) making them seem rather grey. The backs of the instruments are neatly moulded - and do note, they will be clearly visible in the gap under the windscreen, so many modellers will want to add some wiring. The Revi 16 gunsight comes complete with a pair of clear reflectors. Finally, the cockpit tub attaches to front and rear bulkheads and is set aside for later.
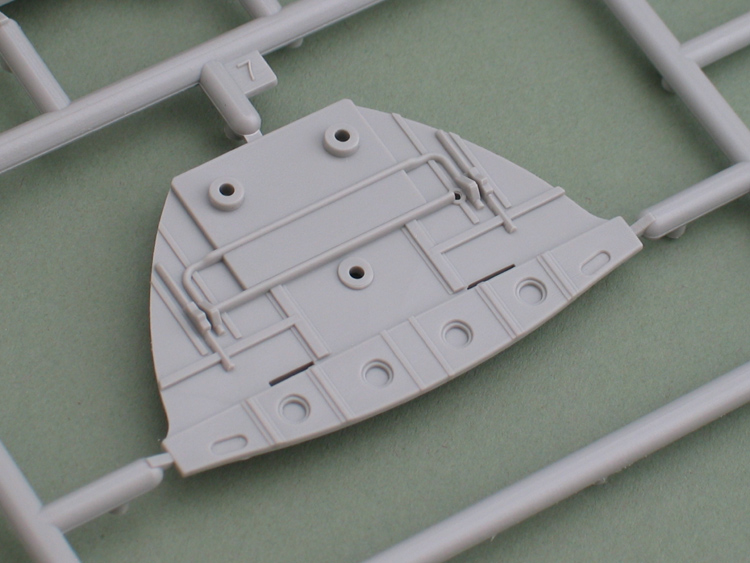
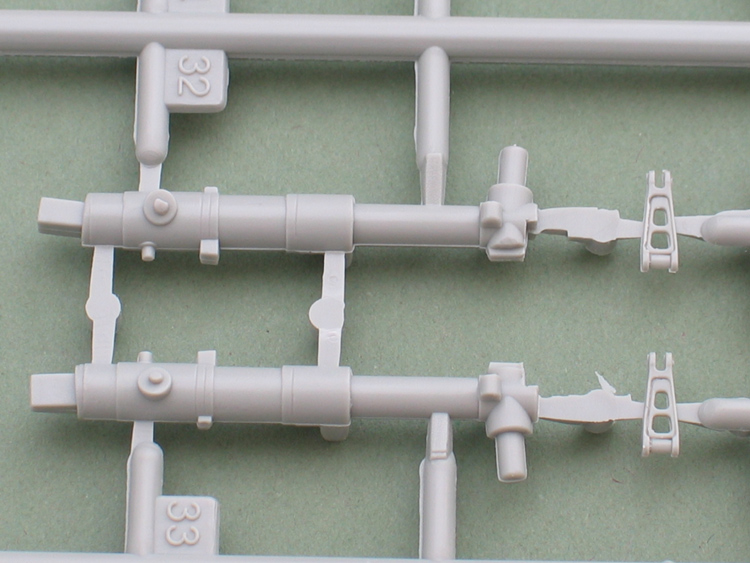
Stages 4-7 tackle the nose gear and cannon bay. Trumpeter give a choice of nose wheels and legs, both of which are well detailed and only really require brake cables and the prominent weld seams of the original aircraft. to look good. The tyres are vinyl, which I must admit isn't my favourite choice; apart from usually looking too dark, it has a horrible tendency to melt styrene through a chemical reaction. Anyway, vinyl it is, but the good news is that Trumpeter have depicted the treads very well indeed.
In addition to the styrene legs, there are also white metal legs, which are basically identical but will need some extra cleaning up. Trumpeter don't indicate the need for any nose-weight, but I'm sure this kit will be a tail-sitter without a reasonable amount, so the metal gear legs could come in handy.
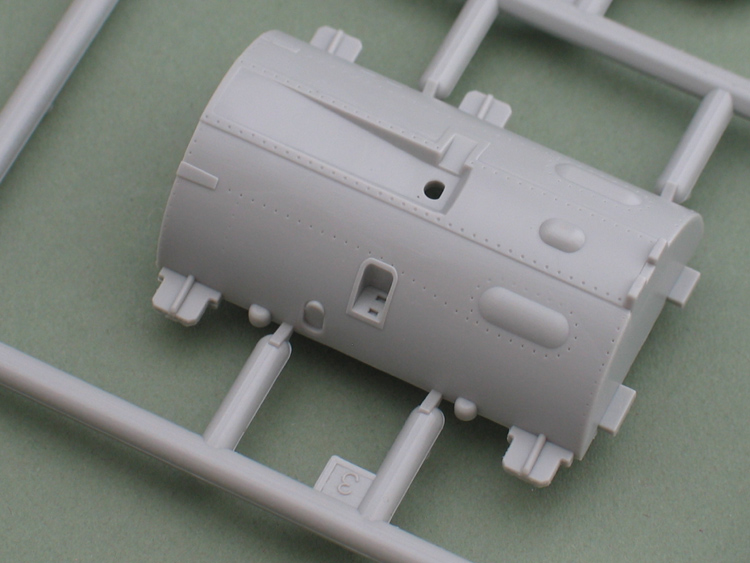
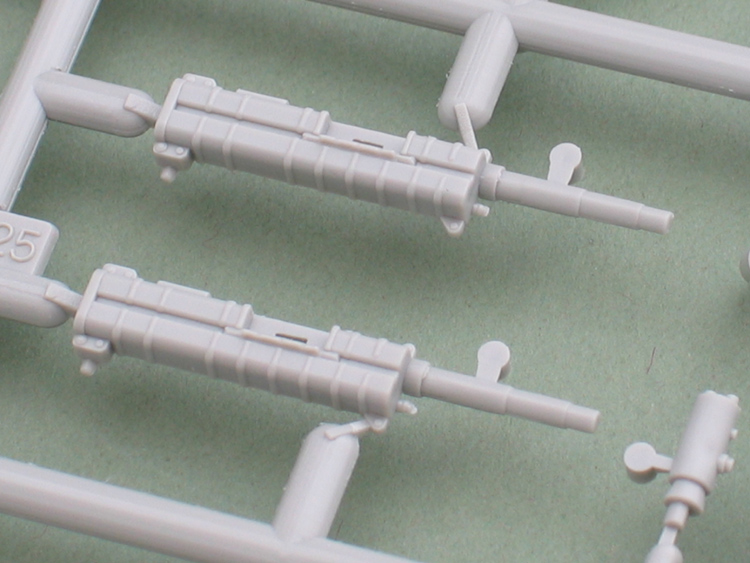
The gun bay is very well detailed, with the 4 x Mk 108 30mm cannons and their ammunition feeds, plus a gun-camera in the extreme nose. Of course there's plenty of scope for extra detail in terms of cabling for the guns and on the rear bulkhead, but the basics are all here.
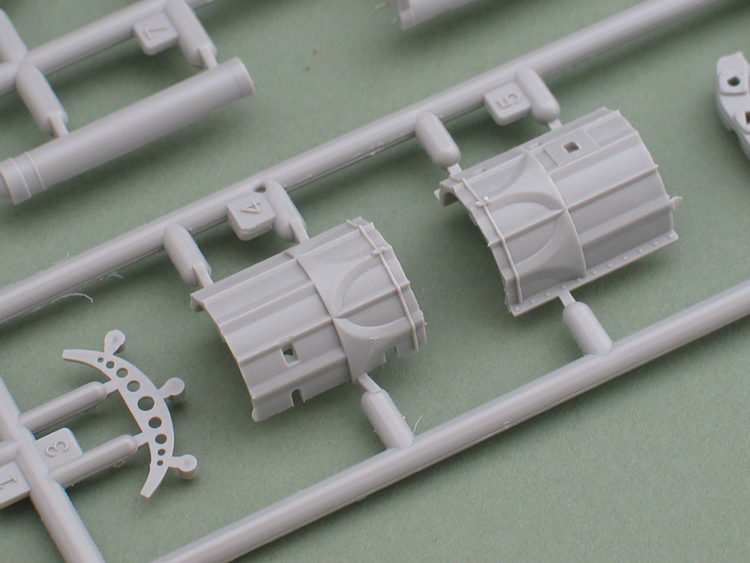
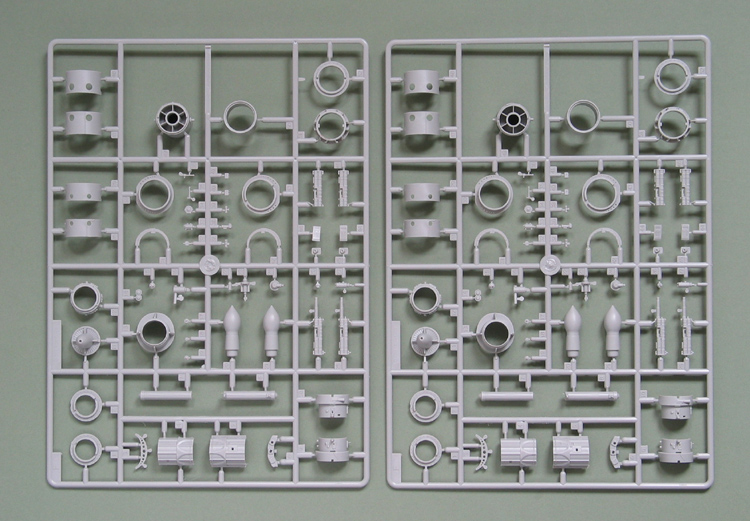
Stages 8 -10 cover the engines and nacelles. The engines are probably better detailed than any I've seen before. Each is made up of over 40 parts and built in 5 sub-stages. The results should look spectacular but, as detailed as the engines are, a quick glance at any reference photo will show the mass of wiring and plumbing that the superdetailer can still add to turn these items into real eye-poppers.
The nacelles are moulded both solid and clear, although the clear parts aren't mentioned in the instructions. To be honest, I'm not convinced that the clear parts are a great success; they aren't particularly clear and, of course, all the ejector pins marks inside are visible, so they'll need a lot of cleaning up and polishing to be much use. Something not shown in the instructions is that deep lines are scribed inside the nacelles, so it will be easy enough to cut out the access panels to display the engines, should you wish.
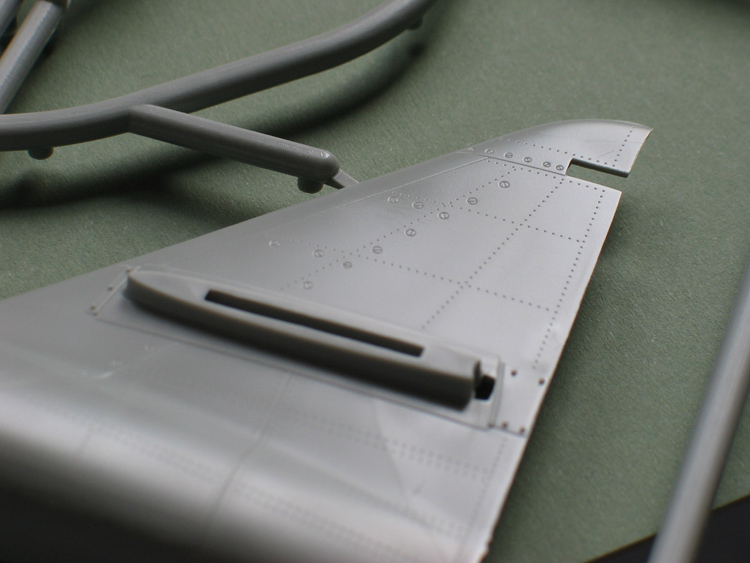
Stages 11- 21 cover the construction of the wings, which feature separate leading edge slats and control surfaces. Thankfully, Trumpeter have done away with the metal hinges which so many modellers disliked in their early kits; there are no gimmicks here and the result should look excellent. The kit also includes a pair of RATOG packs. Annoyingly, although the instructions state these are optional, the fuselage mounting holes are already opened.
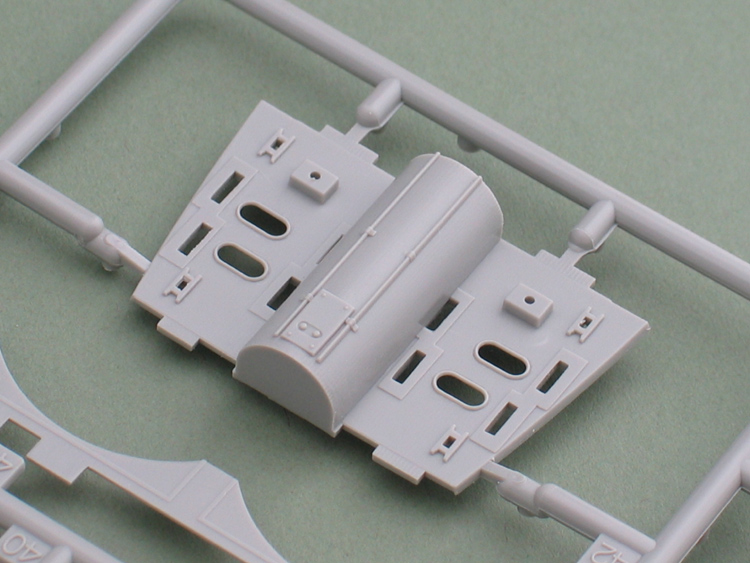
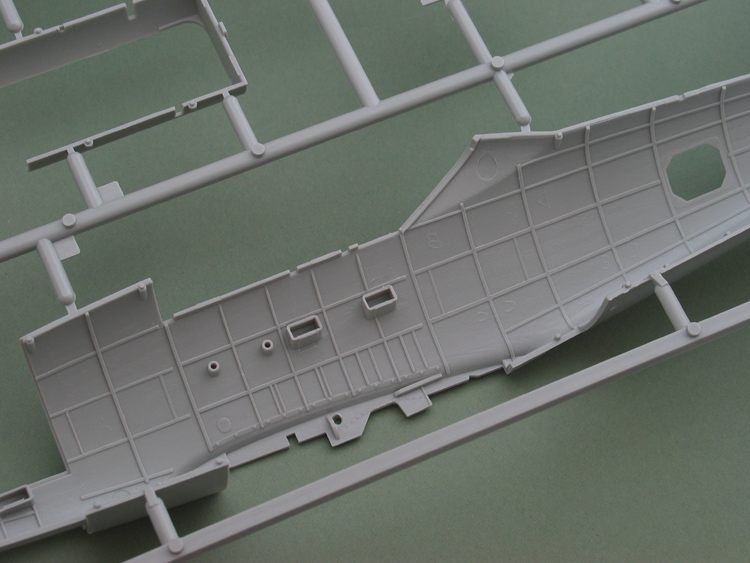
Stages 22-25 add the fuselage interior and close the fuselage halves. The real surprise for me is that Trumpeter have modelled the radio and compass bay in the area behind the cockpit. It's very nicely done and will be visible through the separate hatch provided. Once again, there's a fair amount of cabling you can add here and most modellers will, at least, want to add the prominent control-cable runs which Trumpeter have omitted.
The fuselage halves feature interior framework from the nose to the tip of tail fin. Most of this will be totally invisible, so it could well be a sign that Trumpeter are planning a clear-fuselage version at some stage... Another sign of more versions to come is the inclusion on the sprues of parts for a 2-gun nose.
Stages 26-28 Cover the main landing gear. As with the nose-gear, there's a choice of plastic or metal legs and, again, it should be straightforward to add brake lines etc.
Stages 29-33 Things really begin to come together now as the wings are attached and the main undercarriage are added, followed by the construction of the tail surfaces with separate elevators and rudder.
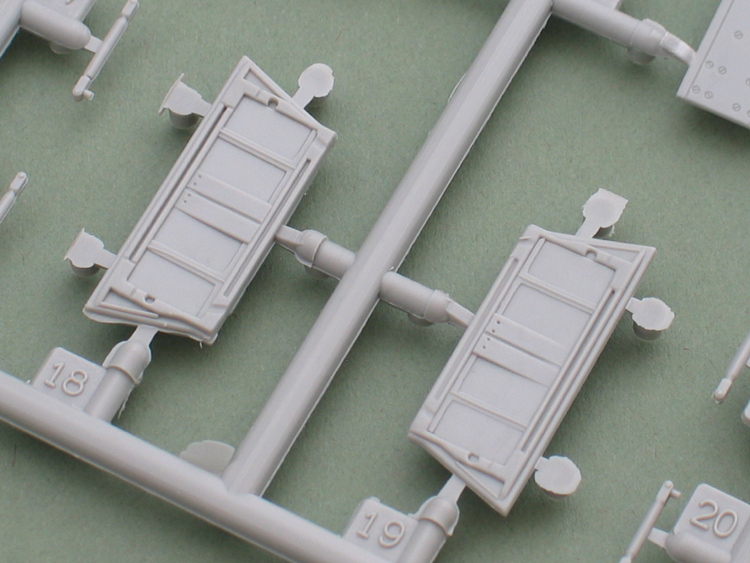
Stages 34-36 add the final details such as gun-bay doors and the canopy, which includes an interior armoured windscreen and headrest and can be posed open. The canopy is very thin and clear, but the centre section has a couple of ugly attachment tabs which must be trimmed off if it's modelled closed. I think it'll look much better if these are removed anyway and the corresponding slots on the cockpit sill filled for a more realistic look. Trumpeter have missed off the prominent locking handle of the original and also the restraining cable on the rear edge.
Painting and Decals
Perhaps the weakest aspect of Trumpeter's Me 262 are the painting instructions. Colour matches are given for Gunze Sangyo paints and they are not only over-simplified for a model with this amount of detail, but are quite misleading in places - particularly in regard to the interior colours. For instance, the instructions show the inside of the fuselage halves painted RLM 02, whereas all my references indicate that the bulk of the fuselage interior and main wheel well were left in unpainted aluminium on the real aircraft. Likewise, many of the fittings in the radio compartment seem to have been finished in tinted clear laquer. I would personally disregard the painting instructions and go by the many available references instead.
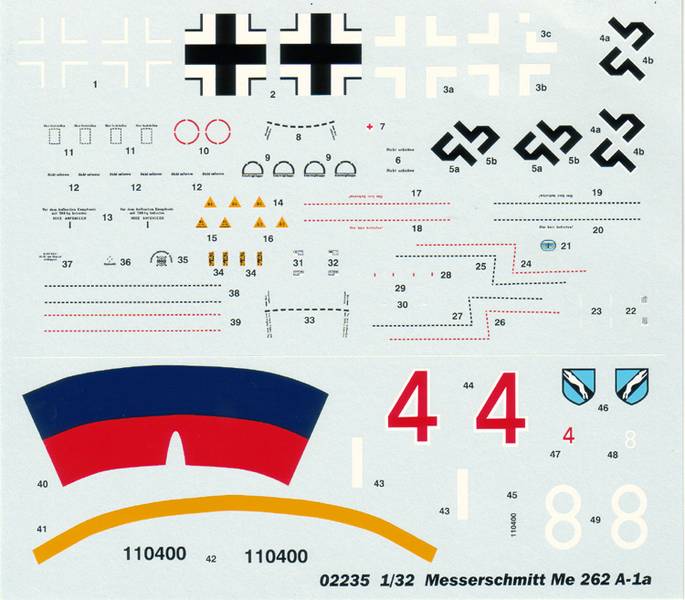
Decals are provided for two aircraft:
1. Red 4 - flown by Haupt. Franz Schall of 10/JG7 in April 1945.
2. White 8, W. Nr 110400 - flown by Major Walter Novotny.
The decals themselves look good quality - rather thick, but printed in good register. There's an extensive selection of stencilling and it's all legible. The Swastikas are provided as split halves.
The camouflage diagram takes the form of a large full-colour sheet and gives a full 4-view for Schall's aircraft, but only a port view for Novotny's. Both are camouflaged in RLM 81/82 topsides over RLM 76, while Novotny's machine features the distinctive stencilled pattern applied to the fin and rudder.
Conclusion
Overall, this is a stunning kit - easily the best Trumpeter model I've bought so far. Out of the box it will build into a very impressive model and provides a superb basis for superdetailers to go to work on. The best thing is the price - at just £29.99 it represents extraordinary value for money and deserves to be a huge success. Thoroughly recommended.
Brief Reference List
Messerschmitt Me 262 - Nohara Shigeru - Model Art, 1991 - (Japanese text) has detailed walkaround photos, plus period shots and 1/48 scale plans.
Luftwaffe Camouflage & Markings 1933-45 Vol.1 - Kenneth.A. Merrick - Classic Colours, 2004 - has many useful photos, plus arguably the most extensive and up-to-date research into Luftwaffe camouflage and painting available.
German Aircraft Interiors - Kenneth .A. Merrick - Monogram Aviation - Publications, 1996 - has a useful section on the Me 262 with many close-up photos of the cockpit, undercarriage and armament. The book also includes a separate section on German aircraft instruments, gunsights and other systems.
German Aircraft Cockpits 1911-70 - Pete W. Cohausz - Schiffer Military History, 2003 - has a useful section on the Me 262 with annotated photos from original manuals and pics of reserved aircraft. The intoduction covers the development of German flight instruments generally.
Me 262 Units - Marek J. Murawski - Kagero 2005 - (Polish / English text) has a good selection of wartime photos, plus a short walkaround section with particularly good shots of the engines and a bonus set of decals in 1/72/ 1/48 and 1/32 scales.
Aircraft Walkaround Center
Cybermodeler
Aircraft Resource Center