Affectionately known as the Big Ack, the Armstrong-Whitworth F.K.8 was essentially a scaled up version on the earlier F.K.3 (unsurprisingly nicknamed the Little Ack). Dutch designer Frederick Koolhovens new design made its first flight in May 1916 and began to reach R.F.C. units towards the end of the same year.
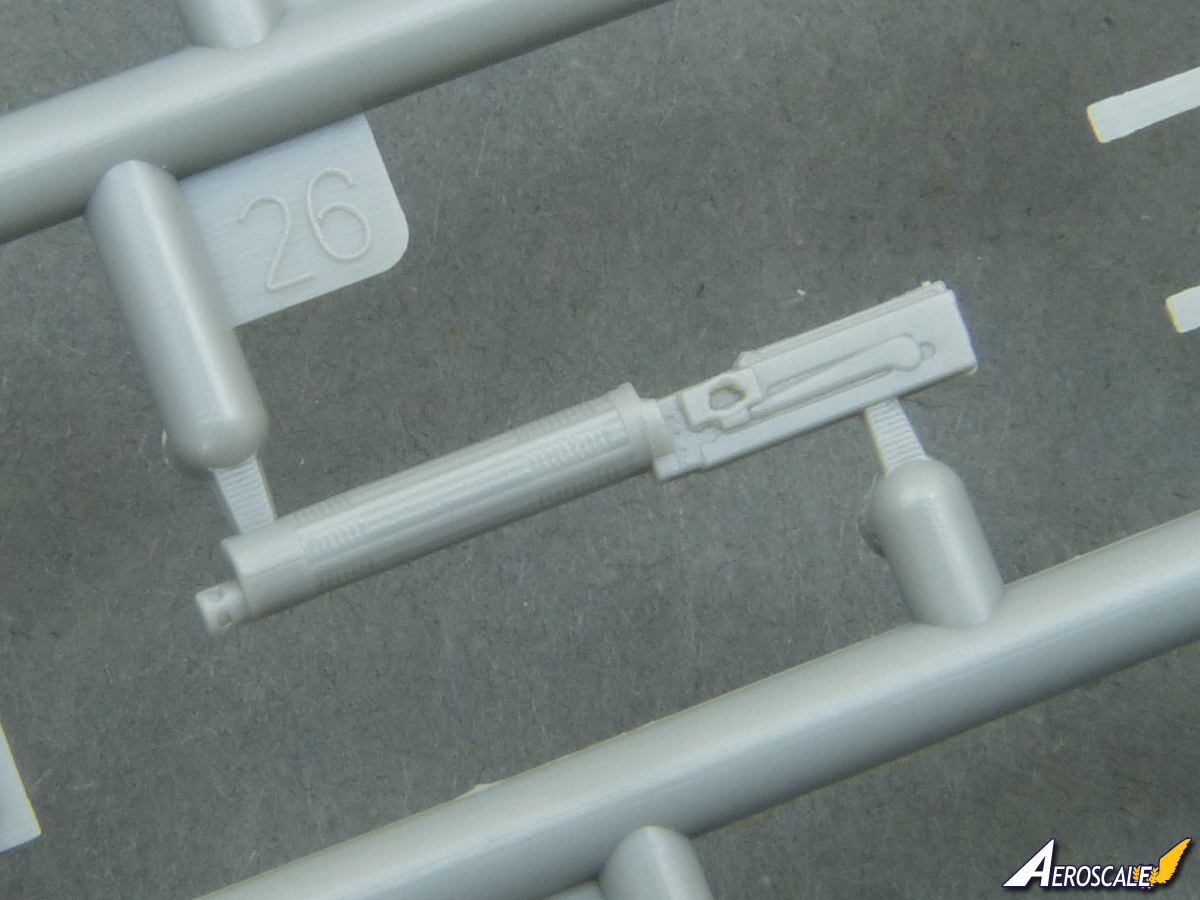
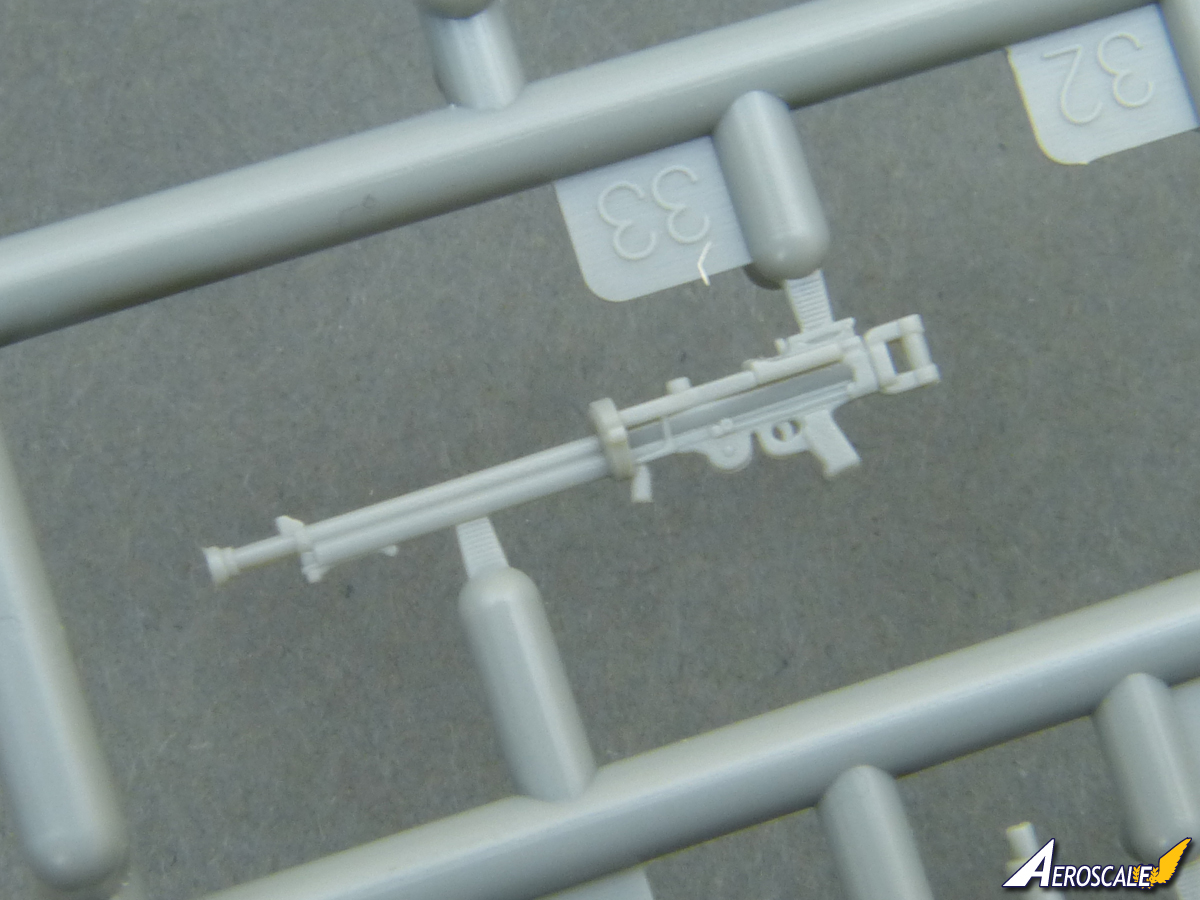
Armed with a synchronised Vickers gun for the pilot and a Lewis gun for the observer, F.K.8s were widely used in reconnaissance, and day and night bombing missions with an offensive load of 160 lbs. The aircraft proved popular with its crews, and was widely considered superior to the contemporary R.E.8, although the latter is better known.
Orders from F.K.8s included 650 from Armstrong-Whitworth themselves, with a further 900 from Angus Sanderson & Co., but over 100 more may still have remained uncompleted when production ended in July 1918. At the end of the war, 650 remained on charge, although over 40% were in storage. Nevertheless, some 200 were still in frontline service, but the F.K.8 soon disappeared from the inventory following the end of hostilities. Source: Kenneth Munson
In Kit Form
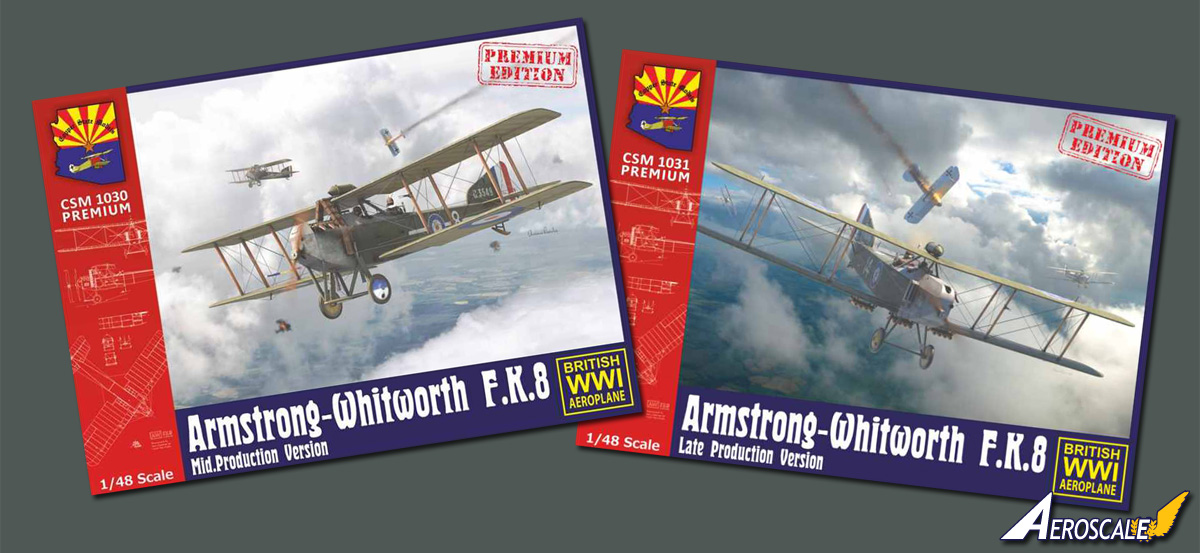
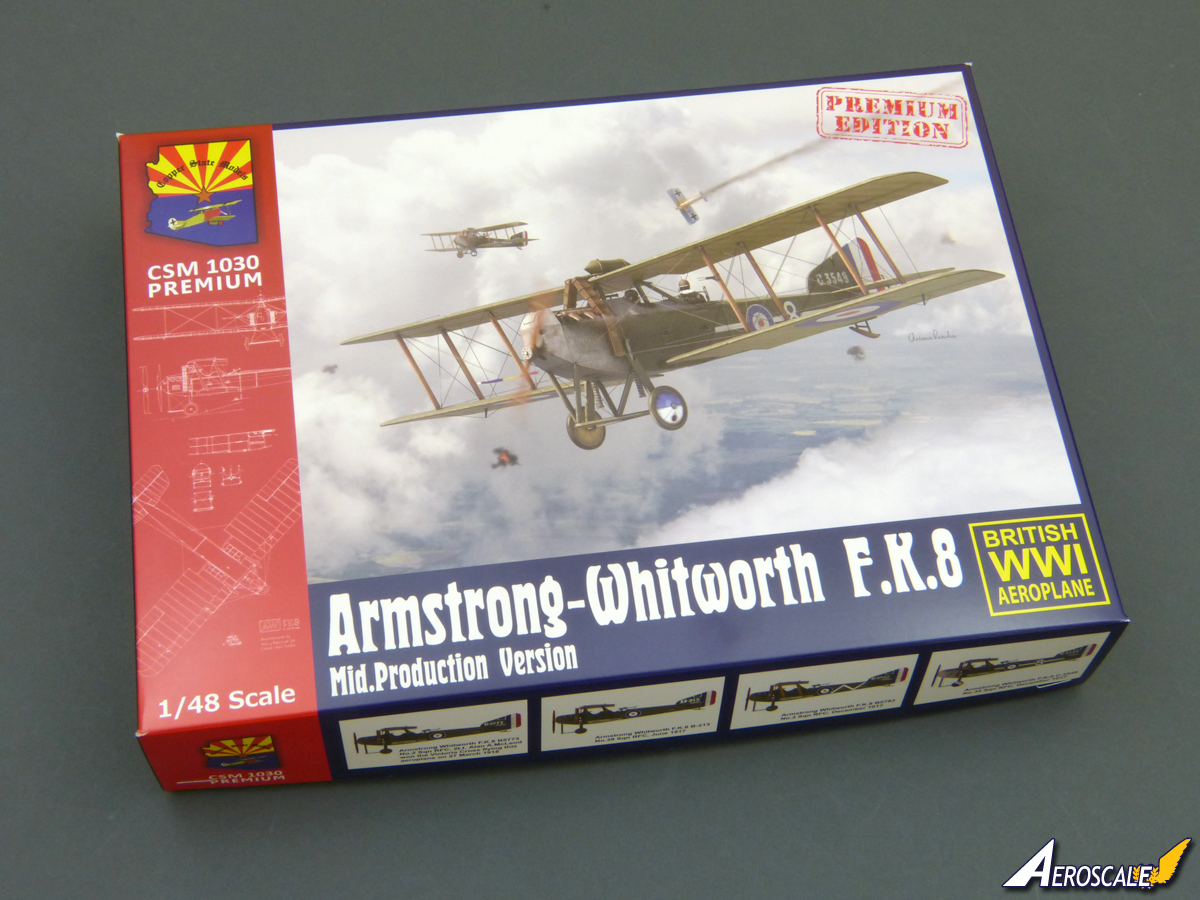
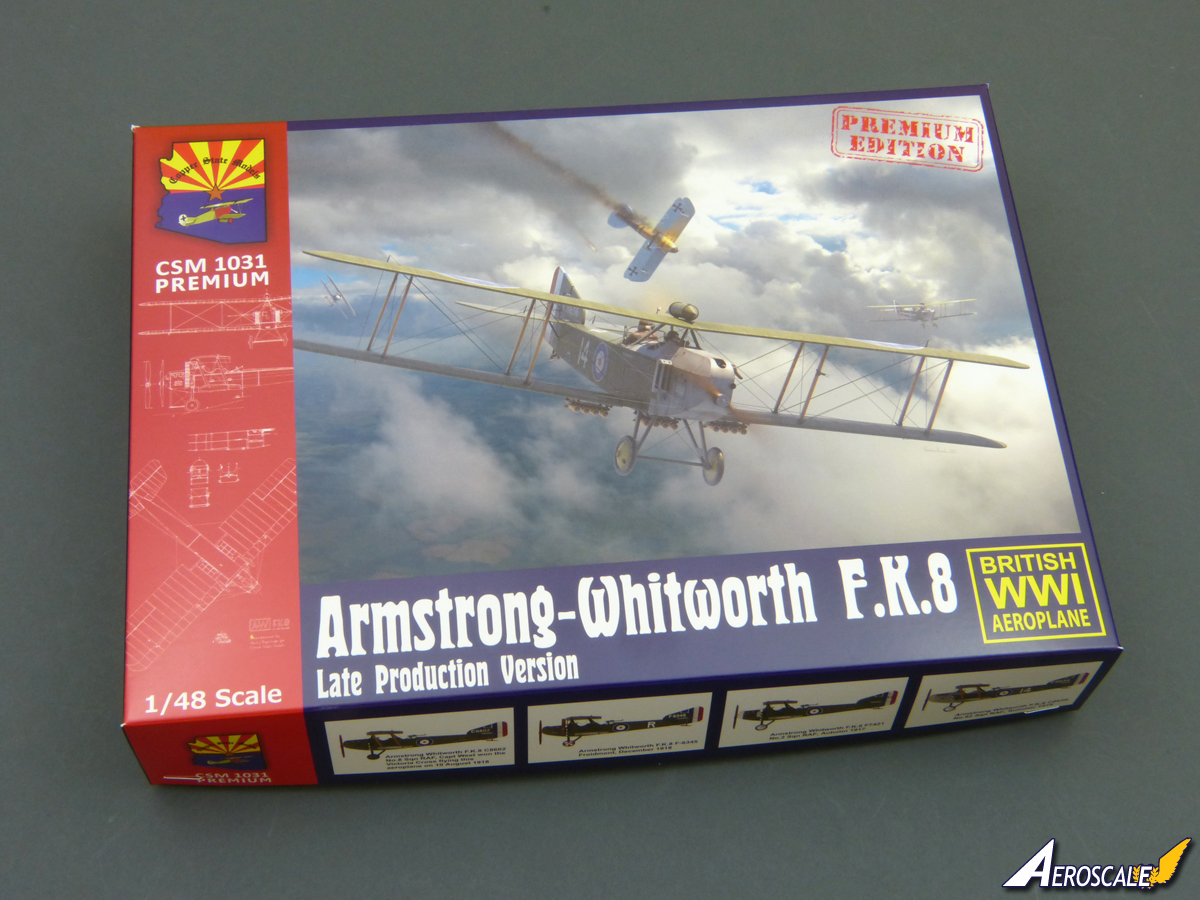
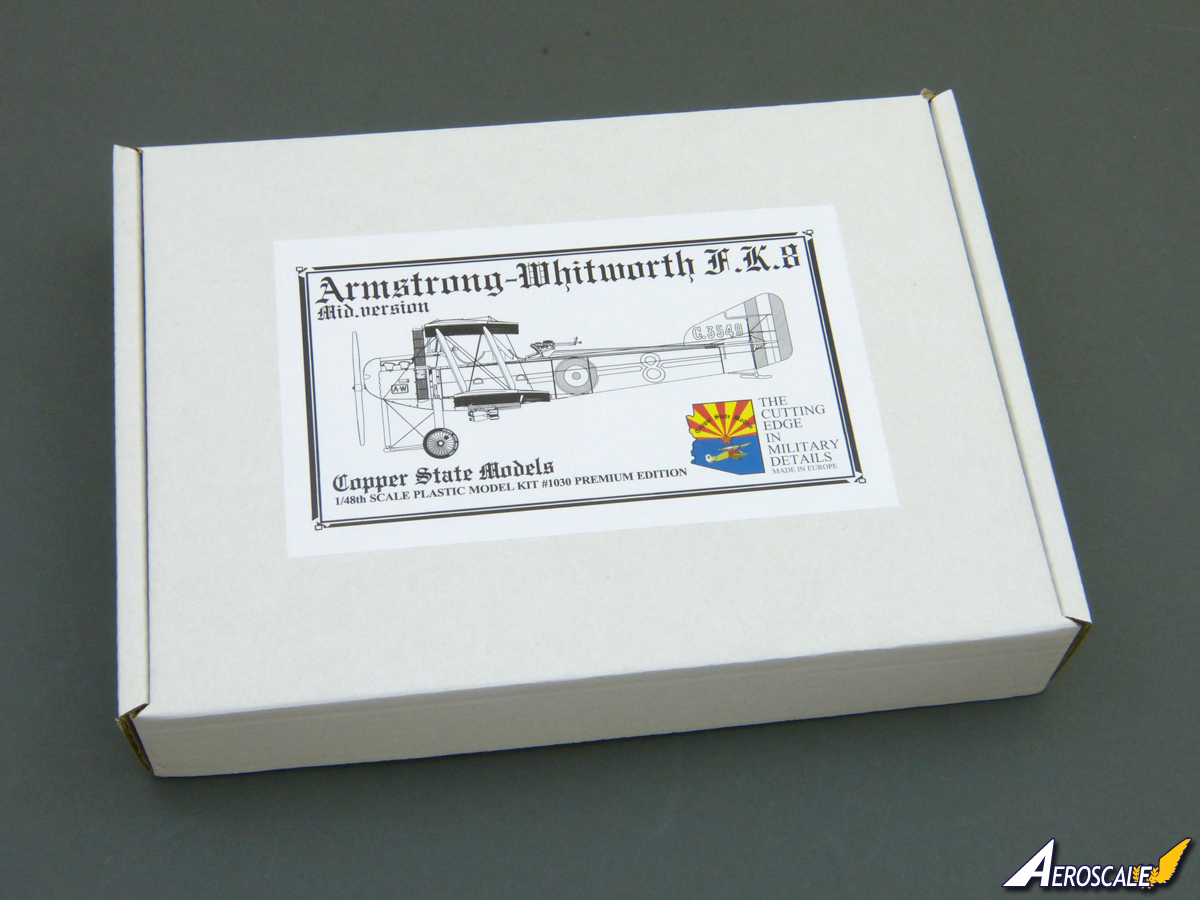
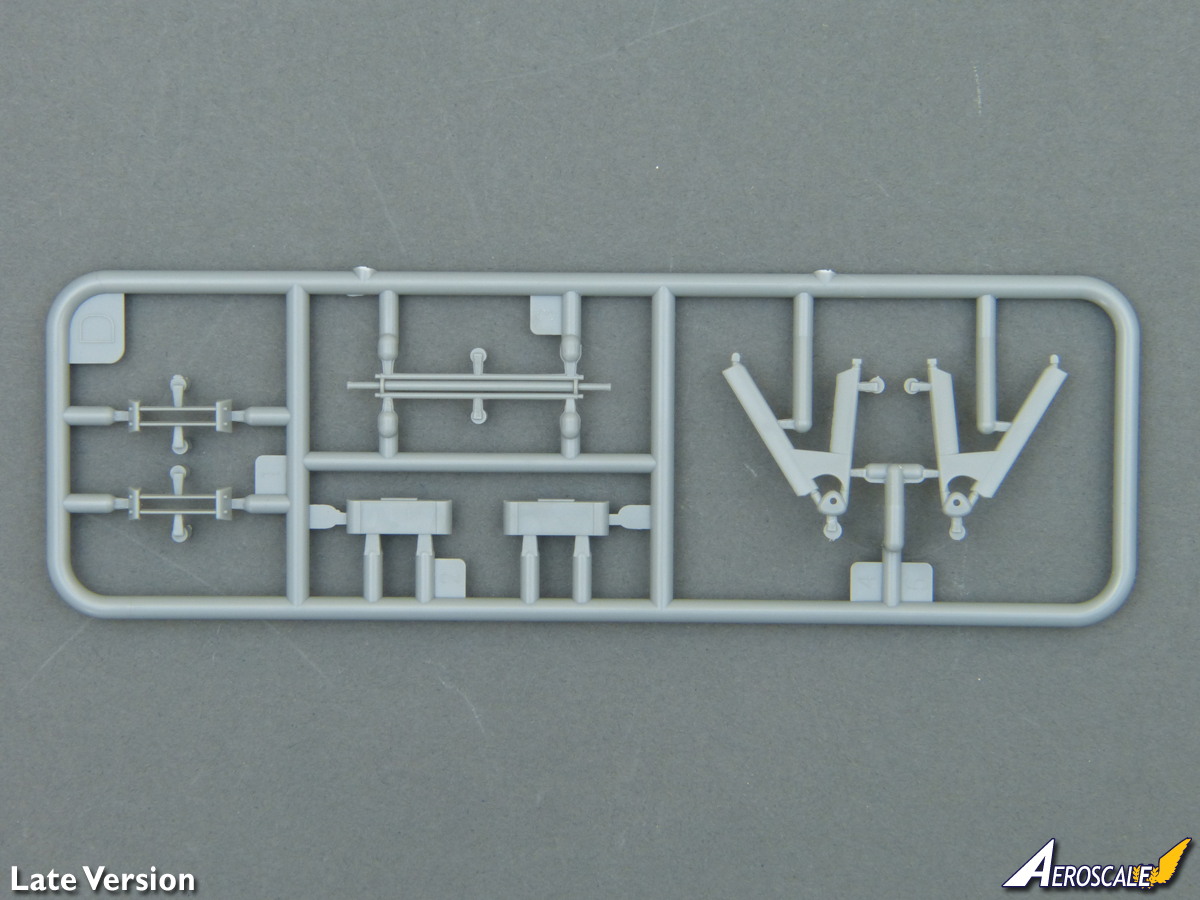
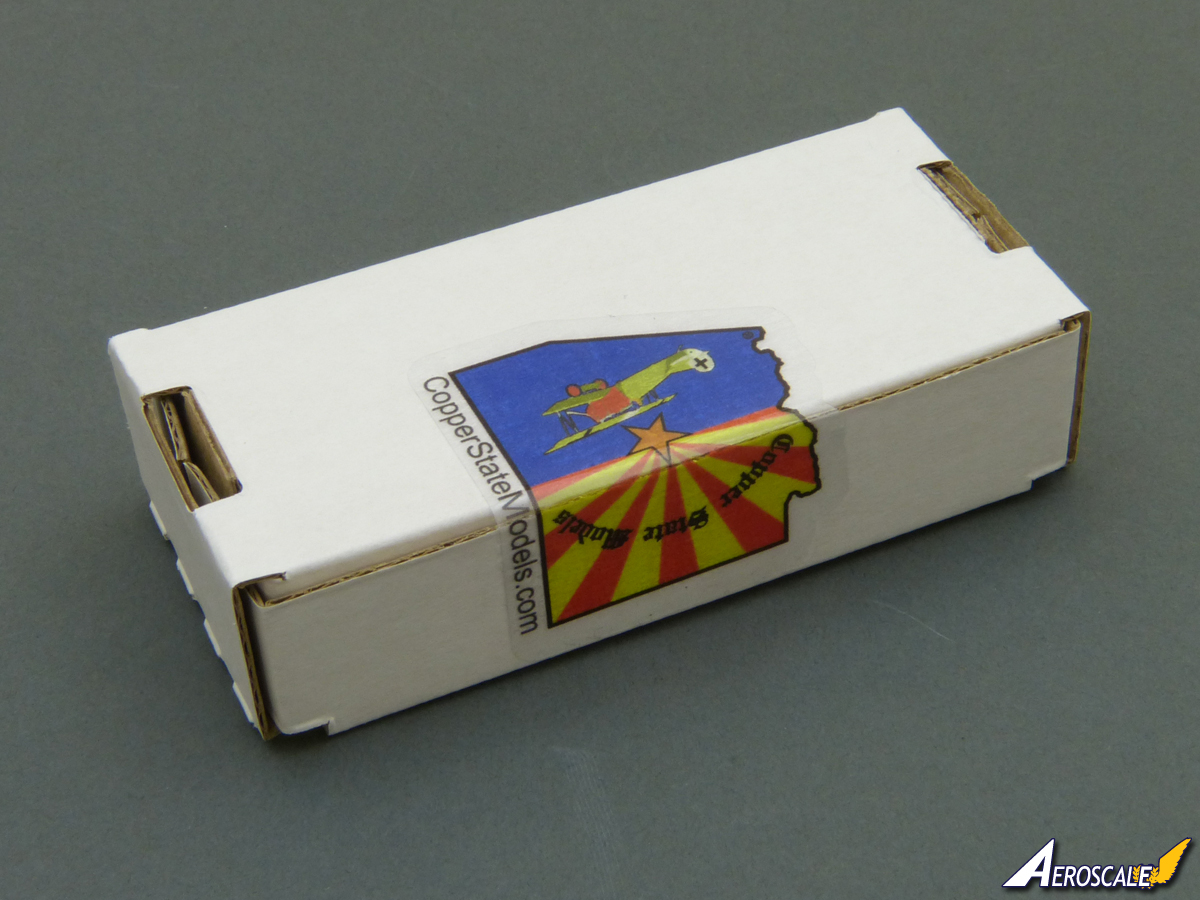
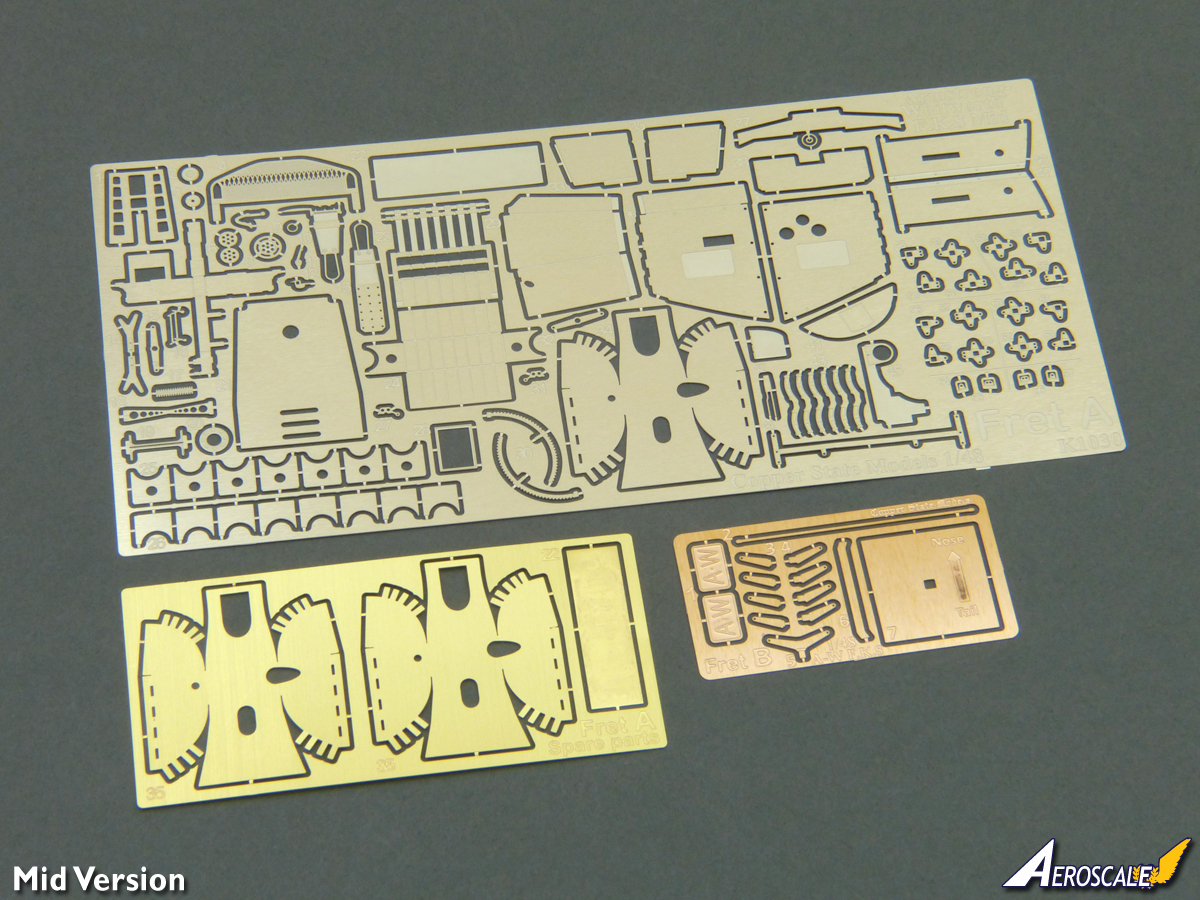
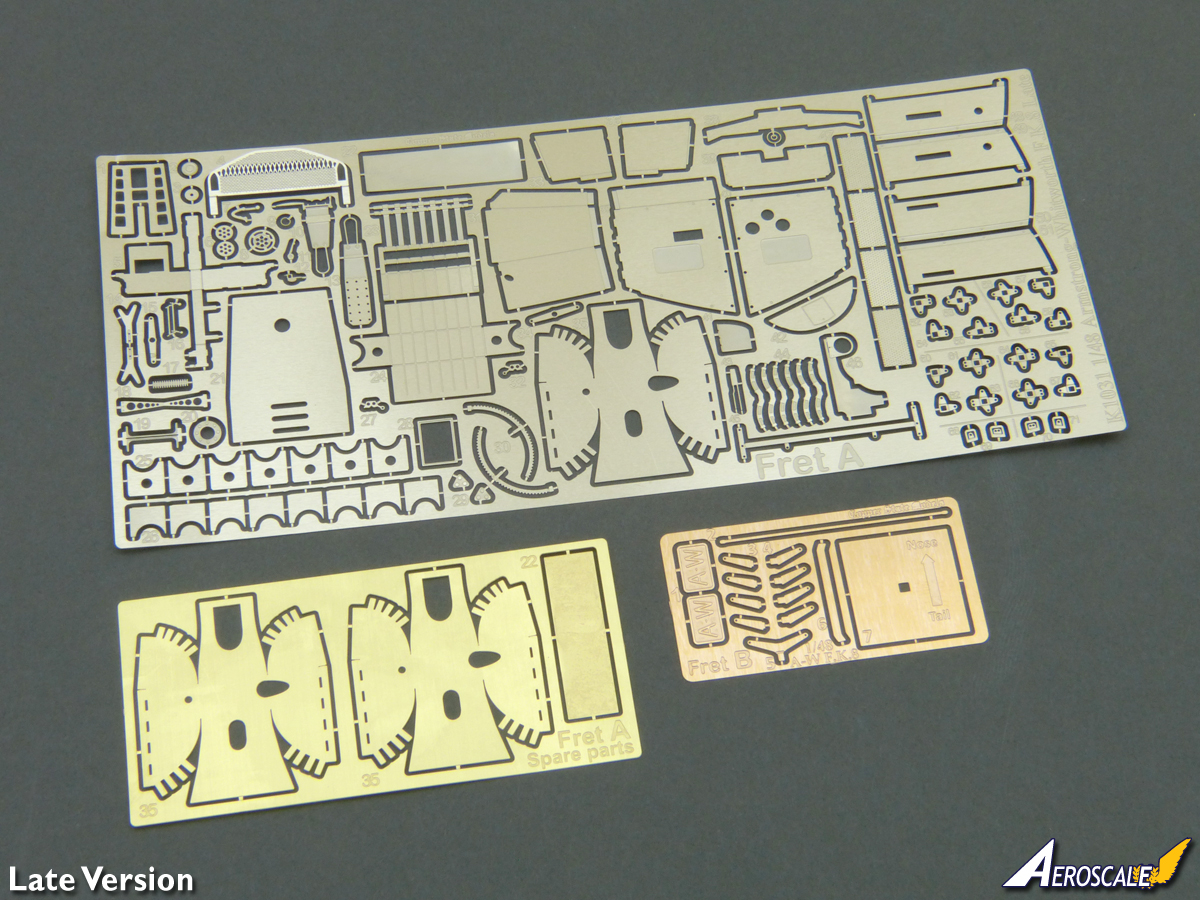
Copper States F.K.8 is currently available in two Premium boxings, with standard versions (minus extra accessories and half the decal options) due to follow. The kits exude quality from the moment you go to open the box. Lifting what appears to be a conventional lid actually reveals a very solid flip-top underneath, which not only protects the contents very well, but is ideal as a tray to hold the parts during construction. The main sprues and decals are bagged separately, while a small cardboard packet protects the extra resin and metal parts for this Premium edition. The two are kits are largely identical in terms of the parts included, with the late production version adding a small extra sprue to cater for the different undercarriage and radiators styles, plus a pair of extra etched panels. So, each kit comprises:
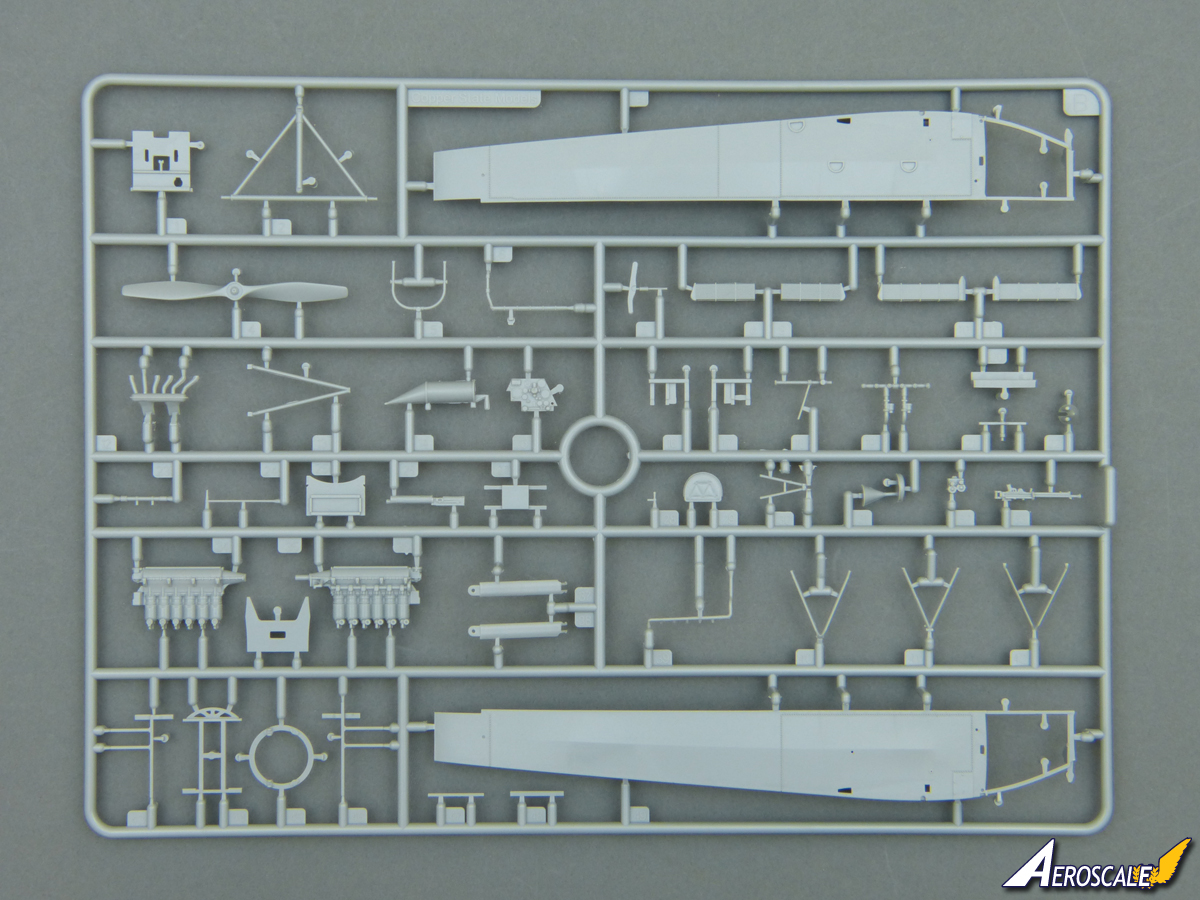
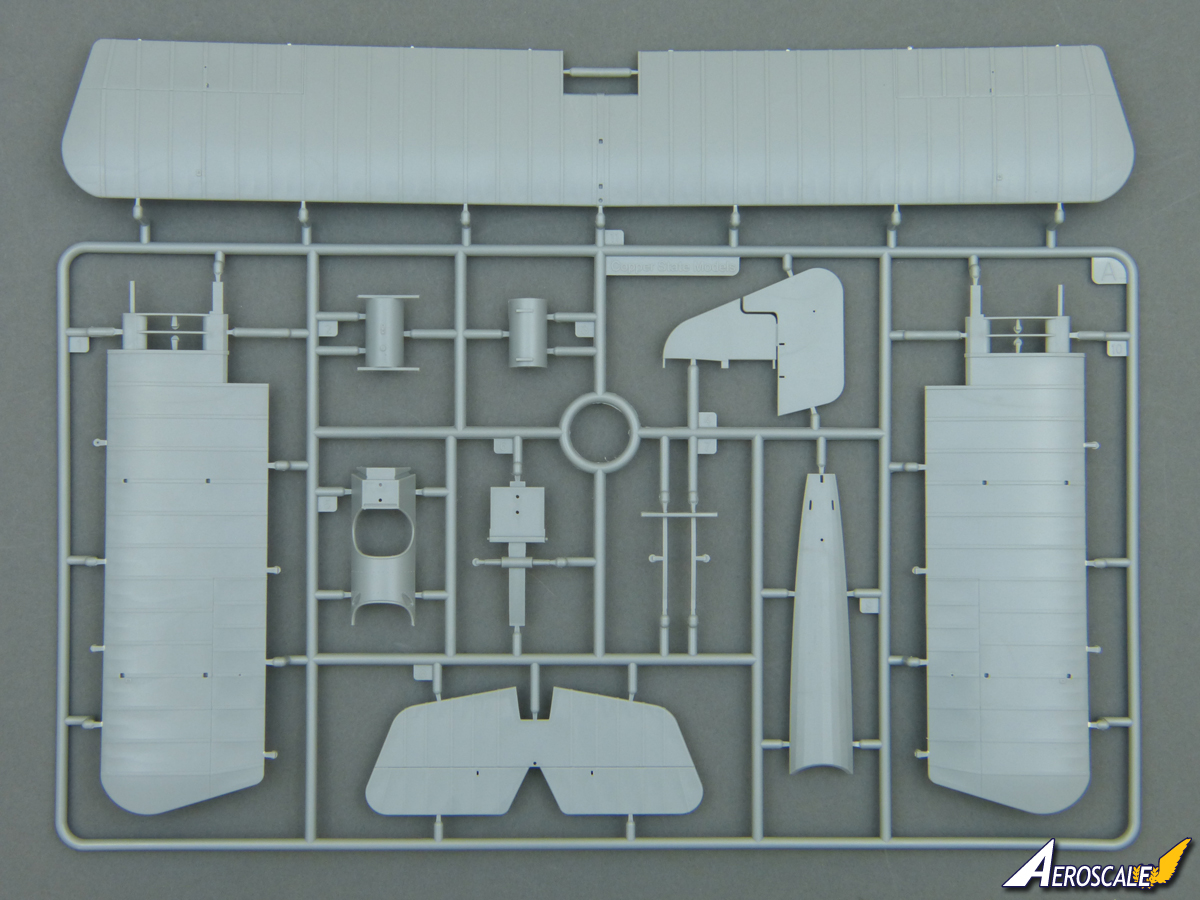
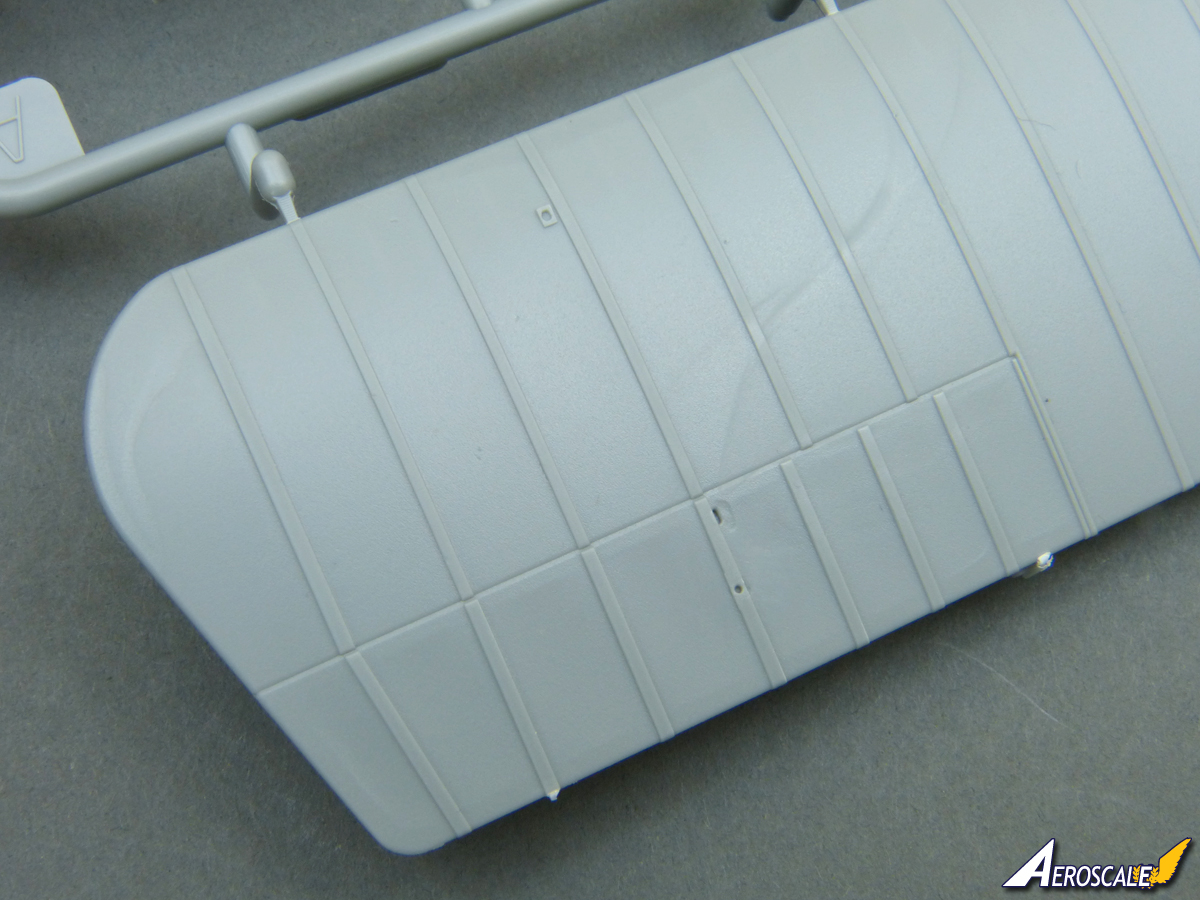
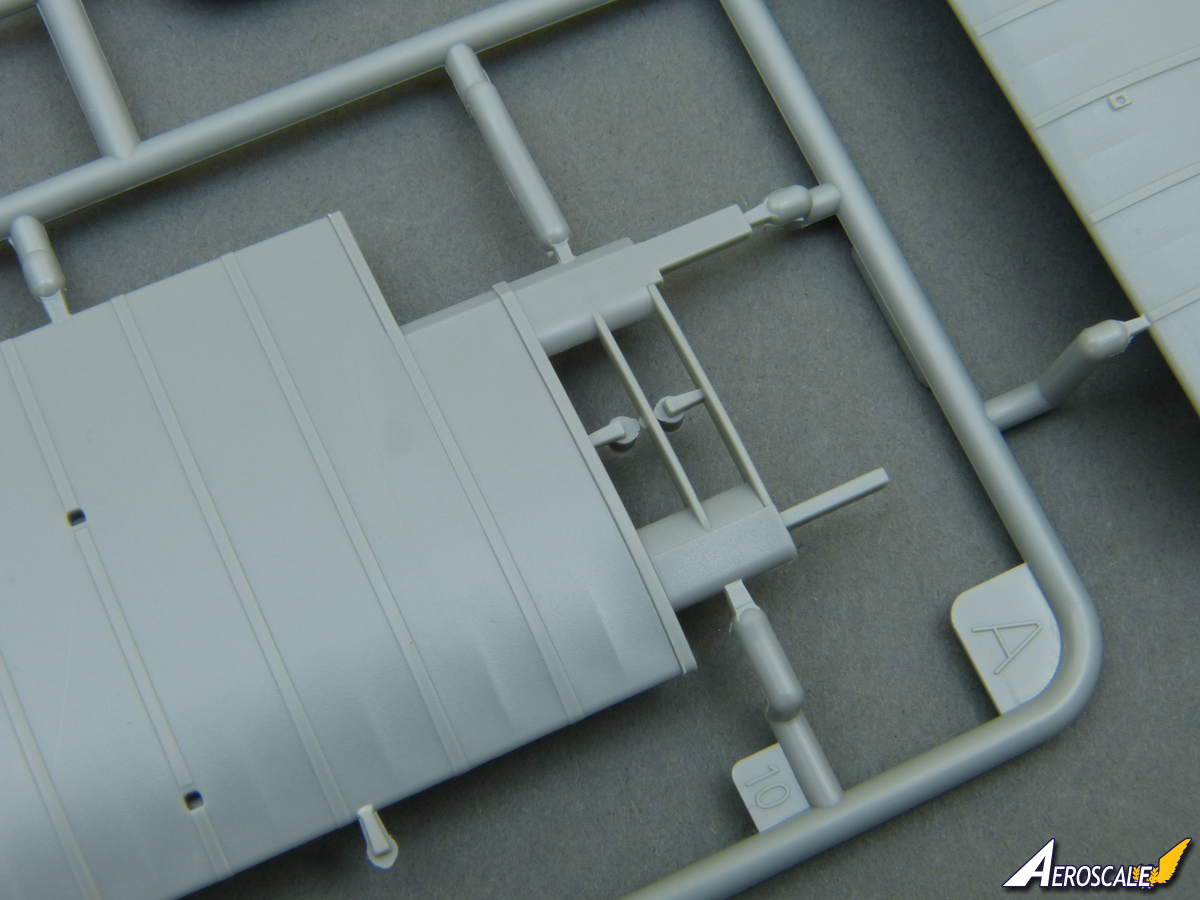
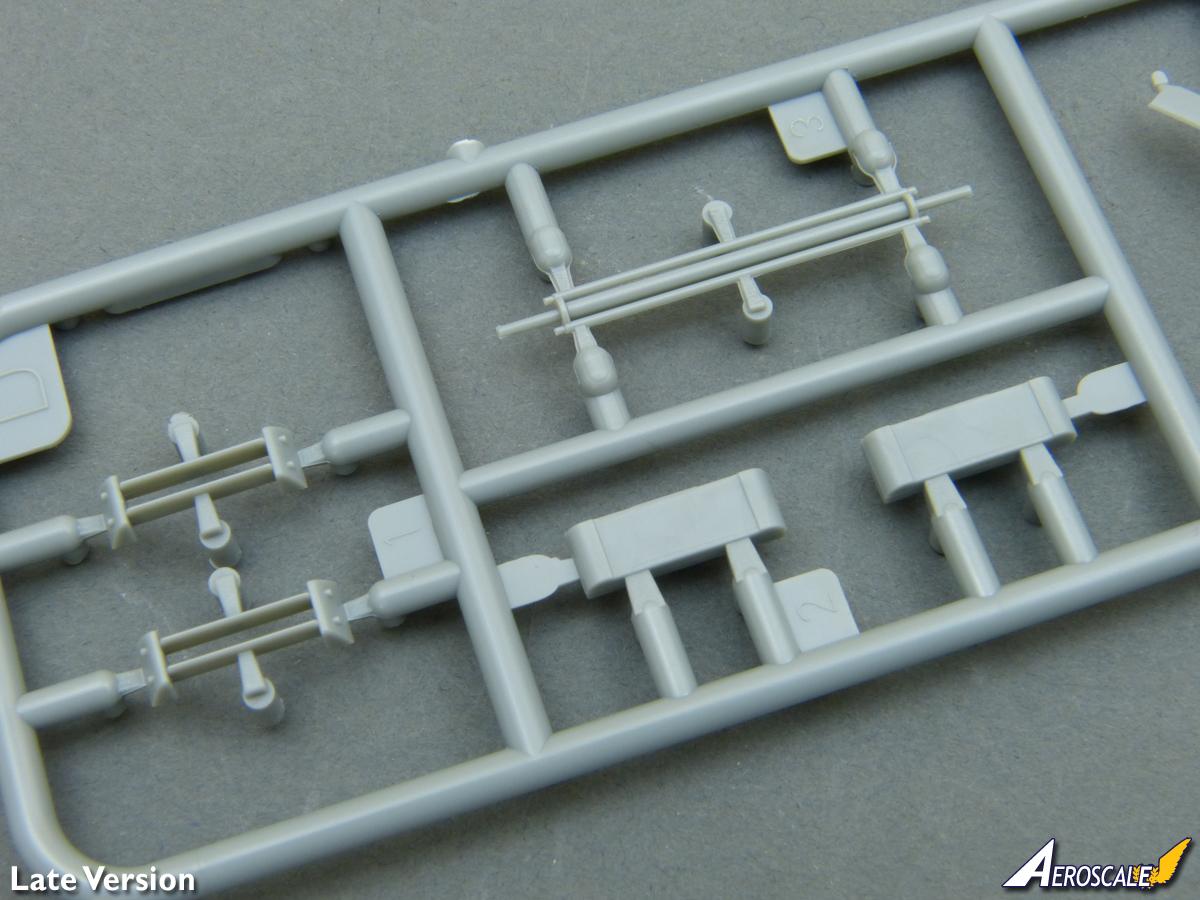
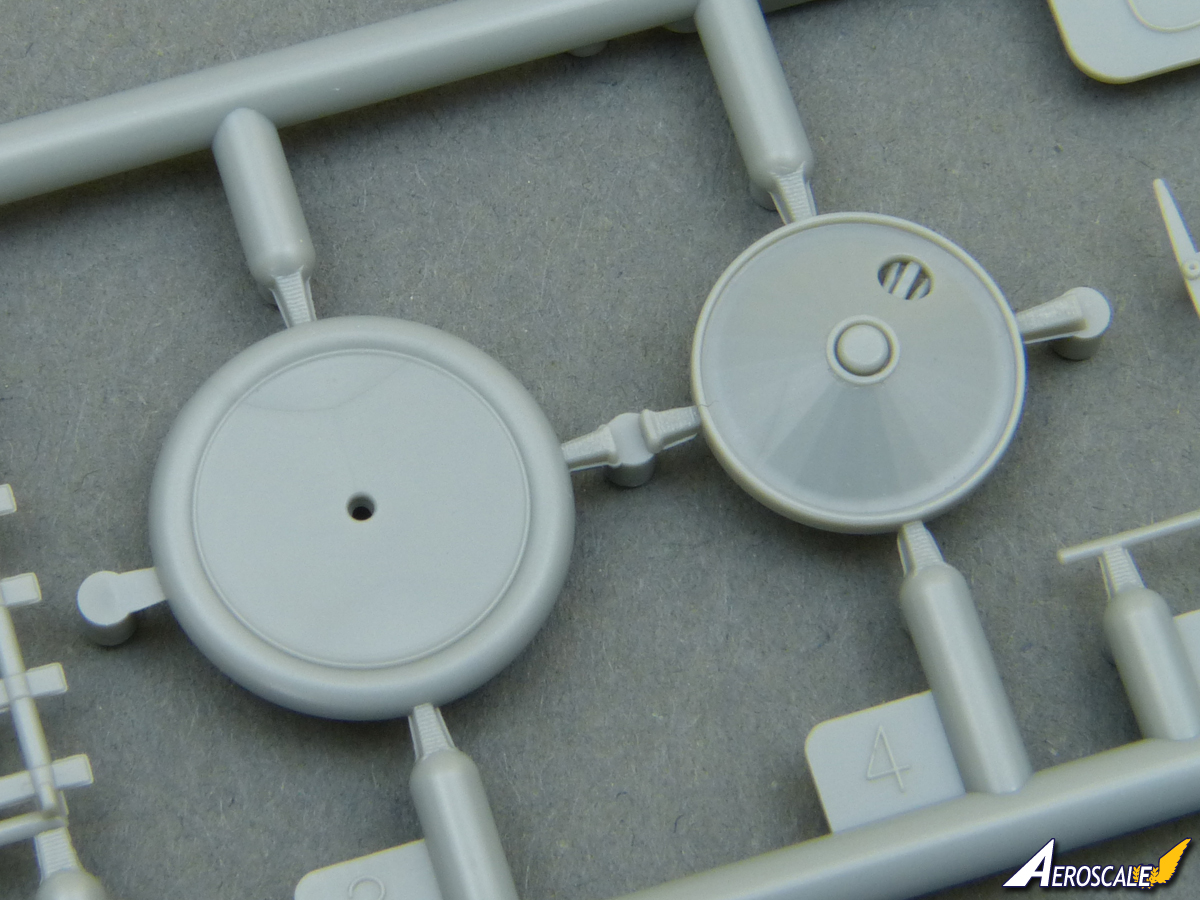
112 (119 Late version) x grey styrene parts
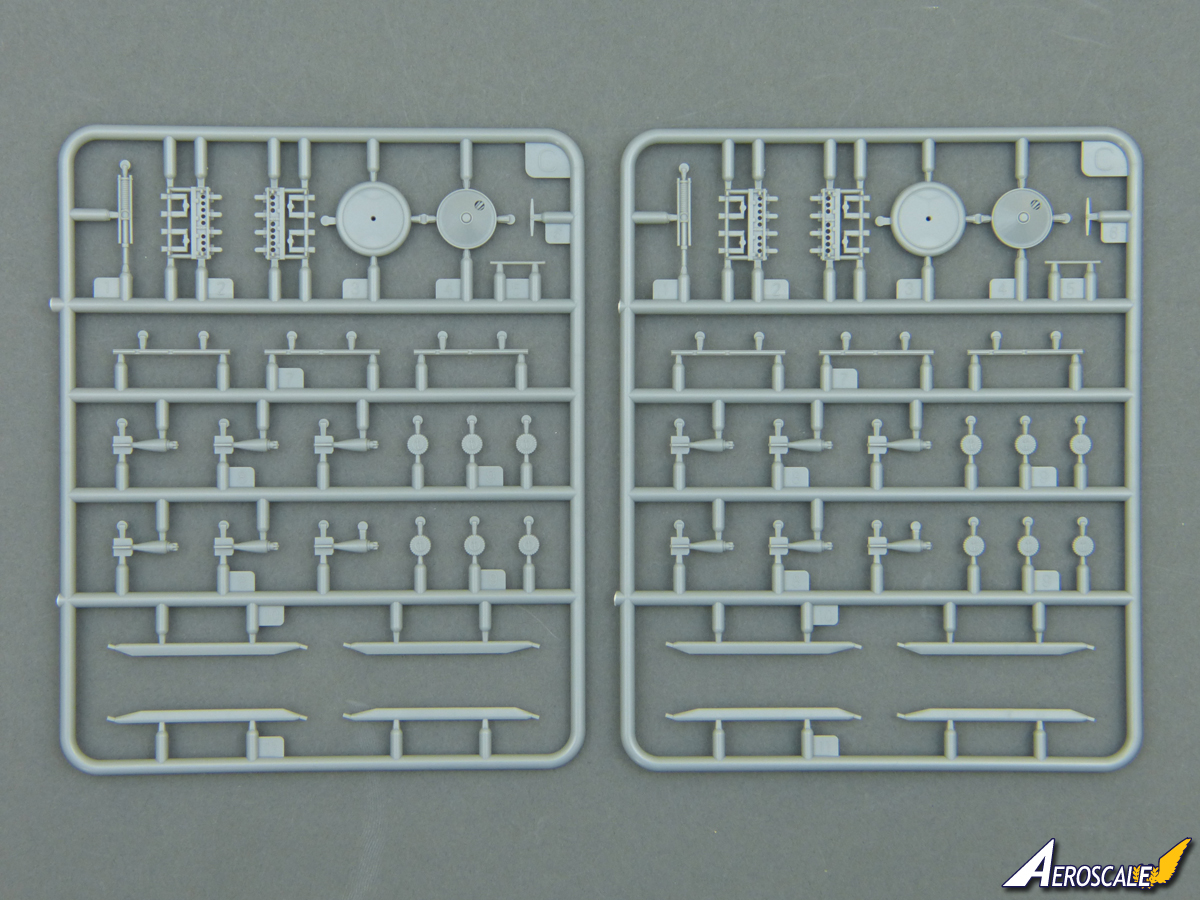
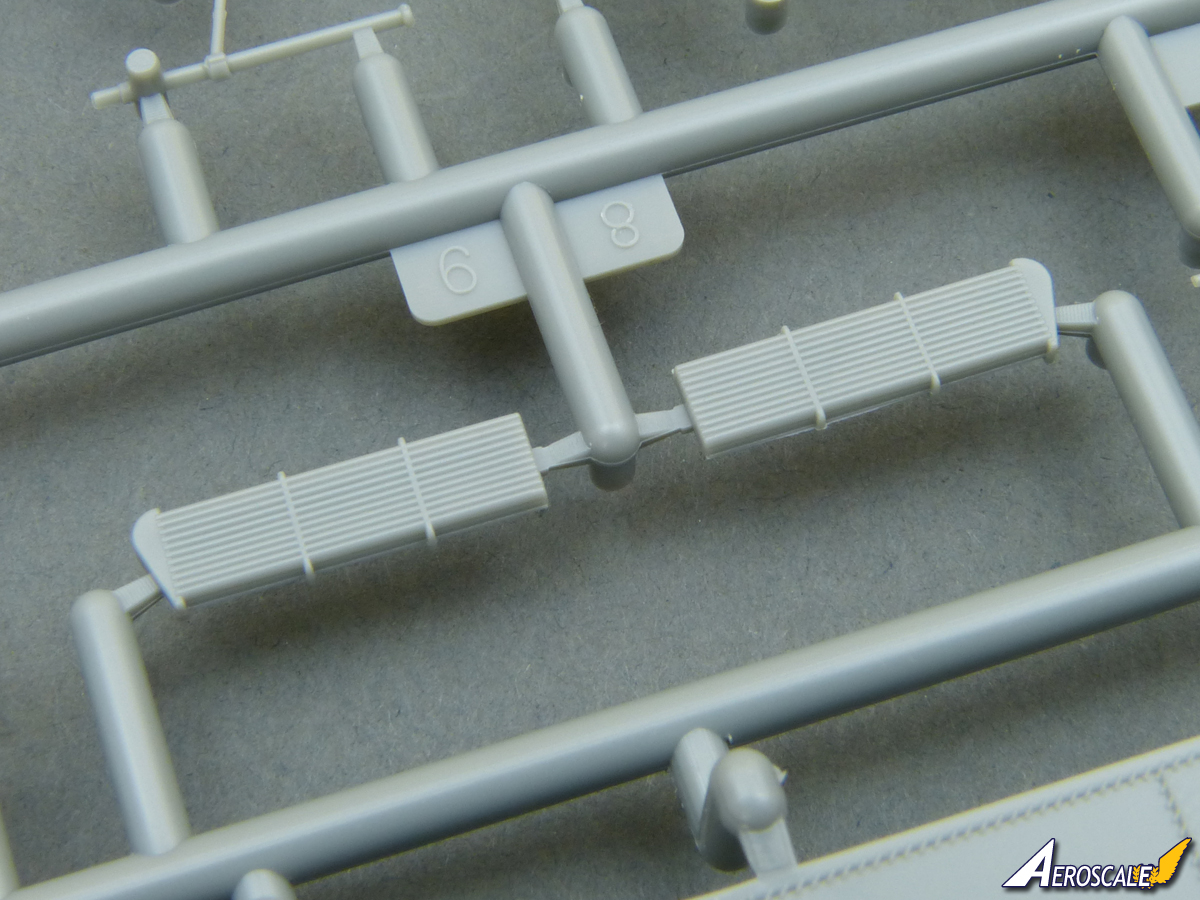
103 (105 Late version) x etched metal parts, plus an etched film
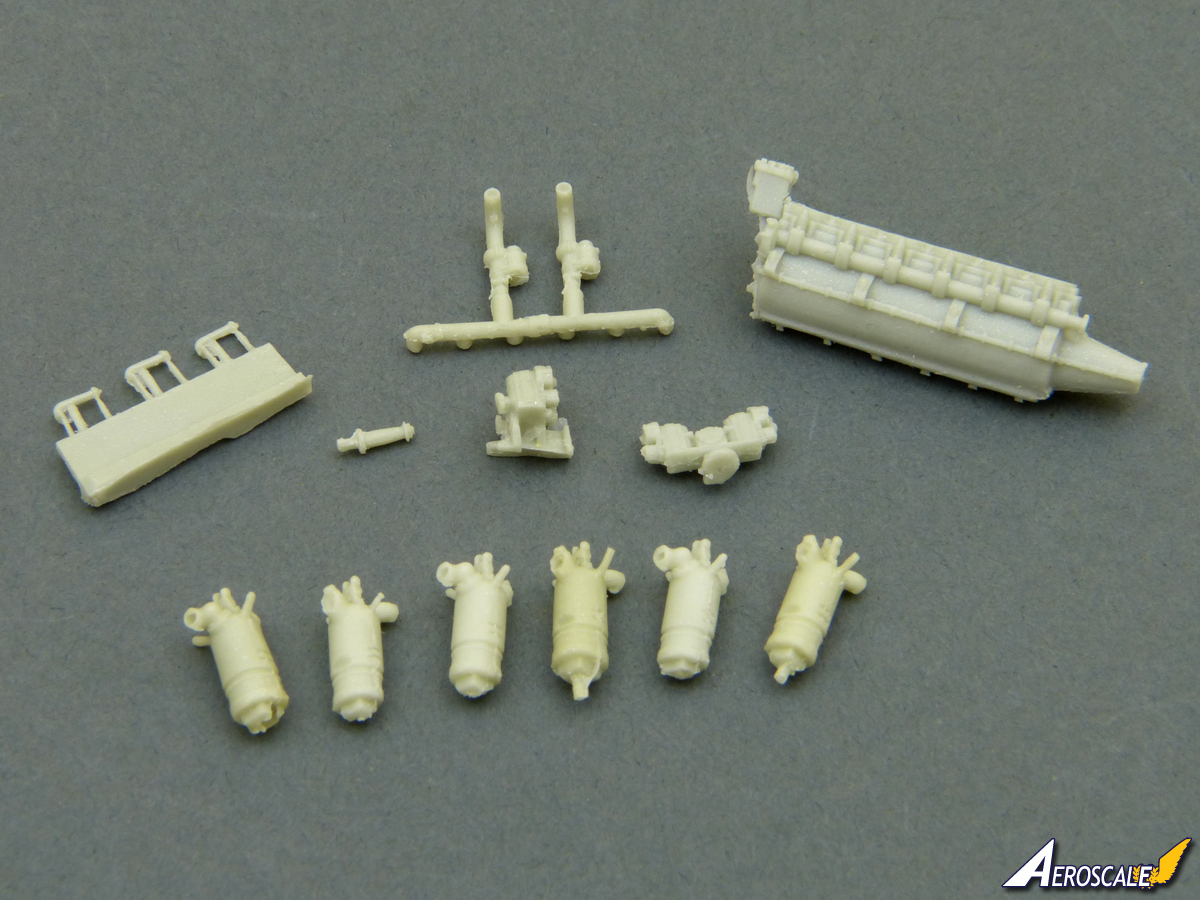
14 x resin parts
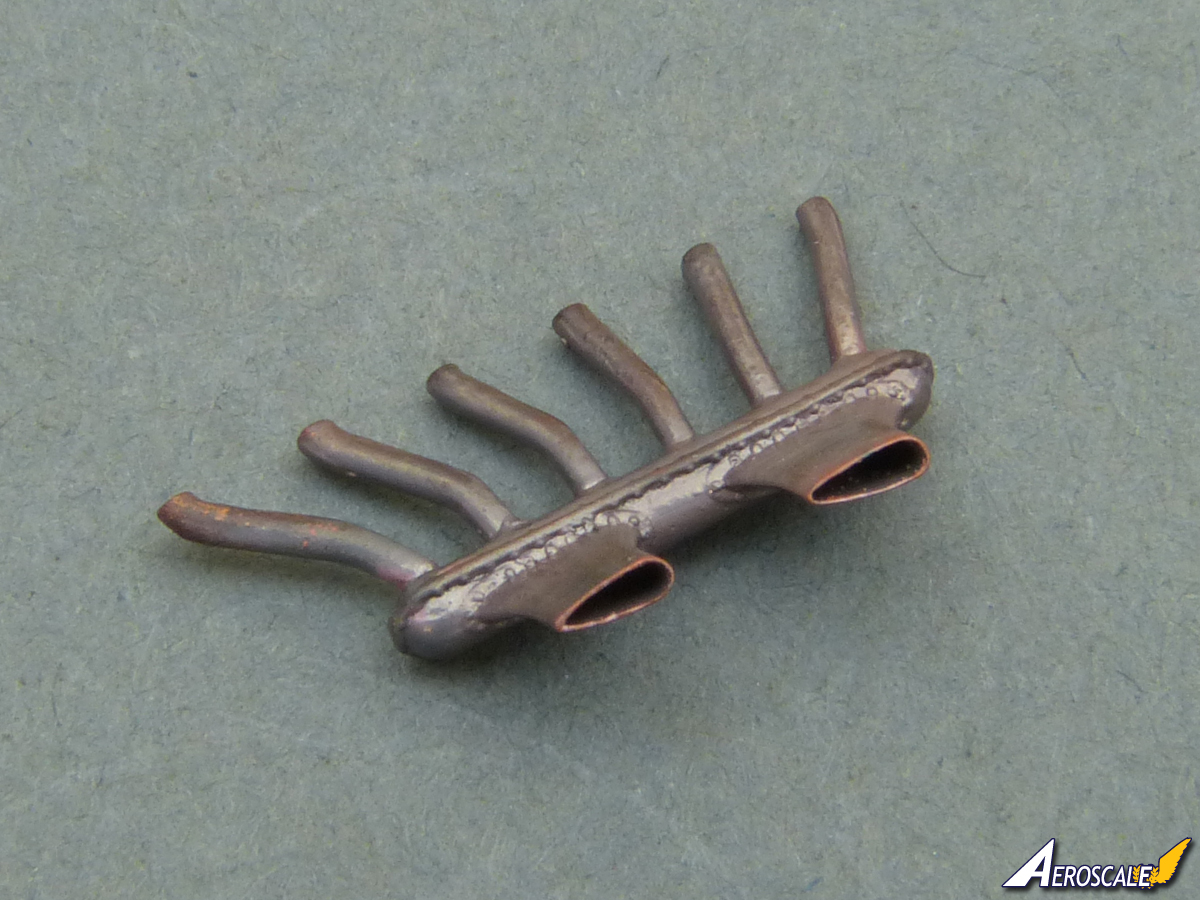
1 x metal exhaust stack
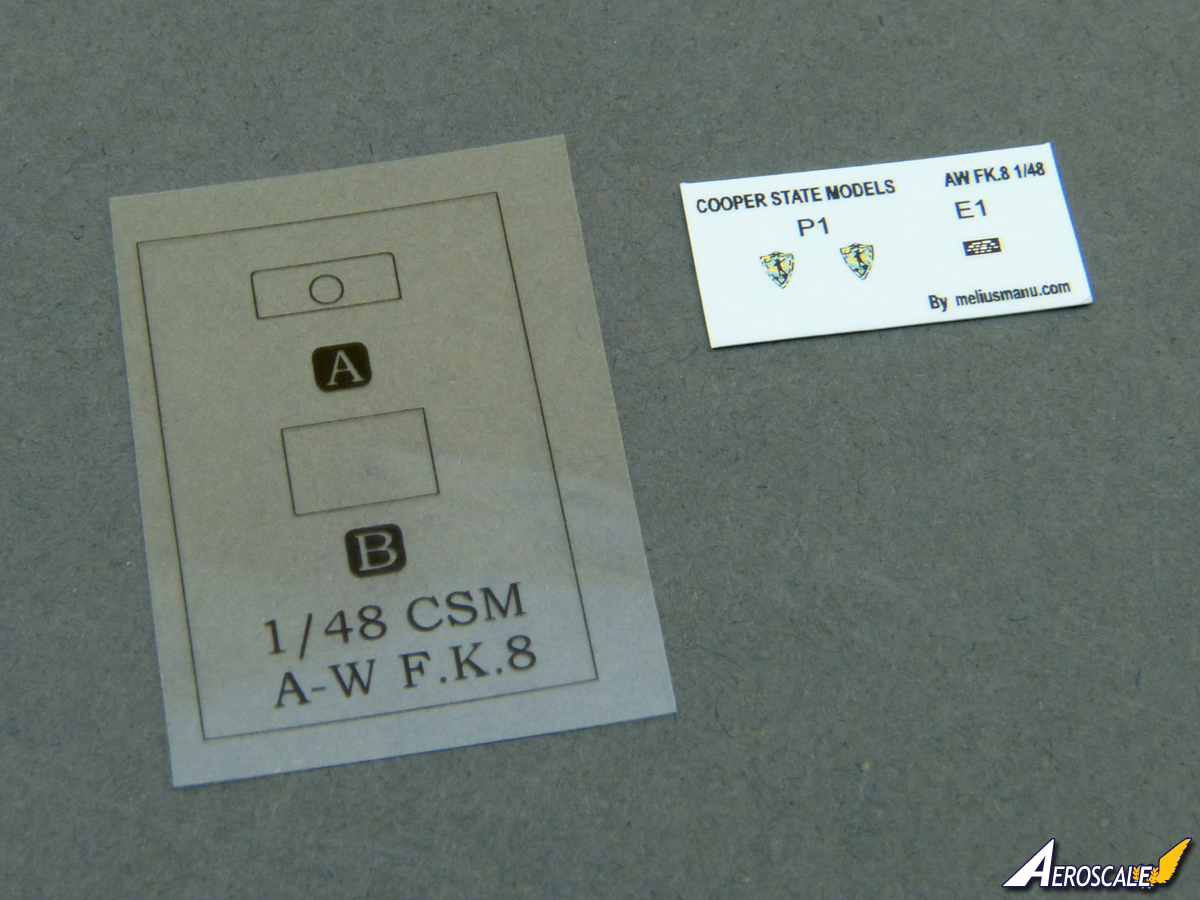
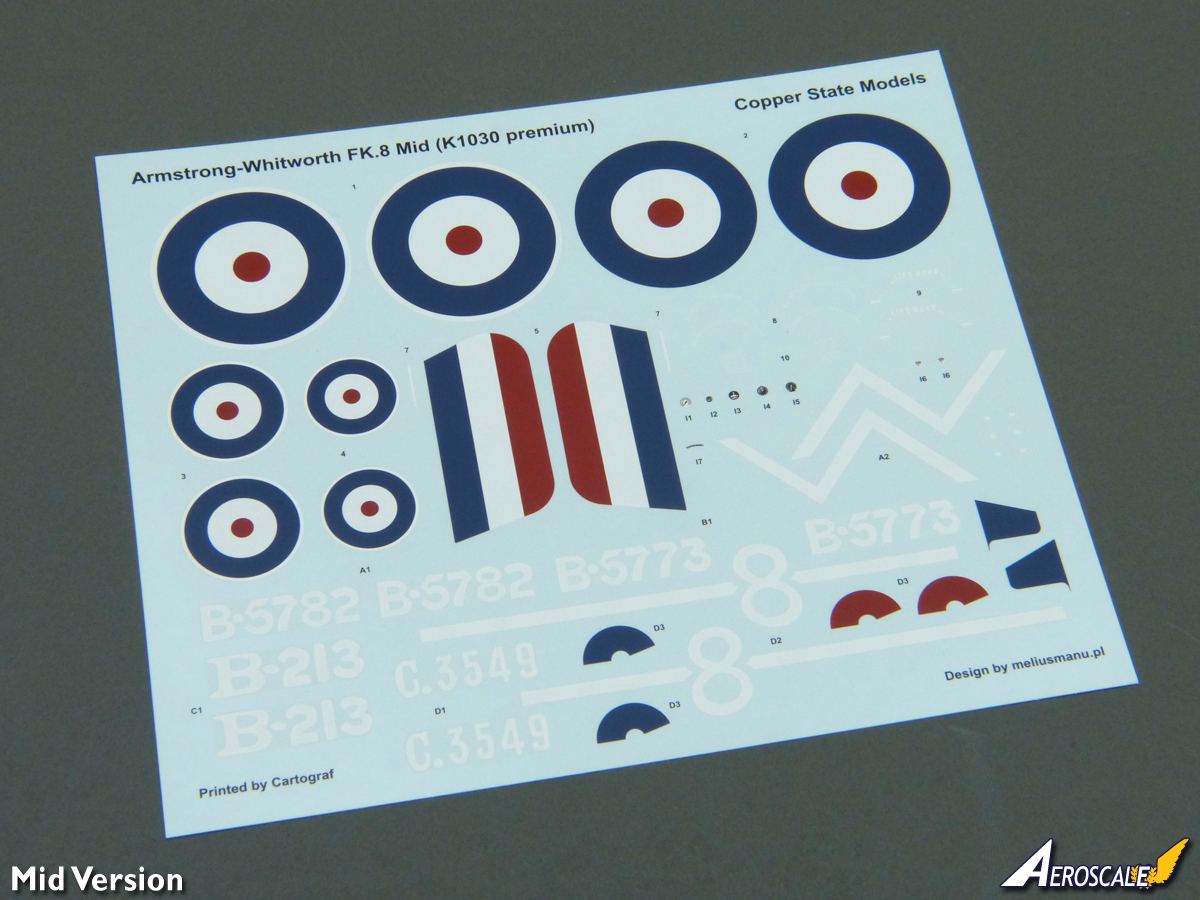
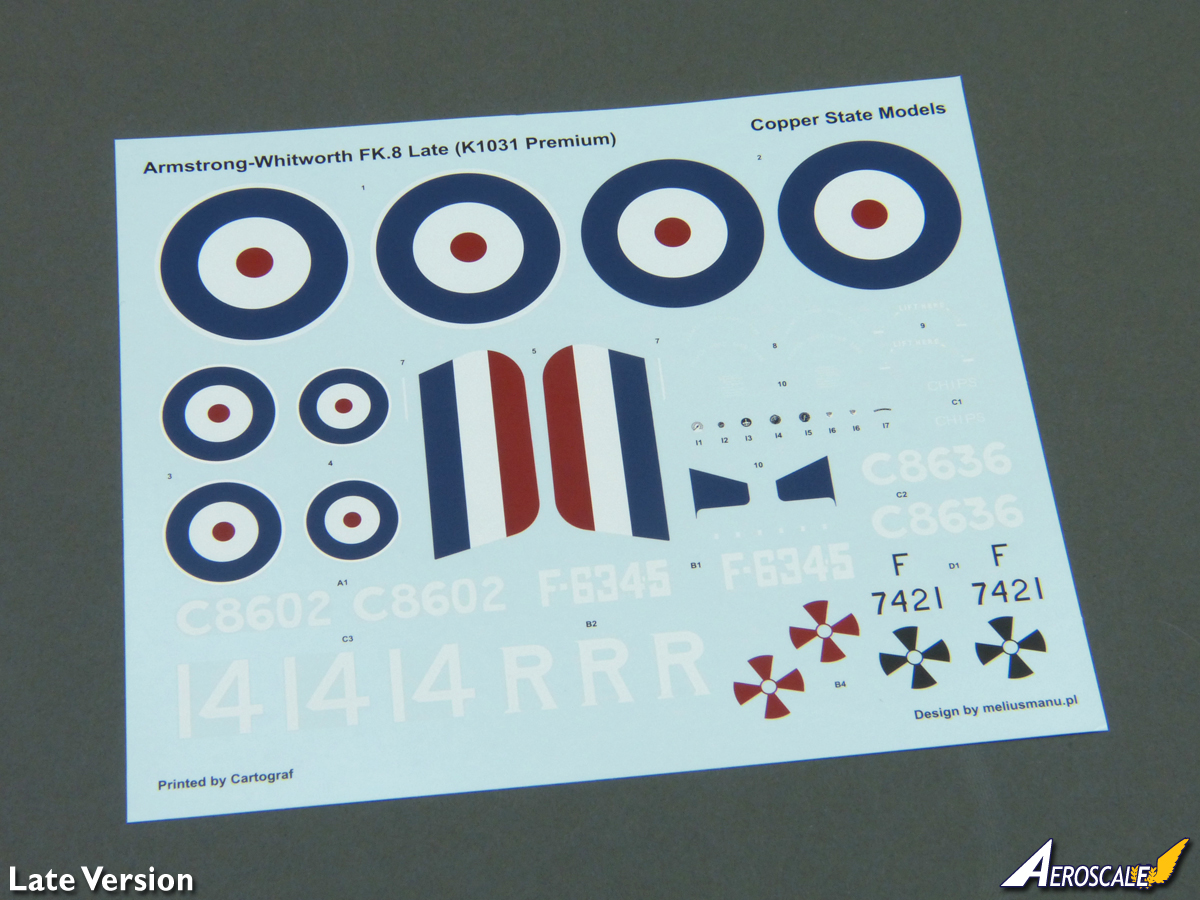
Decals for 4 x colour schemes
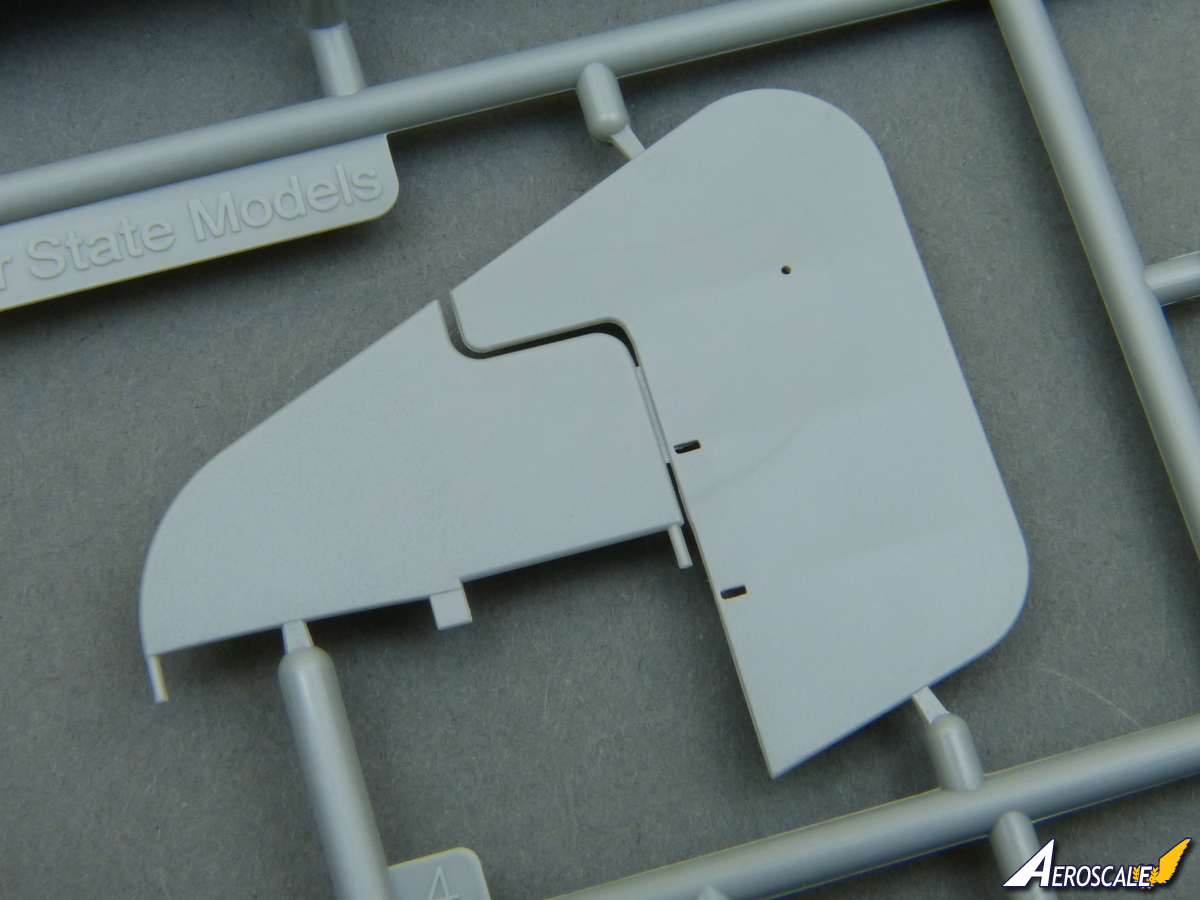
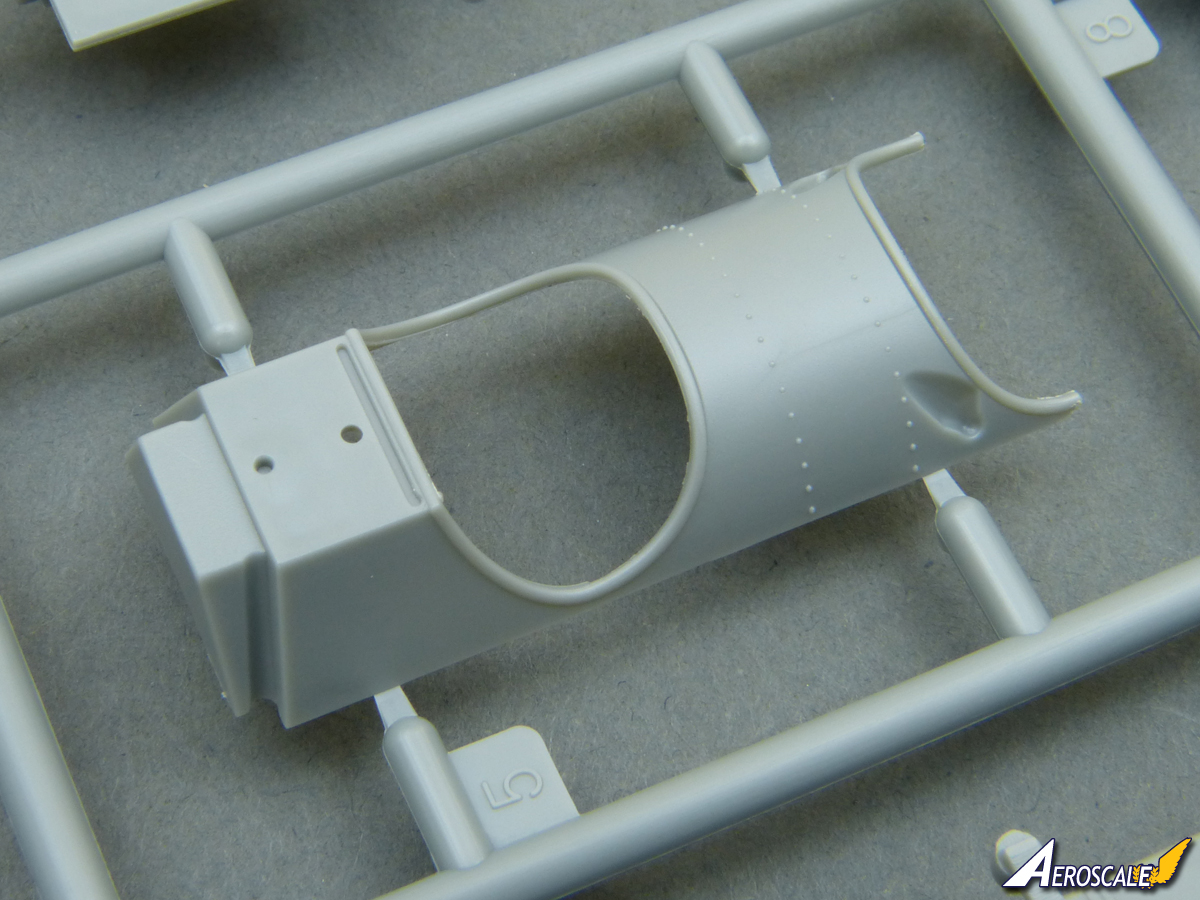
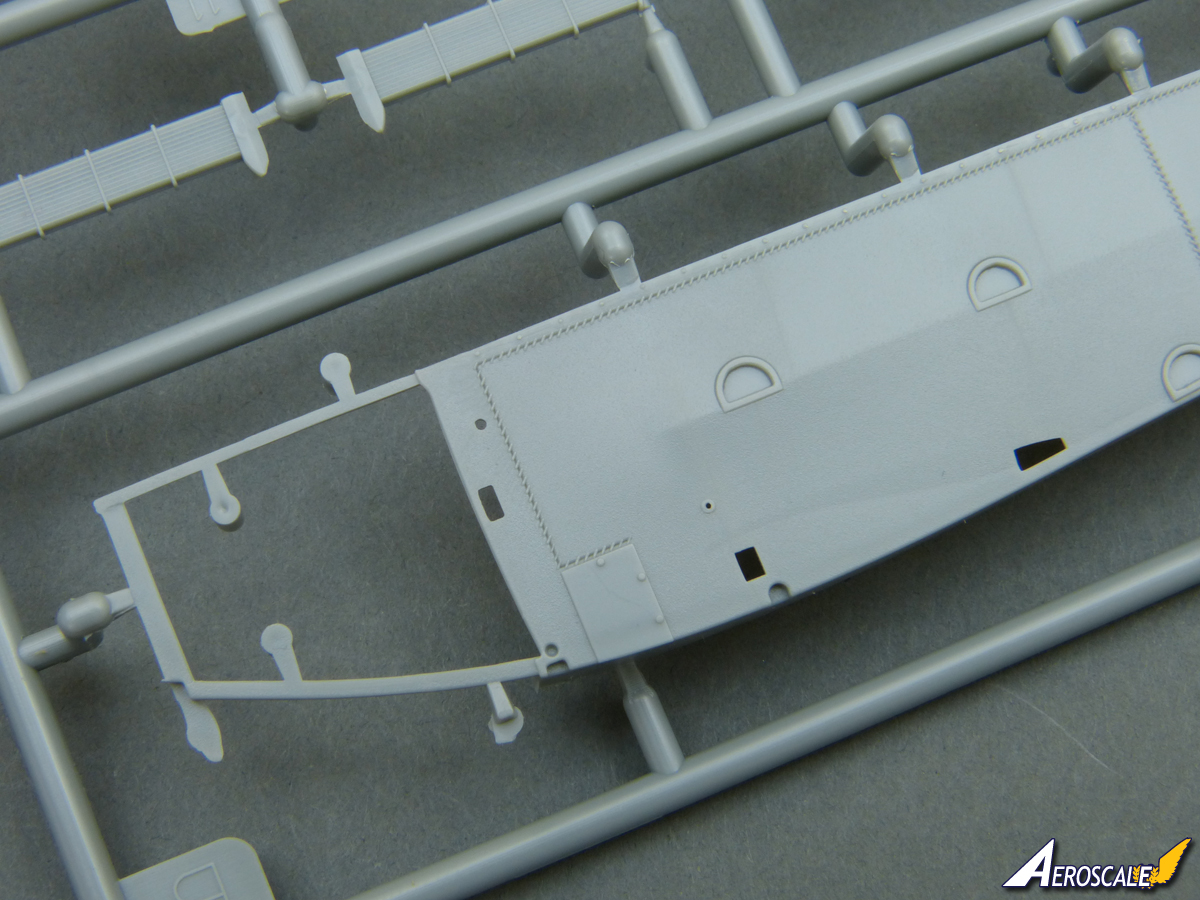
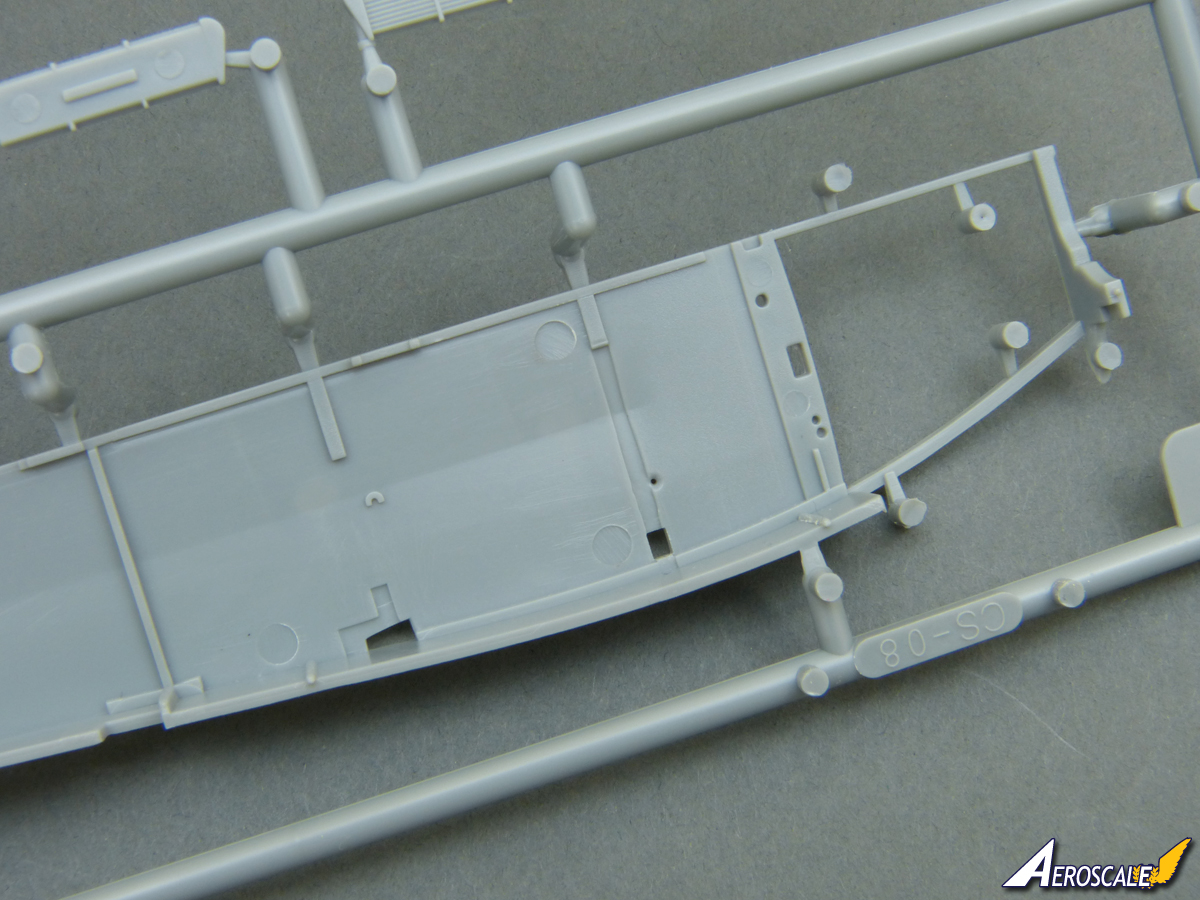
Just over 100 styrene parts doesnt seem overly complicated, but the clue that this is an advanced kit lies in the fact that there are almost as many etched pieces included. The styrene parts are beautifully moulded and the only surface blemishes I spotted on the sample kits are a couple of shallow sink marks on the underside of the fuselage where there are locating pins on the inside. The detailing is lovely and crisp and ejection pin marks are light and mostly out of sight. There are a couple each side in the cockpit area which Ill sort out, just in case theyre not hidden when the numerous interior fittings are added.
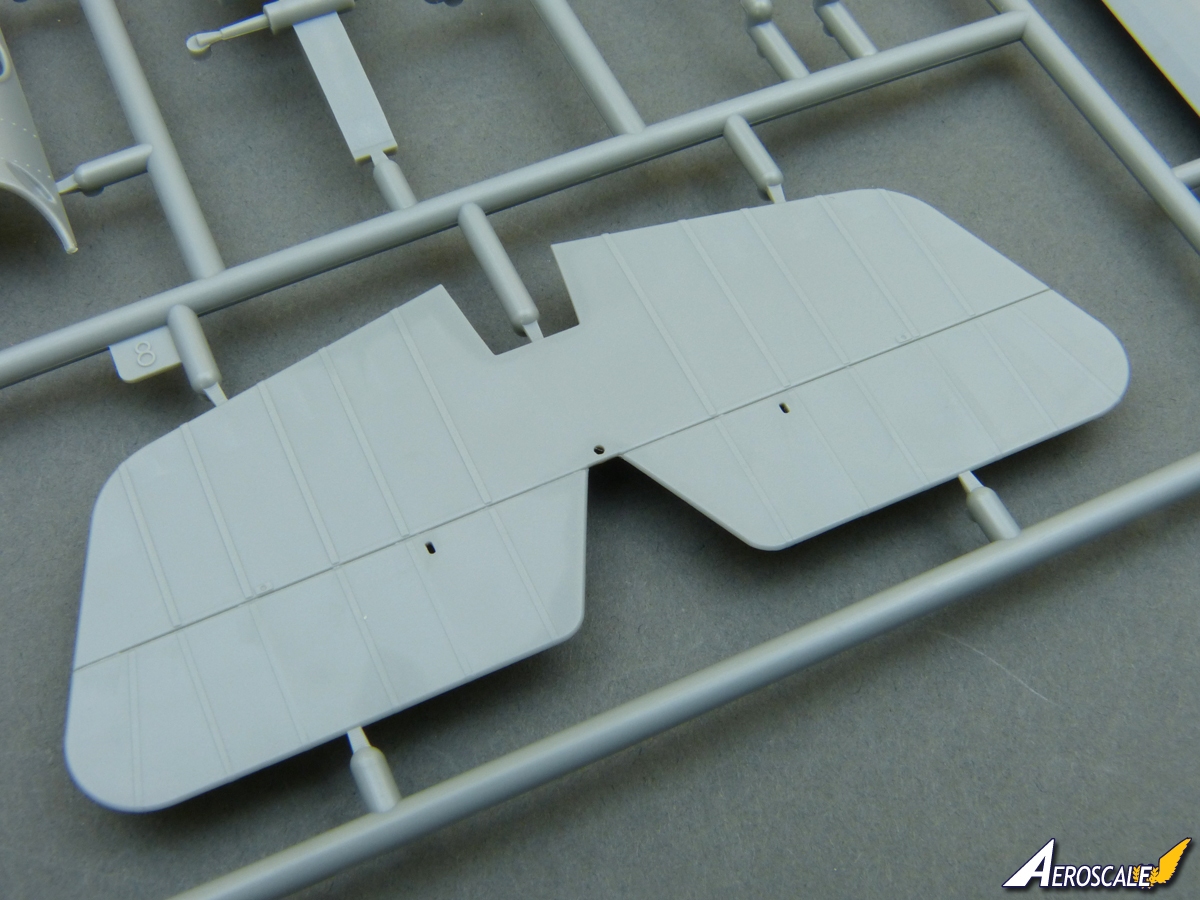
The surface detail comprises delicate lacing on the fuselage sides, with a few appliqué panels and fasteners, plus a drum tight fabric effect on the turtle deck. The flying surfaces have raised ribs (which Ill reduce a little) and no attempt at stitching - which doesnt worry me, because its usually overstated when attempted in this scale anyway. The fabric is depicted taught on the top surfaces and very faintly pillowed on the undersides.
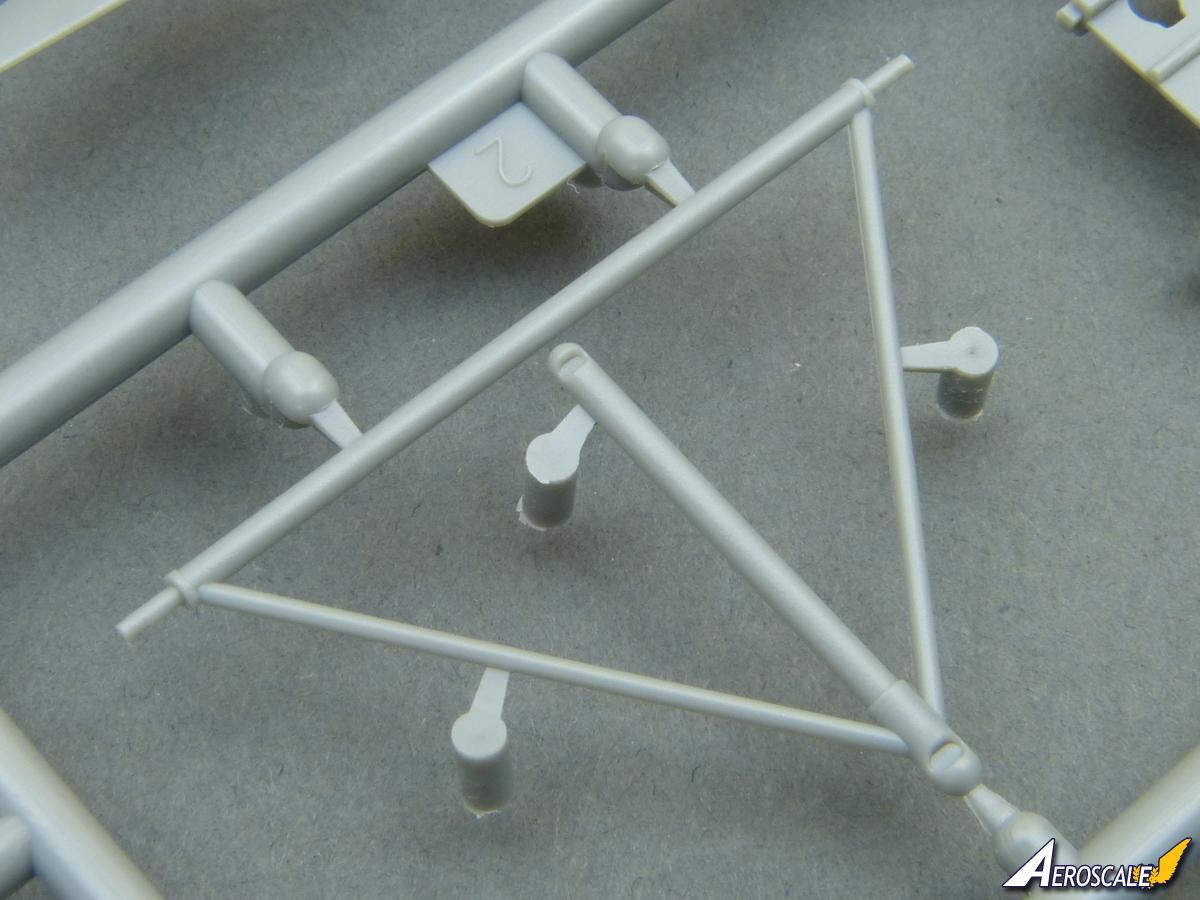
The fuselage halves clip together precisely and the turtle deck and cockpit coaming line up perfectly. The horizontal tail sits nice and square, while the fin and rudder attaches neatly. The upper wing is moulded full-span, while the lower wings are separate left and right panels with long spars that slot through holes in the fuselage to meet at the centreline. Whats rather clever is that the interior parts trap the spars and act as braces to support the weight of the wings.
A Few Details
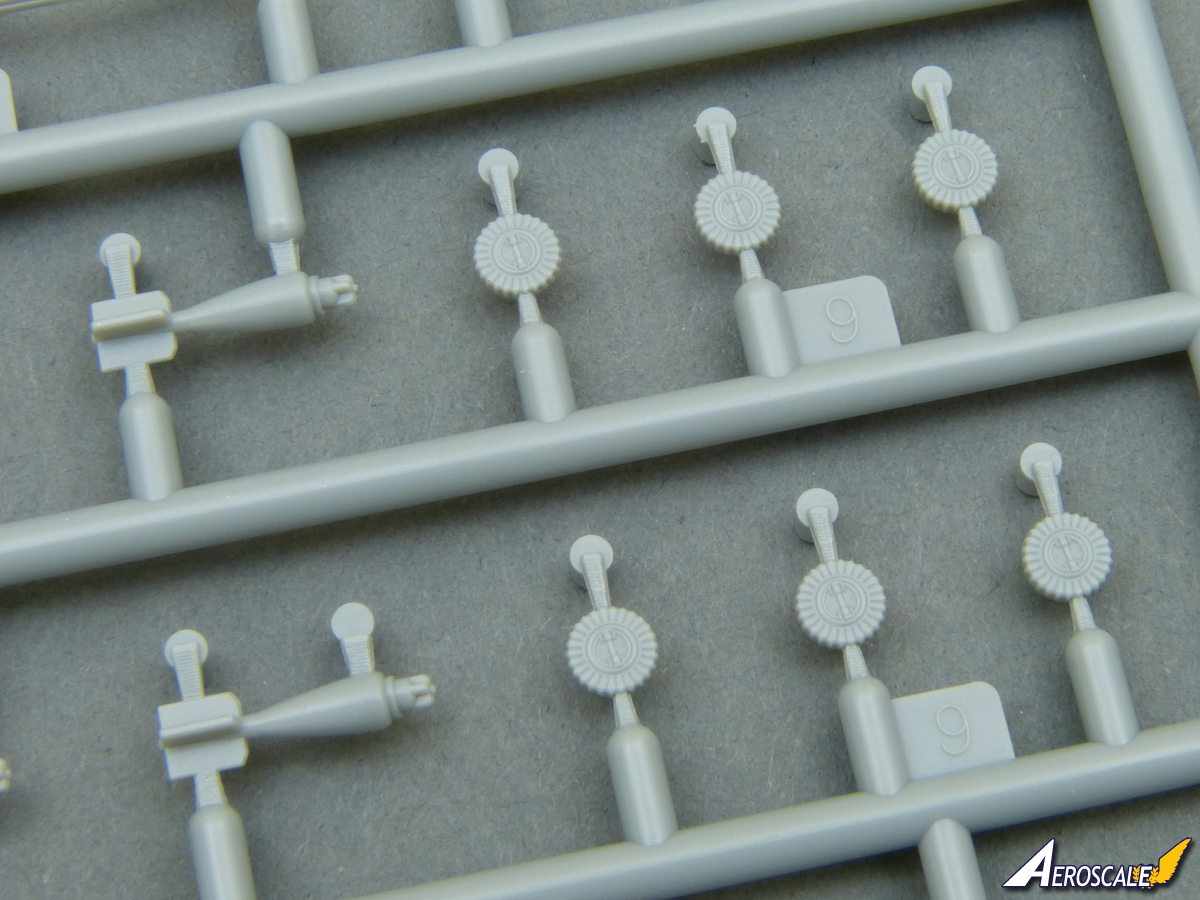
Over 50 parts combine to produce a very detailed interior with a mix of styrene and photo-etch. The pilots seat has an etched back to represent wickerwork and a pair of lap belts, but the use of metal really comes into its own with the ammunition holders for the Vickers and Lewis guns. The former involves quite a complex piece of folding, while the racks have individual dividers between the rack, so thats 17 parts to make the two racks! The ammunition drums are neatly detailed, as is the instrument panel which is supplied with decals for the faces.
The windscreen and observation window in the floor are made of thin film, each with an etched frame.
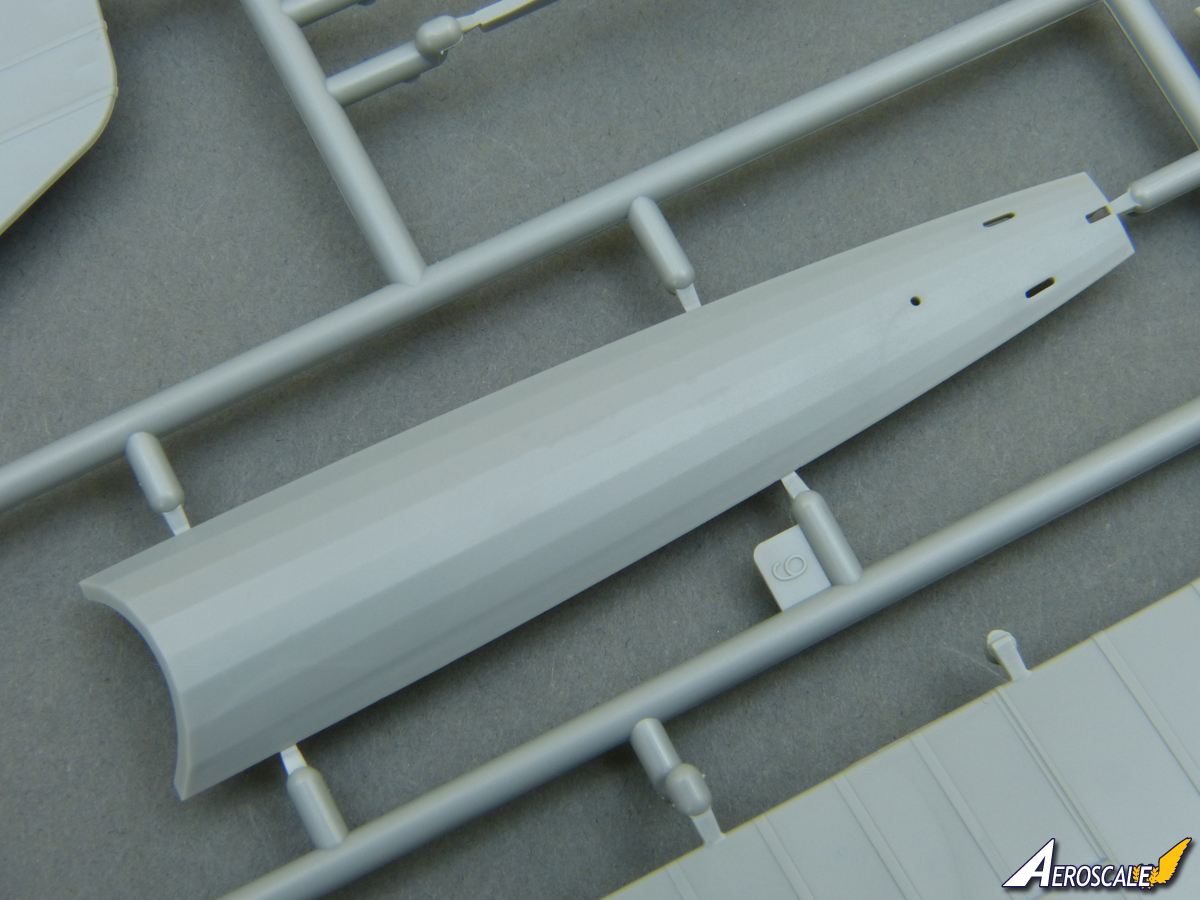
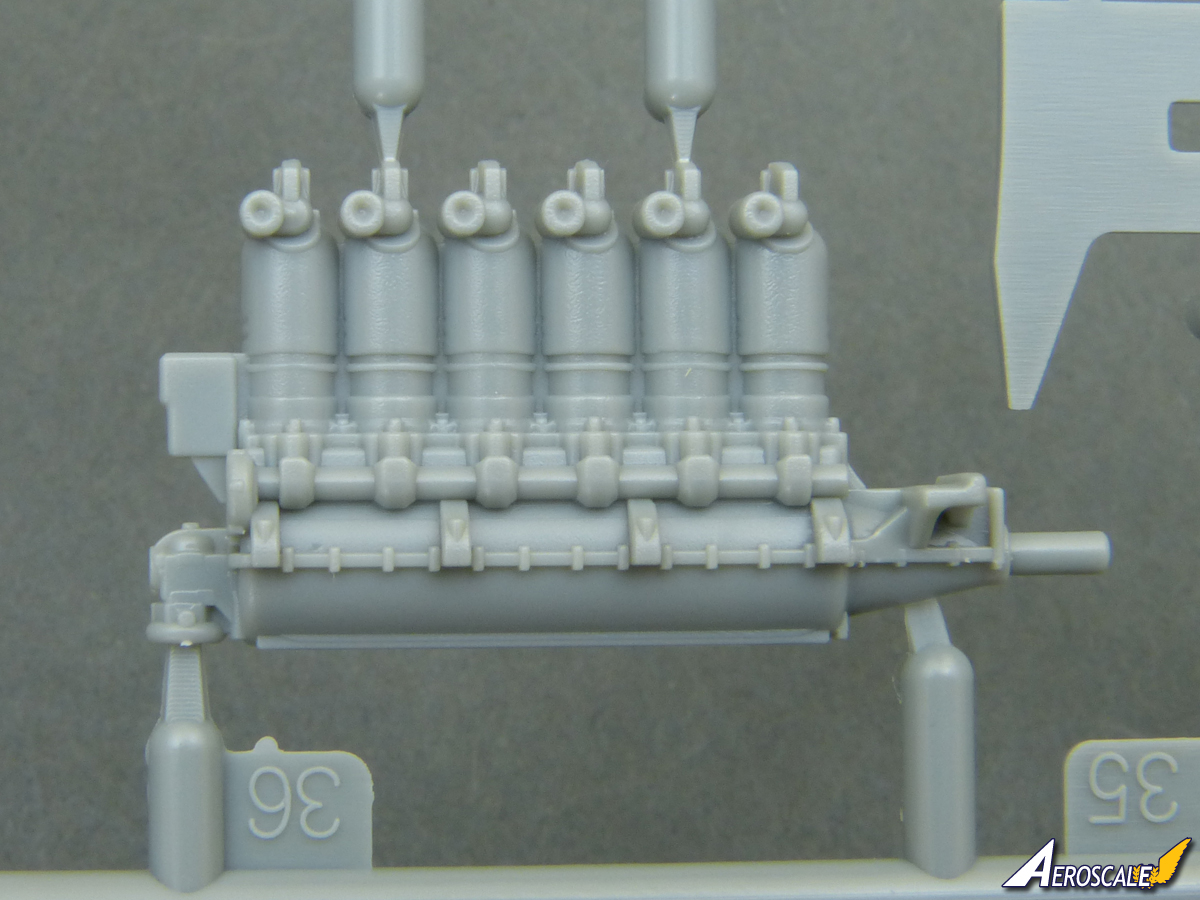
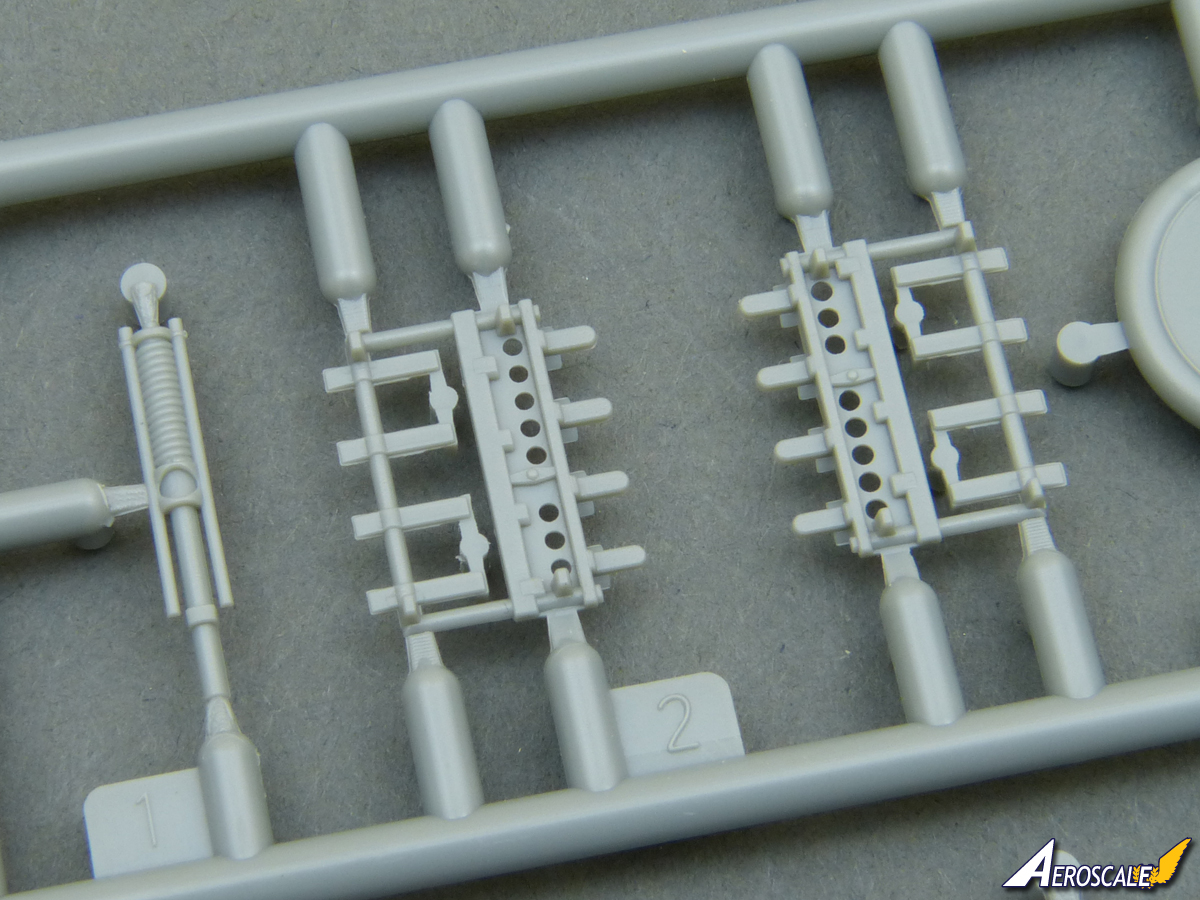
The Premium edition gives a resin Beardmore engine to replace the standard styrene parts. The standard components are already very nice, but the new resin parts take things to the next level, being beautifully cast and detailed, and the resulting motor should be a real gem. While the resin engine is excellent, the Premium edition exhaust stack is little short of amazing! Presumably galvanically grown it almost defies belief and makes the standard styrene version pale by comparison.
For once, effort spent on the engine neednt be wasted, because you could leave all the cowl panels off to keep the engine area open for inspection. The cowls themselves could well be one of the more challenging aspects of the kit, because they are all photo-etched. Theres no easy option with alternative plastic parts its etched panels or nothing. This even applies to the streamlined nose cowl, which must be rolled and folded to shape. True, Copper State do thoughtfully provide a couple of spare sets of nose parts to practise on and to allow for cock-ups, but this could also be an indication that itll be a challenge for even experienced modellers.
The Vickers guns blast tube is supplied in metal too, which must be rolled to form a tube. This might be easier done in thin styrene sheet, using the etched part as a template, or even using a drinking straw if you can find one of the correct size.
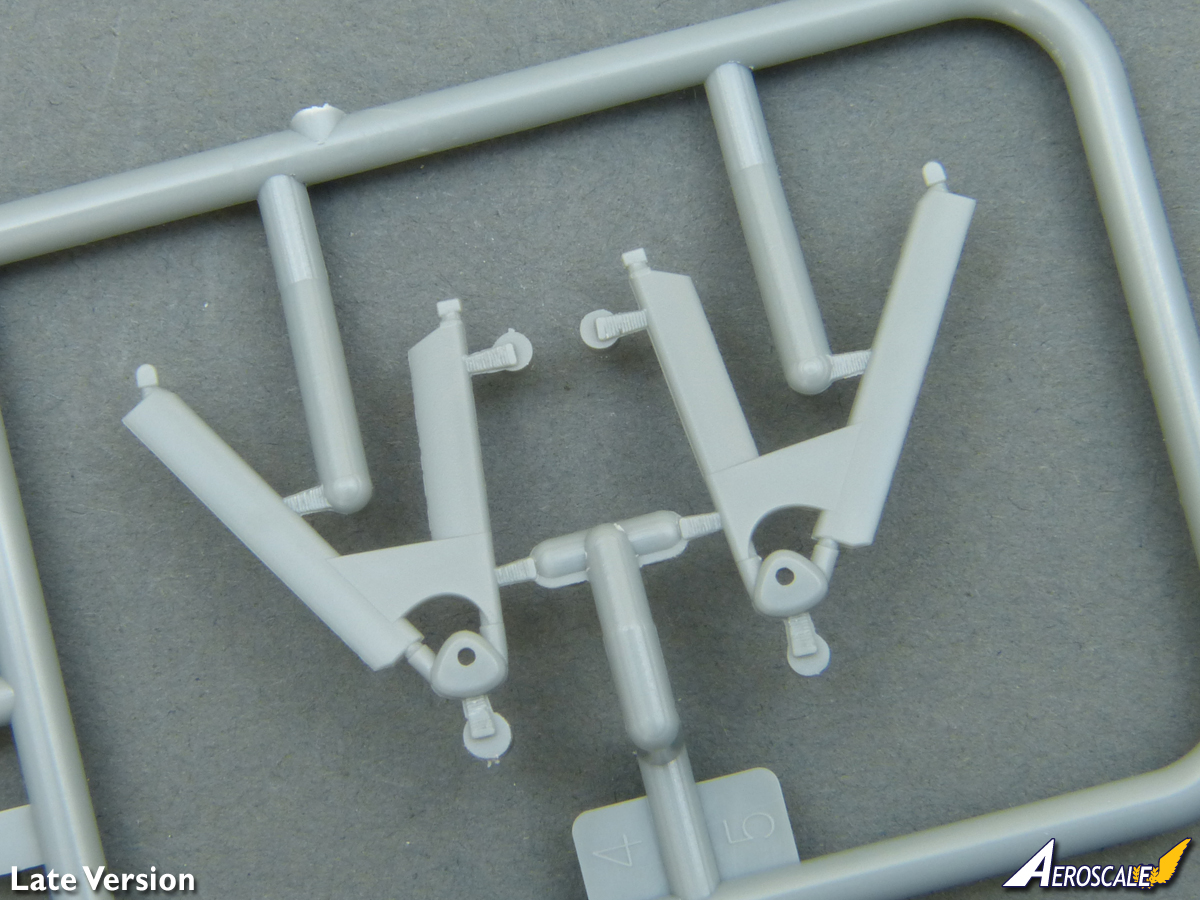
The main differences between the mid and late versions are the undercarriage and radiators. (Things arent actually quite that straightforward, because one of late aircraft colour schemes has mid-style radiators). To fit the late-style undercarriage, the instructions would have you attach the mid-style bracing and then trim it off to fill a pair of locating points, but you could always use some rectangular section styrene to achieve the same result.
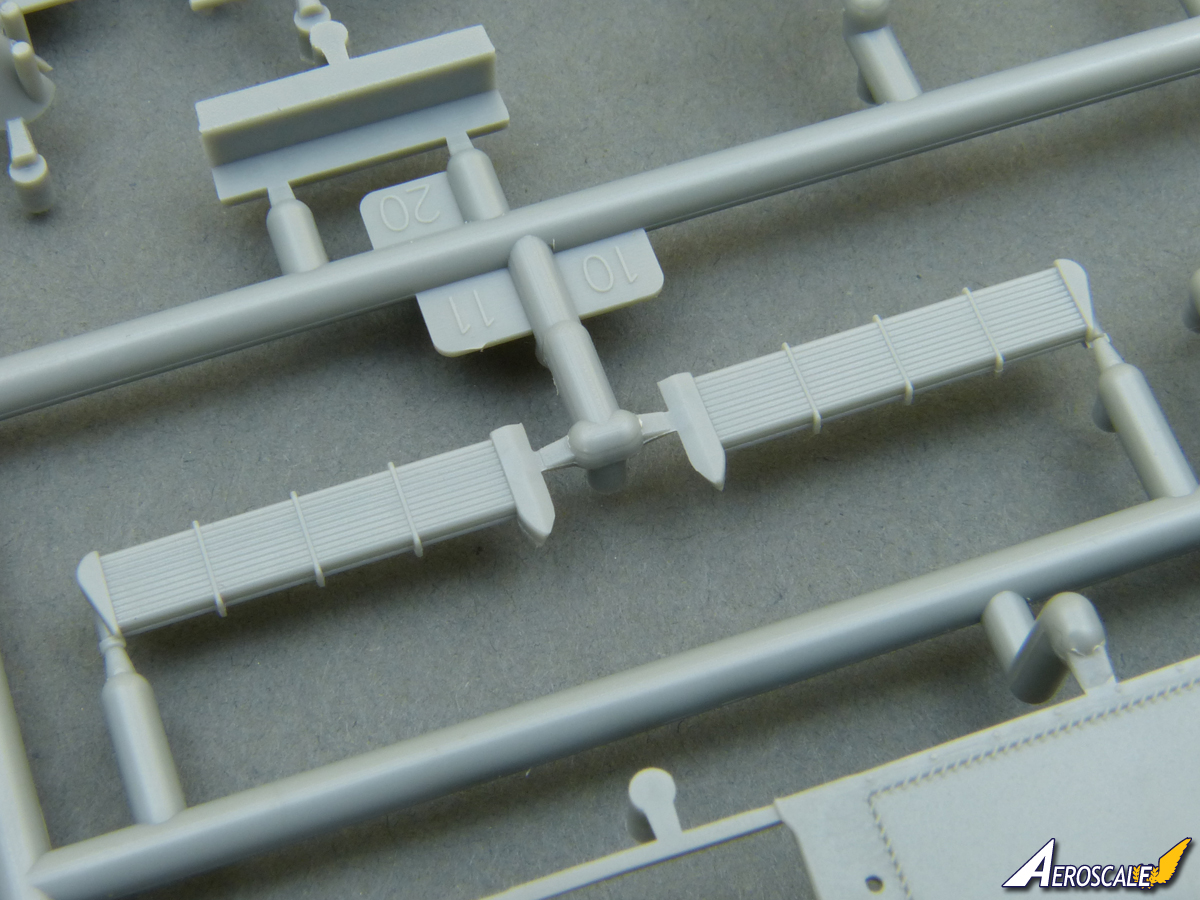
The wheels are nicely handled with separate hubs showing spokes inside, while the tail skid is a 2-part affair. Its very delicate and the attachments to the sprue are thicker than the parts themselves, so take extra care removing them.
The Lewis gun sits in a beautifully delicate Scarff ring mount and etched sight is provided.
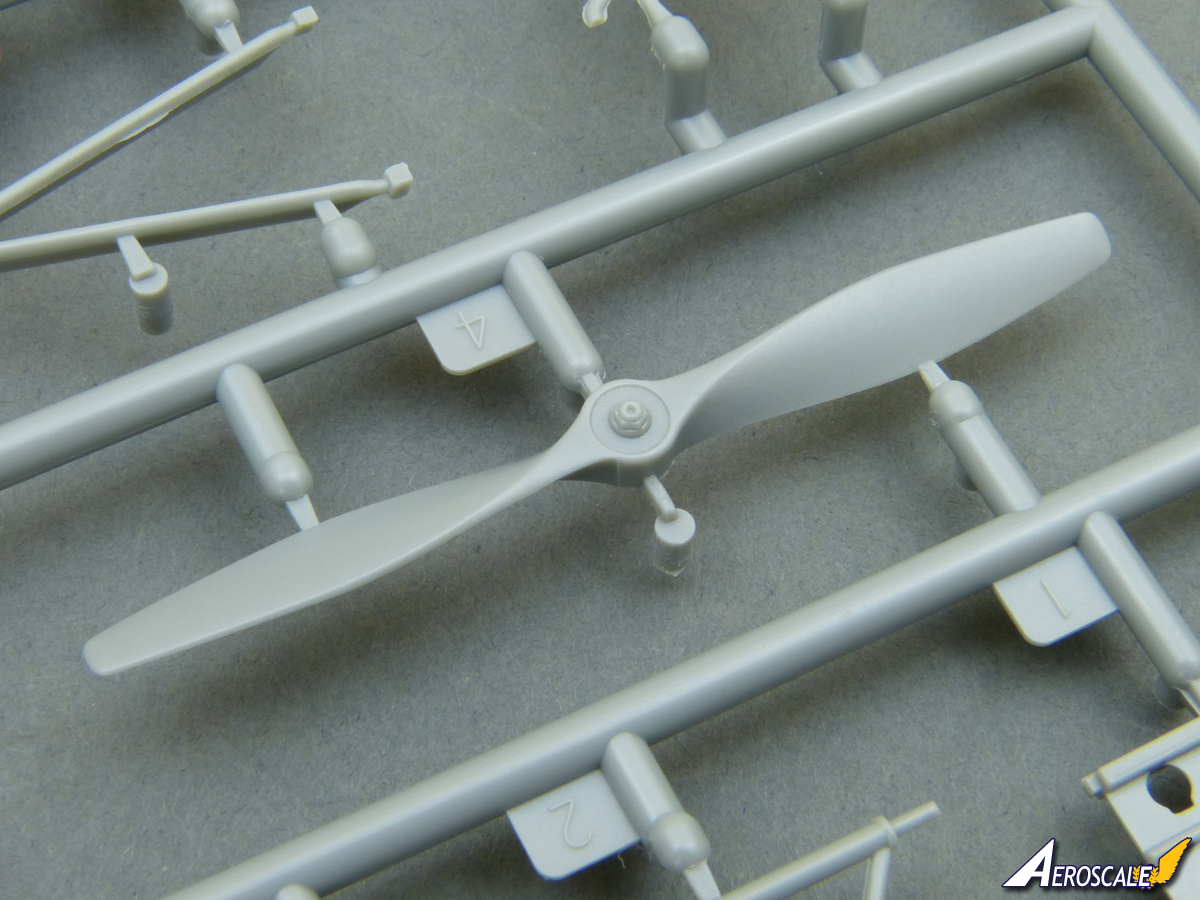
Construction ends with two underwing racks of 20lb Cooper bombs and the propeller. The boxtop illustration for the Late version shows three racks, and the kit actually does include sufficient parts if you want to fit the extra rack. The propeller is neatly moulded with a shallow recess ready for the photo-etched hub.
As youd expect on a two-bay biplane, the rigging is quite complex on the F.K.8 and Copper State provide etched attachments to sit at the base of each strut. Clear diagrams are included in the instructions to ensure that you place the 20 single- and double-wire attachments correctly.
Instructions & Decals
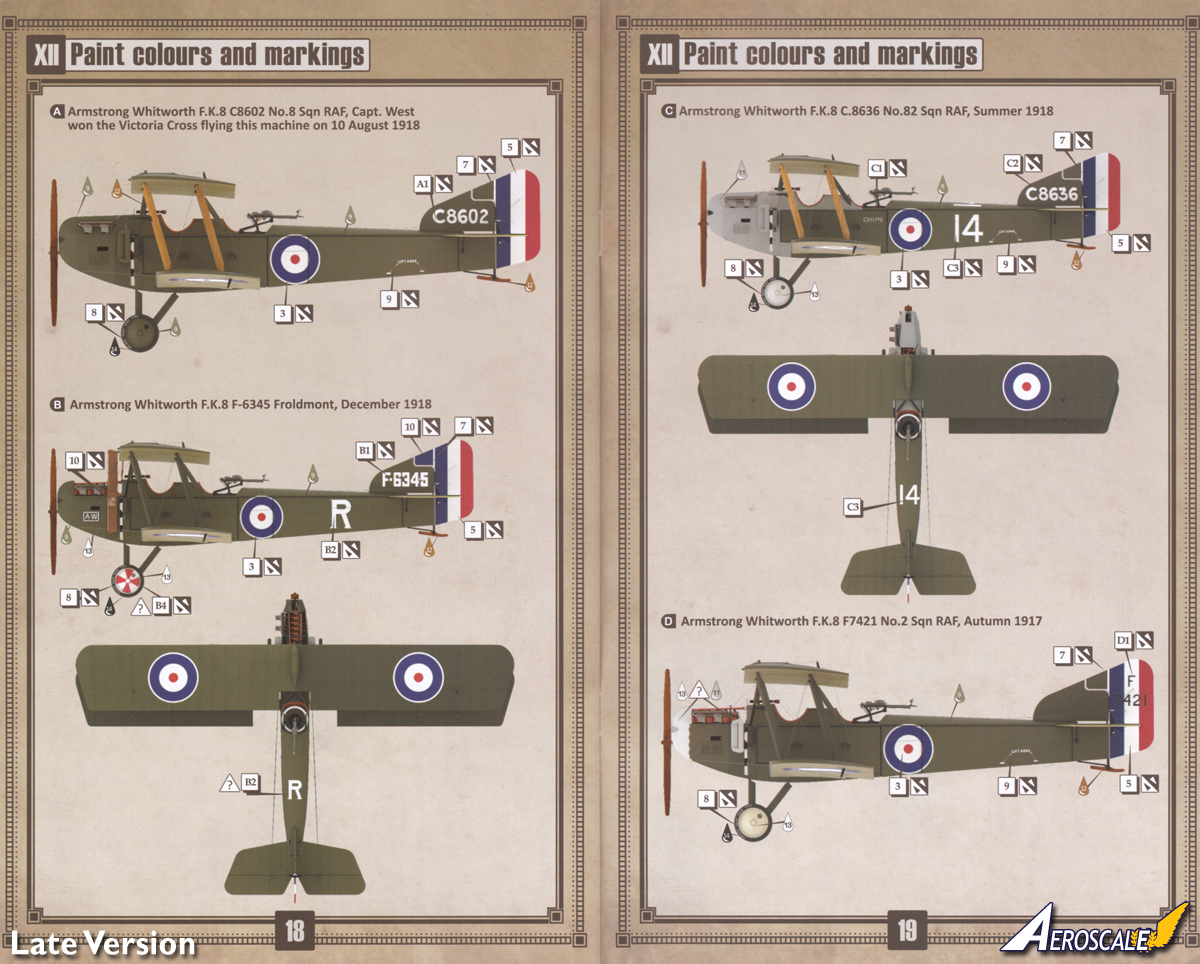
Copper State have produced each set of instructions as a very classy retro style 19-page booklet. Construction is broken down into 10 main stages with numerous sub-assemblies along the way, and the colour shaded diagrams are clear and straightforward to follow. Colours are suggested for many details throughout assembly and these are not matched to any particular range of model paints.
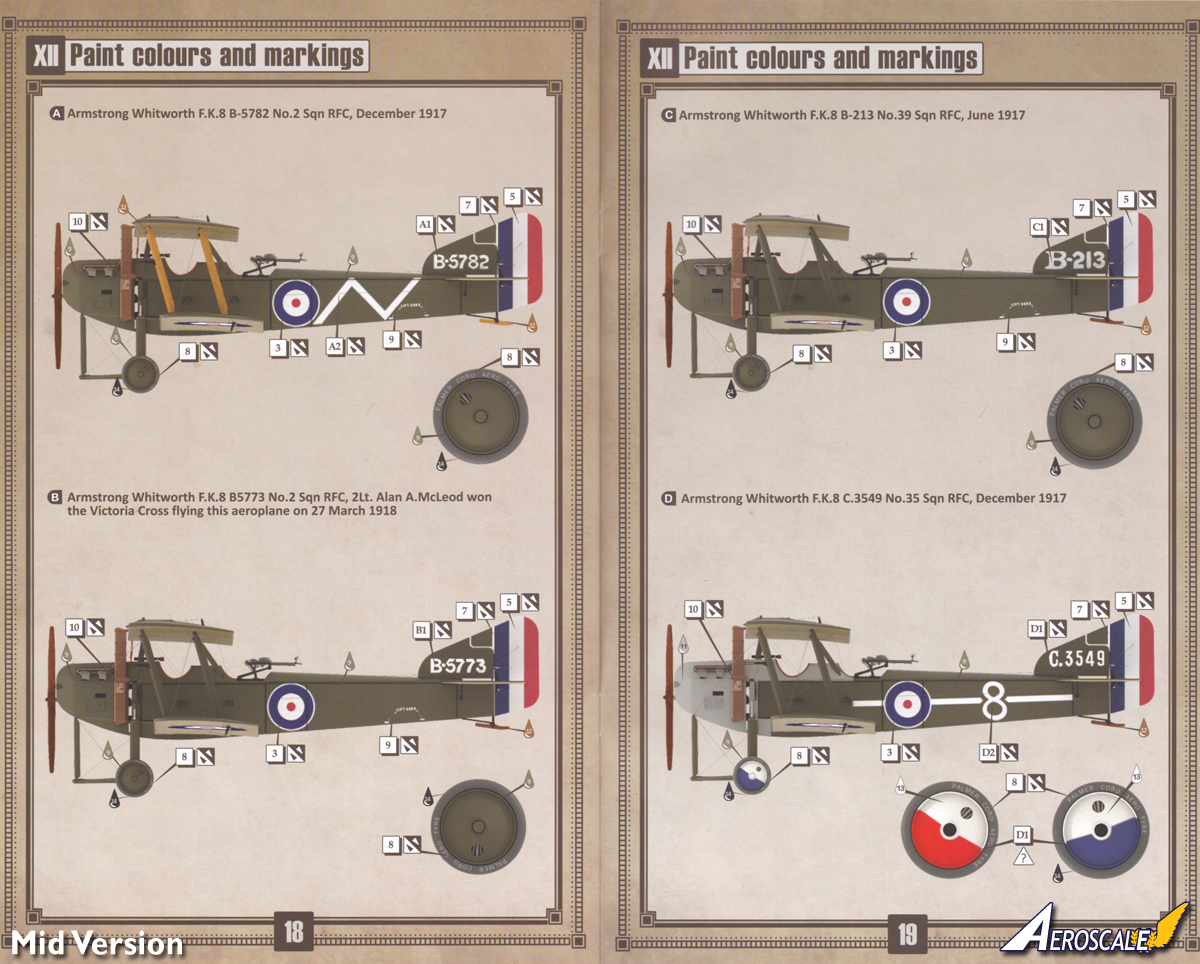
Each Premium kit offers four colour schemes:
Mid Production Version
A. Armstrong-Whitworth F.K.8 s/n B.5782, No. 2 Sqn. RFC, December 1917
B. Armstrong-Whitworth F.K.8 s/n B.5773, No. 2 Sqn. RFC, March 1918
C. Armstrong-Whitworth F.K.8 s/n B.213, No. 39 Sqn. RFC, June 1917
D. Armstrong-Whitworth F.K.8 s/n C.3549, No. 35 Sqn. RFC, December 1917
Late Production Version
A. Armstrong-Whitworth F.K.8 s/n C.8602, No. 8 Sqn. RAF, August 1918
B. Armstrong-Whitworth F.K.8 s/n F.6345, Froldmont, December 1918
C. Armstrong-Whitworth F.K.8 s/n C.8636, No. 82 Sqn. RAF, Summer 1918
D. Armstrong-Whitworth F.K.8 s/n F.7421, No. 2 Sqn. RAF, Autumn 1918 (the instructions state 1917, but the RAF was formed in April 1918)
The decals are custom printed by Cartograf to their usual excellent standard. The registration is perfect on the sample sheets and items are thin with minimal matt carrier film (there is basically no excess film evident at all on the national markings). The colours used arent overly bright, which is a good choice in my opinion to depict machines that have been in service for a while.
Conclusion
Copper States F.K.8 is a great kit and its soon clear as you dry-fit the basic airframe why the aircraft was known as the Big Ack - this is going to be a very impressive model when completed. Its definitely not a kit for beginners, though; whats fast becoming almost something of a trademark for the company is its extensive use of photo-etched parts in its kits, and the F.K.8 is no different, so Id say this alone makes the kit suited for modellers who are confident working in this medium. Beautifully produced and packed with detail, the F.K.8 is going to be a very rewarding challenge for experienced modellers.
Please remember, when contacting retailers or manufacturers, to mention that you saw their products highlighted here - on AEROSCALE.
SUMMARY
Highs: Excellent detail with a mix of styrene and photo-etched parts. Premium edition also includes top quality resin and metal accessories. Decals by Cartograf for 4 colour schemes.Lows: The extensive use of photo-etched parts may put off less experienced modellers.Verdict: Copper States F.K.8 is an exciting and challenging model that promises to be a hugely rewarding build for modellers who are confident working with mixed media kits.
Our Thanks to Copper State Models Ltd! This item was provided by them for the purpose of having it reviewed on this KitMaker Network site. If you would like your kit, book, or product reviewed, please contact us.
About Rowan Baylis (Merlin) FROM: NO REGIONAL SELECTED, UNITED KINGDOM
I've been modelling for about 40 years, on and off. While I'm happy to build anything, my interests lie primarily in 1/48 scale aircraft. I mostly concentrate on WW2 subjects, although I'm also interested in WW1, Golden Age aviation and the early Jet Age - and have even been known to build the occas...
Hi again
I promised Edgar at Copper State that I'd make a start on his kit at the first opportunity, so I began some prep work on the cockpit at teatime.
It was a chance to dip a toe in the water folding some etched parts - the ammunition canister is one piece - and it all seems to be lining up very neatly. There are a few light ejection pin marks to take care of and then I'll start throwing some paint at the sub-assemblies. Luckily the colours are all to hand from the SE.5a that's on my other workbench.
All the best
Rowan
Hi again
No fresh pics yet, but I did make a bit of overdue progress today. I've primed the interior with a coat of "linen" ahead of picking out the woodwork and had a go at constructing the etched metal Lewis drum racks.
I found one a piece of cake, but the other style was much more fiddly. I've ended up splitting it in two to make painting easier, and I think they should both look pretty neat when done. They are so much more delicate than could have been moulded in plastic, it's worth the effort constructing them.
Hopefully I'll have some pics to show before too long.
All the best
Rowan
Hi again
I squeezed in another mini-session today. No pics still (sorry), but I'm trying to learn from Libor Jekl who not only builds phenomenally well, but maintains an almost frightening output rate. I remember his advice to just try to make a little progress every day, however small it may seem in the overall scheme of things, because it all adds up.
So, today was the fuel tank and a bit of pre-prep of more fuselage parts ready for the first wood colours (hopefully) tomorrow after work.
And the good news here in the UK is (for modeller's, at least)... following our short heatwave, the weather's apparently set to break, so the humidity should drop and make airbrushing easier.
All the best
Rowan


Comments