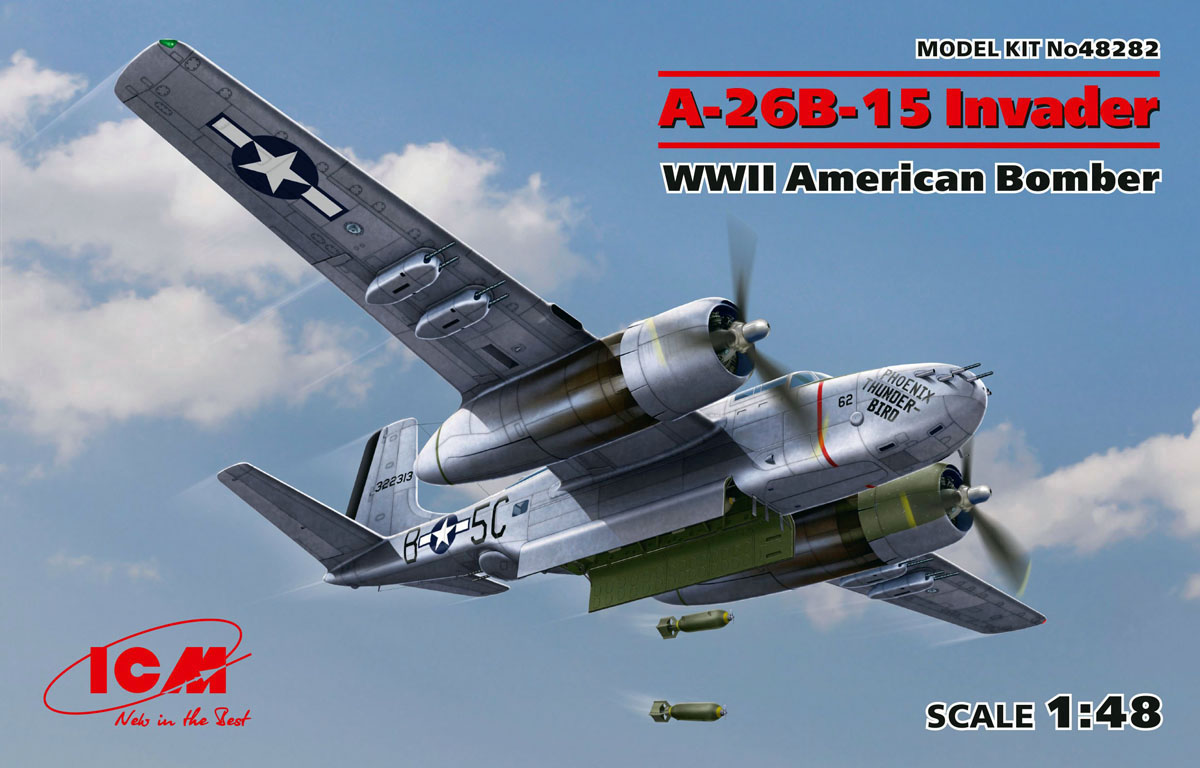
B-26 Invader was a remarkable aircraft seeing service with the United States Air Force at the end of the Second World War, through the Korean War and even saw service during the Vietnam War; this aircraft also served with the French during the Indo-Chino War before the Americans got involved and later Algeria. The B-26 was tested and trialled early during World War 2, but due to requirements placed upon Douglas Aircraft from contracts already in existence a production aircraft was not completed until 1944; a real shame when you consider just how effective this aircraft turned out to be. There was no A variant of the B-26 built as a production aircraft due to I believe the time between the trials aircraft and a production aircraft being completed, but there were a lot of different set ups tested, even a night fighter version was produced but lost out to the P-61 due to the production of the P-61 already being in production. When this aircraft finally went into production it resulted in an aircraft that was forgiving in flight, sturdy, well armed in various configurations and effective at both low and medium height. Lets take a look at this all new 1/48th scale model offering from ICM of a World War 2 A-26B-15 Invader. This offering from ICM is the early B-26 Invader due to the under wing gun pods and the six guns mounted in the nose of the aircraft.
Review
This offering of the A-26 is packaged in the usual way favoured by ICM and approved of by me; a cardboard tray with flip top lid that provides a high degree of protection and a separate card lid with all of the artwork on it. Inside you will find an instruction booklet with the decal sheet inside. The model parts are in a single re-sealable bag that also contains the clear mouldings in their own bag. An initial inspection does not cause me any concerns beyond some flow lines in the larger mouldings, but these pass the look and feel test.
The internals of this model are surprisingly wide reaching and well produced by ICM. The internal frame structure is replicated from the nose nearly all the way passed the rear of the bomb bay, but I feel they may be a little on the heavy side. The cockpit is a fairly simple affair due to the aircraft not requiring a co-pilot. The dials, radios and the like look good and should with careful painting bring the interior to life, I also appreciate that ICM has included decals for the instrument panel but no effort has been made to provide the seat harness either moulded or as a decal and this detail is needed in models of this scale. Bomb racks and bombs have been provided in this release from ICM. The mid upper turret has received attention from ICM and results in a well detailed area both inside and out; I do think that watching companies such as Master for turned barrels will lift this model even further, but if you have a steady hand drilling the muzzles is another option.
Moving to the fuselage of the model and an issue comes to light on the right hand half of the fuselage; the frame detail on the interior of that side has caused light ridges on the exterior and so it will require filling on this example or so I believed, but Iit has been pointed out to me that the internal structure does cause distortion on the exterior. The panel lines are nice and lightly engraved which results in a pleasing look. I have tried to check the panel lines and failed to find enough good reference and so I cannot say if they are 100% accurate with any certainty. Due to the way that ICM has tackled this release with other future releases in the works it does mean that there are some large panels that need to be added to the fuselage and it is only as these are added that the fuselage assembly will become stable so take care with the handling. The nose of the aircraft has been very well tackled with a small number of assemblies resulting in a well defined nose with good armament package. I particularly appreciate that ICM has included the particular weight that needs adding to the nose to prevent a tail sitter.
Moving onto the flight surfaces and controls left me pleased with what I found. ICM has supplied all of the flight control surfaces as separate parts and means that the modeller can decide how they wish to display them despite the instructions only showing them in a neutral position. The engraved panel lines here are again finely replicated and so pleasing to my eye. the various wing weapon options require the modeller to open the needed locators and I give ICM special merit for including the needed drill sizes for the openings and also clearly identifying what holes are for what. The wings on larger models can end up with droop occurring; in order to prevent this ICM has the modeller securely fit the wings together and then later using slides inside the wings that attach to braces extending from the fuselage, this should allow the wings to be secured in the correct orientation and set before adding the weight of the engine nacelles and undercarriage.
The clear parts for the model are of a very good standard being of a reasonable thickness with a high level of clarity. The detail present on the parts used with this offering do match online reference so far as I can see.
The nacelles on this offering have a lot of detail moulded into them in the area of the undercarriage and pleasing shallow engraved panel lines. Unusually for nacelles these are assembled off of the model with the undercarriage doors open. They are then added to the model minus the undercarriage and engine, I like this approach as it prevents parts getting in the way or damaged as building progresses. I also appreciate that ICM has included a front and rear panel in the wheel wells and so providing detail on all faces. The undercarriage itself looks good with excellent diamond pattern on the wheels; the wheels are supplied in two halves and so any seams will be hard to rectify. The struts look to be accurate when compared to images showing the legs, but it does mean I can only view the visible portion of the struts. I like that the scissors have been provided separately and I believe only requires the break cabling be provided by the modeller. The undercarriage was an issue on the Invader and during the trials had to be altered and strengthened, but from what I can see in my reference the undercarriage continued to be an issue, in one case even collapsing on a static aircraft that is a feat in itself.
ICM has a good record of providing engines to their models and this offering of the A-26 is no exception with two Pratt & Whitney R 2800 engines included. ICM has provided both banks of cylinders with each bank in two halves. The required exhausts are included as separate parts and with some work by the modeller will look very good. The ignition harness has been replicated for the engines, but due to being in plastic it would benefit from being used as a pattern and fine wire used instead. There were several variants of the R 2800 built and used in this aircraft and I am told they can be told apart by the details on the cone and in this case a smooth cone is present; I am no expert in this field and so can only say they look good to me for the model. The R 2800 served in a huge number of aircraft during the war and its reliability also saw it serving well after as well. The cowlings for the engines are positioned in a way on the sprue that one of mine again came free but without damage, the detail provided on the cowlings are good and have the correct lip mounted air intake present. Displaying the engines is not easy from an accuracy standpoint, but with a little extra work on the firewall and improved detail on some areas means leaving the whole cowling off would seem the best way of displaying the engines.
The external weaponry provided for this model is nicely replicated and varied in choice, but there is the issue of what to add or not to add and that is not clearly covered by the instructions from ICM. I very strongly suggest that those who seek to perfectly replicate an aircraft some online searches are undertaken to clarify this detail, or of course you can add what you wish to. The new nose moulding meaning an early aircraft tells me that for this offering the correct armament should be the four gun pods under the wings and not the bombs; this also tells me that ICM has many more options up their sleeve.
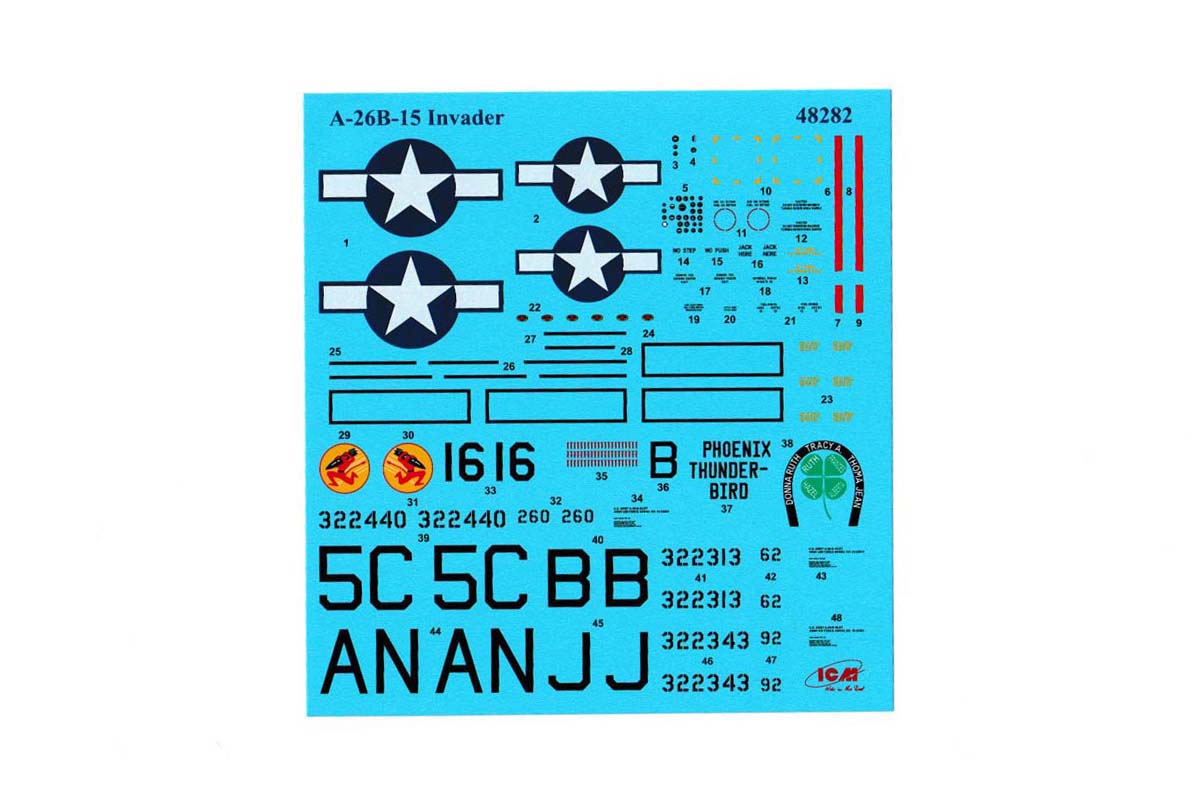
ICM has provided three finishing options for this model, but of course there are already alternative decals for the model if you want to finish it differently. I like that ICM has provided a top and bottom view covering decal placement as this is often overlooked on large models. The decals themselves are of a very good thickness as I can cannot feel them on the carrier paper. The finishing options provided are:
A-26B-15-DT, 671st BS/416th BG, A55 Melun, France, early 1945
A-26B-15-DT, 553rd BS/386th BG, A92 St Trond, Belgium, April 1945
A-26B-20-DT, 84th BS/47th BG. Grosseto, Italy, early 1945
Partial Build
The interior of the model is not the easiest task for a myopic ham fisted modeller such as myself, but with trial and error I got there in the end. I assembled most of the interior minus the bombs and installed it as directed by the instructions which slowly but surely improves the stability of the fuselage, but when it comes to closing the fuselage you will be fought every step of the way and so I tackled it thus. Begin at the tail as the fit is very good there and when cured continue to the next area which is on the bottom, this needs to be closed up and pushed inwards to attach to the interior wall. As long as you apply a little thought and take it slowly the fit achieved is very good. I have assembled the interior prior to painting and for that reason I have attached the cockpit floor to the opposite side of the fuselage than indicated in the instructions to ease access when painting. The small area that needs to be put together at the rear of the front wheel well is tricky due to the small area and trying to avoid glue finger prints on the model. I spray painted the interior with flat black followed by a light coat of zinc-chromate green and the finished with misting to a light coat of chromate yellow which gave me a nice mix of colour inside that I rather like; the paints used are all from the Mr Color range produced by GSI Creos.
The nose of the model is a new part and it is indicated by ICM how much weight needs to be added to avoid a model that ends up as a tail sitter; in this case it is 40g that are needed. I noted this and grabbed a pot of liquid gravity from Deluxe Material. This provides small balls of an unknown material which is listed as non-toxic and so not lead; you just pour this product into the nose and add CA glue in stages to achieve a secure weight which will not move. I added well over 40g and so have no concerns about a model sitting on its tail, it actually sits on its nose with the rest of the model in the air in its current state. When adding the nose to the model it can best be described as a rough fit and will need some filling to get a good finish; I used Mr Surfacer 500 on all of the joints and got a pleasing finish in the end. I will say that this approach does require some robust sanding and so an amount of surface detail will need re-scribing on the model.
Moving along to the tail and control surfaces of the model is an area of exceptional fit in my opinion. Yes I took my time during clean-up and found that no glue was required when fitting any of the control surfaces to the tail, the result being that the modeller does not need to make a decision on the orientation they want during this stage of assembly. The fit of the tail to the model is exceptionally good providing the correct angle and an invisible joint. There is an S shape moulding mark present on the tail fins and this causes me some minor concern that it may show when painted.
The wings of the model are very thin mouldings compared to what I am familiar with and this has resulted in some very nice moulding detail and wing shape. The downside is that the fit of the wings fights you a little due to the flex in the plastic; however I started at the wing tips and worked my way to the route which resulted in a good fit in my opinion. I should point out that prior to closing the wing halves you will need to open the holes for the under wing stores; you should open the holes for the gun pods as that is the correct stores for an early A-26 Invader. I have to congratulate ICM for taking the time to include the needed drill size for that purpose and clearly identifying where to drill. You also add the radiators to each wing and I consider this a nice touch. The three flight control surfaces for each wing are supplied separately and the fit and form is very pleasing; the fit is so good that all three are just placed in my case allowing for future consideration on orientation. The blanking plates for the internal wing machine guns used in other variants is not the greatest fit in my opinion and will need some work with the filler to get to a satisfactory look. The wing tip lights are hollow and the clear colour paint indicated should be added to the interior face. The under wing navigation lights should have a silver paint added to the location in my opinion and that is what I have done although not indicated in the instructions. The wings fit reasonably well but I removed the bomb load as it made it easier to get fingers inside and hold everything as it should be and get the fit I was happy with.
The nacelles go together very well at the rear and fight a little at the front; however as you add the internal structure it becomes easier to manipulate the parts into the position required. I again painted these the same as the interior using the same and so with flat black followed by a light coat of zinc-chromate green and the finished with misting to a light coat of chromate yellow which gave me a nice mix of colour inside that I rather like; the paints used are all from the Mr Color range produced by GSI Creos. The result of this painting approach pleased me greatly as it made for a natural look in my opinion and made a lot of the detail pop. The nacelles are sided and fit very well to the wings, but some filler will be needed on some areas especially at the rear of the wing where the nacelles meet.
The rear turrets go together very easily with the guns designed to elevate and one of the turrets rotate; I decided that as this model is not a toy and so I would lock them in a dead astern position, but remember to position the control station correctly with the position of the gun turrets. The gun control station is not locked in placed but is secured by the portion through the belly of the fuselage and the clear panel above. I was worried the fit of the glazed parts would be bad due to the fight I had with closing the fuselage, but I need not have worried as the fit is very good and may even be good enough to result in no filler being used. This is as far as I am going at this point, but I will add some more when it is finished in order that you can see the result of my efforts.
Conclusion
The fuselage and wing mouldings are quite thin and this has enabled the mouldings to bow and bend a little, but by the sane score if you take your time it also makes it possible to bully everything back into the shape and position they should be. The fit of many of the parts is very good with the flight control parts and fit of the tail being exceptional in my opinion. The glazed parts are a very good fit and are one area that would be very problematic if that was not the case. Other than it not being stated that this is an early version of the A-26 Invader due to the under wing machine gun stations I really like and happily recommend it to anyone with an interest, just take your time and think ahead and a very acceptable model can be built from the box.
Reference
A-26 Invader in Action No 134
SUMMARY
Darren Baker takes a look at the A-26B-15 Invader from ICM in 1/48th scale and performs a partial build to check on its build ability.
Our Thanks to ICM Holding! This item was provided by them for the purpose of having it reviewed on this KitMaker Network site. If you would like your kit, book, or product reviewed, please contact us.
About Darren Baker (CMOT) FROM: ENGLAND - SOUTH WEST, UNITED KINGDOM
I have been building model kits since the early 70s starting with Airfix kits of mostly aircraft, then progressing to the point I am at now building predominantly armour kits from all countries and time periods. Living in the middle of Salisbury plain since the 70s, I have had lots of opportunitie...
Hi Darren, did you finish this build ? I noticed an issue when looking over things. Step 80 in the instructions would have attach part E34 to the forward engine assembly before installing the exhausts so you need two parts E34, one for each engine but there is only one part E34 on the sprue.
OK, I figured it out, I missed the "no glue" icon, E34 is just an alignment tool for the exhausts and doesn't stay on the engine, pretty clever of ICM.


.JPG)
.JPG)
.JPG)
.JPG)
.JPG)
.JPG)
.JPG)
.JPG)
.JPG)
.JPG)
.JPG)
.JPG)
.JPG)
.JPG)
.JPG)
.JPG)
.JPG)
.JPG)
.JPG)
.JPG)
.JPG)
.JPG)
.JPG)
.JPG)
.JPG)
.JPG)
.JPG)
.JPG)
.JPG)
.JPG)
.JPG)
.JPG)
.JPG)
.JPG)
.JPG)
.JPG)
.JPG)
.JPG)
.JPG)
.JPG)
.JPG)
.JPG)
.JPG)
.JPG)
.JPG)
.JPG)
.JPG)
.JPG)
.JPG)
.JPG)
.JPG)
.JPG)
.JPG)
.JPG)
.JPG)
.JPG)
.JPG)
.JPG)
.JPG)
.JPG)
.JPG)
.JPG)
.JPG)
.JPG)
.JPG)
.JPG)
.JPG)
.JPG)
.JPG)
.JPG)
.JPG)
.JPG)
.JPG)
.JPG)
.JPG)
.JPG)
.JPG)
.JPG)
.JPG)
.JPG)
.JPG)
.JPG)
.JPG)
.JPG)
.JPG)
.JPG)
Comments