Introduction
I'm usually more excited by 1/48 short run releases from the Czech Republic or alternative resin kits from various origins. But, as the furore over the new Dragon Mustang gathered pace (to a point that some modellers say it is "unbuildable") I grew steadily more intrigued and really began to want to see for myself just how good - or bad - the kit really is...
History
I won't bother you with the history of the Mustang. Everybody knows the story of this famous plane and the fact that it became a fantastic fighter once fitted with the Rolls-Royce Merlin engine...
The kit
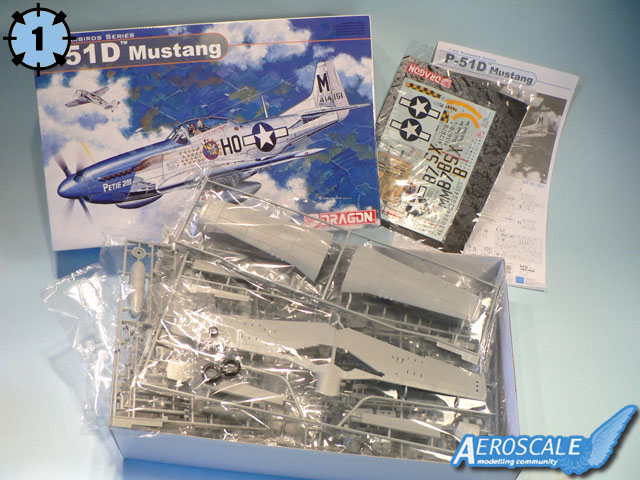
Dragon's new P-51D model comes in a sturdy top opening cardboard box with a beautiful artwork of a Mustang chasing a Fw 190 on the top (picture 1). Inside, there are 7 separately bagged light grey injected plastic sprues, 2 transparent plastic sprues, one photo etched fret, one bag with vinyl tyres, two bags with small metal parts, two decals sheets and an instruction booklet.
The overall quality of the plastic parts is good. I found no obvious sink marks and very little flash. But the surface of the plastic may appear a little grainy and will need some sanding to get something smooth. There are some ejector pin marks, but they are all located in places where they won't be visible once the model is finished. Dragon has also found a way to hollow the entries of the exhausts and the machine guns. This may be a detail, but it's something pretty rare, even on modern kits, so it is worth to be mentioned. It seems they used slide molds to get that result, and this will prevent the modeller from drilling the holes himself, which is always a tricky affair even in 1/32 scale. I found some seams on the fuselage and the canopy, but more on that later.
From a strictly technical point of view, this is a modern and well done model, but this is generally not an argument for the modeler so let's take a closer look.
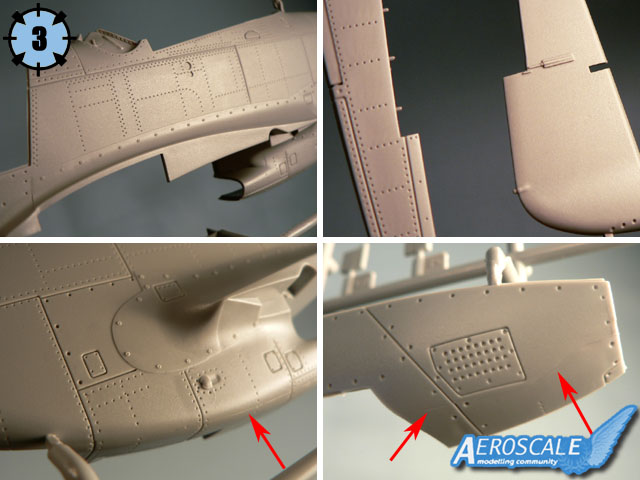
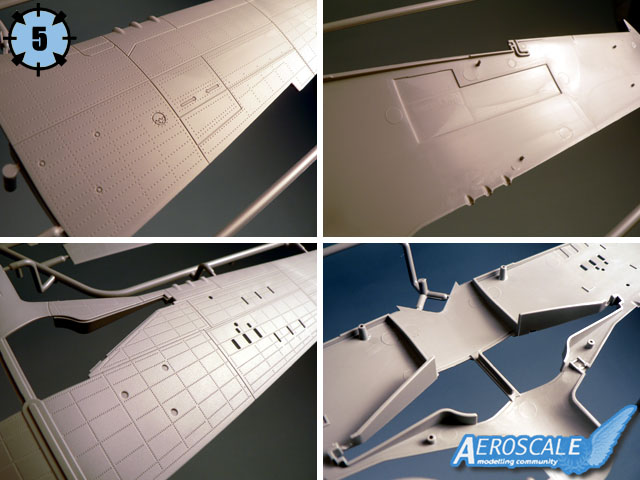
Sprue B (Picture 2) holds the fuselage halves as well as the elevators and rudder. It's nice to have the movable surfaces of the plane separated in the kit as it will allow the modeller to display the model in a more "dynamic" way. The surface detail of the parts is engraved with numerous rivets all over the airframe (picture 3). I must admit they are on the heavy side. Some will like it as it will look spectacular with a wash, but other will dislike it as it may appear overdone, even in this large scale. I don't want to enter into the debat here because I like to enhance my models with precise panel lines and rivets (when they are present on the surface of the kit), so my judgement wouldn't be objective. I built many Matchbox kits in my youth and I got probably accustomed to the "trenches"... but with regard to Dragon's P-51D, a solution "in between" would have certainly satisfied more people.
I noticed some seams along the fuselage bottom (red arrows), probably due to a "multi-part" mold. This allowed the manufacturer to preserve the details all over the airframe, but with the disadvantage that it will require some cleaning. It's not a big problem though.
Sprue A (picture 4) is one big tree of plastic which was cut in two to fit inside the box. It consists of one underwing, two upper wing halves, separate flaps and ailerons and the landing gear doors. The surface detail is the same as the fuselage, so I won't comment further.
In picture 5 you can see that inside the upper wings, some areas are thinner. In fact it is made so that you can cut the armament access panels easily if you want to display the machine gun bays. I'm sure a lot of modelers would have preferred to have these panels removed from the very start, but I think this is the kind of "in between" solution that is acceptable, especially if you want to build the model all closed up. Though, if I would have been Dragon, I would have provided optionnal access panels in the kit, in case the ones on the wings would have been damaged during the cutting process.
A noticable mistake as been made in the gear bay because it's rear wall follows the gear well opening. It should be different as the back wall of the wheel well on the real aircraft is in fact the wing's main spar. If you want to modify this area to be more accurate, check the
P-51 D walkaround pictures Leon Storla (newtothegame) kindly sent us lately. For the defense of Dragon, I noticed that in every P-51 D I have in my stash (1/48 Hasegawa, Tamiya and Fujimi kits and 1/32 Hasegawa kit), the same mistake was made! But it's not an excuse not to have done it right this time.
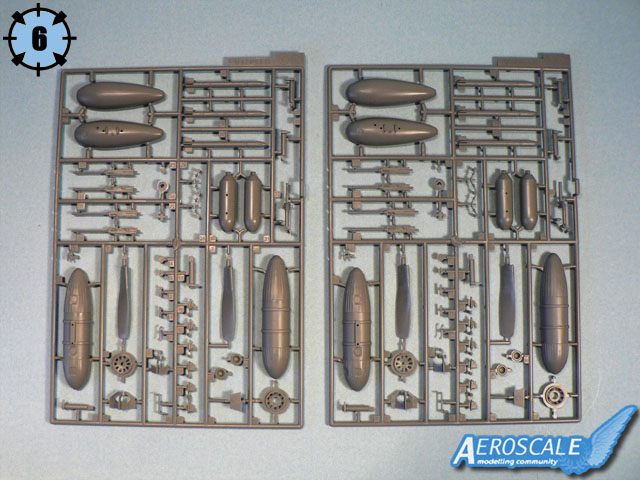
Spue C are in fact two identical sprues (picture 6). They hold the optional external stores of the aircraft (two different pairs of additional fuel tanks, two bombs and six rockets), the internal armament (eight superb machine guns of which two are spare ones), the propeller blades and some detail parts (mainly for the landing gear).
All these detail parts are nicely done and I couldn't resist the temptation to compare them with the 1/32 Hasegawa kit. The result is much to the advantage of Dragon, believe me!
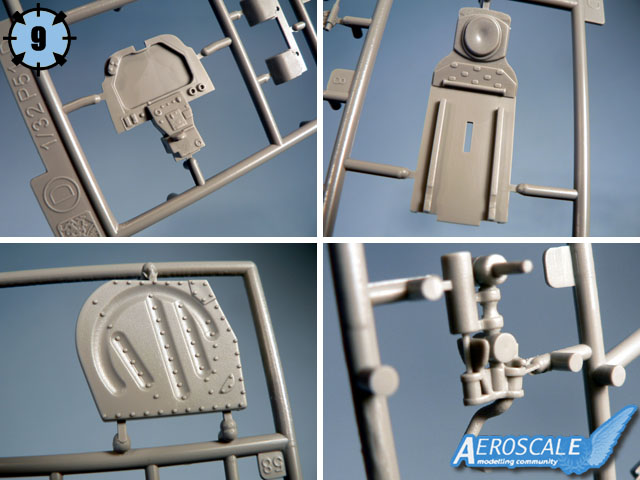
Sprue D (picture 8) is composed of details parts for the cockpit (picture 9), armament bay (the ammunition belts are quite a piece of art), exhausts (hollowed, see picture 10), spinner, tailwheel strut etc... here also the detail is very good and compares advantageously with the older Hasegawa kit.
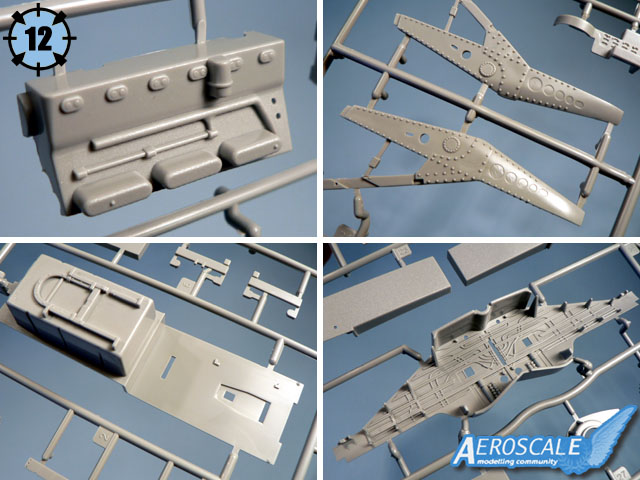
Sprue E (picture 11) is mainly devoted to the engine parts but also holds the cockpit floor and wheel bay (picture 12). The latter has some cable detail molded on it but the real one looks busier (again, take a look at the walkaround pics). The engine provided in the kit appears to be well detailed but there is certainly room for more, but it's a nice base for scratchbuilders.
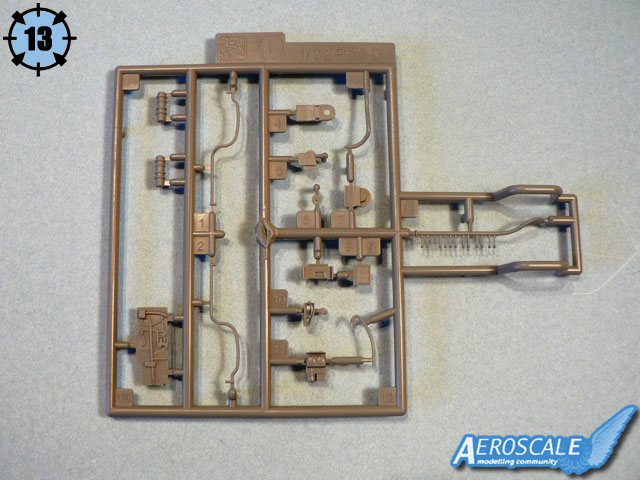
The last grey plastic sprue (I) is the smallest of all (picture 13). It holds some detail parts to enhance the look of the engine (pipes) and the gunsight (composed of 9 plastic parts!).
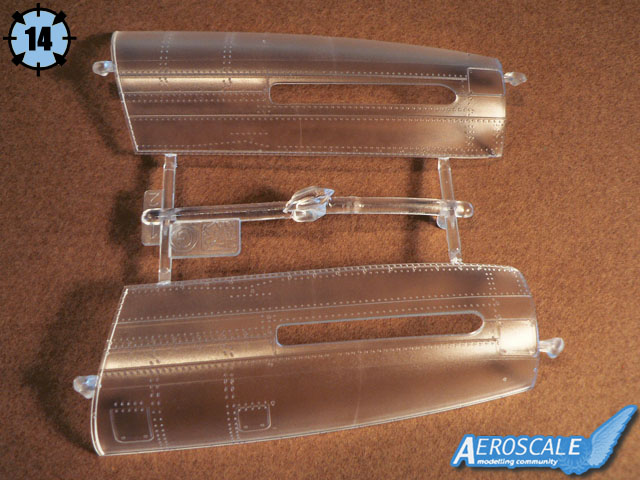
The first transparent sprue (G) is quite unusual as it represents the engine cowlings (picture 14). Dragon choosed to provide them this way and this is ok. If you don't like it, you can paint them and nobody will notice they are made of clear plastic. However, the surface of the parts is grainy like the rest of the kit, so you won't see much of the engine if you choose to use the cowlings in their original state. I would have produced these parts with a smooth finish to get more transparency.
The second clear plastic sprue (H) is composed of the canopy, the instrument panel, The landing lights, the navigation lights and the gunsight visor (picture 15). The parts are nicely molded except that the bubble canopy has a "nice" little seam line on the top (red arrow) that will require some fine sanding and buffing which is always a little annoying.
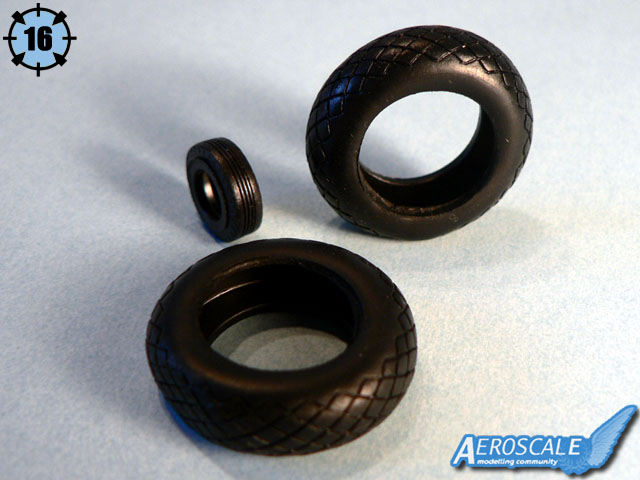
The tyres are made of vinyl (picture 16). Some don't like them but I must confess they look very convincing "from the box" and will look terrific with some weathering.
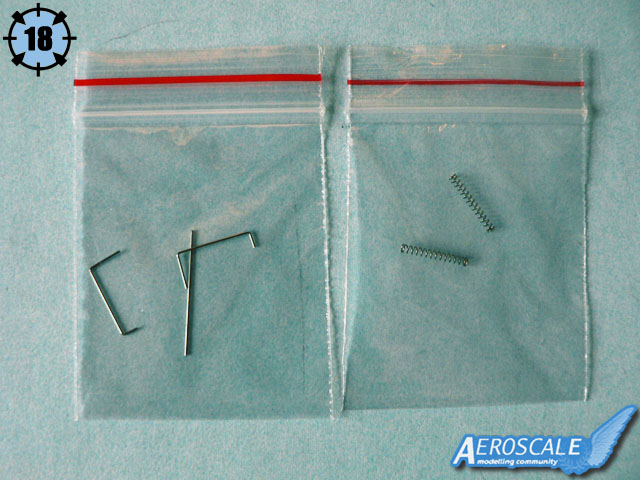
A nice photo etched fret is present in the kit (picture 17) and will allow you to add the seatbelts, an instrument panel, the radiator grills as well as the hinges for the flaps. Two bags with small metal parts are also provided (picture 18), one of them is composed of small rods for the ailerons and the other of tiny springs for the landing gear.
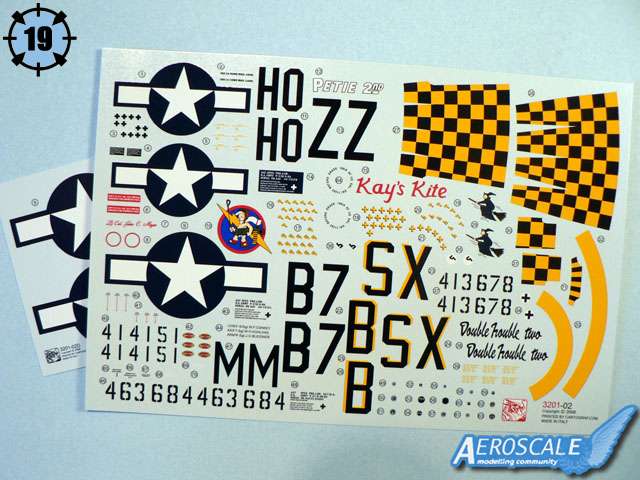
The decals (picture 19) have been produced by Cartograf. They are nicely printed on two sheets and are in register. separate decals are provided for each instrument dials. They will probably look very good once properly placed on the PE instrument panel, but this will be a time consuming job.
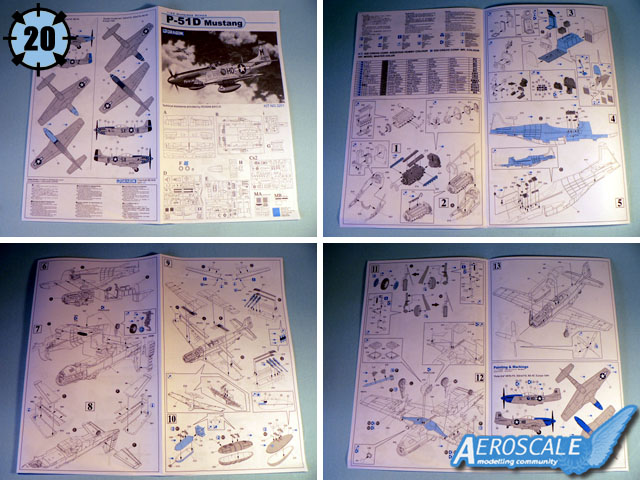
The kit's instructions are a big paper sheet folded so to make 8 pages (picture 20). They are composed of a part layout, a 13 step assembly guide with precise drawings, painting and marking guides and a color chart for Gunze Aqueous Hobby and Model Master colors.
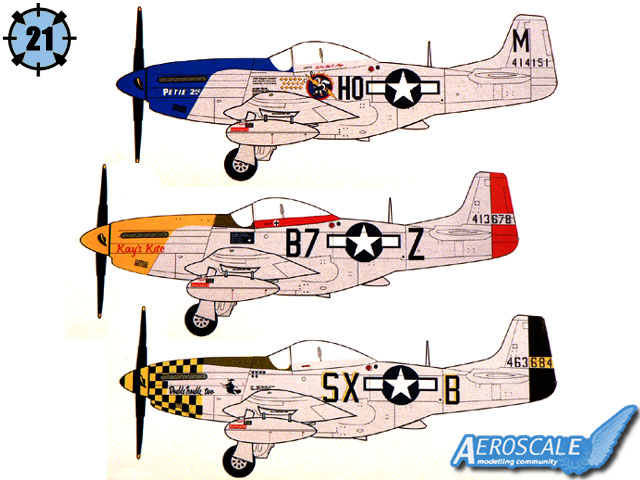
Three marking options are provided (picture 21):
1 - P-51 D "Petie 2nd", 487th FS, 352nd FG, 8th Air Force, europe 1944.
2 - P-51 D "Kay's Kite", 374th FS, 361nd FG, 8th Air Force, europe 1944.
3 - P-51 D "Double Trouble two", 352nd FS, 353nd FG, 8th Air Force, europe 1944.
Conclusion
Well here it is, Dragon's brand new 1/32 scale P-51 D Mustang. Certainly not a perfect kit (it has some "issues") but certainly not a bad kit either. It is much better than the Hasegawa kit if I compare them "from the box" and will make into a nice replica of the real thing. It's too bad that the surface detail is too pronounced though, otherwise it would have been a really good kit. I don't know how the deep engraved panel lines and the rivets will look under a coat of primer and a coat of paint, so I won't comment any further and do the most appropriate thing in this situation: build the model and draw my conclusions about it after...
Please remember, when contacting retailers or manufacturers, to mention that you saw their products highlighted here - on
AeroScale.


Comments